Recipe Index
A
- A Meal Fit for a Doctor
- Achiote Oil(Aceite De Achiote)
- Achiote Paste
- Achiote Rubbed Fish
- Adobo Seasoning
- Aebleskiver
- Aebleskivers with Lemon Curd
- Air-Fryer Sweet Potato Chips
- Aleppo Rub
- Alfredo Sauce
- Alfredo Sauce
- Allotment Cottage Pie
- Almond Biscotti
- Almond Biscotti
- Aloha Rolls
- Alsace Onion Tart
- Ameretti
- Amish "Steak"
- Amish Apple Fritter
- Amish Sugar Cookies
- Amy's Lentils
- Andre's Barbecued Shrimp and Homemade Biscuits
- Anginetti
- Aperol Spritz
- Apple Bavarian Torte
- Apple Cider Donut Bread
- Apple Cole Slaw
- Apple Square Dough
- Applesauce Muffins
- Applesauce Pork Chops
- Apricot Filling for Cookies, Pastries and Hamantaschen
- Apricot and Ricotta Sbriciolata (Butter Pie)
- Armenian-Style Rice Pilaf
- Asian Chicken Thighs
- Asian Spice Rub
- Asparagus Lemon roasted
- Asparagus, Goat Cheese, and Caramelised Onion Quiche
- Aunt Schmoopie's Lamb Rub
- Authentic German Potato Salad (Bavarian Kartoffel Salat), from My "Mutti"
- Authentic Niter Kibbeh (Ethiopian Spiced Clarified Butter)
- Avocado Dark Chocolate Mousse
B
- Ba's Best Coconut Cream Pie
- Bacalhau Com Feijão Branco
- Backyard Barbecue Beans
- Bagels
- Bagels
- Bagna Cauda
- Baguette
- Baked Chicken Nuggets
- Baked Egg Rolls
- Baked Egg Rolls
- Baked Eggplant with Lamb and Walnut Sauce
- Baked Potato Salad
- Baked Samosa
- Balsamic Braised Short Ribs
- Banana Cookies
- Banana Cream Pie
- Banana Crumb Muffins
- Banana Ketchup
- Banana Nut Bars
- Banana Nut Breakfast Bars
- Banh Mi Bo Kho (Vietnamese Beef Stew)
- Banh Mi Rolls
- Banh Mi Smash Burgers
- Barbecue Sauce (Clone of Chivetta'S)
- Barley Pilaf
- Basic Barbecue Rub
- Basic Blonder Brine
- Basic Bulgogi
- Basic Yeast Dough (Famian)
- Bean Thread Noodles with Pickled Vegetables
- Bear Canyon Ranch Dressing
- Beef Nilaga
- Beef Pho Noodle Soup Recipe (Pho Bo)
- Beef Short Rib-Vegetable Pho
- Beef Soba Noodles with Spinach and Coconut-Curry Vinaigrette
- Beef and Broccoli
- Beer Cheese
- Beet, Olive, and Kale Salad
- Beezil Bars
- Beezil Bread
- Beezil Bread
- Bell's Poultry Seasoning
- Bell's Poultry/Stuffing Seasoning
- Bell's Seasoning Copycat
- Berbere
- Best Baked Lahmajoun
- Best Chocolate Sugar Cookies
- Best French Onion Soup
- Best Latke Recipe! (Gluten Free Too!)
- Best Palestinian Upside-Down Chicken and Rice (Maqlubeh)
- Best Spicy Pickled Celery
- Beth's Pickled Salmon
- Better Than Sex Cake
- Bialys
- Bibimbap
- Big & Buttery Chocolate Chip Cookies
- Bigos (Polish Hunter's Stew)
- Biko (Filipino Sticky Rice Cake)
- Bill Smith's Atlantic Beach Pie
- Birria De Res (Beef Birria)
- Black Bean & Hominey Salad
- Black Chickpea Hummus
- Blackberry Limeade
- Blood Orange Balsamic Vinegar
- Blood Orange Balsamic Vinegar
- Blueberry Cream Cheese Pastry Braid
- Blueberry Peach Feta Salad!!!
- Blueberry-Ricotta Tart
- Bobby Bread
- Boiled Beef Slices in a Fiery Sauce (Shui zhu niu rou)
- Boiled Chicken Dumplings
- Bolillos
- Bombay-style Chicken with Red Split Lentils
- Braised Cabbage
- Bratwurst Supper
- Bread and Butter Pickle
- Breakfast Pizza
- Broccoli asian
- Broccoli with Nuts and Cherries
- Broiled Buffalo Wings
- Brookie
- Brooklyn Blackout Cake
- Brussels Sprouts the Best of Your Life!
- Buccellati (Sicilian Christmas Fig Cookies)
- Buffalo Cauliflower Bites
- Bulgogi
- Bulgogi (Korean Bbq Beef)
- Bulgogi (Korean Bbq Beef)
- Bulgogi-Style Eggplant
- Butterflied, Dry Brined Roasted Turkey with Roasted Root Vegetable Panzanella
- Butternut Squash Bolokithopastitsa from Naxos
- Butternut Squash Soup
- Butternut Squash and Cauliflower Chowder
- Butterscotch Sauce
- Buttery Hamantaschen
- Buttery Hamantaschen
- Buttery Lemon Pasta with Almonds and Arugula
- Buttery, Flaky Pie Crust
- Byrdhouse Spicy Chicken and Peaches
- Bánh Mì Khong (Bánh Mì Bread)
- Bánh Pho
C
- Cabbage Roll Soup
- Cabbage Schnitzel
- Cacio E Pepe
- Cacio E Pepe
- Cacio e Pepe
- Caesar Green Bean Salad
- Caesar Salad Dressing
- Caesar Salad with Crouton Collars
- Cake Salé or Savory Quick Bread? Just Call It Delicious
- Caliente Chicken Fajita Bowl
- Cambodian Skewers
- Can'T Leave Alone Bars
- Canadian Bacon
- Cannoli Cookies
- Caprese Burger
- Caramel Apple Dip
- Caramel Brownies
- Caramel Pecan Ice Cream Dessert
- Caramel Shortbread Squares
- Caramel Truffles
- Caramelized Banana Pudding Bars
- Caramelized Broccoli with Garlic
- Caramelized Leek and Bacon Pizza
- Carne Guisada (Latin Beef Stew)
- Carne Guisada (Latin Beef Stew)
- Carnitas
- Carnitas
- Carta Musica (Semolina Crackers)
- Catalina Dressing
- Categories Bread, Apple
- Cauliflower Couscous
- Cauliflower Gnocchi
- Cauliflower Gratin
- Cauliflower Pizza Crust
- Cauliflower Pizza Crust
- Celery Root (Celeriac) Schnitzel
- Cemitas (Mexican Sesame Seed Sandwich Buns)
- Chairman Mao's Red-Braised Pork (Mao Shi Hong Shao Rou)
- Chairman Mao's Red-Braised Pork (Mao Shi Hong Shao Rou)
- Chao Shou (Sichuan Pork Wontons)
- Char Kway Teow
- Charred Corn Salad with Basil and Tomatoes
- Chaurice
- Cheese Blintzes
- Cheese Sauce for Cheese Fries and Nachos
- Cheesecake Cookies
- Cheesy Chive & Onion Crackers
- Chef Anthony Rose's “Shhhh Sauce”
- Chef John's Braised Red Cabbage
- Chef John's Stuffed Peppers
- Cherry Scones
- Chicken Bog
- Chicken Karaage Recipe (With Video)
- Chicken Livers with Chipotle Caramelized Onions
- Chicken Mushroom Stroganoff
- Chicken Noodle Casserole I
- Chicken Pad Thai
- Chicken Piccata Meatballs
- Chicken Souvlaki with Tzatziki
- Chicken Tortilla Soup
- Chicken Tortilla Soup
- Chicken and Broccoli Stir-Fry
- Chicken and Cabbage Salad
- Chicken and Rice
- Chicken and Smoked Sausage Gumbo with White Rice
- Chicken or Duck Liver Mousse
- Chicken with Tamarind, Apricots and Chipotle Sauce
- Chicken-Green Bean Yellow Chili Stir-Fry
- Chickpeas and Kale in Spicy Pomodoro Sauce
- Chili Powder
- Chilled Soba in Cucumber Cups
- Chilli- Maple Vinaigrette
- Chimichurri
- Chinatown Char Siu Ribs
- Chinese Garlic Sauce
- Chinese New Year...Tangerine Beef
- Chinese Orange Chicken
- Chinese Smashed Cucumbers with Sesame Oil and Garlic
- Chinese Spareribs
- Chinese-Style Barbecued Spareribs
- Chinese-Style Barbecued Spareribs
- Chinese-Style Barbecued Spareribs
- Chipotle Ham Glaze
- Chipotle Potato Salad
- Chipotle Rub
- Chipotle-Lime Salt
- Chips and Fish
- Chips and Fish
- Chocolate Babka
- Chocolate Banana Bread
- Chocolate Chip Cookies Nyt
- Chocolate Hazelnut Fruit Crepes
- Chocolate Mug Cake Recipe (With Video)
- Chocolate Orange Cake a Citrusy Chocolate Delight!
- Chocolate Peanut Butter Pretzel Ritz Bars
- Chocolate Snowcap Cookies
- Chocolate Toffee Matzo Crunch
- Chocolate-Hazelnut Matzo Cake
- Chopped Liver
- Chopped Liver
- Chorizo Stuffed Pork Roast with Three Chiles Adobo
- Chowder Crackers
- Chremslach (Matzo Pancakes)
- Chremslach Are Your New Favorite Jewish Pancakes
- Cilantro Lime Chicken
- Cilantro Lime Mayo
- Cinnamon Roll Pancake
- Cinnamon-Walnut Sticky Buns
- Citrusy Couscous Salad with Broccoli and Feta
- Classic Baked Macaroni and Cheese Casserole
- Classic Bbq Rub
- Classic Chicken Teriyaki
- Classic Chicken Teriyaki
- Classic Chocolate Layer Cake
- Classic Coleslaw
- Classic Crab Cakes
- Classic Dry Adobo
- Classic Latkes
- Classic New England Baked Beans
- Classic Rich and Silky Potato Gratin (Scalloped Potatoes)
- Classic Sourdough Pancakes or Waffles
- Classic White Frosting
- Clementine Preserve
- Cochinita Pibil (Yucatán-Style Barbecued Pork)
- Cocoa Cream Pie
- Cocoa Peanut Logs
- Coconut Macaroons Dipped in Chocolate
- Coconut-Pecan German Chocolate Pie
- Coffee Steak Rub
- Coffee-Chile Dry Rub
- Coffee-Rubbed Strip Steaks with Chimichurri Sauce
- Cold Mousse of Chicken and Pistachios
- Cold Noodles with Tomatoes Recipe (With Video)
- Cold Smoked Salmon
- Cold Udon Noodles Recipe (Zaru Udon)
- Columbia Gold, a South Carolina Mustard Bbq Sauce
- Cook's Country Brunswick Stew
- Copy Cat Mcdonald's Tartar Sauce & Filet 'O Fish Sandwich
- Copycat Chiavetta's Marinade Recipe (The Best Chicken Marinade)
- Corn Chowder
- Corn Starch Glaze
- Cornbread, No Chaser
- Corned Beef Brisket
- Corned Beef Brisket, Potatoes, Cabbage, and Carrots for St. Patrick's Day
- Corned Beef, Home-Cured, Wet
- Cornstarch Solution for Glazing Bread
- Cottage Cheese- Reloaded
- Cowboy Cookies
- Crackling Bread
- Cranberry Coffee Cake with Almond Crunch
- Cranberry Orange Cookies
- Cranberry Sauce
- Cranberry and Orange Almond Rugelach
- Cream Cheese Pound Cake
- Cream Filled Cupcakes
- Cream Puffs and Éclairs
- Creamy Alka-Seltzer Nacho Cheese Sauce
- Creamy Banana Pudding
- Creamy Dreamy Cookie
- Creamy Homemade Yogurt
- Creamy White Chili
- Creamy, Nutty Za’Atar Roasted Carrot Dip
- Crema De Coco
- Creme Brulee French Toast
- Creme Brulee French Toast
- Creme Caramel
- Creole Seasoning
- Creole-Style Red Jambalaya with Chicken, Sausage, and Shrimp
- Crepe
- Crisp Rosemary Flatbread Crackers
- Crisp-Skinned Spatchcocked (Butterflied) Roast Turkey with Gravy
- Crispy Baked Potato Wedges
- Crispy Cheese- and Kimchi-Topped Skillet Rice
- Crispy Home Fries with Red Onions and Roasted Poblano Pepper
- Crispy Home Fries with Red Onions and Roasted Poblano Pepper
- Crispy Rosemary Chicken and Fries
- Crunchy Broccoli Salad
- Crusty Rolls
- Cuban Bread
- Cucumber Raita (Indian Yogurt Condiment)
- Cucumber Salad with Asian Flavors
D
- DELI-STYLE RYE BREAD
- Daddy Pasta (Ricotta–Red Pepper Sauce with Burnt Lemon Oil)
- Daffodil Cake
- Daikon and Carrot Pickle Recipe (Do Chua)
- Danmuji (Korean Pickled Daikon Radish)
- Danmuji (Korean Pickled Daikon Radish)
- Dark Chocolate Brown Sugar Cookies > Call Me Pmc
- Dark Chocolate Mousse
- David Rosengarten's Pullman Loaf
- David Tanis's Crispy Fried Shallots
- Decadent German Chocolate Pecan Pound Cake Delight
- Deep-Fried Onion Rings
- Delicious Homemade Dijon Mustard
- Delightful Banana Cake
- Deviled Egg Macaroni Salad
- Di San Xian (Stir Fried Eggplant, Potato and Pepper, 地三鲜)
- Diane Kochilas's Mediterranean Rice Recipe Will Help You Live Longer
- Dinner Tonight: Korean Barbecue Beef Bulgogi
- Diy Feta Cheese
- Diy Oyster Crackers for Soup
- Diy Oyster Crackers for Soup
- Don & Bob's Hot Sauce
- Donut Pops
- Doro Wat (Ethiopian Spiced Chicken)
- Doro Wat (Ethiopian-Style Spicy Chicken)
- Dou Chi Ji Ding (Black Bean Chicken)
- Double Chocolate Banana Bread
- Double Chocolate Coconut Brownies
- Dough
- Dry Chimichurri Rub
- Dry Jerk Seasoning
- Dry Rub
- Dry Rub Ii
- Dry Rub Iii
- Dry-Brined Turkey (A.K.A. the 'Judy Bird')
- Dry-Rubbed Flank Steak with Grilled Corn Salsa
- Dumpling and Smashed Cucumber Salad with Peanut Sauce
E
- East Carolina Vinegar Bbq Sauce and Mop
- Easter Ham-Horseradish Puff Pastry Wreath
- Easy 4-Ingredient Chicken Paprikash
- Easy Apple Tart
- Easy Beef Lo Mein
- Easy Cinnamon Rolls
- Easy Coconut Cream Pie
- Easy Crusty French Bread
- Easy Flatbread
- Easy Flatbreads
- Easy Fried Rice
- Easy Homemade Mac and Cheese (Stovetop)
- Easy Microwave Chocolate Mug Cake Recipe (With Video)
- Easy Mixed-Cheese Quiche
- Easy Pork Rillettes (Slow-Cooked Pork Spread)
- Easy Queso Fresco
- Easy Swedish Meatballs and Smashed Potatoes
- Easy and Quick Halushki
- Ebi No Chiri-Sōsu (Japanese Shrimp in Chile Sauce)
- Ed's Banana Cream Pie
- Egg Bake
- Egg Rolls in a Bowl
- Eggnog
- Eggnog
- Eggplant Bolognese
- Eggplant Dip (Baba Ghanoush)
- Eggs Benedict
- Eggs Benedict Casserole
- Elegant and Easy Gourmet Gefilte Fish Pâté
- Emeril's Essence (Bam)
- Empanadas De Plátano Maduro (Ripe Plantain Empanadas with Cheese)
- Energy Bars
- English Bangers and Mash with Onion Gravy
- English Breakfast Sausage
- English Muffins
- Escarole with Italian Sausage and White Beans
- Ethiopian Chicken Stew (Doro Wot)
- Extra Crispy Baked Chicken Wings
- Extreme Chocolate Cake
F
- Falafel
- Falafel in Waffle Iron
- Falafels with Yogurt-Dill Sauce
- Famous Pork Chops
- Farfel Pilaf
- Farmhouse Cream Cheese from 'Mastering Fermentation'
- Farro Salad with Blue Cheese, Pine Nuts, and Tomatoes
- Farro and Roasted Pepper Salad
- Fattoush Salad Dressing
- Faux Gras
- Fava Garnished with Capers and Onions
- Fettuccine Alfredo
- Fideuà
- Fiery Stir-Fried Iceberg Lettuce with Basil
- Figgy Pudding
- Filipino Grilled Pork Chops
- Filmjölkslimpa (Seeded Buttermilk Bread)
- Fire & Ice Appetizer
- Fire & Ice Appetizer
- Fish and Chips with Malt Vinegar Mayonnaise
- Fish-Fragrant Eggplants (Sichuan Braised Eggplant with Garlic, Ginger, and Chiles)
- Five Bean Hotdish
- Five Spice Powder
- Flat Hand-Pulled Noodles (Biang Biang Mian) with Chili Oil Vinaigrette
- Foolproof 2-Minute Hollandaise
- Foolproof Cheese Fondue
- Foolproof Pan Pizza
- French Bread
- French Butter Cookies
- French-Style Bread
- Fresh Mozzarella from Scratch
- Fresh Orange Cookies
- Fresh Pasta
- Fresh Peach BBQ Sauce
- Fresh Rice Sheets with Shrimp
- Fresh Spring Rolls
- Fresh Strawberry Pie
- Fried Calamari
- Fried Cornmeal Mush
- Fried Shallots
- Fromage Fort
- Fuchsia Dunlop's Mapo Tofu
- Fudgy Oatmeal Bars
- Fwd: Re: Baklava - Scottycooks@Gmail.Com - Gmail
G
- Gado-Gado (Indonesian Vegetable Salad with Peanut Dressing)
- Gai Pad Krapow (Thai Basil Chicken)
- Garlic Butter Shrimp
- Garlic Parmesan Roasted Zucchini
- Garlicky Lamb Chop
- Gateau Basque
- Gefilte Fish Terrine
- Gefilte Fish a La Veracruzana
- German Chocolate Cake Cookies
- German Chocolate Pie
- German Oven Pancakes
- Giant Black-And-White Layer Cake
- Giardiniera
- Gigante Beans with Sausage
- Glazed Chinese Long Beans
- Goat Cheese Guacamole
- Gochujang-Glazed Ham
- Golden Diner Pancakes
- Golden Honey Pan Rolls
- Goong Pad Nam Prik Pao (Thai Stir-Fried Shrimp with Chile Jam)
- Gougères
- Grandma B's Super Waffles
- Grandma's Braciole
- Grandma's Rice Pudding
- Gravlax
- Greek Juicy Orange Cake
- Greek Sea Bass Baked with Santorini Assyrtico Wine, Capers Leaves, and Herbs
- Greek Spice Rub
- Greek-Style Lamb Pita Sandwiches with Tzatziki Sauce (Gyros)
- Green Bean Casserole
- Green Bean Salad
- Green Chile Chicken Tamales *(Tamales Con Salsa Verde Y Pollo)*
- Green Chili and Tomatillo Hot Sauce
- Green Tomato Chutney
- Green Tomato Chutney
- Green Tomato Pickles
- Grilled Beef Galbi (Korean-Style Marinated Short Ribs)
- Grilled Beef Rolls with Nuoc Cham Dipping Sauce
- Grilled Beef and Jicama Salad
- Grilled Brussels Sprouts
- Grilled Brussels Sprouts
- Grilled Naan
- Grilled Pork Shoulder Bo Ssam
- Grilled Steak Ramen
- Grilled Watermelon Salsa
- Grilled-Peach Pizzas with Prosciutto
- Ground Beef and Andouille Jambalaya
- Ground Lamb with Almond Hummus, Almond Flatbread, and Pickled Onions
- Gâteau Au Yaourt (Yogurt Cake)
H
- Hakka Style Eggplant with Mint
- Ham Haystack
- Ham and Grits
- Hamantaschen- Easy Pareve Hamantaschen
- Hamburger Buns
- Hamburger Buns
- Hamburger Dill Pickle Chips
- Hamburger Steak with Onions and Gravy
- Hamburger Steaks with Onion Gravy
- Harissa
- Hash Brown Waffles
- Hasselback Chicken
- Healthier Restaurant-Style Buffalo Chicken Wings
- Healthy Ham and Cheese Casserole with Apples and Sage
- Henry Bain Sauce
- Herbed Greek Chicken Salad
- Herby-Beet Deviled Eggs
- Hit Pause On the Takeout and Make Pad Thai at Home with This Pro-Chef
- Home-Style Inner Beauty Hot Sauce
- Homemade Bagels
- Homemade Bratwurst, the Best of the Wurst
- Homemade Chili Garlic Sauce Recipe (Tuong Ot Toi)
- Homemade Claussen Pickles
- Homemade Cultured Butter
- Homemade Cultured Butter
- Homemade Farmers Cheese On Grilled Bread
- Homemade Feta Cheese
- Homemade Fig Newtons
- Homemade Flour Tortillas Recipe from Good Eats
- Homemade Fresh Poultry Seasoning
- Homemade Haggis
- Homemade Italian Beef Sandwich
- Homemade Old Bay Seasoning
- Homemade Old Bay Seasoning
- Homemade Pita Bread
- Homemade Ramen Noodles
- Homemade Rice Noodles, ( Cheung Fun) Two Ways
- Homemade Ricotta
- Homemade Self-Rising Flour
- Homemade Sriracha
- Homemade Tacos Al Pastor
- Homemade Thai Sweet Chili Sauce
- Homemade Toffee
- Homemade Udon Noodles
- Homemade Whole-Milk Ricotta
- Homemade Yellow Mustard
- Honey Baklava Cheesecake
- Honey Fried Chicken
- Honey Ginger Lemonade
- Hot Buttered Fluffy Pretzels
- Hot Dog Buns
- Hot Fudge Sauce
- Hot Fudge Sauce
- Hot Pepper Spread
- Hot Stone
- Hot and Numbing Sichuan Chicken Salad (Bang Bang Ji Si)
- Hot and Sour Shrimp with Noodles
- Hot and Sour Shrimp with Noodles
- Hot and Sour Shrimp with Noodles
- Hot-And-Sour Shrimp Soup Tom Yum Kung
- Hot-Water Pie Crust
- Hotteok (Sweet Filled Pancakes)
- How I Got Hooked On (Crick) Crack
- How to Make Banh Mi at Home
- How to Make Buldak (Korean-Style Fire Chicken)
- How to Make Crusty Rolls
- How to Make Diy Laoganma's Chili Crisp
- How to Make Homemade Fresh Mozzarella
- How to Make Perfect Hamantaschen
- How to Make Sourdough Bread
- How to Make Sous Vide Chicken Wings
- How to Make Spaetzle, the Easy Way
- How to Make Sushi Rice
- How to Make Zhug, the Yemenite Hot Sauce You'Ll Want to Put On Everything
- How to Make the Fluffiest Brioche Ever!
- How to Make the Perfect Omelet
- Hummingbird Cake
- Hummus
- Hungarian Poppy Seed and Walnut Noodles
- Hungarian Potato Bread
- Hungarian Potato Bread
I
- I Made Laura Bush's Coconut Buttermilk Pie with Whipped Cream
- Icebox Butterhorns
- Ikea's Famous Swedish Meatballs
- Immersion Circulator Rump Roast
- Incredible Passover Rolls
- Indian Samosas with Potatoes and Peas
- Injera (Ethiopian Flatbread)
- Instant-Cured Salmon
- Irish Cabbage
- Irish Soda Bread
- Irish Soda Bread 8
- Israeli Chicken Sofrito
- Italian Bean and Vegetable Soup
- Italian Bread
- Italian Ricotta Cookies
- Italian Salad Dressing
- Italian Sausage, Garlic, and Red Pepper Stromboli
J
- Jalapeno Pepper Jelly Sauce
- Jalapeño Jelly
- Japanese Milk Bread
- Japanese-Style Chicken Wings (Teba No Karaage)
- Jean Anderson Shrimp and Grits
- Jim Lahey's No-Knead Bread
- Joan Nathan's Rugelach
- Joan Nathan's Traditional Crispy Latkes
- Judy's Strawberry Pretzel Salad
- Julia Child's Easy Blender Hollandaise Sauce
- Julia Turshen's Potluck Quinoa Recipe Review
K
- Kabanosy, Polish Smoked Meat Sticks
- Kaiser Rolls
- Kar' Assali (Egyptian Baked Pumpkin Dessert)
- Karaage (Japanese Fried Chicken)
- Kasha Varnishkes
- Kasha Varnishkes
- Kashk-O-Bādemjān (Persian Braised Eggplant with Kashk)
- Kefta Tagine
- Ketchup On Spaghetti? You’Ll Never Doubt It After Trying This Japanese Favorite
- Key Lime Bread
- Key Lime Pound Cake Is Better Than Pie
- Key West Chicken
- Khachapuri
- Kielbasa
- Kifli
- Kimchi Recipe (With Video)
- Kimchi Stew with Pork Belly
- Kimchi and Spam Fried Rice
- Knishes Turkey and Cranberry
- Knäckebröd Med Frön (Seeded Crispbread)
- Kofte Kebabs with Spicy Harissa Yogurt Sauce and Grilled Flatbread (Minced Lamb Kebabs)
- Kompot a Homemade Fruit Drink
- Korean Barbecue Beef Bulgogi
- Korean Bbq Sauce
- Korean Flavors Punch Up Super Bowl Pulled Pork
- Korean Fried Chicken
- Korean Fried Chicken Wings
- Korean Garlic and Chile Pork
- Korean Grilled Chicken
- Korean Noodles with Beef and Vegetables
- Korean Rice Bowl (Dolsot Bibimbap)
- Korean Shrimp Dumplings
- Kosher Dill Pickles
- Kreplach
- Krispy Kremes
L
- Lacquered Chicken Legs
- Lacto-Fermented Dill Pickles
- Lady Fingers
- Lamb & Anchovy Sausage
- Lamb Breast Recipe (Breast of Lamb)
- Lamb Ribs
- Lamb Stew from 'Stewed'
- Lamb Tagine with Prunes, Apricots, and Vegetables
- Lao Chicken and Rice Noodle Soup
- Latke Waffles
- Latke Waffles
- Latkes-Ramen with Sriracha Mayo
- Lavender Syrup
- Lebanese Kofta
- Lechon Kawali
- Leek and Potato Casserole (Quajado)
- Lekvar Apricot Butter
- Lemon Blondies
- Lemon Blueberry Scones
- Lemon Cake (Flourless)
- Lemon Crinkle Cookies
- Lemon Crumble Breakfast Cake
- Lemon Drizzle Cake
- Lemon Magic Cake
- Lemon Oatmeal Sugar Cookies
- Lemon Pound Cake with Aunt Evelyn's Lemon Glaze
- Lemon-Chile Green Bean Pickles
- Lemon-Rosemary Risotto
- Lemon-Rosemary Risotto
- Lemonade Layer Cake
- Lemongrass Pork Noodle Bowls (Bún Thịt Nướng)
- Lentil Stew (Lencsefőzelék)
- Light Brioche Buns
- Light and Easy Greek Potato Salad
- Light and Silky Banana Crémeux
- Lighter-Than-Air Chocolate Roll
- Lima Soup
- Loaded Cauliflower Casserole
- Loaded Sheet Pan Nachos
- Lofthouse Sugar Cookies
- Long-Life Noodles
- Longevity Noodles
- Longevity Noodles with Chicken, Ginger and Mushrooms
- Lop Cheong
- Lop Cheong
- Lovage and Walnut Pesto
- Lox Cheesecake
- Lumpia
- Lumpia Shanghai
- Lumpiang Shanghai (Filipino Egg Rolls)
- Lychee Coconut Rice Pudding
M
- MAPLE-CURED SMOKED BACON
- Magic Cake
- Mama Stamberg's Cranberry Relish
- Mandarin Pancakes
- Mango Tomatillo Salsa
- Mango-Tomatillo Guacamole
- Maple Roasted Brussels Sprouts with Bacon
- Maple Syrup Grandfathers (Sweet Dumplings)
- Maple-Cured Bacon
- Maple-Cured Canadian Bacon
- Maple-Cured Canadian Bacon
- Margarita's Tomato Fritters with Cod
- Marinated Cucumbers, Onions, and Tomatoes
- Martas
- Matzo Bagels/Rolls
- Matzo Balls
- Matzoh Ball Soup
- Meat Loaf
- Meatballs
- Melitzanosalata Me Kapari Kai Kremmydia (Roasted Eggplant Salad with Capers and Onions)
- Melon Basil Summer Rolls
- Melopita (Honey Pie)
- Mexican Orange Cookies
- Mexican Pulled Pork (Carnitas)
- Mexican Style Gefilte Fish
- Mexican Tamales
- Microwave Sticky Toffee Pudding
- Minestrone alla Romagnola—Vegetable Soup, Romagna Style
- Misir Wat
- Misir Wat (Ethiopian Spiced Red Lentils)
- Misir Wot, Ethiopian Lentil Stew (Misr Wot)
- Miso Gochujang Pulled-Pork
- Miso-Sesame Vinaigrette That's Good On Anything
- Moist Apple Cider Doughnut Loaf Cake!
- Mole Verde
- Mom's Apple Fritters
- Momofuku's Bo Ssam
- Morimoto's Sushi Rice
- Muhammara
- Multigrain Bread Extraordinaire
- Musaengchae (Spicy Radish Salad)
- Mushroom and Scallion Lo Mein
- Mushroom-Doenjang Soup
- Mushroom-Jalapeño Matzo Ball Soup
- My Favorite Chocolate Cream Cheese Frosting
N
- Naengmyeon (Cold Noodles in Chilled Beef Broth)
- Nam Prik Ong (Thai Pork-And-Tomato Chile Dip)
- Nathalie Dupree's Food Processor Biscuits
- Nathalie Dupree's Shrimp and Grits
- New England Fish Chowder
- New England Fish Chowder
- New Orleans–Style Red Beans and Rice
- New Year's Pretzel)
- New York Bagels
- New York Bagels
- New York Bagels
- New York Deli-Style Rye Bread
- Nigella's Chicken with 40 Cloves of Garlic
- Niku Udon (Japanese Beef Noodle Soup)
- No Bake Energy Bites
- No-Bake Crème Brûlée
- No-Waste Tacos De Carnitas with Salsa Verde
- Noodles & Cabbage
- Northeastern Potato, Eggplant and Peppers
- Northern-Style Cornbread
- Northern-Style Cornbread
- Norwegian Sour Cream Cookies
- Not Really Taco Bell's Taco Meat
- Nuoc Cham
O
- O'Brian's Potato Casserole
- Oatmeal Cookies
- Oatmeal Craisins® Chocolate Chunk Cookies
- Oatmeal Dinner Rolls
- Oi Muchim (Korean Marinated Cucumber Banchan)
- Old-Fashioned Latkes
- Old-Fashioned Pecan Pie
- Old-Fashioned, No-Knead English Muffins
- Oven-Fried Artichokes
- Oven-Fried Chicken
- Overnight Apple Butter
- Overnight Waffles
- Overnight Waffles
P
- PICKLED RED ONIONS
- Pad Krapow Gai (Thai Basil Chicken)
- Pad See Ew (Thai Noodles with Beef and Broccoli)
- Paella with Chickpeas, Green Beans, and Shishito Peppers
- Pain De Mie
- Pain De Mie
- Pakistani Potato Samosas
- Paleo Sriracha
- Pan De Cristal
- Pan De Horno (Real Spanish Bread)
- Pan-Roasted Chicken and Vegetables
- Pane Francese
- Panzanella with Mozzarella and Herbs
- Papaya Granita
- Parker House Rolls
- Parmesan-Roasted Broccoli
- Parmesan-Roasted Cauliflower
- Party Shrimp
- Passover Bagels
- Passover Crack
- Passover Potato Kugel
- Pasta Da Pizza (Naples-Style Pizza Dough)
- Pastry Cream
- Patient Fried Potatoes
- Peanut Butter Chooclate Chip Granola Bars
- Peanut Butter Cup Banana Bread
- Peanut Butter Cup Brownie Bottom Cheesecake
- Peanut Sauce
- Peanut Sauce for Satay
- Pecan Pie Thumbprints
- Peggy's Sweet Polish Sausage Appetizer
- Peking Meat Sauce Noodles (Zha Jiang Mian)
- Perfect (Almost) No-Stir Risotto Risotto
- Perfect Guacamole
- Perfect Homemade Pita Bread
- Perfect Pasta -
- Perfect Popovers Recipe (+ Tips and Video)
- Perfect Risotto
- Perfect Sesame Chicken
- Persian Lamb in Pomegranate Quince Sauce
- Persian Pomegranate Mocktail
- Phat Bai Horapha (Thai-Style Beef with Basil & Chiles)
- Phat Phrik Khing with Tofu and Long Beans (Thai Dry-Curry Stir-Fry)
- Philly Cheesesteak
- Philly Fluff Cake
- Pho Spice Blend
- Phở Saigon (Southern Vietnamese Noodle Soup)
- Piccalilli Pepper Relish
- Pickapeppa Sauce Clone
- Pickapeppa Sauce Clone ?
- Pickled Daikon
- Pickled Jalapeno Peppers
- Pickled Onions
- Pickled Red Onions
- Pickled Rhubarb Stalks
- Piggy Cookies
- Pinched Noodles
- Pineapple Cream Cheese Upside Down Cake
- Pistachio Cream Cheese Cookies
- Pistachio Mixed Herb Pesto
- Pita Bread
- Pita Bread
- Pita Bread
- Pita Bread
- Pizza
- Pizza Dough
- Pizza Rustica
- Pomegranate Champagne Cocktail
- Pomegranate Oatmeal Cookies
- Pomegranate-Glazed Chicken with Buttery Pine Nuts
- Poppy Seed Cake
- Poppy Seed Dressing
- Poppy Seed Filling
- Porchetta Pork Roast
- Pork Adobo
- Pork Bao
- Pork Belly Big Squid Ramen
- Pork Belly Onigiri
- Pork Chop Spice Rub
- Pork Potstickers
- Pork and Chive Dumplings (Shui Jiao)
- Pork-And-Crab Soup Dumplings
- Potato Kugel: Delicious Pesach
- Potato Latkes
- Potato, Scallion & Chorizo Crispy Tacos
- Pozole Verde
- Preserved Lemons
- Pressure Cooker French Onion Soup
- Pretzel Rods from 'Classic Snacks Made from Scratch'
- Pudding Chomeur
- Puerto Rican Pork Shoulder
- Puff Pastry Dough from Scratch
- Pullman Loaf
- Pumpernickel Color
- Pumpkin Crème Brûlée
- Pumpkin-Pecan Tassies
- Pâté de Sardine
- Pão de Queijo - David Grabowski
Q
- Quentin's Grandma's Cream Cheese Rugelach
- Quick Barbecue Beans
- Quick Chicken Piccata
- Quick Curtido (Mexican Cabbage Slaw)
- Quick Immersion Blender Hollandaise
- Quick Immersion Blender Hollandaise
- Quick Injera
- Quick-Pickled Cucumbers with Rice Vinegar
- Quick-Pickled Shrimp
R
- Radish Salad (Musaeng-Chae) Recipe by Maangchi
- Radish, Cucumber and White Bean Farro Salad
- Raised Pork Pie
- Ras Al-Hanut
- Raspberry Thyme Tarts
- Re-Creating Husk's Kentuckyakai Chicken Wings
- Real Strawberry Cupcakes
- Red Boat Pork Belly in Caramel Sauce (Thit Kho)
- Red Cabbage Slaw
- Red Lentil Soup with North African Spices
- Red Lentil Soup with North African Spices
- Red October Dressing
- Red Pozole with Traditional Garnishes
- Reuben Benedict
- Rhubarb Cake with Butter Sauce
- Ribs with Hot-Pepper-Jelly Glaze
- Ricciarelli: Chewy Italian Almond Cookies
- Rice Pudding Recipe Made with Leftover Rice
- Rice Vermicelli with Chicken and Nuoc Cham
- Rich and Creamy Tonkotsu Ramen Broth
- Rich and Creamy Tonkotsu Ramen Broth
- Ricotta Dumplings with Red Pepper Sauce
- Risotto Cakes
- Roasted Broccoli with Garlic and Chili Pepper
- Roasted Butternut Squash Ravioli with a Sage Brown Butter Sauce
- Roasted Chicken Thighs with Delicata Squash
- Roasted Garlic Confit
- Roasted Melting Potatoes
- Roasted Mushroom Pizza with Fontina and Scallions
- Roasted Sesame Asparagus
- Roasted Sesame Asparagus
- Roasted Spiced Chickpeas
- Roasted Spiced Lamb Ribs with Whole Grain Mustard Sauce
- Roasted Sweet Potato Salad W/ Honey Maple Viniagrette
- Roasted Vegetable Udon
- Rochester Hot Dog Sauce
- Rochester Hot Sauce
- Rock Sugar Ginger Chicken
- Rock Sugar Ginger Chicken
- Rosemary Balsamic Tzimmes: Elegant Rosh Hashanah
- Rugelach
- Rugelach
- Rugelach ***
- Russ Parsons' Dry-Brined Turkey (A.K.A. the Judy Bird)
- Russ Parsons' Dry-Brined Turkey (A.K.A. the Judy Bird)
- Russian Borscht
- Russian Borscht
- Rustic Italian Ciabatta
- Rustic Rosemary Sourdough Bread
- Rustic Rub
- Rye Bread, Light
- recipe
- recipe
S
- SCOTTISH BROTH
- SINGAPORE CHILI CRAB
- Salisbury Steak
- Salsa De Chipotle Y Cacahuate
- Salsa Macha
- Salsa Naranja
- Salt Bread Shio Pan Sogeum-Ppang Buttery Crispy
- Salt-Rubbed Brussels Sprouts Make a Salad That's Both Tender and Crisp
- Salted Caramel Brownies
- Salted Honey Parker House Rolls
- Salted Maple Pie
- Salted-Butter Apple Galette with Maple Whipped Cream
- Saltine Toffee Cookies
- Salty Oil-Cured Chilies
- Sambal Oelek
- San Francisco-Style Vietnamese American Garlic Noodles
- Sandwich Rye Bread
- Saucisson of Pork Tenderloin
- Savory Lentils
- Scallion Pancake Challah
- Scalloped Potatoes
- Scarlett's Sesame Noodles
- Scotch Broth
- Scotcheroos
- Seafood Essence
- Seaweed Salad
- Semolina Braid
- Semolina Pizza Dough
- Senegalese Black-Eyed Pea and Sweet Potato Soup (Ndambe)
- Sephardic Charoset Truffles
- Sesame Noodles with Chili Oil and Scallions
- Sesame-Brown Butter Udon Noodles
- Sesame-Orange Shrimp and Chicken Stir-Fry
- Shakshouka
- Shakshuka
- Shakshuka (North African–Style Poached Eggs in Spicy Tomato Sauce)
- Shanghai Soup Dumplings
- Shaved Zucchini and Herb Salad with Parmesan
- Sheet Pan Tomato Sauce
- Sheet-Pan Döner Kebab
- Shokupan (Japanese Milk Bread)
- Shokupan (Japanese Milk Bread)
- Shortcut Banh Mi with Pickled Carrots and Daikon
- Shoyu Ramen
- Shrimp Ceviche "Cocktail"
- Shrimp Scampi with Garlic, Red Pepper Flakes, and Herbs
- Shrimp Tacos
- Shrimp Veggie Salad
- Shrimp and Pea Shoot Dumplings (Har Gow)
- Shrimp and Sugar Snap Peas
- Shrimp Étouffée
- Sichuan Cold Sesame (Or Peanut) Noodles
- Sichuan Cucumber Pickles
- Sichuan Dry-Fried Beef
- Sichuan Noodles with Spicy Pork Sauce (Dan Dan Mian) Posted December 18, 2013
- Sichuan Style Stir-Fried Chinese Long Beans
- Sichuan-Style Smashed Cucumber Salad
- Silky Roasted Eggplant with Tomato and Feta
- Simple Crusty White Bread
- Simple Garlic Shrimp
- Simple Guacamole
- Simplified Haggis
- Singaporean Chili Crab
- Singaporean Sriracha Chile Sauce
- Sisig (Filipino Sizzling Pork)
- Skirt Steak with Bloody Mary Tomato Salad
- Sloppy Joes
- Smoke Roasted Potato Salad
- Smoked Bratwurst
- Smoky Potato Salad
- Smoky Roasted Cauliflower Soup with Herbed Chickpea Dumplings
- Soba Noodles with Miso-Roasted Tomatoes
- Socca
- Soda Bread
- Soda Bread Buns
- Sofrito
- Soft Lemonade Cookies
- Soft Pretzels
- Somen Noodles with Poached Egg, Bok Choy and Mushrooms
- Sour Cream Apple Pie
- Sour Cream Pie Crust
- Sour Pickles
- Sourdough Cheese Crackers
- Sourdough Hot Dog Buns
- Sous Vide Barbecue Pork Ribs
- Sous Vide Barbecue Pulled Pork Shoulder
- Sous Vide Barbecue Pulled Pork Shoulder
- Sous Vide Barbecue Pulled Pork Shoulder
- Sous Vide Glazed Carrots
- Sous Vide Rosemary-Mustard Seed Crusted Roast Beef and Yogurt Herb Sauce
- Sous Vide Smoked Brisket
- Sous-Vide Glazed Carrots
- Southern Biscuits
- Southern Hummus
- Southern Sweet Potato Pie
- Spaghetti Carbonara
- Spaghetti Squash Lasagna
- Spaghetti with Carbonara Sauce
- Spatchcocked (Butterflied) Roast Chicken
- Speculaas
- Spiced Up Turkey Burger Recipe with Lemon Herb Mayo
- Spicy Banana Ketchup
- Spicy Brussel Sprouts with Pork Belly and Habanero
- Spicy Cabbage Salad Recipe (Goi Bap Cai)
- Spicy Cheese Bread
- Spicy Cilantro Almond Pesto
- Spicy Cucumber Salad Side Dish Recipe by Maangchi
- Spicy Garlic Lime Chicken
- Spicy Korean Coleslaw
- Spicy Orange Chicken
- Spicy Orange Chicken
- Spicy stir-fried squid with red chili and holy basil (Phat phed pla muek phrik sod bai kaprao)
- Spinach Pie
- Spinach Salad
- Spinach Walnut Penne
- Spinach and Feta Pita Bake
- Spiralized Thai Salad
- Spotted Dick with Custard Sauce
- Spring Cleaning Cookies
- Spring Cleaning Cookies
- Springerle I
- Sriracha Chile Sauce Recipe (Tuong Ot Sriracha)
- Sriracha Lime Salt
- Ssamjang (Korean Barbecue Dipping Sauce)
- Ssamjang (Korean Spicy Dipping Sauce) Recipe by Maangchi
- Ssamjang Recipe (Korean Dipping Sauce)
- Ssamjang Recipe (Korean Dipping Sauce)
- St. Louis-Style Pizza
- Stardust Chocolate Pancakes
- Steak & Arugula Salad with Oranges
- Steak Seasoning
- Stewed Chicken and Sausage
- Stir-Fried Chile-Lemon Shrimp and Rice Noodles
- Stir-Fried Chinese Broccoli with Crispy Pork Belly (Khana Mu Krop)
- Stir-Fried Lo Mein Noodles with Pork and Vegetables
- Stir-Fried Lo Mein with Beef and Broccoli
- Stollen
- Stollen
- Strawberry Salsa
- Strawberry Tarts
- Stromboli
- Stromboli with Olives, Sun-Dried Tomatoes, Ham, Salami, and Cheese
- Stromboli with Olives, Sun-Dried Tomatoes, Ham, Salami, and Cheese
- Stuffed Breast of Lamb
- Stuffed Eggplant with Lamb and Pine Nuts from 'Jerusalem'
- Submarine Dressing
- Subtle Steps Lead to the Best Tabbouleh Salad
- Sugar Cookie Bars
- Sugar Cookies
- Sugar Cookies
- Sugar Cookies 1/2 batch
- Summery Chicken Pho Salad
- Sunday Gravy (Frankie Avalon Style)
- Super Soft ‘N Chewy Hoagie Rolls
- Surprise Carrot Cake
- Sweet & Sour Seaweed Salad (Miyeok-Muchim) Recipe by Maangchi
- Sweet Mochi with Red Bean Filling
- Sweet Potato Pavé
- Sweet Potatoes with Lime
- Sweet Sesame Matzo Bars
- Sweet and Moist Northern-Style Cornbread
- Sweet and Sour Thai Chili Sauce
- Sweet and Spicy Chili Sauce for Korean Fried Chicken
- Sweet and Spicy Pork Noodles
- Sweet and Spicy Shrimp with Rice Noodles
- Sweet-Hot Strawberry Bbq Sauce
T
- Tabbouleh Salad
- Tabbouleh Salad
- Tabbouleh Salad
- Taco Seasoning
- Tacos De Camarones Al Mojo De Ajo (Sautéed Shrimp Tacos)
- Tacos Gobernador (Sinaloan Shrimp Tacos)
- Taiwanese Beef Noodle Soup
- Taiwanese Flaky Scallion Pancakes
- Takeout-Style Kung Pao Chicken (Diced Chicken with Peppers and Peanuts)
- Takeout-Style Sesame Noodles
- Tamale Pie
- Tamarind Butter
- Tamarind Glaze
- Tamarind-Braised Beef Short Ribs
- Tandoor-Style Grilled Chickens or Cornish Hens
- Tandoori Rub
- Tangerine Beef with Glass Noodles
- Tangerine Peel Beef
- Tangerine Peel Beef
- Tangerine Peel Beef
- Tangy Peanut-Avocado Salsa
- Tangy and Creamy Macaroni Salad
- Tangy and Creamy Macaroni Salad
- Tasajo
- Tasajo Torta with Smoky Guacamole
- Tempura Batter
- Tender Italian Sugar Cookies
- Texas-Style Baked Beans
- Texas-Style Baked Beans
- Texas-Style Chili
- Thai Beef with Basil
- Thai Drunken Noodles (Pad Kee Mao)
- Thai Peanut Slaw
- Thai Pickled Cabbage
- Thai Pork and Noodles
- Thai Salad Dressing
- Thai Sweet Chile Sauce
- Thai Sweet Chili Sauce
- Thai Sweet Chili Sauce
- Thai Watermelon Salad
- Thai-Style Marinated Flank Steak and Herb Salad
- Thai-Style Vegetable Rice Noodles
- Thanksgiving Leftovers Hot Pockets
- The Almost Original Branston Pickle Recipe!
- The Best Baba Ganoush
- The Best Buttermilk-Brined Southern Fried Chicken
- The Best Cauliflower Pizza Crust
- The Best Chicken Paprikash
- The Best Chicken Paprikash
- The Best General Tso's Chicken
- The Best Korean Fried Chicken
- The Best Minestrone Soup Recipe
- The Best Oven-Fried Buffalo Wings
- The Best Pizza Dough
- The Best Yorkshire Pudding
- The Bread Bible's Sesame Burger Buns
- The Easiest Way to Make Vanilla Ice Cream at Home
- The Final Pizza
- The Food Lab's Ultra-Gooey Stovetop Mac and Cheese
- The Lemony Couscous Salad I Make On Repeat All Summer
- The One-Bowl Passover Cake You Have to Make This Year
- The Ultimate Beef Stroganoff
- These 5-Ingredient, One-Bowl Moroccan Biscuits Are Buttery Soft and Sweet Like Cornbread
- These Homemade Real-Deal Thai Drunken Noodles Are *Way* Better Than Takeout
- Thin-Crust Pizza
- Thirty-Minute Mozzarella
- This One-Pan Dinner Is 'So Tasty!'
- Three Sisters Soup
- Tlayudas (Oaxacan Quesadillas)
- Todd's Famous Blueberry Pancakes
- Toffee Bits
- Toffee Cheesecake Bars
- Tomatillo-Avocado Salsa
- Tomato Basil Salad
- Tomato Jam
- Tomato Pesto Tart with Cauliflower Crust
- Tomato-Olive Focaccia
- Tonkatsu Sauce (Japanese-Style Barbecue Sauce)
- Tonkatsu or Chicken Katsu (Japanese Breaded Pork or Chicken Cutlets)
- Too Sauced to Pork Vinegar Sauce
- Top Sirloin Hot Pot
- Tornado Cake
- Torta Ahogada
- Torta Ahogada (Mexican "Drowned" Sandwich)
- Tortang Talong (Filipino Eggplant Omelette)
- Tortillas the Café Sucre Flour
- Traditional French Cassoulet
- Traditional Hungarian Sausage
- Tricked-Up Brisket Rub
- Turkish Mixed Vegetable Pickles
- Turtle Cookie Bars
- Two-Hour Gravlax
- Two-Minute Aioli
U
- Uncle John's Christmas Cookies
- Uncle Scotty's Atomic Retrofire Brisket Rub
- Uncle Scotty's Atomic Retrofire Dry Rub
- Uncle Scotty's Atomic Retrofire Dry Rub
- Uncle Scotty's Atomic Retrofire Ranchero Salsa
- Uncle Scotty's Atomic Retrofire Wet Mop
- Uncle Scotty's Chicken Rub
- Uncle Scotty's Mexican Spice Blend
V
- Vaguely Vietnamese Slow Cooker Pork Tacos
- Vajdasági Salted Roll with Cheese and Ham
- Vanilla Ice Cream
- Vanilla Pomegranate Oatmeal Cookies
- Vegan Challah
- Vegan Creamy Leek Pasta
- Vegan Doro Wat
- Vegan Lemon Loaf (No Eggs, No Butter, No Milk!)
- Vegetable Broth Base
- Veggie Ricotta Calzones
- Viet-Style Maggi Roast Chicken and Butternut Squash
- Vietnamese Beef-Noodle Soup with Asian Greens
- Vietnamese Caramel Bbq Sauce
- Vietnamese Green Papaya Salad with Beef Jerky Goi Du Du Bo Kho
- Vietnamese Lemon Grass Beef and Noodle Salad (Bun Bo Xao)
- Vietnamese Lemongrass-Chili Oil
- Vietnamese Pickled Daikon and Carrots for Banh Mì (Do Chua)
- Vietnamese Pork Chops
- Vietnamese-American Thanksgiving Salad
- Vietnamese-Style Baked Chicken
W
- Waffle House-Style Waffles
- Watermelon Lime Chiller
- Watermelon Margaritas
- Watermelon, Heirloom Tomato, and Feta Salad
- West African Peanut Stew
- White Bean Tapenade
- White Beans and Carrots with Roasted Orange Vinaigrette
- Whole Grilled Sea Bass with Asian Aromatics
- Whole Roasted Cauliflower with Whipped Goat Cheese
- Whole Roasted Chicken Infused with Tangerines and Rosemary with a Tangerine Glaze
- Whole Roasted Fish with Oregano, Parsley, and Lemon
- Whole-Wheat Sandwich Bread
- Wonton Soup
- Worcestershire Sauce
- Worcestershire Sauce
Y
- Years in the Making, a Keeper Japanese Orange Dressing
- Yellow Rice
- Yemeni Spice Rub
- Yen Ta Fo "Pink Noodle Soup" เย็นตาโฟ
- Yocheved Hirsch's Round Challah
- Yogurt Hollandaise Sauce
- Yogurt Hollandaise Sauce
- Yogurt and Honey Bread
- You'Ll Want to Put Grilled Watermelon Salsa On Everything This Summer
- Yucatecan Pickled Red Onions (Escabeche De Cebolla)
- Yucatán-Style Pickled Red Onions in Sour-Orange Juice
- Yuzu-Miso Soba Noodle Soup
Z
- Za'atar Chicken, Potatoes and Broccoli
- Zucchini Cookies
- Zucchini Parmesan Crisps
- Zucchini Parmigiana
- Zucchini Pizza Casserole
- Zucchini and White Bean Salad with Feta and Mint
- Zucchini-Oat Dark Chocolate Chip Cookies
Achiote Oil(Aceite De Achiote)
Tags: Condiments
Latin Mexican
Servings: 1 Cup
Ingredients
- 1 cup olive oil
- 2 tablespoons achiote (annatto) seeds
Steps
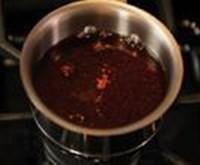
- Heat the oil and annatto seeds in a small skillet over medium heat just until the seeds give off a lively, steady sizzle. Don't overheat the mixture or the seeds will turn black and the oil a nasty green. Once they're sizzling away, pull the pan from the heat and let stand until the sizzling stops. Strain as much of the oil as you are going to use right away into the pan; store the rest for up to 4 days at room temperature in a jar with a tight fitting lid.
- In addition to using achiote oil to sauté onions, garlic and such, you can use it straight, painted onto fish and poultry headed for the grill or broiler.
Notes
- FAVORITE
↑ Back to top
Achiote Paste
Adapted from http://www.bonappetit.com/recipe/achiote-paste
Tags: Condiments
Latin Mexican
Ingredients
- 3 whole cloves
- 1 bay leaf
- 1/4 cup annatto seeds
- 2 teaspoons coriander seeds
- 2 teaspoons cumin seeds
- 2 teaspoons dried Mexican or Italian oregano
- 1 teaspoon black peppercorns
- 1 teaspoon kosher salt
- 4 garlic cloves
- 1/4 cup distilled white vinegar
- 1 teaspoon finely grated lime zest
- 1 teaspoon finely grated orange zest
Steps
- Blend cloves, bay leaf, annatto seeds, coriander seeds, cumin seeds, oregano, peppercorns, and salt in a blender on low speed, increasing to high, until finely ground.
- Add garlic, vinegar, lime zest, and orange zest and continue blending until a coarse paste forms. Transfer to a small airtight container and chill.
Notes
- Paste can be made 1 month ahead. Store in an airtight container and chill.
↑ Back to top
Achiote Rubbed Fish
Adapted from https://patijinich.com/recipe/tikin-xic/

Tags: Fish
Mexican
Ingredients
- 6 red snapper, snook, sea bass, or bronzino fillets deboned (about 6 ounces each)
- 2 dried guajillo chiles, stemmed and seeded
- 1/2 cup freshly squeezed orange juice
- 1/2 cup freshly squeezed lime juice
- 2 tablespoons white distilled vinegar
- 4 ounces (or 6 tablespoons) achiote paste
- 9 cloves garlic
- 1/4 cup white onion coarsely chopped
- 5 whole cloves hard stems removed
- 1/4 teaspoon ground allspice
- 1/4 teaspoon freshly ground black pepper
- 1 teaspoon kosher or coarse sea salt divided
- 1 tablespoon vegetable oil
- Warm corn tortillas (optional)
Steps
- Place the fish in a large baking dish.
- Toast the guajillo chiles on a pre-heated comal or skillet, set over medium heat, for about 30 seconds per side. Place the toasted chiles in a saucepan, cover with water, and set over medium-high heat. Simmer until chiles rehydrate, soften and plump up, about 10 to 12 minutes.
- In the jar of a blender, add rehydrated guajillos, plus a couple tablespoons from their simmering liquid, as well as the orange juice, lime juice, vinegar, achiote paste, garlic, onion, cloves, allspice, pepper and salt. Purée until completely smooth.
- Pour the marinade over the fish, making sure the fish is completely covered in the marinade on both sides. Cover with plastic wrap and let it marinate in the refrigerator anywhere from 30 minutes to 12 hours.
- When ready to bake, remove from the refrigerator at least 15 minutes ahead of time to bring to room temperature. Preheat oven to 450 degrees Fahrenheit.
- Butter a large baking dish and place the marinated fish, skin side down. Reserve the remaining marinade.
- Bake the fish anywhere from 10 to 15 minutes, depending on the thickness of the fish, until it flakes the fish with a fork. It should be moist and look opaque, but don't let it get dry and overdone.
- While the fish cooks, place a saucepan over medium heat and heat the oil. Once it is hot, pour in the marinade; it will splatter so you may want to use a lid as a shield. Simmer for 8 to 10 minutes, partially covered, stirring often, until the marinade has thickened to a light puree or thick sauce consistency. Serve in a small bowl with a spoon, for your guests to add more sauce to the fish as they eat it, or to spoon over the tacos if making.
Notes
- FAVORITE
↑ Back to top
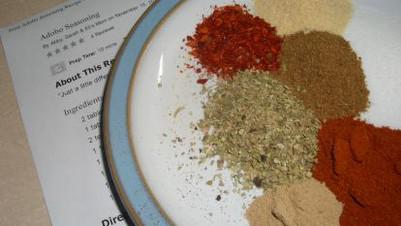
Adobo Seasoning
Adapted from https://www.food.com/recipe/adobo-seasoning-442098
Tags: Latin
Mexican Spices
Servings: 7 Tablespoons UNITS: US
Ingredients
- 2 tablespoons salt
- 1 tablespoon paprika
- 2 teaspoons ground black pepper
- 1 1⁄2 teaspoons onion powder
- 1 1⁄2 teaspoons dried oregano
- 1 1⁄2 teaspoons ground cumin
- 1 teaspoon garlic powder
- 1 teaspoon chili powder
Steps
- In a bowl, stir together the salt, paprika, black pepper, onion powder, oregano, cumin, garlic powder, and chili powder.
- Store in a sealed jar in a cool, dry place.
Notes
- MY PRIVATE NOTES
- Add a Note
↑ Back to top
Aebleskiver

Tags: Baking
Scandinavian Snacks
Ingredients
- 2 apples, peeled, cored, pared, and chopped into 1/2” pieces
- 2 Tbsp. butter plus butter to grease aebleskiver pan
- 2 tsp. cinnamon
- 2 eggs
- 1 Tbsp. sugar
- 2 cups flour
- 1 tsp. baking powder
- 1 1/2 cups buttermilk
Steps
- Place aebleskiver pan over medium-high burner and bring up to heat (to the point where butter sizzles on the surface).
- In a separate pan, lightly sauté apple pieces in 2 Tbsp. butter until softened but still firm. Sprinkle with cinnamon.
- Separate the eggs and beat the egg whites until stiff peaks form. Whisk egg yolks and sugar together until creamy. Sift together flour and baking powder; gradually stir flour and buttermilk, alternating with each 1/2-cup addition, into egg mixture. Gently fold beaten egg whites into batter.
- Reduce heat under aebleskiver pan to medium. Place 1/8 tsp. butter into each well to grease, using a pastry brush to coat surface of wells entirely.
- Spoon batter into each well, filling half-way (about 1 tsp.). Place an apple chunk on batter, then spoon enough additional batter over apple to cover and fill well to the top. Allow to cook until the edges of each “pancake” begin to brown and pull away from the sides of the wells.
- Lightly run a knife or (in the traditional fashion) a knitting needle around the edge of each ball to loosen, and then flip over to cook through (about 2 minutes).
- Remove the aebleskiver to a plate and sprinkle with powdered sugar to serve.
Notes
- FAVORITE
↑ Back to top
Aebleskivers with Lemon Curd
Tags: Baking
Scandinavian Snacks
Servings: 4 to 6 servings
Ingredients
- 3 egg whites
- 3 egg yolks
- 3 cups milk
- 4 cups all-purpose flour
- ¼ cup granulated sugar
- 4 teaspoons baking powder
- 1 teaspoon salt
- 1 stick butter, melted
- Powdered sugar
Steps
- Whip the egg whites to soft peaks. In a separate bowl, mix the egg yolks with the milk. Combine the dry ingredients in large mixing bowl. Stir the milk mixture into the dry ingredients, then add the melted butter.Batter will be lumpy. Gently fold inthe egg whites.
- Heat an aebleskiver pan according to directions. Coat each aebleskiver pan cup with cooking spray and fill almost to the top with batter. When the edges start to brown and get bubbly, start turning the balls of dough in their cups with a skewer or fork to form spheres. Continue to rotate the dough balls in one-third turns until golden brown and cooked through. Dust with powdered sugar and serve with Lemon Curd
↑ Back to top
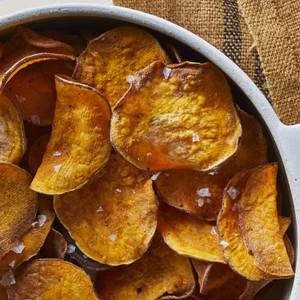
Air-Fryer Sweet Potato Chips
Adapted from https://ubiquinol.org/recipes/air-fryer-sweet-potato-chips?twclid=2-5jhgg4cbh091xb1lr4u9d3da0
Tags: Snacks
Servings: 8
Ingredients
- 1 medium sweet potato (about 8 ounces) , sliced into ⅛-inch-thick rounds
- 1 tablespoon canola oil
- ¼ teaspoon sea salt
- ¼ teaspoon ground pepper
Steps
- Place sweet potato slices in a large bowl of cold water; soak for 20 minutes. Drain and pat dry with paper towels.
- Return the sweet potatoes to the dried bowl. Add oil, salt and pepper; toss gently to coat.
- Lightly coat air-fryer basket with cooking spray. Place just enough of the sweet potatoes in the basket to form a single layer. Cook at 350°F until cooked through and crispy, about 15 minutes, flipping and rearranging into a single layer every 5 minutes. Using tongs, carefully remove the chips from the air fryer to a plate. Repeat with the remaining sweet potatoes.
- Let the chips cool for 5 minutes; serve immediately or cool completely and store in an airtight plastic container for up to 3 days.
↑ Back to top
Aleppo Rub
Tags: Middle-East
Rubs and Blends
Spices
Is starred.
Servings: YIELD 4 ACTIVE TIME 10
minutes
Ingredients
- 1 1/2 teaspoons Aleppo pepper
- 1 teaspoon kosher salt
- 1 teaspoon brown sugar
Steps
- Mix Aleppo pepper, salt and sugar in a small bowl until well combined. Rub all over ribs and allow to sit overnight.
Notes
- FAVORITE
↑ Back to top
Alfredo Sauce
Tags: Sauces
Ingredients
- 1 pint heavy cream
- 1/2 cup butter, unsalted softened
- 1 cup Parmigiano-Reggiano
- Freshly cracked black pepper
- 1 tblspoons fresh flat-leaf parsley chopped
Steps
- To prepare alfredo sauce: Heat heavy cream over low-medium heat in a deep saute pan. Add butter and whisk gently to melt. Sprinkle in cheese and stir to incorporate. Season with freshly cracked black pepper. In a large stockpot, cook pasta in plenty of boiling salted water for 3 minutes. Quickly drain the pasta and add it to the saute pan, gently toss the noodles to coat in the alfredo. Transfer pasta to a warm serving bowl. Top with more grated cheese and chopped parsley. Serve immediately.
Notes
- FAVORITE
↑ Back to top
Alfredo Sauce
Tags: Sauces
Ingredients
- 1 stick butter
- 1 cup heavy cream
- Salt and freshly ground black pepper
- 2 cups freshly grated Parmesan
- Pasta cooking water, as needed
Steps
- In a saucepan or skillet, warm the butter and cream. Season with salt and pepper. Add the Parmesan and stir until melted.
- Toss to combine, thinning with pasta water if necessary.
- Recipe courtesy Ree Drummond
Notes
- FAVORITE
↑ Back to top
Allotment Cottage Pie
Tags: Pies and Tarts
Savory Vegetarian
Servings: 6 TO 8
Ingredients
- 10 g dried porcini mushrooms
- 2 large leeks
- 3 carrots
- 500 g swede
- 500 g celeriac
- olive oil
- 3 sprigs of fresh rosemary
- 1 teaspoon cumin seeds
- 2 kg potatoes
- 40 g unsalted butter
- 1 splash of semi-skimmed milk
- 1 onion
- 1 teaspoon Marmite
- 3 tablespoons tomato purée
- 1 x 400 g tin of green lentils
Steps
- In a blender, cover the porcini with 600ml of boiling water.
- Trim, wash and slice the leeks 2cm thick, then scrub the carrots, swede and celeriac and chop to roughly the same size.
- Drizzle 2 tablespoons of oil into a large casserole pan on a medium heat, strip in the rosemary, fry for 1 minute to crisp up, then remove to a plate with a slotted spoon.
- Add the cumin seeds and prepped veg to the flavoured oil, season with sea salt and black pepper, and cook for 30 minutes, stirring regularly.
- Meanwhile, peel and roughly chop the potatoes, cook in a pan of boiling salted water for 15 minutes, or until tender, then drain well. Mash with the butter and milk, and season to taste.
- Preheat the oven to 190ºC/375ºF/gas 5.
- Quarter the onion, add to the porcini in the blender along with the Marmite and tomato purée and whiz until smooth.
- Pour into the veg pan and cook for 20 minutes, or until dark and caramelised, stirring regularly and scraping up any sticky bits from the bottom of the pan.
- Tip the lentils (juices and all) into the veg pan, bring to the boil, then season to taste.
- Spoon over the mash, place on a tray, bake for 30 minutes, or until lightly golden and bubbling at the edges, then sprinkle over the crispy rosemary.
- Serve with simple steamed seasonal greens – it’s a winner!
Notes
- EASY SWAPS:
- – I’ve used dried porcini mushrooms to bolster the flavour of the gravy, but you could absolutely use fresh mushrooms, or just rely on a good stock cube.
- – When it comes to herbs, use any woody herbs you’ve got: rosemary, thyme, bay, sage, or even a bit of dried herbs.
- – Use any root veg in the filling, or the topping.
- – This recipe celebrates beautiful veg, but you could add veggie mince into the mix, if you’ve got it.
↑ Back to top
Almond Biscotti
Tags: Baking
Cookies
Ingredients
- 2 cups all-purpose flour
- 1 cup sugar
- 1 teaspoon baking powder
- 1/8 teaspoon salt
- 3 large eggs
- 2 tablespoons Amaretto ( OR 2 tbs rum with 1 tsp. almond extract)
- 1 teaspoon vanilla
- 1 teaspoon anise extract (optional)
- 1 cup whole almonds toasted and chopped a few times, not too fine
Steps
- Preheat oven to 300°F.
- Line 2 baking sheets with parchment.
- Combine dry ingredients and set aside.
- Whisk the eggs, amaretto (if using, or the almond extract and rum), vanilla and anise extracts in your mixer until well blended.
- Add the dry ingredients and mix until combined.
- Dough should be thick and sticky at this point--do not worry, and DO NOT add more flour!
- Scrape the dough out onto a parchment lined sheet pan.
- Flour your hands and shape into a long flat loaf about 10 inches long and 5 inches wide.
- This will be kind of messy, so don't worry about how neat it is, just try to get it in that general shape.
- Bake until firm and dry, about 50 minutes.
- Remove from the oven and cool 10 minute..)
- Directions
- Use a long serrated knife and slice into 1/2-inch wide slices.
- Lay the slices cut side down on the baking sheet and bake another 20 minutes.
- Turn the slices over and bake 20 minutes more, or until the cookies are a light golden brown.
- Cool the biscotti on a rack; cool completely before storing.
Notes
- FAVORITE
↑ Back to top
Almond Biscotti
Adapted from https://www.sipandfeast.com/almond-biscotti/

Tags: Cookies
Snacks
Ingredients
- 2 ½ cups (300g) all-purpose flour
- ¾ cup (150g) granulated sugar
- ¼ teaspoon salt
- ½ teaspoon cinnamon
- 1 teaspoon baking powder
- 4 large eggs divided
- 1 tablespoon (15ml) honey
- 1 teaspoon vanilla extract
- ¾ cup (105g) almonds raw, unsalted, and roughly chopped
- 6 ounces (170g) dark chocolate
- 1 tablespoon (15ml) milk for the eggwash
Steps
- Preheat the oven to 350f and line two baking sheets with parchment paper.
- In a large bowl, mix the flour, sugar, salt, cinnamon, and baking powder until combined.
- In a separate bowl, whisk together 3 eggs, honey, and vanilla extract.
- Add the wet ingredients to the dry ingredients and mix together until a rough dough is formed.
- Add the almonds to the dough and mix with your hands until the almonds are well combined and a dough ball is formed. The dough will be sticky.
- On a floured work surface, cut the dough in half and use your hands to shape each piece into a log roughly 3 inches wide and 1 inch thick.
- Whisk together 1 egg and 1 tablespoon of milk to create an egg wash, then use a pastry brush to wash the mixture onto the tops of the logs.
- Bake the logs in the oven for 20 minutes, then remove from the oven and cool for 10 minutes. Drop the oven temperature down to 275f.
- Transfer the logs to a cutting board and slice them into ¾-inch slices. Place the slices back onto the baking sheet, cut side up, and bake for another 25 minutes until lightly golden.
- Allow the cookies to cool completely, then melt the chocolate over a double boiler and dip one end of the biscotti into the chocolate, or use a pastry brush to brush the chocolate onto the biscotti, and place on a baking sheet. Allow the chocolate to set completely before serving or storing. Enjoy!
Notes
- The biscotti dough will be very sticky. If it's too sticky to handle, add a little flour at a time, and keep your hands floured while shaping the dough.
- Allow the chocolate to set on the biscotti before serving or storing. To speed up the process, you can place the biscotti in the refrigerator.
- This recipe was written for a conventional oven. For convection ovens, reduce the temperature by 25 degrees and begin checking for doneness at the 75% mark.
- Almond biscotti can be stored at room temperature in an airtight container for up to 1-2 weeks.
↑ Back to top
The Almost Original Branston Pickle Recipe!
Tags: British
Pickles
Ingredients
- 9 ounces carrots, peeled and cut into small chunks
- 1 medium swede, peeled and cut into small chunks
- 4 to 5 garlic cloves, peeled and finely chopped
- 5 ounces dates, finely chopped
- 1 small cauliflower, finely chopped
- 2 onions, peeled and finely chopped
- 2 medium apples, finely chopped, unpeeled
- 2 medium finely chopped courgettes, unpeeled
- 15 to 20 small cornichons or 15 -20 small gherkins, finely chopped
- 10 ounces dark brown sugar
- 1 teaspoon salt
- 4 tablespoons lemon juice
- 3/4 pint malt vinegar
- 2 teaspoons mustard seeds
- 2 teaspoons ground allspice
- 1 teaspoon cayenne pepper
Steps
- Combine all the ingredients in a large saucepan and bring them to the boil.
- Then reduce the heat to a simmer and cook until the swede is cooked, but still remains firm, about 2 hours.
- Stir well to redistribute all of the vegetables.
- Bottle and seal in sterile and hot jars.
- Allow the pickle to age for a few weeks before using, this improves the taste and it will become more "mellow".
- Serve with cheese, ploughman's lunches, in sandwiches, with cold cuts and meats. This pickle is also wonderful when added to curries and stews.
Notes
- FAVORITE
↑ Back to top
Aloha Rolls
Adapted from http://sassy-spoon.com/2012/03/05/aloha-rolls/

Tags: Baking
Rolls and Buns
Ingredients
- 2 (1/4 ounce) packages active dry yeast or about 1 tablespoon 1 cup lukewarm water (105 to 115 F)
- 1/4 cup canola oil
- 1 large egg
- 3/4 cup raw sugar or honey
- 1 1/2 cups warm water (more if needed)
- 6 1/2 to 7 cups bread flour
- 1 teaspoon sea salt
- Extra Virgin Olive Oil
- Butter
Steps
- Dissolve the yeast in a large mixing bowl with 1 cup of lukewarm water and let it stand for about 5 minutes
- Add the oil, egg, sugar or honey, salt and the rest of the water and mix it with a whisk, let stand again for a few minutes
- Add the flour and mix on medium with a dough hook until the dough forms a ball. It should be a moist dough, but not very sticky. Add a little more flour if needed. Allow the dough to rest for 15 minutes then knead for 5 minutes
- Put a small circle of olive oil in the bottom of a large bowl and put the ball of dough smooth side down into the bowl, then flip it over and cover with plastic wrap. And allow to rise for 90 minutes or until doubled
- Pre-heat oven to 350 degrees Fahrenheit and get a large sheet pan spray with cooking spray or line with partchment paper or silicone mat
- Punch down the dough and pinch off pieces of the dough and roll into golf ball size for dinner rolls or “slider” buns, or tennis ball sizes for sandwich rolls. Arrange the dough on the pan about 1-2 inches apart then cover with plastic wrap that has been sprayed with olive oil or Pam. Allow to rise for 20 minutes. The rolls will not quite double in bulk on the second rising
- Bake rolls for 18 to 30 (shorter time for small rolls) mintues or until golden brown. When they come out of the oven brush lightly with olive oil or take a stick of butter and rub on the tops. You can also add seeds to the tops immediately after buttering.
Notes
- These can also be made into hot dog buns by making 4″ X 1 1/2 inch torpedo shapes and allowing to rise in the same manner. They make AWESOME hamburger buns too!
↑ Back to top
Alsace Onion Tart

Tags: France
Pies and Tarts
Servings: YIELD Makes 6
main-course or 10 first-course servings ACTIVE TIME 1 1/4 hours TOTAL
TIME 3 1/2 hours
Ingredients
- 2 cups all-purpose flour
- 1 stick (1/2 cup) cold unsalted butter, cut into 1/2-inch cubes
- 1/4 cup vegetable shortening
- 1/2 teaspoon salt
- 4 to 5 tablespoons ice water
- 4 bacon slices (1/4 lb), cut crosswise into 1/8- to 1/16-inch-wide strips
- 3 tablespoons unsalted butter
- 2 lb onions, halved lengthwise and very thinly sliced crosswise (10 cups)
- 1 1/4 teaspoons salt
- 1 teaspoon black pepper
- 1 cup crème fraîche or heavy cream
- 4 large eggs
- 1/2 teaspoon freshly grated nutmeg
- Special equipment: a pastry scraper; an 11-inch tart pan (1 1/4 inches deep) with a removable bottom; pie weights or raw rice
For pastry:
For filling:
Steps
- Blend together flour, butter, shortening, and salt in a bowl with your fingertips or a pastry blender (or pulse in a food processor) just until most of mixture resembles coarse meal with some small (roughly pea-size) butter lumps. Drizzle evenly with 4 tablespoons ice water and gently stir with a fork (or pulse in processor) until incorporated.
- Squeeze a small handful: If it doesn't hold together, add more ice water, 1/2 tablespoon at a time, stirring (or pulsing) until just incorporated, then test again. (Do not overwork mixture, or pastry will be tough.)
- Turn out mixture onto a lightly floured surface and divide into 6 equal portions. With heel of your hand, smear each portion once or twice in a forward motion. Gather dough together with pastry scraper and press into a ball, then flatten into a disk. Chill dough, wrapped in plastic wrap, until firm, at least 1 hour.
- Roll out dough on a floured surface with a floured rolling pin into a 14-inch round and fit into tart pan. Trim excess dough, leaving a 1/2-inch overhang, then fold overhang over pastry and press against side to reinforce edge. Lightly prick bottom with a fork and chill until firm, about 30 minutes.
- Put oven rack in middle position and preheat oven to 400°F.
- Line chilled shell with foil and fill with pie weights. Bake until pastry is set and pale golden along rim, 15 to 20 minutes. Carefully remove foil and weights and bake shell until golden all over, 10 to 15 minutes more. Transfer shell to a rack. (Leave oven on.)
- Prepare filling while shell bakes
- Cook bacon in a 12-inch nonstick skillet over moderate heat, stirring occasionally, until crisp, 6 to 8 minutes. Transfer bacon with a slotted spatula to paper towels to drain and pour off bacon fat. Add butter to skillet and cook onions with 3/4 teaspoon salt and 1/2 teaspoon pepper over moderate heat, stirring, until just wilted, about 2 minutes. Cover surface of onions with a round of parchment or wax paper (or cover skillet with a tight-fitting lid) and continue to cook, lifting parchment to stir frequently, until onions are very soft and pale golden, about 20 minutes. Stir in bacon, then remove from heat and cool 10 minutes.
- Whisk together crème fraîche, eggs, nutmeg, remaining 1/2 teaspoon salt, and remaining 1/2 teaspoon pepper in a large bowl, then stir in onions.
- Fill and bake tart
- Pour filling into tart shell, spreading onions evenly, and bake until filling is set and top is golden, 25 to 35 minutes. Serve warm or at room temperature.
Make pastry:
Notes
- FAVORITE
↑ Back to top
Ameretti

Ingredients
- 2.2 lbs (1 kg) sweet almonds
- 3.5 oz (100 g) bitter almonds
- 3 cups (700 g) sugar
- 5 egg whites
- Zest of 1 lemon, grated
Steps
- Blanch the almonds in boiling water, then rinse and dry them thoroughly.
- Grind the almonds together with the lemon zest.
- Combine the ground almonds and lemon zest with the sugar and egg whites.
- Knead the mixture until it forms a dough.
- Shape the dough into desired-sized balls and roll them in sugar.
- Preheat the oven to 350°F (180°C).
- Place the amaretti on a baking sheet lined with parchment paper and bake for about 30 minutes, or until they are lightly golden.
Once baked, allow the
amaretti to cool before enjoying them. Buon appetito!
↑ Back to top
Amish "Steak"
Ingredients
- 2 pounds ground beef
- 1/2 diced onion
- 1 cup crumbled saltine crackers
- 1 cup milk
- 1/4 flour
- 1/2 teaspoon garlic powder
- 3 tablespoons butter
- Salt and pepper to taste
- 1-2 cans cream of mushroom soup
- 1.5 cups of milk
For the gravy
sauce:
Steps
- Preheat oven to 350°F.
- In a mixing bowl, combine ground beef, crumbled saltine crackers, milk, minced onion, salt, black pepper, chili powder, and garlic powder. Mix thoroughly until well combined.
- Shape the mixture into oval or rectangular patties, similar to traditional steak shapes.
- Coat each patty with flour, shaking off any excess.
- In a large skillet, melt the butter over medium-high heat.
- Place the coated patties in the skillet and cook until browned on both sides, about 3 minutes per side. Remove the patties and set them aside. (This is just to give color and enhance flavor.)
- Transfer to greased 9x13 baking dish. Mix gravy sauce in bowl and pour over patties.
- Cover baking dish with foil and bake for 50 mins. Remove cover and bake for 10 more mins.
Enjoy the hearty and comforting flavors of this Amish classic, where
simple ingredients come together to create a mouthwatering dish the
whole family will love.
↑ Back to top
Amish Apple Fritter
Adapted from https://99easyrecipes.com/amish-apple-fritter/2/

Ingredients
- 2 Tablespoons granulated sugar
- 2 large eggs
- 1 cup all-purpose flour
- 2 tsp. baking powder
- ½ tsp. cinnamon
- ½ tsp. salt
- ¼ cup milk
- 2 tsp. fresh lemon juice
- 2-3 cups peeled, cored and chopped Granny Smith or Gravenstein apples (firm pie apples!)
- Vegetable oil for deep-frying (approx. 4-5 cups- enough to come halfway up sides of pan or skillet)
- 1¼ cups powdered sugar
- ¼ tsp. vanilla
- 3-4 tsp. warm water (thin enough to make the glaze “paintable”)
For fritters:
For glaze:
Steps
- In a large bowl (or the bowl to a stand mixer), cream the sugar and eggs for 1-2 minutes with a mixer.
To this, add the flour,
baking powder, cinnamon, salt and milk. Mix these ingredients well.
In a separate bowl, mix the chopped apples with the lemon juice. Using
a spoon, add the apple mixture to the batter and stir well, to
combine.
Heat vegetable oil to 375 degrees (use a deep-fry thermometer or use
an
electric skillet with a temperature control). It is very important to
make sure the temperature is hot enough to fry the fritters correctly.
Once the oil is at 375 degrees, scoop out really large tablespoonfuls
of the fritter batter (as big as you can get ’em!) and carefully and
gently slide the fritter into the hot oil.
When they get to a true golden brown color, carefully turn the
fritters
over to the other side (I used two spoons to carefully flip them) and
continue cooking. (This should take approx. 2-3 minutes on each side).
When the fritters become brown on both sides (you might have to flip
them over again to make sure both sides are brown), then you know they
will be ready and cooked through.
Using a SLOTTED spoon, remove the fritters, one at a time, to a
paper-towel lined (several thicknesses) plate to drain and cool.
To
make a glaze for the tops of the fritters, mix together the powdered
sugar, vanilla and water in a small bowl until you have a nice
“paintable” glaze.
Using a pastry brush, brush this glaze over the entire top of the
fritter. Let glaze harden slightly, turn it over and “paint” the glaze
on the bottom. Place glazed fritters on wire rack; let glaze harden,
then serve.
↑ Back to top
Amish Sugar Cookies

Tags: Amish
Cookies
Ingredients
- 1 cup butter, softened
- 1 cup vegetable oil
- 1 cup sugar
- 1 cup confectioners' sugar
- 2 eggs
- 1 teaspoon vanilla extract
- 4 to 1/2 cups all-purpose flour
- 1 teaspoon baking soda
- 1 teaspoon cream of tartar
Steps
- In large bowl, beat the butter, oil and sugars. Beat in eggs until well blended. Beat in vanilla. Combine the flour, baking soda and cream of tartar; gradually add to creamed mixture.
- Drop by small teaspoonfuls onto ungreased baking sheets. Bake at 375° for 8-10 minutes or until lightly browned. Remove to wire racks to cool. Yield: about 5 dozen.
Notes
- FAVORITE
↑ Back to top
Amy's Lentils
Tags: Stew
Vegetarian
Ingredients
- 1 large onion, diced
- 4 cloves garlic, minced
- 2 to 3 Tbsp olive oil
- 2 carrots, finely chopped
- 2 stalks celery, finely chopped
- 1 tsp cumin
- 1 tsp coriander
- Red pepper flakes, to taste
- Salt and pepper, to taste
- 1 can crushed or diced tomatoes
- 1 to 2 fresh tomatoes, diced (optional)
- 1 c vegetable stock
- 2 to 3 c water
- 1 c dried lentils
Steps
- Saute onion and garlic in olive oil in a big nonstick soup pot for a few minutes. Add carrots and celery. Saute until the vegetables are somewhat soft, 5-10 minutes? Add tomatoes and spices.
- Add tomatoes and stock. Simmer on medium heat until lentils are tender, adding water as needed. Stir frequently. Stop adding water when the lentils are soft (or al dente-whatever you prefer).
- Puree a few cups of the stew in a food processor, then add the puree back to the big pot. This will thicken the stew. You want it to be pretty thick, not watery like soup. If it’s watery, keep simmering.
- Serve over rice, curly fries, or whatever you want. Top with Cheddar cheese, sour cream, hot sauce, ketchup … again: whatever you want.
Notes
- FAVORITE
↑ Back to top
Andre's Barbecued Shrimp and Homemade Biscuits
Adapted from http://www.foodnetwork.com/recipes/emeril-lagasse/new-orleans-bbq-shrimp-recipe/index.html

Tags: Cajun and Creole
Seafood
Servings: YIELD 4 servings TOTAL
TIME --
Ingredients
- 3 pounds large Gulf shrimp, in their shells
- 2 tablespoons Creole seasoning, recipe follows
- Cracked black pepper
- 2 tablespoons olive oil
- 1/4 cup chopped onions
- 2 tablespoons minced garlic
- 3 bay leaves
- 3 lemons, peeled and sectioned
- 2 cups water
- 1/2 cup Worcestershire sauce
- 1/4 cup dry white wine
- 1/4 teaspoon salt
- 2 cups heavy cream
- 2 tablespoons butter
- Traditional southern Biscuits, recipe follows
- 1 tablespoon chopped chives
- 2 1/2 tablespoons paprika
- 2 tablespoons salt
- 2 tablespoons garlic powder
- 1 tablespoon black pepper
- 1 tablespoon onion powder
- 1 tablespoon cayenne pepper
- 1 tablespoon dried oregano
- 1 tablespoon dried thyme
Steps
- Peel the shrimp, leaving only their tails attached. Reserve the shells and set aside. Sprinkle the shrimp with 1 tablespoon Creole seasoning and fresh cracked black pepper. Use you hands to coat the shrimp with the seasonings. Refrigerate the shrimp while you make the sauce base.
- Heat 1 tablespoon of the oil in a large pot over high heat. When the oil is hot, add the onions and garlic and saute for 1 minute. Add the reserved shrimp shells, the remaining Creole seasoning, the bay leaves, lemons, water, Worcestershire, wine, salt, and black pepper. Stir well and bring to a boil. Reduce the heat and simmer for 30 minutes. Remove from the heat, allow to cool for about 15 minutes. Strain into a small saucepan. There should be about 1 1/2 cups. Place over high heat, bring to a boil, and cook until thick, syrupy, and dark brown, for about 15 minutes. Makes about 4 to 5 tablespoons of barbecue sauce base. Heat the remaining 1 tablespoon of oil in a large skillet over high heat. When the oil is hot, add the seasoned shrimp and saute them, occasionally shaking the skillet, for 2 minutes. Add the cream and all of the barbecue base. Stir and simmer for 3 minutes. Remove the shrimp to a warm platter with tongs and whisk the butter into the sauce. Remove from the heat. Mound the shrimp in the center of a platter. Spoon the sauce over the shrimp and around the plate. Arrange the biscuits around the shrimp. Garnish with chopped chives.
- Combine all ingredients thoroughly.
- Yield: 2/3 cup
Notes
- FAVORITE
↑ Back to top
Anginetti
Adapted from http://allrecipes.com/recipe/anginetti/

Tags: Cookies
Servings: 2 dozen
Ingredients
- 1/2 cup white sugar
- 6 tablespoons butter
- 2 teaspoons vanilla extract
- 1 teaspoon lemon zest
- 3 eggs
- 2 cups all-purpose flour
- 2 teaspoons baking powder
- 1 tablespoon butter
- 3 cups sifted confectioners' sugar
- 2 tablespoons water
- 2 tablespoons lemon juice
- 1 teaspoon vanilla extract
Steps
- Preheat oven to 350 degrees F. Line cookie sheet with parchment paper.
- In a mixing bowl beat sugar, vanilla, lemon peel and 6 tablespoons of butter with an electric mixer until well blended. Add eggs one at a time, beating well after each addition. Continue to beat for 1 minute.
- Stir in flour and baking powder (will be a soft, sticky dough). Spoon dough into a pastry bag fitted with a 3/8-inch round tip. Pipe 2-inch diameter rings onto the prepared cookie sheet.
- With moistened fingertips, press ends of each ring together to form a smooth ring.
- Bake about 20 minutes or until golden brown.
- To make icing: Melt 1 tablespoon of butter over low heat. Add sugar, water, lemon juice and vanilla and whisk until sugar melts and mixture is heated through. Thin with more water if icing is too thick to brush.
- Remove cookies from oven and immediately brush warm icing over hot cookies. Cool iced cookies on sheet for 2 minutes. Transfer to a rack and cool completely.
Notes
- FAVORITE
↑ Back to top
Aperol Spritz

Tags: Beverages
Servings: 1 cocktail
Ingredients
- 3 ounces dry sparkling wine, such as prosecco or cava, chilled
- 2 ounces Aperol
- 1 ounce seltzer, chilled
Steps
- Fill chilled wine glass halfway with ice. Add wine, Aperol, and seltzer. Using bar spoon, gently lift mixture from bottom of glass to top to combine. Top with additional ice and garnish with olives, if using. Pinch orange peel over drink and rub outer edge of glass with peel, then garnish with olives and orange peel and serve.
↑ Back to top
Apple Bavarian Torte

Tags: Pies and Tarts
Ingredients
- 1 cup white whole-wheat or all-purpose flour
- 1/2 cup sliced almonds
- 2 tablespoons sugar
- 1/4 teaspoon salt
- 6 tablespoons cold unsalted butter, cut in small pieces
- 1 large egg yolk
- 1/2 teaspoon vanilla extract
- 1 large egg
- 8 ounces reduced-fat cream cheese, at room temperature
- 1/4 cup sugar
- 3/4 teaspoon vanilla extract
- 4 cups peeled and thinly sliced McIntosh apples
- 1/4 cup sugar
- 1/2 teaspoon ground cinnamon
- 1/4 cup sliced almonds
Crust:
Filling:
Topping:
Steps
- Preheat oven to 400°F.
- Pulse flour, almonds, sugar and salt in a food processor, using about 10 one-second pulses, until combined. With the motor running, add butter, a few pieces at a time, until combined. Add egg yolk and vanilla and process until evenly combined (the mixture will look like wet sand). Pat the crust into the bottom of a 9-inch springform pan and about 1 inch up the sides.
- Wipe out the food processor. Add egg, cream cheese, sugar and vanilla; process until smooth. Spread into the crust.
- Toss apples, sugar and cinnamon in a bowl until combined. Spoon over the filling, pressing gently. Top with almonds.
- Bake the torte for 15 minutes.
- Reduce oven temperature to 350°. Continue baking until set around the edges and just a bit jiggly in the center, 20 to 25 minutes more.
- Let cool on a wire rack for 15 minutes. Run a knife around the edges, remove the pan sides and let cool completely, about 1 hour. Refrigerate until cold, at least 2 hours or up to 8 hours, before serving.
To prepare crust:
To prepare filling:
To prepare topping:
Notes
- FAVORITE
↑ Back to top
Apple Cider Donut Bread
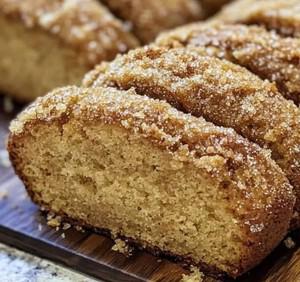
Servings: 10 slices
Ingredients
- 2 cups apple cider
- ½ cup butter (room temperature)
- 1 cup brown sugar
- 1 large egg
- 2 cups flour
- 1 tablespoon apple pie spice
- 1 teaspoon baking powder
- ½ teaspoon baking soda
- ½ teaspoon salt
- ¼ cup melted butter
- ½ cup sugar
- 1 tablespoon cinnamon
Topping:
Steps
- Boil the apple cider until reduced by half.
- Preheat oven to 350°F. Grease a 9x5 loaf pan.
- Beat butter and brown sugar until fluffy. Add the egg and mix.
- Mix in dry ingredients and reduced cider by hand until just combined.
- Pour into the pan and bake for 50 minutes.
- Brush with melted butter, sprinkle with cinnamon sugar, and let cool before serving.
↑ Back to top
Apple Cole Slaw
Tags: Salad
Sides
Ingredients
- 3 cups chopped cabbage
- 1 unpeeled red apple, cored and chopped
- 1 unpeeled Granny Smith apple, cored and chopped
- 1 carrot, grated
- 1/2 cup finely chopped red bell pepper
- 2 green onions, finely chopped
- 1/3 cup mayonnaise
- 1/3 cup brown sugar
- 1 tablespoon lemon juice, or to taste
Steps
- In a large bowl, combine cabbage, red apple, green apple, carrot, red bell pepper, and green onions. In a small bowl, mix together mayonnaise, brown sugar, and lemon juice. Pour dressing over salad.
Notes
- FAVORITE
↑ Back to top
Apple Square Dough
Servings: about 18 slices
Ingredients
- 4 cups ( 500g) all-purpose flour ( spooned & leveled)
- 1 and 1/2 teaspoons salt
- 1 teaspoon granulated sugar
- 1 and 3/4 cup ( 396g) unsalted butter gram used lard, very cold and cubed
- 3/4 cup (180ml) very cold ice water
- optional: coarse sugar for sprinkling on top
Crust:
Steps
- Make the pie crust: Mix the flour, salt, and sugar together in a large bowl. Add the butter. Using a pastry cutter or two forks, cut the butter into the mixture until it resembles coarse meal (pea-sized bits with a few larger bits of fat is OK). A pastry cutter makes this step very easy and quick. Drizzle the cold water in, 1 Tablespoon (15ml) at a time, and stir with a silicone spatula or wooden spoon after every Tablespoon (15ml) added. Do not add any more water than you need to. Stop adding water when the dough begins to form large clumps. I always use about 3/4 cup (180ml) water. Transfer the pie dough to a floured work surface. Using floured hands, fold the dough into itself until the flour is fully incorporated into the butter pieces. The dough should come together easily and should not feel overly sticky. Form dough into a ball. Divide dough in half. Flatten each half into 1-inch thick discs using your hands. Wrap each tightly in plastic wrap. Refrigerate for at least 2 hours (and up to 5 days) or freeze for up to 3 months. Thaw overnight in the fridge before using.
- Make the filling: Mix all of the filling ingredients together in a large bowl. Set aside.
- Preheat oven to 375°F (190°C).
- Roll out the chilled pie crust: Remove 1 disc of pie dough from the refrigerator.Keep the other in the refrigerator as you work. On a lightly floured work surface, roll the dough out into (roughly) an 18×13-inch rectangle. Make sure to turn the dough about a quarter turn after every few rolls. Carefully place the dough into a 10×15-inch jelly roll pan; there will be overhang on the sides—trim it to be about 1 inch. Smooth the crust out so it fits nicely into all the corners of the pan.
- Roll out the 2nd pie dough disc in the same manner and size as the first. Drape over filling and fold the bottom crust’s overhang over the edges. Seal them shut with your fingers and crimp the pie crust edges with a fork. Cut slits into the top of the crust, then brush with water. Sprinkle with coarse sugar.
- Bake the slab pie for about 40-46 minutes probably less time until the crust is golden brown and you can see the filling bubbling. Remove from the oven and allow to cool on top of a wire rack for a few hours. You can serve this pie a little warm or at room temperature (or cold!).
Notes
- Make Ahead & Freezing Instructions: The pie crust dough can be made ahead of time and stored in the refrigerator for up to 5 days or in the freezer for up to 3 months. Thaw overnight in the refrigerator before using. Baked pie freezes well for up to 3 months. Thaw overnight in the refrigerator and allow to come to room temperature before serving.
↑ Back to top
Applesauce Muffins

Tags: Muffins
Ingredients
- 1 cup butter, softened
- 2 cups sugar
- 2 eggs
- 1 teaspoon vanilla extract
- 2 cups applesauce
- 4 cups all-purpose flour
- 1 teaspoon baking soda
- 1 teaspoon ground cinnamon
- 1 teaspoon ground allspice
- 1/4 teaspoon ground cloves
- 1 cup chopped walnuts, optional
- Cinnamon-sugar, optional
Steps
- In a bowl, cream butter and sugar. Add eggs and vanilla; mix well. Stir in applesauce. Combine the flour, baking soda and spices; stir into creamed mixture. Fold in nuts.
- Fill greased or paper-lined muffin cups three-fourths full. Bake at 350° for 20-25 minutes or until a toothpick comes out clean. Cool for 5 minutes before removing from pans to wire racks. Sprinkle with cinnamon-sugar if desired. Yield: about 2 dozen.
Notes
- FAVORITE
↑ Back to top
Applesauce Pork Chops
Adapted from http://allrecipes.com/recipe/applesauce-pork-chops/
Tags: Main
Pork
Servings: YIELD 2 servings ACTIVE
TIME 15 mins
Ingredients
- 1 tablespoon butter
- 1/4 cup chopped onion
- 1 apple - peeled, cored, and sliced
- 2 (1/2-inch thick) pork chops
- 3/4 cup applesauce
- 2 tablespoons brown sugar
- 1/2 teaspoon ground mustard
- 1/8 teaspoon ground cinnamon
- 1/2 teaspoon salt
- ground black pepper to taste
Steps
- Preheat oven to 375 degrees F (190 degrees C).
- Melt butter in a large skillet over medium heat; cook and stir onion and apple slices in the melted butter until tender, about 5 minutes. Transfer onion and apple to a bowl.
- Place pork chops in the same skillet; cook over medium heat until pork chops are browned on both sides, about 5 minutes per side.
- Mix applesauce, brown sugar, mustard, and cinnamon into onion and apple mixture.
- Place pork chops in a 9x9-inch baking dish; season with salt and black pepper. Spoon applesauce mixture over pork chops; cover dish.
- Bake in the preheated oven until pork chops are no longer pink in the center, about 30 to 45 minutes. An instant-read thermometer inserted into the center should read at least 145 degrees F (63 degrees C).
Notes
- FAVORITE
↑ Back to top
Apricot and Ricotta Sbriciolata (Butter Pie)

Tags: Baking
Cheese Pies
and Tarts
Servings: 10
Ingredients
- flour - 10.5 oz (300 g)
- butter - 4.2 oz (120 g)
- sugar - 3.9 oz (110 g)
- eggs - 1 pc.
- egg yolks - 1 pc.
- baking powder - 1/2 tsp.
- grated lemon peel
- ricotta - 9 oz (250 g)
- powdered sugar - 1.4 oz (40 g)
- brown sugar - 2 tbsp.
- sliced almonds - 1.1 oz (30 g)
- apricots - 5 - 6 pcs.
- crystal sugar - 1 tbsp.
- cold water - 1 tbsp.
FOR THE
FILLING:
Steps
- Sift the flour in a bowl with the baking powder and a pinch of salt. Add the sugar, egg, yolk and cold butter (cut into pieces).
- Flavor with the grated peel of one lemon. With your hands, start kneading, until buttery crumbs start to form. Put the container with the crumbs in the refrigerator for an hour.
- Beat the ricotta and the powdered sugar with a fork.
- Cut the apricots into pieces, put them in a pot with 1 tbsp. of sugar and 1 tbsp. of water. Boil for about 5 minutes. Remove the pot from the heat and cool it.
- Line the oblong cake mold with baking paper. Pour half of the butter crumbs into it. Form a high boarder to create an indentation in the crumbs.
- Pour the ricotta inside and the cooled apricots on top. Cover with the remaining butter crumbs.
- Sprinkle generously with sliced almonds and brown sugar.
- Bake the Sbriciolata in a preheated oven with a fan at 360°F (180°C) for 35-40 minutes.
- Sprinkle the warm Apricot Sbriciolata with powdered sugar.
- Leave the apricot cake to cool completely before cutting it.
↑ Back to top
Apricot Filling for Cookies, Pastries and Hamantaschen
Adapted from https://toriavey.com/hamantaschen-apricot-filling/

Tags: Holidays
Jewish
I made this.
Servings: 32
Ingredients
- 2 cups dried pitted apricots
- 1 cup water
- 1/4 cup orange juice
- 1/2 cup sugar
- 1 tablespoon lemon juice
- Pinch salt
Steps
- Combine all of the ingredients in a saucepan. Stir and bring to a boil for one minute.
- Remove the lid from the pan. Let the apricots continue to simmer for 2-3 more minutes, stirring frequently, until most of the liquid has evaporated/absorbed. Keep a close eye on the pan to make sure the apricots don't burn. When there are about 3 tbsp of liquid left in the pan, remove from heat.
- Mash the apricots with a potato masher till a smooth puree forms. Run a fork through the mixture to break up any pieces the potato masher missed. You can also use an immersion blender for a smoother puree, if desired.
- Let cool to room temperature before using. Store in a sealed, airtight container in the refrigerator. Refrigerating the filling to chill completely will make it easier to work with when filling cookies like hamantaschen.
Reduce heat to medium low so
the mixture simmers slowly and constantly. Cover the pot.
Let the mixture simmer
covered for 30 minutes, stirring every few minutes.
↑ Back to top
Armenian-Style Rice Pilaf
Servings: 4 to 6
Ingredients
- 1 cup (185g) long-grain white rice
- 3 tablespoons (42g) unsalted butter
- 3/4 cup (2 ounces; 57g) thin pasta (such as vermicelli or fine spaghetti), broken into 1-inch pieces, or 1/2 cup of small, non-tubular pasta, like orzo
- 2 cups (480ml) homemade or store-bought low-sodium chicken stock
- 1 teaspoon (3g) Diamond Crystal kosher salt; if using table salt use half as much by volume or same weight
- 1/2 teaspoon black pepper
- 1 tablespoon minced fresh parsley or dill (or a combination), optional, divided
Steps
- Place rice in a medium bowl and rinse with hot tap water until water runs clear, about 30 seconds. Cover rice completely with fresh hot tap water and set aside for 10 minutes. Drain rice thoroughly in a fine-mesh strainer; discard soaking water.
- Melt butter in a 3-quart saucepan over medium heat. Add the pasta and cook, stirring regularly, until evenly golden brown, 4 to 6 minutes. Add rice and cook, stirring occasionally, until edges of rice begin to turn translucent, about 3 minutes. Add stock, salt, and pepper, increase heat to high, and bring to boil. Reduce heat to low, cover, and cook until liquid is absorbed, about 10 minutes.
- Remove pan from heat, remove the lid, cover pot with a folded dish towel, and set lid back in place. Let sit for 10 minutes. Fluff rice with a fork, stir in half of parsley, if using, and transfer to a serving dish. Top with remaining parsley and serve.
- Special Equipment
- Fine-mesh sieve
Notes
- The recipe can easily be doubled, if desired.
- For bulgur pilaf, replace the rice with 1 cup (175g) bulgur, rinsed and drained and skip step 1 entirely. Add the bulgur in place of the rice in step 3, and cook until sizzling stops, about 3 minutes, before adding the remaining ingredients.
↑ Back to top
Asian Chicken Thighs

Tags: Asian
Main Poultry
Ingredients
- 5 teaspoons olive oil
- 5 bone-in chicken thighs (about 1-3/4 pounds), skin removed
- 1/3 cup water
- 1/4 cup packed brown sugar
- 2 tablespoons orange juice
- 2 tablespoons reduced-sodium soy sauce
- 2 tablespoons ketchup
- 1 tablespoon white vinegar
- 4 garlic cloves, minced
- 1/2 teaspoon crushed red pepper flakes
- 1/4 teaspoon Chinese five-spice powder
- 2 teaspoons cornstarch
- 2 tablespoons cold water
- Sliced green onions
- Hot cooked rice, optional
Steps
- In a large skillet, heat oil over medium heat. Add chicken; cook 8-10 minutes on each side or until no longer pink. In a small bowl, whisk water, brown sugar, orange juice, soy sauce, ketchup, vinegar, garlic, pepper flakes and five-spice powder. Pour over chicken. Bring to a boil. Reduce heat; simmer, uncovered, 30-35 minutes or until chicken is tender, turning chicken occasionally.
- In a small bowl, mix cornstarch and cold water until smooth; stir into pan. Bring to a boil; cook and stir 1 minute or until sauce is thickened. Sprinkle with green onions. If desired, serve with rice. Yield: 5 servings.
Notes
- FAVORITE
↑ Back to top
Asian Spice Rub
Adapted from http://www.epicurious.com/recipes/food/views/Fillet-of-Beef-with-Asian-Spice-Rub-103048
Tags: Asian
Rubs and Blends
Ingredients
- 2 tablespoons Sichuan peppercorns
- 1 tablespoon anise seeds
- 4 teaspoons coarse salt
- 1 teaspoon Chinese five-spice powder
- 1 teaspoon ground ginger
Steps
- Toast peppercorns and anise seeds in a dry large heavy skillet over moderate heat, stirring, until fragrant, about 1 minute. Finely grind toasted mixture in an electric coffee/spice grinder or with a mortar and pestle. Sift mixture through a coarse sieve into a bowl and stir in salt, five-spice powder, and ginger.
Notes
- FAVORITE
↑ Back to top
Asparagus Lemon roasted
Tags: Vegetarian
Ingredients
- This classic veggie dish is simple, healthy, and elegant.
- Serve it as a side for beef, chicken, or fish.
- Lemon Roasted Asparagus
- (serves 4)
- ● 1 lb (450 g) fresh asparagus, trimmed
- ● 2 Tbsp olive oil
- ● 2 tsp grated lemon zest
- ● 1 garlic clove, minced
- ● ¼ tsp each salt and pepper
- Preheat oven to 425°F/220ºC. Line a baking sheet with parchment paper. In a large bowl, mix together the olive oil, lemon zest, garlic, salt, and pepper. Add the trimmed asparagus and toss until well coated.
- Arrange the asparagus in a single layer on the baking sheet and place it in the oven. Roast for 10-14 minutes, until the asparagus are barely tender. Remove from the oven and serve. Enjoy!
↑ Back to top
Asparagus, Goat Cheese, and Caramelised Onion Quiche
Adapted from https://www.cloudykitchen.com/blog/2017/8/11/asparagus-goat-cheese-and-caramelised-onion-quiche
Tags: Cheese
Pies and Tarts Vegetables
Servings: - Makes one 9" quiche -
Ingredients
- 1/2 batch of Kate's pie crust, rested
- 1 egg white plus 1 tsp water, whisked
- 4 Medium to large white onions, peeled and sliced thinly
- Olive Oil
- Large pinch of salt
- 1/2 Tbsp brown sugar
- 2 Tbsp balsamic vinegar
- 1 medium bunch asparagus, washed and trimmed
- 1/2 cup caramelised onions
- 4oz (115g) soft goat's cheese (chevre) or feta
- 1 cup (240ml) heavy cream
- 4 eggs, at room temperature
- Salt and pepper to season
Crust:
Caramelised
onions:
Filling:
Steps
- Heat a large, heavy bottomed pan over high heat. Add about 2 Tbsp oil, and the onions, stirring to coat. Add a big pinch of salt. Reduce the heat slightly, and cook for about 10 minutes, stirring occasionally. After 10 minutes, add the sugar, and stir well.
- Continue to cook the onions for a further 30 to 40 minutes, reducing the heat as necessary and stirring every few minutes. Add a little extra oil or water if needed to stop the onions drying out.
- The onions are done once they are collapsing, and dark brown in colour. They will have reduced significantly.
- Deglaze the pan with the balsamic vinegar, and stir well. Remove from the heat and allow to cool.
- Preheat the oven to 350˚f. Roll out the dough to 1/4" thickness and use it to line a 9" round Tart tin with a removable bottom, trimming the excess. Line tightly with foil, and fill with ceramic pie weights, rice, or beans.
- Bake for 15 minutes, until the pastry has set and is beginning to go golden. Remove
- In a medium bowl, whisk together the cream, eggs, and salt and pepper. Blanch the asparagus in boiling water for 15-20 seconds. Drain and run under cold water. Spread the caramelised onions over the bottom of the prepared tart crust using your hands or an offset spatula. Crumble the goat's cheese over the onions. Pour the egg mixture over the onions and goat cheese, taking care not to overfill.
- Arrange the asparagus on the surface of the tart, with all of the spears pointing in the
CARAMELISED ONIONS:
CRUST:
from the oven, remove foil
and weights, leave to sit for 5 minutes, then brush all over
with egg wash. Return to the oven for another 5 minutes. Remove from
the oven and allow to cool completely on a wire rack.
ASSEMBLY AND BAKING:
same direction. You will most likely have to double up on the layers
to
fit it all in. Bake the quiche for 30-35 minutes, until the filling is
set and golden. Remove from the oven and allow to cool. Serve warm or
at room temperature.
↑ Back to top
Aunt Schmoopie's Lamb Rub
Adapted from https://bakeitwithlove.com/lamb-rub/
Tags: Lamb
Rubs and Blends Spices
Ingredients
- 2 tablespoon Kosher salt
- 2 teaspoon dried rosemary
- 2 teaspoon ground sage
- 2 teaspoon granulated onion powder
- 2 teaspoon granulated garlic
- 1 teaspoon dried oregano
- 1 teaspoon dried orange peel
- 1 teaspoon paprika (or smoked paprika)
- 1 teaspoon ground black pepper
Steps
- Measure out all ingredients into a small mixing bowl. Add 2 tablespoons salt, 1 tablespoon dried parsley, 2 teaspoons each of dried rosemary, ground sage, and onion powder, plus 1 teaspoon each of oregano, dried orange peel, paprika, and ground black pepper.
- Mix completely until the spices and herbs are evenly distributed in the mixture.
- Apply liberally to lamb or store in an airtight container.
↑ Back to top
Authentic German Potato Salad (Bavarian Kartoffel Salat),
from My "Mutti"

Tags: Germany
Potato Salad
Ingredients
- 5 pounds Yukon Gold potatoes
- 1 small red onion, finely chopped (about 1 cup)
- 1/2 pound bacon strips
- 1 Tablespoon dill
- 1/4 cup fresh parsley, chopped
- 1/4 cup chicken stock
- 1 teaspoon sugar
- 2 teaspoons kosher salt
- 1 teaspoons fresh cracked pepper, approx
- 3/4 cup red wine vinegar
- 1/4 cup Japanese rice vinegar (optional secret ingredient)
- 1 cup vegetable oil
Steps
- Slice the bacon and cook until crispy. Drain the bacon on a paper towel and save about 2 Tablespoons of the fat. Finely chop the cooked bacon and set aside. Finely dice the onion, parsley and fresh dill (dried dill is fine, too) NOTE: You want all of your ingredients to be prepped, because once you peel and slice the potatoes, you want to add the "dressing" so that it better absorbs into the potatoes. Boil the potatoes, skin on, until fork tender (approx 20-30 minutes) in water. Drain and allow to cool so that they can be picked up, and held into a clean tea towel. TIP: Hold a potato in a tea towel and grip with one hand. Rub the peel off with the towel, and the other hand, and the peels should come right off! Once all of the potatoes are peeled, cut each potato in half and then into fairly thin slices (about 1/4")into a large bowl. Pour the vinegar, salt & pepper, to the warm potatoes and wait for a few minutes, so that it absorbs. Add the bacon, onion, salt and pepper, and dill. Add the reserved bacon fat, and chicken stock. Gently stir with a large spatula, being careful not to press the potatoes too much. Add about 3/4 cups of the vegetable oil (you can always add more). Gently combine. Add 1 teaspoon of white sugar-- not too much! Taste the salad. Adjust the salt, if necessary. Add a little more vinegar, so that it has a mild tartness to it. The potato salad should have a nice sheen to it, but not be too oily. Add a little oil at a time, until you see a very light sheen. I like to add the fresh parsley, last. It's best served at room temperature. We love this with German Wiener Wurstl (veal sausages). It's delicious cold, but ideally, you want to serve it room temp-- never hot! That's Bavarian "blasphemy"!
Notes
- FAVORITE
↑ Back to top
Authentic Niter Kibbeh (Ethiopian Spiced Clarified Butter)
Adapted from https://www.daringgourmet.com/wprm_print/45375
Tags: Dairy
Ethiopia
Servings: 2 cups
Ingredients
- 1 pound unsalted butter, cubed
- 1/4 cup chopped yellow onion
- 3 tablespoons minced fresh garlic
- 2 tablespoons minced fresh ginger
- 1 2-inch cinnamon stick
- 1 teaspoon whole black peppercorns
- 3 BLACK cardamom pods (not the green cardamom variety)
- 3 whole cloves
- 1 teaspoon fenugreek seeds
- 1 teaspoons coriander seeds
- 1 teaspoon dried oregano
- 1/2 teaspoon cumin seeds
- 1/4 teaspoon ground nutmeg
- 1/4 teaspoon ground turmeric
- 1 tablespoon besobela ,if you can find it, otherwise omit (see blog post)
- 1 tablespoon kosseret ,if you can find it, otherwise omit (see blog post)
Steps
- Toast the whole spices over medium heat in a dry skillet for a few minutes until very fragrant. Be careful not to scorch the spices or they will become bitter. Set aside.
- Place all the ingredients in a medium saucepan and bring it to an extremely low simmer. Continue to simmer over low for at least one hour or up to 90 minutes. BE VERY CAREFUL NOT TO BURN THE BUTTER. If it burns it will be bitter and there is no salvaging it.
- Pour everything through a fine-mesh cheesecloth. (No need to skim off the foam, everything will be removed during straining.) Pour the niter kibbeh into a jar, let it cool, and cover so that it is airtight. It will keep at room temperature for several weeks, in the fridge for a few months, and even longer in the freezer (it will be hard in the fridge and freezer, let it come to room temp for easy scooping). Makes about 2 cups.
↑ Back to top
Avocado Dark Chocolate Mousse
Adapted from https://toriavey.com/vegan-dark-chocolate-mousse/

Servings: 6
Ingredients
- 4 whole ripe avocados peeled and pitted (weighing about 1 1/2 lbs unpeeled)
- 1/2 cup cocoa powder
- 4 ounces dairy free dark chocolate, melted double check to make sure it is dairy free
- 1/4 teaspoon cinnamon Ceylon cinnamon is best
- 1/4 heaping teaspoon salt
- 1/2 cup agave or 3/4 cup granulated white sugar or natural sweetener of your choice (add more or less to taste if desired)
- 1 tablespoon vanilla
- Raspberries and fresh mint leaves (optional garnish)
Steps
- In the bowl of a food processor, combine all ingredients and process until smooth.
- Divide into bowls or dessert dishes and chill until ready to serve, at least 2 hours. Garnish with raspberries and fresh mint leaves, if desired.
Notes
- You will also need: Food processor
↑ Back to top
Ba's Best Coconut Cream Pie
Tags: Pies and Tarts
Ingredients
- 1 1/4 cups unsweetened finely shredded coconut
- 4 ounces graham crackers (about 7), lightly crushed
- 2 tablespoons sugar
- 1/4 teaspoon kosher salt
- 1/4 cup (1/2 stick) unsalted butter, melted, cooled
- 1 large egg yolk
- 1/3 cup sugar, divided
- 1/4 cup heavy cream
- 2 tablespoons virgin coconut oil, melted
- 1/2 teaspoon kosher salt
- 3 tablespoons virgin coconut oil, room temperature
- 1 vanilla bean, split lengthwise
- 1 13.5-ounce can unsweetened coconut milk, shaken
- 1 cup half-and-half
- 1 large egg
- 4 large egg yolks
- 3 tablespoons cornstarch
- 1/4 teaspoon kosher salt
- 1/2 cup plus 2 tablespoons sugar
- 1 1/2 cups heavy cream
- Toasted coconut flakes (for serving)
- A 9-inch deep pie dish; a candy thermometer
Coconut Graham
Crust
Coconut
Caramel
Coconut
Custard and Assembly
Special
Equipment
Steps
- Preheat oven to 350°. Arrange coconut in a thin, even layer on a rimmed baking sheet and bake, stirring halfway through, until golden brown, 5–8 minutes; let cool. Set aside 1/2 cup toasted coconut for the coconut caramel.
- Pulse graham crackers, sugar, salt, and remaining 3/4 cup toasted coconut in a food processor until crackers are coarsely ground. With the motor running, stream in butter, followed by yolk. Do not overprocess; you should have fine crumbs that are the texture of wet sand.
- Transfer mixture to pie dish and press firmly and evenly up sides and across the bottom. Place pan on a rimmed baking sheet and bake until crust is set and edges are brown, 12–18 minutes. Let cool.
- Do Ahead: Crust can be baked 1 day ahead. Let cool, wrap in plastic, and store at room temperature, or freeze up to 2 weeks.
- Sprinkle a thin, even layer of sugar into a small heavy saucepan. Cook, undisturbed, over medium heat until mostly melted, about 3 minutes. Sprinkle another layer of sugar over and cook, stirring to incorporate granular sugar into melted sugar with a heatproof spatula, until melted, another minute or so. Repeat until you’ve used all sugar. Continue to cook, swirling saucepan (do not stir), until caramel is dark amber, about 30 seconds longer. Remove from heat and carefully pour in cream, stirring to combine (caramel will sputter and seize up, but don’t worry).
- Return saucepan to low heat and cook, stirring, until any hardened bits of caramel are dissolved. Stir in oil until mixture is smooth, then fold in salt and reserved 1/2 cup toasted coconut. Let caramel cool in pan, then scrape into cooled crust and use an offset spatula to spread in an even layer. Cover with plastic and chill.
- Do Ahead: Caramel can be made 4 days ahead. Transfer to an airtight container and chill. Rewarm over low heat before pouring into pie crust.
- Place oil in a medium bowl and set a fine-mesh sieve over top; set aside. Scrape vanilla seeds into a heavy medium saucepan. Add vanilla pod and coconut milk. Bring to a simmer over medium heat and cook, stirring occasionally, until coconut milk is reduced to about 1 cup, 10–15 minutes. Add half-and-half and bring to a gentle simmer.
- Meanwhile, briskly whisk egg, yolks, cornstarch, salt, and 1/2 cup sugar in another medium bowl until pale and thick, about 1 minute. Whisking constantly, slowly pour about 1/2 cup hot milk mixture into egg mixture. Go back to whisking milk mixture in saucepan, then slowly pour tempered egg mixture into saucepan. Cook over medium heat, whisking constantly, until foam has subsided and custard holds the marks of the whisk, about 2 minutes.
- Immediately scrape custard into sieve and use a spatula to press mixture into bowl with oil; pluck out vanilla pod. Whisk strained custard until oil is incorporated and mixture is glossy and smooth.
- Set bowl inside another large bowl of ice water. Whisk occasionally until custard is cool, about 3 minutes. Scrape custard into chilled pie crust and smooth top. Press a piece of plastic directly onto surface of custard to prevent a skin from forming, and chill until set, at least 3 hours.
- Using an electric mixer on medium-high speed, beat cream in a large bowl until soft peaks form. Whisk in remaining 2 Tbsp. sugar.
- Remove plastic from surface of pie and dollop cream over set custard. Top with coconut flakes.
- Do Ahead: Pie can be filled with custard 1 day ahead. Wrap in plastic and chill. Top with whipped cream and toasted coconut just before serving.
Coconut Graham Crust
Coconut Caramel
Coconut Custard and
Assembly
Notes
- Caramel needs a lil vanilla and would probably be easier as a wet caramel
- Add 1/2 to 1 cup of shredded coconut to filling
↑ Back to top
Bacalhau Com Feijão Branco
Tags: Fish
Ingredients
- 1 lb salt cod, soaked overnite, drained, cut into serving size chunks (I like 2 – 3”)
- 2 cups dried white beans
- 1 large onion
- 1 1/2 cups celery, chopped
- 1 1/2 cups (375 mL) carrots chopped
- Thyme parsley bay leaf bouquet garni
- 1 28 oz can tomatoes
- 2 hot Hungarian/banana peppers
- 2 Rstd. red peppers
- 1/2 cup dry white wine
- 1 tsp paprika
- 1 tsp smoked paprika
- salt and pepper.
- parsley for garnish
- Good olive oil for garnish
- black olives, pitted (optional)
Steps
- Soak fish in cold water for 24 hours, changing water several times.
- Saute onion, celery, carrots until onions tender. Stir in tomatoes, peppers, wine, paprika and s and p. Add beans and 6 cups water. Cook until beans tender. Add fish and thyme bouquet. Simmer until fish is tender and flaky. Stir in parsly and oil. Adjust seasoning.
- Serve with oil for drizzling.
Notes
- FAVORITE
↑ Back to top
Backyard Barbecue Beans
Tags: Beans and Other
Legumes Sides
Is starred.
Ingredients
- 1/2 cup barbecue sauce
- 1/2 cup ketchup
- 1/2 cup water
- 2 tablespoons spicy brown mustard
- 2 tablespoons cider vinegar
- 1 teaspoon liquid smoke
- 1 teaspoon granulated garlic
- 1/4 teaspoon cayenne pepper
- 1 1/4 pounds bratwurst, casings removed
- 2 onions, chopped
- 2 (28-ounce) cans baked beans
- 2 (15-ounce) cans pinto beans, drained
- 2 (15-ounce) cans cannellini beans, drained
- 1 (10-ounce) can Ro-tel Original Diced Tomatoes & Green Chilies, drained
- 6 slices thick-cut bacon, cut into 1-inch pieces
Steps
- Adjust oven rack to middle position and heat oven to 350 degrees. Whisk barbecue sauce, ketchup, water, mustard, vinegar, liquid smoke, granulated garlic, and cayenne together in large bowl; set aside.
- Cook bratwurst in 12-inch nonstick skillet over medium-high heat, breaking up into small pieces with spoon, until fat begins to render, about 5 minutes. Stir in onions and cook until sausage and onions are well browned, about 15 minutes.
- Transfer bratwurst mixture to bowl with sauce. Stir in baked beans, pinto beans, cannellini beans, and tomatoes. Transfer bean mixture to 13 by 9-inch baking pan and place pan on rimmed baking sheet. Arrange bacon pieces in single layer over top of beans.
- Bake until beans are bubbling and bacon is rendered, about 11/2 hours. Let cool for 15 minutes. Serve.
Notes
- TO MAKE AHEAD: At end of step 3, beans can be wrapped in plastic and refrigerated for up to 24 hours. Proceed with recipe from step 4, increasing baking time to 1¾ hours.
↑ Back to top
Bagels
Tags: Bagels
Baking
Ingredients
- 3 1/2 cups (1 pound) unbleached bread flour
- 3 teaspoons salt divided
- 3/4 teaspoon instant yeast
- 1 tablespoon barley malt syrup (or honey)
- 1 cup plus 2 tablespoons water
- 1 teaspoon baking soda
- Toppings as desired
Steps
- In the bowl of an electric mixer or food processor or by hand, mix the flour, 2 teaspoons salt, the yeast, barley malt syrup and 1 cup plus 2 tablespoons water until the ingredients form a stiff, coarse ball of dough (about 3 minutes if mixing by hand or in a mixer; or 1 minute in a food processor). If necessary, add a little more water. Let the dough rest 5 minutes.
- Knead the dough on a lightly floured surface until the dough feels stiff yet supple, with a satiny, slightly tacky feel, 2 to 3 minutes. If the dough seems too soft or too tacky, sprinkle over just enough flour as needed.
- Place the dough in a lightly oiled bowl, cover tightly with plastic wrap, and place it in the refrigerator for at least 1 hour and up to several hours. Keep in mind that the bagels must be shaped before proofing overnight.
- When ready to shape the bagels, line a baking sheet with lightly greased parchment paper or a silicone baking mat.
- Remove the dough from the refrigerator and divide it into 6 to 8 equal pieces. Form each piece into a loose, round ball by rolling it on a clean, dry work surface with a cupped hand; do not use any flour on the surface. If the dough slides around and won't ball up, wipe the work surface with a damp paper towel and try again -- the slight amount of moisture will provide enough "bite" for the dough to form a ball. When each piece has been formed into a ball, you are ready to shape the bagels.
- Using your hands and a fair amount of pressure, roll each dough ball into a "rope" 8 to 10 inches long. (Moisten the work surface with a damp paper towel, if necessary, to get the necessary bite or friction). Slightly taper the rope at the ends so that they are thinner than the middle. Place one end of the dough between your thumb and forefinger and wrap it around your hand until the ends overlap in your palm; they should overlap by about 2 inches. Squeeze the overlapping ends together and then press the joined ends into the work surface, rolling them back and forth a few times until they are completely sealed.
- Remove the dough from your hand and squeeze as necessary to even out the thickness so that there is a 2-inch hole in the center. Place the bagel on the prepared sheet pan. Repeat with the other pieces. Lightly wipe the bagels with oil, cover with plastic wrap and place in the refrigerator overnight.
- Remove the bagels from the refrigerator 90 minutes before you plan to bake them. Fill a large stockpot with 3 quarts of water (be sure the water is at least 4 inches deep), cover with a lid, and slowly bring the water to a boil. When it comes to a boil, add the remaining teaspoon of salt and 1 teaspoon of baking soda, reduce the heat and simmer with the lid on.
- Thirty minutes before baking, heat the oven to 500 degrees.
- Test the bagels by placing one in a bowl of cold water. If it sinks and doesn't float to the surface, return it to the sheet, wait 15 minutes and then test it again. When one bagel passes the float test, they are ready for the pot.
- Gently lift each bagel and drop it into the simmering water. Add as many as will comfortably fit in the pot. After 1 minute, use a slotted spoon to flip each bagel over. Poach for an extra 30 seconds. Using the slotted spoon, remove each bagel and return it to the lined baking sheet. Continue until all the bagels have been poached. Generously sprinkle each bagel with a topping, except for cinnamon sugar (see note below).
- Place the baking sheet in the oven and reduce the heat to 450 degrees. Bake for 8 minutes and then rotate the sheet (if using two sheets, also switch their positions). Check the underside of the bagels. If they are getting too dark, place another sheet under the baking sheet (i.e., double-pan it). Bake until the bagels are golden brown, an additional 8 to 12 minutes. Remove from the oven and transfer the bagels to a rack for at least 30 minutes before serving.
Notes
- Barley malt, also known as barley malt syrup, is generally
↑ Back to top
Bagels
Tags: Bagels
Baking
Ingredients
- 2 tsp yeast
- 1 to 1/2 tbsp sugar
- 1 to 1/4 c warm water
- 3 to 1/2 c bread flour
- 1 to 1/2 tsp salt
Steps
- Dissolve yeast and sugar in 1/2 c warm water-let stand for 5 minutes do not stir
- Mix the flour and salt and make well in center
- Stir yeast mixture and pour into flour with additional 1/3 cup warm water mix well and add more water as necessary until you have a moist firm dough-knead for 10 minutes. Let rise until double.
- Press down last rest 10 minutes
- divide dough in 8 pieces. Roll into 8 balls. Coat a finger in flour create hole about 1/3 the sixe of the bagel place on greased cooking sheet. Again let rest for 10 minutes.
- Bring water to boil add bagels as necessary boil 1-2 minutes each side
- Apply toppings
- Bake at 425 degrees 20-25 minutes
Notes
- FAVORITE
↑ Back to top
Bagna Cauda
Tags: Dips and Spreads
Italian Sauces
Ingredients
- 1/2 cup olive oil
- 1 stick (1/4 pound) butter
- 3 to 5 cloves galic, chopped fine
- 6 anchovy fillets, chopped or mashed
- Pepper
Steps
- Heat the oil and butter together in an earthenware pot over hot
- water or in a double boiler. In another pan cook the garlic in a bit
- of the oil until it is soft. Add the anchovy fillets, and cook until
- the fish dissolves into a paste, about 5 minutes. Add all to the pan
- of hot oil.
Notes
- The bagna cauda is kept hot in the middle of the table.
- Guests dip celery, cooked and cooled artichokes, endive, cucumbers,
- green onions, and Italian bread into this lovely mixture.
↑ Back to top
Baguette

Tags: Breads
Ingredients
- 56g (1/2 cup) sifted whole-wheat flour (see note)
- 465g (3 1/3 cups) high-protein all-purpose flour, such as King Arthur (see note)
- 11g (4 teaspoons) Diamond Crystal kosher salt; for table salt, use half as much by volume or the same weight
- 4g (1 teaspoon) instant yeast
- 1g (heaping 1/4 teaspoon) diastatic malt powder, optional (see note)
- 375g (1 1/2 cups plus 1 tablespoon) water, 75˚F (24°C)
Steps
- In a medium bowl, whisk together sifted whole wheat flour, all-purpose flour, salt, yeast, and diastatic malt (if using) until thoroughly combined, about 15 seconds. In another medium bowl, add water and half of the flour mixture and mix with a dough whisk or your hands until a thick batter forms, about 15 seconds. Add the remaining flour mixture and mix until a uniform dough forms and no dry flour remains, about 15 seconds. Cover bowl with a plate, and let rest at room temperature for 30 minutes.
- Using lightly-moistened fingertips, fold dough over itself by gently lifting and folding edge of the dough toward center. Rotate bowl slightly and repeat folding until the dough is taut and you can no longer easily stretch the edge of the dough, 6 to 8 times total. Cover bowl with plate and let rest at room temperature until dough is puffy and expanded about 1 1/2 times from its original volume, 1 to 2 hours.
- Transfer dough to a lightly-oiled 13- by 9-inch cake pan, pressing gently until the dough fills as much of the pan as possible. Cover pan tightly with plastic wrap and refrigerate for 15 to 48 hours.
- Lightly flour a work surface that’s at least twice as large as the pan, and flour top of dough lightly but evenly, until no longer sticky to the touch. Using a plastic dough scraper or stiff plastic spatula, release dough from sides of pan if necessary, then gently nudge dough onto work surface without stretching it beyond its current dimensions. Flour top of dough once more, lightly but evenly. Using a bench scraper, divide dough into 4 equal rectangles (about 225g or 8 ounces each). Using bench scraper, return two of the rectangles to the pan, separated by at least 1 inch. Cover pan tightly and refrigerate until ready to bake remaining two baguettes.
- Using bench scraper, and dusting work surface with more flour as needed, separate remaining two rectangles by at least one inch and cover loosely with a clean plastic trash bag (or a clean cake pan). Let rest at room temperature until dough warms up to just cool to the touch (between 50˚ and 55˚F), 30 to 60 minutes.
- Meanwhile, using a spray bottle, lightly mist back side of couche with water. Center couche, misted side down, over a rimmed (or rimless) baking sheet, roll overhanging sections up to meet edges of pan, and, using a fine mesh sieve, dust exposed area of couche liberally and evenly with flour.
- Flour an area of the work surface away from where you are working and slide one piece of dough onto floured surface. Position the remaining piece of dough so that the short side is facing you, then gently fold into thirds like a business letter. Rotate dough 90 degrees and repeat folding into thirds to form a log about 4- by 3-inches. Move log back to floured area and then repeat with other dough. Cover logs loosely with plastic bag (or a cake pan) and let rest for 20 minutes.
- On a lightly floured surface, position one piece of dough with the long edge facing you. Using a slightly cupped hand, gently compress dough into a 6- by 4-inch rectangle. Fold top third of dough toward center and press gently using fingertips to seal seam. Rotate dough 180 degrees, and repeat folding to form a rectangle with a slight crease along the center where seams overlap. (If at any point dough begins to stick to counter, flour an area adjacent to your work area and briefly place dough on floured area to eliminate stickiness.)
- Place the thumb of your non-dominant hand at end of the seam to anchor dough in place, then fold the dough in half over your thumb, sealing the dough with the heel of your hand and moving your thumb as you work your way from one end of loaf to the other. (Do not seal ends of loaf.)
- Cup one hand over center of loaf, and roll it gently forward and back 3 or 4 times, compressing the center slightly.
- Using both hands, starting at center of loaf and working outward toward ends, gently roll dough into an even, 13- to 14-inch long cylinder. You may need to repeat rolling from center to ends 2 to 5 times to achieve the desired length. Do not seal ends of loaf until it is fully elongated.
- Moving hands forward and back in opposite directions, roll ends of loaf under palms to form defined points. (The finished loaf should be about 14 inches long.)
- Transfer dough to floured couche, seam side up. Form edges of couche into pleats along either side of loaf, fold remaining flaps of couche over loaf, and then cover couche with loosely with a second clean plastic garbage bag. Repeat steps 12 through 17 with the remaining dough piece.
- Fold loose ends of couche over loaves, then cover baking sheet completely with plastic bag. Fold ends of bag loosely under sheet to enclose. Let loaves rest at room temperature until about 1-1/2 times in volume and dough springs back slowly when poked gently with fingertip, 45 minutes to 1 hour 15 minutes.
- Meanwhile, adjust oven rack to the middle position, place baking stone directly on rack, and preheat oven to 500°F (260°C). On a work surface, place a 20- by 18-inch sheet of aluminum foil and center a 16- by 12-inch sheet of parchment on top. Remove plastic bag from couche and unfold couche to separate loaves. Using a transfer peel, gently roll first loaf away from second one, inverting it seam side down. Place transfer peel alongside inner edge of first loaf at a 45-degree angle to couche. With other hand, lift opposite end of couche and use it to invert loaf, seam side up, onto transfer peel. Gently invert loaf onto parchment-lined foil, seam side down, centered lengthwise and about 2 inches from long edge of parchment. Use transfer peel and your other hand to straighten loaf if needed. Repeat with second loaf, leaving 3 inches of space between loaves.
- Holding lame concave side up, with handle oriented at a 30-degree angle to loaf, make a 1/8-inch deep slash along centerline of loaf, using a single, swift motion from one end to the other. Repeat with second loaf.
- Invert a disposable aluminum 17- by 13-inch roasting pan over edges of parchment, then crimp overhanging foil tightly around edges of pan to seal it close. Carefully slide pizza peel (or rimless baking sheet) under foil packet and transfer to baking stone. Bake for 10 minutes.
- Using pizza peel, transfer packet to a wire rack. Using tongs or hands, carefully peel back one corner of foil and allow excess steam to escape. Uncrimp remaining foil and remove roasting pan.
- Using pizza peel, return loaves to baking stone (discarding parchment-lined foil), separated by at least 2 inches. Bake loaves, rotating them back to front after 5 minutes, until deep golden brown, 8 to 12 minutes total.
- Transfer loaves to wire rack and let loaves cool for at least 15 minutes before serving. Repeat steps 6 to 28 to proof and bake remaining two baguettes.
Notes
↑ Back to top
Baked Chicken Nuggets
Tags: Poultry
Ingredients
- 3 skinless, boneless chicken breasts
- 1 cup Italian seasoned bread crumbs
- 1/2 cup grated Parmesan cheese
- 1 teaspoon salt
- 1 teaspoon dried thyme
- 1 tablespoon dried basil
- 1/2 cup butter, melted
Steps
- Preheat oven to 400 degrees F (200 degrees C).
- Cut chicken breasts into 1 1/2-inch sized pieces. In a medium bowl, mix together the bread crumbs, cheese, salt, thyme and basil. Mix well. Put melted butter in a bowl or dish for dipping.
- Dip chicken pieces into the melted butter first, then coat with the breadcrumb mixture. Place the well-coated chicken pieces on a lightly greased cookie sheet in a single layer, and bake in the preheated oven for 20 minutes.
Notes
- FAVORITE
↑ Back to top
Baked Egg Rolls
Tags: Asian
Snacks
Servings: 8
Ingredients
- 2 cups grated carrots
- 1 can (14 ounces) bean sprouts, drained
- 1/2 cup chopped water chestnuts
- 1/4 cup chopped green pepper
- 1/4 cup chopped green onions
- 1 garlic clove, minced
- 2 cups finely diced cooked chicken
- 4 teaspoons cornstarch
- 1 tablespoon water
- 1 tablespoon light soy sauce
- 1 teaspoon canola oil
- 1 teaspoon brown sugar
- Pinch cayenne pepper
- 16 egg roll wrappers
- Cooking spray
Steps
- Coat a large skillet with cooking spray; add the first six ingredients. Cook and stir over medium heat until vegetables are crisp-tender, about 3 minutes. Add chicken; heat through.
- In a small bowl, combine the cornstarch, water, soy sauce, oil, brown sugar and cayenne until smooth; stir into chicken mixture. Bring to a boil. Cook and stir for 2 minutes or until thickened; remove from the heat.
- Spoon 1/4 cup chicken mixture on the bottom third of one egg roll wrapper; fold sides toward center and roll tightly. (Keep remaining wrappers covered with a damp paper towel until ready to use.) Place seam side down on a baking sheet coated with cooking spray. Repeat.
- Spritz tops of egg rolls with cooking spray. Bake at 425° for 10-15 minutes or until lightly browned.
- Freeze option: Freeze cooled egg rolls in a freezer container, separating layers with waxed paper. To use, reheat rolls on a baking sheet in a preheated 350° oven until crisp and heated through. Yield: 8 servings.
Notes
- FAVORITE
↑ Back to top
Baked Egg Rolls
Adapted from http://www.tasteofhome.com/recipes/baked-egg-rolls

Tags: Asian
Snacks
Ingredients
- 2 cups grated carrots
- 1 can (14 ounces) bean sprouts, drained
- 1/2 cup chopped water chestnuts
- 1/4 cup chopped green pepper
- 1/4 cup chopped green onions
- 1 garlic clove, minced
- 2 cups finely diced cooked chicken
- 4 teaspoons cornstarch
- 1 tablespoon water
- 1 tablespoon light soy sauce
- 1 teaspoon canola oil
- 1 teaspoon brown sugar
- Pinch cayenne pepper
- 16 egg roll wrappers
- Cooking spray
Steps
- Coat a large skillet with cooking spray; add the first six ingredients. Cook and stir over medium heat until vegetables are crisp-tender, about 3 minutes. Add chicken; heat through.
- In a small bowl, combine the cornstarch, water, soy sauce, oil, brown sugar and cayenne until smooth; stir into chicken mixture. Bring to a boil. Cook and stir for 2 minutes or until thickened; remove from the heat.
- Spoon 1/4 cup chicken mixture on the bottom third of one egg roll wrapper; fold sides toward center and roll tightly. (Keep remaining wrappers covered with a damp paper towel until ready to use.) Place seam side down on a baking sheet coated with cooking spray. Repeat.
- Spritz tops of egg rolls with cooking spray. Bake at 425° for 10-15 minutes or until lightly browned. Freeze option: Freeze cooled egg rolls in a freezer container, separating layers with waxed paper. To use, reheat rolls on a baking sheet in a preheated 350° oven until crisp and heated through. Yield: 8 servings.
Notes
- FAVORITE
↑ Back to top
Baked Eggplant with Lamb and Walnut Sauce
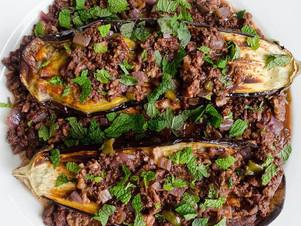
Servings: 4
Ingredients
- 3 tablespoons olive oil
- 1 medium red onion, finely chopped
- 3 long hot peppers (see note), finely chopped
- 4 cloves garlic, minced
- 2 tablespoons janissary spice (recipe to follow)
- 3/4 teaspoon cumin seeds, divided
- 1 1/2 cups chopped walnuts
- 1 pound ground lamb
- 1 (28 ounce) can of tomatoes
- 1 tablespoon pomegranate molasses, or balsamic vinegar
- Fresh chopped mint, for garnish
- 2 medium Italian eggplant
- 2 tablespoons olive oil
- 6 tablespoons ground maraş or aleppo chile (see note)
- 3 tablespoons dried oregano
- 2 to 4 teaspoons sumac, or to taste
For lamb and
walnut sauce
For baked
eggplant
For janissary
spice
Steps
- For lamb and walnut sauce: Heat oil in a large sauté pan or Dutch oven on medium, then add onions, long hot peppers, and garlic. Cook, stirring frequently, until vegetables soften, about 5 minutes. Increase heat slightly and add janissary spice and 1/2 teaspoon cumin, stir to combine, and cook for 30 seconds. Add walnuts and cook for 1 to 2 minutes, or until they begin to toast and brown.
- Increase heat slightly, add some more olive oil if pan looks dry, and add lamb. Lamb should brown but not sear. Season with a couple generous pinches of salt, and break up large clumps with a wooden spoon and cook until lamb is lightly browned. Add tomatoes, stir to combine, and bring to a boil. Reduce to a simmer and cook, covered, for 45 minutes, or until lamb is very tender. Before serving, check for seasoning and stir in pomegranate molasses and remaining 1/4 teaspoon of cumin seed.
- For baked eggplant: Heat oven to 375°F. Cut eggplant in half lengthwise, leaving stems intact. Drizzle some olive oil on baking sheet. Season cut sides of eggplant with several pinches of salt, then place cut side down on baking sheet and spread oil to an even film. Season skin sides of eggplant and drizzle with more olive oil.
- Bake for 30 minutes, or until skins are wrinkled and eggplant offers no resistance to a knife. Carefully flip eggplant over with tongs or a long, thin offset spatula, so cut sides point up. Broil until cut sides are well browned, just a couple minutes.
- To serve, spread some lamb and walnut sauce on a serving platter. Arrange eggplant cut side up, then top with remaining sauce. Garnish with freshly chopped mint leaves.
- For janissary spice: Combine chile and oregano in an airtight bag or jar. If using whole chiles, remove seeds before grinding. Add sumac in small increments; spice mix should not taste sour or tart, but should have a slight piquancy. Sweeter chiles will require more sumac than spicier varieties. Store tightly sealed in a cool, dark place. Recipe makes about 1/2 cup; use within 3 months.
↑ Back to top
Baked Potato Salad
Adapted from https://shop.wegmans.com/recipes/1664
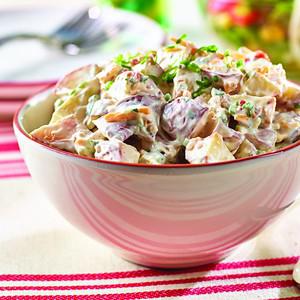
Tags: Potato
Salad
I made this.
Servings: 14
Ingredients
- 2 bags (24 oz each) Wegmans Baby Red Potatoes, 1-inch dice
- 1 Tbsp Wegmans Pure Olive Oil
- 1/2 tsp salt, plus additional to taste
- 1/4 tsp black pepper, plus additional to taste
- 8 slices Wegmans Center Cut Uncured Bacon
- 1 cup Wegmans Classic Mayonnaise
- 1/2 cup Wegmans Sour Cream
- 4 green onions, trimmed, thinly sliced
- 1 Tbsp peeled, minced shallot
- 2 Tbsp chopped Wegmans Italian Parsley
1 cup Wegmans
Shredded Sharp Cheddar Cheese (Dairy Dept):
Steps
- Preheat oven to 400 degrees. Toss potatoes, oil, salt, and pepper in large bowl. Arrange in single layer on parchment paper-lined baking sheet. Roast about 35 min, until lightly browned and tender. Set aside to cool. Chill l hour.
- Cook bacon to desired crispness; chop into small pieces. Set aside.
- Combine mayo, sour cream, green onion, shallot, bacon, and cheese in large bowl. Season with salt and pepper.
- Toss potatoes with mayo mixture and parsley until combined.
↑ Back to top
Baked Samosa
Adapted from https://www.tarladalal.com/Baked-Samosa-33324r

Tags: Appetizers and Dim
Sum Finger Food
Indian
Ingredients
- 1 tbsp oil
- 1/2 tsp cumin seeds (jeera)
- 2 cups boiled , peeled and mashed potatoes
- 1 tsp ginger-green chilli paste
- salt to taste
- 1 1/2 tsp dried mango powder (amchur)
- 1 tsp chilli powder
- 1/2 cup boiled green peas
- 2 tbsp finely chopped coriander (dShow me for samosas
- 1 cup whole wheat flour (gehun ka atta)
- 1/2 tbsp melted ghee
- a pinch salt
- 1/4 tsp oil for kneading
- hania) - See more
Ingredients:
For The
Chapatis:
↑ Back to top
Balsamic Braised Short Ribs
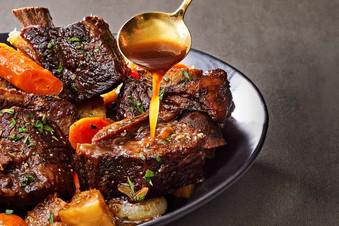
Tags: Beef
Ingredients
- 2 tablespoons vegetable oil
- 8 bone-in beef short ribs (about 4 1/2 pounds)
- 1 teaspoon black pepper, plus more to taste
- 1 tablespoon kosher salt, divided, plus more to taste
- 1 medium-size yellow onion, finely chopped (about 1 1/4 cups)
- 6 garlic cloves, thinly sliced (about 3 tablespoons)
- 1/3 cup balsamic vinegar
- 1 teaspoon onion powder
- 1/2 teaspoon garlic powder
- 2 cups beef broth
- 1/3 cup packed light brown sugar
- 2 bay leaves
- 12 small fresh cipollini onions (about 10 ounces), trimmed and peeled
- 1 medium celeriac (celery root), peeled and cut into 1 1/2-inch pieces (about 2 cups)
- 3 carrots, peeled and cut into 1 1/2-inch pieces (about 1 1/2 cups)
- Finely chopped fresh flat-leaf parsley (optional)
Steps
- Preheat oven to 275°F. Heat oil in a large Dutch oven over medium-high. Pat short ribs dry, and sprinkle evenly with black pepper and 2 teaspoons salt. Working in two batches, cook short ribs, flipping occasionally, until well browned on all sides, about 10 minutes. Transfer browned short ribs to a plate; set aside.
- Pour off all but 2 tablespoons drippings in Dutch oven; discard. Return Dutch oven to heat over medium, and add yellow onion, sliced garlic, and remaining 1 teaspoon salt. Cook, stirring occasionally and scraping bottom of Dutch oven to loosen browned bits, until onion is softened and browned, 6 to 8 minutes. Stir in vinegar, onion powder, and garlic powder; cook, stirring often, until liquid has reduced by half, about 1 minute.
- Add broth, brown sugar, and bay leaves to onion mixture; cook over medium, stirring constantly, until sugar is dissolved, about 1 minute. Nestle browned short ribs, meaty side down, into Dutch oven in a single layer. Pour any accumulated juices on plate over top. Return mixture to a simmer over medium-high.
- Cover Dutch oven, and transfer to preheated oven. Braise for 1 hour. Uncover; add cipollini onions, celeriac, and carrots, taking care to submerge them as much as possible in cooking liquid. Cover and continue braising until vegetables are tender and meat is easily pierced with a paring knife, about 1 hour and 30 minutes.
- Remove from oven. Transfer short ribs and vegetables to a serving platter; set aside. Return Dutch oven to stovetop, and bring cooking liquid to a simmer, uncovered, over medium-high. Reduce heat to medium, and gently simmer, stirring occasionally, until liquid is slightly reduced and flavors have concentrated, 10 to 15 minutes. Remove and discard bay leaves. Season sauce with additional black pepper and salt to taste. Skim off excess fat from top of sauce using a ladle; discard. (Alternatively, pour sauce through a fat separator into a gravy boat; discard excess fat.) Spoon desired amount of sauce over short ribs. Garnish with parsley, if desired. Serve immediately alongside remaining sauce.
↑ Back to top
Banana Cookies
Tags: Cookies
Servings: Makes 9 dozen cookies.
Ingredients
- 1 1/2 cups butter
- 1 1/2 cups sugar
- 1 1/2 cups brown sugar
- 1 tsp vanilla
- 1/2 tsp cinnamon
- 4 eggs
- 5 1/2 cups flour
- 2 tsp baking soda
- 1 tsp kosher saly
- 4 ripe bananas mashed
Steps
- Preheat oven to 350 degrees. Lightly grease a baking sheet.
- In a large bowl, cream together butter, sugar, brown sugar, vanilla, and cinnamon. Stir in eggs.
- Stir together the flour, baking soda, and salt; add half to the batter. Stir in the bananas, then mix in the remaining flour mixture.
- Drop batter by generous teaspoonfuls onto the prepared baking sheet. Bake for 12 minutes until set and golden.
- Makes 9 dozen cookies.
Notes
- FAVORITE
↑ Back to top
Banana Cream Pie
Adapted from https://www.seriouseats.com/banana-cream-pie-5323950

Tags: Pies and Tarts
Servings: 1 pie
Ingredients
- 1/2 recipe Old-Fashioned Flaky Pie Dough, blind-baked
- 3 medium ripe, peeled bananas (about 12 ounces; 340g), sliced into 1/4-inch rounds
- 1 recipe Vanilla Pastry Cream, cold
- Brown Sugar Whipped Cream, for topping
Steps
- Starting in the center of the blind-baked crust, set down a single banana slice, then arrange concentric circles of banana slices around it in a single, even layer until you fully cover the bottom of the crust.
- Using a small offset spatula, spread half of the pastry cream in an even layer on top of banana slices (banana slices should be fully covered). Repeat layering process with remaining bananas and cream. Place plastic wrap directly on the surface of the cream to prevent a skin from forming. Refrigerate until filling is cold and set, at least 3 hours and up to 1 day.
- When ready to serve, top pie with whipped cream. Slice into wedges with a chef’s knife, carefully slide a pie server under the crust, making sure it reaches all the way to the tip of each wedge, and serve.
↑ Back to top
Banana Crumb Muffins
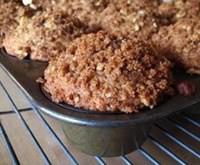
Tags: Muffins
Ingredients
- 1 1/2 cups all-purpose flour
- 1 teaspoon baking soda
- 1 teaspoon baking powder
- 1/2 teaspoon salt
- 3 bananas, mashed
- 3/4 cup white sugar
- 1 egg, lightly beaten
- 1/3 cup butter, melted
- 1/3 cup packed brown sugar
- 2 tablespoons all-purpose flour
- 1/8 teaspoon ground cinnamon
- 1 tablespoon butter
Steps
- Preheat oven to 375 degrees F (190 degrees C). Lightly grease 10 muffin cups, or line with muffin papers.
- In a large bowl, mix together 1 1/2 cups flour, baking soda, baking powder and salt. In another bowl, beat together bananas, sugar, egg and melted butter. Stir the banana mixture into the flour mixture just until moistened. Spoon batter into prepared muffin cups.
- In a small bowl, mix together brown sugar, 2 tablespoons flour and cinnamon. Cut in 1 tablespoon butter until mixture resembles coarse cornmeal. Sprinkle topping over muffins.
- Bake in preheated oven for 18 to 20 minutes, until a toothpick inserted into center of a muffin comes out clean.
Notes
- FAVORITE
↑ Back to top
Banana Ketchup
Tags: Condiments
Ingredients
- 2 tablespoon peanut or vegetable oil
- 1/2 cup finely chopped sweet onion (about 1 small onion)
- 2 teaspoons minced garlic (about 2 medium cloves)
- 1 tablespoon finely chopped seeded jalapeño from (about 1 small jalapeño)
- 2 teaspoons freshly grated ginger
- 1/2 teaspoon ground turmeric
- 1/4 teaspoon ground allspice
- 1 1/4 cups mashed ripe bananas (about 4 large bananas)
- 1/2 cup white vinegar
- 2 tablespoons honey
- 2 tablespoons rum
- 1 tablespoon tomato paste
- 1 tablespoon soy sauce
- 1/2 teaspoon salt, plus more to taste
- Water, as needed
Steps
- Heat oil in medium saucepan over medium heat until shimmering. Add onions and cook, stirring occasionally, until onions have softened, about 5 minutes. Add garlic, jalapeno, ginger, turmeric, and allspice and cook until fragrant, about 30 seconds.
- Stir in bananas, vinegar, honey, rum, tomato paste, soy sauce, and salt; bring to simmer. Reduce heat to low, cover, and cook for 15 minutes, stirring often. Remove from heat and let cool for 10 minutes.
- Transfer ketchup to a food processor fitted with a steel blade and process until smooth, about 1 minute. Thin with water as needed to reach a ketchup-like consistency. Season with additional salt to taste. Transfer to an airtight container and store in refrigerator for up to two weeks.
Notes
- FAVORITE
↑ Back to top
Banana Nut Bars
Tags: Cakes and Pastries
Ingredients
- 1 cup sugar
- 1 cup mashed ripe bananas (2 medium)
- 1/3 cup vegetable oil
- 2 eggs
- 2 cup flour
- 1 teaspoon baking powder
- 1/2 teaspoon baking soda
- 1/2 teaspoon cinnamon
- 1/4 teaspoon salt
- 1/2 cup chopped pecans
- 2 tablespoons dark brown sugar
Steps
- Heat oven to 350F degrees. Grease pan, 13x9x2 inches.
- Mix sugar, bananas, oil and eggs in large bowl with a spoon. Stir in flour, baking powder, baking soda, cinnamon and salt. Stir in pecans.
- Spread batter in pan. Sprinkle the dark brown sugar over the top. Bake 20 to 25 minutes or until toothpick inserted in center comes out clean. Cool completely. Cut into 6 row by 4 rows. Then, try not to eat them all in one sitting. I'll bet, you can't eat only one...teeheehee.
Notes
- FAVORITE
↑ Back to top
Banana Nut Breakfast Bars
Servings: 9 bars
Ingredients
- 2 ripe medium bananas (about 240 grams peeled)
- 2 large eggs
- 6 tablespoons/90 milliliters olive oil, plus more for greasing the pan
- ¾ cup/187 grams peanut or almond butter
- 6 tablespoons/120 grams honey
- 2 teaspoons kosher salt (such as Diamond Crystal), or 1 teaspoon fine salt
- 2 teaspoons ground cinnamon
- 2 teaspoons pure vanilla extract
- 1 cup/100 grams old-fashioned rolled oats
- ¾ cup/80 grams walnut halves and pieces, roughly chopped
- Flaky salt, for topping
Steps
- In a large bowl, use a fork to mash the bananas; you should get about 1 cup mashed bananas. Add the eggs and whisk with the fork to evenly combine. Set the mixture aside for 15 minutes.
- Adjust oven rack to lower-middle position and heat to 350 degrees. Grease an 8- by-8 or 9-by-9-inch baking pan and line it with one long sheet of parchment paper to cover the bottom and two of the sides, creasing as needed to ensure a secure fit.
- Add the olive oil, peanut butter, honey, kosher salt, cinnamon and vanilla to the banana mixture and whisk until smooth. Add the oats and whisk to combine.
- Scrape the mixture into the prepared pan, then top it with the walnuts and a light sprinkling of flaky salt. Bake until the top feels set when pressed lightly and a toothpick inserted into the center comes out clean, 35 to 40 minutes.
- Cool fully before using the parchment to lift the bars out of the pan. Cut into 9 squares and store in an airtight container at room temperature for up to 5 days.
↑ Back to top
Banh Mi Bo Kho (Vietnamese Beef Stew)
Tags: Stew
Vietnam
Ingredients
- 2 tablespoons unsalted butter
- 2 pounds beef chuck, cut into 1-inch cubes
- 2 yellow onions, thinly sliced
- 1 jalapeño, stemmed and sliced into rounds
- 4 whole star anise
- 2 cinnamon sticks
- 1/2 cup brown sugar
- 1/4 cup fish sauce
- 3 cups low-sodium beef stock, preferably homemade
- 4 medium carrots, cut into 1-inch pieces
- Salt, to taste
- Toasted and sliced baguette, to serve
Steps
- Heat the butter in a large Dutch oven over medium-high heat. Working in batches (if necessary), brown the beef on all sides, about 15 minutes. Add the onions and cook, making sure to stir periodically to prevent burning, until softened, about 8 minutes.
- Add the jalapeño, star anise and cinnamon to the pan and cook, stirring, until fragrant, about 2 minutes. Add the sugar and cook, stirring until dissolved, about 2 minutes. Add the fish sauce and cook, stirring and scraping the bottom of the pan using a wooden spoon, about 1 minute. Pour in the beef stock and bring to a boil. Reduce the heat to medium-low and simmer, covered, until the beef is tender, about 1 hour and 10 minutes.
- Add the carrots and cook, uncovered, until the carrots are tender, about 10 minutes more. Add salt if necessary.
- To serve, divide the stew among 4 bowls and serve with baguette.
Notes
- FAVORITE
↑ Back to top
Banh Mi Rolls
Tags: Breads
Vietnam
Ingredients
- 500 milligrams vitamin C from a capsule or crushed tablet
- 1 teaspoon (0.2 ounces 5g) fine sea salt (like La Baleine)
- 1 1/2 teaspoons (0.2 ounces 6g) sugar
- About 2 teaspoons (0.25 ounces; 1 envelope 7g) instant dry yeast (SAF/Red Star and Flesichman's both work well)
- 2 tablespoons lightly packed (0.6 ounces 18g) vital wheat gluten, plus more as needed (like Bob's Red Mill or Giusto's)
- Scant 3 1/4 cups (3 cups plus 3 1/2 tablespoons; 16 ounces 454g) unbleached all-purpose flour, plus more as needed (like Gold Medal or Whole Foods brand; if using King Arthur flour, reduce the amount of VWG to 4 teaspoons)
- 1 1/2 tablespoons (0.6 ounces 18) shortening, in 3 or 4 chunks, at room temperature (like Crisco, Earth Balance, or Spectrum)
- 1 1/4 cups (10 ounces 284g) very warm tap water (about 110° F)
Steps
- Mix and rise: Put the vitamin C, salt, sugar, yeast, vital wheat gluten (VWG), and flour in the bowl of a heavy-duty stand mixer. With the paddle attachment in place, mix on the lowest speed for 1 minute, adding the shortening midway. Stop to add water. Restart on the lowest speed and continue mixing for about 1 minute to form a shaggy ball. Let sit for 5 minutes, uncovered, to hydrate. Lightly oil a bowl for rising the dough. Set aside.
- Pull the dough off the paddle, attach the dough hook, and mix on medium-low (speed 2 on a KitchenAid) for 2 minutes, until smooth and medium-firm. The dough should wrap around the hook in the last 30 seconds. If the dough is soft and wraps around the hook early on, add 1 to 2 teaspoons of VWG to stiffen and build structure.
- Transfer the dough to an unfloured work surface and briefly knead it into a ball. If the dough feels soft and moist (think perspiration on a humid day), lightly dust the work surface with flour and knead it in. The finished dough should be barely tacky; when you lightly press a finger into the dough, it should bounce back immediately yet a shallow indentation should remain. Put it into the oiled bowl, turn to coat, then tightly cover with plastic wrap. Set it in a warm spot to rise for 45 minutes, or until it doubles in volume.
- Cut, round, and shape: Uncover the bowl and set the plastic wrap aside to reuse later. Invert the dough onto your work surface. Cut the dough in half. Form each half into a brick shape, then cut crosswise into 3 pieces to yield 6 pieces total.
- To round each dough piece, use both hands to cup it, then pull, tuck, and gather the edges toward the center to form a small mound. Aim to create a taut outer surface. Put the mound, seam side down, on your work surface, then loosely cover with the saved plastic. Let the balls rest and rise for 10 minutes. Line a heavy-duty rimmed baking sheet (I use a half sheet pan) with parchment paper. Set aside.
- Uncover the mounds and save the plastic (you’ll need it again). To shape each roll, put the dough smooth side-down on your work surface. Press and pat it into a big thick disk, about 4 1/4 inches wide and 5/8 inch thick.
- Imagine a scroll that rolls inward from the top and bottom. Roll the top down and over twice, pressing each time to seal well. When done, the top should be rolled to the midline. Roll the bottom up and over twice, sealing well each time. Firmly pinch the top and bottom together to form a center seam and create surface tension. Pinch the ends to seal.
- Gently roll and rock the dough back and forth to form a torpedo about 6 1/2 inches long and 1 3/4 inches wide at its center. Place the roll, seam side-down, on the lined baking sheet. Repeat, arranging the rolls in a 3 by 2 formation on the prepared baking sheet.
- Proof and bake: Smear a little oil (or use nonstick spray) on 2 pieces of plastic wrap (use the saved one plus a new piece), then use them to loosely cover the rolls. Let them rise until more than doubled, close to a full rise, which will take about 1 hour at moderate room temperature. If it’s a hot day, preheat the oven after shaping the rolls.
- After 20 minutes of rising, or when most rolls are 2 inches wide, set up the oven for baking. Place a broiler pan or a heavy-duty rimmed baking sheet on the oven floor, its rim positioned near the oven edge (you’ll be pouring hot water into this pan). Put a rack in one of the lower positions, about 5 inches from the water pan, to safely pour water into the pan later. Place a baking stone (or an inverted heavy-duty rimmed baking sheet) on the rack. Preheat to 475° F.
- At 45 minutes, or when the rolls have nearly doubled, remove the plastic wrap. Let the rolls dry and finish rising for 10 to 15 minutes. Meanwhile, bring some water (about 1 cup) to a boil, then lower the heat to keep it hot. Find a 1-quart measuring cup or similar vessel -- you'll use it later to pour hot water into the pan in the oven. Partially fill a spray bottle with water. Set aside.
- Around the 1 hour mark, or when the rolls are porpoise-like and 2 1/2 to 2 3/4 inches at the middle, it’s time to bake. Pour a good 1/2 cup of hot water into the pouring vessel. Set near the stove.
- To slash each roll, hold a sharp knife nearly horizontal to the roll surface and make one angled cut on the midline. Mist the rolls 5 or 6 times with the spray bottle of water. Slide the baking sheet onto the stone or invetred sheet, carefully pour the hot water into the pan that's on the oven floor, then close the door. Lower the heat to 425° F and bake for 22 to 24 minutes, or until golden brown and hollow sounding (check by thumping the bottom crust).
- When the rolls are light golden, usually after baking for 15 minutes, rotate the pan and/or shift the rolls to expose them equally to the oven temperature variation. (If the rolls achieve that color after baking for only 10 minutes, lower the temperature to 400° F.)
- When done, turn the oven off. Let the rolls further crisp and brown in the oven for 8 to 10 minutes. Remove the rolls from the oven and let them cool on a rack for about 45 minutes before eating. The sides will slightly soften. If the rolls are a little flat, don’t fret because you’ll be filling them to a beautiful plumpness. Use the rolls as is, or reheat them to achieve a shattering crispness, like I do in my master banh mi recipe.
Monitor the rolls via
these benchmarks:
Notes
- FAVORITE
↑ Back to top
Banh Mi Smash Burgers

Ingredients
- 3/4 cup rice vinegar
- 1/2 cup water
- 3 tablespoons light brown sugar, divided
- 1 tablespoon plus 1 teaspoon kosher salt, divided
- 1 cup matchstick carrots
- 1/4 cup thinly sliced red radishes or 1/2 cup matchstick daikon
- 1/3 cup Kewpie mayonnaise
- 2 1/2 tablespoons chile-garlic sauce, divided
- 1 1/2 teaspoons fish sauce, divided
- 1 1/2 pounds 80% lean ground pork
- 1 tablespoon grated fresh ginger (about 1 [ 3-inch] piece)
- 3 tablespoons finely chopped tender cilantro stems, plus leaves for topping
- 4 brioche hamburger buns, split and toasted
- 1 jalapeño, thinly sliced
Steps
- Bring vinegar, 1/2 cup water, 2 tablespoons brown sugar, and 1 tablespoon salt to a boil in a small saucepan over medium-high, stirring often to dissolve sugar. Remove from heat, and stir in carrots and radish. Set aside
- Stir together mayonnaise, 1 1/2 tablespoons chile-garlic sauce, and 1/2 teaspoon fish sauce in a small bowl; cover and chill spicy mayonnaise until ready to use.
- Stir together pork, ginger, cilantro stems, remaining 1 tablespoon brown sugar, remaining 1 tablespoon chile-garlic sauce, remaining 1 teaspoon fish sauce, and remaining 1 teaspoon salt in a large bowl until just combined. Divide pork mixture into 8 (about 3-ounce) portions, and shape each portion into a loose ball. Place meat balls on a large plate; cover and chill while preheating grill.
- Preheat grill to high (450°F to 500°F). Place a griddle or large cast-iron skillet on preheated grill, and let heat for 10 minutes. (Alternatively, preheat a flattop grill to medium-high.) Cut a 3-inch square piece of parchment paper. Working in batches if needed, arrange meat balls on griddle, spacing at least 2 inches apart. Place parchment paper square on top of 1 meat ball, and use a sturdy spatula or burger press to firmly press and flatten, forming a 4-inch-wide patty; remove parchment paper. Repeat with remaining meat balls. Cook, uncovered and undisturbed, until bottom sides of patties are browned, about 2 minutes. Flip patties; cook until browned on both sides, 30 seconds to 1 minute. Remove patties from grill.
- Drain pickled carrot mixture; discard brine. Spread spicy mayonnaise on cut sides of buns. Place 2 patties on each bottom bun half, and top evenly with pickled carrot mixture (about 1/4 cup each). Top with sliced jalapeño and cilantro leaves to taste. Sandwich with top buns. Serve immediately.
↑ Back to top
Barbecue Sauce (Clone of Chivetta'S)
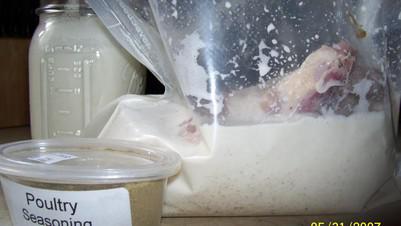
Tags: Barbecue
Sauces
Servings: 10
Ingredients
- 1 egg
- 1 cup oil
- 3 tablespoons salt
- 1 teaspoon pepper
- 1 teaspoon poultry seasoning
- 2 cups cider vinegar (don't use white vinegar!)
Steps
- To make half of this recipe you should use: 1/2 cup oil, 1 Tablespoon salt, pinch of pepper, 1/2 teaspoon poultry seasoning and 1 cup cider vinegar (again don't use white vinegar!).
- This sauce is made by using a blender or mixer.
- Start by putting the egg in the blender and thoroughtly beat. Continue to beat while slowly adding the oil to the egg.
- This makes a thick, mayonnaise-like mixture which is the key to success in keeping the oil uniformly suspended in the vinegar.
- Continue to beat while adding 1/4 of the vinegar and then the salt, pepper and poultry seasoning.
- Finally add the remaining venegar and mix thoroughly.
- Marinate from 30 minutes to a whole day.
- The sauce may have to be stirred during the barbecuing.
- Refrigerate the left over sauce in a covered container. It will keep indefinitely.
- Turn halves of chicken as often as is necessary to keep from burning and at least every 5 minutes.
- Sprinkle the sauce on the chicken halves after each turning by shaking the basting brush over the halves.
COOKING CHICKEN:
↑ Back to top
Barley Pilaf
Adapted from https://thehealthyfoodie.com/barley-pilaf/
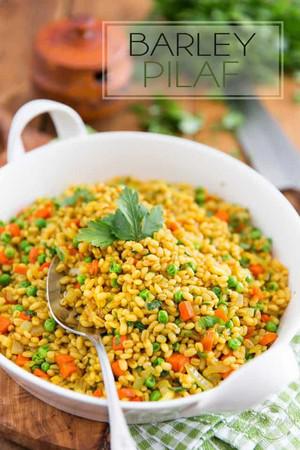
Tags: Grains
Servings: 4
Ingredients
- 1 cup pearl barley
- 1 cup chicken broth
- 1-3/4 cups water
- 1-2 tbsp extra-virgin olive oil
- 1 medium onion, finely diced
- 1 large carrot, finely diced
- 1 clove garlic, minced
- 1/2 tsp salt, I use Himalayan salt
- 1/4 tsp ground white pepper
- 1/2 cup frozen peas
- 1/4 cup chopped fresh parsley
- 1/4 tsp turmeric
Steps
- Rinse the barley thoroughly under cold running water until the water runs clear and place it in a medium sized saucepan along with the chicken broth and water. Stir once, bring to the boil then lower the heat to a slow simmer; cover and cook without stirring for about 30 minutes, until all water is absorbed. Avoid taking the lid off during cooking.
- Once all the liquid is gone, allow the barley to rest, covered, for about 10 minutes.
- Meanwhile, heat the olive oil in a saute pan set over medium heat; add the onion, garlic and carrot as well as the salt and pepper and cook, stirring frequently, for about 5 minutes or until the carrots are tender.
- Add the cooked barley, frozen peas, parsley and turmeric; stir delicately until well combined.
- Kill the heat and let the barley pilaf sit for a few minutes, until the peas are heated through, and serve.
↑ Back to top
Basic Barbecue Rub
Tags: Barbecue
Rubs and Blends
Servings: YIELD Makes about 1 cup
Ingredients
- 1/4 cup firmly packed brown sugar
- 1/4 cup sweet paprika
- 3 tablespoons black pepper
- 3 tablespoons coarse salt
- 1 tablespoon hickory-smoked salt or more coarse salt
- 2 teaspoons garlic powder
- 2 teaspoons onion powder
- 2 teaspoon celery seeds
- 1 teaspoon cayenne pepper
Steps
- Combine all the ingredients in a mixing bowl and stir to mix. (Actually, your hands work better for mixing than a spoon or whisk does. Use your fingers to break up any lump of brown sugar.) Store the rub in an airtight jar away from heat or light; it will keep for at least 6 months.
Notes
- FAVORITE
↑ Back to top
Basic Blonder Brine
Tags: Barbecue
Brines and Marinades
↑ Back to top
Basic Bulgogi
Adapted from http://www.bonappetit.com/recipe/basic-bulgogi
Tags: Korean
Servings: YIELD 4 TOTAL TIME 50
min
Ingredients
- 1/4 pear, grated
- 1 garlic clove, grated
- 2 tablespoons soy sauce
- 1 tablespoon gochugaru (coarse Korean hot pepper flakes), or 1 teaspoon crushed red pepper flakes
- 1 tablespoon grated peeled ginger
- 1 tablespoon light brown sugar
- 1 tablespoon toasted sesame oil
- 1 pound boneless pork loin, trimmed hanger steak, boneless short rib, or skinless, boneless chicken breasts or thighs
- 2 tablespoons vegetable oil, divided
- Kosher salt
- Sliced scallions (for serving)
Steps
- Combine pear, garlic, soy sauce, gochugaru, ginger, sugar, and sesame oil in a large resealable plastic bag or medium bowl. Using a sharp knife, slice meat into very thin strips. Add to marinade, seal bag, and squish everything around until the meat is coated. Let sit at room temperature 30 minutes, or chill up to 8 hours. â©
- Heat 1 Tbsp. vegetable oil in a large skillet over medium-high until oil is shimmering. Remove half of meat from marinade, letting excess drip back into bag; season lightly with salt and cook in a single layer without moving until lightly browned, about 1 minute. Toss meat and continue to cook, tossing occasionally, until cooked through and crisp at edges, about 3 minutes. Transfer to a plate. Repeat with remaining 1 Tbsp. vegetable oil, remaining meat, and more salt. â©
- Serve topped with scallions.
Notes
- FAVORITE
↑ Back to top
Basic Yeast Dough (Famian)

Tags: Breads
Ingredients
- c flavor, but bleached flour imparts a brighter finish that some Asian cooks like.
- 1 1/2 teaspoons instant dry yeast
- 3/4 cup lukewarm water
- 2 tablespoons canola oil
- 2 tablespoons sugar
- 2 teaspoons baking powder
- Scant 3 cups (12 1/2 ounces) flour
Steps
- Put the yeast in a small bowl, add the water and set aside for 1 minute to soften. Whisk in the oil to blend and dissolve the yeast. Set aside.
- To make the dough in a food processor: Combine the sugar, baking powder and flour in the bowl of the food processor. Pulse two or three times to combine. With the motor on, pour the yeast mixture through the feed tube in a steady stream and allow the machine to continue running until the dough starts coming together into a ball, about 20 seconds. (If this doesn't happen, add lukewarm water by the teaspoon.) Let the machine continue for 45 to 60 seconds to knead most of the dough into a large ball that cleans the sides of the bowl; expect some dangling bits. Press on the finished dough; it should feel medium-soft and tacky but should not stick to your finger.
- Alternatively, to make the dough by hand: Combine the sugar, baking powder and flour in a large bowl. Make a well in the center and pour in the yeast mixture. Slowly stir with a wooden spoon, moving from the center toward the rim, to work in all the flour. (Add lukewarm water by the teaspoon if this doesn't happen with relative ease.) Keep stirring as a ragged, soft mass forms. Then use your fingers to gather and pat the dough together into a ball. Transfer to a work surface and knead for about 5 minutes, until smooth, fingertip-soft and slightly elastic. (You shouldn't need any additional flour on the work surface if the dough was properly made. Keep kneading, and after the first minute or two, the dough shouldn't stick to your fingers. If it does, work in a sprinkling of flour.) Press your finger into the dough; the dough should spring back, with a faint indentation remaining.
- Lightly oil a clean bowl and add the dough. Cover with plastic wrap and put in a warm, draft-free place to rise until nearly doubled, 30 to 45 minutes (timing will vary depending on the temperature of the room). The dough is now ready to use.
- If not using immediately, cover and refrigerate the dough until needed.
Notes
- FAVORITE
↑ Back to top
Bean Thread Noodles with Pickled Vegetables

Tags: Noodles
Southeast Asia
Servings: 4
Ingredients
- 6 ounces wide bean thread noodles
- 1 small garlic clove, finely grated
- 1/4 cup fish sauce (such as nam pla or nuoc nam)
- 3 tablespoons fresh lime juice
- 2 tablespoons unseasoned rice vinegar
- 1 tablespoon sugar
- 2 teaspoons finely grated peeled ginger
- 1/4 teaspoon freshly ground black pepper
- 1 large daikon (Japanese white radish; about 1 pound), julienned
- 1 English hothouse cucumber, thinly sliced
- 2 large carrots, peeled, julienned
- 1/4 cup vegetable oil
- 1 cup torn fresh cilantro, divided
- 3/4 cup unsalted, dry-roasted peanuts, coarsely chopped, divided
Steps
- Place noodles in a large bowl and add boiling water to cover. Let noodles soak until tender but not mushy, 15–20 minutes; drain. Rinse under cold water and drain well.
- Whisk garlic, fish sauce, lime juice, vinegar, sugar, ginger, and pepper in another large bowl. Add daikon, cucumber, and carrots; toss to combine. Let sit 10 minutes.
- Add noodles, oil, half of cilantro, and half of peanuts to bowl; toss to combine. Top salad with remaining cilantro and peanuts.
- DO AHEAD: Vegetables can be pickled 2 days ahead. Cover and chill.
Notes
- FAVORITE
↑ Back to top
Bear Canyon Ranch Dressing
Ingredients
- 1/2 cup non-fat Greek yogurt
- 1/2 – 3/4 cup low-fat buttermilk, use more for dressing, less for dip
- 2 tablespoons fresh dried chives, chopped fine
- 2 tablespoons of grated Parmesan cheese
- 1 tablespoon flat leaf parsley, chopped fine
- 1 clove of garlic chopped fine
- 1 teaspoon dried onion flakes or 1/2 teaspoon of onion powder
- 1 teaspoon of dried or fresh dill
- 1 tablespoon lemon juice
- 2 teaspoons prepared yellow mustard
- 1/8 teaspoon black pepper
- 1/8 – 1/4 teaspoon salt
- 1/8 teaspoon paprika
Notes
- I started with my old standby non-fat Greek yogurt, as well as buttermilk which is naturally low in fat. To that I added chives along with onion flakes, a clove of garlic, Parmesan cheese and the rest of the things mentioned below. Everything really started to taste pretty good! I mixed it with the always slightly overbearing, lovable taste of Frank’s and I was happy. Success
↑ Back to top
Beef and Broccoli

Ingredients
- 1 teaspoon baking soda
- 1/3 cup, plus 2 tablespoons water, divided
- 4 tablespoons vegetable oil, divided
- 2 tablespoons oyster sauce, divided
- 2 tablespoons Shaoxing wine or dry sherry, divided
- 1 tablespoon, plus 2 teaspoons soy sauce, divided
- 1 tablespoon, plus 1 teaspoon cornstarch, divided
- 2 teaspoons granulated sugar, divided
- 12 ounces flank steak, cut into 1/2-inch strips
- 12 ounces fresh broccoli, cut into 1 1/2-inch florets (about 4 cups)
- 1 bunch scallions, trimmed and cut into 1 1/2-inch pieces (about 1 1/4 cups)
- 1 (1/2-inch) piece fresh ginger, peeled and thinly sliced (about 1 tablespoon)
- 3 garlic cloves, minced (about 1 tablespoon)
- 1 tablespoon toasted sesame oil
- Toasted sesame seeds
- Steamed white rice
Steps
- Whisk together baking soda, 2 tablespoons water, 1 tablespoon oil, 1 tablespoon oyster sauce, 1 tablespoon Shaoxing wine, 1 tablespoon soy sauce, 1 tablespoon cornstarch, and 1 teaspoon sugar in a medium bowl. Add steak strips, and toss to coat. Set aside at room temperature, stirring occasionally, for 10 minutes.Broccoli can be trimmed and steamed up to three days ahead. Leftovers keep well in the fridge for up to three days. Don’t marinate (velvet) the beef for more than one hour; any longer and it may turn mealy.
- Meanwhile, whisk together remaining 1 tablespoon oyster sauce, 1 tablespoon Shaoxing wine, 2 teaspoons soy sauce, 1 teaspoon cornstarch, and 1 teaspoon sugar in a medium bowl. Set aside.
- Heat 1 tablespoon oil in a wok or large cast iron skillet over high until just smoking. Add broccoli; cook, stirring constantly, until starting to turn bright green, about 30 seconds. Add remaining 1/3 cup water; cover and reduce heat to medium. Steam broccoli until tender-crisp, about 3 minutes; transfer to a paper towel-lined plate.
- Return wok or skillet to high heat, allowing any excess water to evaporate, if necessary. Once dry, add remaining 2 tablespoons oil to wok, and swirl to coat; reduce heat to medium-high. Using tongs or a slotted spoon, add half of steak strips from marinade to wok, allowing excess marinade to drip off; cook, undisturbed, until starting to turn brown, about 1 minute. Flip steak strips, and cook until mostly browned, about 1 minute more. Push browned steak strips to the side of wok, and repeat cooking process with remaining strips. (Discard remaining marinade.) Push all steak strips to the sides of wok. Add scallions, ginger, and garlic to empty part of wok; cook, stirring constantly, until fragrant, 15 to 20 seconds. Stir steak strips into mixture; return broccoli to wok, and toss to combine. Whisk oyster sauce mixture until combined; add to wok, and cook, stirring constantly, until sauce is thickened and evenly distributed, about 30 seconds. Transfer Beef and Broccoli to a platter, and drizzle with sesame oil. Sprinkle with sesame seeds, and serve with rice.
Notes
- Make ahead
- Broccoli can be trimmed and steamed up to three days ahead. Leftovers keep well in the fridge for up to three days. Don’t marinate (velvet) the beef for more than one hour; any longer and it may turn mealy.
↑ Back to top
Beef Nilaga

A Steaming Bowl of This Filipino Beef Soup Brings
Unparalleled Comfort
Servings: 6 to 8
Ingredients
- 5 pounds ( 2.25 kg) beef bones, cut into roughly 2-inch discs (see notes)
- Neutral oil such as vegetable or canola oil for brushing the bones
- 6 scallions, chopped into 2-inch pieces
- One 2-inch piece of fresh ginger
- 6 cloves garlic, lightly smashed
- 4 pounds ( 1.8 Kg) beef shanks, bone in
- 4 teaspoons Diamond Crystal kosher salt, divided, plus more to taste; for table salt, use half as much by volume
- 1/2 tablespoon freshly ground black pepper
- 7 tablespoons (105ml) neutral oil such as canola or vegetable, divided
- 1 pound ( 453 g) beef tendons, cut into 2-inch long pieces
- 1 leek, trimmed, green tops chopped and white and light green bottoms minced (see notes)
- 1/4 cup ( 25 g) diced ginger
- 2 tablespoons (about 6 cloves) crushed and finely chopped garlic, divided
- 2 ears of corn, husked
- 1 pound ( 453 g) yellow potatoes, cut into 1-inch pieces
- 1/2 head green cabbage (about 1 pound; 453 g), halved, cored, and cut into 1-inch chunks
- 1 pound ( 453 g) baby bok choy, ends trimmed, and halved through core
- 1 medium yellow onion ( 8 ounces; 226 g), chopped
- 1/4 cup ( 60 ml) fish sauce, plus more to taste
- 1 scallion, sliced thin on the bias for garnish
For the Broth:
For the Soup:
Steps
- For the beef stock: Fill a large stockpot halfway with cold water. Add bones and bring to a boil over high heat until you see bubbles forming at the top and the blood and other impurities are drawn out of the bones, about 5 minutes. Drain the bones to rinse off any remaining scum, then pat dry.
- Adjust oven rack to middle position and preheat oven to 400°F (200°C). Lightly coat bones with oil and arrange in an even layer on a rimmed baking sheet or in a roasting pan. Roast, turning bones once or twice, until beginning to turn golden brown, 30 to 40 minutes.
- Transfer roasted beef bones to a stovetop or electric pressure cooker (such as an Instant Pot). Pour off and discard (or save for another use) any accumulated fat from the pan. Pour a thin layer of boiling water into the still-hot roasting pan and scrape up any browned bits. Pour pan juices into the pressure cooker. Add enough cold water to bring level to the cooker's max-fill line; do not let water exceed the max-fill line, even if some solids are not submerged.
- Close pressure cooker lid, bring to high pressure, and cook for 2 hours 30 minutes. Allow cooker to depressurize naturally. Carefully open cooker and strain stock through a fine-mesh strainer into a large pot. Discard solids, though if there's shank meat in there, be sure to reserve it to add to the soup. (At this stage the broth can be cooled and refrigerated for up to 5 days or frozen for up to 3 months before continuing with the recipe.)
- For the beef shank and tendons: Pat beef shanks dry, and sprinkle evenly all over with 1 tablespoon salt and 1/2 tablespoon pepper. Set on a large plate or sheet pan and refrigerate, uncovered for 1 to 12 hours.
- Once broth is prepared through step 4, In a large cast iron or stainless-steel skillet, heat 1 tablespoon oil over high heat until just smoking, add beef shanks in batches if needed, and sear on all sides until browned and caramelized, turning as needed, about 10 minutes.
- Return the now-strained beef broth (about 2 1/2 quarts) to the pressure cooker and add the seared shanks and tendons along with the reserved leek green tops, scallions, ginger, 1/2 tablespoon garlic, and 1 teaspoon salt. Cook on high pressure for 1 hour and 15 minutes. Let the pressure release naturally, about 30 minutes, then transfer shanks and tendons to a large bowl or plate and set aside. Strain the beef broth into a large soup pot or Dutch oven; discard strained aromatics. Add the cooked shanks and tendons to the broth in the large pot; set aside.
- For the corn and potatoes: Adjust oven rack to upper middle and lower middle positions and set oven temperature to 425°F (220℃). In a rimmed baking sheet, arrange corn and drizzle with 1 tablespoon oil, making sure to coat all sides. On a separate rimmed baking sheet, toss potatoes with 2 tablespoons oil, season with salt and pepper, and spread into an even layer. Roast both sheet pans, corn on upper-middle rack and potatoes on lower-middle pack, until corn is browned all over, 20 to 30 minutes, and potatoes are cooked through and edges turn brown and crisp, about 20 minutes, flipping food on sheet trays about half way through. Set sheet trays aside.
- Once corn is cool enough to handle, cut kernels from cobs and reserve kernels. (Cobs can be reserved for making a separate vegetable stock.)
- For the fried garlic: In a small skillet, heat remaining 3 tablespoons oil and remaining 1 1/2 tablespoons garlic over medium-high and cook, stirring frequently, until garlic is crispy and brown, 3 to 5 minutes. Set aside.
- For finishing the soup: To the large soup pot with the beef stock and meat, add the leek bottoms, cabbage, bok choy, onion, and fish sauce and bring to a gentle boil over medium-high heat. Reduce heat to medium-low and simmer until onions, cabbage, and bok choy soften and turn translucent, about 20 minutes. Season broth to taste with extra fish sauce or salt, if needed.
- Stir in the corn and cook until warmed through, about 5 minutes. Portion the meat and divide the soup evenly into individual bowls, topping with portions of the roasted potatoes. Garnish with scallions and prepared fried garlic with oil and serve.
Notes
- For the broth, make sure the beef bones are cut short enough to fit into your pressure cooker (ask your butcher to cut them shorter if not). You can use any assortment of bones your butcher has, but bones with bits of meat still attached will give more flavor, while connective tissue–rich options like joints and feet will deliver more gelatin to the stock; you can also include some veal bones for even more gelatin. A cross-cut beef shank, while not required, will boost the flavor even more; add the meat to the soup so it doesn't go to waste.
- I recommend saving the trimmings when you prepare the cabbage, bok choy, leeks, ginger, and onion; you can use them (as well as the roasted corn cobs) to make a vegetable stock for another use.
- If you prefer to use boneless shanks, cut into 2-inch cubes and follow the recipe as written for bone-in shanks.
- If you like, you can use other vegetables, such as green beans, carrots, napa cabbage, or mushrooms instead of or in addition to the vegetables in the recipe. Monitor their simmering time and cook until they are just tender.
↑ Back to top
Beef Pho Noodle Soup Recipe (Pho Bo)

Tags: Soups
Vietnam
Servings: 8
Ingredients
- 2 medium yellow onions (about 1 pound total)
- 4-inch piece ginger (about 4 ounces)
- 5-6 pounds beef soup bones (marrow and knuckle bones)
- 5 star anise (40 star points total)
- 6 whole cloves
- 3-inch cinnamon stick
- 1 pound piece of beef chuck, rump, brisket or cross rib roast, cut into 2-by-4-inch pieces (weight after trimming)
- 1 1/2 tablespoons salt
- 4 tablespoons fish sauce
- 1 ounce (1-inch chunk) yellow rock sugar (duong phen; see Note)
- 1 1/2-2 pounds small (1/8-inch wide) dried or fresh banh pho noodles ("rice sticks'' or Thaichantaboon)
- 1/2 pound raw eye of round, sirloin, London broil or tri-tip steak, thinly sliced across the grain (1/16 inch thick; freeze for 15 minutes to make it easier to slice)
- 1 medium yellow onion, sliced paper-thin, left to soak for 30 minutes in a bowl of cold water
- 3 or 4 scallions, green part only, cut into thin rings
- 1/3 cup chopped cilantro (ngo)
- Ground black pepper
- Optional garnishes arranged on a plate and placed at the table
- Sprigs of spearmint (hung lui) and Asian/Thai basil (hung que)
- Leaves of thorny cilantro (ngo gai)
- Bean sprouts (about 1/2 pound) Red hot chiles (such as Thai bird or dragon), thinly sliced
- Lime wedges
For the broth:
For the bowls:
Steps
- Prepare the pho broth
- The key is to be organized and have everything ready to go. Thinly slice cooked meat. For best results, make sure it's cold.
Char onion and ginger. Use an open flame on grill or gas stove. Place
onions and ginger on cooking grate and let skin burn. (If using stove,
turn on exhaust fan and open a window.) After about 15 minutes, they
will soften and become sweetly fragrant. Use tongs to occasionally
rotate them and to grab and discard any flyaway onion skin. You do not
have to blacken entire surface, just enough to slightly cook onion and
ginger.
Let cool. Under warm water, remove charred onion skin; trim and
discard
blackened parts of root or stem ends. If ginger skin is puckered and
blistered, smash ginger with flat side of knife to loosen flesh from
skin. Otherwise, use sharp paring knife to remove skin, running ginger
under warm water to wash off blackened bits. Set aside.
Parboil bones. Place bones in stockpot (minimum 12-quart capacity) and
cover with cold water. Over high heat, bring to boil. Boil vigorously
2
to 3 minutes to allow impurities to be released. Dump bones and water
into sink and rinse bones with warm water. Quickly scrub stockpot to
remove any residue. Return bones to pot.
Simmer broth. Add 6 quarts water to pot, bring to boil over high heat,
then lower flame to gently simmer. Use ladle to skim any scum that
rises to surface. Add remaining broth ingredients and cook, uncovered,
for 1 1/2 hours. Boneless meat should be slightly chewy but not tough.
When it is cooked to your liking, remove it and place in bowl of cold
water for 10 minutes; this prevents the meat from drying up and
turning
dark as it cools. Drain the meat; cool, then refrigerate. Allow broth
to continue cooking; in total, the broth should simmer 3 hours.
Strain the pho broth through fine strainer. If desired, remove any
bits
of gelatinous tendon from bones to add to your pho bowl. Store tendon
with cooked beef. Discard solids.
Use ladle to skim as much fat from top of the pho broth as you like.
(Cool it and refrigerate it overnight to make this task easier; reheat
before continuing.) Taste and adjust flavor with additional salt, fish
sauce and yellow rock sugar. The pho broth should taste slightly too
strong because the noodles and other ingredients are not salted. (If
you've gone too far, add water to dilute.) Makes about 4 quarts.
Assemble pho bowls:
Heat the pho broth and ready the noodles. To ensure good timing,
reheat
broth over medium flame as you're assembling bowls. If you're using
dried noodles, cover with hot tap water and soak 15-20 minutes, until
softened and opaque white. Drain in colander. For fresh rice noodles,
just untangle and briefly rinse in a colander with cold water.
Blanch noodles. Fill 3- or 4-quart saucepan with water and bring to
boil. For each bowl, use long-handle strainer to blanch a portion of
noodles. As soon as noodles have collapsed and lost their stiffness
(10-20 seconds), pull strainer from water, letting water drain back
into saucepan. Empty noodles into bowls. Noodles should occupy 1/4 to
1/3 of bowl; the latter is for noodle lovers, while the former is for
those who prize broth.
If
desired, after blanching noodles, blanch bean sprouts for 30 seconds
in
same saucepan. They should slightly wilt but retain some crunch. Drain
and add to the garnish plate.
Add other ingredients. Place slices of cooked meat, raw meat and
tendon
(if using) atop noodles. (If your cooked meat is not at room
temperature, blanch slices for few seconds in hot water from above.)
Garnish with onion, scallion and chopped cilantro. Finish with black
pepper.
Ladle in broth and serve. Bring broth to rolling boil. Check
seasoning.
Ladle broth into each bowl, distributing hot liquid evenly so as to
cook raw beef and warm other ingredients. Serve your pho with with the
garnish plate.
Notes
- This recipe is adapted from my cookbook, Into the Vietnamese Kitchen (Ten Speed Press, 2006). If you'd like to totally master pho, check out The Pho Cookbook, my 2017 book devoted to cooking and learning about one of my favorite food groups!
- Yellow rock sugar (a.k.a. lump sugar) is sold in one-pound boxes at Chinese and Southeast Asian markets. Break up large chunks with hammer.
↑ Back to top
Beef Short Rib-Vegetable Pho

Servings: 4
Ingredients
- Broth foundation
- 2 whole cloves
- 1 1/2-inch cinnamon stick
- 2 star anise (16 robust points)
- 1 1/2 tsp coriander seeds
- 225g | 1 medium yellow onion, halved and thickly sliced
- 45g | Chubby 1 1/2-in section ginger, peeled, cut into thick coins and smashed
- 1.75 to 2L | 7 1/2 to 8 cups hot or just-boiled water, depending on cooker used
- 750g | 1 2/3 lb English-cut beef short ribs (3 chunky ones!)
- 225g | 8 oz green or napa cabbage, cut through the core into 3 wedges
- 120g | 1 medium carrot, unpeeled, cut as 2-inch sections
- 90g | 1 large celery stalk, cut into pinkie-finger lengths
- 15g | 1/2 oz dried shiitake mushrooms
- 2 tsp fine sea salt
- Broth final seasonings
- 1 1/2 to 2 Tbsp fish sauce
- 1 teaspoon organic sugar or agave syrup
- 1/2 to 3/4 teaspoon MSG, or 1 to 1 1/2 teaspoons Asian mushroom seasoning (optional)
- Noodles, toppings, and garnishes
- 300g | 10 oz dried narrow flat rice noodles (bánh phở, pad Thai noodle)
- Beef and vegetables from broth making
- 1/2 small yellow or red onion, very thinly sliced against the grain, soaked in water for 10 minutes, and drained
- 2 green onions, green parts only, thinly sliced
- 1/4 cup chopped cilantro, leafy tops only
- Recently ground black pepper
- Optional add-ins
- 120g | 3 handfuls mung bean sprouts
- 2 Thai or small serrano chiles, or 1 jalapeno or Fresno chile, sliced (retain seeds for excitement)
- 1 lime, cut into wedges
- 2 or 3 sprigs fresh mint, Thai basil, and/or rice paddy herb; and/or 3 or 4 fresh culantro leaves
- Hoisin, Vietnamese Chile Sauce , Sriracha, and/or Sate Sauce
Steps
- Make the broth: Put the cloves, cinnamon, star anise, and coriander seeds in a 6- to 8-quart electric multicooker, like the Instant Pot. Program it to sauté on moderate-high heat to toast the spices for several minutes, stirring, until fragrant. Add the ginger and onion. Stir until heady, 45 to 60 seconds (some browning is okay).
- Add the hot water, short ribs, cabbage, carrot, celery, mushrooms, and salt. Lock the lid in place. Program the cooker to pressure cook on high pressure for 15 minutes. When done, unplug the cooker and let the pressure decrease naturally for 20 minutes. (On a stovetop pressure cooker, toast the spices over medium-high heat, add 8 cups water, then cook on high pressure for 15 minutes then depressurize naturally on a cool burner for 15 minutes.)
- Release pressure, carefully remove the lid, then let the broth settle for 5 minutes before using tongs to transfer the beef to a bowl. Add water to cover the beef and soak for 5 minutes to cool and prevent drying. Pour off the water, partially cover, and let cool completely or refrigerate.
- Retrieve the mushroom and put on a plate or add to the beef. If the carrot, celery and cabbage are not too soft, include them as well. Strain the broth through a muslin-lined mesh strainer, positioned over a medium pot. Press or squeeze on the solids to expel excess broth; you should have about 8 cups total (boil to reduce or add water to arrive around that amount). Leave the bit of fat in the broth for good flavor.
- Finish the broth by seasoning it with fish sauce. If it still needs a bold, savory-sweet finish, add salt, and/or sugar or MSG.
- Prep and assemble the bowls: While the broth cooks, or about 30 minutes before serving, boil the noodles until just tender, drain and rinse well, then divide between four bowls. Bring the broth to a simmer over medium heat, then cover and lower the heat to keep warm.
- Thinly slice the beef across the grain, then quarter or slice the mushrooms. To warm everything in the bowl, arrange the beef, mushroom and other cooked vegetable in one flat layer atop the noodles. If things are cold, warm each bowl in a microwave via 30-second blasts. Crown the bowls with yellow onion, green onion, cilantro, and black pepper.
- Taste the broth and make any final adjustments with extra fish sauce or salt. Bring the broth to a boil over high heat, then ladle about 2 cups of broth into each bowl. Serve with your add-ins.
Notes
- Ingredients For extra healthy pho, add chopped kale, chard, or spinach. Microwave-steam 4 packed cups until tender-firm, 1 minute. Or, as the noodles finish boiling, add 8 ounces of chopped leafy greens to the hot water. Drain then divide the noodles and greens among the bowls. You may also steam-sauté the greens in a splash of broth then use as a topping.
- To build a little extra flavor and broth, add about 10 ounces of chicken to the pressure cooker. It can be bits sitting around. For instance, a wing, neck, giblets, thigh bone, and drumstick. Add 1 cups extra water to the pressure cooker.
- No-waste cooking: Save the fat for stir-fries, fried rice, and the pho pot sticker recipe in The Pho Cookbook.
- Extra beef: There’s plenty of beef for the bowls, but if you like, include thinly sliced raw steak when assembling the bowls to create phở bò tái chín.
- Lifespan The broth, beef, and vegetables can be kept in separate airtight containers and refrigerated for up to 3 days. The broth and uncut beef freeze well for 3 months but the veggies won’t.
- Equipment To make the broth in a 6- to 8-quart stockpot, toast the spices and sear the ginger and onion over medium heat. When aromatic, add 11 cups of hot water, then the beef, cabbage, carrot, celery, mushroom, and salt. Partially cover and bring to a simmer over high heat. Skim scum, if any. Adjust the heat to gently simmer for 1 1/2 hours, uncovered, until the beef is firm tender (a paring knife tip inserted 1/2 inch should meet resistance). Then proceed as directed. Except the mushrooms, the other veggies may be spent.
↑ Back to top
Beef Soba Noodles with Spinach and Coconut-Curry
Vinaigrette

Ingredients
- 1 (8-ounce) boneless sirloin steak
- 1 1/2 teaspoons kosher salt, divided
- 8 ounces uncooked soba noodles
- 8 cups coarsely chopped bok choy
- 1 pound bagged prewashed spinach
- 1/2 cup light coconut milk
- 2 tablespoons fresh lime juice
- 2 tablespoons lower-sodium soy sauce
- 1 tablespoon rice vinegar
- 1 teaspoon honey
- 1/2 teaspoon freshly ground black pepper, divided
- 2 tablespoons peanut oil, divided
- 1 tablespoon chopped peeled fresh ginger
- 1 tablespoon sliced garlic
- 1 1/2 teaspoons Madras curry powder
- 1 tablespoon sesame seeds, toasted
Steps
- Place beef in freezer.
- Bring 4 quarts water and 1 teaspoon salt to a boil in a large saucepan. Add noodles to boiling salted water; cook according to package directions. During last 1 minute of cooking, add bok choy and spinach. Cook 1 minute or until greens wilt. Drain and rinse under cold water; drain well.
- Combine 1/4 teaspoon salt, coconut milk, juice, soy sauce, vinegar, honey, and 1/4 teaspoon pepper in a small bowl, stirring with a whisk.
- Combine 5 teaspoons oil, ginger, garlic, and curry in a Dutch oven over low heat; cook 5 minutes, stirring frequently. Remove from heat. Add reserved coconut milk mixture and noodle mixture; toss well.
- Heat a large, heavy skillet over high heat. Cut beef across the grain into thin slices; sprinkle with remaining 1/4 teaspoon salt and the remaining 1/4 teaspoon pepper. Add remaining 1 teaspoon oil to pan; swirl to coat. Add beef to pan; sauté 2 minutes or until done. Add beef to pasta mixture; toss well. Sprinkle with sesame seeds.
Notes
- FAVORITE
↑ Back to top
Beer Cheese
Adapted from https://www.seriouseats.com/beer-cheese-recipe

Tags: Cheese
Dips and Spreads
Servings: 3 cups
Ingredients
- 12 ounces sharp cheddar cheese, shredded
- 1 1/2 tablespoons cornstarch
- 1 ( 12- ounce) bottle beer, preferably brown ale
- 5 ounces evaporated milk
- 1 tablespoon Dijon mustard
- 1 teaspoon Worcestershire sauce
- 1 teaspoon hot sauce
- Kosher salt, to taste
Steps
- Toss cheese with cornstarch in a medium bowl; set aside.
- Whisk together beer, milk, mustard, and Worcestershire sauce in a medium saucepan. Heat over medium heat until gently steaming, whisking frequently to prevent scorching.
- When beer mixture is warm, add cheese, stirring until completely melted, bubbling slightly, and thickened. Stir in hot sauce and season with salt to taste; serve immediately.
- Special Equipment
- Saucepan, whisk.
↑ Back to top
Beet, Olive, and Kale Salad
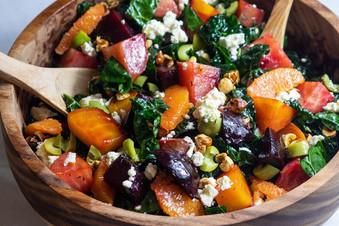
Tags: Salad
Servings: 6
Ingredients
- 6 medium beets, (trimmed and scrubbed (different colors if available))
- 8 cloves garlic, (peeled and smashed 6 thyme sprigs)
- 6 rosemary sprigs
- 1/4 cup extra virgin olive oil
- 1 teaspoon kosher salt
- Zest and juice of 1 orange, (segments reserved for the salad)
- 2 teaspoons apple cider vinegar
- 2 tablespoons extra virgin olive oil
- 1 ½ teaspoon kosher salt
- 1 small bunch Tuscan kale, (ribs removed and leaves sliced thin)
- 1/2 cup crumbled feta cheese
- 1/2 cup Bella Di Cerignola or Castelvatrano olives, (pitted and quartered)
- 1/2 cup hazelnuts, (toasted and peeled)
For the Salad:
Notify Me:
Notify Me:
Steps
- Preheat the oven to 350 degrees.
- On a large piece of aluminum foil place the beets, garlic, thyme, and rosemary. Drizzle with the oil and sprinkle with salt. Bring the foil up and around the beets and seal to create a small package. Place on a baking sheet and bake for about 1 1‚ÅÑ2 hours or until the beets are tender when pierced with the tip of a knife. Allow the beets to cool slightly. When cool enough to handle, peel the beets by simply rubbing off the skin with a paper towel or by using a small pairing knife. Cut the beets into bite-sized pieces. Set aside.
- In a large bowl, whisk together 2 tablespoons of orange juice, the orange zest, apple cider vinegar, olive oil, and salt. Add the beets and toss. Massage the kale slightly and add the kale to the beets along with the feta, olives, and reserved orange segments. Toss gently. Top with the hazelnuts and serve.
↑ Back to top
Beezil Bars
Ingredients
- 1/2 cup Butter Room Temperature
- 1/2 cup Sugar
- 1/2 cup Brown Sugar Light
- 1 Egg
- 1 teaspoon Salt
- 1 teaspoon Baking soda
- 1 teaspoon Vanilla
- 1 cup Flour
- 1 cup oats
- 1/2 cup Chocolate chips
- 1/4 cup Walnuts chopped (optional)
Steps
- Cream together the butter and sugar. Mix in Egg and Vanilla. Add Salt, Flour, Baking Soda and Oats and Nuts. Place in a greased 9x13 inch baking pan. Bake in a 350° for 20 minutes.
Notes
- FAVORITE
↑ Back to top
Beezil Bread

Tags: Breads
Ingredients
- 2 C Warm Water
- 2 Pkg Active Dry Yeast
- 3 C Bread Flour
- 3 Tbsp Sugar
- 3 Tbsp Shortening Or Vegetable Oil -- At Room Temp
- 2 1/2 C Unbleached All Purpose Flour,divided
- 1 Tbsp Salt
- Oil -- For Greasing The Bowl
- 1/2 C Sesame Seeds -- (Optional)
- Cornmeal -- For Baking Sheet
sponge:
bread:
Steps
- In the mixing bowl, sprinkle the yeast over the warm water; stir to dissolve. Add the flour and mix at firts speed until smooth. cover and allow to rise until doubled in size about 30-45 minutes.
- Stir down the sponge with 1-2 rotations of the beater, then add the sugar, shortening, 2 c flour and salt.
- Pulse at first speed using the on/off switch so that the beater does not throw flour out of the bowl. When the flour is absorbed, run the machine at first speed until the dough comes away from the sides of the bowl.
- If the dough is too soft, add flour 1/4 c at a time.
- Remove and scrape down the beater and insert the dough hook. run at first speed until the dough forms up on the hook and comes away from the sides of the bowl (8-10 minutes).
- You can use the second speed for the last 5 minutes to strengthen the gluten.
- Transfer the dough to an oiled bowl and turn to coat. Cover and allow to rise until doubled in volume (35-45 minutes).
- Punch down the dough, cut in half, shape into rounds, and cover.
- Allow to rest for 10 minutes. Form into Italian shaped loaves.
- Place the loaves on a baking sheet dusted with cornmeal. Brush with water and sprinkle with sesame seeds if desired.
- Cover with a damp cloth and allow to rise until doubled in size (45-60 minutes).
- When the bread has fully proofed, cut 3 diagonal slashes or 1 long slash down the center.
- Bake in a preheated 400 oven until golden brown(25 - 30 minutes).
Notes
- FAVORITE
↑ Back to top
Beezil Bread
Ingredients
- 2 C Warm Water
- 2 Pkg Active Dry Yeast
- 3 C Bread Flour
- 3 Tbsp Sugar
- 3 Tbsp Shortening Or Vegetable Oil -- At Room Temp
- 2 1/2 C Unbleached All Purpose Flour,divided
- 1 Tbsp Salt
- Oil -- For Greasing The Bow
- 1/2 C Sesame Seeds -- (Optional)
- Cornmeal -- For Baking Sheet
sponge:
bread:
Steps
- In the mixing bowl, sprinkle the yeast over the warm water; stir to dissolve. Add the flour and mix at firts speed until smooth. cover and allow to rise until doubled in size about 30-45 minutes.
- Stir down the sponge with 1-2 rotations of the beater, then add the sugar, shortening, 2 c flour and salt.
- Pulse at first speed using the on/off switch so that the beater does not throw flour out of the bowl. When the flour is absorbed, run the machine at first speed until the dough comes away from the sides of the bowl.
- If the dough is too soft, add flour 1/4 c at a time.
- Remove and scrape down the beater and insert the dough hook. run at first speed until the dough forms up on the hook and comes away from the sides of the bowl (8-10 minutes).
- You can use the second speed for the last 5 minutes to strengthen the gluten.
- Transfer the dough to an oiled bowl and turn to coat. Cover and allow to rise until doubled in volume (35-45 minutes).
- Punch down the dough, cut in half, shape into rounds, and cover.
- Allow to rest for 10 minutes. Form into Italian shaped loaves.
- Place the loaves on a baking sheet dusted with cornmeal. Brush with water and sprinkle with sesame seeds if desired.
- Cover with a damp cloth and allow to rise until doubled in size (45-60 minutes).
- When the bread has fully proofed, cut 3 diagonal slashes or 1 long slash down the center.
- Bake in a preheated 400 oven until golden brown(25 - 30 minutes).
Notes
- FAVORITE
↑ Back to top
Bell's Poultry Seasoning
Adapted from http://chowhound.chow.com/topics/669904
Ingredients
- 4 1/2 tsp dried rosemary
- 4 tsp dried oregano
- 3 3/4 tsp dried sage
- 3 1/2 tsp ground dried ginger
- 3 tsp dried marjoram
- 2 3/4 tsp dried thyme
- 3/4 tsp ground black pepper
Steps
- Mix together and grind to fine powder in a coffee or spice grinder.
Notes
- FAVORITE
↑ Back to top
Bell's Poultry/Stuffing Seasoning
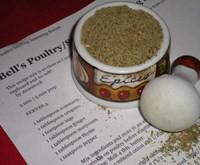
Servings: YIELD 5 servings TOTAL
TIME 5 mins
Ingredients
- 1 tablespoon rosemary
- 1 tablespoon oregano
- 1 teaspoon sage
- 1 tablespoon ginger
- 1 tablespoon marjoram
- 1 tablespoon thyme
- 1 teaspoon pepper
Steps
- Mix ingredients and store in an airtight container.
- Sprinkle on poultry before roasting or make a stuffing.
- Stuffing: Melt 4 tbls. butter.
- Saute 1/3 c.minced onion and 1/2 cup chopped celery until tender.
- Salt to taste.
- Add vegetables to eight slices of bread (cubed and toasted).
- Add 1/2 cup water and 1 1/2 tsp of poultry seasoning to the bread mixture and toss.
Notes
- FAVORITE
↑ Back to top
Bell's Seasoning Copycat

Ingredients
- 4 1/2 teaspoon dried rosemary
- 4 teaspoon dried oregano
- 3 3/4 teaspoon dried sage
- 3 1/2 teaspoon ground dried ginger
- 3 teaspoon dried marjoram
- 2 3/4 teaspoon dried thyme
- 3/4 teaspoon ground black pepper
Steps
- Mix together and grind to fine powder using a coffee or spice grinder.
Notes
- FAVORITE
↑ Back to top
Berbere
Ingredients
- 1 teaspoon fenugreek seeds
- 1/2 cup ground dried serrano chiles or other ground dried chiles
- 1/2 cup paprika
- 2 tablespoons salt
- 2 teaspoons ground ginger
- 2 teaspoons onion powder
- 1 teaspoon ground cardamom
- 1 teaspoon nutmeg
- 1/2 teaspoon garlic powder
- 1/4 teaspoon ground cloves
- 1/4 teaspoon cinnamon
- 1/4 teaspoon allspice
Steps
- Finely grind fenugreek seeds with a mortar and pestle or spice grinder. Stir together remaining ingredients in a small bowl until well combined. This mixture can be stored in an airtight container for up to 3 months.
Notes
- FAVORITE
↑ Back to top
The Best Baba Ganoush
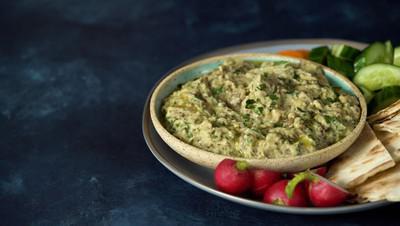
Servings: 4 to 6
Ingredients
- 3 medium Italian eggplants (about 2 pounds/ 900 g total), pricked all over with a fork
- 2 tablespoons (30 ml) lemon juice from 1 lemon, plus more as desired
- 3 medium cloves garlic, minced
- 3 tablespoons (45 ml) tahini
- 1/3 cup (80 ml) extra-virgin olive oil, plus more for serving
- 1/4 cup chopped fresh parsley leaves
- Kosher salt
Steps
- If Using a Grill (recommended): Preheat a gas or charcoal grill to medium heat and place eggplants directly over heat source. Cook, turning occasionally with tongs, until eggplants are completely tender and well charred on all sides, 30 to 40 minutes. Wrap with foil and let rest 15 minutes. Continue to step 3.
- If Using the Broiler: Adjust rack to 6 inches below broiler element and preheat broiler to high. Place eggplants on a foil-lined rimmed baking sheet and prick all over with a fork. Broil, turning occasionally, until charred on all sides and completely tender, about 30 minutes (timing may vary depending on broiler strength). Eggplants should be very, very tender when cooked; if eggplant is not fully tender once skin is charred all over, switch oven to 425°F and roast until fully tender (a toothpick or skewer inserted near stem and bottom ends should not meet any resistance). Remove from oven and gather up foil, crimping it around eggplants to form a sealed package. Let eggplants rest for 15 minutes. Continue to step 3.
- Open foil package. Working with one eggplant at a time, use a sharp paring knife to slit each eggplant open lengthwise. Carefully scoop out soft flesh with a large spoon and transfer to a fine-mesh strainer set in a large bowl. Once all eggplant is scooped, pick out any stray bits of skin and blackened flesh and discard.
- Transfer eggplant to a salad spinner, distributing it evenly around the perimeter. Spin gently until all excess moisture is extracted. Discard all drippings, wipe out large bowl, and return eggplant to bowl.
- Add lemon juice and garlic to eggplant and stir vigorously with a fork until eggplant breaks down into a rough paste, about 1 1/2 minutes. Stirring constantly and vigorously, add tahini, followed by the olive oil in a thin, steady stream. The mixture should become pale and creamy. Stir in parsley and season to taste with salt, plus more lemon juice if desired.
- Transfer to a serving bowl, drizzle with olive oil, and serve with warm pita bread or vegetables for dipping.
- Special Equipment
- Grill, rimmed baking sheet, fine-mesh strainer, paring knife, salad spinner
- Make-Ahead and Storage
- The baba ganoush can be made ahead of time and stored in an airtight container in the refrigerator for up to four days. Let it come back to room temperature before serving.
↑ Back to top
Best Baked Lahmajoun
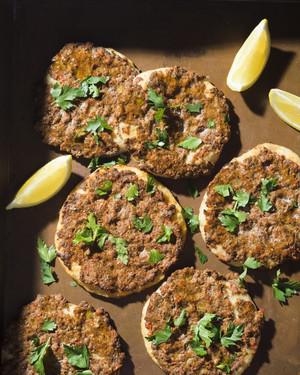
Tags: Finger Food
Lebanese
Ingredients
- 293 GRAMS (2¼ CUPS) ALL-PURPOSE FLOUR, PLUS MORE FOR DUSTING
- 2¼ TEASPOONS INSTANT YEAST
- 1 TEASPOON WHITE SUGAR
- ¾ TEASPOON TABLE SALT
- 1 CUP WARM WATER (100°F TO 110°F)
- 1 TABLESPOON EXTRA-VIRGIN OLIVE OIL, PLUS MORE TO GREASE THE BOWL AND BAKING SHEETS
- 1 RIPE LARGE TOMATO, HALVED AND SEEDED
- 1 MEDIUM RED BELL PEPPER
- ½ MEDIUM RED ONION
- 4 MEDIUM GARLIC CLOVES
- ½ CUP LIGHTLY PACKED FRESH FLAT-LEAF PARSLEY
- 1 POUND GROUND LAMB OR GROUND BEEF
- 3 TABLESPOONS TOMATO PASTE
- 1 TABLESPOON ALEPPO PEPPER
- 1 TABLESPOON DRIED OREGANO
- 1 TABLESPOON GROUND CUMIN
- 2 TEASPOONS GROUND SUMAC
- KOSHER SALT
- ROUGHLY CHOPPED FRESH FLAT-LEAF PARSLEY
FOR THE
TOPPING:
FOR SERVING:
LEMON WEDGES:
Steps
- To make the dough, in a stand mixer with the dough hook, mix the flour, yeast, sugar and table salt on medium until well combined, about 15 seconds. With the mixer on low, gradually add the water and oil; mix until a sticky, slightly curdy dough forms, about 3 minutes. Increase to medium and continue kneading, scraping the bowl once or twice, until the dough is smooth, supple, elastic and clears the sides of the bowl, about 10 minutes; if needed, knead in up to 2 tablespoons additional flour. The finished dough should feel slightly tacky but not unworkable. Meanwhile, oil a large bowl.
- Lightly dust the counter with flour and turn the dough out onto it. Shape the dough into a ball and place it in the prepared bowl, then turn the ball so all sides are oiled. Cover with a kitchen towel and let rise at room temperature until doubled in bulk, 45 to 60 minutes.
- Meanwhile, to make the topping, grate the tomato halves against the large holes of a box grater (start with the cut sides against the grater) into a medium bowl; stop when you reach the skin and discard it. On a large cutting board, stem, seed and finely chop the bell pepper; peel and finely chop the onion and finely chop the garlic and parsley. Push the ingredients to one side of the board as they are done. When they are all prepped, gather them on the board, then add the ground meat, tomato paste, Aleppo pepper, oregano, cumin, sumac and 1½ teaspoons kosher salt. Using a chef’s knife, chop the ingredients until well integrated. Add the tomato pulp to the mixture (reserve the bowl) and chop it in until well combined. Transfer the filling to the reserved bowl; cover and refrigerate until ready to use.
- Heat the oven to 450°F with a rack in the middle position. Line 2 rimmed baking sheets with kitchen parchment, then brush the parchment with oil.
- When the dough is properly risen, dust the counter with flour and turn the dough out onto it. Divide the dough evenly into 12 portions (about 45 grams each) and form each into a taut ball. Arrange 6 dough balls on each prepared baking sheet, spaced evenly apart and staggered to give the portions as much room as possible. Cover each baking sheet with a kitchen towel and let the dough rest for about 30 minutes.
- Using your hands, flatten each portion of dough into a round 4 to 5 inches in diameter. Evenly divide the topping among the rounds (about ⅓ cup each). Use your fingers to press each portion on one baking sheet into a round about 6 inches in diameter while dimpling the surface and evenly distributing the topping; press the topping into the dough but do not compact it into a patty. It’s fine if the dough rounds touch slightly.
- Slide the baking sheet into the oven and bake until the crust is light golden brown and the topping is sizzling at the edges, 14 to 17 minutes. Meanwhile, shape the second batch. When the first batch is done, use a wide metal spatula to transfer the lahmajoun directly to a wire rack. Bake the second batch in the same way as the first.
- Sprinkle the lahmajoun with parsley and serve with lemon wedges. To eat, squeeze lemon juice onto the lahmajoun and fold it half.
- To make the topping in a food processor: Grate the tomato halves as directed. Stem, seed and cut the bell pepper into chunks. Peel and cut the onion into chunks. In a food processor, combine the bell pepper, onion, garlic and parsley; pulse until the vegetables are chopped, about 10 pulses; scrape the bowl once or twice. Add the ground meat, tomato paste, Aleppo pepper, oregano, cumin, sumac and 1½ teaspoons kosher salt. Pulse until the mixture is well combined, about 5 pulses; do not overprocess. Add the grated tomato (reserve the bowl) and pulse a few times to combine; transfer to the reserved bowl. Cover and refrigerate until ready to use.
↑ Back to top
The Best Buttermilk-Brined Southern Fried Chicken

Servings: 3 to 4
Ingredients
- 2 tablespoons paprika
- 2 tablespoons freshly ground black pepper
- 2 teaspoons garlic powder
- 2 teaspoons dried oregano
- 1/2 teaspoon cayenne pepper
- 1 cup buttermilk
- 1 large egg
- Kosher salt
- 1 whole chicken, about 4 pounds, cut into 10 pieces or 3 1/2 pounds bone-in, skin-on breasts, legs, drumsticks, and/or wings
- 1 1/2 cups all purpose flour
- 1/2 cup cornstarch
- 1 teaspoon baking powder
- 4 cups vegetable shortening
For the Spice
Mix:
For the
Buttermilk Brine:
For Finishing
the Chicken:
Steps
- Combine the paprika, black pepper, garlic powder, oregano, and cayenne in a small bowl and mix thoroughly with a fork.
- Whisk the buttermilk, egg, 1 tablespoon salt, and 2 tablespoons of the spice mixture in a large bowl. Add the chicken pieces and toss and turn to coat. Transfer the contents of the bowl to a gallon-sized zipper-lock freezer bag and refrigerate for at least 4 hours, and up to overnight, flipping the bag occasionally to redistribute the contents and coat the chicken evenly.
- Whisk together the flour, cornstarch, baking powder, 2 teaspoons salt, and the remaining spice mixture in a large bowl. Add 3 tablespoons of the marinade from the zipper-lock bag and work it into the flour with your fingertips. Remove one piece of chicken from the bag, allowing excess buttermilk to drip off, drop the chicken into the flour mixture, and toss to coat. Continue adding chicken pieces to the flour mixture one at a time until they are all in the bowl. Toss the chicken until every piece is thoroughly coated, pressing with your hands to get the flour to adhere in a thick layer.
- Adjust an oven rack to the middle position and preheat the oven to 350°F. Heat the shortening or oil to 425°F in a 12-inch straight-sided cast-iron chicken fryer or a large wok over medium-high heat. Adjust the heat as necessary to maintain the temperature, being careful not to let the fat get any hotter.
- One piece at a time, transfer the coated chicken to a fine-mesh strainer and shake to remove excess flour. Transfer to a wire rack set on a rimmed baking sheet. Once all the chicken pieces are coated, place skin side down in the pan. The temperature should drop to 300°F; adjust the heat to maintain the temperature at 300°F for the duration of the cooking. Fry the chicken until it’s a deep golden brown on the first side, about 6 minutes; do not move the chicken or start checking for doneness until it has fried for at least 3 minutes, or you may knock off the coating. Carefully flip the chicken pieces with tongs and cook until the second side is golden brown, about 4 minutes longer.
- Transfer chicken to a clean wire rack set in a rimmed baking sheet, season lightly with salt, and place in the oven. Bake until thickest part of breast pieces registers 150°F (65.5°C) on an instant-read thermometer, and thigh/drumstick pieces register 165°F (74°C), 5 to 10 minutes; remove chicken pieces as they reach their target temperature, and transfer to a second wire rack set in a rimmed baking sheet, or a paper towel-lined plate. Season with salt to taste. Serve immediately—or, for extra-crunchy fried chicken, proceed to step 7.
- Place the plate of cooked chicken in the refrigerator for at least 1 hour, and up to overnight. When ready to serve, reheat the oil to 400°F. Add the chicken pieces and cook, flipping them once halfway through cooking, until completely crisp, about 5 minutes. Transfer to a wire rack set on a rimmed baking sheet to drain, then serve immediately.
↑ Back to top
The Best Cauliflower Pizza Crust

Tags: Pizza
Vegetables Vegetarian
Ingredients
- 1/2 cup Pomi Pizza Sauce
- 1 cup shredded mozzarella cheese
- 1/2 cup shredded cheddar cheese
- 1/4 cup pepperoni minis
- 1/4 cup fresh basil leaves
- 1/2 teaspoon crushed red pepper flakes, optional
- 1 head cauliflower, chopped
- 2 large eggs
- 1/2 cup shredded mozzarella cheese
- 2 tablespoons freshly grated Parmesan
- 1 tablespoon Italian seasoning
- Kosher salt and freshly ground black pepper, to taste
FOR THE
CAULIFLOWER CRUST:
Steps
- Preheat oven to 425 degrees F. Line a baking sheet with parchment paper or a silicone baking mat; set aside.
- To make the cauliflower crust, add cauliflower to the bowl of a food processor and pulse until finely ground, yielding about 2-3 cups.*
- Transfer to a microwave-safe bowl. Cover loosely and place into microwave for 4-5 minutes, or until softened; let cool.
- Using a clean dish towel or cheese cloth, drain cauliflower completely, removing as much water as possible.
- Transfer cauliflower to a large bowl. Stir in eggs, mozzarella, Parmesan and Italian seasoning; season with salt and pepper, to taste.
- Spread cauliflower mixture into a 15- by 10-inch rectangle onto the prepared baking sheet. Spray lightly with nonstick spray and bake for 12-15 minutes, or until golden.
- Top with pizza sauce, cheeses and pepperoni minis. Place into oven and bake until the cheese has melted, about 3-5 minutes.
- Serve immediately, sprinkled with basil and red pepper flakes, if desired.
Notes
- A box grater can also be used.
↑ Back to top
The Best Chicken Paprikash

Tags: Chicken
Hungary
Servings: 4
Ingredients
- 1 cup homemade or store-bought low-sodium chicken stock
- 1 (0 .25 ounce) packet powdered gelatin (about 2 1/2 teaspoons)
- 4 whole chicken legs, split into thighs and drumsticks (about 2 pounds)
- Kosher salt and freshly ground black pepper
- 1 tablespoon vegetable oil
- 1 large yellow onion, thinly sliced (about 1 1/2 cups)
- 1 red bell pepper, thinly sliced (optional, see notes)
- 1/4 cup ( 1 ounce) high quality Hungarian sweet paprika (see notes)
- 1 bay leaf
- 1/2 cup sour cream, plus more for garnish
- 1/2 teaspoon Asian fish sauce
- 1 teaspoon juice from 1 lemon
- Minced fresh parsley leaves or dill (optional)
- Egg noodles, boiled potatoes, or spaetzle for serving
Steps
- Pour chicken stock into a 1-cup liquid measuring cup and sprinkle gelatin over the top. Set aside.
- Season chicken pieces generously on all sides with salt and pepper. Heat vegetable oil in a large straight-sided sauté pan or a Dutch oven over medium-high heat until lightly smoking. Add chicken pieces skin-side-down in a single layer and cook without moving until deep golden brown, about 8 minutes. As the chicken pieces finish browning, flip them over and cook until the second side is light golden brown, about 2 minutes longer. Transfer chicken to a large plate and set aside. Pour off all but 1 tablespoon of fat from pan.
- Add onions and bell peppers (if using) to the pan and cook, stirring and scraping up any browned bits from the bottom, until the onions are tender and just starting to brown, about 5 minutes. Add paprika and cook, stirring, until fragrant and nutty, about 1 minute.
- Add stock/gelatin mixture and scrape up anything stuck to the bottom of the pan, stirring constantly. Add bay leaf. Nestle seared chicken pieces back into the sauce, leaving them skin-side up. Reduce heat to lowest setting, cover pan, and cook until chicken is completely tender, about 30 minutes.
- Remove chicken pieces and set aside on a large plate. Whisk sour cream, fish sauce, lemon juice, and half of minced parsley or dill into sauce. Season to taste with salt and more paprika if desired. Return chicken to pan and turn to coat in sauce.
- Serve immediately over noodles, boiled potatoes, or spaetzle , tossing the noodles or potatoes with the sauce and placing the chicken on top. Garnish with more sour cream, paprika, and minced fresh parsley or dill (if using)
↑ Back to top
The Best Chicken Paprikash

Servings: Serves 4
Ingredients
- 1 cup homemade or store-bought low-sodium chicken stock
- 1 (.25 ounce) packet powdered gelatin (about 2 1/2 teaspoons)
- 4 whole chicken legs, split into thighs and drumsticks (about 2 pounds)
- Kosher salt and freshly ground black pepper
- 1 tablespoon vegetable oil
- 1 large yellow onion, thinly sliced (about 1 1/2 cups)
- 1 red bell pepper, thinly sliced (optional, see note above)
- 1/4 cup (1 ounce) high quality Hungarian sweet paprika (see note above)
- 1 bay leaf
- 1/2 cup sour cream, plus more for garnish
- 1/2 teaspoon Asian fish sauce
- 1 teaspoon juice from 1 lemon
- Minced fresh parsley leaves or dill (optional)
- Egg noodles, boiled potatoes, or spaetzle for serving
Steps
- Pour chicken stock into a 1-cup liquid measuring cup and sprinkle gelatin over the top. Set aside.
- Season chicken pieces generously on all sides with salt and pepper. Heat vegetable oil in a large straight-sided sauté pan or a Dutch oven over medium-high heat until lightly smoking. Add chicken pieces skin-side-down in a single layer and cook without moving until deep golden brown, about 8 minutes. As the chicken pieces finish browning, flip them over and cook until the second side is light golden brown, about 2 minutes longer. Transfer chicken to a large plate and set aside. Pour off all but 1 tablespoon of fat from pan.
- Add onions and bell peppers (if using) to the pan and cook, stirring and scraping up any browned bits from the bottom, until the onions are tender and just starting to brown, about 5 minutes. Add paprika and cook, stirring, until fragrant and nutty, about 1 minute.
- Add stock/gelatin mixture and scrape up anything stuck to the bottom of the pan, stirring constantly. Add bay leaf. Nestle seared chicken pieces back into the sauce, leaving them skin-side up. Reduce heat to lowest setting, cover pan, and cook until chicken is completely tender, about 30 minutes.
- Remove chicken pieces and set aside on a large plate. Whisk sour cream, fish sauce, lemon juice, and half of minced parsley or dill into sauce. Season to taste with salt and more paprika if desired. Return chicken to pan and turn to coat in sauce.
- Serve immediately over noodles, boiled potatoes, or spaetzle, tossing the noodles or potatoes with the sauce and placing the chicken on top. Garnish with more sour cream, paprika, and minced fresh parsley or dill (if using)
↑ Back to top
Best Chocolate Sugar Cookies
Tags: Cookies
I use cup and a half butter
I made this.
Ingredients
- 2 cups ( 240 g) all-purpose flour
- 1/2 cup ( 43 g) cocoa powder, see notes above
- 1 teaspoon ( 5 g) baking soda
- 1/2 to 1 teaspoon ( 3 – 6 g) sea salt, see notes above (I use 6 g)
- 16 tablespoons ( 226 g) softened butter
- 1.5 cups ( 300 g) dark brown sugar
- 1 egg (50 g)
- 1 teaspoon ( 5 g) vanilla extract
- granulated sugar for rolling, 1/4 to 1/2 cup (50 to 100 g)
Steps
- Heat the oven to 350ºF.
- Line a baking sheet with parchment paper.
- Place the flour, cocoa powder, baking soda, and salt in a medium bowl and whisk to combine the ingredients. Set aside.
- Put the butter and brown sugar in the bowl of a stand mixer. Fit the mixer with the paddle attachment and beat on medium speed for 2 to 3 minutes, stopping to scrape down the mixer once or twice, until the mixture is light and fluffy.
- Turn off the mixer, add the egg and vanilla, and beat until the egg is thoroughly incorporated, 1 to 2 minutes.
- Add the dry ingredients and mix on low speed until no flour is visible, stopping to scrape down the mixer once during the process.
- Pour the granulated sugar into a small bowl. Portion out the dough using a 2-tablespoon scoop or measure or a scale — each portion should weigh 50 grams. You should have about 16 to 18 balls total. Roll each portion between your hands to form a ball; then roll in the sugar — coat each ball as generously as you are able to in the sugar. Transfer 6 balls to the prepared sheet. Bake for 12 minutes; remove from heat and allow cookies to cool completely on the sheet pan. Repeat this process, baking 6 cookies at a time.
- Store the cookies in an airtight container at room temperature for up to 1 week or freeze for up to 3 months.
↑ Back to top
Best French Onion Soup
Adapted from https://archive.ph/KBHKa

Ingredients
- 4 TABLESPOONS SALTED BUTTER, CUT INTO 4 PIECES
- 1½ POUNDS (3 MEDIUM) YELLOW ONIONS, HALVED AND CUT CROSSWISE INTO ⅛-INCH SLICES
- 2 TABLESPOONS FRESH THYME
- 4 BAY LEAVES
- KOSHER SALT AND GROUND BLACK PEPPER
- 5 OUNCES COMTÉ OR GRUYÈRE CHEESE, SHREDDED (1¼ CUPS)
- ALL-PURPOSE FLOUR, FOR DUSTING
- 14 OUNCE PACKAGE DUFOUR FROZEN PUFF PASTRY, THAWED (SEE HEADNOTE)
- 2 TABLESPOONS CORNSTARCH
- ⅓ CUP DRY VERMOUTH
- 1 QUART LOW-SODIUM CHICKEN BROTH
- 1 LARGE EGG YOLK, BEATEN
Steps
- In a large saucepan over medium, melt the butter. Stir in the onions, thyme, bay and ¾ teaspoon salt. Cover and cook, stirring only occasionally at the start then more often once browning begins, until the onions are lightly golden and deep browning has formed on the bottom of the pot, about 45 minutes.
- Meanwhile, heat the oven to 375°F with a rack in the middle position. Place four 12-ounce oven-safe bowls on a rimmed baking sheet and sprinkle ¼ cup cheese in each; set aside. Lightly flour a counter and unfold the thawed puff pastry onto it; dust the surface with flour. Using a paring knife, cut out four rounds from the pastry, each about ½ inch larger than the diameter of the bowls. Stack the pastry rounds on a large plate and refrigerate, uncovered, until ready to use.
- Uncover the pot and stir in the cornstarch. Add the vermouth and cook, scraping up the browned bits, until the mixture is homogeneous and thickened, about 2 minutes. Stir in the broth, 1 cup water and ¼ teaspoon pepper. Bring to a simmer and cook, uncovered and stirring occasionally, until lightly thickened, about 15 minutes. Off heat, remove and discard the bay. Taste and season with salt and pepper.
- Divide the soup evenly among the bowls. Working one at a time, brush a thin layer of egg yolk around the rim, then place a pastry round on top; gently press around the rim of the bowl to secure the pastry. Once all four bowls are lidded, brush the pastry rounds with the remaining yolk and sprinkle with the remaining cheese. Bake until the pastry is puffed and golden brown, 25 to 30 minutes. Serve right away.
↑ Back to top
The Best General Tso's Chicken
Servings: 4 to 6
Ingredients
- 1 large egg white
- 2 tablespoons (30ml) Chinese dark soy sauce
- 2 tablespoons (30ml) Shaoxing wine (see note)
- 2 tablespoons (30ml) 80-proof vodka
- 3 tablespoons (24g) cornstarch
- 1/4 teaspoon (1g) baking soda
- 1 pound (455g) boneless, skinless chicken thighs, cut into 1/2- to 3/4-inch chunks
- 1/2 cup (64g) all-purpose flour
- 1/2 cup (64g) cornstarch
- 1/2 teaspoon (2g) baking powder
- 1/2 teaspoon (1.5g) kosher salt
- 1 1/2 quarts (1.4 liters) peanut, vegetable, or canola oil for deep frying
- 4 tablespoons (50g) granulated sugar
- 3 tablespoons (45ml) homemade or store-bought low-sodium chicken stock
- 3 tablespoons (45ml) dark soy sauce
- 2 tablespoons (30ml) Shaoxing wine (see note)
- 2 tablespoons (30ml) Chinese rice vinegar or distilled white vinegar
- 1 tablespoon (8g) cornstarch
- 2 teaspoons (10ml) peanut, vegetable, or canola oil
- 2 teaspoons (6g) minced garlic (about 2 medium cloves)
- 2 teaspoons ( 4 g) minced fresh ginger (about one 1-inch piece)
- 2 teaspoons (4g) minced scallion bottoms (about 1 scallion), plus 6 to 8 scallions, white parts only, cut into 1-inch lengths
- 1 teaspoon (5ml) toasted sesame oil
- 8 small dried red Chinese or Arbol chiles (see note)
- 1 cup, loosely packed steamed white rice
For the
Marinade:
For the Dry
Coating:
To Fry
Chicken:
For the Sauce
and to Finish (see note):
Steps
- For the Marinade: Beat egg whites in a large bowl until broken down and lightly foamy. Add soy sauce, wine, and vodka and whisk to combine. Set aside half of marinade in a small bowl. Add cornstarch and baking soda to the large bowl and whisk to combine. Add chicken to large bowl and turn with fingers to coat thoroughly. Cover with plastic wrap and set aside.
- For the Dry Coat: Combine flour, cornstarch, baking powder, and salt in a large bowl. Whisk until homogeneous. Add reserved marinade and whisk until mixture has coarse, mealy clumps. Set aside.
- To Fry Chicken: Heat 1 1/2 quarts peanut, vegetable, or canola oil in a large wok or Dutch oven to 350°F (177°C) and adjust flame to maintain temperature.
- Working one piece at a time, transfer chicken from marinade to dry coat mixture, tossing in between each addition to coat chicken. When all chicken is added to dry coat, toss with hands, pressing dry mixture onto chicken so it adheres, and making sure that every piece is coated thoroughly.
- Lift chicken one piece at a time, shake off excess coating, and carefully lower into hot oil (do not drop it). Once all chicken is added, cook, agitating with long chopsticks or a metal spider, and adjusting flame to maintain a temperature of 325 to 375°F (163 to 191°C), until chicken is cooked through and very crispy, about 4 minutes. Transfer chicken to a paper towel-lined bowl to drain. Pour frying oil through a fine-mesh strainer set over a large heatproof bowl; allow to cool, then reserve for future frying.
- For the Sauce and to Finish: Combine sugar, chicken stock, soy sauce, wine, vinegar, cornstarch, and sesame oil in a small bowl and stir with a fork until cornstarch is dissolved and no lumps remain. Set aside.
- Combine oil, garlic, ginger, minced scallions, and red chiles in a wok or large skillet and place over medium heat. Cook, stirring, until vegetables are aromatic and soft, but not browned, about 3 minutes. Stir sauce mixture and add to wok, making sure to scrape out any sugar or starch that has sunk to the bottom of bowl. Cook, stirring, until sauce boils and thickens, about 1 minute. Add scallion segments.
- Add chicken to sauce, then toss, folding it with a wok spatula or silicone spatula until all pieces are thoroughly coated. Serve immediately with white rice.
- Special Equipment
- Whisk, wok or Dutch oven (for frying) and large stainless-steel skillet (for sauce and finishing)
Notes
- Shaoxing wine can be found in most Asian markets. If unavailable, dry sherry can be used in its place. If you can't find boneless skinless chicken thighs, you can debone them yourself using this guide. If you can't find whole dried chiles, substitute with 1/4 teaspoon crushed red pepper flakes.
- This recipe is written to maximize efficiency with a wok: frying the chicken first, then making the sauce in the same wok (emptied of frying oil) and finally tossing it all together. This way, you only have to wash the wok once after making the full recipe. If desired, however, you can prepare the sauce in advance (up to 1 day ahead), then transfer it to an airtight container and refrigerate until ready to use; warm sauce before tossing with fried chicken right before serving.
- Make-Ahead and Storage
- If desired, the sauce can be prepared up to 1 day in advance. Refrigerate in an airtight container, then warm before tossing with freshly fried chicken right before serving.
↑ Back to top
The Best Korean Fried Chicken
Tags: Chicken
Korean
Servings: 4
Ingredients
- Kosher salt
- 3/4 cups corn starch
- 1 teaspoon baking powder
- 2 pounds chicken wings (about 12 whole wings, see note)
- 2 quarts peanut oil
- 1/2 cup all-purpose flour
- 1/2 cup cold water
- 1/2 cup vodka
- 1 recipe sweet soy sauce or sweet and spicy chili sauce
Steps
- Combine 2 teaspoons kosher salt, 1/4 cup cornstarch, and 1/2 teaspoon baking powder in a large bowl and whisk until homogenous. Add chicken wings and toss until every surface is coated. Transfer wings to a wire rack set in a rimmed baking sheet, shaking vigorously as you go to get rid of excess coating. Transfer to refrigerator and let rest, uncovered, for at least 30 minutes and up to overnight.
- When ready to fry, preheat oil to 350°F (177°C) in a large wok, Dutch oven, or deep fryer.
- Combine remaining 1/2 cup cornstarch, 1/2 teaspoon baking powder, flour, and 2 teaspoons kosher salt in a large bowl and whisk until homogenous. Add water and vodka and whisk until a smooth batter is formed, adding up to 2 tablespoons additional water if batter is too thick. It should have the consistency of thin paint and fall off of the whisk in thin ribbons that instantly disappear as they hit the surface of the batter in the bowl.
- Add half of the wings to the batter. Working one at a time, lift one wing and allow excess batter to drip off, using your finger to get rid of any large pockets or slicks of batter. Carefully lower wing into hot oil. Repeat with remaining wings in first batch. Fry, using a metal spider or slotted spatula to rotate and agitate wings as they cook until evenly golden brown and crisp all over, about 8 minutes. Transfer to a paper towel-lined plate and season immediately with salt. Keep warm while you fry the remaining wings.
- Serve plain, or toss with sweet soy sauce for Korean fried chicken or sweet and spicy chili sauce for Korean fried chicken (or serve sauce on side).
- Sweet and Spicy Chili Sauce for Korean Fried Chicken
Notes
- A Cornish hen broken down into frying parts (drumstick, thighs, and breast quarters) can be used in place of the the chicken wings.
↑ Back to top
Best Latke Recipe! (Gluten Free Too!)
Ingredients
- 2 large russet potatoes
- 1/2 red onion
- 2 eggs (beaten)
- 1/4 cup corn starch
- Pinch of Kosher salt
- 1 tablespoon fresh chopped dill (optional)
- 1/2 ″ of olive oil & 1 tablespoon of butter in a large heavy pan
Steps
- Using the fine grater on the food processor grate the potatoes and onion. Place in a sieve over a bowl and allow to rest for 5 minutes, then push the excess water out.
- Note if using a hand grater, use the larger holed grater, the fine one on that is too small.
- Place the potatoes and onion in a medium bowl and add the egg and stir, then sprinkle the corn starch and dill over the bowl and stir again till all are incorporated. For larger portions, create 2-3 flat cakes and add to the pan when the oil sizzles when a piece f potato hits it. For the smaller portions add cakes about 1 1/2 to 2″ across. These cook more quickly, so keep your eye on them. You want the small cakes to be lighter, more light gold and the larger cakes to be a crispy golden brown. Place on a rack to drain before serving.
Notes
- FAVORITE
↑ Back to top
The Best Minestrone Soup Recipe
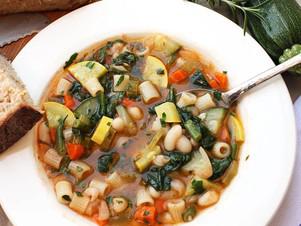
Tags: Italian
Soups
The best minestrone is the one you can make without
going to the store.
Servings: 6
Ingredients
- 8 ounces (225g) dried cannellini, borlotti, or kidney beans
- Kosher salt
- 1 medium onion, split in half (about 6 ounces; 175g)
- 1 medium carrot (about 3 ounces; 85g)
- 2 celery stalks (about 3 ounces; 85g)
- 2 medium cloves garlic
- 1 large sprig rosemary
- 2 to 3 sprigs parsley
- 1 bay leaf
- 4 ounces (115g) salt pork or pancetta, cut into 1/4-inch dice (optional)
- 2 tablespoons (30ml) extra-virgin olive oil, plus more as needed
- 1 medium onion, finely chopped (about 6 ounces; 175g)
- 1 medium carrot, peeled and finely diced (about 3 ounces; 85g)
- 2 celery stalks, finely diced (about 3 ounces; 85g)
- 1 tablespoon (15ml) minced fresh rosemary leaves
- 2 medium cloves garlic, minced (about 2 teaspoons; 12g)
- 1 pound (450g) ripe Roma tomatoes, peeled, seeded, and chopped (see note)
- 1 Parmesan rind (optional; see notes)
- 1 cup dried small pasta, such as ditali, macaroni, or orecchiette (about 3 1/2 ounces; 100g)
- 1 medium zucchini, cut into bite-size pieces (about 4 ounces; 115g)
- 1 medium summer squash, cut into bite-size pieces (about 4 ounces; 115g)
- 4 ounces green beans, cut into 1/2-inch lengths (about 115g)
- 4 ounces spinach, roughly chopped (about 4 cups loosely packed leaves; 115g)
- Chopped fresh herbs, such as basil, parsley, or rosemary, for serving
- Freshly ground black pepper
For the Beans
(see note):
For the Soup
Base:
To Finish:
Steps
- For the Beans: In a medium bowl, cover beans with cold water by several inches and stir in 1 tablespoon salt. Let beans soak at least 12 hours and up to a day. Drain and rinse.
- Combine beans, onion halves, carrot, celery, garlic cloves, rosemary, parsley, and bay leaf in a large pot and cover with water by several inches. Add a pinch of salt. Bring to a boil, reduce to a simmer, and cook, topping up with water as necessary, until beans are fully tender, about 45 minutes. Using tongs, discard vegetables and aromatics. Drain beans, reserving cooking liquid. Transfer bean-cooking liquid to a 2-quart measuring cup and add enough cold water to equal 2 full quarts (8 cups; 2L).
- For the Soup Base: Heat pancetta (if using) and olive oil in a large Dutch oven or stockpot over medium-high heat. Cook, stirring, until pancetta has rendered fat and softened, but has not yet browned. (If omitting pancetta, heat oil just until shimmering.) Add onion, carrot, celery, and minced rosemary. Season with a big pinch of salt and cook, stirring, until vegetables are softened but not browned, 10 to 15 minutes, adding more oil if pot appears dry or if vegetables are starting to stick to the bottom.
- Add garlic and cook, stirring, until fragrant, about 30 seconds. Add tomatoes and cook, stirring, until most of their moisture has evaporated and the mixture starts to fry. (The sound should change from a sputtering simmering sound to a sharper crackle as vegetables start to fry.)
- Add reserved bean-cooking liquid, beans, and Parmesan rind, if using. Let broth simmer for at least 10 minutes.
- Add pasta (unless you are planning on simmering for a long time; see step 7), zucchini, squash, and green beans and simmer until pasta and vegetables are tender, about 10 minutes. Add spinach and cook, stirring occasionally, until spinach is wilted, about 5 minutes. Discard Parmesan rind, if used.
- Serve soup immediately as is, or continue simmering for up to 2 1/2 hours for a heartier texture and flavor (if simmering for a long time, add the pasta 10 to 15 minutes before serving). Alternatively, reserve half of soup on the side, continue to simmer the other half in the pot for up to 2 1/2 hours, and stir reserved soup back in for a soup that is hearty, but still has plenty of bright vegetable flavor and texture. Stir in chopped herbs and season to taste with salt and pepper before serving.
Notes
- Canned beans can be used in place of fresh. To use canned beans, in step 5, drain and rinse 2 cups of canned beans and add them to the soup, along with 2 quarts of homemade vegetable stock, or store-bought or homemade low-sodium chicken stock. Increase simmering time to 30 minutes before proceeding to step 6.
- Use fresh tomatoes only if ripe and in season. Otherwise, tomatoes may be omitted or replaced with one (14-ounce) can of whole peeled tomatoes, crushed by hand or chopped with a knife. A Parmesan rind can be added to the soup while simmering for deeper flavor.
- Soup Vegetable Timetable:
- 20 min:
- Carrot Peeled and cut into 1/2-inch chunks, sautéed at start until tender 20 minutes
- Cauliflower Florets separated, stems sliced 1/4 inch thick 20 minutes
- Celery Peeled and cut into 1/2-inch chunks, sautéed at start until tender 20 minutes
- Celery root Peeled and cut into 1/2-inch chunks 20 minutes
- Jicama Peeled and cut into 1/2-inch chunks 20 minutes
- Kohlrabi Peeled and cut into 1/2-inch chunks 20 minutes
- Leeks Thinly sliced or diced, sautéed at start until tender 20 minutes
- Onion Thinly sliced or diced, sautéed at start until tender 20 minutes
- Parsnip Peeled and cut into 1/2-inch chunks 20 minutes
- Potato Peeled and cut into 1/2-inch chunks 20 minutes
- Radish Cut into 1/2-inch chunks 20 minutes
- Rutabaga Peeled and cut into 1/2-inch chunks 20 minutes
- Sweet potato Peeled and cut into 1/2-inch chunks 20 minutes
- Asparagus Cut into 1-inch lengths 10 minutes
- Broccoli Florets separated, stems sliced 1/4 inch thick 10 minutes
- Hearty greens (cabbage, kale, collards) Tough stems or cores removed, leaves sliced or roughly chopped
- 10 minutes:
- Green beans Trimmed and cut into 1-inch pieces 10 minutes
- Summer squash Cut into 1/2-inch chunks or disks 10 minutes
- Zucchini Cut into 1/2-inch chunks or disks 10 minutes
- Tender greens (spinach, arugula, watercress, chard) Leaves roughly chopped or torn 5 minutes
- Brussels sprouts Leaves separated 5 minutes
- Frozen peas Added straight from freezer 5 minutes
- Frozen lima beans Added straight from freezer 5 minutes
- Corn kernels Cut off cob and separated into individual kernels 5 minutes
↑ Back to top
The Best Oven-Fried Buffalo Wings
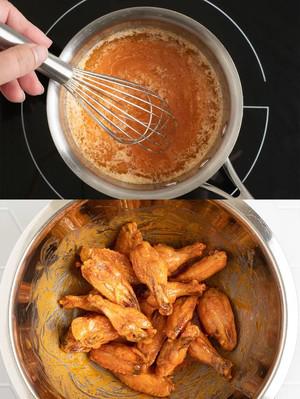
Tags: Chicken
Sides Wings
Baked Buffalo wings that are just as crisp and
delicious as their fried counterparts.
I made this.
Servings: 2
Ingredients
- 2 pounds (900g) chicken wings, cut into drumettes and flats
- 2 teaspoons (10g) baking powder
- 2 teaspoons (10g) kosher salt; for table salt use half as much by volume or the same weight
- 4 tablespoons (50g) unsalted butter
- 4 tablespoons (60ml) Frank's RedHot Sauce
- Blue cheese dressing, for serving
- Celery sticks, for serving
Steps
- Line a rimmed baking sheet with aluminum foil and set a wire rack inside. Carefully dry chicken wings with paper towels. In a large bowl, combine wings with baking powder and salt and toss until thoroughly and evenly coated. Place on rack, leaving a slight space between each wing. Repeat with remaining 2 batches of wings.
- Place baking sheet with wings in refrigerator and allow to rest, uncovered, at least 8 hours and up to 24 hours.
- Adjust oven rack to upper-middle position and preheat oven to 450°F (230°C). Add chicken wings and cook for 20 minutes. Flip wings and continue to cook until crisp and golden brown, 15 to 30 minutes longer, flipping a few more times towards the end.
- Meanwhile, combine butter and hot sauce in a small saucepan and cook over medium heat, whisking until combined. Transfer wings to a large bowl, add sauce, and toss to thoroughly coat. Serve wings immediately with blue cheese dressing and celery sticks, conspicuously shunning anyone who says that real Buffalo wings must be fried.
Notes
- This recipe easily scales up and down. For every pound of chicken wings, use the following amounts of the other ingredients:
- 1 teaspoon (5g) baking powder
- 1 teaspoon (5g) Diamond Crystal kosher salt
- 2 tablespoons (25g) unsalted butter
- 2 tablespoons (30ml) Frank’s RedHot Sauce
↑ Back to top
Best Palestinian Upside-Down Chicken and Rice (Maqlubeh)
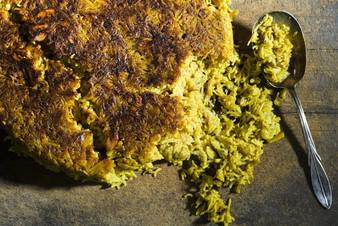
Tags: Middle-East
Poultry
Ingredients
- 2 CUPS BASMATI RICE
- KOSHER SALT AND GROUND BLACK PEPPER
- 1½ POUNDS BONE-IN, SKIN-ON CHICKEN THIGHS, TRIMMED
- 4 TABLESPOONS EXTRA-VIRGIN OLIVE OIL, DIVIDED
- ⅓ CUP SLIVERED ALMONDS
- 8 OUNCES CAULIFLOWER FLORETS (1-INCH PIECES)
- 8 MEDIUM GARLIC CLOVES, CHOPPED
- 4 TABLESPOONS (½ STICK) SALTED BUTTER, MELTED
- 4 TEASPOONS GROUND CUMIN
- 1 TABLESPOON GROUND ALLSPICE
- 2 TEASPOONS GROUND TURMERIC
- 1 TEASPOON GRATED NUTMEG
- ½ MEDIUM EGGPLANT (ABOUT 8 OUNCES), SLICED INTO ¼-INCH-THICK ROUNDS
- 1 QUART LOW-SODIUM CHICKEN BROTH
Steps
- In a large bowl, combine the rice and 1 tablespoon salt. Add water to cover by 1 inch, then set aside. Have ready a lidded pot that measures 9½ to 11 inches in diameter and 4 to 6 inches deep. Cut 2 rounds of kitchen parchment the size of the pot.
- Season the chicken all over with salt and pepper. Set the pot over medium and heat 1 tablespoon of the oil until shimmering. Add the chicken skin down and cook until browned, about 10 minutes. Transfer to a plate and set aside. Remove the pot from heat. Place 1 parchment round on the bottom, then turn to coat it with fat.
- Add the remaining 3 tablespoons oil to the parchment-lined pot, then sprinkle evenly with the almonds. Drain the rice in a fine mesh strainer, then rinse under cool running water and drain again. Scatter 1 cup of the rice in a thin, even layer over the almonds. In a medium bowl, mix together the remaining rice with the cauliflower, garlic, butter, cumin, allspice, turmeric, nutmeg and ¾ teaspoon salt and 1¾ teaspoons pepper. Reserve ½ cup of this mixture, then distribute the remainder in an even layer in the pot.
- Place the chicken in the pot, slightly nestling the pieces into the rice-cauliflower layer; discard any accumulated juices. Shingle the eggplant slices over the chicken in an even layer. Sprinkle with the reserved ½ cup rice.
- Pour the broth into the pot (it will not fully cover the eggplant), then bring to a boil over medium-high. Set the second parchment round over the food, the cover the pot with the lid. Cook for 5 minutes, reduce to low and cook, undisturbed, for 35 minutes.
- Remove the pot from the heat, uncover and let stand for 15 minutes. Remove the parchment, then invert a serving platter onto the pot. Holding the platter against the pot, carefully invert the two together; leave the pot overturned on the platter and let rest for about 10 minutes. Slowly lift off the pot and, if needed, remove and discard the parchment.
Notes
- Tip: Don’t forget to soak and rinse the rice. This helps the grains cook up light and separate.
↑ Back to top
The Best Pizza Dough
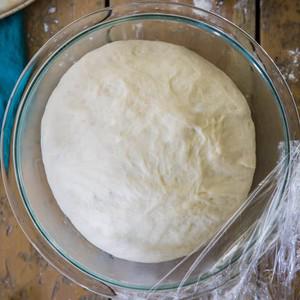
Servings: 12 servings (makes one
10-12" pizza)
Ingredients
- 2-2 ⅓ cups all-purpose flour OR bread flour¹ divided (250-295g)
- 1 packet instant yeast² (2 ¼ teaspoon)
- 1 ½ teaspoons sugar
- ¾ teaspoon salt
- 2 Tablespoons olive oil + additional
- ¾ cup warm water³ (175ml)
Steps
- Combine 1 cup (125g) of flour, instant yeast, sugar, and salt in a large bowl. If desired, add garlic powder and dried basil at this point as well.
- Add olive oil and warm water and use a wooden spoon to stir well very well.
- Gradually add another 1 cup (125g) of flour. Add any additional flour as needed (I've found that sometimes I need as much as an additional ⅓ cup), stirring until the dough is forming into a cohesive, elastic ball and is beginning to pull away from the sides of the bowl (see video above recipe for visual cue). The dough will still be slightly sticky but still should be manageable with your hands.
- Drizzle a separate, large, clean bowl generously with olive oil and use a pastry brush to brush up the sides of the bowl.
- Lightly dust your hands with flour and form your pizza dough into a round ball and transfer to your olive oil-brushed bowl. Use your hands to roll the pizza dough along the inside of the bowl until it is coated in olive oil, then cover the bowl tightly with plastic wrap and place it in a warm place.
- Allow dough to rise for 30 minutes or until doubled in size. If you intend to bake this dough into a pizza, I also recommend preheating your oven to 425F (215C) at this point so that it will have reached temperature once your pizza is ready to bake.
- Once the dough has risen, use your hands to gently deflate it and transfer to a lightly floured surface and knead briefly until smooth (about 3-5 times).
- Use either your hands or a rolling pin to work the dough into 12" circle.
- Transfer dough to a parchment paper lined pizza pan and either pinch the edges or fold them over to form a crust.
- Drizzle additional olive oil (about a Tablespoon) over the top of the pizza and use your pastry brush to brush the entire surface of the pizza (including the crust) with olive oil.
- Use a fork to poke holes all over the center of the pizza to keep the dough from bubbling up in the oven.
- Add desired toppings (see the notes for a link to my favorite, 5-minute pizza sauce recipe!) and bake in a 425F (215C) preheated oven for 13-15 minutes or until toppings are golden brown. Slice and serve.
Notes
- ¹I've found that all-purpose flour yields a softer crust while bread flour gives a slightly crispier exterior. Please see the post for more information on all-purpose vs. bread flour in pizza dough.
- ²Many commenters have reported using active dry yeast (use the same amount, 2 ¼ teaspoon) with success. Some people have proofed the yeast first with the ¾ cup warm water, which is what I would recommend, while others have just mixed it into the dough as instructed. Both have had success!
- ³Ideally your water should be between 105-115F (40-46C). I usually just use warm tap water but do make sure that your water isn't too hot or it will kill your yeast!
- Making in Advance:
- To make in advance, let the dough rise covered at room temperature as indicated in the recipe, then deflate it, wrap it tightly so it doesn't dry out, and store in the refrigerator for up to several days or it will freeze for up to a month.
- Top your pizza off with my favorite, easy, homemade pizza sauce!
↑ Back to top
Best Spicy Pickled Celery
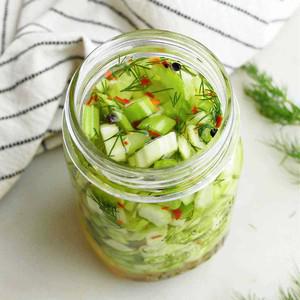
Tags: Pickles
Servings: 12-20 pickles
Ingredients
- 1 cup white vinegar
- 1/4 cup sugar
- 1 tablespoon salt
- 4 garlic cloves, smashed
- 1 tablespoon mustard seeds
- 1 teaspoon red chili flakes
- 1 tablespoon cracked peppercorns
- 8 large celery stalks, peeled and cut into pieces (see note)
Steps
- Bring the vinegar, sugar, and salt to a boil in a small saucepan. Stir until sugar and salt are dissolved. Remove from heat and add garlic, mustard seed, peppercorns, chili flakes.
- Place the celery pieces in a large bowl (preferably glass or ceramic) and pour the vinegar mixture over it. Stir to combine spices. Make sure all the pieces are submerged in the brine. Allow to cool completely (at least a couple hours) before serving.
- If you would like to make longer stalks into pickles, you can cut them to the length of the tallest wide-mouthed Mason jar you have. Stand them upright in the jar and pour the brine over them. Cover tightly. As the pickles cool, you may have to shake the jar (carefully!) to distribute the spices and brine.
↑ Back to top
The Best Yorkshire Pudding
Servings: 8 Yorkshire puddings
Ingredients
- 4 large eggs (200g; 7 ounces)
- 150 g all-purpose flour (5.25 ounces; about 1 cup plus 2 teaspoons)
- 175 g whole milk (6 ounces; 3/4 cup) (see notes)
- 2 g kosher salt (about 1/2 teaspoon)
- 25 g water (0.85 ounces; 1 tablespoon plus 2 teaspoons) (see notes)
- 100 ml beef drippings, lard, shortening, or vegetable oil (about 1/2 cup)
Steps
- Combine eggs, flour, milk, water, and salt in a medium bowl and whisk until a smooth batter is formed. Let batter rest at room temperature for at least 30 minutes. Alternatively, for best results, transfer to an airtight container and refrigerate batter overnight or for up to 3 days. Remove from refrigerator while you preheat the oven.
- Adjust oven rack to center position and preheat oven to 450°F (230°C). Divide drippings (or other fat) evenly between two 8-inch cast iron or oven-safe non-stick skillets, two 6-well popover tins (see notes), one 12-well standard muffin tin, or one 24-well mini muffin tin. Preheat in the oven until the fat is smoking hot, about 10 minutes.
- Transfer the pans or tins to a heat-proof surface (such as an aluminum baking sheet on your stovetop), and divide the batter evenly between every well (or between the two pans if using pans). The wells should be filled between 1/2 and 3/4 of the way (if using pans, they should be filled about 1/4 of the way). Immediately return to oven. Bake until the yorkshire puddings have just about quadrupled in volume, are deep brown all over, crisp to the touch, and sound hollow when tapped. Smaller ones will take about 15 minutes, popover- or skillet-sized ones will take around 25 minutes.
- Serve immediately, or cool completely, transfer to a zipper-lock freezer bag, and freeze for up to 3 months. Reheat in a hot toaster oven before serving.
Serious Eats / J. Kenji
Lopez-Alt:
Serious Eats / J. Kenji
Lopez-Alt:
↑ Back to top
Beth's Pickled Salmon
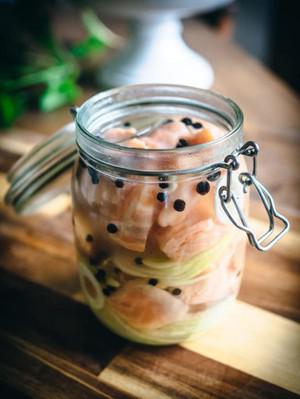
Tags: Appetizers and Dim
Sum Fish
Jewish Pickles
Servings: 8
Ingredients
- 1 1/2 cups Water
- 2 cups rice wine or other clear vinegar
- 6 Tbsp Sugar
- 2 Tbsp Kosher Salt
- 6 Bay Leaves
- 2 Tbsp Pickling Spice
- 2 lb Salmon Fillets skin off cut into 1/2” cubes
- 2 Medium White Onions sliced very thinly
- 1/3 cup Raisins
Marinade:
Steps
- Place pickling spice in cheesecloth so you can easily remove later. Combine all ingredients except salmon, raisins, and onions in a saucepan. Bring to a boil for 5 minutes. Cool to room temperature.
- Place salmon, raisins, and onions in a glass container or jar and pour the marinade over. Cover and refrigerate for 3-4 days, gently stirring once a day.
- Remove cheesecloth bag and serve with toothpicks, crackers, or matzah.
Notes
- A wonderful addition to an hors d’oeuvres platter.
↑ Back to top
Better Than Sex Cake
Servings: 24
Ingredients
- 1 box of chocolate cake mix
- 10 oz diet coke
- 1 egg white
- 6 oz fat free caramel ice cream topping
- 7 oz fat free sweetened condensed milk
- 3 heath bars, crumbled up
- 1 container fat free cool whip
Steps
- Preheat over to 375
- Grease 9X13 pan
- mix cake mix, egg white and diet soda
- Bake for 35 min or until toothpick comes out clean.
- During the last few minutes of baking, put caramel and condensed milk in a sauce pan and stir on medium heat until smooth.
- Take cake out of oven, and poke holes all over the top.
- Pour caramel mixture over warm cake, filling in the holes.
- Sprinkle some of the heath bar crumbs over the top, but save some for the top.
- Cool completely.
- Cover with cool whip and sprinkle remaining heath bar crumbs over it.
Notes
- 4 WW points a serving
↑ Back to top
Bialys

Servings: 10 bialys
Ingredients
- 1 2/3 cups water at 100º
- 2 teaspoons dry yeast
- 4 cups unbleached bread flour (11 or 12 % gluten)
- 1½ teaspoons kosher salt
- Extra flour for bench work
- 4 ounces sweet onion (Walla Walla, Vidalia or similar)
- ½ teaspoon kosher salt
- 1 Tablespoons bread crumbs
- 1 eggwhite mixed with 1 teaspoon water
- 2 Tablespoons good poppyseeds
For the dough:
For the
topping:
Steps
- Mix all dough ingredients in large bread bowl. Turn out and knead 10 minutes. Return to bowl, cover and let rise for 3 hours at room temperature. Punch down and let rise 1½ to 2 hours until doubled in volume. Make onion topping: Finely chop sweet onion; mix with salt and bread crumbs in a small bowl. Cover and let sit 4 hours. Form the bialys: Turn dough out onto work surface, forming a snake by turning the long edge in on itself to stretch the skin. Cut dough into short rounds of 3 ounces each. Tuck sides of each baby bialy under and stretch the tops into mounds. Arrange bialys on two floured wooden peels or lightly oiled cookie sheets, cover loosely with a cloth and let sit for 30 minutes. Top the bialys: Using your thumb or the bottom of a small glass, depress the middle only of each bialy until it is about 1/8 inch thick. Make sure before you continue that they 'slip'. Brush the top of each bialy with a thin coating of eggwhite wash. Scoop a teaspoon of onion mixture into the middle depression, smear some up the inner sides and sprinkle a little over the tops. Finish each bialy with ½ teaspoon of poppy seeds. Baking in a woodfired oven: Your fire should be at least 1½ hours old. Put a 3 inch thick log and a handful of kindling on the fire about 20 minutes before the bialys are ready, and push fire to the back. Brush the floor clean. Bake five bialys at a time in a semicircle around the coals. Turn bialys once after 4 minutes. They will bake in about 8 minutes total. Baking in a conventional oven: Place a pizza stone or quarry tiles on the center rack. Preheat oven to 400º for a half hour. Bake 5 bialys at a time, either directly on the stone or in the cookie sheet on the stone. The bialys will be ready in 10 to 12 minutes, depending on your oven. See original content and other recipes at www.woodfiredkitchen.com. Copyright © 2010 by Don Hogeland
↑ Back to top
Bibimbap
Adapted from https://cooking.nytimes.com/recipes/1024852-bibimbap

Servings: 4 to 6
Ingredients
- 12- to 16-ounce strip steak
- 2 garlic cloves, peeled
- 1 small onion, peeled and quartered
- 1 medium Asian pear, cored and quartered
- 1 (½-inch) piece ginger
- ¼ cup soy sauce
- 2 tablespoons brown sugar, lightly packed
- 2 tablespoons mirin
- 1 tablespoon plus 2 teaspoons vegetable oil
- ½ teaspoon black pepper
- 2 cups uncooked short-grain rice
- 3 cloves garlic, peeled and finely grated
- ¼ cup gochujang paste
- 3 tablespoons mirin
- 1 tablespoon soy sauce
- 1 tablespoon sesame oil
- 1 tablespoon apple cider vinegar
- 1 teaspoon granulated sugar
- 1 (12-ounce) package bean sprouts
- 3 garlic cloves
- 1¾ teaspoons kosher salt (such as Diamond Crystal)
- 6 teaspoons toasted sesame oil
- 3 teaspoons soy sauce
- 1 (5-ounce) package baby spinach
- 1 teaspoon sesame seeds
- 8 ounces shiitakes, stemmed and cut into ½-inch-thick slices
- 1 tablespoon plus 2 teaspoons vegetable oil
- 1½ teaspoons granulated sugar
- 1 English cucumber, thinly sliced
- 2 tablespoons rice wine vinegar
- Crushed red pepper, to taste
- 1 large carrot, peeled and thinly sliced into matchsticks
- 2 large eggs
- 1 scallion, trimmed and thinly sliced, for serving
- Toasted seaweed, for serving (optional)
- Kimchi, roughly chopped, for serving (optional)
FOR THE
BULGOGI AND RICE
FOR THE
GOCHUJANG SAUCE
FOR THE
BANCHAN AND ADDITIONAL TOPPINGS
Steps
- Prepare the bulgogi: Wrap the steak in plastic wrap or place on a clean plate. Place in the freezer until firm, about 20 minutes. This will make it easier to thinly slice.
- Meanwhile, add garlic, onion, pear, ginger, soy sauce, brown sugar, mirin, 1 tablespoon of the oil and black pepper in a blender. Blend until smooth. Transfer to a large bowl or resealable container until steak has firmed in the freezer.
- Once steak has firmed, remove from the freezer and, using a sharp knife, very thinly slice across the grain. Toss sliced beef in the marinade and set aside for 30 minutes and up to 4 hours. If marinating longer than 30 minutes, transfer the meat to the refrigerator. (Bring to room temperature 45 minutes before cooking.)
- Meanwhile, prepare the rice: Rinse the rice in a fine-mesh strainer until the water runs clear, then transfer it to a medium saucepan. Add 2¼ cups water and bring to a boil over medium-high. Once boiling, reduce heat to medium-low and simmer, covered, until most of the water has been absorbed, about 4 minutes. Turn off the heat with the lid on and let sit until rice is cooked through and fluffy, 12 to 15 minutes. Fluff with a fork and set aside, covered. (Alternatively, use a rice cooker and follow the manufacturer’s instructions.)
- Make the gochujang sauce: In a medium bowl, stir garlic, gochujang paste, mirin, sesame oil, soy sauce, vinegar and sugar until well combined. This can be made up to 2 days ahead.
- Prepare the banchan: For the bean sprouts, finely grate 1 garlic clove into a medium bowl. In a medium saucepan, bring 3 cups water and ½ teaspoon salt to a boil over high heat. Add the bean sprouts to the saucepan and cook until softened and slightly translucent, about 3 minutes. Using tongs or chopsticks, transfer to the bowl with the garlic, along with 2 teaspoons sesame oil and 1 teaspoon soy sauce, and toss until combined. Reserve the cooking liquid in the saucepan.
- For the spinach, return the reserved bean sprouts cooking liquid to a boil over high heat. Add the spinach and stir until wilted, about 1 minute. Turn off the heat. Using tongs or chopsticks, transfer the spinach to a colander. Rinse under cold water until cool, then gently squeeze out excess water. Transfer to a small bowl and toss with 1 teaspoon sesame oil and ¼ teaspoon salt until combined. Sprinkle with ½ teaspoon sesame seeds.
- For the mushrooms, mince 2 cloves of garlic. Heat 1 tablespoon vegetable oil in a (12-inch) cast-iron skillet over medium-high. Add shiitake mushrooms and ½ teaspoon salt. Cook, stirring occasionally, until they have softened and started to brown, about 6 minutes. Add the garlic and cook until slightly golden, about 30 seconds. Stir in 2 teaspoons of soy sauce, 1 teaspoon of sugar and 1 teaspoon of toasted sesame oil. Cook for 1 minute and transfer to a small bowl. Turn off the heat and reserve the skillet for assembly.
- For the cucumber, in a medium bowl, combine cucumber, 2 tablespoons vinegar, crushed red pepper (to taste), ½ teaspoon sugar and ½ teaspoon salt. Toss until well combined.
- When ready to cook the bulgogi, heat 2 teaspoons of oil in the reserved skillet over medium-high. Once hot, remove the beef from the marinade and gently shake off any excess liquid. Add half of the beef to the skillet and cook until slightly charred and cooked through, about 1 minute per side. Transfer to a plate and repeat with remaining beef.
- Assemble bibimbap: To the cast-iron skillet, drizzle in 2 teaspoons sesame oil and swirl the pan to fully coat the bottom. Add the cooked rice and spread out into an even layer. Try not to pack in the rice; it should stay fluffy. Turn the heat on to low.
- In a small, nonstick skillet, heat 2 teaspoons of oil over medium-high heat. Crack the eggs into the skillet and fry until the whites are cooked through and the edges are slightly crispy, 4 to 5 minutes. The egg yolks should still be runny. Slide the eggs into the center of the skillet, on top of the rice.
- While the eggs are frying, arrange the bulgogi, carrots, bean sprouts, spinach, shiitake mushrooms and cucumber on top; each component should be in its own sector until ready to mix. Scatter scallion and ½ teaspoon of sesame seeds on top. Drizzle with some of the gochujang sauce.
- Turn off the heat under the skillet. Pierce the egg yolks, and toss with all the components. The heat from the pan will create a crust on the bottom and help cook the runny yolk. Divide among the bowls and serve immediately, topped with kimchi, toasted seaweed and additional gochujang sauce, if desired.
↑ Back to top
Big & Buttery Chocolate Chip Cookies
Ingredients
- 1 cup butter, softened
- 1 cup packed brown sugar
- 3/4 cup sugar
- 2 large eggs
- 1 to 1/2 teaspoons vanilla extract
- 2 to 2/3 cups all-purpose flour
- 1 to 1/4 teaspoons baking soda
- 1 teaspoon salt
- 1 package (12 ounces) semisweet chocolate chips
- 2 cups coarsely chopped walnuts, toasted
Steps
- In a large bowl, beat butter and sugars until blended. Beat in eggs and vanilla. In a small bowl, whisk flour, baking soda and salt; gradually beat into butter mixture. Stir in chocolate chips and walnuts.
- Shape 1/4 cupfuls of dough into balls. Flatten each to 3/4-in. thickness (2-1/2-in. diameter), smoothing edges as necessary. Place in an airtight container, separating layers with waxed or parchment paper; refrigerate, covered, overnight.
- To bake, place dough portions 2 in. apart on parchment paper-lined baking sheets; let stand at room temperature 30 minutes before baking. Preheat oven to 400°.
- Bake 10-12 minutes or until edges are golden brown (centers will be light). Cool on pans 2 minutes. Remove to wire racks to cool. Yield: about 2 dozen.
Notes
- FAVORITE
↑ Back to top
Bigos (Polish Hunter's Stew)
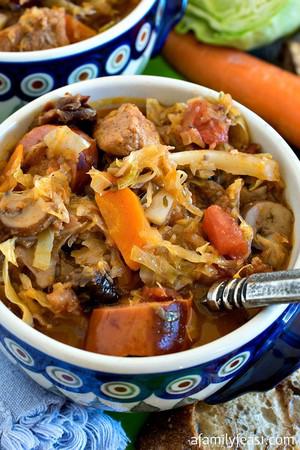
Servings: 10– 12 servings
Ingredients
- 2 tablespoons extra virgin olive oil
- 1 pound pork stew meat (best from a pork butt)
- 1 pound good quality kielbasa, quartered (it gets sliced at the end of the cooking process)
- 1/4 pound thick cut bacon, cut into half inch strips
- 3 cups yellow onion, diced (about one very large onion)
- 2 cups carrots cut into half circle slices, about 1/2 pound
- 1 pound baby bella mushrooms (cremini) sliced
- 3 tablespoons fresh garlic, chopped
- 6 cups shredded cabbage (about one small head)
- 1 cup red wine, such as Burgundy or merlot
- 3 14.4– ounce cans sauerkraut, drained
- 1 14.5– ounce can diced tomatoes in juice
- 1 quart beef broth
- 1 1/2 teaspoon dry thyme
- 1 1/2 teaspoon dry marjoram
- 1 teaspoon allspice
- 1 bay leaf
- 2 tablespoons paprika
- 1/8 teaspoon teaspoon cayenne pepper
- 1 teaspoon caraway seeds
- 1/2 teaspoon kosher salt
- 1/2 teaspoon freshly ground black pepper
- 1 cup pitted prunes, quartered
- Rye bread for serving
Steps
- In a large 5 – 6 quart Dutch oven, heat oil over high.
- Pat the pork stew meat dry and fry half to sear both sides, about 4-5 minutes per batch. Remove to a bowl and reduce temperature of pot to medium high.
- Add the four Kielbasa quarters and brown all sides, about five minutes. Remove to the same bowl.
- Add bacon and onions and sauté for three minutes. You do not want the bacon crisp.
- Add the carrots and sauté two minutes.
- Add the mushrooms and garlic and sauté two minutes.
- Add the cabbage and cook two minutes.
- Add the wine and scrape up brown bits from the bottom, if any.
- Add the drained sauerkraut, canned tomatoes, beef broth, thyme, marjoram, allspice, bay leaf, paprika and cayenne pepper.
- In a mortar and pestle, place caraway seeds with the salt and pepper and crush until the seeds are fine, then add to the mixture.
- Add the seared pork and Kielbasa.
- Raise the heat to high then once bubbling, reduce to low and cook partially covered for 90 minutes, stirring occasionally to make sure it doesn’t stick.
- Remove four whole pieces of Kielbasa to your cutting board.
- Remove and discard bay leaf.
- Add the prunes and simmer ten minutes.
- Slice the kielbasa into bite sized slices and add back to pot and serve in bowls with the rye bread.
- Store leftovers in the refrigerator. Great reheated the next day.
↑ Back to top
Biko (Filipino Sticky Rice Cake)
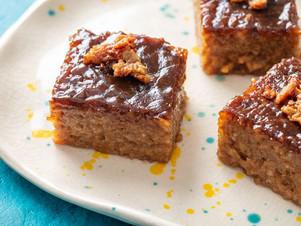
Tags: Desserts
Rice
Servings: 16
Ingredients
- One 14-ounce ( 400 ml) can coconut cream (see note)
- 2 cups (14 ounces; 400 g) glutinous sticky rice (see note)
- One 13.5-ounce ( 400 ml) can coconut milk
- 1 cup (8 ounces; 230 g) dark muscovado or dark brown sugar (see note)
- 1 teaspoon (5ml) vanilla or pandan extract (see note)
- 1/8 teaspoon Diamond Crystal kosher salt; for table salt, use half as much by volume
Steps
- Adjust oven rack to middle position and preheat to 375°F (190°C). In a 12-inch nonstick skillet, bring the coconut cream to a boil over high heat. Lower the heat to maintain a steady simmer. Cook, stirring every few minutes with a wooden spoon or heatproof spatula, until the curds separate from the oil, smell toasty, and turn deep golden brown, about 30 minutes.
- Strain curds through a fine-mesh strainer set over a small heatproof bowl; set aside, reserving strained coconut oil. Transfer the strained latik to a separate small bowl and set aside; the curds will crisp up as they cool. Clean skillet and strainer.
- Grease an 8-inch square anodized aluminum pan with the reserved coconut oil (save remaining coconut oil for another use).
- In a large bowl, cover rice with water by several inches. Using your hands, swish the rice in the water until water turns cloudy, about 30 seconds. Strain through fine-mesh strainer and repeat two more times.
- In a 3-quart saucepan, combine the washed rice with 2 cups (475ml) water, cover, and bring to a boil over high heat. Lower heat to maintain a simmer, and cook until the rice is tender and water has been absorbed, about 18 minutes. Remove from heat and keep covered.
- In the cleaned 12-inch nonstick skillet, combine the coconut milk, muscovado sugar, vanilla or pandan extract, and salt. Bring to a boil over medium-high heat, watching constantly to ensure it doesn't boil over. Lower heat to maintain a simmer. Cook, stirring occasionally, until the mixture has formed a dark brown caramel that coats the back of a spoon, about 10 minutes; you should have 1 1/2 cups (14 ounces; 400g) caramel. Remove from heat.
- Measure 1/2 cup (5 ounces; 140g) of the caramel and set aside. Add the cooked rice to the remaining caramel in the skillet and stir to combine. Return to medium heat and cook, stirring constantly, until caramel is absorbed and the biko mixture begins to thicken, about 5 minutes.
- Transfer biko to prepared pan and spread in an even layer. Spread the reserved 1/2 cup caramel on top.
- Bake biko until the caramel topping is hot and bubbly, about 20 minutes.
- Transfer pan to a wire rack to cool, about 45 minutes. Slice into sixteen 2-inch squares. Top each square with 1/2 teaspoon of reserved latik curds before serving.
- Special Equipment
- 8-inch square anodized aluminum cake pan
Notes
- When purchasing coconut cream, avoid ones that include stabilizers and emulsifiers in their ingredients lists, which will prevent the curds from separating from the oil.
- Glutinous rice (also sold as “sweet” and “sticky” rice) can be found online or at Asian supermarkets.
- Muscovado sugar is sold in many grocery stores; we prefer it for its rich molasses flavor and moisture content. If you cannot find muscovado sugar, dark brown sugar is a great substitute.
- Pandan extract has a mild grassy vanilla flavor with hints of coconut. It's sold in many Asian supermarkets.
- Make-ahead and Storage
- To store biko, cover tightly with foil and refrigerate for up to 5 days. Reheat in the microwave in 15-second intervals.
- You can also slice and freeze biko on a parchment-lined baking sheet until firm. Transfer to a zipper lock bag and store in the freezer for up to 2 months. Defrost before reheating in the microwave.
- Latik curds can be used to top many other Filipino desserts. Store in an airtight container and refrigerate for up to 1 week or freeze up to 1 month.
↑ Back to top
Bill Smith's Atlantic Beach Pie
Adapted from http://www.npr.org/2013/04/11/176279512/a-north-carolina-pie-that-elicits-an-oh-my-god-response

Ingredients
- 1 1/2 sleeves of saltine crackers
- 1/3 to 1/2 cup softened unsalted butter
- 3 tablespoons sugar
- 1 can (14 ounces) sweetened condensed milk
- 4 egg yolks
- 1/2 cup lemon or lime juice or a mix of the two
- Fresh whipped cream and coarse sea salt for garnish
For the crust:
For the
filling:
Steps
- Preheat oven to 350 degrees.
- Crush the crackers finely, but not to dust. You can use a food processor or your hands. Add the sugar, then knead in the butter until the crumbs hold together like dough. Press into an 8 inch pie pan. Chill for 15 minutes, then bake for 18 minutes or until the crust colors a little.
- While the crust is cooling (it doesn't need to be cold), beat the egg yolks into the milk, then beat in the citrus juice. It is important to completely combine these ingredients. Pour into the shell and bake for 16 minutes until the filling has set.
- The pie needs to be completely cold to be sliced. Serve with fresh whipped cream and a sprinkling of sea salt.
Notes
- FAVORITE
↑ Back to top
Birria De Res (Beef Birria)
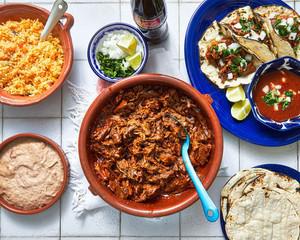
Tags: Beef
Meat Mexican
Servings: 8
Ingredients
- 1 1/2 teaspoons black peppercorns
- 1/4 teaspoon cumin seeds
- 2 cloves
- 4 cups (945ml) homemade chicken stock or store-bought low-sodium chicken broth
- 2 plum (Roma) tomatoes (8 ounces; 225g)
- 2 tomatillos, husks removed (4 ounces; 85g)
- 3 guajillo chiles,stems removed
- 2 California chiles, stems removed
- 3 árbol chiles, stems removed
- One 3.5-ounce pack achiote paste (100g) (see notes)
- 2 tablespoons gochujang (see notes)
- 5 medium cloves garlic
- 4 pounds (2kg) boneless beef chuck roast, trimmed of excess fat and cut into 2-inch cubes
- Kosher salt and freshly ground black pepper
- 1 cup water
- 1 whole yellow onion, unpeeled, ends trimmed (8 ounces; 227g)
- 2 whole bay leaves
- Diced white onion
- Minced fresh cilantro leaves and tender stems
- Warmed corn tortillas
- Cooked rice ( see notes)
- Cooked beans
- Lime wedges
For Serving:
Steps
- In a large saucepan, toast peppercorns, cumin seeds, and cloves over medium heat until fragrant, about 30 seconds. Add chicken stock, tomatoes, tomatillos, guajillo, California, and árbol chiles. Bring to a boil over high heat, then turn off the heat, and let rest until tomato skins begin to shrivel and chiles soften, about 15 minutes.
- Transfer chicken stock mixture to a blender. Crumble achiote paste into the blender by hand. (see notes) Add gochujang and garlic cloves and blend (in batches if needed) into a smooth puree. Set aside.
- Generously season beef all over with salt and pepper. In a stock pot or large Dutch oven, add the beef, blended chile sauce, water, onion, and bay leaves and cook, covered, until just simmering.
- Continue to cook, covered, adjusting heat as needed to maintain gentle simmer (about 180-190°F; 82-88°C), until beef is fork-tender, 3 to 4 hours. Discard onion and bay leaves and season with salt and pepper to taste. Hold warm until ready to serve.
- For Serving: Using a slotted spoon, transfer beef to a cutting board. Using 2 forks, shred beef into bite-sized pieces or lightly chop. Ladle consomé into individual serving bowls and top consomé with diced onion and cilantro (this is for dunking and/or spooning over the meat). Serve shredded beef with prepared consomé, warm tortillas, rice, beans, and lime wedges. (see notes)
Serious Eats / Lorena
Masso:
Serious Eats / Lorena
Masso:
Serious Eats / Lorena
Masso:
Serious Eats / Lorena
Masso:
↑ Back to top
Black Bean & Hominey Salad
Servings: Yields about 3/4 cup
per serving
Ingredients
- 15 oz canned black beans, rinsed and drained
- 15 oz canned hominy, rinsed and drained
- 1 cup(s) grape tomatoes, halved
- 1 small yellow pepper(s), diced
- 1/2 small uncooked red onion(s), diced
- 1/3 cup(s) cilantro, fresh, chopped
- 1 medium jalapeño pepper(s), seeded, minced
- 2 Tbsp fresh lime juice
- 1 tsp honey
- 1 tsp olive oil, extra virgin
- 1/4 tsp ground cumin
- 1/4 tsp table salt
Steps
- In a medium-size bowl, combine beans, hominy, tomatoes, pepper, onion, cilantro and jalapeno.
- In a small bowl, whisk together lime juice, honey, oil, cumin and salt; pour over bean mixture and toss well to combine. Yields about 3/4 cup per serving.
Notes
- FAVORITE
↑ Back to top
Black Chickpea Hummus

Servings: 3 cups
Ingredients
- 2 3/4 cup black chickpeas (about 7 ounces)
- 1/2 cup tahini
- 2 tablespoons lemon juice
- 1 finely minced garlic clove
- 1/4 cup extra virgin olive oil
- 2 tablespoons chopped parsley
Steps
- Place the chickpeas in a bowl with enough water to cover them by two to three inches and allow to soak 8 hours.
- Drain off the soaking liquid, transfer the chickpeas to a pot and cover with enough cold water to cover by at least three inches. Bring to a boil and immediately reduce to a gentle simmer. Continue simmering until the chickpeas are tender, about 2 hours. Drain, reserving 2 cups of the cooking liquid. (You won’t need all of it.)
- Combine the chickpeas in a food processor with the tahini, lemon juice, garlic, salt and 1 cup plus 2 tablespoons of the cooking liquid. Run the machine until the mixture is fully pureed, stopping several times to scrape down the sides.
- Place a spoon in the tahini and lift it straight up. The mixture should be thick enough to take time to fall off the spoon, and not so thick that it falls in one big clump. It should ribbon slightly. If it is too thick, add more of the cooking liquid, one tablespoon at a time, testing between additions.
- Place the hummus in a shallow bowl and draw a concentric spiral in the surface with a spoon. Drizzle the well with the extra virgin olive oil and sprinkle with fresh parsley.
↑ Back to top
Blackberry Limeade
Ingredients
- 6 cups water, divided
- 3 cups fresh blackberries $
- 1 cup sugar
- 2/3 cup fresh lime juice (about 4 limes) $
- 8 thin lime slices $
- Fresh blackberries (optional) $
Steps
- Place 1 cup water and 3 cups blackberries in a blender; process until smooth. Press blackberry puree through a sieve into a large pitcher; discard seeds. Add remaining 5 cups water, sugar, and juice to pitcher; stir until sugar dissolves. Place 1 lime slice and a few blackberries, if desired, into each of 8 glasses; pour about 1 cup limeade over each serving.
Notes
- FAVORITE
↑ Back to top
Blood Orange Balsamic Vinegar
Is starred.
Ingredients
- 250 ml White Balsamic Vinegar
- 40 ml Blood Orange Juice
Steps
- Combine and Strain into sterilized bottles
Notes
- FAVORITE
↑ Back to top
Blood Orange Balsamic Vinegar
Ingredients
- 250 ml White Balsamic Vinegar
- 40 ml Blood Orange Juice
Steps
- Combine and Strain into sterilized bottles
Notes
- FAVORITE
↑ Back to top
Blueberry Cream Cheese Pastry Braid

Tags: Baking
Pastry
Servings: 2 braids, 6 servings
each
Ingredients
- 1/4 cup (60ml) warm water (between 100-110°F, 38-43°C)
- 2 and 1/4 teaspoons active dry or instant yeast ( 1 standard packet)*
- 1/2 cup (120ml) whole milk, at room temperature (between 68–72°F, 20-22°C)
- 1 large egg, at room temperature
- 1/4 cup ( 50g) granulated sugar
- 1 teaspoon salt
- 14 Tablespoons ( 205g) unsalted butter, cold
- 2 and 1/2 cups ( 315g) all-purpose flour ( spoon & leveled), plus more for generously flouring hands, surface, and dough
- 8oz ( 224g) full-fat cream cheese, softened to room temperature
- 1 large egg yolk
- 1/3 cup ( 67g) granulated sugar
- 1 teaspoon fresh lemon juice
- 1 teaspoon pure vanilla extract
- 2/3 cup ( 125g) fresh or frozen blueberries (do not thaw)
- optional: 1/3 cup (40g) sliced almonds
- 1 large egg
- 2 Tablespoons (30ml) whole milk
- 1/2 cup ( 60g) confectioners’ sugar
- 1 Tablespoon (15ml) heavy cream or milk
- 1/2 teaspoon pure vanilla extract
Pastry Dough:
Cream Cheese
Filling:
Egg Wash:
Vanilla Icing:
Steps
- Preliminary note: To help guarantee success, I recommend reading through the recipe before beginning. I also detail this recipe in the separate pastry dough post. Do not use an electric mixer for this dough. It’s best if the dough is folded together with a wooden spoon or rubber spatula since it is so sticky. There is very minimal mixing required.
- Make the Pastry Dough: Whisk the warm water, yeast, and 1 Tablespoon (6g) of sugar together in a large bowl. Cover and allow to rest until foamy on top, about 5 minutes. If the surface doesn’t have bubbles on top or look foamy after 15 minutes (it should if the yeast isn’t expired), start over with a fresh packet of yeast. Whisk in remaining sugar, the milk, egg, and salt. Once these wet ingredients are mixed together, lightly cover and set the bowl aside as you work on the next step.
- Cut the cold butter into 1/4 inch slices and add to a food processor or blender. Top with 2 and 1/2 cups flour. Pulse the mixture 12-15 times, until butter is crumbled into pea-size bits. See photo below for a visual. Using a food processor or blender is best for this dough. Keeping that in mind, if you don’t have one, you can use a pastry cutter to work in the butter.
- Pour the flour mixture into the wet yeast mixture. Very gently fold everything together using a rubber spatula or wooden spoon. Fold *just until* the dry ingredients are moistened. The butter must remain in pieces and crumbles, which creates a flaky pastry. Turn the sticky dough out onto a large piece of plastic wrap, parchment paper, aluminum foil, or into any container you can tightly cover.
- st Refrigeration: Wrap the dough/cover up tightly and refrigerate for at least 4 hours and up to 48 hours.
- nd Refrigeration: Wrap up/seal tightly and refrigerate for at least 1 hour and up to 24 hours. You can also freeze the dough at this point. See freezing instructions.
Roll & Fold: Take the dough out of the refrigerator to begin the
“rolling and folding” process. If the dough sat for more than 4 hours,
it may have slightly puffed up and that’s ok. (It will deflate as you
shape it, which is also ok.) Very generously flour a work surface. The
dough is very sticky, so make sure you have more flour nearby as you
roll and fold. Using the palm of your hands, gently flatten the dough
into a small square. Using a rolling pin, roll out into a 15×8 inch
rectangle. When needed, flour the work surface and dough as you are
rolling. Fold the dough into thirds as if it were a business letter.
(See photos and video tutorial.) Turn it clockwise and roll it out
into
a 15 inch long rectangle again. Then, fold into thirds again. Turn it
clockwise. You’ll repeat rolling and folding 1 more time for a total
of
3 times.
Line two large baking sheets with parchment paper or silicone baking
mats. Rimmed baking sheets are best because butter may leak from the
dough as it bakes. If you don’t have rimmed baking sheets, when it’s
time to preheat the oven, place another baking sheet on the oven rack
below to catch any butter that may drip.
Make the cheese filling: In a medium bowl using a handheld or stand
mixer fitted with a paddle attachment, beat the cream cheese and egg
yolk together on medium speed until smooth. Add the sugar, lemon
juice,
and vanilla, then beat until smooth. Cover and refrigerate until ready
to use.
Take the dough out of the refrigerator and cut it in half. Wrap 1 half
up and keep refrigerated as you work with the first half. (You can
freeze half of the dough at this point, use the freezing instructions
below.)
On
a floured work surface, roll dough out into a 12×8 inch rectangle. You
can roll out the dough on a lightly floured piece of parchment paper
or
lightly floured silicone baking mat instead because you will transfer
the shaped dough to a lined baking sheet next.
Using a sharp knife, cut off two corners of the dough (on one 8-inch
side) and then two small triangles 3 inches apart from each other on
the other end (the other 8-inch side). See visual below.
Spread 1/2 of the cream cheese filling down the length of the center
of
the strip, which should be about 3 inches wide. Dot with half of the
blueberries (1/3 cup). Using a sharp knife, pastry wheel, or pizza
cutter, cut 10 slanting strips (3/4 – 1 inch wide each) along both
sides. Fold strips over filling, alternating each side to resemble a
twist or a braid. Fold the bottom end up to seal the filling inside.
Repeat with the second half of the dough and the rest of the filling.
The braids may seem very narrow, but they puff up and out as they
bake.
Egg
Wash: Whisk the egg wash ingredients together. Brush all over the
dough. If you want a little crunch from almonds, sprinkle them evenly
on top of the braids after brushing the dough with egg wash.
I
strongly recommend refrigerating the shaped braids before baking for
at
least 15 minutes and up to 1 hour before baking. The braids tend to
leak more butter and/or lose more shape if they haven’t chilled.
Preheat oven to 400°F
(204°C).
Bake each braid for 18-22 minutes or until golden brown. Some butter
may leak from the dough, that’s completely normal and expected. Feel
free to remove the baking sheets from the oven halfway through baking
and brush the dough with any of the leaking butter, then place back in
the oven to finish baking. (That’s what I do!)
Remove baked braids from the
oven and cool for at least 5 minutes before icing, cutting, and
serving.
Vanilla Icing: Whisk the icing ingredients together. If you want a
thicker icing, whisk in more confectioners’ sugar. If you want a
thinner icing, whisk in more milk or cream. Drizzle over warm pastries
and serve.
Cover leftover iced or un-iced pastries and store at room temperature
for 1 day or in the refrigerator for up to 5 days. Or you can freeze
them for up to 3 months. Thaw before serving. Before enjoying, feel
free to reheat leftover iced or un-iced pastries in the microwave for
a
few seconds until warmed.
Notes
- Make Ahead & Freezing Instructions: Prepare the dough as instructed in steps 2-4. At this point the dough can be refrigerated up to 48 hours. You can also prepare the dough through step 6. At this point the dough can be refrigerated up to 24 hours. During or after this second chilling time, you could also freeze the dough for up to 1 month. (I don’t recommend freezing the dough before the rolling and folding step.) Thaw overnight in the refrigerator, then continue with step 8. You can also freeze the shaped and filled braids after shaping them in step 13. Thaw in the refrigerator, then continue with step 14.
- Temperature & Substitutions: The temperature of your ingredients is imperative to this pastry’s success. Make sure you take the time to warm the water and bring the milk to room temperature. Keep the butter in the refrigerator until you need it in step 3. I do not recommend any substitutions in this carefully formulated dough, though a lower fat or nondairy milk works in a pinch. For the egg wash, low fat or nondairy milks work, as do heavy cream or half-and-half.
- Yeast: You can use either active dry yeast or instant (quick rise) yeast. The instructions and amount are exactly the same no matter which you use. Reference my Baking with Yeast Guide for answers to common yeast FAQs.
- Halve the Recipe? I don’t recommend halving this dough recipe. Make the dough as written, then freeze half after step 10.
↑ Back to top
Blueberry Peach Feta Salad!!!
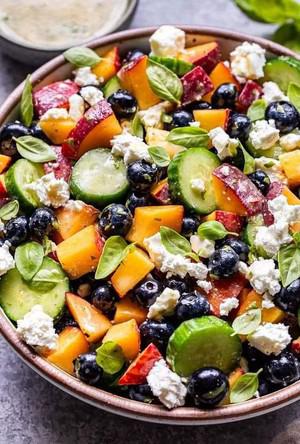
Ingredients
- 1 tbsp Basil
- 1 pint Blueberries, fresh
- 2 Peaches
- 2 Persian cucumbers
- 1 tbsp Dijon mustard
- 1 tbsp Honey
- 3 tbsp Lemon juice, fresh
- 1 Kosher salt and fresh ground black pepper
- 1 tbsp Olive oil
- 1/2 cup Feta
Produce:
Condiments:
Baking &
Spices:
Oils &
Vinegars:
Dairy:
Steps
- In a large bowl, combine the chopped basil, fresh blueberries, sliced peaches, and sliced Persian cucumbers.
- In a separate small bowl, whisk together the Dijon mustard, honey, fresh lemon juice, salt, and pepper.
- Gradually whisk in the olive oil until the dressing is well combined.
- Pour the lemon basil vinaigrette over the salad ingredients in the large bowl and toss gently to coat everything evenly.
- Sprinkle the crumbled feta cheese over the salad.
- Toss the salad one more time lightly to distribute the feta cheese throughout.
- Serve the Blueberry Peach Feta Salad immediately as a refreshing and flavorful summer salad.
Enjoy!
↑ Back to top
Blueberry-Ricotta Tart
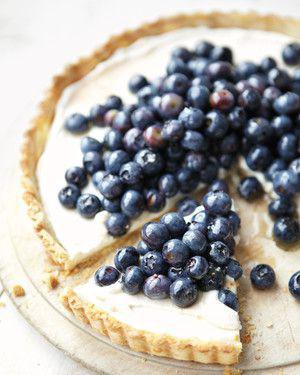
Tags: Cheese
Pies and Tarts
Servings: 8
Ingredients
- 1 cup all-purpose flour
- ¼ cup finely ground blanched almonds
- 2 tablespoons toasted wheat germ
- 2 tablespoons light brown sugar
- ½ teaspoon kosher salt
- ½ teaspoon baking powder
- 4 tablespoons cold, unsalted butter, cut into pieces
- 1/4 to 1/3 cup low-fat buttermilk
- 1 ¼ cups part-skim ricotta
- ¼ teaspoon salt
- ¼ teaspoon cinnamon
- 1 tablespoon plus 2 more tablespoons honey
- 2 cups blueberries
Steps
- In a food processor, pulse together all-purpose flour, finely ground blanched almonds, toasted wheat germ, light brown sugar, kosher salt, and baking powder. Add cold, unsalted butter, and process until largest pieces are the size of small peas. With machine running, add low-fat buttermilk until dough just holds together. Pat into a disc, wrap in plastic, and refrigerate for 1 hour (or overnight).
- Preheat oven to 375 degrees. On a lightly floured surface, roll out dough 1/8 inch thick. Fit into a 9 1/2-inch tart pan with removable bottom. Trim edges flush with pan and prick holes in dough with fork. Freeze for 15 minutes. Line with parchment paper and fill with pie weights. Bake for 25 minutes. Remove parchment and weights and bake until golden brown and dry, 15 to 20 minutes more. Let cool.
- Puree part-skim ricotta with 1/4 teaspoon salt, cinnamon, and 1 tablespoon honey. Spread into cooled shell. Stir 2 tablespoons honey gently into blueberries and arrange on top of tart. Chill for 2 hours.
Notes
- Blueberries are at their peak in July. Go organic if you can because non-organic berries are heavily sprayed.
↑ Back to top
Bobby Bread
Ingredients
- Flour, bread 500 g
- Sugar, white 30g
- Salt 10 g
- Yeast (SAF i.e instant) 5g
- Eggs ~223g (4 each)
- Butter, unsalted 56 g
- Water, cool 200 ml/ g
Steps
- Note: Mixing & kneading was done with an electric stand mixer w/ paddle at low (est) speed.
- Combine dry ingredients.
- Cut in butter
- Add eggs one-by-one
- Add water
- Mix for ~5 minutes or until dough forms gluten sheets.
- Note: When done, the dough will be very wet.
- Fold dough over in mixing bowl with a spatula; cover and ferment (proof) at room temp for a total of 8 hours. Of course, you'll have to punch the thing down a few times. Actually "punching"is not a good idea. Better to lift and fold it over until it collapses.
- Turn out onto a floured board and fold it into a uniform rectangle (no bulges or tapering) that mirrors the proportions of the bread pan.
- Spray or grease the pan on all interior surfaces; lay in the dough, slide on the cover and let rise until its about 2/3rd the volume of the pan.
- Bake in a preheated 177 deg C / 350 deg F oven for approx 45 minutes or until it sounds hollow when thumped / skewer comes out dry.
Notes
- Total water content from eggs* and tap water approx 350 ml/ g or approx 70% of the wt of the flour.
- (Since eggs are approx 68% water, 4 eggs at 223 g contain approx. 0.68* 233g= 152 ml / grams of water.)
↑ Back to top
Boiled Beef Slices in a Fiery Sauce (Shui zhu niu rou)
Tags: Beef
Chinese
This dish, known in Chinese simply as
"water-boiled beef," comes from Zigong, the city poetically referred to
as Sichuan's "salt capital," because it was the center of a salt-mining
industry that flourished from the Han dynasty until the 1960s.
Salt-traders from different provinces built their own guild
headquarters in Zigong; one of them, a splendid eighteenth-century
complex of buildings with a magnificent, many- horned gatehouse,
remains, and now houses a local salt industry museum. In a
timber-framed building nearby, bare-chested laborers work in a sauna-
like atmosphere, tending simmering salt pans that are fueled, as they
have been for centuries, by natural gas. The pans are encrusted with
salt crystals; salt drifts across the floor like snowfall.
In the past, oxen drove the wooden machinery that drew the salty bittern from deep within the Earth; when they died, miners bought the meat cheaply and boiled it up for their suppers, originally with Sichuan pepper and ginger, later wit
In the past, oxen drove the wooden machinery that drew the salty bittern from deep within the Earth; when they died, miners bought the meat cheaply and boiled it up for their suppers, originally with Sichuan pepper and ginger, later wit
I made this. Is starred.
Ingredients
- 9 oz (250g) beef tenderloin
- 1 tbsp Shaoxing wine
- ¾ cup (18Oml) cooking oil
- 7oz (200g) Napa cabbage (preferably the white crunchy parts)
- 2 celery sticks (about 3½ oz/100g)
- 10-12 dried chillis
- 2 tsp whole Sichuan pepper
- 1 tbsp potato starch
- 2½ tbsp Sichuan chilli bean paste
- 2 tsp ground Variations
- 1 tbsp finely chopped garlic
- 1tbsp finely chopped ginger
- 1½ cups (350ml) stock
- ¼ tsp dark soy sauce
- A few sprigs of cilantro or
- 2 tbsp thinly sliced scallion greens
- Salt
Steps
- Cut the beef across the grain into thin, broad slices. Place in a bowl with 4 tsp salt, the Shaoxing wine and 1 tbsp oil. Mix well and set aside while you prepare the other ingredients.
- Place the Napa cabbage on a chopping board. Cut lengthwise into finger-thick slices, and then into 2-inch (5cm) pieces. Remove any strings from the celery, cut into 2-inch (5cm) lengths, and then into thin batons.
- Prepare the "knife-mouth chillis." Snip the chillis in half or into 4-inch (2cm) sections and shake out the seeds as much as possible. Heat 3 tbsp oil in a wok over high heat. Before the oit gets too hot, add the chillis and stir. When they begin to sizzle, add the Sichuan pepper and stir until the chillis begin to darken, then quickly remove the spices from the wok with a slotted spoon or fine-mesh strainer, letting any excess oil drain back into the wok. Turn the spices out onto a chopping board and finely chop (or pound with a mortar and pestle). Set aside until needed.
- Add the potato starch and 1 tbsp cold water to the beef and mix well to coat all the slices.
- Return the oily wok to high heat and, when it's hot, tip in the vegetables and stir-fry until hot and barely cooked, seasoning with about a tsp salt. Pile the vegetables in the center of a large, deep serving bowl.
- Add 3 tbsp oil to the wok and heat over medium heat. Add the chilli bean paste and stir-fry gently until the oil is red and fragrant. Add the ground chillis and stir a couple of times, then tip in the garlic and ginger and continue to stir-fry until they smell wonderful. Pour in the stock and soy sauce and bring to a boil. Scatter the beef slices into the boiling liquid, nudging then so they don't stick together. When the beef is just cooked, pour the contents of the wok over the waiting vegetables.
- Rinse and dry the wok, then return to high heat and add 5 tbsp oil. Stir until the oil is sizzling hot (test the temperature by dripping some onto some scallion or vegetable offcuts in a heatproof bowl: it should produce a sudden, dramatic sizzle). When the oil is ready, quickly tip the reserved spices into the center of the serving bowl and ladle over the hot oil. Scatter over the cilantro or scallion greens and rush the bowl to the table before the sizzling stops!
Notes
- Variations
- The same method can be used for all kinds of other ingredients, including thick slices of plain white tofu (which don't need a marinade), sliced pork (in which case, add 1 tbsp chopped garlic with the chopped spices before you ladle over the hot oil, and omit the cilantro), and squid, cut into frilly slices (again, no
- need for a marinade).
- The dish is traditionally finished off with a scattering of what they call "knife-mouth chillis" (daokou haijiao)-dried chillis and Sichuan pepper that are fried and then chopped-but if you'd prefer a shortcut, you can use 1 tbsp coarsely ground chillis and 4 tsp ground roasted Sichuan pepper instead.
↑ Back to top
Boiled Chicken Dumplings

Ingredients
- 4 to 5 dried shitake mushrooms
- 3 scallions (green parts only)
- 1 cup jicama
- 1 lb. ground chicken
- 1/2 cup olive oil
- 1/4 cup soy sauce
- 1 tablespoon sugar
- salt , to taste
- 2 packages round dumpling wrappers
- Chinkiang vinegar or rice vinegar, soy sauce, and sesame oil
Steps
- Re-hydrate shitake mushrooms: place dried mushrooms in a bowl, pour hot water over them to cover, and weigh them down with a saucer or jar to ensure they stay submerged. Leave overnight.
- Drain mushrooms and squeeze them to remove excess water. Finely chop mushrooms, scallions, and jicama.
- Mix vegetables into the chicken, then add the olive oil, soy sauce, sugar, and salt and mix to combine well.
- Test the mixture: Boil a small amount of water in a saucepan and use a spoon to scoop out about a teaspoon's worth of the chicken mixture. Place the spoon with mixture into the water and boil for 2-3 minutes, until it is cooked through. Taste, and adjust seasonings if needed.
- Set up your workspace with a small bowl of water, a tray or sheet pan covered in a kitchen towel, and plenty of paper towels. Fill each dumpling according to the step-by-step instructions here [this should be a link]
- , or by simply wetting the edges of the wrapper with water and folding the wrapper in half with some of the filling inside to create a half-circle, pinching the edges firmly to seal. When making dumplings, begin with a small amount of filling, so that they're easier to work with, and increase the amount as you get used to the technique. Set each dumpling aside on the cloth-covered tray.
- To cook the dumplings, bring a large pot of water to a boil and drop a few dumplings into the water. When the dumplings float to the surface, add a cup of cold water to the pot. When the water reaches a boil for a second time, the dumplings should be done.
- Serve with bowls of Chingkiang vinegar or with a mixture of equal parts rice vinegar and soy sauce and a few drops of sesame oil.
Notes
- FAVORITE
↑ Back to top
Bolillos
Adapted from https://patijinich.com/bolillos/
Tags: Breads
Mexican
Ingredients
- 3 1/4 cups (340g) all-purpose flour
- 3 leveled teaspoons instant yeast
- 2 1/2 teaspoons sugar
- 2 teaspoons salt
- 1 1/4 cups (284g) lukewarm water
Steps
- Mix and knead all of the ingredients — by hand, stand mixer with dough hook, or bread machine — to make a smooth, elastic dough.
- Cover the dough and let it rise until doubled in bulk, about 45 to 60 minutes.
- Gently deflate the dough and turn out onto a lightly floured surface, shape into a ball and divide it into 8 equal pieces (about 85g each).
- One by one, gently flatten each piece a little by pressing it with your fingers against the surface. Bring all the edges inwards, pinching it into a ball shape and pressing to seal. Flip it to have the sealed part on the bottom and roll it a little bit over the top to make it round, then place onto a parchment-lined baking sheet keeping the sealed part on the bottom. Continue with the rest of the dough. Once you are done, brush or spray the 8 balls with water so they will not dry out, cover, and let rest for 10 minutes.
- Preheat the oven to 400°F. Lightly grease (or line with parchment) one baking sheet.
- Working with one piece of dough at a time, use your hands to flatten it into a 4” to 4 1/2" round. Starting at the bottom edge, lift the two “corners” and fold inward, as if making a folded triangle. Press lightly to seal, then roll up and over again and repeat by folding the bottom edge inward, continuing as if you are making a folded triangle. When finished, you will have a somewhat oval piece of dough that is chubbier in the center.
- Use the palms of your hands to roll out the ends of the oval further, making the ends much thinner than the center.
- Place the bolillos on the prepared baking sheet as you shape them. Repeat with the remaining pieces of dough.
- Brush or spray the 8 shaped bolillo balls with water so they will not dry out, cover and let rise until puffy, 30 to 45 minutes.
- When ready to bake, brush or spray the bolillos with water one more time and take a sharp knife, or lame, and score the bolillos with one long slash from end to end, about 1/4” deep. The bread may deflate a bit; that’s OK, it’ll pick right up in the hot oven.
- Bake until golden, about 20 to 22 minutes.
- Remove the bread from the oven and cool on a rack.
- Store bread, securely wrapped, at room temperature for a couple days or so; freeze for longer storage.
↑ Back to top
Bombay-style Chicken with Red Split Lentils

Tags: Chicken
Indian
This dish is really like a hearty stew, just
perfect for cold winter days. You could add vegetables such as shelled
peas or 1 cm ( inch) lengths of green beans. Put them in when you add
the lemon juice. Traditionally, rice is served on the side but you
could serve thickly cut slices of some dark, crusty bread.
Servings: 6-7
Ingredients
- 250 g (9 oz) red split lentils, picked over, washed and drained
- 75 g (3 oz) onions, peeled and chopped
- 1 fresh, hot green chilli, finely sliced
- 2 teaspoons ground cumin } teaspoon ground turmeric
- 1 teaspoon peeled, very finely chopped ginger
- 1.5 liters (24 pints) water
- 3 lb jointed chicken pieces, skinned
- 24 teaspoons salt
- 2 tablespoons vegetable oil
- 1 teaspoon cumin seeds
- 2-4 cloves garlic, peeled and finely chopped
- 1/2 teaspoon cayenne pepper
- 2 tablespoons lemon juice
- 1/2 teaspoon sugar
- 1/4teaspoon garam masala (page 205)
- Optional garnish: 3 tablespoons chopped, fresh green coriander
Steps
- Combine the lentils, onions, green chilli, ground cumin, turmeric, half of the chopped ginger and the water in a big, heavy pan. Bring to a simmer, cover, leaving the lid very slightly ajar, and cook on low heat for 45 minutes. Add the chicken and the salt. Mix and bring to a boil. Cover, turn heat to low and simmer gently for 25-30 minutes or until the chicken is tender.
Put
the oil in a small frying-pan and set over medium heat. When hot, put
in the cumin seeds. As soon as the seeds begin to sizzle - this just
takes a few seconds - put in the remaining i teaspoon chopped ginger
and the garlic. Fry until the garlic turns slightly brown. Now put in
the cayenne. Lift up the frying- pan immediately and pour its entire
contents - oil and spices – into the pan with the chicken and lentils.
Also add the lemon juice, sugar and Garam Masala. Stir to mix and cook
on medium-low heat for 5 minutes.
Sprinkle the fresh coriander
over the top just before you serve.
↑ Back to top
Braised Cabbage

Tags: Vegetables
Servings: 4
Ingredients
- 1 medium green cabbage about 2 lb
- 1 tablespoon canola oil or vegetable oil
- 3 cloves garlic minced
- 1 teaspoon sesame oil
- 2 tablespoons San-J Tamari Soy Sauce
- ¾ teaspoon kosher salt
- ⅛ teaspoon of red pepper flakes
- ⅛ teaspoon ground black pepper
- ½ cup water
- 2 tablespoons tahini
- ½ teaspoon maple syrup or agave
- ¼ teaspoon kosher salt
- 1 teaspoon San-J Tamari Soy Sauce
- 1 small garlic clove minced; optional
- 2 tablespoons water
- 2 tablespoons chopped parsley
- 2 teaspoons white sesame seeds toasted*
For the
Cabbage:
For the Tahini
Dressing:
Garnishes:
Steps
- Preheat the oven to 350°F.
- Peel the outer layer of the cabbage off if it looks dirty. Cut the cabbage down the core and into 6-7 wedges.
- Heat a large oven-safe skillet (with high sides) with the canola or vegetable oil over medium heat. Carefully place the cabbage pieces into the skillet and sear on each side for 3-5 minutes until caramelized, then turn off the heat. If your pan is on the smaller side, sear the cabbage wedges in batches and then return all the cabbage wedges to the pan once all batches are seared.
- While the cabbage is cooking, make the sauce. In a medium bowl, whisk together the minced garlic, sesame oil, tamari soy sauce, salt, red pepper flakes, pepper, and water. Pour the tamari-sesame sauce mixture over the cooked cabbage pieces in the skillet. Carefully tilt the skillet and using a spoon, spoon the sauce a few times over any areas of the cabbage that didn’t get well coated.
- Cover the skillet with an oven-safe lid or foil and bake for 30 minutes in the center rack of the oven. Then, carefully remove the lid/foil and bake at 425°F for 15 minutes.
- Remove the pan from the oven and set it on a wire cooling rack. Carefully, spoon the remaining hot liquid from the bottom of the pan onto the cabbage wedges a few times. Let it cool for at least 10 minutes before serving.
- While the cabbage cools, make the tahini dressing by whisking all the ingredients together in a medium bowl. Add more water as needed until you’ve reached a creamy drizzle consistency.
- When ready to serve, spoon any remaining liquid over the cabbage a few times. Then, drizzle the tahini dressing over the cabbage and sprinkle with chopped parsley and toasted sesame seeds. Enjoy!
Notes
- If your cabbage is around 3 lb, don’t worry about increasing the sauce or tahini dressing – that isn’t necessary. Just make the recipe as is.
- Make sure that the cabbage wedges are dry before searing them or they will turn soggy instead of crunchy.
- Do not overcrowd the pan when searing. If your pan is on the smaller side, sear the cabbage wedges in batches and then return all the cabbage wedges to the pan once all batches are seared.
- How to toast sesame seeds:
- Place white sesame seeds into a small pan or pot on the stove.
- Turn the heat to medium and cook for 2-3 minutes, stirring frequently with a rubber spatula or wooden spoon until golden and fragrant.
- Once sesame seeds look toasted and golden, turn off the heat and immediately remove them from the pan so they don’t burn.
↑ Back to top
Bratwurst Supper
Ingredients
- 3 pounds uncooked bratwurst links
- 3 pounds small red potatoes, cut into wedges
- 1 pound baby carrots
- 1 large red onion, sliced and separated into rings
- 2 jars (4-1/2 ounces each) whole mushrooms, drained
- 1/4 cup butter, cubed
- 1 envelope onion soup mix
- 2 tablespoons soy sauce
- 1/2 tep black pepper
Steps
- For each of two foil packets, arrange a double thickness of heavy-duty foil (about 17x15 in.) on a flat surface.
- Cut brats into thirds. Divide the brats, potatoes, carrots, onion and mushrooms evenly between the two double-layer foil pieces. Dot with butter. Sprinkle with soup mix, soy sauce and pepper. Bring edges of foil together; crimp to seal, forming two large packets. Seal tightly; turn to coat.
- Grill, covered, over medium heat for 23-28 minutes on each side or until vegetables are tender and sausage is no longer pink.
Notes
- FAVORITE
↑ Back to top
Bread and Butter Pickle
Tags: Pickles
Servings: 2 pints
Ingredients
- 4 cups thickly sliced pickling cucumbers (8 to 10 pickling cucumbers)
- 1 cup sliced red bell peppers (about 1 small)
- 1 cup sliced onion (about 1 medium)
- 2 tablespoons pickling salt
- 1 cup apple cider vinegar
- 3/4 cup granulated sugar
- 1 tablespoon mustard seed
- 1 teaspoon celery seed
- 1/2 teaspoon red pepper flakes
- 1/4 teaspoon ground cloves
Steps
- Prepare two pint jars and a small canning pot. Combine the sliced cucumbers, bell peppers, onion, and pickling salt in a colander set in a large bowl. Refrigerate for one hour to remove excess liquid. Rinse vegetables and discard liquid.
- Combine the vinegar and sugar in a large pot. Heat over medium heat until the sugar is dissolved. Add the mustard seed, celery seed, red pepper flakes and cloves. Increase the heat to high and bring the brine to a boil.
- Add the drained vegetables and stir to combine. Cook for 5 minutes, until all the vegetables in the brine are fully heated through. Using tongs, fill the sterilized jars with the vegetables. Slowly pour the hot brine over the vegetables in each jar, leaving 1/2 inch headspace.
- Gently tap the jars on a towel-lined countertop to help loosen any bubbles before using a wooden chopstick to dislodge any remaining bubbles. Check the headspace again and add more brine if necessary.
- Wipe the rims, apply the lids and rings, and process in a hot water bath for 10 minutes. Let these pickles cure for at least 48 hours before eating.
↑ Back to top
The Bread Bible's Sesame Burger Buns

Tags: Breads
Rolls and Buns
Servings: Makes 12 rolls
Ingredients
- 1 3/4 cups warm water
- 1 tablespoon (1 package) active dry yeast
- 2 tablespoons plus 1/2 teaspoon sugar
- 1/3 cup nonfat dry milk powder
- 1 1/2 teaspoons salt
- 3 tablespoons unsalted butter, melted
- 4 1/2 to 5 cups unbleached all-purpose flour or bread flour
- 1 large egg beaten with 2 teaspoons water, for glazing
- 1/2 cup sesame seeds
Steps
- In a small bowl, pour in 1/2 cup of the warm water. Sprinkle the yeast and 1/2 teaspoon sugar over the water. Stir to dissolve and let stand at room temperature until foamy, about 10 minutes.
- In a large bowl using a whisk or in the work bowl of a heavy-duty electric mixer fitted with the paddle attachment, combine the remaining 1 1/4 cups water, dried milk, the remaining sugar, salt, and butter. Add 2 cups of the flour. Beat hard until creamy, about 1 minute. Add the remaining flour, 1/2 cup at a time, until a soft, shaggy dough that just clears the sides of the bowl is formed. Switch to a wooden spoon when necessary if mixing by hand.
- Turn the dough out onto a lightly floured work surface and knead for about 4 minutes, dusting with flour only 1 tablespoon at a time as needed to make a smooth and soft dough.
- Place the dough in a greased deep container. Turn once to coat the top and cover with plastic wrap. Let rise at room temperature until doubled in bulk, 1 to 1 1/2 hours.
- Gently deflate the dough. Turn the dough out onto a lightly floured work surface. Grease or parchment-line a baking sheet. Divide the dough into 12 equal portions. Shape each into a tight round ball and place each ball seam side down and at least 2 inches apart on the baking sheet. Use a second baking sheet rather than crowd the rolls. Flatten each ball with your palm. Cover loosely with plastic wrap and let rise until puffy, about 20 minutes.
- Twenty minutes before baking, preheat the oven to 350˚F. Brush each roll with the egg glaze and sprinkle the tops with sesame seeds. Place the baking sheet on the rack in the center of the oven and bake 20 to 25 minutes, or until lightly brown and firm to the touch. Transfer the rolls immediately to a cooling rack. Cool completely before splitting.
If
kneading by machine, switch from the paddle to the dough hook and
knead
for 3 to 4 minutes, or until the dough is smooth and springy and
springs back when pressed. If desired, transfer the dough to a floured
surface and knead briefly by hand,
↑ Back to top
Breakfast Pizza

Servings: 6-8
Ingredients
- pizza dough
- 2 -3 eggs (depending on your taste)
- 1⁄4 cup milk
- 6 ounces shredded yellow cheddar cheese
- 3 ounces deli ham, sliced into 2 inch strips
- 3 ounces cooked bacon, crumbled
- 5 breakfast sausage links, chunked
- 1⁄4 minced onion (optional)
- chopped chives (for garnish)
Steps
- This recipe is a lot quicker if you precook your Bacon and Sausage the night before and store them in your refrigerator as I do -- the prep time will be based on this.
- Preheat your oven to 400°F
- For the Pizza Dough, if you can find it frozen, uncooked, and preshaped. it's a huge time saver. If not, just prepare it as you would normally on a large pizza pan (I make the crust about 1/4 thick). Excluding the 1 1/2 of the outer crust, make little indentations with your fingertips in the dough. This helps the egg settle and cook more evenly.
- Beat the eggs with the milk, and pour over the center of the crust. Use your fingers, or a pastry brush to evenly disperse the egg.
- Evenly cover the egg with the strips of ham.
- Scatter the sausages, and if you want to have them, add the onion. Salt and pepper it lightly.
- Add a blanket of the Mozzarella cheese, then the Cheddar.
- Sprinkle the crumbled bacon.
- Put this wonderful pie in the oven on the center rack and check it after 15 minutes. It's hard for me to give an approximate cooking time as I used a ride through oven for 7 minutes at 475°F at my work. If it looks done, then it is. The egg layer is thin enough to cook in 10 minutes or so, so it's really just about the crust and how you like it.
- Once you've deemed it to be done, take it out of your oven and garnish it with some chopped chives. Slice, and enjoy! It's great on the go, and is wonderful hot or cold. I'm hoping this recipe will make your household as happy as it made my customers :).
↑ Back to top
Broccoli asian

Servings: 4
Ingredients
- 1 large head broccoli
- 3 tablespoons unsalted butter
- 1 tablespoon soy sauce
- Kosher salt and freshly ground black pepper
- Sesame seeds for garnish, optional
Steps
- Cut the broccoli into florets, reserving stems for another use. Combine the broccoli with the butter, soy sauce, and 1/4-inch water in a skillet just large enough to hold the broccoli in one layer. Bring the mixture to a boil. Reduce the heat to low, cover and simmer for 3 minutes.
Remove the cover and simmer 1 to 2 minutes or until most of the liquid
has evaporated. Add salt and pepper to taste. Stir until all florets
are nicely coated with the butter mixture and serve. Sprinkle with
sesame seeds if desired.
↑ Back to top
Broccoli with Nuts and Cherries
Servings: YIELD 8 servings TOTAL
TIME 15 mins
Ingredients
- 6 cups broccoli, cut into florets
- 2/3 cup walnuts, chopped
- 6 garlic cloves, minced
- 2 tablespoons extra virgin olive oil
- 1/2 cup cherries, dried
- 1/4 teaspoon salt
- 1/4 teaspoon crushed red pepper flakes
Steps
- Place broccoli in a steamer basket, then put that into a large saucepan containing an inch of water. Bring to a boil, then cover & steam 3 to 4 minutes or until tender.
- Meanwhile, in a large nonstick skillet coated with cooking spray, saute walnuts & garlic in the oil until garlic is tender.
- Stir in the cherries, salt, pepper flakes & broccoli, tossing to coat.
Notes
- FAVORITE
↑ Back to top
Broiled Buffalo Wings
Ingredients
- 2 pounds chicken wings split at the joint
- 1/4 cup cayenne pepper sauce preferably Frank’s
- 1 tablespoon fresh lemon juice
- 3 tablespoons low-sodium chicken broth
- 3 large ribs celery cut into sticks
- 1 recipe Blue Cheese Dip
Steps
- Preheat the broiler. Place the wings in a large pot and fill the pot with water to cover by about 2 inches. Bring to a boil, then continue to boil for 10 minutes. Drain.
- Meanwhile, in a small bowl, combine the cayenne pepper sauce, lemon juice, and broth.
- Transfer the wings to a broiler pan and broil 5 to 6 inches from the flame, until the skin begins to blister and brown, 5 to 6 minutes. Turn the wings over and broil until cooked through, 4 to 5 minutes more.
- Transfer the wings to a baking sheet, drizzle with the reserved sauce, and toss well to coat. Place the baking sheet under the broiler for 1 minute to heat the wings and sauce together.
- Serve the broiled Buffalo wings with extra hot sauce on the side, celery sticks, and the blue cheese dip.
Notes
- FAVORITE
↑ Back to top
Brookie
Adapted from http://parade.condenast.com/340770/cmcandrews/meet-your-new-dessert-obsession-the-brookie/
Ingredients
- 2 oz unsweetened chocolate, roughly chopped
- 1/2 cup semisweet chocolate chips
- 3/4 cup (11/2 sticks) unsalted butter
- 3/4 cup sugar
- 1 1/2 tsp vanilla
- 1/2 tsp salt
- 2 large eggs
- 3/4 cup all-purpose flour
- 1/2 cup (1 stick) unsalted butter
- 1/2 cup packed light brown sugar
- 1/4 cup sugar
- 1 egg
- 1 tsp vanilla
- 1/2 tsp baking powder
- 1/2 tsp salt
- 1 cup all-purpose flour
- 1 cup chocolate chips.
- 1 1/4 cups (about 6.5 oz) chopped chocolate candy bars
For Cookies:
Steps
- Preheat oven to 350°F. Line a 9-inch square pan with foil; mist with cooking spray.
- Make brownie batter: In a medium, microwave-safe bowl, place unsweetened chocolate, chocolate chips and butter. Microwave until butter is completely melted but chunks of chocolate remain, about 1 minute 30 seconds, stirring every 30 seconds. Stir until chocolate is completely melted. Add sugar, vanilla and salt; whisk to combine. Whisk in eggs. Add flour and stir until just combined. Scrape into pan; cover and refrigerate.
- Make cookie dough: Melt butter in a medium, microwave-safe bowl. Whisk in brown sugar and sugar. Beat in egg and vanilla. Stir together baking powder, salt and flour. Mix together dry and wet ingredients until just combined, then stir in chocolate chips.
- Scatter chopped candy bars over brownie batter. Spoon cookie batter over and spread evenly. Bake until top is set but fudgy crumbs stick to a toothpick inserted in the center, about 35 minutes.
Notes
- FAVORITE
↑ Back to top
Brooklyn Blackout Cake

Ingredients
- 1/2 cup sugar
- 2 tablespoons cornstarch
- 1/4 teaspoon salt
- 1 to 1/2 cups whole milk
- 3 ounces semisweet chocolate, chopped
- 1 teaspoon vanilla extract
- 1 to 1/2 cups all-purpose flour
- 2 teaspoons baking powder
- 1/2 teaspoon baking soda
- 1/2 teaspoon salt
- 1/2 cup unsalted butter, cubed
- 3/4 cup Dutch-processed cocoa
- 1 cup sugar
- 1 cup packed brown sugar
- 1 cup buttermilk
- 1 cup strong brewed coffee
- 1 teaspoon vanilla extract
- 2 eggs
- 8 ounces semisweet chocolate, chopped
- 1/2 cup unsalted butter, cubed
- 1/3 cup hot water
- 2 teaspoons light corn syrup
- 2 teaspoons vanilla extract
PUDDING:
CAKE:
FROSTING:
Steps
- In a small heavy saucepan, mix sugar, cornstarch and salt. Whisk in milk. Cook and stir over medium heat until thickened and bubbly. Reduce heat to low; cook and stir 2 minutes longer. Stir in chocolate until melted. Transfer to a bowl; stir in vanilla. Cool slightly, stirring occasionally. Press plastic wrap onto surface of pudding. Refrigerate, covered, 2 hours or until cold.
- Preheat oven to 325°. Line bottoms of two greased 8-in. round baking pans with parchment paper; grease paper. In a small bowl, whisk flour, baking powder, baking soda and salt. In a large saucepan, melt butter over medium heat. Add cocoa; cook and stir until blended. Stir in sugars. Remove from heat; stir in buttermilk, coffee and vanilla. Whisk in eggs, one at a time, until blended. Stir in flour mixture just until combined.
- Transfer batter to prepared pans. Bake 35-40 minutes or until toothpick inserted in center comes out clean. Cool in pans 10 minutes before removing to wire racks; remove paper. Cool completely.
- For frosting, in the top of a double boiler or a metal bowl over hot water, melt chocolate and butter; stir until smooth. Remove from heat. Whisk in hot water, all at once. Whisk in corn syrup and vanilla. Refrigerate 25-30 minutes or just until spreadable.
- Using a long serrated knife, cut each cake horizontally in half. Place a cake layer on a serving plate. Spread with half of the pudding. Repeat layers. Top with a third cake layer. Spread frosting over top and sides of cake.
- Crumble remaining cake layer; sprinkle over top and sides of cake, pressing lightly to adhere. Refrigerate leftovers. Yield: 8 servings.
Notes
- FAVORITE
↑ Back to top
Brussels Sprouts the Best of Your Life!
Tags: Vegetables
Servings: 4
Ingredients
- 1 pound Brussels Sprouts Cleaned and trimmed
- 3 cloves garlic peeled & sliced *See the notes section before starting
- ¼ cup Parmesan Cheese Freshly grated
- salt and freshly ground black pepper To taste
- 3 tablespoons good quality olive oil or for Keto, butter flavor coconut oil
Steps
- Preheat the oven to 400°F/200°C.
- If needed, clean and trim the Brussels sprouts and cut them in halves and place them in an oven safe dish. Make sure to dry them very well before cooking.
- Add the garlic, Parmesan cheese, salt, and pepper, followed by the olive oil. Toss to coat.
- Roast in the oven uncovered for 20-25 minutes until crisp, brown and caramelized on the outside and tender on the inside. Serve with more grated cheese.
- This recipe makes very crispy garlic. In some ovens, it could burn or become bitter. If you are worried about the garlic getting too dark for your liking, slice it thin and add at the last 5-7 minutes of cooking time, coated in a little oil, and scattered around the pan.
- For less crispy cheese, add it for the last 10 minutes.
- To keep your sprouts from sticking, line your pan with nonstick foil or baking paper.
- Dry your Brussels sprouts well. The drier they are, the crispier they’ll be. If washing, use paper towels to pat them dry or use a salad spinner to spin that liquid right off.
- For crisper sprouts, spread them out on the pan without too much touching. Overcrowding causes you to steam the Brussels sprouts instead of roasting them.
- Cut the sprouts into even-sized pieces if you want them to have a similar texture.
- Be sure to start with a hot oven to help the sprouts crisp on the outside and soft on the inside.
- Brown is good. If you’ve never cooked Brussels sprouts this way, at first glance, you may think it looks burnt out of the oven, but once you taste it, you’ll know those little “burnt” areas are the best-tasting parts!
- When using untrimmed Brussels sprouts, trim off the dry part of the stem at the base of the sprout and any loose outer leaves.
- For an extra caramelized area, place the sliced Brussels sprouts cut-side down on the pan. This will give a larger browned surface area.
- Leave smaller sprouts whole to avoid overcooking.
- On smaller sprouts that don’t need to be halved, slice a cross in the stem (see the video). The stem is the toughest part of the Brussels sprout, and the cross allows them to cook at the same rate as the tender area.
- For an extra kick of flavor, try adding lemon zest before roasting and a squeeze of fresh lemon juice before serving.
- Be sure to taste and season well before serving.
↑ Back to top
Buccellati (Sicilian Christmas Fig Cookies)

Servings: YIELD Makes 40 to 50
cookies
Ingredients
- 1 pound (17 ounces or 500 grams) dried figs
- 1 cup (5 ounces or 150 grams) raisins
- 1/2 cup (2 ounces or 60 grams) unsalted pistachios, shelled
- 1/4 cup (1 ounce or 35 grams) pine nuts
- 1 cup (4 ounces or 120 grams) walnut kernels
- 1/3 cup (4 ounces or 125 grams) honey
- 2/3 cup (200 grams) orange marmalade or apricot jam
- Zest of 2 oranges
- 1 pinch ground cinnamon
- 5 cups (600 grams) flour
- 1 1/2 cups (180 grams) confectioner's sugar
- 2 teaspoons baking powder
- 1 pinch salt
- 7 ounces (200 grams) chilled butter or lard, diced
- 3 eggs plus 1 yolk, beaten
- 2 egg whites
- 2 1/2 cups (310 grams) confectioner's sugar, sifted
- 1 to 2 tablespoons finely chopped unsalted pistachios (optional)
- 1 to 2 tablespoons colored sprinkles (optional)
- Confectioner's sugar for dusting (optional)
For the
filling:
For the pastry
and decorating:
Steps
- Place the figs in a bowl and pour boiling water over them; let them sit for at least 15 minutes to soften. Drain figs and remove the stems with a sharp knife before chopping roughly. Place in a food processor and blitz until you have a paste, then transfer to a bowl.
- Place the walnuts and pistachios in the food processor and chop finely-but leave them a little rough; don't go so far as to turn this into a paste too. Add to the figs, along with the rest of the filling ingredients. Combine well and chill in the fridge for a couple of hours at least, but it's better to leave it overnight to let the flavors develop.
- For the pastry: Place first four ingredients in a bowl. Rub the butter into the flour mixture (or pulse in a food processor) until it resembles bread crumbs. Add the eggs and yolk and combine until you have a smooth dough. If it is a little too sticky, add a small amount of flour until it no longer sticks to your hands. If it's dry or crumbly, add some cold water, a little at a time, until it comes together. Wrap firmly in plastic wrap and place in the fridge to rest and chill, at least 1 hour but better overnight.
- To assemble: Cut the chilled dough into 4 to 6 smaller portions and work one portion at a time (keeping the others wrapped in plastic and chilled). Roll first into a sausage shape, then flatten and roll out on a lightly floured surface to a long rectangle, no more than an 1/8-inch thick. Place filling along the middle of the rectangle lengthways in a long, thin log shape, no more than an inch wide. Roll the pastry around it to enclose completely, overlapping the dough just a little bit. Trim off the extra pastry. Roll the log gently with the palms of your hands to seal the edges and tighten and lengthen the log ever so slightly. Cut 3-inch pieces of the log with diagonal cuts. (It helps if both the pastry and the filling are chilled, so if possible, work a bit at a time and keep chilled anything that you are not using).
- Prepare a baking sheet lined with baking paper. To make an "X" shape, use a very sharp knife to cut about 1 1/4-inch incision from top and bottom of the logs (leaving about 3/4 inch uncut in the middle) and separate gently to form an "X." To make an arch, make 1/2-inch incisions along the side of the log, then gently bend to form into an arch. Place cookies on baking sheet and bake at 350º F (180º C) for about 15 to 20 minutes, or until the pastry is just beginning to turn golden. Remove from the oven and let cool.
- In the meantime, prepare the glaze (if using). With a fork, beat the whites until they become frothy. Add the 2 1/2 cups confectioner's sugar until you have a smooth paste the consistency of honey. Add more sugar if not thick enough and, if necessary, you can strain the mixture through a sieve again to make it perfectly smooth. Spoon or brush the glaze over the tops of the cookies and either leave as they are or top with a pinch of chopped pistachios or colored sprinkles. You could also simply dust with confectioner's sugar.
- Place the glazed cookies back on the baking tray and return to the oven for a further 5 minutes or until the glaze feels dry and set. Let cool completely before serving. Keep in an airtight container.
Notes
- FAVORITE
↑ Back to top
Buffalo Cauliflower Bites
Adapted from https://www.nobiggie.net/buffalo-cauliflower-bites/

Tags: Appetizers and Dim
Sum Vegetables
Ingredients
- 1 head cauliflower cut into florets
- 1/2 cup milk
- 2 eggs
- 1/2 cup Panko breadcrumbs
- 1/2 cup parmesan cheese grated
- 1 teaspoon garlic powder
- 1 teaspoon smoked paprika
- 1/2 teaspoon salt
- 1/4 teaspoon black pepper
- 1/2 cup buffalo hot sauce
- 2 tablespoons butter melted
- 1/2 tablespoon lemon juice
- ranch or blue cheese dressing for dipping
Steps
- Preheat oven to 425°F.
- Line a sheet pan with parchment paper.
- In a medium sized bowl, whisk together the eggs and milk. In a separate bowl combine, panko bread crumbs, grated parmesan cheese, garlic powder, paprika, salt and pepper until combined.
- Working with a few cauliflower pieces at a time, add the cauliflower to the milk and egg mixture then to the dry ingredients to coat all in the mixture.
- Spread coated cauliflower florets onto the prepared sheet pan in a single layer with space between them. Bake in the oven until lightly browned, about 20 to 25 minutes, flipping each piece over halfway through.
- In another small bowl, combine the Buffalo hot sauce, melted butter and lemon juice until well blended. Brush the buffalo sauce mixture onto all the cauliflower florets.
- Return to the oven and bake until they start to brown, about 15 minutes.
- Serve hot with ranch or blue cheese dressing for dipping.
Notes
- Try substituting half rice flour.
↑ Back to top
Bulgogi
Tags: Beef
Korean
From Barbecue to Bibimbap 100 Easy-To-Prepare
Recipes by Taekyung Chung and Debra Samuels
Servings: 4
Ingredients
- 1½ lbs (750 g) sirloin tips, New York steak, or boneless rib eye steak
- Vegetables for grilling (optional)
- 20 soft lettuce leaves for wrapping (optional)
- Seasoned Shredded Leeks (optional)
- ¼ cup (65 g) Spicy Miso Dip (optional)
- ⅔ cup (160 ml) Sweet Soy Base Sauce
- 1 small apple, grated (skin on)
- 1 tablespoon minced garlic or garlic paste
- ½ cup (50 g) minced green onion (scallion)
- 2 tablespoons dark sesame oil
- ¼ teaspoon fresh ground black pepper
MARINADE:
Steps
- Place the beef in the freezer for 1 hour or until it is semi-frozen. This will make the beef easier to cut.
- If you’re using whole sirloin tips, cut them crosswise into segments approximately 3 to 4 inches (7 to 10 cm) in length.
Combine the marinade
ingredients in a bowl and set aside.
Remove the beef from the freezer and place on a cutting board. Cut the
beef into slices, following the steps in the “Lesson in Cutting Beef
for Bulgogi,” as shown to the left.
Place the beef slices in a large plastic zippered bag. Add the
marinade
to the beef. Compress the bag slightly to release the air. Distribute
the sauce evenly in the bag, making sure it completely covers the
meat.
(Be careful not to push the sauce out of the bag!) Secure the top.
Place the bag on a baking sheet, so it is lying flat and place in the
refrigerator for 1 hour.
Prepare the vegetables (see Mixed Grilled Vegetables), if you’re
serving them. Arrange the marinated beef slices on a platter and set
on
the table.
Heat the electric grill to medium-high and brush the surface with some
neutral-flavored cooking oil. Place the vegetables on the grill first.
Add the meat when the vegetables are nearly done, as the marinated
beef
strips take no more than 1 to 2 minutes on each side to cook. To
serve,
take the grilled meat and vegetables from the tabletop griddle and put
them on a plate. Wrap piping hot beef strips in lettuce leaves and top
them with shreds of seasoned leeks and a dab of Spicy Miso Dip.
LESSON IN CUTTING BEEF
FOR BULGOGI:
Notes
- TIPS FOR TABLETOP GRILLING
- You can find electric grills in the kitchenware sections of many Asian markets or online. Grill ridges allow the fat to drain away from the food, but they’re not necessary. An electric frying pan will also work. Or tabletop electric, gas, or induction-style cooking elements can be set up on the table and used with a skillet. Alternatively, you can also use a cast-iron grill pan or griddle on your stovetop and bring the cooked meat to the table.
↑ Back to top
Bulgogi (Korean Bbq Beef)
Adapted from https://mykoreankitchen.com/bulgogi-korean-bbq-beef/
Tags: Beef
Servings: 4 to 6 Calories: 436
kcal
Ingredients
- 800 g rib eye (1.76 pounds) or top sirloin (or any tender prime beef cut), thinly sliced, 2mm to 3mm (1/8 inch) thickness
- 1 onion (130 g / 4.6 ounces), optional, peeled & thinly sliced
- 2 stalks green onion (55 g / 2 ounces), optional, thinly sliced
- 1/2 carrot (55 g / 2 ounces), optional, peeled & thinly sliced
- 1 Tbsp toasted sesame oil
- 1 Tbsp toasted sesame seeds
- 1 Tbsp cooking oil (I used rice bran oil)
- 6 Tbsp soy sauce (I use regular Kikkoman soy sauce)
- 3 Tbsp brown sugar
- 2 Tbsp rice wine (mirin)
- 1 red apple or asian pear (155 g / 5.5 ounces)
- 1/2 onion (80 g / 2.8 ounces)
- 1 Tbsp minced garlic
- 1 tsp minced ginger
- 1/8 tsp ground black pepper
MAIN:
BULGOGI
MARINADE:
Steps
- Blend the marinade ingredients in a mixer or food processor until smooth. Set aside.
- Place the thinly sliced meat in a mixing bowl and pour the marinade over it. Mix them well together while gently massaging the meat with your hands. (Wearing a food prep glove is very handy here!)
- Preheat a skillet / bbq grill on medium high heat until well heated. Add the cooking oil and spread it well. Add the meat (and vegetables) and cook it on medium high to high heat for 3 to 5 mins (until the meat and vegetables cook to your desired doneness). Toss in the sesame seeds and stir them quickly.
- Serve the bulgogi with steamed rice and other Korean side dishes. (refer above for more tips)
Add
the sesame oil and mix it into the meat. (I prefer adding the sesame
oil separately as opposed to mixing it in the marinade sauce. I read
somewhere that the oil can prevent the other sauce getting absorbed
effectively into the meat.)
Cover the bowl with cling wrap (or move the marinated meat into a
glass
container with a lid) and marinate the meat for at least 4 hours in
the
fridge. (If you have more time, you can also marinate it overnight to
deepen the flavour even more).
↑ Back to top
Bulgogi (Korean Bbq Beef)
Adapted from https://mykoreankitchen.com/bulgogi-korean-bbq-beef/
Ingredients
- 800 g / 1.76 pounds rib eye or top sirloin (or any tender prime beef cut), thinly sliced, 2mm to 3mm (1/8 inch) thickness
- 1 onion (130 g / 4.6 ounces), optional, peeled & thinly sliced
- 2 stalks green onion (55 g / 2 ounces), optional, thinly sliced
- 1/2 carrot (55 g / 2 ounces), optional, peeled & thinly sliced
- 1 Tbsp toasted sesame oil
- 1 Tbsp toasted sesame seeds
- 1 Tbsp cooking oil (I used rice bran oil)
- 6 Tbsp soy sauce (I use regular Kikkoman soy sauce)
- 3 Tbsp brown sugar
- 2 Tbsp rice wine (mirin)
- 1 asian pear or red apple (155 g / 5.5 ounces)
- 1/2 onion (80 g / 2.8 ounces)
- 1 Tbsp minced garlic
- 1 tsp minced ginger
- 1/8 tsp ground black pepper
MAIN
BULGOGI
MARINADE
Steps
- Blend the marinade ingredients in a mixer or food processor until smooth. Set aside.
- Blending bulgogi sauce in a blender
- Place the thinly sliced meat in a mixing bowl and pour the marinade over it. Mix them well together while gently massaging the meat with your hands. (Wearing a food prep glove is very handy here!)
- Add the sesame oil and mix it into the meat. (I prefer adding the sesame oil separately as opposed to mixing it in the marinade sauce. I read somewhere that the oil can prevent the other sauce getting absorbed effectively into the meat.)
- Cover the bowl with cling wrap (or move the marinated meat into a glass container with a lid) and marinate the meat for at least 4 hours in the fridge. (If you have more time, you can also marinate it overnight to deepen the flavour even more).
- Marinating bulgogi in a mixing bowl
- Preheat a skillet / bbq grill on medium high heat until well heated. Add the cooking oil and spread it well. Add the meat (and vegetables) and cook it on medium high to high heat for 3 to 5 mins (until the meat and vegetables cook to your desired doneness). Toss in the sesame seeds and stir them quickly.
- Stir frying bulgogi in a skillet
- Bulgogi stir fry
- Serve the bulgogi with steamed rice and other Korean side dishes. (refer above for more tips)
Notes
- FAVORITE
↑ Back to top
Bulgogi-Style Eggplant
Tags: Korean
Vegetables Vegetarian
Servings: 4 side servings
Ingredients
- ¼ medium onion, finely chopped (about ⅓ cup)
- 3 garlic cloves, finely chopped
- 1 scallion, chopped
- ¼ cup rice syrup or 2 Tbsp. sugar
- 1 Tbsp. soy sauce
- 2 tsp. gochugaru (coarse Korean hot pepper flakes)
- 1 tsp. toasted sesame oil
- 1 Tbsp. plus ½ tsp. kosher salt
- 1 lb. eggplants (preferably Korean)
- 1 Tbsp. vegetable oil
- 1 tsp. toasted sesame seeds
Steps
- Mix onion, garlic, scallion, rice syrup, soy sauce, gochugaru, sesame oil, and ½ tsp. salt in a medium bowl until well combined.
- Cut eggplants crosswise at 3"–4" intervals, then slice pieces ½" wide by ¼" thick.
- Put eggplant strips in a large bowl and add 1 Tbsp. salt. Toss well by hand until all eggplant is salted. Let sit, tossing every 5 minutes, for 20 minutes.
- Drain eggplant; discard liquid. Take up handfuls of eggplant and squeeze tightly to remove excess liquid, then return to large bowl. Add marinade to bowl with eggplant and mix together well. Cover and chill 30 minutes.
- Heat oil in a large heavy skillet over medium-high and swirl to coat pan evenly. Add marinated eggplant and spread evenly in skillet. Leave to sear for a few minutes, until bottom is lightly colored. Turn with a spatula or tongs and cook until other side is lightly browned, 2–3 minutes. Reduce heat to medium and continue to cook, pressing eggplant into pan and turning from time to time, until eggplant is cooked through and glazed and any excess marinade has evaporated, 5–6 minutes.
- Transfer eggplant to a plate. Sprinkle with sesame seeds. Serve hot or cold.
- Do Ahead: Eggplant can be made 3 days ahead. Store in an airtight container and chill.
↑ Back to top
Butterflied, Dry Brined Roasted Turkey with Roasted Root
Vegetable Panzanella
Ingredients
- 3 1/2 tablespoons kosher salt
- 1 1/2 teaspoons rubbed sage
- 1 1/2 teaspoons dried thyme
- 1 1/4 teaspoons whole black peppercorns
- 1/2 teaspoon whole allspice berries
- 1 13 to 14 pound whole turkey, neck and giblets removed and reserved for Giblet Stock
- 1 1/2 pounds parsnips, peeled and cubed into 1/2-inch pieces
- 1 1/2 pounds rutabaga, peeled and cubed into 1/2-inch pieces
- 1 teaspoon vegetable oil
- 1/2 pound red onion, diced into 1/2-inch pieces
- 8 ounces medium Brussels sprouts, shredded on the thin slicing blade of a food processor
- 8 ounces hearty sourdough or multigrain bread, cut into 1/2-inch cubes and staled
- 2 cloves garlic, minced
- 1/4 cup apple cider vinegar
- 2 teaspoons fresh thyme leaves
- Kosher salt
- Freshly ground black pepper
Turkey
Panzanella
Steps
- For the turkey: Four days before service, place the salt, sage, thyme, black peppercorns, and allspice into a spice grinder and pulse until the peppercorns and allspice are coarsely ground, 5 to 6 pulses. Set aside.
- Set the turkey, breast-side down, on a large cutting board with the tail closest to you. Use an electric knife or heavy-duty kitchen shears to cut up one side of the backbone. Turn the bird around and cut back down the other side of the spine. Reserve the backbone for Giblet Stock. Discard any fat pockets or excess skin found inside the turkey. Turn the turkey breast-side up and use the heel of your hands to press down on both breasts, until you hear a cracking sound and the bird has flattened slightly.
- Rub the seasoned salt on both sides of the turkey. Place the turkey on a parchment paper lined half sheet pan, breast-side up with legs running with the long side of the pan. Store, uncovered, in the refrigerator for 4 days.
- Remove the turkey from the refrigerator and leave at room temperature for 1 hour.
- For the panzanella: Place the parsnips and rutabaga in a large nonstick roasting pan, toss with vegetable oil and set aside.
- Place one rack in the middle of the oven and a second one far enough below so the roasting pan will fit. Heat the oven to 425 degrees F.
- Place the turkey directly on the middle rack of the oven with the legs perpendicular to the metal bars of the rack. Place the roasting pan with the parsnips and rutabaga on the rack below the turkey and roast both for 30 minutes.
- Reduce the heat to 350 degrees F. Add the red onion to the roasting vegetables and stir to combine. Continue to roast both the vegetables and the turkey until a probe thermometer inserted into the thickest part of the breast registers 155 degrees F, an additional 40 to 50 minutes.
- Remove the turkey from the oven onto a cooling rack set inside a half sheet pan and rest for 30 minutes.
- Add the Brussels sprouts, bread cubes and garlic to the roasting vegetables, stir to combine and roast for an additional 15 minutes. Remove the vegetables from the oven and immediately transfer to a serving bowl. Pour the apple cider vinegar in the warm roasting pan, stir and scrape off any browned bits from the pan. Pour the vinegar mixture over the salad, add the thyme and toss to combine. Season with salt and pepper as desired. Serve warm or at room temperature.
- Carve the turkey with an electric knife and serve with the panzanella.
Notes
- FAVORITE
↑ Back to top
Butternut Squash and Cauliflower Chowder

Servings: YIELD Serves 6
Ingredients
- 2 Tbs. unsalted butter
- 1 medium leek, halved lengthwise, rinsed, then thinly sliced (1 1/3 cups)
- 1 3/4 lb. butternut squash, peeled, seeded, and diced into 1/2-inch cubes (4 cups)
- 1 small head cauliflower florets, chopped or broken into bite-size pieces (41/2 cups)
- 2 Tbs. all-purpose flour
- 2 1/2 cups low-sodium vegetable broth
- 1 1/2 cups low-fat milk
- 1 bay leaf
- 2 sprigs fresh thyme
- 2/3 cup frozen corn
- 2 Tbs. grated lemon zest
Steps
- Heat butter in large pot or Dutch oven over medium heat. Add leek, and sauté 4 to 5 minutes, or until softened. Add butternut squash, and season with salt and pepper, if desired.
- Add cauliflower, and sprinkle with flour. Stir in broth, milk, bay leaf, and thyme sprigs; season with salt and pepper, if desired. Bring to a boil, then reduce heat to medium-low. Simmer 10 minutes, or until vegetables are tender.
- Stir in corn and lemon zest, and cook 2 to 3 minutes more. Remove thyme sprigs.
Notes
- FAVORITE
↑ Back to top
Butternut Squash Bolokithopastitsa from Naxos
Tags: Greece
Vegetables Vegetarian
Servings: (serves 4-6)
Ingredients
- 1 butternut squash or approx. 4 cups, peeled and cut into french fry sticks
- 1 large onion, peeled and sliced
- approx. 2 tsp. sea salt
- 1/2 tsp. ground pepper
- 4-5 Tbsp. all-purpose flour
- olive oil for frying
Steps
- Into a large bowl, add the squash, onions, salt and pepper and toss well. Add the flour in increments with your hands. Add a couple of splashes of water just make make the mixture a little pasty.
- To a 9-inch non-stick skillet, set heat to medium and add enough olive oil to come up 1/4 inch in the pan. Add the squash mixture and press down to compact the mixture. Cover and cook for 10-12 minutes or until the bottom has a crisp-golden colour.
- Once golden, use the lid to help you pour off oil into a nearby bowl. Place a large plate on the pan, invert the pie to sit on the plate.
- Add some oil back into the skillet and carefully slide the pie back into the pan and fry for another 7-8 minutes the crisp the other side.
- Slide the pie onto a large round serving plate (or invert again then slide onto plate).
↑ Back to top
Butternut Squash Soup
Adapted from http://simmerandboil.cookinglight.com/2014/12/29/warm-spiced-butternut-squash-soup-chef-john-fraser/
Servings: 10
Ingredients
- 4 pounds whole butternut squash
- 1/4 cup extra-virgin olive oil, divided
- 7 cups water
- 1/2 teaspoon whole allspice
- 1/2 teaspoon black peppercorns
- 6 thyme sprigs
- 3 whole cloves
- 1 (3-inch) cinnamon stick
- 1 star anise pod
- 1 yellow onion, chopped
- 1 1/2 teaspoons kosher salt
- 1 tablespoon cider vinegar
- 1/8 teaspoon crushed red pepper
- 1/2 cup pomegranate arils
- 1/4 cup chopped fresh cilantro
Steps
- Peel and seed squash, reserving peels, trimmings, and seeds. Cube peeled and seeded squash. Heat a large Dutch oven over medium-high heat. Add 1 tablespoon oil; swirl to coat. Add squash scraps; sauté 8 minutes or until lightly browned. Add 7 cups water, allspice, and next 5 ingredients (through anise). Bring to a boil; cover, reduce heat, and simmer 45 minutes. Strain mixture into a large bowl; discard solids.
- Wipe pan clean with paper towels; heat over medium heat. Add remaining 3 tablespoons oil and onion; cover and cook 5 minutes, stirring occasionally. Add cubed squash; cover and cook 10 minutes, stirring occasionally. Add reserved broth and salt; bring to a boil. Cover and simmer 40 minutes or until squash is very tender.
- Place half of squash mixture in a blender. Remove center piece of blender lid (to allow steam to escape); secure blender lid on blender. Place a clean towel over opening in blender lid (to avoid splatters). Blend until smooth. Pour into a large bowl. Repeat procedure with remaining squash mixture. Stir in vinegar and red pepper. Ladle soup into shallow bowls. Top evenly with pomegranate and cilantro.
- SERVES 10 (serving size: about 11/3 cups, about 2 teaspoons pomegranate arils, and about 1 teaspoon cilantro)
Notes
- CALORIES 125; FAT 5.6g (sat 0.8g, mono 4g, poly 0.6g); PROTEIN 2g; CARB 20g; FIBER 3g; CHOL 0mg; IRON 1mg; SODIUM 294mg; CALC 71mg -
↑ Back to top
Butterscotch Sauce
Servings: YIELD 3/4 cup
Ingredients
- 1/4 cup (4 tablespoons, 2 ounces or 1/2 stick) unsalted butter
- 1/2 cup (about 109 grams) packed dark or light brown sugar (I used dark)
- 1/2 cup (118 ml) heavy cream
- 1/2 teaspoon (2 grams) flaky sea salt (or 1/4 teaspoon regular salt), plus more to taste
- 1 1/2 teaspoons (8 ml) vanilla extract, plus more to taste
Steps
- Melt butter in a medium heavy-bottomed saucepan over medium heat. Add the sugar, cream and salt and whisk until well blended. [A flat whisk works great here.]
- Bring to a very gentle boil and cook for about five minutes, whisking occasionally.
- Remove from heat and add one teaspoon of the vanilla extract, stirring to combine and this is where, despite the simplicity of the recipe, you get to feel all “chef-y”. Dip a spoon in the sauce and carefully taste the sauce (without burning your tongue!) to see if you want to add additional pinches or salt or splashes of vanilla. Tweak it to your taste, whisking well after each addition. I ended up using a full teaspoon of flaky salt and the listed amount of vanilla to get a butterscotch sauce with a very loud, impressive butterscotch flavor but the strength of your vanilla and intensity of your salt may vary.
- Serve cold or warm over vanilla ice cream, roasted pears or pound cake. The sauce will thicken as it cools. It can be refrigerated in an airtight container and reheated in a microwave or small saucepan.
Notes
- FAVORITE
↑ Back to top
Buttery Hamantaschen
Adapted from https://toriavey.com/buttery-hamantaschen/

Tags: Baking
Holidays Jewish
I made this.
Servings: 35
Ingredients
- 3/4 cup unsalted butter, room temperature
- 2/3 cup sugar
- 1 teaspoon vanilla
- 1 teaspoon grated orange zest
- 2 1/4 cups flour
- 1/4 teaspoon salt
- 1 tsp baking powder
- 1-5 teaspoons water (if needed)
- You will also need: Large mixing bowl, electric mixer, sifter, pastry scraper, rolling pin, 3-inch cookie cutter or drinking glass with 3-inch diameter rim
1 large egg,
room temperature:
NOTES:
Steps
- Slice room temperature butter into small chunks and place in a large mixing bowl.
- Add sugar to the bowl. Use an electric mixer to cream the butter and sugar together for a few minutes till light and fluffy.
- Add the egg, vanilla, and orange zest to the bowl. Beat again till creamy and well mixed.
- Sift flour and salt into the bowl.
- Begin to knead dough with hands till a smooth dough ball forms. Try not to overwork the dough, only knead till the dough is the right consistency. If the crumbles are too dry to form a smooth dough, add water slowly, 1 teaspoon at a time, using your hands to knead the liquid into the dough. Knead and add liquid until the dough is smooth and slightly tacky to the touch (not sticky), with a consistency that is right for rolling out. It can easily go from the right consistency to too wet/sticky, so add water very slowly. If the dough seems too wet, knead in a little flour till it reaches the right texture.
- Form the dough into a flat disk and wrap in plastic wrap. Place in the refrigerator to chill for 3 hours to overnight.
- Before you begin to assemble the hamantaschen, choose and make your filling and have it on hand to work with. Preheat oven to 350 degrees F. Lightly flour a smooth, clean surface. Unwrap the dough disk and place it on the floured surface. The dough will be very firm after chilling.
- Use a rolling pin to roll the dough out to 1/4 inch thick. At the beginning, it will be tough to roll out-- you may need to pound it a bit. A heavy rolling pin works best. As you roll, cracks may form on the edges of the dough. Repair any large cracks with your fingers and continue rolling.
- Use a 3-inch cookie cutter (not smaller) or the 3-inch rim of a glass to cut circles out of the dough, cutting as many as you can from the dough.
- Place a teaspoon of filling (whichever filling you choose) into the center of each circle. Do not use more than a teaspoon of filling, or you run the risk of your hamantaschen opening and filling spilling out during baking. Cover unused circles with a lightly damp towel to prevent them from drying out while you are filling.
- Assemble the hamantaschen in three steps. First, grasp the left side of the circle and fold it towards the center to make a flap that covers the left third of the circle.
- Grasp the bottom part of the circle and fold it upward to create a third flap and complete the triangle. When you fold this flap up, be sure to tuck the left side of this new flap underneath the left side of the triangle, while letting the right side of this new flap overlap the right side of the triangle. This way, each side of your triangle has a corner that folds over and a corner that folds under-- it creates a "pinwheel" effect. This method if folding is not only pretty-- it will help to keep the cookies from opening while they bake.
- Pinch each corner of the triangle gently but firmly to secure the shape. If any cracks have formed at the places where the dough is creased, use the warmth of your fingers to smooth them out.
- When all of your hamantaschen have been filled, place them on a lightly greased baking sheet, evenly spaced.
- Place them in the oven and let them bake at 350 degrees for 10-25 minutes, until the cookies are cooked through and lightly golden. Start checking them at 10 minutes; because the dough thickness tends to vary on these cookies they can cook quite fast if rolled thin. In most ovens it will take around 15-20 minutes, but best to keep a close watch over them as they cook to avoid overcooking or burning.
Mix with the electric mixer
on low speed till a crumbly dough forms.
When the dough reaches 1/4 inch thickness, scrape the dough up with a
pastry scraper, lightly reflour the surface, and flip the dough over.
Continue rolling the dough out very thin (less than 1/8 of an inch
thick). The thinner you roll the dough, the more delicate and crisp
the
cookies will turn out-- just make sure that the dough is still thick
enough to hold the filling and its shape! If you prefer a thicker,
more
doughy texture to your cookies (less delicate), keep the dough closer
to 1/4 inch thick. Lightly flour the rolling pin occasionally to
prevent sticking.
Gather the scraps and roll them out again. Cut circles. Repeat process
again if needed until you've cut as many circles as you can from the
dough. You should end up with around 35 circles (unless you've kept
your dough on the thicker side, which will result in less cookies).
Grasp the right side of the circle and fold it towards the center,
overlapping the upper part of the left side flap to create a
triangular
tip at the top of the circle. A small triangle of filling should still
be visible in the center.
Repeat this process for the
remaining circles.
Cool the cookies on a wire
rack. Store them in a tightly sealed plastic bag or Tupperware.
↑ Back to top
Buttery Hamantaschen
Adapted from https://toriavey.com/buttery-hamantaschen/

Rated 3/5
Servings: 35
Ingredients
- 3/4 cup unsalted butter, room temperature
- 2/3 cup sugar
- 1 large egg, room temperature
- 1 teaspoon vanilla
- 1 teaspoon grated orange zest
- 2 1/4 cups flour
- 1/4 teaspoon salt
- 1-5 teaspoons water (if needed)
- You will also need: Large mixing bowl, electric mixer, sifter, pastry scraper, rolling pin, 3-inch cookie cutter or drinking glass with 3-inch diameter rim
NOTES:
Steps
- Slice room temperature butter into small chunks and place in a large mixing bowl.
- Add sugar to the bowl. Use an electric mixer to cream the butter and sugar together for a few minutes till light and fluffy.
- Add the egg, vanilla, and orange zest to the bowl. Beat again till creamy and well mixed.
- Sift flour and salt into the bowl.
- Begin to knead dough with hands till a smooth dough ball forms. Try not to overwork the dough, only knead till the dough is the right consistency. If the crumbles are too dry to form a smooth dough, add water slowly, 1 teaspoon at a time, using your hands to knead the liquid into the dough. Knead and add liquid until the dough is smooth and slightly tacky to the touch (not sticky), with a consistency that is right for rolling out. It can easily go from the right consistency to too wet/sticky, so add water very slowly. If the dough seems too wet, knead in a little flour till it reaches the right texture.
- Form the dough into a flat disk and wrap in plastic wrap. Place in the refrigerator to chill for 3 hours to overnight.
- Before you begin to assemble the hamantaschen, choose and make your filling and have it on hand to work with. Preheat oven to 350 degrees F. Lightly flour a smooth, clean surface. Unwrap the dough disk and place it on the floured surface. The dough will be very firm after chilling.
- Use a rolling pin to roll the dough out to 1/4 inch thick. At the beginning, it will be tough to roll out-- you may need to pound it a bit. A heavy rolling pin works best. As you roll, cracks may form on the edges of the dough. Repair any large cracks with your fingers and continue rolling.
- Use a 3-inch cookie cutter (not smaller) or the 3-inch rim of a glass to cut circles out of the dough, cutting as many as you can from the dough.
- Place a teaspoon of filling (whichever filling you choose) into the center of each circle. Do not use more than a teaspoon of filling, or you run the risk of your hamantaschen opening and filling spilling out during baking. Cover unused circles with a lightly damp towel to prevent them from drying out while you are filling.
- Assemble the hamantaschen in three steps. First, grasp the left side of the circle and fold it towards the center to make a flap that covers the left third of the circle.
- Grasp the bottom part of the circle and fold it upward to create a third flap and complete the triangle. When you fold this flap up, be sure to tuck the left side of this new flap underneath the left side of the triangle, while letting the right side of this new flap overlap the right side of the triangle. This way, each side of your triangle has a corner that folds over and a corner that folds under-- it creates a "pinwheel" effect. This method if folding is not only pretty-- it will help to keep the cookies from opening while they bake.
- Pinch each corner of the triangle gently but firmly to secure the shape. If any cracks have formed at the places where the dough is creased, use the warmth of your fingers to smooth them out.
- When all of your hamantaschen have been filled, place them on a lightly greased baking sheet, evenly spaced.
- Place them in the oven and let them bake at 350 degrees for 10-25 minutes, until the cookies are cooked through and lightly golden. Start checking them at 10 minutes; because the dough thickness tends to vary on these cookies they can cook quite fast if rolled thin. In most ovens it will take around 15-20 minutes, but best to keep a close watch over them as they cook to avoid overcooking or burning.
Mix with the electric mixer
on low speed till a crumbly dough forms.
When the dough reaches 1/4 inch thickness, scrape the dough up with a
pastry scraper, lightly reflour the surface, and flip the dough over.
Continue rolling the dough out very thin (less than 1/8 of an inch
thick). The thinner you roll the dough, the more delicate and crisp
the
cookies will turn out-- just make sure that the dough is still thick
enough to hold the filling and its shape! If you prefer a thicker,
more
doughy texture to your cookies (less delicate), keep the dough closer
to 1/4 inch thick. Lightly flour the rolling pin occasionally to
prevent sticking.
Gather the scraps and roll them out again. Cut circles. Repeat process
again if needed until you've cut as many circles as you can from the
dough. You should end up with around 35 circles (unless you've kept
your dough on the thicker side, which will result in less cookies).
Grasp the right side of the circle and fold it towards the center,
overlapping the upper part of the left side flap to create a
triangular
tip at the top of the circle. A small triangle of filling should still
be visible in the center.
Repeat this process for the
remaining circles.
Cool the cookies on a wire
rack. Store them in a tightly sealed plastic bag or Tupperware.
↑ Back to top
Buttery Lemon Pasta with Almonds and Arugula
Adapted from https://cooking.nytimes.com/recipes/1023797-buttery-lemon-pasta-with-almonds-and-arugula
Servings: 4 to 6
Ingredients
- Fine salt and freshly ground black pepper
- 1 pound linguine or spaghetti
- 6 tablespoons unsalted butter
- 1 cup sliced almonds
- 2 fresh rosemary sprigs
- ¼ teaspoon red-pepper flakes, plus more to taste
- ¼ cup freshly squeezed lemon juice, plus more to taste
- 1 tablespoon finely grated lemon zest
- 4 to 5 ounces baby or wild arugula, coarsely chopped, or use baby kale or spinach (4 to 5 cups)
- Grated Parmesan, for serving
Steps
- Bring a large pot of heavily salted water to a boil. Add pasta and cook until it is 1 minute shy of being al dente, usually a minute or 2 less than the package instructions. Scoop out about 1½ cups pasta water, then drain pasta.
- While the pasta cooks, in a large skillet or Dutch oven, melt butter over medium heat. Cook, swirling occasionally, until the foam subsides, the milk solids turn golden-brown and the butter smells nutty and toasty, 3 to 4 minutes. (Watch carefully to see that it doesn’t burn.)
- Stir in almonds, rosemary and red-pepper flakes, and cook, stirring occasionally, until the nuts are toasted and slightly darker in color, about 1 minute.
- Add about 1 cup pasta water to the skillet and bring to a simmer. Add lemon juice, zest, ½ teaspoon salt and a large pinch of black pepper, then add drained pasta and toss well. Add arugula, tossing until it wilts. Simmer for another minute, if needed, to thicken the sauce until it’s thick and glossy. If the mixture seems dry, add more pasta water 1 tablespoon at a time.
- Taste and add more salt, red-pepper flakes and lemon juice, if needed. Serve topped with grated Parmesan and more red-pepper flakes, if you like.
↑ Back to top
Buttery, Flaky Pie Crust
Tags: Pastry
Pies and Tarts
Servings: 2 pies
Ingredients
- 8 ounces low-protein all-purpose flour, such as Gold Medal Blue Label (1 2/3 cups; 225g), plus more for dusting
- 1/2 ounce sugar (1 tablespoon; 15g)
- 1 teaspoon ( 4 g) Diamond Crystal kosher salt; for table salt, use half as much by volume or use the same weight
- 8 ounces unsalted, American-style butter, straight from the fridge (2 sticks; 225g), cold
- 4 ounces cold tap water (1/2 cup; 115g)
Steps
- For the Dough: Whisk flour, sugar, and salt together in a medium bowl. Cut butter into cubes no smaller than 1/2 inch, and toss with flour mixture to break up the pieces. With your fingertips, smash each cube flat—that's it! No rubbing or cutting. Stir in water, then knead dough against sides of the bowl until it comes together in a shaggy ball. Dough temperature should register between 65 and 70°F (18 and 21°C); if not, refrigerate briefly before rolling and folding (see note).
- Make the Layers: On a generously floured work surface, roll dough into a roughly 10- by 15-inch rectangle. Fold the 10-inch sides to the center, then close the newly formed packet like a book. Fold in half once more, bringing the short sides together to create a thick block. Divide in half with a sharp knife or bench scraper. Dough temperature should still be somewhere between 65 and 70°F (18 and 21°C); if not, refrigerate briefly before proceeding (see note).
- For Single-Crusted Pies: Using as much flour as needed, roll one piece into a 14-inch circle; this size allows ample room to line pie plate, with enough overhang to form a generous border. At smaller sizes, dough will fall short, making it difficult to shape edges, and thicker dough will not crisp as intended. Transfer to 9-inch pie plate; dough should be easy to handle, and will not require any special procedures to move. Dust off excess flour with a pastry brush, using it to nestle dough into corners of pan. With scissors or kitchen shears, trim edge so that it overhangs by 1 1/4 inches. Fold overhang over itself to create thick border that sits on top edge of pie plate, not below. Crimp or shape crust as desired. Repeat with remaining dough. Wrap with plastic and refrigerate at least 2 hours and up to overnight. Use as directed in your favorite recipe.
- For a Double-Crusted Pie: Using as much flour as needed, roll one piece into a 14-inch circle; this size allows ample room to line pie plate, with enough overhang to form a generous border. At smaller sizes, dough will fall short, making it difficult to shape edges, and thicker dough will not crisp as intended. Transfer to 9-inch pie plate; dough should be easy to handle, and will not require any special procedures to move. Dust off excess flour with a pastry brush, using it to nestle dough into corners of pan. With scissors or kitchen shears, trim edge so that it overhangs by 1 1/4 inches. For solid top crust, roll remaining dough as before; for lattice-top pie, roll into a 9- by 15-inch rectangle instead. Transfer to a baking sheet or parchment-lined cutting board. (The parchment will prevent dough from absorbing any savory odors from the board.) Wrap both portions in plastic and refrigerate at least 2 hours and up to overnight. Use as directed in your favorite recipe; after filling pie and sealing crusts together, refrigerate 30 minutes before baking.
- For a Blind-Baked Pie: Adjust oven rack to lower-middle position and preheat to 350°F (180°C). Line pie shell that has been chilled for at least 2 hours (as outlined in Step 3) with large sheet of aluminum foil, pressing so it conforms to curves of plate. (A second sheet of foil may be needed for full coverage.) Fill to brim with sugar, transfer to a half sheet pan, and bake until fully set and golden around the edges, 60 to 75 minutes. Fold long sides of foil toward middle, gather short sides, and use both hands to carefully transfer sugar to heat-safe bowl. Let sugar cool to room temperature. If needed, continue baking crust a few minutes more to brown along the bottom.
Notes
- Compared to stoneware or heavy enameled ceramic, tempered-glass pie plates conduct heat quickly and evenly, so the crust bakes up light and crisp, never greasy or soft.
- When room temperature exceeds 74°F (23°C), kitchen equipment and pantry staples will act as a heat source to the butter, creating a sticky dough. If it’s warm in your kitchen, take these proactive steps to manage your dough temperature.
↑ Back to top
Byrdhouse Spicy Chicken and Peaches
Ingredients
- 1 (15 ounce) can peaches, drained and chopped
- 4 cloves garlic, pressed
- 1 1/2 cups orange juice
- 2 tablespoons distilled white vinegar
- 2 tablespoons brown sugar
- 1 1/2 teaspoons nutmeg
- 1/2 teaspoon red pepper flakes
- 2 teaspoons dried basil
- salt and pepper to taste
- 4 (6 ounce) skinless, boneless chicken breast halves - cut into bite-size pieces
- 2 tablespoons flour
- 3 tablespoons butter
Steps
- Bring peaches, garlic, orange juice, vinegar, sugar, nutmeg, red pepper flakes, and basil to a boil in a saucepan over high heat. Reduce heat to medium-low, and simmer for 15 minutes, stirring occasionally.
- Meanwhile, season the chicken to taste with salt and pepper, then dust with flour and shake off the excess. Melt the butter in a large skillet over medium-high heat. Add the chicken, and cook until lightly brown on both sides, but still pink in the center.
- Season peach sauce with salt and pepper, and pour over browned chicken. Return the chicken to a simmer, then reduce heat to medium-low, cover, and simmer 15 minutes more until the chicken is no longer pink in the center.
Notes
- FAVORITE
↑ Back to top
Bánh Mì Khong (Bánh Mì Bread)

Servings: 4 to 6 loaves
Ingredients
- 450 g ( 3 1/2 cups) bread flour
- 7 g ( 1 1/2 teaspoons) instant yeast (see note)
- 7 g ( 1 3/4 teaspoons) Diamond Crystal kosher salt; for table salt, use half as much by volume or the same weight
- 270 g ( 1 1/4 cups) tepid water
- 25 g ( 2 tablespoons plus 1 teaspoon) canola or other neutral flavored oil
- 15 g ( 1 tablespoon) fresh lime juice
- 12 g ( 2 teaspoons) sugar
- Nonstick cooking spray
Steps
- In a stand mixer bowl, whisk flour, yeast, and salt to combine. In a liquid measuring cup or bowl, whisk water, oil, lime juice, and sugar until sugar is dissolved.
- Fit stand mixer with dough hook, and on medium-low speed, slowly pour water mixture into flour mixture and mix until a shaggy dough forms, about 2 minutes. Increase the speed to medium and continue to mix, scraping down bowl and dough hook as needed, until the dough is smooth and stretchy and clears the sides of bowl, but sticks to the bottom, about 5 minutes.
- Using clean hands, transfer dough to a lightly oiled work surface and knead by hand to form a smooth, round ball, about 30 seconds. Place dough seam side down in a lightly greased large bowl. Cover bowl with plastic wrap and let sit at warm room temperature (75°F/24°C) until doubled in size, 1 to 1 1/2 hours.
- Transfer dough to a lightly oiled work surface. Using your hands, punch dough down to deflate, then form it into a taut ball, and let rest, covered, for 20 minutes.
- Divide dough into 4 even portions for longer banh mi loaves or 6 dough portions for shorter loaves (see notes). Lightly spray the dough portions all over with cooking spray, cover with plastic wrap, and let rest for 15 minutes.
- Working with one dough portion at a time, pull edges of the dough towards the center, pinching ends together, to create a tight ball. Set dough ball seam side down on work surface, then cup dough beneath your palm and work it in quick circular motion to form a smooth ball. Repeat with remaining portions of dough. Let rest, covered, for 15 minutes.
- Flip each dough ball so that the seam side is on top. Working with one dough ball at a time, use your fingers to press down and deflate two-thirds of the ball; the remaining one-third of the dough ball should still be airy and plump with an elongated football shape.
- Using a small, lightly oiled French tapered rolling pin or other small rolling pin, roll the deflated side of dough until it is evenly flat and fans outward (for smaller loaves about 10 inches wide and 1/8 inch thick; for larger loaves, 12 inches wide and 1/8 inch thick), while keeping the inflated portion of the dough untouched (this ensures the center of each will be full and fluffy). The rolled out portion of the dough should be longer than the still inflated portion of the dough.
- Using both hands and starting with the still-inflated portion of dough, gently roll the dough over itself to form a log; continue rolling until a longer baguette forms with tapered ends (you should have a tapered baguette measuring about 1 1/2 inches thick in the middle that is about 8 inches long for smaller loaves and 10 inches long for larger ones). Gently press and pinch seam closed along the length of loaf.
- Transfer shaped loaf, seam side down, to a perforated baguette tray that has been lightly coated with cooking spray (see notes). Repeat loaf shaping with remaining portions of dough, then spray the loaves evenly with cooking spray and loosely cover with plastic wrap. Let rest until the dough springs back slowly when pressed lightly, about 45 minutes.
- Meanwhile, adjust oven racks to the upper-middle position and the lowest position. Place a large baking dish on the bottom oven rack and fill halfway with boiling water. Preheat oven to 475°F (246°C).
- Holding a bread lame concave side up, with handle oriented at a 30-degree angle to loaf, make one 1/4-inch deep slash along the centerline of each loaf, using a single swift motion from one end to the other, but leaving 1/2-inch uncut at each end.
- Using a spray bottle of water, mist the surface of each loaf. Working quickly, place loaves in the oven, then mist the inside walls of the oven with water. Bake loaves for 8 minutes, then rotate the tray and bake 4 minutes longer.
- Reduce oven temperature to 400°F (205°C) and continue to bake loaves until golden brown all over, 6 to 8 minutes. If the bottoms of the loaves have not achieved the desired color, flip loaves upside down and bake until bottoms are golden brown, 2 to 3 minutes. Transfer loaves to a wire rack and let cool for at least 15 minutes before serving.
- Special Equipment
- Stand mixer with dough hook attachment, French tapered or other small rolling pin, perforated baguette tray (preferred) or rimmed baking sheet, bread lame, spray bottle of water
Notes
- Take care: instant yeast is not the same as active dry yeast. We prefer it for its longer shelf life and the fact that it does not require blooming before using in a recipe (read more about different types of yeast here).
- Bánh mì loaves are typically smaller in size for individual sandwiches, which is what 6 portions of dough will produce, but feel free to make slightly larger ones by dividing into 4 portions instead.
- A perforated baguette tray will produce the best results, but if you don't have one you can use a rimmed baking sheet, though the breads will need to be formed very well to bake into the proper shape.
- If baking 6 loaves: Most baguette trays you should be able to to fit two 8-inch loaves in one channel to bake the full batch at once, but if for some reason your tray can't accommodate all 6 at once when making the smaller size loaves, set 2 aside and bake after the first round.
- Make-Ahead and Storage
- Dough can be made ahead, covered, and refrigerated overnight to bulk proof in step 1. Let dough sit at room temperature for 30 minutes before shaping.
- Baked loaves can be stored in paper bags at room temperature for up to 2 days. If the bread's crust becomes soft, moisten the entire loaf with water before reheating in a 375°F (190°C) oven until hot and crispy.
↑ Back to top
Bánh Pho

Tags: Soups
Vietnam
One morning not too long ago, I began thinking
about pho, virtually the national dish of Vietnam. Typically, it is a
beef soup with rice noodles and loads of aromatic garnishes. Such was
the power of imagination that I determined to have it for dinner that
night. Like most people, I don't have enough hours in the day to do
everything I'd like to do, but as a self-employed writer I'm flexible
in how I chose to organize those hours. So, when the urge for pho
struck, I knew I could make a one-hour beef stock at lunchtime and have
a complete traditional pho on the table at dinnertime.
For traditional pho, the cook simmers meaty beef bones to make a stock (seasoned with charred ginger, onion, and sweet spices), then slices off the tough meat and includes it in the finished soup. But by then, the flavor will have cooked out of the meat. Better to use an inexpensive cut raw, slice it thin, and barely cook it. Or even serve it raw in the bowl and ladle hot broth over it and the noodles.
The
Servings: 4 TO 6
Ingredients
- 2 quarts/2 liters One-Hour Beef Stock
- 1 medium onion, peeled if desired and halved through its equator
- 1 (3-inch/8-centimeter) piece ginger, halved lengthwise
- Vegetable oil, as needed
- 2 cinnamon sticks
- 3 or 4 star anise
- 5 whole cloves
- 12 to 16 ounces/ 340 to 450 grams
- bánh pho or rice noodles of your choice
- to 1 1/2-pound/ 450- to 650-gram boneless eye round or top loin, thinly sliced and seasoned with salt, at room temperature
- 1 cup/90 grams bean sprouts
- Fresh herb leaves: mint and/or spearmint, culantro and/or cilantro, Thai basil, Scallions, thinly sliced, Lime juice, Fish Sauce, Sriracha
Raw garnishes,
to taste:
Steps
- ln a large saucepan, bring the beef stock to a simmer. Meanwhile, rub the cut sides of the onion and ginger with a little oil and sear them in a dry saute pan over high heat till they are charred, 3 to 5 minutes.
Transfer them to the stock. Toast the cinnamon, star anise, and cloves
in the same pan for a minute or so, until they're fragrant. Add these
ingredients to the stock and gently simmer for about 45 minutes.
While the stock is simmering, put the noodles in a large bowl or
saucepan and pour boiling water over them. Let them soak for 10 to 20
minutes, then strain them. Scoop out the aromatics from the
stock
(or strain it). Cook the noodles and then the bean sprouts either in
the stock (use a strainer) or separately. Stir the beef into the
simmering stock, then serve the soup, beef, and noodles immediately,
garnishing to your taste.
Notes
- ©Michael Ruhlman
↑ Back to top
Cabbage Roll Soup
Adapted from https://ineskohl.info/cabbage-roll-soup/
Ingredients
- 1 lb minced beef
- 22 oz crushed tomatoes
- 2 carrots
- 14 oz white cabbage
- 2 Tablespoons olive oil
- 6 cups beef broth
- ½ cup rice
- 4 cloves garlic
- 2 Tablespoons sugar
- 1 bay leaf
- 1 bulb onion
- 2 teaspoon salt
- ½ teaspoon ground black pepper
Steps
- Cut onions into small slices.
- In a medium size pot, over medium heat, Add olive oil and chopped onions and leave for four minutes, Add the minced beef to the pot. Mix the ingredients and leave for five minutes.
- Cut the carrots and cabbage into small pieces.
- Add the carrots, cabbage, rice, mashed garlic, salt, pepper, sugar, bay leaf, beef broth, and tomato sauce to the pot with the rest of the ingredients. Using a wooden spoon, mix the ingredients.
- Cover the pot and leave it on low heat for half an hour.
- Now it is ready to serve and enjoy.
↑ Back to top
Cabbage Schnitzel
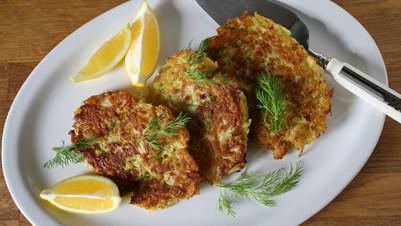
Tags: Austria
Vegetables Vegetarian
Ingredients
- 1½ lbs (680 grams) cabbage, about 16 cups shredded
- ½ small yellow onion
- 3 large eggs
- ⅓ cup plain bread crumbs/matzah meal
- ¼ cup all-purpose flour
- Salt and pepper, to taste
- Oil, as needed
- Fresh dill, for garnish
- Lemon wedges, for garnish
Steps
- Start by shredding your cabbage thin. This can be done with a mandoline, a food processor with the shredding disc attachment, or even with a sharp knife.
- Fill a large pot with water and bring the water to a boil. Salt the water generously and then add the shredded cabbage to the boiling water. Cook until the cabbage is tender, about 3-4 minutes. Drain in a colander, and then allow the cabbage to sit and continue to drain and cool for at least 10 minutes.
- While the cabbage is cooling and draining, prepare the remaining ingredients. Grate the onion or chop it very fine. Beat the eggs and reserve.
- Once cooled, squeeze out any excess liquid from the cabbage and add it to a large bowl. To the cabbage add the onion, beaten eggs, bread crumbs, flour, and salt and pepper. Stir until the cabbage is evenly and well-coated in the breadcrumb and egg mixture. The mixture should be thick and it should stick together to be formed into patties. If the mixture is too liquidy, add more breadcrumbs/flour. If you want to taste for seasoning, take a small spoonful of the mixture and cook and brown it in a pan before cooking off all of the schnitzels.
- Heat a large skillet filled with a ¼” of neutral cooking oil (like avocado or canola). Once the oil is hot, form the cabbage mixture into schnitzel-shaped patties in the pan, about ½”-thick. Cook the patties in batches, so as not to crowd the pan and cause the cabbage to steam instead of brown. Cover the pan with a lid and brown for 3-4 minutes. Lift the lid, carefully flip over the patties (a fish spatula works well for this), cover again, and brown for an additional 2-3 minutes or until the schnitzels are golden brown and crisp on each side.
- Once cooked, transfer to a paper towel-lined plate or rack to drain some of the excess oil. Serve the schnitzels immediately, garnished with fresh dill and lemon wedges if desired.
↑ Back to top
Cacio E Pepe
Adapted from https://www.177milkstreet.com/recipes/cacio-e-pepe
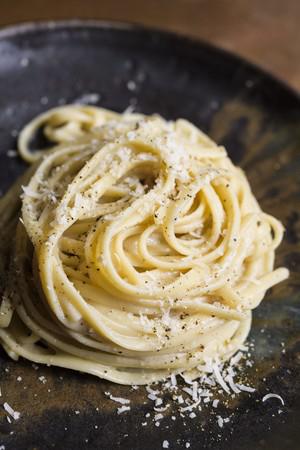
Tags: Dairy
Italian Pasta
Ingredients
- 1½ CUPS WATER
- 2 TEASPOONS CORNSTARCH
- 6 OUNCES PECORINO ROMANO CHEESE, FINELY GRATED (3 CUPS), PLUS EXTRA TO SERVE
- 12 OUNCES LINGUINI OR SPAGHETTI
- 2 TABLESPOONS KOSHER SALT
- 2 TEASPOONS GROUND BLACK PEPPER, PLUS MORE TO SERVE
Steps
- In a large pot, bring 4 quarts of water to a boil. Meanwhile, in a large saucepan, whisk the water and cornstarch until smooth. Add the pecorino and stir until evenly moistened. Set the pan over medium-low and cook, whisking constantly, until the cheese melts and the mixture comes to a gentle simmer and thickens slightly, about 5 minutes. Remove from the heat and set aside.
- Stir the pasta and salt into the boiling water and cook until al dente. Reserve about ½ cup of the cooking water, then drain the pasta very well. Return the pasta to the pot and let cool for about 1 minute.
- Pour the pecorino mixture over the pasta and toss with tongs until combined, then toss in the pepper. Let stand, tossing two or three times, until most of the liquid has been absorbed, about 3 minutes. The pasta should be creamy but not loose. If needed, toss in reserved pasta water 1 tablespoon at a time to adjust the consistency. Transfer to a warmed serving bowl and serve, passing more pecorino and pepper on the side. For Pasta Gricia: In a 10-inch skillet over medium, cook 3 ounces finely chopped pancetta until crisp, about 5 minutes. Using a slotted spoon, transfer the pancetta to a paper towel–lined plate; reserve 2 tablespoons of the rendered fat. Follow the recipe for cacio e pepe, whisking the fat into the pecorino mixture before setting it aside. Stir the cooked pancetta into the pasta along with the pepper.
SEE DEMO:
Notes
- Tip: Don’t use pre-shredded cheese, even if it's true pecorino Romano. And grate it on the small holes of a box grater; larger shreds won’t melt. Don’t pour the pecorino mixture onto the piping-hot, just-drained pasta; letting the pasta cool for a minute or so ensures the mixture won’t break from overheating.
↑ Back to top
Cacio E Pepe
Adapted from https://belaya.info/cacio-e-pepe.html
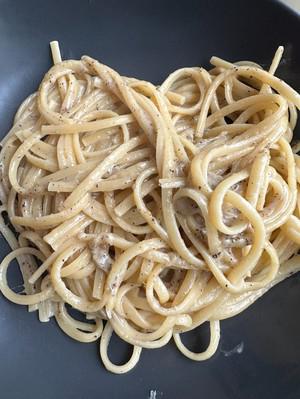
Ingredients
- Kosher salt
- 6 oz. pasta (such as egg tagliolini, bucatini, or spaghetti)
- 3 Tbsp. unsalted butter, cubed, divided
- 1 tsp. freshly cracked black pepper
- ¾ cup finely grated Grana Padano or Parmesan
- ⅓ cup finely grated Pecorino
Steps
- Bring 3 quarts water to a boil in a 5-qt. pot.
- Meanwhile, melt 2 Tbsp. butter in a Dutch oven or other large pot or skillet over medium heat.
- Add ½ cup reserved pasta water to skillet and bring to a simmer.
Season with salt; add pasta
and cook, stirring occasionally, until about 2 minutes before tender.
Drain, reserving ¾ cup pasta
cooking water.
Add pepper and cook, swirling
pan, until toasted, about 1 minute.
Add pasta and remaining
butter.
Reduce heat to low and add
Grana Padano, stirring and tossing with tongs until melted.
Remove pan from heat; add Pecorino, stirring and tossing until cheese
melts, sauce coats the pasta, and pasta is al dente. (Add more pasta
water if sauce seems dry.)
Transfer pasta to warm bowls
and serve.
Notes
- Cheese Selection: The combination of Grana Padano (or Parmesan) and Pecorino cheeses is essential for achieving the authentic flavors of Cacio e Pepe. Grana Padano provides a nutty and milder flavor, while Pecorino brings a more pronounced saltiness and tanginess.
- Pasta Cooking Technique: Cooking the pasta until it is just shy of al dente ensures that it finishes cooking perfectly in the sauce, absorbing flavors while maintaining a firm texture.
- Building Flavor: Toasting the freshly cracked black pepper in butter enhances its aroma and flavor, crucial for the characteristic peppery taste of the dish.
- Sauce Consistency: Adding reserved pasta water gradually to the cheese mixture helps emulsify and create a creamy sauce that coats the pasta evenly. Adjust the amount of pasta water based on the desired consistency of the sauce.
- Final Assembly: Removing the skillet from heat before adding the Pecorino prevents the cheese from becoming grainy or clumpy. Tossing the pasta with the cheese off the heat ensures a smooth and velvety sauce.
- Serving: Serve Cacio e Pepe immediately in warm bowls to enjoy it at its best. Garnish with additional Pecorino or black pepper if desired.
↑ Back to top
Cacio e Pepe
Adapted from https://altonbrown.com/wprm_print/cacio-e-pepe
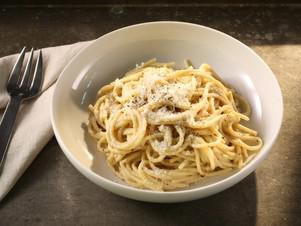
Servings: 4
Ingredients
- 3 cups finely grated pecorino Romano cheese
- 1 1/2 cups finely grated Parmesan cheese
- 1/3 cup extra-virgin olive oil
- 2 tablespoons freshly ground black pepper, plus more for serving if desired
- 1 pound dry spaghetti
- 2 tablespoons kosher salt
- Cold water, for cooking the pasta
Steps
- Combine 2 3/4 cups (100 grams) of the Pecorino, all of the Parmesan, the olive oil, and the 2 tablespoons (14 grams) pepper in a large, deep mixing bowl. Work the ingredients together with the back of a wooden spoon until a thick paste forms, 2 to 3 minutes. Set aside while you cook the pasta.
- Combine the pasta and salt in a 3-quart, straight-sided sauté pan. Add enough cold water to just barely cover the pasta and measure 1 1/2 inches deep total. Cover, set over medium-high heat, and bring to a boil, about 10 minutes.
- When the water reaches a boil, remove the lid and decrease the heat to medium to maintain a simmer. Stir the pasta every minute or so, making sure the ends of the noodles stay submerged and that they aren't sticking together.
- After the pasta has been simmering for 5 minutes, ladle 1 cup of the cooking water into a measuring cup, then slowly drizzle 3/4 cup of that water into the cheese paste, mixing until smooth, about 2 minutes.
- At this point, check the pasta for doneness; you want it to be just barely al dente as there'll be some carryover cooking in the next step. If it isn’t al dente, continue to check on the pasta every 30 seconds until you are happy with it.
- Use tongs to lift the pasta out of the cooking water and allow to briefly drain before adding to the bowl with the cheese paste. Grasp the pasta with the tongs and stir and toss vigorously for 2 minutes. (Really use a lot of elbow grease here — this is not a light toss.) The pasta will continue to release starch and the sauce will emulsify. After around 1 1/2 minutes, you will see cheesy water magically transform into a proper sauce. If you find your sauce clumping, add a bit more of the reserved pasta water and continue working the pasta.
- Portion the pasta into four bowls, top with the remaining Pecorino and additional black pepper, if desired, and serve immediately.
↑ Back to top
Caesar Green Bean Salad
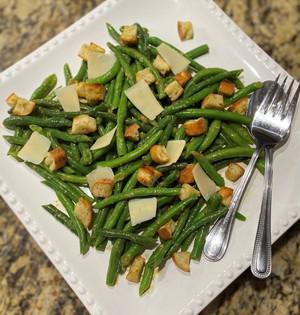
Tags: Salad
Vegetables
Servings: 6
Ingredients
- 1 1/2 T. lemon juice
- 1 T. Worcestershire sauce
- 1 T. Dijon mustard
- 3 cloves garlic pressed
- 3 anchovy fillets minced into paste
- 1/2 tsp. black pepper
- 1/4 tsp. salt
- 3 T. extra virgin olive oil
- 1 1/2 lbs. fresh green beans trimmed
- 1 1/2 tsp. salt
- 2 oz. Parmesan cheese shaved with a vegetable peeler
- 3 oz. baguette cut into 1/2-inch pieces
- 3 T. extra virgin olive oil
- 1/4 tsp. black pepper
DRESSING &
GREEN BEANS:
CROUTONS:
Steps
- DRESSING: In a small bowl, whisk together lemon juice, Worcestershire, mustard, garlic, anchovies, 1/2 teaspoon pepper and 1/4 teaspoon salt until combined. Slowly whisk in olive oil until emulsified; set aside.
- GREEN BEANS: Line a rimmed baking sheet with a clean dish towel. Bring 4 quarts of water to a boil in a large Dutch oven. Add green beans and 1 1/2 teaspoons salt, return to a boil, cook until tender, about 5-7 minutes. Drain green beans in a colander then spread in an even layer on the prepared baking sheet. Allow beans to cool completely.
- CROUTONS: Meanwhile, toss baguette pieces, olive oil, and pepper in a large bowl until pieces are coated with oil. Transfer to a 12-inch non-stick skillet (reserve bowl). Cook over medium-high heat until, stirring occasionally, until golden brown and crispy about 5-7 minutes. Return croutons to the reserved bowl.
- Transfer dressing, green beans, and half of the Parmesan cheese to the bowl with croutons; toss to combine. Season with salt and pepper to taste. Transfer to a serving dish. Sprinkle with remaining Parmesan cheese, enjoy!
↑ Back to top
Caesar Salad Dressing
Adapted from https://www.seriouseats.com/caesar-dressing-recipe
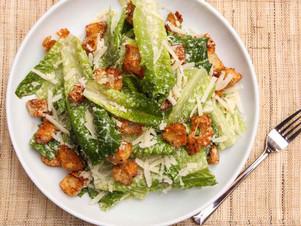
Servings: 3/4 cup
Ingredients
- 1 large egg yolk (see note)
- 1 tablespoon ( 15 ml) juice from 1 lemon
- 2 oil-packed anchovy fillets, or more to taste, up to 6 fillets (see note)
- 1 teaspoon ( 5 ml) Worcestershire sauce (see note)
- 2 medium cloves garlic, minced (about 2 teaspoons)
- 1/2 ounce Parmesan cheese, finely grated ( 15 g; about 1/4 cup)
- 1/3 cup ( 80 ml) canola oil
- 1/4 cup ( 60 ml) extra-virgin olive oil
- Kosher salt and freshly ground black pepper
Steps
- Combine egg yolk, lemon juice, anchovies, Worcestershire sauce, garlic, and Parmesan cheese in the bottom of a cup that just fits the head of an immersion blender, or in the bottom of the mini chopper attachment of a food processor. With blender or processor running, slowly drizzle in canola oil until a smooth emulsion forms. Transfer mixture to a medium bowl.
- Whisking constantly, slowly drizzle in 1/4 cup extra-virgin olive oil. Season to taste generously with salt and pepper. Caesar dressing can be stored in a sealed container in the refrigerator for up to 5 days.
↑ Back to top
Caesar Salad with Crouton Collars

Servings: 4
Ingredients
- 1 (4-inch thick) sourdough or French baguette, cut into 2-inch thick slices
- 1/2 cup olive oil
- 1 egg yolk, coddled
- 1/4 teaspoon salt
- 1 teaspoon coarsely ground black pepper
- 4 garlic cloves, minced
- 2 anchovies (or 1 teaspoon anchovy paste)
- 2 teaspoons Dijon mustard (the real stuff, not the dried stuff)
- 1 1/2 tablespoons freshly squeezed lemon juice
- 1 teaspoon Worcestershire sauce
- 1/4 cup safflower oil, or olive oil
- 1 1/2 teaspoons red wine vinegar
- 2 large heads romaine lettuce, outer leaves discarded, remaining inner leaves washed and thoroughly dried
- 4 crouton collars
- 1/2 cup freshly grated imported Italian Parmigiano-Reggiano
Crouton
Collars:
Caesar Salad:
Steps
- Preheat oven to 350 degrees F.
- Using your fingers, pluck the doughy section of bread away from the crust leaving a 1/4-inch thick collar of crust. Place the crusty collars in a large bowl and drizzle with olive oil. Toss and squish the bread like a sponge until the oil is evenly absorbed.
- Place the oil-soaked crusty collars on a baking sheet, standing up so that the hot air can circulate through the "O", and bake for approximately 20 minutes, or until collars are crispy and golden brown.
- Place the egg, in its shell, in boiling water for 40 seconds. Remove, run under cold water for 15 seconds to stop the cooking process, then use as directed.
- To make caesar salad dressing, add salt and pepper to the salad bowl (this creates a sandpaper-like base that will make the next steps easier). Using the back of a soup spoon, grind the garlic against the wall of the bowl until it becomes a paste. Then add the anchovies, and once again use the back of the spoon to grind it into a paste. Follow the same procedure, adding the Dijon, egg yolk, lemon juice and Worcestershire sauce, 1 at a time. Make sure that each ingredient is blended into a smooth paste with the previous ingredients before proceeding.
- Add the oil and vinegar. Blend well.
- To serve, stand lettuce leaves upright in crouton collars. Drizzle 2 tablespoons of dressing overtop each serving, then sprinkle liberally with Parmigiano-Reggiano.
Notes
- Note: If you don't have a rough wooden salad bowl, the dressing can be made (with some sacrifice) in a blender. Add the salt, pepper, garlic, anchovies, Dijon, lemon juice, Worcestershire and vinegar. Puree. Then add the oil and pulse a few times. Add the yolk and pulse a couple more times—just enough to blend it without causing the dressing to turn mayonnaisey.
↑ Back to top
Cake Salé or Savory Quick Bread? Just Call It Delicious
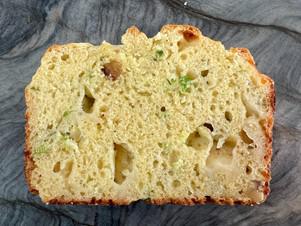
Tags: Quickbread
Servings: 10
Ingredients
- 1 3/4 cups (238 grams) all-purpose flour
- 1 tablespoon baking powder
- 1/2 teaspoon fine sea salt
- 3 large eggs, at room temperature
- 1/3 cup (80 ml) whole milk, at room temperature
- 1/3 cup (80 ml) olive oil
- 2 tablespoons honey
- 4 ounces (113 grams) shredded cheese (see above)
- 2 to 3 ounces (56 to 85 grams) cheese, cut into tiny cubes (see above)
- 1/2 cup (20 to 30 grams; precision's not important here) minced herbs and/or thinly sliced scallions (see above)
- 1/4 cup (about 40 grams) chopped walnuts or other nuts, toasted or not (see above)
- Extra add-ins, optional (see above)
Steps
- Center a rack in the oven and preheat it to 350 degrees F. Butter an 8-inch loaf pan (see above) or use baker’s spray.
- Working in a large bowl, whisk the flour, baking powder and salt together. In another bowl or in a large measuring cup, whisk the eggs, milk, olive oil and honey together. Pour the wet ingredients over the flour mixture and, using a flexible spatula, stir until mostly blended. There’s no need to be thorough now. Add the remaining ingredients to the bowl and mix them together. Try to be gentle, but don’t try to be perfect – just like with muffins, it’s better to under- than over-mix. The batter will be heavy and sticky, so scrape it into the pan (it might only come halfway up the sides) and use the edge of the spatula to nudge it into the corners.
- Bake the loaf for about 35 minutes – start checking early – or until a tester inserted into the center comes out clean. Put the pan on a rack, let the loaf rest for 3 minutes, then run a table knife around the edges and unmold it onto the rack. Let the loaf come to room temperature right side up. You can eat it when it’s warm, but I think it’s best at room temperature.
- SERVING: Use a serrated knife to cut the loaf into slices about 1/2 inch thick. If you’d like, cut each slice into strips for easy nibbling. Serve with drinks. I usually serve the loaf bare, but you could spread it with butter, tapenade or a savory jam or marmalade that you might put on a cheese board.
- STORING: Wrapped well, the loaf will keep for up to 2 days at room temperature or for up to 2 months in the freezer; defrost at room temperature in its wrapper. Stale bread is nice toasted, but I didn’t have to tell you that.
↑ Back to top
Caliente Chicken Fajita Bowl
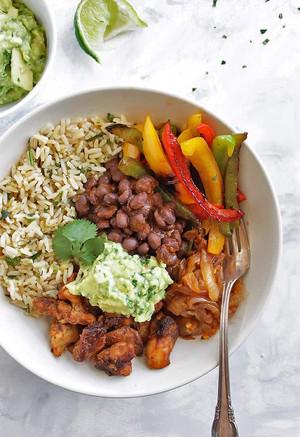
Tags: Chicken
Salad
Servings: 1
Ingredients
- Mexican spices seasoning mix
- 2 Tsp Extra-virgin olive oil
- 1/4 Cup Chopped fresh cilantro (coriander)
- 1/4 Cup Your favourite store bought salsa
- Pinch of salt and pepper to flavour
- Approximately 4.4 ounces (125 gms), boneless, skinless chicken breast cut however you like.
- 1 Cup Sliced red and/or green bell pepper (capsicum)
- 1/4 Red onion
- 1/2 Lime, freshly squeezed
- 2 handfuls of baby spinach salad leaves
- 1/2 Cup Cooked basmati or brown rice
- 1/4 Can Black beans, rinsed (these are also actually protein!)
SEASONING,
SAUCES & SPICES (YOU MAY HAVE THESE IN YOUR PANTRY ALREADY):
PROTEIN:
VEGETABLES:
CARBOHYDRATE:
Steps
- Drizzle chicken with 1 teaspoon oil and sprinkle over the spice mixture. Use enough to coat all strips of chicken. Add salt and pepper for extra seasoning. If you have time, let this marinate for 15 minutes.
- Heat a non-stick pan with remaining 1 teaspoon oil. Add the chicken mixture and sauté until fully browned and cooked.
- Remove the chicken from the pan and add the onion and bell peppers. Sauté until tender and charred.
- Add the chicken back into the pan and toss to combine. Once completely cooked remove from stove and add the fresh lime juice and cilantro.
- Meanwhile, cook rice according to package directions.
- Warm beans in a small bowl in the microwave or small saucepan.
- Assemble the baby spinach leaves In a deep salad bowl. Arrange the rice, chicken, onion and peppers mixture and beans on top. Top with salsa and a little extra cilantro with a final squeeze of fresh lime.
↑ Back to top
Cambodian Skewers
Tags: Beef
Cambodian Grilled
Ingredients
- 2 bulbs of garlic
- 1 cup of lemongrass
- 3 thin slices of galangal
- 4 lime leaves
- 3 thin slices of turmeric
- 2 tbsp of chicken bouillon powder
- 3 tbsp of Red Boat Fish Sauce
- 4lbs of beef
- 3 tbsp of sugar
- 1 tbsp of oyster sauce
- 1 bag of roast pork seasoning powder mix (100g)
- 1/3 cup of neutral oil
Steps
- Create a kreung lemongrass paste by blending garlic, lemongrass, galangal, lime leaves, and turmeric
- Cut beef into thin slices
- Place the beef into a large mixing bowl. Add the kreung lemongrass paste, chicken bouillon powder, sugar, oyster sauce,, bag of roast pork seasoning powder mix, neutral oil, and Red Boat Fish Sauce.
- Thoroughly mix these ingredients together. Let this rest in the refrigerator overnight.
- The next day, soak a bunch of skewer sticks in water to prevent burning when you grill it. Use these sticks to skewer each piece of meat in a back and forth motion.
- Grill each skewer for 5-10 minutes on med-high heat. Flip it every 2 min until it gets a nice char.
- Enjoy this with pickled veggies, lettuce, and a bowl of warm rice.
↑ Back to top
Can'T Leave Alone Bars

Ingredients
- 1 package white cake mix (regular size)
- 2 large eggs
- 1/3 cup canola oil
- 1 can (14 ounces) sweetened condensed milk
- 1 cup (6 ounces) semisweet chocolate chips
- 1/4 cup butter, cubed
Steps
- Preheat oven to 350°. In a large bowl, combine the cake mix, eggs and oil. Press two-thirds of the mixture into a greased 13x9-in. baking pan. Set remaining cake mixture aside.
- In a microwave-safe bowl, combine the milk, chocolate chips and butter. Microwave, uncovered, until chips and butter are melted; stir until smooth. Pour over crust.
- Drop teaspoonfuls of remaining cake mixture over top. Bake 20-25 minutes or until lightly browned. Cool before cutting. Yield: 3 dozen.
Notes
- FAVORITE
↑ Back to top
Canadian Bacon

Tags: Charcuterie
Cured Pork
Ruhlman's Way
Ingredients
- 1 gallon water
- 6.4 oz salt (This is 1-1/4 cups of the Diamond Crystal brand Kosher salt I use)
- 40 grams / 3 tablespoons pink salt (6.25% sodium nitrite curing salt)
- 1/2 cup maple syrup
- 1/2 cup sugar
- 8 garlic cloves, peeled and rough chopped
- 4 fresh or dried bay leaves
- 1 tbsp dried thyme, or a generous handful of fresh thyme
- 1 tbsp whole black peppercorn
- Juice of 2 lemons
- 1, 8-to-10 pound pork loin
For the Brine:
For the
Canadian Bacon:
Steps
- Combine all the brine ingredients in a large, non-reactive pot. Stirring occasionally, heat the brine over medium heat until the salt and sugar are fully dissolved. Let the brine cool, then pop it in the fridge to chill.
- While your brine is chilling, trim the pork loin of any excess fat and slice in half to form two, 4-to-5 pound cylinders. Put each piece of pork loin in a heavy duty, gallon-size freezer bag. Divide the brine and the aromatics evenly between the bags, squeeze out excess air and seal the bags well.
- Brine the pork in the the refrigerator for 3 to 4 days, flipping the pork periodically to ensure an even brine.
- Rinse and dry the pork, then allow to dry to form a pellicle.
- Hot smoke the pork at 200 degrees until the internal temperature of the pork reaches 150 degrees.
↑ Back to top
Cannoli Cookies
Adapted from http://recipessmile.com/cannoli-cookies/

Ingredients
- 2 cups all-purpose flour
- 1/2 teaspoon baking powder
- 1/2 teaspoon salt
- 1/2 cup unsalted butter, softened
- 1 cup granulated sugar
- 2 large eggs
- 1/2 teaspoon vanilla extract
- 1 cup ricotta cheese
- 1/2 cup mini chocolate chips
- 1/4 cup chopped pistachios
- Powdered sugar for dusting
Steps
- Preheat the Oven: Set your oven to 375°F (190°C) and line your baking sheets with parchment paper.
- Combine Dry Ingredients: In a bowl, whisk together the flour, baking powder, and salt.
- Cream Butter and Sugar: In a separate bowl, cream the softened butter and granulated sugar until the mixture is light and fluffy.
- Add Eggs and Vanilla: Beat in the eggs, one at a time, followed by the vanilla extract.
- Incorporate Ricotta Cheese: Gently mix in the ricotta cheese until evenly distributed.
- Combine Wet and Dry Mixtures: Gradually add the dry ingredients to the wet mixture, stirring until just combined.
- Add Chocolate Chips and Pistachios: Fold in the mini chocolate chips and chopped pistachios.
- Shape the Cookies: Drop spoonfuls of the cookie dough onto the prepared baking sheets, spacing them evenly.
- Bake the Cookies: Place the cookies in the oven and bake for 12-15 minutes, or until they turn lightly golden.
- Cooling: Allow the cookies to cool on the baking sheets for a few minutes before transferring them to wire racks.
- Dusting with Powdered Sugar: Once cooled, dust the cookies with powdered sugar for a sweet, decorative finish.
Preparing the Dough:
Assembling the Cookies:
Baking and Finishing:
↑ Back to top
Caprese Burger

Ingredients
- 1 tablespoon balsamic vinegar
- 1 tablespoon extra virgin olive oil
- salt and pepper to taste
- 4 thick slices tomato
- 1 1/3 pounds lean ground beef
- 1 tablespoon tomato paste
- 1/4 cup chopped fresh basil
- 1/4 cup grated Parmesan cheese
- 1 clove garlic, minced
- 1/4 teaspoon black pepper
- 4 ounces fresh mozzarella cheese, sliced
- 4 hamburger buns, split
Steps
- Whisk the balsamic vinegar, oil, salt, and pepper in a small bowl. Pour over tomato slices to marinate.
- Preheat an outdoor grill for medium-high heat, and lightly oil the grate.
- Mix ground beef, tomato paste, basil, Parmesan cheese, garlic, and 1/4 teaspoon pepper in a large bowl. Form beef mixture into 4 equal patties.
- Cook on the preheated grill until the burgers are cooked to your desired degree of doneness, about 5 minutes per side for well done. An instant-read thermometer inserted into the center should read 160 degrees F (70 degrees C). Top each burger with mozzarella cheese; allow to melt. Serve on hamburger buns with marinated tomato slices.
Notes
- FAVORITE
↑ Back to top
Caramel Apple Dip

Ingredients
- 16 individually-wrapped caramels, unwrapped
- 1/4 cup water
- 8 oz. cream cheese, softened
- 1/2 cup brown sugar
- 1 teaspoon vanilla
Steps
- In a medium saucepan over medium-low heat, melt caramels with water, stirring frequently. Remove from heat and set aside.
- In a medium bowl, cream together cream cheese, sugar and vanilla.
- Lastly, fold in caramel mixture into the cream cheese mixture.
- Serve immediately with apple slices.
Notes
- FAVORITE
↑ Back to top
Caramel Brownies
Adapted from http://www.tasteofhome.com/recipes/caramel-brownies

Ingredients
- 2 cups sugar
- 3/4 cup baking cocoa
- 1 cup canola oil
- 4 eggs
- 1/4 cup 2% milk
- 1 to 1/2 cups all-purpose flour
- 1 teaspoon salt
- 1 teaspoon baking powder
- 1 cup (6 ounces) semisweet chocolate chips
- 1 cup chopped walnuts, divided
- 14 ounces caramels
- 1 can (14 ounces) sweetened condensed milk
Steps
- In a large bowl, beat the sugar, cocoa, oil, eggs and milk. Combine the flour, salt and baking powder; gradually add to egg mixture until well blended. Fold in chocolate chips and 1/2 cup walnuts.
- Spoon two-thirds of the batter into a greased 13-in. x 9-in. baking pan. Bake at 350° for 12 minutes.
- Meanwhile, in a large saucepan, heat the caramels and condensed milk over low heat until caramels are melted. Pour over baked brownie layer. Sprinkle with remaining walnuts.
- Drop remaining batter by teaspoonfuls over caramel layer; carefully swirl brownie batter with a knife.
- Bake 35-40 minutes longer or until a toothpick inserted near the center comes out with moist crumbs (do not overbake). Cool on a wire rack. Yield: 2 dozen.
Notes
- FAVORITE
↑ Back to top
Caramel Pecan Ice Cream Dessert

Ingredients
- 1 to 3/4 cups all-purpose flour
- 1 cup quick-cooking oats
- 1 cup chopped pecans
- 1 cup packed brown sugar
- 1 cup butter, melted
- 1 to 1/2 cups caramel ice cream topping
- 2 quarts vanilla ice cream, softened
Steps
- In a large bowl, combine the flour, oats, pecans and brown sugar. Add butter; mix well. Spread in a thin layer in a 15-in. x 10-in. x 1-in. baking pan. Bake at 400° for 15 minutes or until golden, stirring occasionally. Crumble while warm; cool.
- Press half of crumb mixture into a 13-in. x 9-in. dish. Drizzle with half of caramel sauce; spread with ice cream. Top with remaining caramel sauce and crumb mixture. Cover and freeze until firm. Remove from the freezer 10 minutes before serving. Yield: 12-15 servings.
Notes
- FAVORITE
↑ Back to top
Caramel Shortbread Squares

Ingredients
- 2/3 cup butter, softened
- 1/4 cup white sugar
- 1 1/4 cups all-purpose flour
- 1/2 cup butter
- 1/2 cup packed light brown sugar
- 2 tablespoons light corn syrup
- 1/2 cup sweetened condensed milk
- 1 1/4 cups milk chocolate chips
Steps
- Preheat oven to 350 degrees F (175 C).
- In a medium bowl, mix together 2/3 cup butter, white sugar, and flour until evenly crumbly. Press into a 9 inch square baking pan. Bake for 20 minutes.
- In a 2 quart saucepan, combine 1/2 cup butter, brown sugar, corn syrup, and sweetened condensed milk. Bring to a boil. Continue to boil for 5 minutes. Remove from heat and beat vigorously with a wooden spoon for about 3 minutes. Pour over baked crust (warm or cool). Cool until it begins to firm.
- Place chocolate in a microwave-safe bowl. Heat for 1 minute, then stir and continue to heat and stir at 20 second intervals until chocolate is melted and smooth. Pour chocolate over the caramel layer and spread evenly to cover completely. Chill. Cut into 1 inch squares. These need to be small because they are so rich.
Notes
- FAVORITE
↑ Back to top
Caramel Truffles
Adapted from http://www.tasteofhome.com/recipes/caramel-truffles

Ingredients
- 26 caramels
- 1 cup milk chocolate chips
- 1/4 cup heavy whipping cream
- 1 to 1/3 cups semisweet chocolate chips
- 1 tablespoon shortening
Steps
- Line an 8-in. square dish with plastic wrap; set aside. In a microwave-safe bowl, combine the caramels, milk chocolate chips and cream. Microwave, uncovered, on high for 1 minute; stir. Microwave 1 minute longer, stirring every 15 seconds or until caramels are melted and mixture is smooth. Spread into prepared dish; refrigerate for 1 hour or until firm.
- Using plastic wrap, lift candy out of pan. Cut into 30 pieces; roll each piece into a 1-in. ball. Cover and refrigerate for 1 hour or until firm.
- In a microwave-safe bowl, melt semi-sweet chips and shortening; stir until smooth. Dip caramels in chocolate; allow excess to drip off. Place on waxed paper; let stand until set. Refrigerate until firm. Yield: 2-1/2 dozen.
Notes
- FAVORITE
↑ Back to top
Caramelized Banana Pudding Bars
Servings: 9 to 12
Ingredients
- 100 g granulated sugar ( 3 1/2 ounces; 1/2 cup)
- 1/2 cup ( 120 ml) heavy cream
- Pinch kosher salt
- Nonstick cooking spray
- 16 digestive cookies ( 240 g; 8 1/2 ounces)
- Pinch kosher salt
- 100 g unsalted butter ( 3 1/2 ounces; 7 tablespoons), melted and cooled
- 3 large very ripe bananas, peeled ( 325 g; 11 1/2 ounces)
- 75 g dark brown sugar ( 2 2/3 ounces; 1/4 cup plus 2 tablespoons)
- 2 cups ( 480 ml) half-and-half
- 4 large egg yolks
- 28 g cornstarch ( 1 ounce; 1/4 cup)
- 1/2 teaspoon Diamond Crystal kosher salt; for table salt, use half as much by volume
- 28 g unsalted butter ( 1 ounce; 2 tablespoons)
- 1 tablespoon ( 15 ml) dark rum, optional
- 1 teaspoon vanilla extract
- 110 g pecans ( 4 ounces; 1 cup), coarsely chopped
- 1/2 cup ( 120 ml) heavy cream
For the Salted
Caramel Sauce:
For the Crust:
For the
Caramelized Banana Pudding:
To Assemble:
Steps
- For the Salted Caramel Sauce: In a medium saucepan, cook sugar, undisturbed, until it begins to melt, 3 to 5 minutes. Using a clean, heatproof spatula, continue to cook, stirring occasionally, until sugar is fully melted and amber. (Only stir as much as you need to help sugar dissolve; try not to get any sugar granules on sides of the pot.) Continue cooking until sugar turns a deep amber and just begins to smoke lightly, another 30 seconds to 1 minute.
- When you see bubbles forming around the edges of the pot, reduce heat to low and add 1/4 of the heavy cream, whisking constantly to incorporate. Add remaining cream in 3 additions, whisking well in between each addition. When all cream is incorporated, add salt and whisk to incorporate. Let cool to room temperature, about 30 minutes, then transfer to an airtight container and refrigerate until ready to use.
- For the Crust: Using nonstick cooking spray, lightly grease an 8-by-8-inch aluminum baking pan with nonstick cooking spray. Line pan with two 8-inch wide strips of parchment paper so that all sides are covered with a 1-inch overhang.
- Adjust oven rack to middle position and preheat oven to 350°F (180°C). In the bowl of a food processor fitted with the blade attachment, pulse digestive biscuits and salt until finely ground. Add melted butter and pulse until a sandy mixture forms.
- Using a flexible spatula, scrape crumbs onto bottom of prepared pan. Spread into an even layer, then use a flat-bottomed drinking glass or measuring cup to compress firmly until crumbs are in a compact, even layer across bottom and sides of pan. Bake until deep golden brown and fragrant, about 10 minutes. Let cool to room temperature in pan, about 30 minutes.
- For the Caramelized Banana Pudding: In a large saucepan, combine bananas and brown sugar and set over medium heat. Using a potato masher or the back of a wooden spoon, mash bananas until a chunky purée forms. Cook, stirring often, until mixture forms a sticky, dark brown paste, 10 to 15 minutes.
- Remove from heat and add half-and-half. Using an immersion blender, purée until smooth. (Alternatively, let cool slightly, then transfer mixture to a blender and blend until smooth; return mixture to pan.)
- In a medium heat-proof mixing bowl, whisk together egg yolks, cornstarch, and salt until smooth. While whisking constantly, slowly pour half of warm banana mixture into egg yolk mixture. Return mixture to the same pot with remaining banana mixture. Cook over medium heat, whisking constantly, until mixture begins to thicken and bubble, about 5 minutes. Once it thickens, continue to whisk, pausing every few seconds to check for bubbles, about 1 minute. Let simmer for 1 minute, then remove pan from heat. Whisk in butter, rum (if using), and vanilla extract.
- Using a fine-mesh sieve set over a medium bowl, strain banana mixture into a medium bowl. Let cool at room temperature, stirring occasionally, until lukewarm, about 30 minutes.
- Pour caramelized banana pudding over cookie crust. Using an offset spatula, spread it into an even layer. Press a piece of plastic wrap directly on the surface of the pudding and refrigerate until chilled, at least 3 hours and up to 24 hours.
- To Assemble: When ready to assemble , adjust oven rack to middle position and preheat oven to 400°F (200°C). Line a rimmed baking sheet with parchment paper. Spread pecans into an even layer, then bake until toasted and fragrant, 5 to 7 minutes. Let cool completely, about 15 minutes.
- In the bowl of a stand mixer fitted with the whisk attachment, whip heavy cream on medium-high speed until stiff peaks form, 1 to 2 minutes. (Alternatively, you can whip cream in a large bowl using an electric hand mixer.)
- Remove caramelized banana pudding bars from fridge. Using an offset or flexible spatula, spread whipped cream evenly over pudding layer. Top with toasted pecans and drizzle with caramel sauce. Serve from the pan or lift parchment overhang to transfer bars to a cutting board; using a sharp knife, portion bars as desired. (For cleaner cuts, run knife under warm water and dry knife with a clean kitchen towel before portioning each slice.)
- Medium saucepan, heatproof spatula, 8-inch square pan, parchment paper, large saucepan, potato masher or large wooden spoon, immersion blender, or blender, 9-by-13-inch baking sheet
Special Equipment:
Notes
- Using a piping bag is the easiest way to neatly drizzle caramel over the top of the dessert, but a spoon will also work fine.
↑ Back to top
Caramelized Broccoli with Garlic
Tags: Vegetables
Servings: Serves : 4
Ingredients
- 3 tablespoons extra-virgin olive oil
- 2 heads of broccoli (1 1/4 pounds total), stems peeled and heads halved lengthwise
- 1/2 cup water
- 3 garlic cloves, thinly sliced
- Pinch of crushed red pepper
- Salt and freshly ground black pepper
- 2 tablespoons fresh lemon juice
Steps
- In a large, deep skillet, heat 2 tablespoons of the olive oil. Add the broccoli, cut side down, cover and cook over moderate heat until richly browned on the bottom, about 8 minutes. Add the water, cover and cook until the broccoli is just tender and the water has evaporated, about 7 minutes. Add the remaining 1 tablespoon of olive oil along with the garlic and the crushed red pepper and cook uncovered until the garlic is golden brown, about 3 minutes. Season the broccoli with salt and black pepper, drizzle with the lemon juice and serve.
↑ Back to top
Caramelized Leek and Bacon Pizza
Adapted from https://www.countryliving.com/food-drinks/recipes/a4152/caramelized-leek-bacon-pizza-recipe-clv0313/

Servings: 8 serving(s)
Ingredients
- 6 slice thick-cut bacon, cut into 1/2-inch pieces
- 2 medium leeks, white and light green parts only, sliced
- Flour, for work surface
- 1 lb. store-bought pizza dough
- 1 tbsp. olive oil
- 1/2 tsp. garlic powder
- 1/4 c. mascarpone (about 2 ounces)
- 1 1/2 c. shredded mozzarella (about 6 ounces)
- 1/4 c. grated Parmesan (about 1 ounce)
Steps
- In a large pan over medium heat, cook bacon until crisp, about 8 minutes. Transfer to a paper-towel-lined plate; set aside. Drain all but a very thin layer of bacon fat from pan. Add leeks to pan and sauté until soft, about 12 minutes. Remove pan from heat; set aside.
- Preheat oven, with pizza stone set on lowest rack, to 500°F. On a lightly floured surface and using a rolling pin, flatten dough to a 12-inch circle that's 1/2 inch thick. Drizzle crust with olive oil and sprinkle on garlic powder.
- Using a rubber spatula, spread a thin layer of mascarpone on the crust. Sprinkle on half the mozzarella, then top with reserved leeks and bacon. Sprinkle on Parmesan and remaining mozzarella. Bake until crust is golden and cheese is bubbly, 10 to 12 minutes. Let sit 2 minutes before slicing.
↑ Back to top
Carne Guisada (Latin Beef Stew)
Servings: 5
Ingredients
- 2 tsp olive oil
- 1 cup scallions, chopped
- 3 cloves garlic, minced
- 2 Serrano chillies, minced
- 2 small tomatoes, chopped
- 2 tbsp cilantro, minced
- 1.5 lb choice round beef stew, cut into small chunks
- 1/3 cup light beer
- 1/3 cup water
- 1/2 tsp cumin
- 1/4 tsp adobo, or salt
- 1/2 tsp achiote, or sazon
- 1 bay leaf
- salt to taste
- 10 oz baby red potatoes, halved or quartered
Steps
- In a large dutch oven or heavy pot, heat oil over medium heat.
- Add scallions and garlic and sauté about 2 - 3 minutes; add tomatoes, cilantro and a pinch of salt. Cook another 2 minutes, stirring.
- Add beef to the pot along with beer, water, cumin, adobo, achiote, bay leaf and salt if needed.
- Cover and simmer on low heat 1 1/2 hours.
- Test to make sure beef is tender, if not cook another 15 minutes.
- Add potatoes and cook until soft, about 20 minutes depending on the size.
- In a large pressure cooker, heat oil over medium heat. Add scallions and garlic and sauté; about 2 - 3 minutes.
- Add tomatoes, cilantro and a pinch of salt. Cook another 2 minutes stirring.
- Add beef to the pot along with beer, water, cumin, adobo, achiote, bay leaf and salt if needed.
- Cover pressure cooker; when the lid is locked, reduce heat to low and cook 25 minutes.
- When the 25 minutes are up, shut stove off. When the pressure from the pot is released, remove the lid, and place the pot uncovered over medium heat.
- Bring to a boil, add potatoes and cook uncovered until potatoes are soft, about 20 minutes depending on the size.
Stove top:
Pressure cooker
instructions:
Notes
- Makes about 5 cups. Perfect served over 3/4 cup cooked rice.
↑ Back to top
Carne Guisada (Latin Beef Stew)

Servings: Makes about 5 cups
Ingredients
- 2 tsp olive oil
- 1 cup scallions, chopped
- 3 cloves garlic, minced
- 2 Serrano chillies, minced
- 2 small tomatoes, chopped
- 2 tbsp cilantro, minced
- 1.5 lb choice round beef stew, cut into small chunks
- 1/3 cup light beer
- 1/3 cup water
- 1/2 tsp cumin
- 1/4 tsp adobo, or salt
- 1/2 tsp achiote, or sazon
- 1 bay leaf
- salt to taste
- 10 oz baby red potatoes, halved or quartered
Steps
- In a large dutch oven or heavy pot, heat oil over medium heat.
- Add scallions and garlic and sauté about 2 - 3 minutes; add tomatoes, cilantro and a pinch of salt. Cook another 2 minutes, stirring.
- Add beef to the pot along with beer, water, cumin, adobo, achiote, bay leaf and salt if needed.
- Cover and simmer on low heat 1 1/2 hours.
- Test to make sure beef is tender, if not cook another 15 minutes.
- Add potatoes and cook until soft, about 20 minutes depending on the size.
- In a large pressure cooker, heat oil over medium heat. Add scallions and garlic and sauté; about 2 - 3 minutes.
- Add tomatoes, cilantro and a pinch of salt. Cook another 2 minutes stirring.
- Add beef to the pot along with beer, water, cumin, adobo, achiote, bay leaf and salt if needed.
- Cover pressure cooker; when the lid is locked, reduce heat to low and cook 25 minutes.
- When the 25 minutes are up, shut stove off. When the pressure from the pot is released, remove the lid, and place the pot uncovered over medium heat.
- Bring to a boil, add potatoes and cook uncovered until potatoes are soft, about 20 minutes depending on the size.
Stove top:
Pressure cooker
instructions:
Notes
- Makes about 5 cups. Perfect served over 3/4 cup cooked rice.
↑ Back to top
Carnitas
Tags: Mexican
Pork
Authentic Mexican carnitas involve slow-cooking
pork in lard until fall-apart tender, then increasing the heat so the
meat fries and crisps. The fried pork then is broken into smaller
pieces for eating. In the U.S., however, carnitas usually is made by
simmering pork in liquid, then shredding the meat. The result is moist
and tender, but lacks intense porkiness as well the crisping
traditional to carnitas. Our method melds the two techniques. We cook
cubes of pork shoulder in 1 cup each of neutral oil and water, along
with spices and aromatics, until the meat is fork-tender. We then break
the pork into smaller pieces, moisten it with its own juices, and fry
it in a hot skillet. The pork gets to keep its flavor and develop crisp
bits. If you have a fat separator, it makes quick work of removing the
fat from the cooking liquid: pour the liquid into it after removing the
pork from the pot, then return the defatted cooking liquid to the pot,
but remember to reserve the fat.
Servings: 6
Ingredients
- 5 to 6 pounds boneless pork butt, not trimmed, cut into 2-inch cubes
- 1 large yellow onion, halved and thinly sliced
- 10 medium garlic cloves, smashed and peeled
- 2 tablespoons ground cumin
- 2 tablespoons ground coriander
- 2 teaspoons dried oregano
- ½ teaspoon dried thyme
- 1 teaspoon red pepper flakes
- Kosher salt and ground black pepper
- 1 cup grapeseed or other neutral oil
Steps
- 1. Heat the oven to 325°F with a rack in the lower-middle position. In a large (at least 7-quart) Dutch oven, stir together the pork, onion, garlic, cumin, coriander, oregano, thyme, pepper flakes and 2 teaspoons salt. Stir in the oil and 1 cup water. Cover, transfer to the oven and cook for 3 hours.
2.
Remove the pot from the oven. Stir the pork and return the pot,
uncovered, to the oven. Cook until a skewer inserted into the meat
meets no resistance, another 30 minutes. Using a slotted spoon,
transfer the meat to a rimmed baking sheet in an even layer to cool.
Tilt the pot to pool the cooking liquid to one side, then use a wide
spoon to skim off as much fat as possible; reserve the fat. Bring the
defatted cooking liquid to a simmer over medium-high and cook,
stirring
occasionally, until reduced to about ⅓ cup, about 5 minutes. Set
aside.
3.
When the meat is cool enough to handle, break the chunks into ¾- to
1-inch pieces, discarding any large pieces of fat. Add the pork back
to
the pot and stir until evenly moistened with the reduced cooking
liquid.
4.
In a nonstick 12-inch skillet over medium-high, heat 1 teaspoon of the
reserved fat until barely smoking. Add the pork in an even layer and
cook without stirring, pressing the meat against the skillet with a
spatula, until the bottom begins to brown and the pork is heated
through, 3 to 5 minutes. Taste and season with salt and pepper.
Notes
- Don’t trim the fat from the pork shoulder. The pork should render its fat in the oven and so the meat cooks slowly in it and the juices. And after cooking, don’t discard the fat you skim off the cooking liquid—you’ll need some of it to crisp the shredded pork in a hot skillet.
↑ Back to top
Carnitas
Adapted from https://www.177milkstreet.com/recipes/carnitas

Tags: Mexican
Pork Tortillas
Ingredients
- 5-6 POUNDS BONELESS PORK BUTT, NOT TRIMMED, CUT INTO 2-INCH CUBES
- 1 LARGE YELLOW ONION, HALVED AND THINLY SLICED
- 10 MEDIUM GARLIC CLOVES, SMASHED AND PEELED
- 2 TABLESPOONS GROUND CUMIN
- 2 TABLESPOONS GROUND CORIANDER
- 2 TEASPOONS DRIED OREGANO
- 1 TEASPOON DRIED THYME
- 1 TEASPOON RED PEPPER FLAKES
- KOSHER SALT AND GROUND BLACK PEPPER
- 1 CUP GRAPESEED OR OTHER NEUTRAL OIL
Steps
- Heat the oven to 325°F with a rack in the lower-middle position. In a large (at least 7-quart) Dutch oven, stir together the pork, onion, garlic, cumin, coriander, oregano, thyme, pepper flakes and 2 teaspoons salt. Stir in the oil and 1 cup water. Cover, transfer to the oven and cook for 3 hours.
- Remove the pot from the oven. Stir the pork and return the pot, uncovered, to the oven. Cook until a skewer inserted into the meat meets no resistance, another 30 minutes. Using a slotted spoon, transfer the meat to a rimmed baking sheet in an even layer to cool. Tilt the pot to pool the cooking liquid to one side, then use a wide spoon to skim off as much fat as possible; reserve the fat. Bring the defatted cooking liquid to a simmer over medium-high and cook, stirring occasionally, until reduced to about ⅓ cup, about 5 minutes. Set aside.
- When the meat is cool enough to handle, break the chunks into ¾- to 1-inch pieces, discarding any large pieces of fat. Add the pork back to the pot and stir until evenly moistened with the reduced cooking liquid.
- In a nonstick 12-inch skillet over medium-high, heat 1 teaspoon of the reserved fat until barely smoking. Add the pork in an even layer and cook without stirring, pressing the meat against the skillet with a spatula, until the bottom begins to brown and the pork is heated through, 3 to 5 minutes. Taste and season with salt and pepper.
Notes
- Tip: Don't trim the fat from the pork shoulder. The pork should render its fat in the oven and so the meat cooks slowly in it and the juices. And after cooking, don't discard the fat you skim off the cooking liquid—you'll need some of it to crisp the shredded pork in a hot skillet.
↑ Back to top
Carta Musica (Semolina Crackers)
Ingredients
- 1 cup semolina flour
- 1 cup all-purpose flour, plus more for kneading and rolling the crackers
- 1 teaspoon kosher salt
Steps
- In a medium bowl, thoroughly mix the flours and salt. Stir in 1 cup water with a wooden spoon, and work into a stiff dough. Scrape the dough onto a lightly floured work surface, and knead until the dough is smooth, 3 to 4 minutes. Cover the dough with plastic wrap, and let rest for 15 minutes.
- Set a baking stone on the lowest oven shelf and heat the oven to 500 degrees. If you don't have a baking stone, set a heavy baking sheet on the shelf.
- Cut the dough into 20 pieces, and roll each piece into a small ball. Cover the balls with plastic wrap so the dough doesn't dry as you work. Roll each ball into a paper-thin sheet using a rolling pin, and flour as needed. Don't worry about the shape -- you want them to look hand-hewn! Bake them off as you go, laying them on the baking stone (or floured baking sheet), turning them as they bubble and begin to turn color. They're done when they're golden brown on the edges, and crisp, about 3 minutes total. Cool on a wire rack, and continue with the remaining dough.
Notes
- FAVORITE
↑ Back to top
Catalina Dressing
Tags: Condiments
Dressings
Ingredients
- 1/2 cup ketchup
- 1/2 cup sugar
- 1/2 cup red wine vinegar
- 1/2 cup onions grated
- 1 teaspoon paprika
- 1/2 teaspoon Worcestershire sauce
- 1 cup salad oil
- salt and pepper
Steps
- Add the ketchup, sugar, vinegar, onion, paprika and Worcestershire to a food processor bowl.
- Pulse until blended.
- With the processor running, slowly add the oil.
- Check the seasonings.
- Cover and refrigerate until needed.
Notes
- FAVORITE
↑ Back to top
Categories Bread, Apple
Adapted from https://www.facebook.com/groups/280324441996437/787495194612690/?notif_t=group_comment_reply
Ingredients
- 1/3 cup brown sugar (not packed)
- 1 teaspoon ground cinnamon
- 2/3 cup white sugar
- 1/2 cup butter, softened
- 2 eggs
- 1 1/2 teaspoons vanilla extract
- 1 1/2 cups all-purpose flour
- 1 3/4 teaspoons baking powder
- 1/2 cup milk
- 1 apple, peeled and chopped
Steps
- Preheat oven to 350 degrees. Grease and flour a 9 x 5-inch loaf pan. Mix brown sugar and cinnamon together in a bowl and set aside. Beat white sugar and butter together in a bowl using an electric mixer until smooth and creamy. Beat in eggs, 1 at a time, until incorporated; add vanilla extract.
- Combine flour and baking powder together in another bowl; stir into creamed butter mixture. Mix milk into batter until smooth. Pour half the batter into the prepared loaf pan. Next add half the apples and half the brown sugar cinnamon mixture. Lightly pat apple mixture into batter.
- Pour the remaining batter over apple layer; top with remaining apples and add more brown sugar/cinnamon mixture. Lightly pat apples into batter; swirl brown sugar mixture through apples using a finger or spoon.
- Bake in the preheated oven until a toothpick inserted in the center of the loaf comes out clean, 30 to 40 minutes. Mickey say 55 minutes
Notes
- FAVORITE
↑ Back to top
Cauliflower Couscous
Ingredients
- 1 to 2 heads cauliflower (one large head or two small), totaling about 3 lbs., or 2 lbs. cauliflower florets
- 1/2 cup water
- Salt and black pepper
- 1 1/2 tbsp butter or margarine
- 1 tbsp olive oil
- Parmesan cheese, sauteed vegetables, dried fruits, spices or other add-ins
Optional
Ingredients
Steps
- I prefer to grate the cauliflower in a food processor, but you can also grate it by hand. If you plan to grate by hand, cut it into large but manageable pieces (4 or 6 per head). Rinse the pieces thoroughly to remove any debris.
- Place half of the clean cauliflower florets into the food processor. Pulse in the processor till the cauliflower resembles small couscous-like pieces. Do not over-process; let it retain some texture. If any larger pieces remain after the cauliflower is cut down to size, remove them from the bowl and process them separately. Set processed cauliflower aside and repeat the process with the second half of the florets.
- Place a medium pot on the stovetop and bring 1/2 cup water to a boil.
- Pour in the processed cauliflower in an even layer on top of the boiling water.
- Cover the pot with a lid. Let the cauliflower steam over medium high heat for 5-7 minutes, stirring once with a fork during cooking, till the cauliflower reaches desired tenderness. Watch it carefully; if you overcook it will burn due to the small amount of liquid. It shouldn't take longer than 7 minutes to steam. Your house will be filled with a-- umm, interesting cauliflower aroma as it cooks. Not my fave, but it's worth it, because the finished product is so darned tasty.
Notes
- FAVORITE
↑ Back to top
Cauliflower Gnocchi
Servings: 4
Ingredients
- 2 large russet potatoes (about 1 1/2 pounds)
- 1/2 cup gluten-free all-purpose flour, plus more for dusting
- 1 medium head cauliflower, chopped into florets (about 1 pound)
- 1/4 cup grated Parmesan
- 1 large egg yolk
- Kosher salt and freshly ground black pepper
- 5 tablespoons unsalted butter, diced
- 2 tablespoons drained capers
- 1/4 cup fresh parsley, chopped
- Salad, for serving
Steps
- Special equipment: a steamer basket insert
- Preheat the oven to 425 degrees F. Prick the potatoes all over with a fork and place on a baking sheet. Bake, flipping halfway through, until fork-tender, about 45 minutes. When the potatoes are cool enough to handle, cut them in half and carefully scoop the flesh into a large bowl. Add the flour and mash with a fork until just a few chunks of potatoes remain. Make a well in the middle of the mixture and set the bowl aside. Reserve the baking sheet.
- Meanwhile, fill a medium saucepan with 2 inches of water. Set a steamer basket insert into the pot and bring the water to a simmer over medium-high heat. Add the cauliflower, cover and steam until very tender and falling apart when pierced with a fork, 12 to 14 minutes. Drain the cauliflower and use clean kitchen towels to squeeze completely dry.
Notes
- My Private Notes
- Add a Note
- Get an editor-picked recipe delivered to your inbox daily. Privacy Policy
↑ Back to top
Cauliflower Gratin
Ingredients
- 1 firm white cauliflower (about 1 1/2 pounds)
- 3 tablespoons unsalted butter
- 3 tablespoons all-purpose flour
- 1 1/2 cups milk
- 3/4 cup heavy cream
- 1/2 teaspoon salt
- 1/4 teaspoon freshly ground white pepper
- 1/8 teaspoon grated nutmeg
- 1/2 cup grated Gruyère or Emmenthaler cheese
- 2 tablespoons freshly grated Parmesan cheese
Steps
- Preheat the oven to 400 degrees.
- Remove the green leaves from the cauliflower, cut out the core, and separate cauliflower into florets. Drop the florets into a large stainless steel saucepan of boiling salted water, bring back to a boil, and cook, uncovered, for about 5 minutes. Drain and set aside.
- Melt the butter in a medium saucepan. Add the flour and cook over low heat for about 1 minute, stirring with a whisk; do not let the mixture brown. Add the milk and bring to a boil over medium heat, stirring constantly to prevent scorching, then simmer over low heat for 1 minute. Add the cream, salt, white pepper, and nutmeg and bring to a boil. Remove from the heat.
- Generously butter a gratin dish. Put the florets in the dish stem side down and coat with the white béchamel. Sprinkle with the cheeses. Place on a cookie sheet and bake for about 30 minutes, or until golden brown. Serve.
Notes
- FAVORITE
↑ Back to top
Cauliflower Pizza Crust
Ingredients
- head cauliflower, chopped
- 2 large eggs
- 1/2 cup shredded mozzarella cheese
- 2 tablespoons freshly grated Parmesan
- 1 tablespoon Italian seasoning
- Kosher salt and freshly ground black pepper, to taste
- 1x scale (click to change)
Steps
- Preheat oven to 425 degrees F. Line a baking sheet with parchment paper or a silicone baking mat; set aside.
- To make the cauliflower crust,
- add cauliflower to the bowl of a food processor and pulse until finely ground, yielding about 2-3 cups.*
- Transfer to a microwave-safe bowl. Cover loosely and place into microwave for 4-5 minutes, or until softened; let cool.
- Using a clean dish towel or cheese cloth, drain cauliflower completely, removing as much water as possible.
- Transfer cauliflower to a large bowl. Stir in eggs, mozzarella, Parmesan and Italian seasoning; season with salt and pepper, to taste.
- Spread cauliflower mixture into a 15- by 10-inch rectangle onto the prepared baking sheet. Spray lightly with nonstick spray and bake for 12-15 minutes, or until golden.
↑ Back to top
Cauliflower Pizza Crust
Ingredients
- head cauliflower, chopped
- 2 large eggs
- 1/2 cup shredded mozzarella cheese
- 2 tablespoons freshly grated Parmesan
- 1 tablespoon Italian seasoning
- Kosher salt and freshly ground black pepper, to taste
Steps
- Preheat oven to 425 degrees F. Line a baking sheet with parchment paper or a silicone baking mat; set aside.
- add cauliflower to the bowl of a food processor and pulse until finely ground, yielding about 2-3 cups.*
- Transfer to a microwave-safe bowl. Cover loosely and place into microwave for 4-5 minutes, or until softened; let cool.
- Using a clean dish towel or cheese cloth, drain cauliflower completely, removing as much water as possible.
- Transfer cauliflower to a large bowl. Stir in eggs, mozzarella, Parmesan and Italian seasoning; season with salt and pepper, to taste.
- Spread cauliflower mixture into a 15- by 10-inch rectangle onto the prepared baking sheet. Spray lightly with nonstick spray and bake for 12-15 minutes, or until golden.
To make the cauliflower
crust,
Notes
- FAVORITE
↑ Back to top
Celery Root (Celeriac) Schnitzel
Ingredients
- 3 kg celery root, aka celeriac (2 large if possible)
- 125 g corn starch (for the initial coating)
- 300 ml Soy milk
- 2 Tbsp corn starch
- 90 g white miso (diluted with a whisk)
- 400 g breadcrumbs (crumbs from Kaiser rolls or leftover challah, or matzo meal)
- 4 Tbsp sesame seeds
- 1 Tablespoon Paprika (Sweet/Hungarian)
- 3 teaspoons Garlic Powder
- 2 teaspoon Onion Powder
- Frying Oil: Refined olive oil is highly recommended for frying, as it imparts a slight, beautiful taste to the vegetables while still offering a high smoke point. Ensure you use enough volume for shallow frying (at least one inch of oil). (Alternatively, you may use a neutral oil such as sunflower, canola, or grapeseed.)
For the
Slurry:
For the
Breading (The Viennese-Israeli Blend):
Steps
- Slice & Prepare Breading: Slice the celeriac into uniform rounds, keeping them between 1 and 1.5 cm thick (we find 1.5 cm delivers the best result). In a shallow dish, thoroughly combine all the ingredients for the breading: breadcrumbs, sesame seeds, paprika, garlic powder, and onion powder.
- Pre-cook:Blanch the slices in simmering water for 15 to 20 minutes, or until they are tender but still hold their shape. The celeriac must be fully cooked and ready for serving at this stage—a gentle fork should pierce it easily, but the slice should not crumble or fall apart when handled. Al dente is not sufficient.
- Prepare the Slurry: Whisk together the soy milk, the corn starch, and the white miso in a narrow container or glass. To ensure the mixture is completely homogeneous and the corn starch and miso are fully dissolved, use an immersion blender (a hand blender) until smooth. Then, pour the slurry into a shallow dish or plate for your breading station.
- Set up Breading Stations: Set up three stations: a dish with the 125 g corn starch, a dish with the prepared slurry, and a dish with the seasoned breadcrumbs.
- Bread: Dredge each blanched slice first in the corn starch, then dip into the prepared slurry, and finally press firmly into the seasoned breadcrumbs.
- Simple or double-breading: For 1.5 cm slices, double-breading is a must. To achieve the classic, thick, and extra-crispy Viennese crust, dip the slice through the entire three-step process—first into the corn starch, then the slurry, and finally the breadcrumbs—a second time. This sequence ensures the perfect layer separation needed for a puffed-up result.
- Storage: At this stage, the breaded schnitzel may be stored in the refrigerator for 1 to 2 days. Before frying, it is critical to briefly reheat the slices in the microwave. Do not fry them cold, as the immediate temperature drop will cause the breadcrumbs to soak up excess oil, resulting in a soggy, greasy final product.
- Fry the schnitzel in at least one inch of oil at 175C (350°F) for a couple of minutes until deeply golden brown. Use an instant-read thermometer to accurately monitor and maintain the oil temperature. Crucially, while the schnitzel is frying, continuously and gently agitate the oil over the cutlet using a spoon. This technique, known as basting, ensures the hot fat heats the top of the schnitzel evenly, causing the breading to detach slightly and “soufflé” (puff up) for that authentic, light crust. Using insufficient oil will cause the schnitzel to cook unevenly and drop the temperature too quickly, resulting in the breading soaking up oil and making the final product greasy instead of crisp.
- Serve: These schnitzel must be eaten piping hot! They do not hold well, and any attempt at keeping them warm, baking, or reheating will cause them to absorb moisture from the celeriac and become soggy. Serve immediately with lingonberry jam (or cranberry jam in a highly unorthodox pinch), mâche with a light sweet vinaigrette, and boiled potatoes with parsley or our mashed potatoes (made from 1 kg steamed potato, mashed with white miso diluted in steaming liquid, freshly ground black pepper, garlic powder, and 8 Tbsp extra virgin olive oil).
↑ Back to top
Cemitas (Mexican Sesame Seed Sandwich Buns)
Adapted from https://www.seriouseats.com/recipes/2015/05/cemitas-mexican-saseme-seed-sandwich-buns-recipe.html
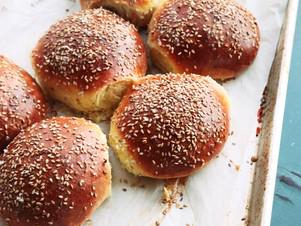
Servings: Makes 6 single-serving
buns
Ingredients
- 12.5 ounces (2 1/2 cups) all-purpose flour
- 8 ounces heavy cream
- 3 eggs, divided
- 1 teaspoon instant yeast
- 1 1/2 teaspoons kosher salt (or 3/4 teaspoon table salt)
- 3 tablespoons sugar
- 1/2 cup sesame seeds
- Coarse sea salt
Steps
- Combine flour, cream, 2 eggs, yeast, salt, and sugar in the bowl of a food processor. Process until a ball of dough that rides around the blade is formed, about 45 seconds. Dough will be very sticky. Alternatively, form dough in a stand mixer fitted with a paddle attachment by adding ingredients and mixing on medium speed until a homogenous dough comes together.
- Transfer dough to a large mixing bowl, cover tightly with plastic wrap, and let rise at room temperature until about 1 1/2 times its original size, about 4 hours.
- Lightly flour dough and transfer to a floured work surface. Form into a large ball then, using a bench scraper or sharp knife, divide the ball into 6 even pieces. Using lightly floured hands, form each piece into a ball. Transfer dough balls to a parchment-lined rimmed baking sheet, tucking the seam underneath. Cover with plastic wrap weighted down with a kitchen towel and set aside at room temperature for 1 hour.
- Meanwhile, adjust oven rack to center position and preheat oven to 450°F. When ready to bake, beat remaining egg with 1 tablespoon of water. Brush egg mixture on top of each bun until evenly coated. Sprinkle with generously with sesame seeds and lightly sprinkle with coarse salt. Bake until deep golden brown, 12 to 15 minutes. Remove from oven, transfer buns to a wire cooling rack, and let cool completely before using. Buns can be stored in a plastic of paper bag in the refrigerator for up to 1 week. Refresh in a warm oven or toaster before using.
↑ Back to top
Chairman Mao's Red-Braised Pork (Mao Shi Hong Shao Rou)

Ingredients
- 1 lb. pork belly (skin optional)
- 2 Tbsp. peanut oil
- 2 Tbsp. white sugar
- 1 Tbsp. Shaoxing wine
- ~ Fresh ginger (a 3/4-inch piece), skin left on and sliced
- 1 star anise
- 2 dried red chiles
- ~ A small piece of cassia bark or a small cinnamon stick
- ~ Light soy sauce
- ~ Salt
- ~ Sugar
- ~ Scallion greens
Steps
- Plunge the pork belly into a pan of boiling water and simmer for 3 or 4 minutes, until partially cooked. Remove and, when cool enough to handle, cut into bite-sized chunks.
- Heat the oil and white sugar in a wok over a gentle flame until the sugar melts, then raise the heat and stir until the melted sugar turns a rich caramel brown. Add the pork and splash in the Shaoxing wine.
- Add enough water to just cover the pork, along with the ginger, star anise, chiles, and cassia. Bring to a boil, then turn down the heat and simmer for 40 to 50 minutes.
- Toward the end of the cooking time, turn up the heat to reduce the sauce, and season with soy sauce, salt, and a little sugar to taste. Add the scallion greens just before serving.
Notes
- In Shaoshan, Mao’s home village, cooks traditionally leave the skin intact for maximum succulence, and cut the meat into rather large chunks, perhaps 1 1/2 inches long; I tend to make the pieces a little smaller. This recipe takes its color from caramelized sugar, which gives it a lovely reddish gloss, but many people just use dark soy sauce at home.
↑ Back to top
Chairman Mao's Red-Braised Pork (Mao Shi Hong Shao Rou)
Ingredients
- 1 lb. pork belly (skin optional)
- 2 Tbsp. peanut oil
- 2 Tbsp. white sugar
- 1 Tbsp. Shaoxing wine
- ~ Fresh ginger (a 3/4-inch piece), skin left on and sliced
- 1 star anise
- 2 dried red chiles
- ~ A small piece of cassia bark or a small cinnamon stick
- ~ Light soy sauce
- ~ Salt
- ~ Sugar
- ~ Scallion greens
Steps
- Plunge the pork belly into a pan of boiling water and simmer for 3 or 4 minutes, until partially cooked. Remove and, when cool enough to handle, cut into bite-sized chunks.
- Heat the oil and white sugar in a wok over a gentle flame until the sugar melts, then raise the heat and stir until the melted sugar turns a rich caramel brown. Add the pork and splash in the Shaoxing wine.
- Add enough water to just cover the pork, along with the ginger, star anise, chiles, and cassia. Bring to a boil, then turn down the heat and simmer for 40 to 50 minutes.
- Toward the end of the cooking time, turn up the heat to reduce the sauce, and season with soy sauce, salt, and a little sugar to taste. Add the scallion greens just before serving.
Notes
- In Shaoshan, Mao’s home village, cooks traditionally leave the skin intact for maximum succulence, and cut the meat into rather large chunks, perhaps 1 1/2 inches long; I tend to make the pieces a little smaller. This recipe takes its color from caramelized sugar, which gives it a lovely reddish gloss, but many people just use dark soy sauce at home.
↑ Back to top
Chao Shou (Sichuan Pork Wontons)

Ingredients
- 1 1/2 lb. ground pork
- 3 tbsp. cornstarch
- 2 tbsp. dry sherry
- 2 tbsp. light soy sauce
- 1 tbsp. Chinese rice wine
- 4 cloves garlic, minced
- 1 4" piece ginger, peeled and minced
- 40 31/2 "-square wonton wrappers
- 1 egg, beaten
- Kosher salt, to taste
- 1/2 cup hong you (Sichuan red chile oil; see recipe, or use store-bought), plus more for serving
- 2 tbsp. Chinkiang black vinegar, plus more for serving
Steps
- Mix pork, cornstarch, sherry, soy, wine, garlic, and ginger in a bowl. Working with 1 wrapper at a time, place 1/2 tbsp. filling in center, brush edges with egg, and fold in half, forming a triangle; overlap opposite corners, brushing with egg to seal together. Repeat with remaining wrappers and pork mixture; set aside.
- Bring a large pot of salted water to boil over high heat; working in batches, cook wontons until firm and cooked through, 5–7 minutes. Using a slotted spoon, transfer to paper towels to drain, and place in a bowl; season with salt and toss with red chile oil and vinegar. Serve additional red chile oil and vinegar on the side, if you like.
Notes
- FAVORITE
↑ Back to top
Char Kway Teow
Servings: YIELD 4 servings ACTIVE
TIME 20 minutes
Ingredients
- 1/4 pound chicken thigh fillets, thinly sliced
- 1/4 pound pork belly, chopped
- 1 tablespoon oyster sauce
- 1 tablespoon corn flour
- 1/4 cup peanut oil
- 1 each fresh red chili, finely chopped
- 2 each garlic cloves, thinly sliced
- 1 teaspoon shrimp paste
- 10 green tiger prawns, peeled and deveined
- 2 pounds packet fresh flat rice noodles
- 1 cup bean sprouts
- 4 green shallots, ends trimmed and cut into 3 centimeter lengths
- 1 egg, fried
- 1/2 cup soy sauce
- 1/4 cup oyster sauce
Steps
- Combine chicken, pork belly, 1 tablespoon oyster sauce and cornflour on a large plate.
- Heat the oil in a wok over high heat until just smoking.
- Add chili, garlic and shrimp paste, and stir-fry for 1 minute or until fragrant.
- Add the chicken mixture and stir-fry for 5 minutes or until brown and just cooked through.
- Add prawns and stir-fry for 2 minutes or until prawns curl and change color.
- Add the noodles and stir-fry for 5 minutes or until noodles are just tender.
- Add the bean sprouts, shallots, soy sauce and extra oyster sauce and stir-fry for 2 minutes or until heated through.
- Fry egg in a hot oiled pan.
- Taste and season with salt. Serve immediately with fried egg on top.
Notes
- FAVORITE
↑ Back to top
Charred Corn Salad with Basil and Tomatoes
Adapted from http://www.epicurious.com/recipes/food/views/charred-corn-salad-with-basil-and-tomatoes-51104300

Servings: YIELD Makes 8 servings
Ingredients
- 12 ears of corn, husked
- 6 tablespoons olive oil, divided
- 1 cup thinly sliced red onion
- 2 large tomatoes, chopped
- 1 cup (loosely packed) fresh basil leaves, large leaves torn
- 1/3 cup (or more) fresh lime juice
- 2 tablespoons chopped fresh thyme
- Kosher salt, freshly ground pepper
Steps
- Build a medium-hot fire in a charcoal grill, or heat a gas grill to high. Rub corn with 1 tablespoon oil. Grill, turning frequently, until corn is charred and heated through, 10-12 minutes. Remove from grill; when cool enough to handle, cut kernels from cobs and transfer to a large bowl. DO AHEAD: Corn can be made 3 hours ahead. Let stand at room temperature.
- Place onion in a strainer and rinse with cold water to mellow its flavor. Drain well. Mix onion, remaining 5 tablespoons oil, tomatoes, basil, 1/3 cup lime juice, and thyme into corn. Season to taste with salt, pepper, and more lime juice, if desired. DO AHEAD: Salad can be assembled 1 hour ahead. Let stand at room temperature.
Notes
- FAVORITE
↑ Back to top
Chaurice
Adapted from file:///C:/Users/Starfleet%20Command/Documents/Zapya/Misc/chaurice.pdf_Dir/chaurice.pdf_Page1.htm

Tags: Cajun and Creole
Charcuterie
Sausage
I made this. Is starred. Rated 5/5
Ingredients
- 1 onion, coarsely chopped 2 1/4 pounds pork butt 1/4 pound pork back fat
- 3 tablespoons pure New Mexico chile powder
- 4 teaspoons kosher salt
- 2 teaspoons minced garlic
- 2 teaspoons ground cayenne pepper or 2 teaspoons red pepper flakes
- 1 teaspoon sugar
- 11/2 teaspoons dried thyme
- 1 teaspoon freshly ground black pepper
- 1/2 teaspoon ground bay leaf (use blender or spice mill)
- 1/4 teaspoon ground allspice
- 1/2 cup finely chopped fresh parsley
- (flat-leaf variety preferred) Medium hog casings
Steps
- Bring 2 quarts of water to a boil and blanch the chopped onion for 2 minutes. Strain and cool under running water.
Combine the meat, fat, chile powder, salt, garlic, cayenne, red pepper
flakes, sugar, thyme, black pepper, bay leaf, allspice, and onions in
a
large bowl. Marinate the mixture in the refrigerator for at least 30
minutes or up to 4 hours.
Grind the mixture through a 1/4-inch plate. Add the parsley and knead
and squeeze to mix the meat and flavorings thoroughly.
Stuff the mixture into medium
hog casings and tie into 5-inch links.
If you wish, you can hot smoke the chaurice using the method discussed
on page 18. Keeps for 3 days refrigerated, or 2 months frozen.
↑ Back to top
Cheese Blintzes
Ingredients
- 1 cup flour
- 3 1/2 tbsp. sugar
- 1/2 tsp. kosher salt
- 1 1/4 cups milk
- 3 tbsp. canola oil
- 1 3/4 tsp. vanilla extract
- 4 eggs, plus 1 yolk
- 1 lb. farmers' cheese, at room temperature
- 6 oz. small curd cottage cheese
- 3 tbsp. cream cheese, softened
- 1/2 tsp. grated lemon zest
- Applesauce, for serving (optional)
Steps
- Whisk flour, 2 tbsp. sugar, and the salt in a bowl; set aside. Whisk milk, 1 tbsp. oil, 1 tsp. vanilla, and 4 eggs in a bowl until combined. Whisk dry ingredients into wet to make a batter. Heat an 8" nonstick skillet over medium heat. Pour 1/4 cup batter into center of skillet. Working quickly, tilt skillet to spread batter evenly, and cook, without flipping, until top is slightly dry, 1–2 minutes. Slide crêpe onto a plate; repeat with remaining batter.
- Mix remaining sugar and vanilla, plus yolk, cheeses, and lemon zest in a bowl. Working with 1 crêpe at a time, spread about 3 tbsp. filling along bottom third of crêpe; tuck sides in and roll into a loose cylinder. Heat remaining oil in a 12" nonstick skillet over medium-high heat. Cook blintzes, flipping once, until golden brown, 2–3 minutes. Serve with applesauce, if you like.
Notes
- FAVORITE
↑ Back to top
Cheese Sauce for Cheese Fries and Nachos

Tags: Cheese
Dips and Spreads
Servings: 1 1/2 cups
Ingredients
- 8 ounces extra-sharp cheddar cheese (or a mix of cheddar and pepper Jack; see notes), grated on large holes of a box grater
- 1 tablespoon cornstarch
- One 12- ounce can evaporated milk, divided
- 2 teaspoons Franks Red Hot or other hot sauce
Steps
- Add cheese and cornstarch to large bowl. Toss to combine. Transfer to medium saucepan.
- Add 1 cup evaporated milk and hot sauce. Cook over low heat, stirring constantly with whisk until melted, bubbly, and thickened, about 5 minutes. Mixture will look thin and grainy at first but will thicken and come together after heating. Thin to desired consistency with additional evaporated milk. Serve immediately with fries, tortilla chips, burgers, or hot dogs.
Notes
- This cheese sauce is gooey and tangy. For a spicier version, substitute half the cheddar cheese with pepper Jack and add 2-3 minced pickled jalapeños, or to taste.
- To reheat the sauce, microwave it on high heat, stopping and stirring every 30 seconds, until it's fully melted.
↑ Back to top
Cheesecake Cookies
Ingredients
- 8 oz cream cheese (room temperature)
- 1/2 cup butter (room temperature)
- 1 1/4 cup granulated sugar
- 2 eggs
- 1 teaspoon vanilla extract
- 2 1/2 cups flour
- 2 teaspoons baking powder
- 1/2 teaspoon salt
- Powdered Sugar
Steps
- Preheat oven to 350 degrees F. Line 2 baking sheets with parchment paper or silicone mats.
- Beat cream cheese and butter together until fluffy and smooth; 1-2 minutes. Add sugar to the butter mixture and beat until fully incorporated and fluffy; 1-2 minutes. Beat in the eggs and vanilla; 1 minute.
- In a separate, medium-sized bowl, whisk together the flour, baking powder and salt. Gradually add the dry ingredients to the butter mixture and stir just until incorporated. Do not over-mix.
- Drop by rounded tablespoons onto the prepared baking sheets.
- Bake at 350 degrees for 10-11 minutes. Cookies should be light in color, not browned, and just starting to brown on the bottom. *Length of baking time may vary from oven to oven.
- Cool cookies on the baking rack for a few minutes before transferring to a wire rack to cool completely.
- If desired, sprinkle with powdered sugar or dip in chocolate once cooled.
Notes
- FAVORITE
↑ Back to top
Cheesy Chive & Onion Crackers
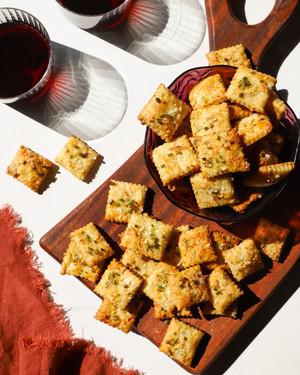
Servings: 30
Ingredients
- 1 ¼ cups all purpose flour
- 5 tablespoons dehydrated onion flakes, divided
- 3 tablespoons dehydrated chives
- ½ teaspoon granulated sugar
- ¼ teaspoon baking powder
- ¼ teaspoon kosher salt
- ½ cup Vermont Creamery Unsalted Cultured Butter, chilled, cubed
- 4 ounces sharp white Cheddar, finely grated
- 2 ounces Gruyère cheese, finely grated
- 3 tablespoons ice water
- ⅓ cup heavy whipping cream
- ⅓ teaspoon flaky sea salt for finishing
Steps
- Place flour, 2 tablespoons dehydrated onions, dehydrated chives, sugar, baking powder, and salt in food processor and pulse a few times to combine. Add cold butter cubes and pulse until the butter is about the size of peas, about 6 to 8 times. Add grated Cheddar and Gruyère and continue to pulse until the cheese is incorporated in the butter and flour mixture, then with the motor running slowly stream in 3 tablespoons ice water and pulse until dough starts to form a ball (it’s okay if it’s a little shaggy).
- Turn dough onto lightly floured surface, bring the dough together into a round with your hands, and knead a couple times. Roll dough into a 12-inch round. Fold top and bottom into the center so they meet in the middle, then repeat the same process with the sides, creating a square (this is creating lots of flaky layers!). Wrap in plastic wrap and chill for 45 minutes.
- Heat oven to 350°F. Line two baking sheets with parchment paper and set aside.
- Remove dough from the refrigerator, divide in half, place one half on a lightly floured surface, and return the other half to refrigerator.
- Roll dough out into a rectangle about 13x10” and no more than ⅛” thick. Using a fluted pastry cutter, trim the edges, saving the scrapes, to create a clean rectangle. Transfer dough to one of the parchment-lined baking sheets. Cut dough into 1½” strips lengthwise and 1½” strips crosswise to create square crackers. Using a fork, dock each cracker diagonally across the center (this will allow steam to escape when baking).
- Using a pastry brush, brush the top of the cut dough with a thin layer of heavy cream and sprinkle each cracker with a few flakes of flakey salt and then sprinkle 1½ tablespoons of dehydrated onions evenly over the top of crackers. Pull crackers apart so there is about ⅛” between each one. Freeze for 10 minutes. (At this point, the crackers can be frozen completely, and then transferred to a zip-top freezer bag to be baked later. The unbaked crackers are good in the freezer for up to 1 month.)
- Bake crackers, turning the tray halfway through, until they are slightly puffed and golden, about 16 to 20 minutes. If baking from frozen, crackers might take a couple extra minutes.
- While the first batch of crackers is chilling and baking, repeat the rolling and cutting process with the remaining half of the dough. Combine any leftover scraps into a ball, reroll, cut, and garnish that dough.
- Cool crackers for 15 minutes before serving and enjoy with bubbles or your favorite batch cocktail! Crackers can be kept in an airtight container for up to 2 days.
↑ Back to top
Chef Anthony Rose's “Shhhh Sauce”
Ingredients
- 2 cup Hellman’s mayo
- 1/2 cup pickle chopped fine
- 1/4 cup capers chopped fine
- 1/4 cup ketchup
- 2 T yellow mustard
- 4 anchovy chopped
- 2 T tarragon chopped fine
- 2 T dill chopped fine
- 2 T tabasco
- 2 T Worcestershire
- 2 T pick a hot sauce
- salt
- pepper
Steps
- mix it all together and season with a little more Tabasco
Notes
- Faux McDonald's special sauce.
↑ Back to top
Chef John's Braised Red Cabbage
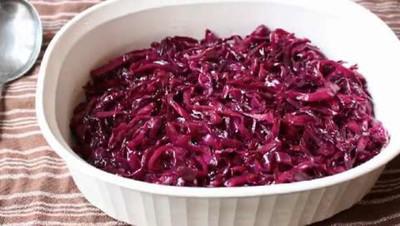
I made this. Rated 4/5
Servings: 4
Ingredients
- Original recipe (1X) yields 4 servings
- 2 tablespoons butter
- 1 small head red cabbage, cored and thinly sliced
- salt to taste
- ⅓ cup water
- ¼ cup red wine I used cider
- 2 tablespoons red wine vinegar, or to taste
- 2 tablespoons white sugar
- 1 pinch caraway seeds
1X 2X:
Steps
- Melt butter in a large skillet over medium heat; cook cabbage in hot butter until it begins to soften, 1 to 2 minutes. Season with salt to taste. Pour in water, red wine, and red wine vinegar; stir to combine. Mix in sugar and caraway seeds.
- Continue to cook and stir until liquid has evaporated and cabbage is tender, about 5 minutes. If cabbage isn't quite tender, add a splash of water and continue cooking a few more minutes.
Notes
- There are so many ways to tweak this recipe. Raisins, currants, shallots, onions, leeks, apples, and pears are just a few things that rock in this recipe.
↑ Back to top
Chef John's Stuffed Peppers
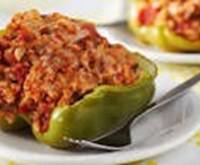
Ingredients
- 1 cup uncooked long grain white rice
- 2 cups water
- 1 onion, diced
- 1 tablespoon olive oil
- 2 cups marinara sauce
- 1 cup beef broth
- 1 tablespoon balsamic vinegar
- 1/4 teaspoon crushed red pepper flakes
- 1 pound lean ground beef
- 1/4 pound hot Italian pork sausage, casing removed
- 1 (10 ounce) can diced tomatoes
- 1/4 cup chopped fresh Italian parsley
- 4 cloves garlic, minced
- 2 teaspoons salt
- 1 teaspoon freshly ground black pepper
- 1 pinch ground cayenne pepper
- 4 large green bell peppers, halved lengthwise and seeded
- 1 cup finely grated Parmigiano-Reggiano cheese, plus more for topping
Sauce:
Peppers:
Steps
- Preheat the oven to 375 degrees F (190 degrees C).
- Bring rice and water to a boil in a saucepan over high heat. Reduce heat to medium-low, cover, and simmer until the rice is tender, and the liquid has been absorbed, 20 to 25 minutes. Set the cooked rice aside.
- Cook onion and olive oil over medium heat until onion begins to soften, about 5 minutes. Transfer half of cooked onion to a large bowl and set aside.
- Stir marinara sauce, beef broth, balsamic vinegar, and red pepper flakes into the skillet; cook and stir for 1 minute.
- Pour sauce mixture into a 9x13-inch baking dish and set aside.
- Combine ground beef, Italian sausage, diced tomatoes, Italian parsley, garlic, salt, black pepper, and cayenne pepper into bowl with reserved onions; mix well. Stir in cooked rice and Parmigiano Reggiano. Stuff green bell peppers with beef and sausage mixture.
- Place stuffed green bell pepper halves in the baking dish over tomato sauce; sprinkle with remaining Parmigiano-Reggiano, cover baking dish with aluminum foil, and bake in the preheated oven for 45 minutes.
- Remove aluminum foil and bake until the meat is no longer pink, the green peppers are tender and the cheese is browned on top, an addition 20 to 25 minutes.
Notes
- FAVORITE
↑ Back to top
Cherry Scones
Adapted from https://twocupsflour.com/cherry-scones-recipe/

Tags: Baking
Fruit
Servings: 6 scones
Ingredients
- 2 ½ Cups (313 grams) All Purpose Flour
- ⅓ Cup (67 grams) Granulated Sugar
- 1 Tablespoon Baking Powder
- 2 teaspoons Lemon Zest
- 2 teaspoons Orange Zest
- ½ teaspoon Kosher Salt
- 6 Tablespoon Unsalted Butter
- ½ Cup (125 ml) Heavy Whipping Cream
- 1 teaspoon Vanilla Extract
- 1 teaspoon Almond Extract
- 1 Large Egg
- 1 Large Egg Yolk
- 1 ½ Cups Bing Cherries pitted, cut into quarters
- 3 Tablespoons Heavy Whipping Cream
- Turbinado or Sparkling Sugar for sprinkling
Scone Dough:
Topping:
Steps
- Preheat oven to 425 F (218 C) and line a baking sheet with parchment paper.
- In a medium bowl whisk together flour, sugar, baking powder, lemon zest, orange zest, and salt.
- Cut in cold butter cubes with pastry grinder and/or fingers until resembles cornmeal.
- Place flour mixture in freezer for 10 minutes.
- In a separate bowl whisk together egg, egg yolk, cream, vanilla extract, and almond extract.
- Remove flour mixture from freezer and pour in egg and cream mixture. Stir together with a wooden spoon until just mixed, then loosely form into a ball with hands.
- Place dough on a floured surface and knead in chopped cherries.
- Shape into a circle about 2 inches thick. Cut circle in half and then each half into thirds for a total of six triangles
- Place scones on baking sheet 1.5-2 inches apart.
- Use the 3 Tbsp of remaining Heavy Cream, more if needed and paint a thin coating on the scones.
- Generously sprinkle with sparkling sugar.
- Bake for 18-20 minutes, or until golden on the edges.
- Let pan cool on baking rack for 10 minutes before removing scones and eating!!
↑ Back to top
Chicken and Broccoli Stir-Fry

Tags: Chicken
Chinese Stir-Fry Vegetables
Servings: Original recipe yields
6 servings
Ingredients
- 6 tablespoons soy sauce
- 3 tablespoons cornstarch, divided
- 4 large skinless, boneless chicken breasts, cut into thin strips
- 2 cups boiling water, or more as needed
- 1 ½ tablespoons instant chicken bouillon granules
- ½ teaspoon ground ginger, or more to taste
- ¼ cup canola oil, divided
- 2 tablespoons sesame oil, divided
- 4 cups fresh broccoli florets, or more to taste
- 1 medium red bell pepper, cut into thin strips
- ½ green bell pepper, cut into thin strips
- 1 medium onion, diced
- 2 tablespoons minced garlic
- ½ teaspoon crushed red pepper, or more to taste
- 1 cup toasted slivered almonds
Steps
- Combine soy sauce and 1 tablespoon cornstarch in a glass bowl or zip-top bag. Add chicken; stir to coat. Remove all air from baggie before sealing, or cover the bowl. Refrigerate at least 30 minutes.
- Combine boiling water and bouillon granules in another bowl, stir until dissolved. Add remaining cornstarch and ginger; stir to combine.
- Heat half of the canola oil and 1 tablespoon sesame oil to 365 degrees F (185 degrees C) in an electric skillet or in a heavy skillet over medium-high heat. Add broccoli, bell peppers, onion, and garlic. Stir-fry until crisp-tender, 5 to 7 minutes. Remove from the skillet with a slotted spoon to a serving dish.
- Heat remaining canola oil and sesame oil in same skillet to 365 degrees F (185 degrees C) or medium-high heat. Add chicken mixture and crushed red pepper. Stir-fry until chicken is no longer pink in the centers and juices run clear, 7 to 10 minutes. Return vegetables to the skillet. Add bouillon mixture. Stir until thickened. Stir in optional almonds.
Notes
- You can use vegetable oil instead of canola.
↑ Back to top
Chicken and Cabbage Salad
Adapted from https://food52.com/blog/18776-meet-the-salad-antidote-for-when-you-ve-just-had-too-much
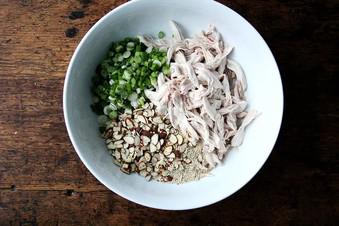
Tags: Chicken
Salad
Ingredients
- 2 tablespoons plus 1 teaspoon kosher salt
- 1 whole chicken, about 3 lbs
- 1 head cabbage, about 2.5 lbs
- 1/2 cup neutral oil such as canola or grapeseed
- 1/4 cup white balsamic vinegar
- 1 tablespoon fresh lemon juice
- 2 tablespoons sesame oil
- 2 teaspoons sugar
- 1 cup sliced almonds
- 1/3 cup sesame seeds
- 6 scallions, thinly sliced
Steps
- The process is simple. Place the cabbage in a colander, sprinkle with a handful of salt, and, using your hands, massage the salt into the cabbage. Let stand for a few minutes, then rinse the salt off with cold water and let the cabbage drain. Salting draws out some of the moisture in the cabbage, allowing it to relax and better soak up the dressing. When I made the Sumi Salad with presalted cabbage, the texture was perfect.
The salted cabbage and
the sesame-y dressing. PHOTO BY ALEXANDRA STAFFORD:
↑ Back to top
Chicken and Rice
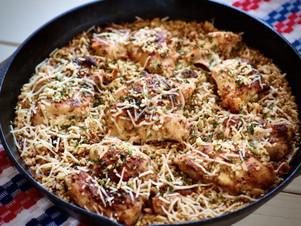
Servings: Original recipe (1X)
yields 6 servings
Ingredients
- Original recipe (1X) yields 6 servings
- 1 1/2 pounds boneless skinless chicken thighs (about 6)
- 1/2 teaspoon salt
- 1/2 teaspoon onion powder
- 1/4 teaspoon freshly ground black pepper
- 1/4 teaspoon paprika
- 2 tablespoons olive oil, or more as needed, divided
- 8 cloves garlic, minced, divided
- 1/4 cup butter, cut into pieces
- 1 1/2 cups long-grain white rice, rinsed
- 3 cups chicken broth
- 2 tablespoons butter, melted
- 2 tablespoons chopped fresh parsley, for garnish
- 2 tablespoons freshly grated Parmesan cheese, for garnish
Steps
- Sprinkle chicken on both sides with salt, onion powder, black pepper, and paprika.
- Heat 2 tablespoons of olive oil in a 5- to 6-quart Dutch oven over medium-high heat. Add the chicken thighs. Cook until seared and lightly browned, 4 to 5 minutes on each side. Transfer to a plate.
- Reduce heat to medium. If needed, add remaining 1 tablespoon olive oil to the Dutch oven. Stir in 6 cloves minced garlic and cook until fragrant, about 30 seconds.
- Add 1/4 cup butter. When melted, stir in rice until fully coated. Pour in chicken broth and scrape the bottom of the Dutch oven with a wooden spoon to loosen any browned bits. Bring to a boil over high heat. Reduce heat to medium-low, cover, and simmer for 10 minutes.
- Combine melted butter and remaining 2 cloves minced garlic in a small bowl; set aside.
- Nestle chicken thighs into the rice mixture. Brush tops of chicken with garlic butter mixture.
- Cover and continue cooking until the rice has absorbed all the liquid and the chicken is cooked through (an instant-read thermometer inserted into the thickest part should read at least 165 degrees F (74 degrees C)), 10 to 15 minutes more.
- Sprinkle with parsley and Parmesan before serving.
Photographer: Jacob Fox
/ Food Styling: Shannon Goforth / Prop Styling: Kristen Schooley:
Photographer: Jacob Fox
/ Food Styling: Shannon Goforth / Prop Styling: Kristen Schooley:
Photographer: Jacob Fox
/ Food Styling: Shannon Goforth / Prop Styling: Kristen Schooley:
Photographer: Jacob Fox
/ Food Styling: Shannon Goforth / Prop Styling: Kristen Schooley:
Photographer: Jacob Fox
/ Food Styling: Shannon Goforth / Prop Styling: Kristen Schooley:
Photographer: Jacob Fox
/ Food Styling: Shannon Goforth / Prop Styling: Kristen Schooley:
Photographer: Jacob Fox
/ Food Styling: Shannon Goforth / Prop Styling: Kristen Schooley:
↑ Back to top
Chicken and Smoked Sausage Gumbo with White Rice
Adapted from http://www.foodnetwork.com/recipes/emeril-lagasse/chicken-and-smoked-sausage-gumbo-with-white-rice-recipe.html

Ingredients
- 1 tablespoon plus 1/2 cup vegetable oil
- 1 pound smoked sausage, such as andouille or kielbasa, cut crosswise 1/2-inch thick pieces
- 4 pounds chicken thighs, skin removed
- 1 tablespoon Essence or Creole seasoning, recipe follows
- 1 cup all-purpose flour
- 2 cups chopped onions
- 1 cup chopped celery
- 1 cup chopped bell peppers
- 1 teaspoon salt
- 1/4 teaspoon cayenne
- 3 bay leaves
- 9 cups chicken stock or canned low-sodium chicken broth
- 1/2 cup chopped green onions
- 2 tablespoons chopped parsley leaves
- 1 tablespoon file powder
- White Rice, recipe follows
- Hot sauce
Steps
- In a large enameled cast iron Dutch oven or large pot, heat 1 tablespoon of the vegetable oil over medium-high heat. Add the sausage and cook until well browned, about 8 minutes. Remove the sausage with a slotted spoon and drain on paper towels. Set aside.
- Season the chicken with the Essence and add in batches to the fat remaining in the pan. Cook over medium-high heat until well browned, 5 to 6 minutes. Remove the chicken from the pan, let cool, and then refrigerate until ready to use.
- Combine the remaining 1/2 cup oil and the flour in the same Dutch oven over medium heat. Cook, stirring slowly and constantly for 20 to 25 minutes, to make a dark brown roux, the color of chocolate.
- Add the onions, celery, and bell peppers and cook, stirring, until wilted, 4 to 5 minutes. Add the reserved sausage, salt, cayenne, and bay leaves, stir, and cook for 2 minutes. Stirring, slowly add the chicken stock, and cook, stirring, until well combined. Bring the mixture to a boil. Reduce the heat to medium-low and cook, uncovered and stirring occasionally, for 1 hour.
- Add the reserved chicken to the pot and simmer for 1 1/2 hours, skimming off any fat that rises to the surface.
- Remove the pot from the heat. Using a slotted spoon, remove the chicken thighs from the gumbo and place on a cutting board to cool slightly. Remove and discard the bay leaves. Pull the chicken meat from the bones and shred, discarding the bones and skin. Return the meat to the gumbo and stir in the green onions, parsley, and file powder.
- Spoon rice into the bottom of deep bowls or large cups and ladle the gumbo on top. Serve, passing hot sauce on the side.
- 2 1/2 tablespoons paprika
- 2 tablespoons salt
- 2 tablespoons garlic powder
- 1 tablespoon black pepper
- 1 tablespoon onion powder
- 1 tablespoon cayenne pepper
- 1 tablespoon dried oregano
- 1 tablespoon dried thyme
- Combine all ingredients thoroughly.
- Yield: 2/3 cup
- Recipe from "New New Orleans Cooking", by Emeril Lagasse and Jessie Tirsch Published by William and Morrow, 1993.
- 2 cups long-grain white rice
- 4 cups water, chicken stock, or canned low-sodium chicken broth
- 1 tablespoon unsalted butter
- 1 1/2 teaspoons salt
- 1 bay leaf
- In a 2-quart saucepan, combine the rice, water, butter, salt, and bay leaf and bring to a boil over high heat. Reduce the heat to low, cover, and simmer until all the liquid is absorbed, about 20 minutes. Remove the pan from the heat and let sit, covered and undisturbed, for 5 minutes.
- Uncover and fluff the rice with a fork. Discard the bay leaf and serve.
- Yield: 7 cups
- Prep Time: 5 minutes
- Cook Time: 20 minutes
- Inactive Prep Time: 5 minutes
- Recipe courtesy Emeril Lagasse
Notes
- FAVORITE
↑ Back to top
Chicken Bog
Adapted from https://www.foodandwine.com/chicken-bog-11683015
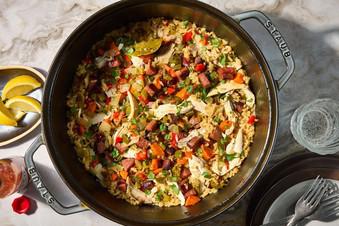
Ingredients
- Original recipe (1X) yields 6 to 8 servings
- 1 cup Carolina Gold rice
- 2 pounds bone-in, skin-on chicken thighs (about 4 thighs)
- 1 1/2 teaspoons kosher salt, divided
- 1 teaspoon black pepper, divided
- 2 teaspoons olive oil
- 8 ounces smoked sausage, such as andouille, chopped (about 1 cup)
- 1 1/2 cups chopped yellow onion (about 1 medium onion)
- 1 cup chopped carrots (about 2 medium carrots)
- 1 cup chopped celery (about 3 stalks)
- 1/2 cup chopped green bell pepper
- 1/2 cup chopped red bell pepper
- 1/2 teaspoon dried thyme
- 2 garlic cloves, thinly sliced
- 4 cups lower-sodium chicken broth
- 2 fresh bay leaves or 1 dried bay leaf
- 1 tablespoon chopped fresh flat-leaf parsley
- 1 tablespoon fresh lemon juice
- 1 tablespoon unsalted butter
- Hot sauce (such as Tabasco)
- Lemon wedges
Steps
- Rinse rice under cold running water until water runs clear, 1 to 2 minutes; drain and set aside. Preheat oven to 350˚F.
- Sprinkle chicken evenly with 1/2 teaspoon each salt and black pepper. Heat olive oil in a large Dutch oven over medium. Add chicken, skin side down, and cook until skin is golden brown, 6 to 9 minutes. Transfer chicken to a plate. Add sausage to drippings in Dutch oven; cook, stirring occasionally, until browned on all sides, about 5 minutes. Transfer sausage using a slotted spoon to a bowl or plate lined with paper towels.
- Add onion, carrots, celery, bell peppers, thyme, garlic, 1 teaspoon salt, and 1/2 teaspoon black pepper to drippings in Dutch oven. Cook over medium, stirring occasionally, until vegetables soften, about 5 minutes. Add rice; cook, stirring constantly, until lightly toasted, about 1 minute. Stir in broth and bay leaves. Return sausage and chicken thighs along with their accumulated juices to Dutch oven; bring to a simmer over high.
- Cover Dutch oven, and transfer to oven. Bake until a thermometer inserted into thickest portion of chicken registers 170°F and rice is tender, about 20 minutes.
- Remove Dutch oven from oven; transfer chicken thighs to a plate, and let cool slightly, about 5 minutes. Once cool enough to handle, shred chicken into large bite-size pieces; discard skin and bones.
- Stir shredded chicken and any accumulated juices into Dutch oven. Remove and discard bay leaves. Stir in parsley, lemon juice, and butter. Serve with hot sauce and lemon wedges.
↑ Back to top
Chicken Karaage Recipe (With Video)

Servings: 2 to 3
Ingredients
- 1 pound boneless, skinless chicken thighs, cut into 2-inch pieces
- 1 (2-inch) piece ginger, peeled and finely grated (2 teaspoons)
- 2 tablespoons soy sauce
- 2 tablespoons sake
- ½ teaspoon granulated sugar
- ½ teaspoon coarse kosher salt
- 1 large egg
- 1 cup cornstarch or potato starch
- About 1 quart canola or vegetable oil, for frying
- Lemon wedges, mayonnaise and shichimi togarashi (see Tip), for serving (optional)
Steps
- Watch
- To a medium bowl, add the chicken, ginger, soy sauce, sake, sugar and salt. Toss to combine. Cover and refrigerate for at least 30 minutes and up to 1 hour.
- Place a wire rack over a large, paper towel-lined sheet pan. Crack the egg into a small bowl and whisk. To a large bowl, add the cornstarch. One by one, dip the chicken into the egg, then into the cornstarch until evenly coated. Set the coated chicken pieces on the left side of the wire rack.
- To a medium saucepan, add enough oil to fill a third of the way up. Heat the oil over medium-high to 320 degrees. Turn your hood vent on, if you’ve got one, and open a nearby window, if possible. Working in batches, fry the chicken until crunchy and light brown, adjusting the heat so the oil temperature stays between 300 and 320 degrees, 4 to 6 minutes per batch. Using tongs or a slotted spoon, transfer the fried chicken to the right side of the wire rack, away from the portion that was exposed to the raw chicken, to rest slightly.
- Serve with the optional (but very delicious) lemon wedges and mayonnaise dusted with togarashi.
Make the recipe with us
Notes
- You can find shichimi togarashi, a flavorful Japanese seven-spice blend, in Asian grocery stores and online. But to make your own simplified version in a pinch, stir together ½ teaspoon ground cayenne, ¼ teaspoon ground ginger, ¼ teaspoon sesame seeds and a couple grinds of black pepper.
↑ Back to top
Chicken Livers with Chipotle Caramelized Onions
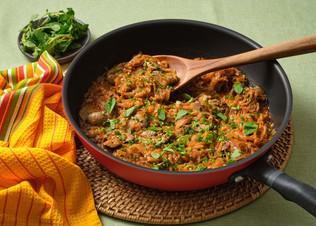
Tags: Passover
Servings: 4
Ingredients
- 1 pound chicken livers
- 1/2 cup whole milk
- 4 tablespoons unsalted butter divided
- 4 tablespoons vegetable oil divided
- 3 large white onions slivered
- 1 teaspoon kosher or coarse sea salt divided, or more to taste
- 3 tablespoons sherry vinegar
- ¼ cup chicken broth
- 2 to 3 tablespoons sauce from chipotles in adobo sauce
- 1 tablespoon tomato paste
- 1 teaspoon Dijon mustard
- ½ teaspoon freshly ground black pepper or to taste
- Chopped fresh chives for garnish, optional
- Fresh oregano leaves for garnish, optional
Steps
- Place the chicken livers in a bowl and gently cover with cold water. One by one, using a chopping board and a sharp knife, remove any connective tissue and cut them into lobes. Place them into a different bowl and cover with cold milk. Let them sit anywhere from 1/2 hour to overnight, if more than an hour, cover and place in the refrigerator.
- When ready to cook the livers, gently drain and place on a chopping board or sheet pan covered with paper towels and pat dry.
- In a large non-stick skillet set over medium heat, add 2 tablespoons of butter and 2 tablespoons of oil. Once the butter has melted, add the onions and ½ teaspoon salt. Cook stirring regularly for about 35 to 40 minutes, until completely softened, caramelized, and their color has turned to light brown and they are slightly browning more along the edges. Scrape into a bowl and reserve.
- Season the livers with the remaining ½ teaspoon salt and ½ teaspoon black pepper. In the same skillet, add 1 tablespoon of butter and 1 tablespoon of oil and raise heat to medium high. Cook the livers for about 2 to 3 minutes per side, until just cooked through but browned outside. Scrape into a bowl and set aside.
- In the same skillet, reduce heat to medium, add the remaining tablespoon of oil and butter. Once melted, add the vinegar and cook, scraping the pan for about 10 to 15 seconds. Add chicken broth, chipotle sauce, tomato paste, and Dijon and stir until well mixed, continuing to scrape the bottom of the pan. Cook for a minute, until it strongly bubbles. Add the cooked onions, stir well to thoroughly combine with the sauce. Incorporate the chicken livers and any of their juices, toss to combine, and let it all cook for a minute. Turn off the heat, garnish with fresh chives and oregano. Serve with rice.
Notes
- I like to chop any leftover chicken livers into chopped liver. I also like to have some extra roasted cherry tomatoes to reserve. Then I’ll spread the chopped liver on some toasted slices of bread and top with roasted cherry tomatoes.
↑ Back to top
Chicken Mushroom Stroganoff

Ingredients
- 1 lb chicken breast, thinly sliced
- 2 cups fresh mushrooms, sliced
- 1 medium onion, finely chopped
- 2 cloves garlic, minced
- 1 tablespoon olive oil
- 1 tablespoon butter
- 1 teaspoon paprika
- 1 cup chicken broth
- 1 cup sour cream
- Salt and pepper to taste
- 2 tablespoons all-purpose flour
- Fresh parsley, chopped for garnish
- Cooked egg noodles or rice, for serving
Steps
- Heat olive oil and butter in a large skillet over medium-high heat. Add the chicken slices and brown on both sides. Remove chicken and set aside.
In the same skillet, add
onions and garlic. Sauté until onions are translucent.
Add mushrooms and cook until
they start to brown and release their juices.
Sprinkle flour over the
mushrooms and stir to combine. Cook for 1-2 minutes.
Gradually pour in chicken
broth, stirring constantly to create a smooth sauce.
Return the chicken to the
skillet. Reduce heat to low and simmer for 10 minutes.
Stir in sour cream and paprika. Season with salt and pepper. Cook for
an additional 5 minutes, or until the sauce thickens and the chicken
is
cooked through.
Serve over cooked egg noodles
or rice, garnished with fresh parsley.
↑ Back to top
Chicken Noodle Casserole I

Servings: YIELD 6 servings ACTIVE
TIME 30 mins
Ingredients
- 4 skinless, boneless chicken breast halves
- 6 ounces egg noodles
- 1 (10.75 ounce) can condensed cream of mushroom soup
- 1 (10.75 ounce) can condensed cream of chicken soup
- 1 cup sour cream
- salt to taste
- ground black pepper to taste
- 1 cup crumbled buttery round crackers
- 1/2 cup butter
Steps
- Poach chicken in a large pot of simmering water. Cook until no longer pink in center, about 12 minutes. Remove from pot and set aside. Bring chicken cooking water to a boil and cook pasta in it. Drain. Cut chicken into small pieces, and mix with noodles.
- In a separate bowl, mix together mushroom soup, chicken soup, and sour cream. Season with salt and pepper. Gently stir together cream soup mixture with the chicken mixture. Place in a 2 quart baking dish.
- Melt butter in a small saucepan, and remove from heat. Stir in crumbled crackers. Top casserole with the buttery crackers.
- Bake at 350 degrees F (175 degrees C) for about 30 minutes, until heated through and browned on top.
Notes
- FAVORITE
↑ Back to top
Chicken or Duck Liver Mousse
Tags: Appetizers and Dim
Sum Offal
Snacks
I made this. Is starred. Rated 5/5
Ingredients
- 1 bay leaf
- 2 whole cloves
- 8 whole white peppercorns
- 2 allspice berries
- 1 large onion, finely diced (about 1 cup)
- 6 ounces salt pork backfat
- 1 pound chicken livers, cleaned and patted dry on paper towels
- 2 eggs
- 1/2 cup heavy cream
- 1 1/2 teaspoons kosher salt
- 1/4 cup brandy
For the spice
mix:
For the
mousse:
Steps
- Preheat the oven to 250°F. Grind the spices together into a fine powder and pass it through a fine mesh strainer. Set aside.
- Cover the onions and pork fat in a medium saucepan with water and bring to a boil over high heat, stirring occasionally. Drain and allow to drip dry for a few minutes.
- Place the chicken livers, egg, heavy cream, salt, brandy, and spices in a blender and blend on high heat until completely smooth. With the blender running, slowly add the fat and onions. Don't add too quickly or the mixture will break. Blend for at least a minute or two after the last addition of fat. Pass the liquid mixture through a fine mesh strainer.
- Pour the liquid into a terrine mold or individual ramekins (a bread pan will do in a pinch) and place them in a roasting pan lined with a kitchen towel. Fill the pan with boiling water to just under the edge of the mold. Cover the top of the mold with a lid (or anything to block moisture from evaporating). Carefully transfer to the middle rack of the oven and back until it reaches 160°F in the center (about 1 1/2 hours or so).
- Remove from the oven and let it cool completely. Chill overnight in the refrigerator.
↑ Back to top
Chicken Pad Thai
Adapted from https://www.seriouseats.com/chicken-pad-thai-recipe

Tags: Chicken
Noodles Thai
Servings: 4
Ingredients
- 1/3 cup tamarind pulp
- 1/3 cup fish sauce
- 2 ounces palm sugar, grated (about 1/3 cup)
- 1 pound skinless, boneless chicken breast, trimmed of visible fat and sliced into 1/4-inch thick strips
- 1/2 cup vegetable oil, divided
- 6 shallots, finely chopped
- 6 medium cloves garlic, minced (about 2 tablespoons)
- 1/4 cup tiny dried shrimp, soaked in hot water for 15 minutes and drained
- 1/4 to 1/2 teaspoon chile flakes
- 12 ounces dry rice stick noodles, soaked in cold water for 30 minutes, drained
- 2 large eggs, beaten
- 2 cups bean sprouts
- 2/3 cup toasted unsalted peanuts, finely chopped
- 1 bunch scallions, cut into 1-inch lengths
- 4 limes, cut into wedges for garnish
Steps
- Soak tamarind in hot water for 15 minutes. Strain and reserve juice, pressing on pulp to extract as much liquid as possible. In a small bowl, combine strained tamarind juice, fish sauce, and palm sugar.
- Place chicken in a bowl and toss with 2 tablespoons fish sauce mixture.
- In a wok, or 12-inch non-stick skillet, heat 4 tablespoons oil over medium heat until shimmering. Add shallots and cook until just beginning to soften, about 3 minutes. Add garlic and cook until fragrant, about 30 seconds.
- Increase heat to medium-high. Add 3 tablespoons oil and chicken (with any juices). Cook, stirring, until cooked through, about 2 minutes.
- Stir in rehydrated dried shrimp and chile flakes and cook for 30 seconds. Stir in noodles and remaining fish sauce mixture. Cook, tossing, until mixture is thoroughly coated and sauce has thickened slightly, about 1 minute.
- Push mixture off to side of pan and add remaining tablespoon oil to empty part of pan. Add beaten eggs and cook, stirring and breaking into small pieces with spatula, until cooked through.
- Toss in sprouts, peanuts and scallions. Cook, continuously tossing, until heated through, about 1 minute. Serve immediately with lime wedges on the side.
- Special Equipment
- Wok or 12-inch non-stick skillet
Notes
- Make sure to have all of your ingredients prepped and ready to go before starting to cook.
- Rice sticks can be found in the Asian food aisle in most major markets. If you don't have palm sugar, light brown sugar can be substituted. Tamarind can be found in your local Asian/Indian market. It usually comes in a package of the pulp with the seeds.
↑ Back to top
Chicken Piccata Meatballs
Servings: 4
Ingredients
- 1 lb. ground chicken
- 1/2 cup panko breadcrumbs
- 2 Tbsp. grated pecorino Romano cheese
- 1 tsp. dried Italian seasoning
- 1/2 tsp. kosher salt
- 1/4 tsp. black pepper
- 1 large garlic clove, grated on a Microplane
- 1 large egg, lightly beaten
- 2 Tbsp. olive oil
- 1 medium shallot (1 1/4 oz.), minced
- 2/3 cup unsalted chicken stock
- 1/4 cup fresh lemon juice
- 3 Tbsp. drained capers
- 3 Tbsp. cold butter, cut into small pieces
- 2 Tbsp. chopped fresh parsley (optional)
Steps
- Place chicken in a large bowl. Add breadcrumbs, cheese, Italian seasoning, salt, pepper, garlic, and egg; mix well with hands.
- Divide mixture into 16 equal portions, shaping each into a ball.
- Heat oil in a large cast-iron skillet over medium. Add meatballs to pan; cook 10 minutes, browning on all sides. Remove meatballs from pan (they won’t be completely done).
- Add shallots to pan; cook 2 minutes, stirring frequently. Add stock, lemon juice, capers, and meatballs to pan; cook until liquid reduces slightly and center of meatballs register 165°F on a thermometer.
- Remove pan from heat. Gradually add butter to pan, stirring into sauce.
- Sprinkle with parsley, if desired.
Make chicken meatballs:
CAITLIN BENSEL, FOOD
STYLIST: TORIE COX
CAITLIN BENSEL, FOOD
STYLIST: TORIE COX
Cook meatballs:
CAITLIN BENSEL, FOOD
STYLIST: TORIE COX
Make sauce:
CAITLIN BENSEL, FOOD
STYLIST: TORIE COX
CAITLIN BENSEL, FOOD
STYLIST: TORIE COX
↑ Back to top
Chicken Souvlaki with Tzatziki

Tags: Greece
Poultry
Ingredients
- 1 ENGLISH CUCUMBER, HALVED, SEEDED AND SHREDDED ON THE LARGE HOLES OF BOX GRATER
- KOSHER SALT AND GROUND BLACK PEPPER
- 4 TABLESPOONS EXTRA-VIRGIN OLIVE OIL, DIVIDED
- 4 TEASPOONS LEMON JUICE, DIVIDED, PLUS LEMON WEDGES TO SERVE
- 3 MEDIUM GARLIC CLOVES, FINELY GRATED
- 2 TABLESPOONS MINCED FRESH OREGANO, DIVIDED
- 2 POUNDS BONELESS, SKINLESS CHICKEN THIGHS, HALVED LENGTHWISE
- 1 MEDIUM RED ONION, ROOT END INTACT, CUT INTO 8 WEDGES
- ¾ CUP PLAIN WHOLE-MILK GREEK YOGURT
- 2 TABLESPOONS FINELY CHOPPED FRESH DILL
- 1 RIPE TOMATO, CORED AND CUT INTO 8 WEDGES
- PITA BREAD, TO SERVE
Steps
- In a colander set over a bowl, toss the shredded cucumber with ½ teaspoon salt. Set aside to drain for at least 10 minutes.Meanwhile, in a large bowl, whisk together 2 tablespoons of oil, 2 teaspoons of lemon juice, two-thirds of the garlic, 1 tablespoon of oregano, 1 teaspoon salt and ¾ teaspoon pepper. Add the chicken and toss to coat; let stand at room temperature while the broiler heats.
- Heat the broiler with a rack 4 inches from the element. Line a rimmed baking sheet with foil and set a wire rack on top. Arrange the chicken in a single layer on the center of the rack, then place the onion wedges around the outer edges. Broil until the chicken is lightly charred on both sides, about 12 minutes, flipping the pieces halfway through (there’s no need to flip the onions).
- While the chicken cooks, in a medium bowl, whisk together the yogurt, the remaining 2 tablespoons oil, the remaining 2 teaspoons lemon juice, the remaining garlic and the dill. A handful at a time, squeeze the shredded cucumber to remove as much moisture as possible, then stir into the yogurt mixture; set aside.
- Transfer the chicken and onion to a serving platter, then sprinkle with the remaining 1 tablespoon oregano. Place the tomato and lemon wedges on the platter and serve with the tzatziki.
Notes
- Tip: Don’t bother peeling the cucumber before shredding it. The skin on English cucumbers is thin and doesn’t require removal. Also, make sure to squeeze the salted cucumber before adding it to the yogurt mixture. This removes excess water that otherwise would dilute the tzatziki.
↑ Back to top
Chicken Tortilla Soup

Tags: Chicken
Mexican Soups
Servings: 6
Ingredients
- 1 Tbsp olive oil
- 1 medium onion, chopped
- 3 garlic cloves, minced
- 1 jalapeno pepper , seeded and diced
- 1 tsp ground cumin
- 1 tsp chilli powder
- 1 lb chicken breasts, (2 medium)
- 20 oz can crushed tomatoes
- 32 oz chicken broth
- 14 oz can black beans, drained and rinsed
- 14 oz can corn, drained and rinsed
- 1/2 cup cilantro, chopped, divided (reserve 1/4 of it for garnish)
- 1 lime, juiced
- 1 tsp salt, or to taste
- 1/4 cup olive oil
- 8 corn tortillas , (6" tortillas)
- 1 large avocado, diced
- 1 lime, cut into wedges, to serve
Chicken
Tortilla Soup:
Homemade
Tortilla Strips:
Toppings:
Steps
- Preheat a pan with 1/4 cup oil over medium-high heat. Cut tortillas into thin strips and fry them in batches in the hot oil until crisp. Remove from the pan and allow them to drain on a paper towel. Repeat with remaining tortilla strips, adding more oil as needed then set aside.
- Preheat a pot with oil over medium-high heat. Add chopped onion, garlic and chopped jalapeño and sauté until veggies soften.
- Add whole chicken breasts, corn, beans, chilli powder, cumin, crushed tomatoes, salt, ¼ cup of cilantro and chicken broth. Bring to a boil and let simmer for at least 25 minutes.
- Remove chicken from the pot and shred it using 2 forks. Add shredded chicken back to the soup and simmer another 5 minutes then add lime juice.
- Serve the soup with some tortilla strips, pieces of avocado, fresh cilantro and lime wedges.
Tortilla Strips:
Chicken Tortilla Soup:
↑ Back to top
Chicken Tortilla Soup

I made this.
Ingredients
- 1 Tbsp olive oil
- 1 medium onion, chopped
- 3 garlic cloves, minced
- 1 jalapeno pepper , seeded and diced
- 1 tsp ground cumin
- 1 tsp chilli powder
- 1 lb chicken breasts, (2 medium)
- 20 oz can crushed tomatoes
- 32 oz chicken broth
- 14 oz can black beans, drained and rinsed
- 14 oz can corn, drained and rinsed
- 1/2 cup cilantro, chopped, divided (reserve 1/4 of it for garnish)
- 1 lime, juiced
- 1 tsp salt, or to taste
Steps
- Preheat a pot with oil over medium-high heat. Add chopped onion, garlic and chopped jalapeño and sauté until veggies soften.
Add
whole chicken breasts, corn, beans, chilli powder, cumin, crushed
tomatoes, salt, ¼ cup of cilantro and chicken broth. Bring to a boil
and let simmer for at least 25 minutes.
Remove chicken from the pot and shred it using 2 forks. Add shredded
chicken back to the soup and simmer another 5 minutes then add lime
juice.
Serve the soup with some
tortilla strips, pieces of avocado, fresh cilantro and lime wedges.
↑ Back to top
Chicken with Tamarind, Apricots and Chipotle Sauce
Tags: Passover
Servings: 8
Ingredients
- 1 whole chicken cut into pieces, plus two more pieces of your choice, with skin and bones
- 1 teaspoon kosher or sea salt or more to taste
- 1/2 teaspoon black pepper freshly ground, or to taste
- 1/2 cup safflower or corn oil
- 4 cups water
- 1/2 pound dried apricots about 3/4 cup, roughly chopped
- 2 tablespoons apricot preserves
- 3/4 cup tamarind concentrate can be store bought or homemade (recipe follows), or substitute with 2 tablespoons tamarind paste mixed with 1 tablespoon sugar and 3/4water
- 2 tablespoons Chipotles in adobo sauce or more to taste, add chiles if you please
Steps
- Thoroughly rinse chicken pieces with cold water and pat dry. Sprinkle with salt and pepper.
- In a deep extended skillet, heat oil over medium heat until it is hot but not smoking. Add chicken pieces in one layer, bring heat to medium-low, and slowly brown the chicken pieces for one hour. Turn them over every once in a while, so they will brown evenly on all sides.
- Pour water over the chicken, raise the heat to medium-high, and bring it to a simmer. Incorporate the apricots, apricot preserve, tamarind concentrate, chipotle sauce and salt and stir, and keep it at a medium simmer for 35 to 40 minutes more. You may need to bring down the heat to medium.
- The sauce should have thickened considerably as to coat the back of a wooden spoon. Taste for salt and heat and add more salt or chipotle sauce to your liking.
↑ Back to top
Chicken-Green Bean Yellow Chili Stir-Fry
Tags: Chillis
Chinese Stir-Fry
Servings: 4
Ingredients
- 4 yellow or red jalapeño or Serrano peppers
- 2 tablespoons vegetable oil
- 3/4 pound chicken breasts or tenderloins, cut against the grain into bite-size pieces
- 2 large cloves garlic, peeled and minced (about 1 tablespoon)
- 1 tablespoon fish sauce (more or less to taste)
- 1 tablespoon oyster sauce
- 1/4 cup homemade or store-bought low-sodium chicken stock
- 1/2 teaspoon granulated sugar
- 1/3 pound long beans or green beans, trimmed and cut crosswise into 1/4-inch pieces
- 4 to 5 fresh makrut lime leaves, hand-torn into pieces and lightly bruised
Steps
- Cut yellow chilies crosswise into 1/2-inch pieces and pound them in a mortar until they're broken up into small chunks, about 1/4-inch in size; set aside. (If you don't have a mortar, place cut-up chilies in a plastic zipper bag, seal bag well and get rid of trapped air, wrap bag with a kitchen towel, then pound on it with a meat tenderizer or something heavy.)
- Heat oil in a 10- or 12-inch skillet over medium-high heat. Add chicken, minced garlic, fish sauce, oyster sauce, chicken stock, and sugar. Cook, stirring occasionally, until chicken is almost cooked through, 2 to 3 minutes. Add long beans, crushed chilies, and kaffir lime leaves. Continue to stir-fry until chicken is cooked through and long beans are still crisp and retain their green color, 1 to 2 minutes longer. Season to taste with more fish sauce if desired. Transfer to a serving platter and serve with steamed rice.
↑ Back to top
Chickpeas and Kale in Spicy Pomodoro Sauce
Servings: Original recipe (1X)
yields 4 servings
Ingredients
- Original recipe (1X) yields 4 servings
- 1/2 cup extra-virgin olive oil
- 5 garlic cloves, thinly sliced
- 1 (28-ounce) can whole peeled Italian tomatoes, crushed by hand
- 1 1/2 teaspoons fennel seeds
- 1 teaspoon crushed red pepper
- Kosher salt
- 1 (8-ounce) bunch of Tuscan kale, stemmed and chopped
- 2 (15-ounce) cans chickpeas, rinsed and drained
- Torn basil and marjoram leaves, for garnish
- Finely grated Pecorino Romano, for serving
Steps
- In a large saucepan, heat the olive oil over low heat. Add the garlic and cook, stirring occasionally, until very fragrant but not browned, about 5 minutes. Add the tomatoes, fennel seeds, crushed red pepper, and a generous pinch of salt. Cook over moderately low heat, stirring occasionally, until the tomatoes break down and the sauce is thickened, about 25 minutes.
- Stir the kale into the sauce and cook over moderately low heat, stirring occasionally, until wilted, about 3 minutes. Stir in the chickpeas and cook until heated through, about 3 minutes. Season with salt. Spoon into bowls and garnish with torn basil and marjoram leaves. Top with finely grated pecorino and serve hot.
↑ Back to top
Chili Powder
Tags: Seasonings
Spices
Is starred.
Ingredients
- 3 ancho chiles stemmed, seeded and sliced
- 3 cascabel chiles stemmed, seeded and sliced
- 3 dried arbol chiles stemmed, seeded and sliced
- 2 tablespoons whole cumin seeds
- 2 tablespoons garlic powder
- 1 tablespoon dried oregano
- 1 teaspoon smoked paprika
Steps
- Place all of the chiles and the cumin into a medium nonstick saute pan
- or cast iron skillet over medium-high heat. Cook, moving the pan around
- constantly, until you begin to smell the cumin toasting, approximately 4
- to 5 minutes. Set aside and cool completely.
- Once cool, place the chiles and cumin into the carafe of a blender along
- with the garlic powder, oregano, and paprika. Process until a fine
- powder is formed. Allow the powder to settle for at least a minute
- before removing the lid of the carafe. Store in an airtight container
- for up to 6 months.
Notes
- FAVORITE
↑ Back to top
Chilled Soba in Cucumber Cups
Adapted from http://www.thekitchn.com/appetizer-recipe-chilled-soba-in-cucumber-cupsrecipes-from-the-kitchn-170638
Ingredients
- 2 large cucumbers
- 4 ounces soba noodes (usually half a package)
- 2 tablespoons rice vinegar
- 1 1/2 tablespoons soy sauce
- 1 tablespoon sesame oil
- 3 green onions, very thinly sliced
Steps
- Peel the cucumbers and cut into rounds 1-inch to 1 1/2-inches thick. Scoop out the middles to create a cup. This is most easily done with a melon baller; you could also use a knife to make the initial cut and then use a grapefruit spoon or dinner spoon to hollow out the walls.
- Bring a pot of water to a simmer and cook the soba noodles according to package directions, usually 6 to 8 minutes. Drain and rinse the noodles under cool water. Transfer to a bowl.
- Whisk together the rice vinegar, soy sauce, and sesame oil in a small bowl. Pour half the sauce over the noodles. Add the green onions to the noodles, saving a few for garnishing, and gently toss the noodles to coat them with the sauce. Soba noodles are fairly fragile, so your hands tend to be the best tool for this task.
- Pack each cucumber cup with noodles, twirling them slightly to help them settle in the cup. Pour 1/4 teaspoon or so of the reserved sauce over the noodles in each cup and sprinkle the tops with a few green onions.
- Serve right away or cover and chill for up to a few hours. If chilling, wait to add the reserved sauce until just before serving as the noodles tend to soak up the sauce.
- Cooking Extra: The discarded cucumber middles can be chopped for salad or used to make cucumber water.
Notes
- FAVORITE
↑ Back to top
Chilli- Maple Vinaigrette
Ingredients
- 1/4 cup Chilli Vinegar
- 1/4 cup Canola Oil
- 1 tsp. Maple Mustard
- 1 tsp. Grade B Maple
- 1/2 tsp. Mexican Oregano
- 1/2 tsp. salt
- 1/4 tsp. Black Pepper
Steps
- Combine and shake well.
Notes
- 3 drops lqd smoke?
↑ Back to top
Chimichurri
Tags: Chillis
Condiments South America
Servings: about 2 cups
Ingredients
- 1 shallot, finely chopped
- 1 Fresno chile or red jalapeño, finely chopped
- 3–4 garlic cloves, thinly sliced or finely chopped
- ½ cup red wine vinegar
- 1 tsp. Diamond Crystal or ½ tsp. Morton kosher salt, plus more
- ½ cup finely chopped fresh cilantro (leaves and tender stems)
- ¼ cup finely chopped fresh flat-leaf parsley (leaves and tender stems)
- 2 Tbsp. finely chopped fresh oregano leaves
- ¾ cup extra-virgin olive oil
Steps
- Combine 1 shallot, finely chopped, 1 Fresno chile or red jalapeño, finely chopped, 3–4 garlic cloves, thinly sliced or finely chopped, ½ cup red wine vinegar, and 1 tsp. Diamond Crystal or ½ tsp. Morton kosher salt in a medium bowl. Let sit 10 minutes. Stir in ½ cup finely chopped cilantro, ¼ cup finely chopped flat-leaf parsley, and 2 Tbsp. finely chopped oregano. Using a fork, whisk in ¾ cup extra-virgin olive oil. Transfer ½ cup chimichurri to a small bowl; season with salt and reserve as sauce.
If
using as a marinade, place beef, chicken, or pork in a glass,
stainless-steel, or ceramic dish. Toss with remaining chimichurri.
Cover and chill at least 3 hours or up to overnight. Remove meat from
marinade, pat dry, and grill; spoon reserved chimichurri over grilled
meat.
Do ahead: Chimichurri can be
assembled up to 3 days in advance; refrigerate in an airtight
container.
Notes
- Editor’s note: This chimichurri recipe was first printed in our July 2011 issue. Serve it alongside a batch of our favorite beef empanadas →
↑ Back to top
Chinatown Char Siu Ribs

Ingredients
- The meat
- Ribs: 2 slabs of baby back ribs, cut into individual bones
- or
- Pork: 4 pounds pork loin cut into strips across the grain, about 1" wide, 2" tall
- The marinade
- 1/2 cup hoisin sauce
- 1/2 cup brandy (or rum or bourbon)
- 1/4 cup honey
- 1/4 cup soy sauce
- 2 tablespoons toasted sesame oil
- 2 tablespoons hot sauce such as Tabasco
- 2 tablespoons powdered ginger
- 2 tablespoons powdered onion
- 1 tablespoon powdered garlic
- 1 tablespoon five spice powder
- 1 teaspoon red food coloring
Steps
- About the ribs. Many Chinese restaurants use spareribs that are chopped into 3-4" riblets with a cleaver. If you want, your butcher can make you riblets with her band saw. If not, you can do them whole. I like baby backs for this recipe because they are meathier on top of the bone.
- About the Chinese ingredients. There are no substitutes for hoisin sauce, five spice powder, or sesame oil. They are responsible for most of what we think of as the flavor of Chinese food in the US. Five spice powder is easy to make at home (click the link above for my recipe), but the others are not easily made. Click on the links for more info on these ingredients. If you have trouble finding them in your grocery store, try Amazon.com.
- About the hot sauce. If you have an Asian-style chili sauce you can use it, but any old hot sauce will work fine in this marinade since it provides more heat than flavor. The recipe above produces mild heat. Add more if you love pain.
- About the food coloring. Food coloring is necessary for the authentic color. I am told by readers that you can substitute beet root powder for the red food coloring or fermented bean red curd, but I've never tried them. There is very little used in this recipe and most is discarded with the unused marinade. There are natural food colorings made from achiote and its seeds annato, or cochineal (a.k.a. carmine), an insect. If you want to leave it out, the food will still be great, but it won't have the traditional festive color.
- Serve with. The classic accompaniments are Chinese beer or jasmine tea. If you can find it, try hibiscus tea or Pinot Grigio from Oregon (most of the California Pinot Grigios are borrrrring).
- Optional. After about 2 1/2 hours, paint the meat with a glaze of honey and roast an additional 30 minutes. Then garnish with sesame seeds or chopped chives or chopped green onions.
- Method
- Mix the marinade thoroughly in a bowl. Don't skip the booze. It helps penetrate, and even if you're a teetotaler, don't worry, there isn't any measurable alcohol in the meat. Yes, I know alcohol can dry meat out, but I just think it works well in this case. If you must skip it, use apple juice or water, but booze is better. You can substitute fresh ginger and garlic for powdered ginger and garlic if you wish.
- Marinate the meat for at least 1 hour in a metal bowl or zipper bags. Overnight is better. Discard the used marinade. It is contaminated with meat juice. Don't marinate in a plastic bowl. The coloring might stain it.
- As much as I am a fan of outdoor cooking, this meat also tastes great cooked in an indoor oven. Either way, heat your grill or oven to about 225°F. If you are grilling, set up in a 2-zone or Indirect system. Make sure the meat is not directly over the flame on a grill. If necessary, put a pan of water with a rack on top of it under the meat. Indoors, this is important or drippings will burn in the pan. Roast ribs for about 3 hours without wood (I think it it cleaner and brighter sans lumber), loin strips for about 1 1/2 hours.
char siu ribs
Return to top
Notes
- FAVORITE
↑ Back to top
Chinese Garlic Sauce
Ingredients
- 2 tablespoons rice vinegar
- 2 tablespoons granulated sugar
- 1 tablespoon light soy sauce
- 1 tablespoon dark soy sauce
- 1 tablespoon sherry vinegar
- 1 tablespoon orange juice
- 1 tablespoon ketchup
- 1 teaspoon grated ginger
- 1/4 to 1/2 teaspoon chili sauce, or according to taste (I use 1/2 teaspoon)
- 1/4 teaspoon Asian sesame oil
- 1 1/2 teaspoons cornstarch
- 1 tablespoon water
- 1 tablespoon vegetable or peanut oil
- 3 to 4 medium garlic cloves, finely chopped (4 teaspoons - 1 1/2 tablespoons chopped garlic)
Steps
- Combine the vinegar, sugar, soy sauces, OJ, ketchup,ginger, chili sauce and sesame oil in a small bowl, stirring to combine. In a separate small bowl, dissolve the cornstarch in the water.
- Heat 1 tablespoon oil over medium heat in a saucepan. Add the garlic and cook, stirring until aromatic (about 30 seconds).
- Quickly restir the sauce, add it into the saucepan and bring to a boil, stirring. (This will take about a minute).
- Re-stir the cornstarch/water mixture and add it to the sauce, stirring to thicken.
- Use the sauce in stir-fry dishes.
Notes
- FAVORITE
↑ Back to top
Chinese New Year...Tangerine Beef

Tags: Beef
Chinese Holidays
Servings: 4
Ingredients
- 2 pieces (EACH about 1 1/2 inches square) dried tangerine peel (see Note)
- Water
- 1/3 cup orange juice
- 2 tablespoons Chinese rice wine OR dry sherry
- 1 tablespoon soy sauce
- 1/2 teaspoon chili garlic sauce
- 2 teaspoons sugar
- 2 tablespoons soy sauce
- 1 tablespoon cornstarch
- 3/4 pound flank steak, thinly sliced across grain
- 2 1/2 tablespoons vegetable oil
- 6 small dried red chiles
- 1 small onion, cut into 1-inch pieces
- 1 stalk celery, cut into 1/2-inch pieces
- 1 1/2 teaspoons cornstarch dissolved in 1 tablespoon water
- 1/2 orange, sliced
PEEL:
SAUCE:
MARINADE:
BEEF:
Steps
- Soak tangerine peel in warm water to cover until softened, about 20 minutes; drain. Thinly slice peel.
- Combine all Sauce ingredients in a bowl; set aside.
- Combine all Marinade ingredients in a bowl.
- Add beef to marinade and stir to coat. Let stand 10 minutes.
- Place a wok over high heat until hot. Add 2 tablespoons oil, swirling to coat sides. Add chiles and cook, stirring, until fragrant, about 10 seconds. Add beef and stir-fry until no longer pink, 1 1/2 to 2 minutes. remove meat and chiles from wok.
- Add remaining 1/2 tablespoon oil, swirling to coat sides. Add tangerine peel, onion and celery; stir-fry 1 minute.
- Return meat and chiles to wok and add sauce; bring to a boil. Add cornstarch solution and cook, stirring, until sauce boils and thickens.
- Place on a serving plate and garnish with orange slices. Makes 4 servings.
Notes
- NOTE: To make dried peels of tangerines and oranges, peel fruit, cut peel into pieces and cut or scrape away white pith from inside peel. Let pieces sun- or air-dry until firm but still flexible. Then store in an airtight jar.
↑ Back to top
Chinese Orange Chicken

Servings: YIELD Makes 4 servings
Ingredients
- 1 pound boneless, skinless chicken thighs, patted dry and cut into 1 1/2-inch pieces
- 1 teaspoon soy sauce
- 1 teaspoon Chinese Shaoxing wine or dry sherry
- 1/2 cup cornstarch
- About 2 cups canola oil for frying
- 2 oranges
- 2 teaspoons cornstarch
- 1 tablespoon canola oil
- 2 cloves garlic, minced
- 2 teaspoons minced peeled fresh ginger (from 1-inch piece)
- 1/8 to 1/4 teaspoon crushed red pepper
- 1 tablespoon low-sodium soy sauce
- 1 teaspoon Chinese Shaoxing wine or dry sherry
- 1 teaspoon rice vinegar (not seasoned) or cider vinegar
- 2 tablespoons sugar
- Thinly sliced scallion greens, for garnish
- Thinly sliced fresh red chile, for garnish (optional)
- Cooked rice for serving
- Equipment: 10-inch cast-iron skillet or other high-sided skillet (at least 2 inches deep), deep-fry thermometer, Microplane (for optional garnish)
For the
chicken
For the orange
sauce
Steps
- In a shallow, medium bowl toss the chicken pieces with the soy sauce and wine. Let stand while you make the sauce.
- Using a vegetable peeler, remove 4 lengthwise strips of zest from 1 orangeeach strip should be about 3/4 inch wide and 3 1/2 to 4 inches long. Arrange the zest in one layer between paper towels and microwave on high in 20-second increments until dry and brittle but not browned, 60 to 80 seconds total. Let the zest cool then finely chop it. If desired, use a Microplane to remove some of the remaining zest from the orange and reserve it for garnish. (If desired, zest the second orange for additional garnish.)
- Squeeze enough juice from both oranges to measure 1/2 cup. In a small bowl, whisk together the juice and 2 teaspoons cornstarch until the cornstarch is dissolved.
- In a 10-inch skillet, heat 1 tablespoon oil over moderate heat until hot but not smoking. Add the garlic, ginger, crushed red pepper, and dried orange zest and stir-fry until golden, about 30 seconds. Add the soy sauce, wine, vinegar, and sugar and stir until the sugar dissolves, about 5 seconds. Stir the orange juice–cornstarch mixture then add it to the skillet. Bring the sauce to a boil, stirring, then reduce the heat to low and simmer, uncovered, for 1 minute. Remove the skillet from the heat and set it aside while you fry the chicken.
- Line a large rimmed baking sheet with paper towels.
- In a 10-inch cast-iron skillet, heat 1/2 inch of oil until a deep-fry thermometer registers 365°F. Meanwhile, coat half of the chicken, a couple pieces at a time, in cornstarch, making sure they are well coated and gently knocking off any excess, then transfer to a plate. Carefully add all the coated chicken to the hot oil, spacing the pieces apart from each other. Fry the chicken, turning it once or twice, until deep golden, about 5 minutes. While frying, adjust the heat as necessary to keep the oil at 365°F. Using a metal spider or a slotted spoon, transfer the chicken as done to the paper-towel-lined baking sheet. Continue to coat and fry the remaining chicken in the same manner, returning the oil to 365°F between batches.
- Once the chicken is fried, place the skillet of reserved orange sauce over moderately low heat and bring it to a simmer, stirring and thinning the sauce with a little water if necessary. Add the chicken, and stir until thoroughly coated in sauce.
- Transfer the chicken to a serving dish and garnish with the scallions, and, if desired, the red chile slices and the freshly grated orange zest. Serve immediately with rice.
Start the chicken:
Make the orange sauce
Fry the chicken:
To serve
Notes
- FAVORITE
↑ Back to top
Chinese Smashed Cucumbers with Sesame Oil and Garlic
Adapted from https://cooking.nytimes.com/recipes/1017629-chinese-smashed-cucumbers-with-sesame-oil-and-garlic
Servings: 4 to 6
Ingredients
- About 2 pounds thin-skinned cucumbers like English or Persian (8 to 10 mini cucumbers, 4 medium-size or 2 large greenhouse)
- 1 teaspoon kosher salt, plus more for cucumbers
- 2 teaspoons granulated sugar, plus more for cucumbers
- 1½ tablespoons rice vinegar
- 2 teaspoons sesame oil
- 2 teaspoons soy sauce
- 1 tablespoon grapeseed or extra-virgin olive oil
- 2 large garlic cloves, minced or put through a press
- Red pepper flakes, to taste
- Small handful whole cilantro leaves, for garnish
- 2 teaspoons toasted white sesame seeds, for garnish (optional)
Steps
- Rinse cucumbers and pat dry. Cut crosswise into pieces about 4 inches long. Cut each piece in half lengthwise.
- On a work surface, place a piece of cucumber (or several) cut side down. Lay the blade of a large knife flat on top the cucumber and smash down lightly with your other hand. The skin will begin to crack, the flesh will break down and the seeds will separate. Repeat until the whole piece is smashed. Break or slice diagonally into bite-size pieces, leaving the seeds behind.
- Place the cucumber pieces in a strainer and toss with a big pinch of salt and a big pinch of sugar. Place a plastic bag filled with ice on top of the cucumbers to serve as a weight and place the strainer over a bowl. Let drain 15 to 30 minutes on the counter, or in the refrigerator until ready to serve, up to 4 hours.
- Make the dressing: In a small bowl, combine salt, sugar and rice vinegar. Stir until salt and sugar are dissolved. Stir in sesame oil and soy sauce.
- When ready to serve, shake cucumbers well to drain off any remaining liquid and transfer to a serving bowl. Drizzle with grapeseed or olive oil and toss. Add half the dressing, half the garlic and the red pepper flakes to taste, and toss. Keep adding dressing until cucumbers are well coated but not drowned. Taste and add more pepper flakes and garlic if needed. Serve immediately, garnished with cilantro and sesame seeds.
↑ Back to top
Chinese Spareribs
Tags: Chinese
Pork
Servings: 3 to 5
Ingredients
- 1 tablespoon Chinese five-spice powder
- 1 full rack St. Louis-style spareribs, cut into individual ribs (about 3 pounds total) (see note)
- 1/2 cup (120g) hoisin sauce
- 1/4 cup (60ml) Shaoxing wine or dry sherry
- 2 tablespoons (30ml) soy sauce
- 1/4 cup (80g) honey
Steps
- Sprinkle five-spice powder evenly over ribs and rub until thoroughly coated. Set ribs aside.
- Combine hoisin sauce, shaoxing wine, soy sauce, and honey in a gallon-sized zipper lock bag. Add ribs to bag and mix until evenly coated. Seal bag, transfer to refrigerator, and let ribs marinate at least overnight and up to three nights.
- When ready to cook, preheat oven to 375°F. Remove ribs from bag, wiping off excess marinade with your fingers (reserve marinade). Line a rimmed baking sheet with foil, set a wire rack in it, and spread the ribs evenly over the rack. Cover with aluminum foil and roast until a paring knife can be inserted into the meat with minimal resistance, about 1 hour 15 minutes. Remove foil, brush ribs with marinade, increase heat to 450°F, and roast until charred, glazed, and sticky, about 20 minutes longer, rotating ribs and basting with marinade once more during cooking. Let rest 10 minutes, then serve.
Notes
- You can add a few drops of red food coloring to the marinade if you want a deeper red hue to your ribs.
- Baby back ribs will work just as well as St. Louis-cut.
- Chinese five spice powder can be found in the spice section of most major supermarkets. You can make your own by combining 1 teaspoon powdered cinnamon, 2 teaspoons powdered fennel, 1 teaspoon powdered star anise, 1/4 teaspoon powdered cloves, and 1/2 teaspoon powdered Sichuan peppercorns (substitute ginger for Sichuan peppercorns for a different style of five spice).
↑ Back to top
Chinese-Style Barbecued Spareribs

Ingredients
- 1 (6-inch) piece fresh ginger, peeled and sliced thin
- 8 garlic cloves, peeled
- 1 cup honey
- ¾ cup hoisin sauce
- ¾ cup soy sauce
- ½ cup Chinese rice wine or dry sherry
- 2 teaspoons five-spice powder
- 1 teaspoon red food coloring (optional)
- 1 teaspoon ground white pepper
- 5 - 6 pounds pork spareribs (2 racks, 2 1/2- to 3-pounds each), preferably St. Louis-style, cut into individual ribs
- 2 tablespoons toasted sesame oil
Steps
- It's not necessary to remove the membrane on the bone side of the ribs. These ribs are chewier than American-style ribs; if you prefer them more tender, cook them for an additional 15 minutes in step 1. Adding water to the baking sheet during roasting helps prevent smoking. Serve the ribs alone as an appetizer or with vegetables and rice as a main course. You can serve the first batch immediately or tent them with foil to keep them warm.
- Pulse ginger and garlic in food processor until finely chopped, 10 to 12 pulses, scraping down sides of bowl as needed. Transfer ginger-garlic mixture to Dutch oven. Add honey; hoisin; soy sauce; ½ cup water; rice wine; five-spice powder; food coloring, if using; and pepper and whisk until combined. Add ribs and stir to coat (ribs will not be fully submerged). Bring to simmer over high heat, then reduce heat to low, cover, and cook for 1¼ hours, stirring occasionally.
- Adjust oven rack to middle position and heat oven to 425 degrees. Using tongs, transfer ribs to large bowl. Strain braising liquid through fine-mesh strainer set over large container, pressing on solids to extract as much liquid as possible; discard solids. Let cooking liquid settle for 10 minutes. Using wide, shallow spoon, skim fat from surface and discard.
- Return braising liquid to pot and add sesame oil. Bring to boil over high heat and cook until syrupy and reduced to 2½ cups, 16 to 20 minutes.
- Set wire rack in aluminum foil–lined rimmed baking sheet and pour ½ cup water into sheet. Transfer half of ribs to pot with braising liquid and toss to coat. Arrange ribs, bone sides up, on prepared rack, letting excess glaze drip off. Roast until edges of ribs start to caramelize, 5 to 7 minutes. Flip ribs and continue to roast until second side starts to caramelize, 5 to 7 minutes longer. Transfer ribs to serving platter; repeat process with remaining ribs. Serve.
- American barbecued ribs require you to spend the better part of a day tending a live fire. Our version of the Chinese approach uses the oven and takes 2 hours from start to finish.
INSTRUCTIONS SERVES 6 TO
8 AS AN APPETIZER OR 4 TO 6 AS A MAIN COURSE:
TO
MAKE AHEAD: At end of step 3, refrigerate ribs and glaze separately,
covered, for up to 2 days. When ready to serve, bring glaze and half
of
ribs to simmer in Dutch oven over medium heat, then proceed with step
4. Repeat with remaining ribs.
Flavor-Packed Indoor
Ribs in 2 Hours:
Cut
Rack into Ribs: Individual ribs have more surface area than an uncut
rack, which means each one is exposed to heat and to the marinade on
all sides. (It's not necessary to remove the rack's membrane before
slicing.)
Braise in Marinade: Moist heat quickly tenderizes the meat and
accelerates the penetration of flavorful compounds (such as salt and
glutamates), so the cooking time doesn't need to be long for the
flavors to soak in.
Roast in Hot Oven: Just 15
minutes in a hot oven dries the ribs' exteriors so that the glaze can
set and caramelize.
↑ Back to top
Chinese-Style Barbecued Spareribs
Ingredients
- 1 (6-inch) piece fresh ginger, peeled and sliced thin
- 8 garlic cloves, peeled
- 1 cup honey
- 3/4 cup hoisin sauce
- 3/4 cup soy sauce
- 1/2 cup Chinese rice wine or dry sherry
- 2 teaspoons five-spice powder
- 1 teaspoon red food coloring (optional)
- 1 teaspoon ground white pepper
- 5 to 6 pounds pork spareribs (2 racks, 2 1/2- to 3-pounds each), preferably St. Louis-style, cut into individual ribs
- 2 tablespoons toasted sesame oil
Steps
- Pulse ginger and garlic in food processor until finely chopped, 10 to 12 pulses, scraping down sides of bowl as needed. Transfer ginger-garlic mixture to Dutch oven. Add honey; hoisin; soy sauce; 1/2 cup water; rice wine; five-spice powder; food coloring, if using; and pepper and whisk until combined. Add ribs and stir to coat (ribs will not be fully submerged). Bring to simmer over high heat, then reduce heat to low, cover, and cook for 1 1/4 hours, stirring occasionally.
- Adjust oven rack to middle position and heat oven to 425 degrees. Using tongs, transfer ribs to large bowl. Strain braising liquid through fine-mesh strainer set over large container, pressing on solids to extract as much liquid as possible; discard solids. Let cooking liquid settle for 10 minutes. Using wide, shallow spoon, skim fat from surface and discard.
- Return braising liquid to pot and add sesame oil. Bring to boil over high heat and cook until syrupy and reduced to 21/2 cups, 16 to 20 minutes.
- Set wire rack in aluminum foil–lined rimmed baking sheet and pour 1/2 cup water into sheet. Transfer half of ribs to pot with braising liquid and toss to coat. Arrange ribs, bone sides up, on prepared rack, letting excess glaze drip off. Roast until edges of ribs start to caramelize, 5 to 7 minutes. Flip ribs and continue to roast until second side starts to caramelize, 5 to 7 minutes longer.
- Transfer ribs to serving platter; repeat process with remaining ribs. Serve.
Notes
- TO MAKE AHEAD: At end of step 3, refrigerate ribs and glaze separately, covered, for up to 2 days. When ready to serve, bring glaze and half of ribs to simmer in Dutch oven over medium heat, then proceed with step 5. Repeat with remaining ribs.
↑ Back to top
Chipotle Ham Glaze
Ingredients
- 3/4 cup Coca-Cola
- 2 chipotle peppers in adobo,
- drained and finely chopped
- 1/3 cup honey
Steps
- Combine the Coca-Cola, chipotles, and honey in a 2-qt. saucepan; boil. Reduce the heat to medium; cook, stirring the glaze, until syrupy, 12–15 minutes.
Notes
- FAVORITE
↑ Back to top
Chipotle Potato Salad
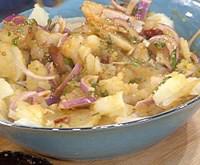
Ingredients
- 4 large russet potatoes, about 2 1/2 pounds, peeled and thinly sliced
- Salt
- 2 chipotles in adobo sauce, chopped, plus 2 tablespoons of sauce
- 3 tablespoons orange marmalade
- 3 tablespoons orange juice
- 3 tablespoons red wine vinegar
- 3 tablespoons extra-virgin olive oil. eyeball it
- 1 small red onion or 1/2 large, chopped
- Handful chopped cilantro leaves, 2 tablespoons
- Couple sprigs fresh oregano, finely chopped (or a couple pinches dried)
- Salt and pepper
Steps
- Place potatoes in a pot and cover with water. Bring water to a boil and season water liberally with salt and cook the potatoes until just fork tender, 8 to 9 minutes.
- Combine chipotles, sauce, marmalade, juice, vinegar in a bowl then whisk in the extra-virgin olive oil.
- Drain the potatoes well, return them to hot pot to let water evaporate, then add immediately to dressing. The dressing will be better absorbed by warm taters. Toss with onions and herbs and season the salad with salt and pepper, to taste. Serve warm or chill. Drizzle a little more extra-virgin olive oil over the salad if it gets dry.
Notes
- FAVORITE
↑ Back to top
Chipotle Rub
Ingredients
- 1 1/2 stemmed, seeded, chopped dried chipotle chiles
- 2 tablespoons pink peppercorns
- 2 tablespoons coriander seeds
- 1 teaspoon fennel seeds
- 1/4 teaspoon cumin seeds
- 2 teaspoons dark brown sugar
- 2 teaspoons kosher salt
- 1 teaspoon mustard powder
Steps
- Grind 1 1/2 stemmed, seeded, chopped dried chipotle chiles in a spice mill; transfer to a small bowl. Grind 2 tablespoons pink peppercorns, 2 tablespoons coriander seeds, 1 teaspoon fennel seeds, and 1/4 teaspoon cumin seeds in the same spice mill; transfer to bowl with chiles. Stir in 2 teaspoons dark brown sugar, 2 teaspoons kosher salt, and 1 teaspoon mustard powder.
Notes
- FAVORITE
↑ Back to top
Chipotle-Lime Salt
Adapted from http://www.bonappetit.com/recipe/chipotle-lime-salt
Servings: YIELD Makes about 1/4
cup
Ingredients
- 1 tsp chipotle chile powder
- 2 limes
- 2 tablespoons flaky sea salt
Steps
- Toss sea salt and chile powder on a baking sheet. Finely zest limes over. Bake in a 350° oven, stirring occasionally, until lime zest is dry, about 5 minutes. Let cool.
Notes
- FAVORITE
↑ Back to top
Chips and Fish
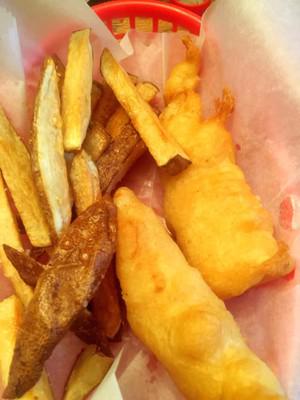
Tags: British
Fish Potato
I made this. Rated 5/5
Ingredients
- 1 gallon safflower oil
- 4 large Russet potatoes
- Kosher salt
- 2 cups flour
- 1 tablespoon baking powder
- 1 teaspoon kosher salt
- 1/4 teaspoon cayenne pepper
- Dash Old Bay Seasoning
- 1 bottle brown beer, cold
- 1 1/2 pounds firm-fleshed whitefish (tilapia, pollock, cod), cut into 1-ounce strips
- Cornstarch, for dredging
For the fries:
For the
batter:
Steps
- Heat oven to 200 degrees F.
- Heat the safflower oil in a 5-quart Dutch oven over high heat until it reaches 320 degrees.
- Using a V-slicer with a wide blade, slice the potatoes with the skin on. Place in a large bowl with cold water.
- In a bowl, whisk together the flour, baking powder, salt, cayenne pepper, and Old Bay seasoning. Whisk in the beer until the batter is completely smooth and free of any lumps. Refrigerate for 15 minutes. Note: The batter can be made up to 1 hour ahead of time.
- Drain potatoes thoroughly, removing any excess water. When oil reaches 320 degrees, submerge the potatoes in the oil. Working in small batches, fry for 2 to 3 minutes until they are pale and floppy. Remove from oil, drain, and cool to room temperature.
- Increase the temperature of the oil to 375 degrees. Re-immerse fries and cook until crisp and golden brown, about 2 to 3 minutes. Remove and drain on roasting rack. Season with kosher salt while hot and hold in the oven.
- Allow oil to return to 350 degrees. Lightly dredge fish strips in cornstarch. Working in small batches, dip the fish into batter and immerse into hot oil. When the batter is set, turn the pieces of fish over and cook until golden brown, about 2 minutes. Drain the fish on the roasting rack. Serve with malt vinegar.
Notes
- FAVORITE
↑ Back to top
Chips and Fish

Servings: 4
Ingredients
- 1 gallon safflower oil
- 4 large Russet potatoes
- Kosher salt
- 2 cups flour
- 1 tablespoon baking powder
- 1 teaspoon kosher salt
- 1/4 teaspoon cayenne pepper
- Dash Old Bay Seasoning
- 1 bottle brown beer, cold
- 1 1/2 pounds firm-fleshed whitefish (tilapia, pollock, cod), cut into 1-ounce strips
- Cornstarch, for dredging
For the fries:
For the
batter:
Steps
- Watch how to make this recipe.
- Heat oven to 200 degrees F.
- Heat the safflower oil in a 5-quart Dutch oven over high heat until it reaches 320 degrees.
- Using a V-slicer with a wide blade, slice the potatoes with the skin on. Place in a large bowl with cold water.
- In a bowl, whisk together the flour, baking powder, salt, cayenne pepper, and Old Bay seasoning. Whisk in the beer until the batter is completely smooth and free of any lumps. Refrigerate for 15 minutes. Note: The batter can be made up to 1 hour ahead of time.
- Drain potatoes thoroughly, removing any excess water. When oil reaches 320 degrees, submerge the potatoes in the oil. Working in small batches, fry for 2 to 3 minutes until they are pale and floppy. Remove from oil, drain, and cool to room temperature.
- Increase the temperature of the oil to 375 degrees. Re-immerse fries and cook until crisp and golden brown, about 2 to 3 minutes. Remove and drain on roasting rack. Season with kosher salt while hot and hold in the oven.
- Allow oil to return to 350 degrees. Lightly dredge fish strips in cornstarch. Working in small batches, dip the fish into batter and immerse into hot oil. When the batter is set, turn the pieces of fish over and cook until golden brown, about 2 minutes. Drain the fish on the roasting rack. Serve with malt vinegar.
Notes
- My Private Notes
- Add a Note
- WATCH
↑ Back to top
Chocolate Babka
Servings: 3 cakes
Ingredients
- 1 1/2 cups warm whole milk, approx. 110 degrees
- 2 (1/4 oz. each) packages active dry yeast
- 3/4 cups, plus a pinch, white granulated sugar
- 3 whole large eggs, room temperature (save 1 egg for egg wash)
- 1 Tbsp heavy cream (for egg wash...you can substitute milk)
- 2 large egg yolks, room temperature
- 1 1/2 tsp of vanilla extract
- 6 cups all-purpose flour, plus more for work surface
- 1 tsp salt
- 2 sticks unsalted butter, cut into 1-inch pieces, room temperature, plus more to grease bowl and loaf pans
- 24 oz. semisweet or dark chocolate chips (2 bags)
- 2 1/2 Tbsp ground cinnamon
- 1 cup walnuts
- 1/2 cup sugar
- 1/2 cup sugar in the raw or turbinado sugar
- 3/4 cup unsalted butter (1 1/2 sticks)
- 1 2/3 cups confectioners’ sugar
- 1 1/3 cups all-purpose flour
- 12 Tbsp (1 1/2 sticks) unsalted butter, room temperature
For the dough
For the
chocolate filling
For the
streusel topping
Steps
- Pour warm milk into a small bowl. Sprinkle yeast and pinch of sugar over milk, stir lightly; let stand until foamy, about 5 minutes.
- In a bowl of electric mixer with paddle attachment, mix together 3/4 cup sugar, 2 eggs, vanilla, and egg yolks. Add yeast mixture and lightly mix to combine.
- In a bowl combine flour and salt. Add to egg mixture, and beat on low speed until almost all the flour is incorporated, about 30 seconds. Change to the dough hook. Add 2 sticks butter, and beat until flour mixture and butter are completely incorporated, and a smooth, soft dough that’s slightly sticky when squeezed is formed, about 10 minutes.
- Turn dough out onto a lightly floured surface, and knead a few turns until smooth. Butter a large bowl.
- Place dough in bowl, and turn to coat. Cover tightly with plastic wrap. Set aside in a warm place to rise until doubled in bulk, about 1 hour.
- To make the filling: Place chocolate chips, 1/2 cup sugar. 1/2 cup raw sugar, walnuts and cinnamon in the bowl of a food processor, process into coarse crumbs.
- Add the 1 1/2 sticks butter and process until well combined; set filling aside.
- To make the streusel topping: In a large bowl, combine sugar, flour, and butter. Using a fork, stir until fully combined with clumps ranging in size from crumbs to 1 inch.
- To assemble: Pre-heat oven to 350F. Generously butter your 9-by-5-by-2 3/4-inch loaf pan.
- In a small bowl beat the remaining egg with the tablespoon of cream, set bowl aside
- Punch back the dough, and transfer to a clean surface. Let rest 5 minutes. Cut into 3 equal pieces. Keep 2 pieces covered with plastic wrap while working with the remaining piece. On a generously floured surface, roll dough out into a 16-inch square; it should be about 1/8 inch thick.
- Brush edges with egg wash. Crumble 1/3 of the chocolate filling evenly over dough, leaving a 1/4-inch border. Roll dough up tightly like a jelly roll. Pinch ends together to seal. Now, twist 5 or 6 turns.
- Fold long roll in 1/2 and brush top of roll with egg wash. Carefully crumble 2 tablespoons more filling over the roll and twist folded roll a few more times.
- Place twisted roll into prepared baking pan (it will be a little messy)
- Brush the top of Babka with egg wash. Crumble 1/3 of streusel topping over each loaf. Loosely cover each pan with plastic wrap, and let stand in a warm place 20 to 30 minutes
- Bake babkas, rotating halfway through, until golden, about 35 minutes test for doneness. Toothpick should come out clean of dough when done. Remove from oven and transfer to wire racks until cool. Remove from pans; serve.
Notes
- FAVORITE
↑ Back to top
Chocolate Banana Bread
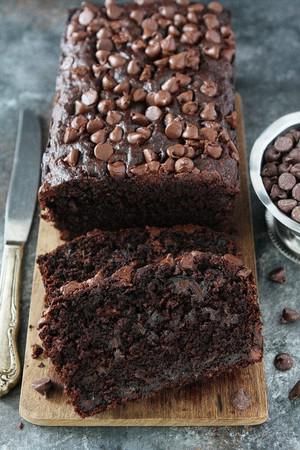
Servings: 12
Ingredients
- 9 x 5 Loaf Pan (This Le Crueset one is so pretty!)
- Wire Cooling Rack
- 1 cup all-purpose flour
- 1/2 cup Dutch process cocoa
- 1 teaspoon baking soda
- 1/2 teaspoon sea salt
- 3 large brown bananas (1 ½ cups mashed)
- 1/4 cup unsalted butter, melted and slightly cooled
- 1/4 cup canola vegetable oil, or melted coconut oil
- 3/4 cup packed light brown sugar
- 1 large egg, at room temperature
- 1 teaspoon pure vanilla extract
- 1 cup semisweet chocolate chips, divided
Equipment:
Ingredients
1x 2x 3x:
Steps
- Heat your oven to 350°F. Grease a 9-by-5-inch loaf pan with nonstick cooking spray and set aside.
- In a medium bowl, whisk together the flour, cocoa powder, baking soda, and sea salt. Set aside.
- In a large bowl, mash the ripe bananas with a fork. Add the melted butter and oil and stir until combined. Stir in the brown sugar, egg, and vanilla extract. Stir until smooth.
- Stir the dry ingredients into the wet ingredients, don't overmix. Stir in ¾ cup of the chocolate chips.
- Pour batter into prepared pan. Sprinkle the remaining ¼ cup of chocolate chips over the top of the bread. Bake for 50-65 minutes, or until a toothpick inserted into the center of the bread comes out mostly clean, you might have some melted chocolate chips on the toothpick and that is fine. You just don't want a lot of gooey batter. Check at 50 minutes, just to be safe. Oven times vary.
- Remove the pan from the oven and set on a wire cooling rack. Let the bread cool in the pan for 15 minutes. Run a knife around the edges of the bread and carefully remove from the pan. Let the bread cool on the wire cooling rack until slightly warm. Cut into slices and serve.
Notes
- Note-the bread will keep on the counter, wrapped in plastic wrap, for up to 4 days. This bread also freezes well. To freeze, cool the bread completely and wrap in plastic wrap and aluminum foil. Freeze for up to 1 month. Defrost before slicing.
↑ Back to top
Chocolate Chip Cookies Nyt
Ingredients
- 17 oz AP flour
- 1 1/4 teaspoons baking soda
- 1 1/2 teaspoons baking powder
- 1 1/2 teaspoons coarse salt
- 2 1/2 sticks (1 1/4 cups) unsalted butter
- 1 1/4 cups (10 ounces) light brown sugar
- 1 cup plus 2 tablespoons (8 ounces) granulated sugar
- 2 large eggs
- 2 teaspoons natural vanilla extract
- As many chocolate chips as you see fit
- Nuts (if you're into that sort of thing)
- Sea salt.
Steps
- Sift flours, baking soda, baking powder and salt into a bowl. Set aside.
- Using a mixer fitted with paddle attachment, cream butter and sugars together until very light, about 5 minutes. Add eggs, one at a time, mixing well after each addition. Stir in the vanilla. Reduce speed to low, add dry ingredients and mix until just combined, 5 to 10 seconds. Drop chocolate pieces in and incorporate them without breaking them. Press plastic wrap against dough and refrigerate for 24 to 36 hours. Dough may be used in batches, and can be refrigerated for up to 72 hours. (See notes)
- When ready to bake, preheat oven to 350 degrees. Line a baking sheet with parchment paper or a nonstick baking mat. Set aside.
- Scoop 6 3 1/2-ounce mounds of dough (the size of generous golf balls) onto baking sheet, making sure to turn horizontally any chocolate pieces that are poking up; it will make for a more attractive cookie. Sprinkle lightly with sea salt and bake until golden brown but still soft, 18 to 20 minutes. Transfer sheet to a wire rack for 10 minutes, then slip cookies onto another rack to cool a bit more. Repeat with remaining dough, or reserve dough, refrigerated, for baking remaining batches the next day. Eat warm, with a big napkin.
Notes
- It's way easier to let the cookies refrigerate for a little bit, then roll the dough into balls before storing the dough. The recommended size in this recipe is hella gigantic - 1 inch makes a respectable cookie. Also you may as well just freeze the whole pre-rolled batch; they can totally be baked from frozen. And don't even think about baking them before 72 hours. Well I guess you could. But I wouldn't recommend it. Jesus took 3 days before resurrection, these cookies need at least 3 days to reach their full potential.
↑ Back to top
Chocolate Hazelnut Fruit Crepes

Ingredients
- 1 cup chocolate hazelnut spread
- 4 crepes*
- 4 bananas, sliced
- 1 (7 ounce) can pressurized whipped cream
Steps
- Spread 1/4 cup of chocolate hazelnut spread onto each crepe. Arrange 1 sliced banana down the center of each one. Roll up, and place in a warm skillet over medium heat. Let them warm up for about 90 seconds. Transfer to plates, and serve topped with whipped cream.
Notes
- FAVORITE
↑ Back to top
Chocolate Mug Cake Recipe (With Video)
Ingredients
- Original recipe (1X) yields 1 servings
- ¼ cup all-purpose flour
- ¼ cup white sugar
- 2 tablespoons unsweetened cocoa powder
- ⅛ teaspoon baking soda
- ⅛ teaspoon salt
- 3 tablespoons milk
- 2 tablespoons canola oil
- 1 tablespoon water
- ¼ teaspoon vanilla extract
1X 2X:
Steps
- Gather all ingredients.
- Mix flour, sugar, cocoa powder, baking soda, and salt together in a large microwave-safe mug; stir in milk, canola oil, water, and vanilla extract.
- Cook in the microwave until cake is done in the middle, about 1 minute 45 seconds.
- Enjoy!
Notes
- For a healthier version, use 1 ½ tablespoons of plain unsweetened applesauce instead of canola oil, and use 3 tablespoons plus 1 teaspoon of water instead of milk.
↑ Back to top
Chocolate Orange Cake a Citrusy Chocolate Delight!

Ingredients
- 2 cups all-purpose flour
- ¾ cup cocoa powder
- 1 ½ cups sugar
- 1 tsp baking powder
- ½ tsp salt
- 1 cup fresh orange juice
- ½ cup vegetable oil
- 3 eggs
- 1 tsp vanilla extract
- 1 tbsp orange zest
- 1 cup orange marmalade
- ½ cup whipped cream
- 1 cup dark chocolate, melted
- ½ cup heavy cream
For the Cake:
For the
Filling:
For the
Ganache:
Steps
- Preheat & Prep: Heat oven to 350°F (175°C). Grease and flour two cake pans.
Mix Dry Ingredients: In a
large bowl, whisk together flour, cocoa powder, sugar, baking powder,
and salt.
Prepare the Batter: In a separate bowl, mix eggs, oil, orange juice,
vanilla extract, and orange zest. Stir into dry ingredients until
smooth.
Bake to Perfection: Divide batter evenly between the pans and bake for
30-35 minutes or until a toothpick inserted in the center comes out
clean. Let cakes cool completely.
Assemble the Cake: Spread a
layer of orange marmalade and whipped cream between the cooled cake
layers.
Make the Ganache: Heat heavy cream until warm (but not boiling), then
pour over melted dark chocolate. Stir until smooth and glossy.
Glaze & Decorate: Pour the ganache over the cake, letting it drip
down the sides. Garnish with fresh orange slices for an elegant touch.
Slice, serve, and enjoy the
perfect blend of rich chocolate and bright citrus flavors
↑ Back to top
Chocolate Peanut Butter Pretzel Ritz Bars
Adapted from http://www.the-girl-who-ate-everything.com/2015/01/chocolate-peanut-butter-pretzel-ritz-bars.html
Ingredients
- 3/4 cup (11/2 sticks) butter, melted
- 1 cup pretzels, crushed finely
- 1 cup Ritz crackers, crushed finely
- 1 1/2 cups powdered sugar
- 1 cup crunchy peanut butter
- 1/4 cup creamy peanut butter
- 1 1/2 cups milk chocolate chips
Steps
- Line a 9x13 baking dish with aluminum foil.
- In medium bowl combine melted butter, crushed pretzels, crushed Ritz crackers, powdered sugar, and crunchy peanut butter.
- Press mixture into the bottom of the foil lined baking dish.
- In a small bowl, melt milk chocolate and 1/4 cup peanut butter in microwave in 30 second intervals until melted. Stirring in between intervals. Pour over peanut butter cracker mix and spread evenly. Refrigerate for 1 hour or until chocolate has set before cutting into squares.
Notes
- FAVORITE
↑ Back to top
Chocolate Snowcap Cookies
Ingredients
- 8 ounces best-quality semisweet or bittersweet chocolate, chopped
- 1 1/4 cups white whole-wheat flour or all-purpose flour
- 1/2 cup unsweetened cocoa powder
- 2 teaspoons baking powder
- 1/4 teaspoon salt
- 1/2 cup unsalted butter (1 stick), at room temperature
- 2 tablespoons canola oil
- 1 cup firmly packed dark brown sugar
- 2 large eggs
- 1/2 teaspoon vanilla extract
- 1/4 cup reduced-fat milk
- 1/2 cup confectioners’ sugar for rolling
Steps
- Melt chocolate in a double boiler over barely simmering water or microwave on Medium until just melted.
- Whisk flour, cocoa, baking powder and salt in a medium bowl. Beat butter, oil and brown sugar in a mixing bowl with an electric mixer on high speed, scraping down the sides once or twice, until light and fluffy. Add eggs and vanilla and beat until well combined. Stir in the melted chocolate. With the mixer on low, alternate adding the dry ingredients and milk, starting and ending with the dry ingredients. Cover and refrigerate until chilled, at least 1 hour and up to 8 hours.
- Preheat oven to 350°F. Line a large baking sheet with parchment paper or a nonstick baking mat.
- Place confectioners’ sugar in a shallow bowl. Roll the dough into 1-inch balls (about 1 tablespoon each). Roll each ball in the sugar to coat. Place the cookies 2 inches apart on the prepared baking sheet. Refrigerate the remaining dough between batches.
- Bake the cookies until the sugar splits, about 12 minutes. Transfer to a wire rack to cool. Repeat with the remaining dough.
Notes
- FAVORITE
↑ Back to top
Chocolate Toffee Matzo Crunch

Tags: Passover
Ingredients
- 4 to 6 unsalted matzos (use gluten free matzo crackers to make this recipe gluten free)
- 1 cup unsalted butter or margarine (butter recommended)
- 1 cup brown sugar
- 1 1/4 cups chopped semi-sweet or dark chocolate chips (use dairy free chocolate for pareve/vegan)
- 2 tbsp chopped pistachios (or your favorite Passover-friendly nut - optional)
- Sea salt
Steps
- Preheat the oven to 375°F. Line a sheet tray with a layer of foil, then cover the foil with a sheet of parchment. Evenly cover the sheet tray with matzos. Break or cut the matzos into smaller pieces if necessary.
- In a heavy bottomed saucepan, combine the butter, brown sugar, and a generous pinch of sea salt. Cook over medium heat, whisking constantly, until the mixture comes to a boil (about 2 to 4 minutes). Boil for 3 additional minutes and continue stirring constantly.
- Remove from the heat and pour the toffee mixture over the matzos.
- Use a spatula to spread evenly across the entire surface of the matzo. Make sure you spread it out fairly quickly or it will start to get sticky and become harder to smooth over.
- Place the baking sheet in the oven and immediately reduce the heat to 350 degrees F. Bake for 15 minutes. Check frequently to be sure that the mixture is not burning. If it appears to browning too quickly, remove the tray from the oven and reduce the heat to 325 degrees F, then replace the tray when the temperature drops a bit.
- Once 15 minutes have passed, remove the matzos from the oven and evenly sprinkle the chopped chocolate chips over the top.
- Let stand for 5 minutes, then spread the melted chocolate over the matzo.
- Sprinkle the chopped pistachios and a light sprinkle of sea salt over the top of the melted chocolate.
- While the matzos are still warm, break them into smaller squares or pieces.
- Place in the freezer until the topping has set. Serve straight from the freezer, chilled, or at room temperature (I prefer it chilled!).
Notes
- FAVORITE
↑ Back to top
Chocolate-Hazelnut Matzo Cake
Tags: Cakes and Pastries
Passover
Servings: 8
Ingredients
- 1 cup plus 2 tablespoons (9 ounces) espresso liqueur (such as Don Ciccio Concerto), plus more as needed
- 5 matzo squares (about 6 1/4 ounces total)
- 6 ounces (58% cacao) bittersweet chocolate bar, chopped
- 1/4 cup granulated sugar
- 4 large egg yolks
- 1/2 cup (4 ounces) cold unsalted butter, cubed
- 1 1/2 cups toasted hazelnuts, finely chopped
- Flaky sea salt
Steps
- Pour liqueur into an 8-inch square pan or rimmed plate that can fit a whole matzo square. Working with 1 matzo square at a time, press matzo gently into liqueur, and let stand 1 minute, flipping once halfway during soaking time. Set squares aside on a plate.
- Pour remaining soaking liqueur into a liquid measuring cup. (You should have about 6 ounces; if not, add additional liqueur to equal 6 ounces in measuring cup.)
- Place chocolate, sugar, and 6 ounces liqueur in a double boiler or a bowl placed on top of a steaming pot of water. Whisk over medium-low until chocolate is melted and mixture is smooth, about 3 minutes; turn off heat.
- Add egg yolks, 1 at a time, to double boiler or bowl, whisking constantly until combined. Turn heat to medium-low, and whisk constantly for 3 minutes or until mixture has reached 160°F over simmering water.
- Remove from heat and whisk in butter, 1 tablespoon at a time, until smooth and emulsified.
- Place 1 soaked matzo square on a plate; cover with a thin layer of chocolate mixture (about 1/4 cup), and sprinkle evenly with about 1/4 cup of finely chopped hazelnuts. Continue to layer matzo squares, chocolate, and hazelnuts (4 more layers), spreading chocolate over edges to coat sides of cake and making sure top layer of chocolate is smooth. Use any additional chocolate to coat any gaps on the sides. Sprinkle sea salt and remaining hazelnuts over top.
- Place cake in refrigerator, uncovered, until chocolate is thick and cake is set, about 2 hours. Remove from refrigerator about 1 hour before serving.
↑ Back to top
Chopped Liver

Tags: Appetizers and Dim
Sum Jewish
So we're talking serious eating. Itzhak Perlman,
the great violinist, and I once did a show together in which we cooked
food from his childhood. He is a Sabra, a Jew born in Israel, but his
family lived in Russia. He came to New York as a child, but he still
relishes the memories of the food he ate in his youth. I prepared this
recipe for him and he announced it to be "almost as good as my
mother's!"
Is starred.
Ingredients
- 1 pound fresh chicken livers
- 3 tablespoons rendered chicken fat (page 253) or butter or margarine (Chicken fat is best!)
- 1 yellow onion, peeled and sliced
- 2 hard-boiled eggs, peeled
Steps
- Crispy fried chicken skin and fat to taste (optional)
- Saute the livers in half of the fat until they are no longer pink inside, about 5 minutes. Remove from the pan and add the onion and the remaining fat. Saute the onion until golden. Grind the liver-onion mixture and the eggs using a coarse blade on your grinder. Add the crispy fried skin and tiny pieces of crunchy fried chicken fat if you wish.
Salt and freshly ground black
pepper to taste
Add salt and pepper. Serve
with toast points or crackers.
Notes
- The Frugal Gourmet
↑ Back to top
Chopped Liver
Tags: Appetizers and Dim
Sum Charcuterie
Servings: YIELD 4 servings TOTAL
TIME 25 mins
Ingredients
- 1 lb fresh chicken liver
- 3 tablespoons rendered chicken fat or 3 tablespoons butter or 3 tablespoons margarine
- 1 yellow onion , peeled and sliced
- 2 hard-boiled eggs , peeled
- crispy fried chicken skin and fat (optional)
- salt & freshly ground black pepper
Steps
- Saute the livers in half the fat until they are no longer pink inside, about 5 minutes.
- Remove from the pan and add the onion and the remaining fat.
- Saute the onion until golden.
- Grind the liver-onion mixture and the eggs using a coarse blade on your grinder.
- Add the crispy fried skin and tiny pieces of crunchy friend chicken fat if you wish.
- Add salt and pepper.
- Serve with toast points or crackers.
Notes
- FAVORITE
↑ Back to top
Chorizo Stuffed Pork Roast with Three Chiles Adobo

Servings: 6
Ingredients
- 2 pasilla chiles, stemmed and seeded
- 2 ancho chiles, stemmed and seeded
- 2 guajillo chiles, stemmed and seeded
- 1 garlic clove
- 1 ripe tomato
- 2 tablespoons white distilled vinegar
- 1/4 teaspoon ground cumin
- 1/2 teaspoon ground allspice
- 1 teaspoon dried oregano
- 1 teaspoon kosher or sea salt or to taste
- freshly ground black pepper
- 3 pounds boneless pork loin, butterflied to ¼” thickness
- 1 tablespoon vegetable oil
- 1/2 pound Mexican chorizo, casings removed, chopped
- 3 ounces bacon slices, coarsely chopped
- 1/2 cup chopped white onion
- 1/2 cup chopped celery
- 1 Granny Smith, or a tart green apple, peeled and diced
- 1 ripe plantain, peeled and diced
- 1/3 cup slivered almonds
- 1/2 teaspoon kosher or sea salt
For the
marinade:
For the
filling:
Steps
- Place the pasilla, ancho and guajillo chiles along with the garlic and tomato in a saucepan. Cover with water, set over medium-high heat, bring to a boil and simmer for 10 minutes, or until the chiles are rehydrated and the tomato is cooked and mushy.
- Using tongs or a slotted spoon, place the cooked vegetables into the jar of a blender, and add 1 cup of their simmering liquid along with the white distilled vinegar, cumin, allspice, oregano, salt and pepper. Puree until completely smooth.
- You can ask the butcher to butterfly the pork loin at ¼” thickness, or you can do it yourself: Using a sharp knife, make a 1/4" deep horizontal cut into the center of the loin, then pull the cut piece back without detaching and continue making 1/4" cuts as if rolling out a fruit roll or plastic wrap. Place the loin between two large pieces of plastic wrap or wax paper and pound to even out the thickness of the meat, as well as tenderize a bit. If the butterflied meat is way too big, cut in half, so that you have two pieces of about 10”x5”.
- Pour about half of the marinade into the bottom of a large baking dish. Place the butterflied loin in the dish so that the bottom of the meat gets covered in marinade. Pour the rest of the marinade on top of the loin and spread to cover.
- Set a rack in the middle of the oven and preheat to 325 degrees Fahrenheit.
- Heat the oil in a large skillet over medium-high heat. When hot, cook the chorizo for 3 to 4 minutes. Once the chorizo starts rendering its fat and browning a bit, add the bacon and cook for 2 to 3 minutes, until it begins to brown. Add the onion, celery, apple and plantain, and cook until softened and cooked through, about 6 to 7 minutes. Add the almonds and salt, stir and remove from heat.
- Scrape the filling onto the butterflied loin - if you have two pieces, divide it among both pieces. Spread all over, leaving about an inch around the edge so the filling doesn’t escape as you roll up the loin. Gently roll up the loin, without trying to pack or squeeze as you do - just try to contain the filling within the loin.
- Place the rolled loin on a chopping board, and using butcher’s twine, roast tie the loin at intervals of about 1” from top to bottom. Return it to the the baking dish with the marinade, cover with aluminum foil and roast for 50 minutes. Raise heat to 400, remove the baking dish from oven, carefully take off the foil, and place back in the oven uncovered. Roast for another 25 to 30 minutes, until the meat has reached an internal temperature of at least 145 degrees and the top has beautifully browned. Remove from the oven, cover loosely with aluminum foil, and let it sit for at least 10 minutes before cutting off the twine and slicing.
- To serve, slice and place on a platter, then pour the remaining marinade from the baking dish on top.
For the marinade:
For the filling:
↑ Back to top
Chowder Crackers
Tags: Crackers
Is starred.
Ingredients
- 5 ounces Bread Flour
- 1/4 teaspoon Yeast
- 1/2 teaspoon Salt
- 1 tablespoon Lard or vegetable shortening
Steps
- The evening before: put the flour yeast salt and lowered in a mixing bowl. Stir in enough water (about 5 tablespoons) to work the mixture into a coherent mass. Kneed this for about 15 minutes minutes, until it forms a slightly resilient dough. Put the dough in a small bowl and cover with plastic wrap. Poke a few slits in the plastic with a sharp knife and put the ball in a cool, draft free place lately floor of the closet or the top of the cellar stairs but not the refrigerator – to rise check the dough now and then to make sure it is not rising too fast.
- Three hours before: Punch the dough down and with a rolling pin on a floured surface roll it into a square about a quarter-inch thick. Cover with plastic wrap and let rest where it is for about 30 minutes. Now roll it out to the thickness of a board of a hardcover book (about 1/16"). Lay the dough on a cutting board and with the times of a fork prick a close set pattern of holes all over the dough.
- Carefully cut the dough into 1 inch squares with a sharp chefs knife and set these on an ungreased dark metal cookie sheet. The crackers can be placed close together on the sheet but they shouldn't touch. Set the sheet in a warm draft free place and allow the crackers to rise for about two or hours.
- Preheat the oven to 450° but the cookie sheet on a rack in the middle of the oven and bake eight minutes. The cracker should be lightly browned. Remove the sheet from the oven turn over and bake another six minutes or until lightly browned on both sides cool on a rack and serve warm.
Notes
- These crackers don't keep. For best results use bread flour.r. Homemade lard give these crackers a nice flavor.
↑ Back to top
Chremslach (Matzo Pancakes)
Adapted from https://www.seriouseats.com/matzo-pancakes-recipe

Tags: Holidays
Jewish Passover
Servings: 2 to 4
Ingredients
- 4 sheets matzo (about 1 1/2 ounces; 40g each)
- 4 large eggs
- Kosher salt
- Unsalted butter, for greasing the pan
- Granulated sugar, for serving
Steps
- In a medium mixing bowl, crush matzo sheets into small pieces. (Exactly how small is a question of personal preference; you can reduce it all to a rough meal, or leave some larger chunks for a more varied texture.)
- Add just enough cold water to saturate all the crushed matzo and let stand until softened, about 1 minute. Drain matzo, pressing out excess water, and return to the bowl.
- In a small mixing bowl, beat eggs with a large pinch of salt. Add eggs to matzo and mix well.
- In a large nonstick or cast iron skillet, melt 1 tablespoon (15g) butter over medium heat until foaming. Using a soup spoon, dollop matzo batter into pan, forming small oval pancakes. Cook until golden on the first side, about 2 minutes. Turn pancakes and continue cooking until golden on the second side, 1 to 2 minutes longer. Continue with remaining matzo batter, using additional butter as needed to keep the pan greased; adjust heat throughout to maintain a gentle but active sizzle.
- Transfer matzo pancakes to a platter and keep warm. Serve with a dish of granulated sugar on the side, for sprinkling on top at the table.
↑ Back to top
Chremslach Are Your New Favorite Jewish Pancakes
Adapted from https://www.myjewishlearning.com/the-nosher/chremslach-are-your-new-favorite-jewish-pancakes/
Tags: Jewish
Pancakes
Ingredients
- 4 eggs
- 1 cup Greek yogurt
- ¾ cup milk (can also use your non-dairy milk of choice)
- 2 Tbsp honey
- 2 Tbsp cinnamon
- 1 tsp kosher salt
- 1 Tbsp granulated sugar
- 1 cup matzah meal
- Butter or olive oil for the pan
- Fresh fruit for serving (optional)
- Powdered sugar, extra cinnamon, honey, or jam for serving (optional)
Steps
- Whisk eggs in a medium-sized bowl or pot and then add your yogurt, milk, honey, cinnamon, salt, and sugar. Whisk after adding each ingredient until completely blended.
- Slowly add in your matzah meal while stirring.
- Once everything is mixed together, set your pot or bowl to the side for about 15 minutes to rest.
- Use a griddle, large-sized skillet or multiple skillets to cook as many as possible at once. Melt your butter or layer with olive oil over medium heat. Sprinkle a dash of water to test for a light sizzle to know the pan is ready.
- Add about ¼ cup of chremslach batter to the skillet and shape them like pancakes. Add as many as you can fit onto your pan, but don’t overcrowd your pan. You’ll likely have to add more butter or olive oil as you cook to avoid burning
- After about three minutes, the first side should be ready or close to ready. (Your next batch will likely cook faster.) When ready, flip your chremslach and cook the other side until golden brown. You might have to press down lightly with a spatula if you’ve built your chremslach too tall.
- Move your chremslach to a plate and layer with fresh fruit of your choice (sliced bananas, blueberries, strawberries all go well with this dish). Top with a fruit jam, a drizzle of honey, powdered sugar, and/or an extra dash of cinnamon before serving.
↑ Back to top
Cilantro Lime Chicken
Ingredients
- Cilantro Lime Chicken
- Cilantro Lime Chicken – juicy, moist chicken marinated with cilantro, lime and garlic. You can pan-fry, bake or grill the chicken with this easy recipe.
- This Mexican-inspired recipe couldn’t be any easier as simple ingredients are all you need. Aromatic cilantro, fresh lime, garlic, chili flakes are the main ingredients that bring out the explosive flavors of the chicken. The secret is to use lots of cilantro stems and some cilantro leaves.
- 1 1/2 s lb skin-on, deboned chicken thighs (click to learn how)
- Lime wedges, for garnishing
- Chopped cilantro, for garnishing
- 3 tablespoons olive oil
- 4 cloves garlic, minced
- 4 tablespoons finely chopped cilantro stems and leaves
- 2 tablespoons lime juice
- 1 heaping teaspoon red chili flakes
- 1/2 teaspoon salt or more to taste
RepIngredients:
Marinade:
Steps
- Preheat oven to 375F.
- Whisk all the Marinade ingredients together in a big bowl, mix well. Add the chicken into the Marinade, stir to coat well. Marinate for 15 minutes but best for 2 hours.
- Heat up a skillet and pan-fry the chicken with the skin-side down until slightly browned. Turn over and pan-fry the other side of the chicken until slightly browned.
- Transfer the skillet into oven and bake for 20 minutes. Transfer the chicken and the Marinade residual (after baking) to a serving platter (discard the oil), squirt some fresh lime juice and garnish with cilantro, serve immediately.
Notes
- FAVORITE
↑ Back to top
Cilantro Lime Mayo
Ingredients
- 1/2 cup mayonnaise
- 1/4 cup sour cream or yougurt
- 15-20 sprigs cilantro
- 1 lime
- 1 garlic clove
- 1/4 jalapeno
- pinch of salt
- freshly cracked black pepper
Cilantro Lime
Mayonnaise:
Steps
- In a blender or food processor add the following ingredients: 1/2 cup mayo, 15-20 sprigs cilantro, juice of 1 lime, 1 garlic clove, 1/4 jalapeno, pinch of salt, and some freshly cracked black pepper. Combine well and take a taste, adding more lime or cilantro if necessary.
↑ Back to top
Cinnamon Roll Pancake
Ingredients
- 4 cups all-purpose flour
- 8 tsps baking powder
- 2 tsp. salt
- 4 cups milk
- 4 tbsps vegetable oil
- 4 large eggs, lightly beaten
- 1 cup butter, melted
- 1 1/2 cup brown sugar, packed
- 2 tbsp ground cinnamon
- 1/2 cup butter
- 4 oz. cream cheese
- 1 1/2 cups pow
for the
Pancakes:
for the
Cinnamon Filling
for the Cream
Cheese Glaze
Steps
- Mix the three ingredients together. Place in a disposable piping bag and snip the end off or put in a Ziploc bag and snip the corner off.
- Mix the dry ingredients in one bowl and the wet ingredients in another bowl. Stir them together until everything is moistened leaving a few lumps.
- Heat your griddle to exactly 325 degrees. You don't want these too cook too quickly, and you won't want your cinnamon to burn.
- Make desired size pancake on greased griddle and then using the piping bag and starting at the center of the pancake, create a cinnamon swirl. Wait until the pancake has lots of bubble before you try to turn it. You will find that when you turn it the cinnamon swirl will melt. The cinnamon will melt out and create the craters which the cream cheese glaze will fill.
- In a microwave safe bowl melt the butter and cream cheese and then stir together. Whisk in the powdered sugar and vanilla. Add a little milk if needed to make
- it a glaze consistency.
- Place pancake on plate, then cover with cream cheese glaze.
To make the Cinnamon
Filling:
To make the Pancakes:
To make the Cream Cheese
Glaze:
Notes
- FAVORITE
↑ Back to top
Cinnamon-Walnut Sticky Buns

Ingredients
- 2 packages (1/4 ounce each) active dry yeast
- 1 to 1/2 cups warm water (110° to 115°)
- 1 cup mashed potatoes (without added milk and butter)
- 1/2 cup sugar
- 1/2 cup butter, softened
- 2 eggs
- 2 teaspoons salt
- 6 to 1/2 cups all-purpose flour
- 1/4 cup butter
- 1 cup packed brown sugar
- 1 cup honey
- 1 teaspoon ground cinnamon
- 1 cup chopped walnuts
- 1/2 cup sugar
- 2 teaspoons ground cinnamon
- 2 tablespoons butter, melted
TOPPING:
FILLING:
Steps
- In a small bowl, dissolve yeast in warm water. In a large bowl, combine mashed potatoes, sugar, butter, eggs, salt, yeast mixture and 2 cups flour; beat on medium speed until smooth. Stir in enough remaining flour to form a soft dough.
- Turn dough onto a floured surface; knead until smooth and elastic, about 6-8 minutes. Place in a greased bowl, turning once to grease the top. Cover with plastic wrap and let rise in a warm place until doubled, about 1 hour.
- For topping, in a small saucepan, melt butter. Stir in brown sugar, honey and cinnamon. Divide mixture among three greased 9-in. round baking pans, spreading evenly. Sprinkle with walnuts.
- For filling, in a small bowl, mix sugar and cinnamon. Punch down dough. Turn onto a lightly floured surface; divide in half. Roll one portion into an 18x12-in. rectangle. Brush with 1 tablespoon melted butter to within 1/2 in. of edges; sprinkle with 1/4 cup sugar mixture.
- Roll up jelly-roll style, starting with a long side; pinch seam to seal. Cut into 12 slices. Repeat with remaining dough and filling. Place eight slices in each pan, cut side down. Cover with kitchen towels; let rise until doubled, about 30 minutes. Preheat oven to 350°.
- Bake 30-35 minutes or until golden brown. Immediately invert onto serving plates. Serve warm. Yield: 2 dozen.
Notes
- FAVORITE
↑ Back to top
Citrusy Couscous Salad with Broccoli and Feta
Adapted from https://cooking.nytimes.com/recipes/1023515-citrusy-couscous-salad-with-broccoli-and-feta
I made this. Is starred. Rated 5/5
Servings: 4
Ingredients
- 1 small navel orange, half juiced (about 3 tablespoons), half peeled and cut into bite-size pieces (see Tip)
- 1 lime, juiced (about 1 tablespoon)
- 2 teaspoons honey
- ½ teaspoon ground cumin
- Kosher salt
- 2 tablespoons olive oil
- 2 scallions, thinly sliced
- 1 red Fresno chile or jalapeño, sliced into thin rounds (deseeded, if desired, for less heat)
- 1½ cups pearl couscous
- 1 medium head broccoli (about 12 ounces), florets and tender stems cut into bite-size pieces, or 10 to 12 ounces frozen florets (4 to 5 cups total)
- ½ cup crumbled feta
- ¼ cup unsalted, dry roasted pistachios, roughly chopped
- ¼ packed cup fresh mint, basil or parsley, finely chopped
- Freshly cracked black pepper
Steps
- To the bottom of a large serving bowl, add the orange juice, lime juice, honey, cumin and ½ teaspoon salt. Whisk in the olive oil until the honey is dissolved. Mix in the scallions and half the chile; set aside.
- In a large lidded pot over medium-high heat, toast the couscous, stirring occasionally, until lightly browned and fragrant, 3 to 4 minutes. Add 3 cups of water, season with 1 tablespoon salt, cover and bring to a boil. Adjust the heat to maintain an active simmer and cook according to the lower end of the time frame on package’s instructions, usually about 8 minutes. During the last 3 or 4 minutes of cooking (depending on the size of your florets), stir in the broccoli and cook until bright and tender, and the thickest parts are easily pierced with a fork. Drain, shake off excess water, then transfer to the serving bowl.
- Mix until the couscous has absorbed most of the dressing. Mix in the feta, pistachios, herbs, orange pieces and the remaining chile, then season to taste with salt and pepper. Eat immediately or let cool and serve at room temperature.
Notes
- For the orange half, cut off the bottom tip, then place the center of the orange cut-side down. Starting from the top, use a knife to follow the curve to remove and discard the rind before cutting the fruit into small pieces.
↑ Back to top
Classic Baked Macaroni and Cheese Casserole

Tags: Cheese
Dairy Pasta
Servings: 8
Ingredients
- 1 pound ( 450 g) elbow macaroni
- 8 tablespoons unsalted butter (4 ounces; 113 g), divided
- 3 tablespoons all-purpose flour (3/4 ounce; 24 g)
- 3 cups (710ml) whole milk
- 1 1/2 pounds grated sharp cheddar cheese ( 680 g; 6 cups), see notes
- 1 teaspoon (5ml) hot sauce, such as Frank's RedHot
- 1 teaspoon Diamond Crystal kosher salt; for table salt, use half as much by volume
- 1/2 teaspoon mustard powder
- 1/4 teaspoon garlic powder
- 8 ounces grated Gruyère cheese ( 225 g; 2 cups), see notes
- 1 cup panko bread crumbs (2 1/2 ounces; 72 g)
Steps
- Preheat oven to 350°F (175°C). In a medium pot of salted boiling water, cook elbow macaroni until just shy of al dente, about 2 minutes less than cooking time indicated on package. Drain, then transfer pasta to a large mixing bowl and toss with 2 tablespoons (30g) butter until butter is melted and pasta is evenly coated. Set aside.
- In a large saucepan, melt 3 tablespoons (40g) butter over medium-high heat (do not allow it to brown). Add flour and whisk to form a paste. Continue to cook, stirring, until raw flour scent is gone, about 1 minute. Whisking constantly, add milk in a thin, steady stream, whisking constantly and thoroughly and getting into all corners of the pan to maintain a homogeneous texture. Sauce will initially become very thick, then get very thin once all the milk is added.
- Heat, stirring, until sauce comes to a simmer and begins to thicken slightly. Reduce heat to medium-low and, working in increments, whisk in cheddar cheese until a smooth, emulsified cheese sauce forms; do not let sauce come to a boil once cheese is added. Whisk in hot sauce, salt, mustard powder, and garlic powder.
- Scrape cheese sauce into pasta and mix until evenly coated. Let cool slightly, then add grated Gruyère and mix well. Scrape pasta into a greased 9- by 13-inch baking dish and smooth surface into an even layer.
- Add panko to a small mixing bowl. Melt remaining 3 tablespoons (45g) butter, then add to panko and mix until evenly coated. Season with salt. Scatter panko all over surface of mac and cheese in an even layer. Bake on top rack of oven until browned and bubbling, about 35 to 40 minutes (ovens can vary; check often to prevent top from burning).
- Let mac and cheese rest 15 minutes, then serve. Leftover mac and cheese can be refrigerated for up to 5 days; it reheats surprisingly well in the microwave or oven.
- Special Equipment
Notes
- For the cheese, any semi-firm cheese, such as cheddar, Swiss, Gruyère, Fontina, or Jack, can work here; feel free to use whichever appeals to you.
- Make-Ahead and Storage
- Casserole can be assembled through the end of step 4, then covered and stored in the refrigerator for up to five days before baking. Increase baking time by 15 minutes if refrigerated.
↑ Back to top
Classic Bbq Rub
Ingredients
- 2 tablespoons smoky Spanish paprika
- 2 tablespoons kosher salt
- 3 tablespoons sugar
- 2 tablespoons brown sugar
- 1 tablespoon cumin
- 1 tablespoon chile powder
- 1 tablespoon freshly ground black pepper
- 1/2 tablespoon cayenne pepper
- 1 tablespoon onion powder
- 1 tablespoon garlic powder
- 1 tablespoon celery salt
- 1 teaspoon oregano, crushed
Steps
- Combine paprika, salt, sugar, brown sugar, cumin, chile powder, black pepper, cayenne, onion powder, garlic powder, celery salt, and oregano in bowl; mix well. For a smoother rub, puree ingredients in a spice grinder until well combined and all pieces are uniform (the rub will be very fine and tan in color).
- Extra rub can be stored in an airtight container for up to six months.
Notes
- FAVORITE
↑ Back to top
Classic Chicken Teriyaki

Ingredients
- 1 cup chicken stock or low-sodium broth
- 1/3 cup low-sodium soy sauce
- 1/3 cup sugar
- 2 tablespoons mirin
- 2 tablespoons sake
- Four 6-ounce skinless, boneless chicken breasts, lightly pounded
- Salt
- Freshly ground pepper
- 2 tablespoons canola oil
- 2 large Italian frying peppers, cut into 1/2-inch strips
- Steamed short-grain rice, for serving
Steps
- In a medium saucepan, combine the chicken stock with the soy sauce, sugar, mirin and sake and bring to a boil over high heat, stirring to dissolve the sugar. Reduce the heat to moderate and simmer until the teriyaki sauce is reduced to 1/2 cup and syrupy, about 20 minutes.
- Meanwhile, season the chicken with salt and pepper. In a large nonstick skillet, heat 1 tablespoon of the oil. Add the chicken and cook over moderately high heat, turning once, until browned all over and cooked through, 8 to 9 minutes. Transfer the chicken to a plate and let stand for 5 minutes.
- Wipe out the skillet. Add the remaining 1 tablespoon of oil and heat until shimmering. Add the pepper strips and cook over high heat, stirring occasionally, until crisp-tender and lightly charred, about 3 minutes. Transfer the peppers to plates. Slice the chicken breasts crosswise and transfer to the plates. Drizzle the teriyaki sauce over the chicken and serve with rice.
Notes
- FAVORITE
↑ Back to top
Classic Chocolate Layer Cake
Ingredients
- 1 1/4 cups (61/4 oz.) all-purpose flour
- 1 cup (3 oz.) unsweetened cocoa powder, plus more for dusting the pans
- 2 tsp. instant espresso or coffee powder
- 1 cup boiling water
- 1/2 cup sour cream
- 2 tsp. vanilla extract
- 1 cup (2 sticks) unsalted butter, at room temperature
- 1 3/4 cups (121/4 oz.) sugar
- 2 large eggs, at room temperature
- 1 tsp. baking soda
- 1/2 tsp. salt
- 9.5 oz. bittersweet chocolate, finely chopped
- 6 oz. cream cheese, at room temperature
- 6 tbsp. unsalted butter, at room temperature
- 2 cups confectioners’ sugar, sifted
- 4 tbsp. unsweetened Dutch-process cocoa powder
- Pinch of salt
- 2/3 cup plus 1 tbsp. sour cream
For the cake:
For the
frosting:
Steps
- To make the cake, preheat the oven to 350˚ F. Butter the edges of 2 9-inch round cake pans and dust with cocoa powder, shaking out the excess. Line the bottoms of the pans with parchment paper. In a medium bowl, combine the cocoa powder, espresso powder, and boiling water. Whisk until smooth; set aside to cool slightly. When cooled down a bit, whisk in the sour cream and vanilla. Set aside. In the bowl of an electric mixer, beat the butter on medium-high speed until smooth, about 1 minute. Gradually blend in the sugar and whip on medium-high speed until light and fluffy, 2-3 minutes more. Blend in the eggs one at a time. In a medium bowl, combine the flour, baking soda, and salt; whisk to blend.
- With the mixer on low speed, add the dry ingredients in three additions alternating with the sour cream mixture, beating each addition just until incorporated. Divide the batter evenly between the prepared pans. Bake the cake layers for about 23-27 minutes or until a toothpick inserted in the center comes out clean, rotating the pans during halfway through to ensure even baking. Transfer the baked cake layers to a wire rack and let cool in the pans at least 30 minutes before inverting onto the rack to cool completely.
- To make the frosting, melt the chocolate in a heat-proof bowl set over a pot of simmering water. Set aside to cool until just barely warm. In the bowl of a stand mixer fitted with the paddle attachment, beat the cream cheese and butter on medium-high speed until pale and fluffy, about 3-4 minutes. Gradually mix in the confectioners’ sugar, cocoa powder and salt. Beat in the melted and cooled chocolate and then the sour cream. Continue beating until the mixture is smooth and well blended.
- To assemble the cake, place one of the cake layers on a cake board or serving platter. Spread an even layer of the frosting over the top of the cake. Top with the second cake layer. Frost the top and sides of the cake using a thin crumb coat at first. Place in the freezer for 30 minutes to set. (While the crumb coat sets, you may want to leave the mixer on low speed with the remaining frosting so that the melted chocolate doesn’t set. Once the crumb cake is set, frost the top and sides of the cake again using an offset spatula or spoon for a soft, billowy appearance. Slice and serve.
Notes
- FAVORITE
↑ Back to top
Classic Coleslaw
Adapted from https://www.seriouseats.com/creamy-cole-slaw
Tags: Salad
Slaw
I made this. Is starred. Rated 5/5
Servings: 12
Ingredients
- 1 large head green cabbage, about 3 1/2 pounds, finely shredded on a mandoline or by hand (see notes)
- 1 large red onion, finely sliced on a mandoline or by hand
- 1 large carrot, peeled and grated on the large holes of a box grater (see notes)
- 1/4 cup roughly chopped fresh parsley leaves
- 1 cup white sugar
- 1/2 cup kosher salt
- 3/4 cup mayonnaise
- 1/4 cup apple cider vinegar
- 2 tablespoons dijon mustard
- 1 tablespoon freshly ground black pepper
- 3 tablespoons sugar
For the Slaw
Mix:
For the
Dressing:
Steps
- For the Slaw Mix: Combine cabbage, onion, carrot, and parsley in a large bowl, leaving plenty of room to toss (you may have to use 2 large bowls if your bowls are not large enough). Sprinkle with sugar and salt and toss to combine. Let rest 5 minutes, then transfer to a large colander and rinse thoroughly under cold running water.
- Transfer rinsed mixture to a salad spinner and spin dry. Alternatively, transfer to a large rimmed baking sheet lined with a triple layer of paper towels or a clean kitchen towel and blot mixture dry with more paper towels. Return to large bowl and set aside.
- For the Dressing: Combine mayonnaise, vinegar, mustard, black pepper, and sugar in a medium bowl and whisk until homogenous.
- Pour dressing over cabbage mixture and toss to coat. Taste and adjust seasoning with more salt, pepper, sugar, and/or vinegar if desired.
- Special Equipment
- Mandoline (see notes)
Notes
- This recipe is easiest to produce with a mandoline-style slicer, though you can also finely shred the cabbage by hand. To slice cabbages on a mandoline, split the head in half, cut out the core using the tip of a sharp chef's knife, then quarter the cabbage and slice it with the mandoline set to 1/16 of an inch.
- When grating the carrot, make sure to hold at a steep vertical bias so that the shreds are long instead of short.
↑ Back to top
Classic Crab Cakes
Ingredients
- 1 pound fresh or canned crabmeat, drained, flaked and cartilage removed
- 2 to 1/2 cups soft bread crumbs
- 1 large egg, beaten
- 3/4 cup mayonnaise
- 1/3 cup each chopped celery, green pepper and onion
- 1 tablespoon seafood seasoning
- 1 tablespoon minced fresh parsley
- 2 teaspoons lemon juice
- 1 teaspoon Worcestershire sauce
- 1 teaspoon prepared mustard
- 1/4 teaspoon pepper
- 1/8 teaspoon hot pepper sauce
- 2 to 4 tablespoons vegetable oil, optional
- Lemon wedges, optional
Steps
- In a large bowl, combine the crab, bread crumbs, egg, mayonnaise, vegetables and seasonings. Shape into eight patties. Broil patties or cook in a skillet in oil for 4 minutes on each side or until golden brown. Serve with lemon if desired. Freeze option: Freeze cooled crab cakes in freezer containers, separating layers with waxed paper. To use, reheat crab cakes on a baking sheet in a preheated 325° oven until heated through. Yield: 8 servings.
Notes
- FAVORITE
↑ Back to top
Classic Dry Adobo
Adapted from https://www.citystyleandliving.com/classic-adobo/

Tags: Philipino
Pork Poultry
Servings: 4 to 6
Ingredients
- 1 cup (240 ml) white sugarcane vinegar
- 1 cup (240 ml) soy sauce
- 10 garlic cloves, minced
- 2 teaspoons whole black peppercorns
- 3 tablespoons fruit preserves, jam, or jelly, such as blueberry or fig
- 3 bay leaves
- 2 bone-in, skin-on chicken thighs
- 2 bone-in, skin-on chicken legs
- 1 pound (455 g) fresh pork belly, cut into 1- inch (2.5 cm) cubes
- 2 tablespoons vegetable oil
- 4-6 cups (800 g to 1.2 kg) cooked white rice, for serving Cucumber-Tomato Relish
Steps
- In a large ziplock bag or nonreactive container, stir together the vinegar, soy sauce, garlic, peppercorns, fruit preserves, and bay leaves until the preserves are thoroughly combined. Add the chicken and pork belly, seal the bag or container, and marinate in the refrigerator for at least 6 hours, or preferably overnight.
- Transfer the chicken, pork, and marinade to a large Dutch oven or heavy-bottomed pot with 4 cups (1 L) water and bring the liquid to a boil over high heat. Immediately reduce the heat to medium and simmer for 30 minutes, or until the chicken is cooked through. Turn off the heat and transfer the meat to a bowl.
- In a Dutch oven or heavy-bottomed deep-sided pot, heat the vegetable oil over medium heat. Remove the pork belly pieces from the cooking liquid (do not discard the liquid) and add them to the pot. (Be careful, as the oil may spatter.) Cook, stirring frequently, until the pork belly is brown on all sides and crispy, about 7 minutes.
- Add the chicken pieces to the pan and cook, flipping them occasionally, until they are browned, about 5 minutes.
- Add ½ cup (120 ml) of the cooking liquid to the pan and cook until all the liquid has evaporated and the only thing left in the bottom of the pan is the fat from the chicken and pork, about 10 minutes.
- Serve hot, with plenty of white rice and relish, if using, making sure to pour a little bit of fat from the bottom of the pan over each serving of rice.
↑ Back to top
Classic Latkes
Adapted from https://www.saveur.com/classic-latkes-recipe/
Servings: 6
Ingredients
- 1 medium onion
- 3 large Yukon Gold potatoes (about 2½ lb.), peeled
- Kosher salt and freshly ground white pepper
- 6 Tbsp. finely chopped chives, plus more for serving if desired
- 3 Tbsp. plain matzo meal
- 2 large eggs, lightly beaten
- Vegetable oil, for frying
- Applesauce, for serving (optional)
- Sour cream or crème fraîche, for serving (optional)
- Caviar, such as salmon or trout roe, for serving (optional)
Steps
- Working over a large bowl using the large holes of a box grater, alternate grating some of the onion, followed by some of the potatoes, until all of the vegetables are grated. Sprinkle with salt and transfer to a fine-mesh strainer set over a medium bowl. Squeeze out as much liquid as possible from the vegetables, allowing it to collect in the medium bowl. Wipe out the large bowl with a paper towel and transfer the vegetables back to it. Cover the surface with plastic and set aside.
- Set aside the potato-onion liquid until the milky white starch settles, then pour off the liquid. Add the starch to the vegetables along with the chives, matzo, and eggs, season with salt and white pepper, and mix gently.
- Into a large skillet, pour ¼ inch of oil and turn the heat to medium-high. When the oil is hot and shimmering, working in batches, form ¼-cup portions of the latke mixture into balls and drop into the oil. Flatten the balls gently with a spatula to form 3–4-inch pancakes. Fry, turning once, until golden brown, crisp, and cooked through, about 8 minutes. Transfer the latkes to a paper towel-lined plate to drain. Serve hot with applesauce or sour cream, caviar, and chives if desired.
↑ Back to top
Classic New England Baked Beans
Tags: Beans and Other
Legumes
Servings: 6 to 8 as a side
Ingredients
- 1 pound uncooked Rancho Gordo Yellow Eye or Alubia Blanca beans, picked over and rinsed
- 1 1/2 yellow onions, chopped
- 2 garlic cloves, chopped
- 1 bay leaf
- 1/2 pound thick-cut bacon or salt pork
- 1/4 cup molasses
- 1/4 cup brown sugar
- 2 teaspoons mustard powder or grainy mustard
- 1 teaspoon Rancho Gordo Castillo Pimenton (optional)
- 1/2 teaspoon black pepper
- 1/2 teaspoon salt
Steps
- In a pot or Dutch oven, add the dried beans and enough liquid to cover by about 2 inches. Add 1/2 of an onion, chopped, the garlic, and bay leaf. Bring the pot to a rapid boil for 10 to 15 minutes. Lower the heat to a gentle simmer until the beans are just tender, about 1 hour (you want them to be slightly undercooked). Strain the beans, reserving the cooking liquid in a separate bowl.
- Preheat the oven to 300F. If using bacon, roughly chop. If using salt pork, cut into chunks.
- Wipe out the pot and place over medium heat. Add the bacon or salt pork and the remaining onion and cook until the onion is soft and golden, 10 to 15 minutes. In a bowl, combine the molasses, brown sugar, mustard, paprika (if using), pepper, and salt. Add to the onion-bacon mixture and stir well.
- Add the beans to the pot, and top with enough of the bean-cooking liquid to fully to cover the beans.
- Cover and bake for 2 hours. Remove from the oven, uncover, and gently stir the beans. Return to the oven and bake, uncovered, for 1 to 2 more hours, until the sauce is thick. If the liquid gets too low, add more bean-cooking liquid.
↑ Back to top
Classic Rich and Silky Potato Gratin (Scalloped Potatoes)
Servings: Serves 6 as a side
Ingredients
- 1 cup (240ml) heavy cream
- 2 cups (480ml) whole milk
- 2 medium cloves garlic (8g), smashed
- 2 small shallots (110g total), quartered
- 1/8 teaspoon freshly grated nutmeg
- 6 sprigs fresh thyme
- 2 teaspoons (6g) whole black peppercorns
- 1 1/2 teaspoons (7g) Diamond Crystal kosher salt
- 3 large russet potatoes (about 30 ounces; 800g)
- 2 ounces (60g) grated Parmigiano-Reggiano cheese
- 4 ounces (120g) grated Gruyère cheese
- 1 tablespoon (15g) unsalted butter, softened
Steps
- In a small saucepan, combine cream, milk, garlic, shallots, nutmeg, thyme, peppercorns, and salt. Bring to a boil, then remove from heat, cover, and let steep for 1 hour.
- Return milk mixture to boil, then strain into a large heatproof bowl, pressing gently on the solids.
- Using a mandoline, slice the potatoes crosswise 1/8 inch thick, directly into the hot milk mixture. Stir the potatoes to fully coat.
- Preheat oven to 300°F (150°C). In a small bowl, combine the Gruyère and Parmigiano-Reggiano cheeses.
- Grease a 2-quart baking dish with the butter. Lay the sliced potatoes in one even layer, then sprinkle with the cheese mixture. Repeat layering potatoes and cheese until all the potatoes have been used and half the cheese mixture remains; leave the top layer without cheese. Pour any remaining milk mixture over the layered potatoes.
- Bake until the potatoes have become tender and the surface is lightly golden brown, about 1 1/2 hours. Top with reserved cheese mixture, switch the oven to broil, and broil until evenly browned on top. Allow the gratin to rest 30 minutes before serving.
↑ Back to top
Classic Sourdough Pancakes or Waffles

Ingredients
- Overnight sponge
- 2 cups (240g) King Arthur Unbleached All-Purpose Flour
- 1 cup (227g) sourdough starter, unfed/discard
- 2 tablespoons (28g) granulated sugar
- 2 cups (454g) buttermilk
- Batter
- all of the overnight sponge
- 2 large eggs
- 1/4 cup (50g) vegetable oil or 4 tablespoons (57g) butter, melted
- 3/4 teaspoon table salt
- 1 teaspoon baking soda
Steps
- To make the overnight sponge: Stir down your refrigerated starter, and remove 1 cup (227g). Note: This is a good opportunity to feed the remainder, if necessary.
- In a large bowl, stir together the 1 cup (227g) unfed starter, flour, sugar, and buttermilk.
- Cover and let rest at cool room temperature (about 65°F to 70°F) for about 12 hours, or overnight.
- To make the batter: In a small bowl or mixing cup, beat together the eggs, and oil or butter. Add to the overnight sponge, stirring just to combine.
- Add the salt and baking soda, stirring to combine. The batter will expand and may bubble a bit.
- To make pancakes: Pour the batter by the 1/4-cupful onto a preheated, lightly greased griddle. Cook until bubbles form and pop on the top side of the pancakes, then turn over and cook until browned underneath.
- To make waffles: Pour the batter onto your preheated, greased waffle iron, and bake according to the manufacturer's instructions. Repeat with the remaining batter.
- Serve pancakes or waffles immediately, with your favorite toppings; or hold in a warm oven until ready to serve.
- Storage instructions: Store any leftovers in the refrigerator for a day or two; freeze for longer storage.
Notes
- Step by step by delicious step, our blog offers all the details for turning your discard starter into the best waffles you'll ever enjoy: Sourdough waffles, the ideal use for your discard starter.
- For whole-grain waffles, substitute our white whole wheat flour or Premium whole wheat flour for some or all of the all-purpose flour.
- Don’t have any starter? Here’s a recipe for homemade sourdough starter. If you're making it from scratch, you'll need to feed it for 5 to 7 days before it’s ready for baking. Want a head start? Purchase our classic fresh sourdough starter — it’ll be ready for baking soon after it arrives at your door. Looking for tips, techniques, and all kinds of great information about sourdough baking? Find what you need in our sourdough baking guide.
- Can these pancakes and waffles be made gluten-free? Absolutely. Make sure to use a gluten-free starter; and substitute our Gluten-Free Measure for Measure Flour for the all-purpose flour called for in the recipe.
↑ Back to top
Classic White Frosting
Ingredients
- 4 cups powdered sugar
- 1/4 teaspoon salt
- 2/3 cup Crisco® All-Vegetable Shortening
- 1 1/2 teaspoons vanilla extract
- 5 to 6 tablespoons milk
↑ Back to top
Clementine Preserve
Ingredients
- 20 clementines
- 2 lemons
- 3 cups sugar
Steps
- Set a small saucer in freezer first thing. Organize self so to have 6 pint size hot sterilized canning jars and lids at the ready when jam is cooked. Also have a large pot or canning kettle close to the boil. Peel clementines. Reserve the peels from one or two clementines. Remove as much pith from fruit as possible without making yourself crazy. Break fruit up into segments and place half the segments in a large heavy bottomed non-reactive pot. Roughly chop other half of clementines, cutting each segment into 3 or 4 pieces. Place chopped fruit and any juices that may have collected into cooking pot. Mince reserved clementine peels and add to pot. Supreme lemons and add fruit to pot, discard peels and membranes. Stir in sugar. Set over medium heat and cook, stirring often to prevent scorching until fruit bubbles up, releases juices and thickens, about 75 minutes. It should darken in color slightly as it cooks. Watch jam carefully as you will get a visual sense of when it is at jelling point. To test readiness spoon a small amount of jam onto frozen saucer. Return saucer to freezer for about 5 minutes. If jam sets you are good to go. If jam spreads out over saucer - continue cooking. When ready - ladle hot jam into hot sterilized jars. Close lids. Submerge jars in boiling water (covered by a good inch) and boil filled jars 5 minutes. Carefully lift from kettle and allow to cool on metal rack. Jam is divine spooned onto buttered toast. We also like it over fresh ricotta or served along side some stinky cheese and nice salty charcuterie.
Notes
- FAVORITE
↑ Back to top
Cochinita Pibil (Yucatán-Style Barbecued Pork)
Adapted from https://www.seriouseats.com/cochinita-pibil-yucatan-barbecue-mexican-smoked-pork-recipe

Tags: Mexican
Pork
Servings: 8 to 12
Ingredients
- 1 whole head garlic, separated into individual unpeeled cloves
- 2 tablespoons (30ml) lard or vegetable oil
- 1/4 cup achiote (annatto) seeds (1 1/2 ounces; 40g)
- 2 tablespoons (about 6 g) Mexican oregano
- 3 whole cloves
- 1 (3-inch) Ceylon cinnamon stick, or a 1 1/2-inch piece of cassia cinnamon (see note)
- 2 tablespoons (about 8 g) whole black peppercorns
- 1 tablespoon (about 4g) whole cumin seed
- 1 tablespoon (about 4 g) whole allspice berries
- 3/4 cup (175ml) bitter (Seville) orange juice, or 1/4 cup (60ml) each lime, orange, and grapefruit juice
- 1/4 cup (60ml) white vinegar
- 1 tablespoon (15ml) soy sauce
- Kosher salt
- 4 pounds (1.8kg) boneless pork shoulder or 6 pounds (2.7kg) bone-in pork shoulder, cut into 2-inch-thick slabs
- 6 to 8 banana leaves (see note)
- 2 Roma tomatoes, sliced
- 1 red or green bell pepper, sliced
- 1 white onion, sliced
- 12 bay leaves
- Warm corn tortillas
- Yucatán-style pickled onions and salsa
For the
Marinade:
For the Pork:
To Serve:
Steps
- Thread garlic cloves onto a metal skewer and grill directly over the flame of a gas grill until completely blackened on all sides, 3 to 4 minutes. Alternatively, toss in a dry skillet over high heat until blackened. Peel blackened skins when cool enough to handle.
- Heat oil or lard in a skillet over medium heat until shimmering. Add achiote, oregano, cloves, cinnamon, black peppercorns, cumin, and allspice and cook, tossing and stirring, until fragrant, about 2 minutes. Transfer to a blender along with peeled garlic, bitter-orange juice, vinegar, soy sauce, and a big pinch of salt. Blend until smooth. Season to taste with more salt. It should be quite salty and have a consistency like ketchup. If too thick, thin it with water until it flows slowly.
- Pour marinade over meat and rub it in with your hands. Cover, refrigerate, and let it rest at least 1 hour and up to overnight.
- Lay out 2 to 3 overlapping banana leaves on a work surface. Place 1 piece of pork in the center and layer with some of the tomatoes, bell pepper, onion, and bay leaves.
- Form a tight parcel by folding the bottom side up and the top side down, then rolling in the sides. Secure parcel with kitchen twine and transfer pork to an oven-safe baking sheet or disposable aluminum baking tray. Repeat with remaining pork and banana leaves.
- Light 3/4 chimney full of charcoal. When all the charcoal is lit and covered with gray ash, pour out and arrange coals on one side of charcoal grate. Set cooking grate in place, cover grill, and allow to preheat for 5 minutes. Alternatively, set half the burners on a gas grill to medium-high, cover, and preheat for 10 minutes.
- Place a few large hardwood chunks on coals (no need to soak). Place aluminum tray or baking sheet on the side opposite the fire and close lid. Smoke pork, aiming for a temperature between 250 and 300°F inside the chamber the whole time, until a metal skewer inserted into pork shows no resistance, 4 to 5 hours total. (Adjust heat by adding coals and/or adjusting the air vents.) Add extra wood chunks to coals once per hour.
- Remove pork from grill and transfer parcels to a deep platter or shallow bowl. Unwrap banana leaves, shred pork with two forks, stir it into drippings, stuff it into tortillas with pickled red onions and salsa, and serve immediately.
Notes
- Look for "true" or Ceylon cinnamon, which has a thinner, more scroll-like bark and a milder flavor. It's available in specialty spice shops or in Latin markets. If unavailable, regular cassia cinnamon can be used in its place (use half the amount called for). Banana leaves can be found in the freezer section of most Asian supermarkets.
↑ Back to top
Cocoa Cream Pie

Ingredients
- 1/2 c. cocoa
- 1/4 cup cornstarch (or 1/2 c. all purpose flour)
- 3 egg yolks
- 1 1/2 c. sugar
- 1/4 tsp. salt
- 2 c. milk
- 1 tsp. vanilla
Steps
- Mix cocoa, cornstarch, beaten egg yolks; sugar and salt, then add milk gradually, while stirring in a pot over med-high heat on your stovetop. Cook until thick, beating it smooth. Cream pies take some time to thicken, so stir, and stir (10-15 min). Using a heavy bottom pan really helps. Just keep it up until it thickens add vanilla in after you take off the heat. Pour into a pre-baked pie shell. Put in the fridge to chill, add whipped cream if you like :0 Or use the left over egg whites for a meringue topping!
Notes
- FAVORITE
↑ Back to top
Cocoa Peanut Logs
Tags: Desserts
Is starred.
Servings: 12
Ingredients
- 1 cup (6 oz.) semi-sweet chocolate chips
- 1/3 cup peanut butter
- 4 cups Kellogg's® Cocoa Krispies® cereal
Steps
- In a microwave safe bowl, microwave chocolate chips and peanut butter at
- Add KELLOGG'S COCOA KRISPIES cereal. Stir until cereal is well coated with
- Spread mixture evenly in 9 x 9 x 2-inch pan coated with cooking spray.
HIGH for 2 minutes or until
melted. Stir until smooth.
chocolate-peanut butter
mixture.
Chill until firm. Cut into
log-shaped bars.
↑ Back to top
Coconut Macaroons Dipped in Chocolate

Ingredients
- 2/3 cup sweetened condensed milk
- 1 large egg white
- 1 1/2 teaspoons vanilla
- 1/8 teaspoon salt
- 3 1/2 cups sweetened coconut
- About 10 ounces bittersweet chocolate, chopped (you can use semi-sweet or milk chocolate if you wish)
For the
chocolate dipping:
Steps
- Preheat the oven to 325°F. Line two baking sheets with parchment paper or a Silpat mat.
- In a large bowl, stir together the sweetened condensed milk, egg white, vanilla extract, and salt. Stir until combined. Add in the coconut and mix well.
- With a spoon, scoop up about 2 Tablespoons of the dough and place the dough balls on the baking sheets-about 2 inches apart. Form the cookies into mounds that have a peak at the top. Use your hands-squeeze the dough together and create a point at the top. Your hands will get sticky-you may need to wash them in between forming cookies.
- Bake cookies one sheet at a time for 15 to 20 minutes. The cookies will turn golden brown.
- Cool the cookies on the baking sheets for about 5 minutes or until they are firm and set. Remove with a spatula onto a cooling rack.
- Melt chocolate in a microwave safe bowl. Make sure you keep stirring the chocolate every 20 seconds or so until chocolate is melted and smooth. You can melt the chocolate in a bowl over a pan of boiling water if you wish. Josh did it in the microwave though.
- Lay out a large piece of parchment paper. Dip the cookies into the chocolate-just so the bottoms are covered in chocolates. Set dipped cookies on the paper to dry. Dip all of the cookies. If you have extra chocolate drizzle the tops with chocolate for fun:)
- Let the cookies sit until the chocolate has dried. Enjoy!
Notes
- FAVORITE
↑ Back to top
Coconut-Pecan German Chocolate Pie

Ingredients
- 1 to 1/4 cups all-purpose flour
- 1/4 teaspoon salt
- 6 tablespoons cold lard
- 3 to 4 tablespoons ice water
- 4 ounces German sweet chocolate, chopped
- 2 ounces unsweetened chocolate, chopped
- 1 can (14 ounces) sweetened condensed milk
- 4 egg yolks
- 1 teaspoon vanilla extract
- 1 cup chopped pecans
- 1/2 cup packed brown sugar
- 1/2 cup heavy whipping cream
- 1/4 cup butter, cubed
- 2 egg yolks
- 1 cup flaked coconut
- 1 teaspoon vanilla extract
- 1/4 cup chopped pecans
FILLING:
TOPPING:
Steps
- In a small bowl, mix flour and salt; cut in lard until crumbly. Gradually add ice water, tossing with a fork until dough holds together when pressed. Shape into a disk; wrap in plastic wrap. Refrigerate 30 minutes or overnight.
- Preheat oven to 400°. On a lightly floured surface, roll dough to a 1/8-in.-thick circle; transfer to a 9-in. pie plate. Trim pastry to 1/2 in. beyond rim of plate; flute edge. Line unpricked pastry with a double thickness of foil. Fill with pie weights, dried beans or uncooked rice.
- Bake 11-13 minutes or until bottom is lightly browned. Remove foil and weights; bake 6-8 minutes longer or until light brown. Cool on a wire rack. Reduce oven setting to 350°.
- In a microwave, melt chocolates in a large bowl; stir until smooth. Cool slightly. Whisk in milk, egg yolks and vanilla; stir in pecans. Pour into crust. Bake 16-19 minutes or until set. Cool 1 hour on a wire rack.
- Meanwhile, in a small heavy saucepan, combine brown sugar, cream and butter. Bring to a boil over medium heat, stirring to dissolve sugar. Remove from heat.
- In a small bowl, whisk a small amount of hot mixture into egg yolks; return all to pan, whisking constantly. Cook 2-3 minutes or until mixture thickens and a thermometer reads 160°, stirring constantly. Remove from heat. Stir in coconut and vanilla; cool 10 minutes.
- Pour over filling; sprinkle with pecans. Refrigerate 4 hours or until cold. Yield: 8 servings.
Notes
- FAVORITE
↑ Back to top
Coffee Steak Rub
Ingredients
- 2 tablespoons finely ground dark-roast coffee beans
- 2 tablespoons chile powder
- 2 tablespoons dark brown sugar
- 1 tablespoon smoked paprika
- 1 1/2 teaspoons ground cumin
- 1 tablespoon kosher salt
Steps
- In a small bowl, mix the ground coffee with the chile powder, brown sugar, paprika, cumin and salt.
Notes
- FAVORITE
↑ Back to top
Coffee-Chile Dry Rub

Ingredients
- 1/4 cup finely ground dark-roast coffee
- 1/4 cup ancho chile powder
- 1/4 cup dark brown sugar, tightly packed
- 2 tablespoons smoked paprika
- 2 tablespoons kosher salt
- 1 tablespoon ground cumin
Steps
- In a small bowl, mix all the ingredients thoroughly, massaging the mixture with your fingers to break down the dark brown sugar into fine crystals.
- Liberally sprinkle a thin layer of the rub onto the steak, then pat it in with your fingers so it adheres.
Notes
- FAVORITE
↑ Back to top
Coffee-Rubbed Strip Steaks with Chimichurri Sauce
Ingredients
- 1/4 cup sherry vinegar
- 1/4 cup red wine vinegar
- 2 tablespoons extra-virgin olive oil
- 1/2 teaspoon sugar
- 1 small shallot, minced
- 1/4 cup finely chopped parsley
- 1 tablespoon finely chopped cilantro
- 1 tablespoon finely chopped chives
- 1 teaspoon dried oregano
- Kosher salt
- Freshly ground pepper
- 2 tablespoons finely ground dark-roast coffee beans
- 2 tablespoons chile powder
- 2 tablespoons dark brown sugar
- 1 tablespoon smoked paprika
- 1 1/2 teaspoons ground cumin
- 1 tablespoon kosher salt
- Four 10-ounce strip steaks
- 1 1/2 cups cilantro leaves
- 1 cup flat-leaf parsley leaves
- 1/2 cup snipped chives
- 1 small shallot, halved lengthwise and thinly sliced crosswise
- Kosher salt
- Freshly ground pepper
chimichurri
steak
salad
Steps
- MAKE THE CHIMICHURRI In a medium bowl, whisk the vinegars with the olive oil and sugar. Stir in the shallot, parsley, cilantro, chives and oregano and season with salt and pepper. Let the chimichurri stand for at least 20 minutes and for up to 2 hours.
- MEANWHILE, PREPARE THE STEAK In a small bowl, mix the ground coffee with the chile powder, brown sugar, paprika, cumin and salt. Pat the steaks all over with the coffee-chile rub and let stand at room temperature for 30 minutes.
- Light a grill or preheat a grill pan; oil the grates or pan. Grill the steaks over moderate heat, turning once, until they’re nicely charred outside and medium-rare within, 11 to 13 minutes. Transfer to a platter and let rest for 10 minutes.
- MAKE THE SALAD In a large bowl, toss the cilantro, parsley, chives and shallot. Add 3 tablespoons of the chimichurri, season with salt and pepper and toss to coat the herbs.
- Thinly slice the steaks and arrange on the platter; spoon some of the chimichurri on the meat. Serve with the herb salad. Pass the remaining chimichurri on the side.
Notes
- FAVORITE
↑ Back to top
Cold Mousse of Chicken and Pistachios

Tags: Appetizers and Dim
Sum Charcuterie
I made this. Is starred. Rated 5/5
Servings: 8-10
Ingredients
- Mousse
- 10 oz. chicken fat, cut into 1/2" pieces
- 4 to 5 sprigs fresh thyme
- 1 lg. bay leaf
- 3/4 tsp. black peppercorns
- 6 oz. chicken breast, cleaned and cut into 1" pieces
- 1/2 c. sliced shallots
- 10 oz. chicken livers, cleaned
- 1 tsp. salt
- 1 to 2 cloves garlic, peeled, crushed, chopped
- 2 tbsp. cognac
- 1/4 c. shelled pistachios
- Decoration
- Thin strips of red pepper, chives, green of leeks or scallions, carrot, and radishes
- Aspic
- 1 lg. egg white
- 3/4 tbsp. unflavored gelatin
- 1/2 c. green of leeks, celery, and parsley
- 1/4 tsp. ground black pepper
- Salt to taste
- 1 to 1/2 c. chicken stock
- Melba toast or black bread
Steps
- Cook chicken fat in large skillet over med-high heat until fat is rendered and brown. In a coffee-grinder, process the thyme, bay leaf, and peppercorns into a powder. Add chicken pieces to skillet and cook for 1 minute. Add shallots, liver, spices, salt, and garlic to the skillet. Cook over med. heat, stirring, for 2 minutes. Remove and let cool for 2 minutes.
- Transfer contents of skillet to a food processor and emulsify for 30 seconds, until smooth. Add cognac and process until smooth. Push mixture through a food mill, and fold in pistachios. Cover the mousse, and refrigerate until it begins to set firm. Mix until smooth, pack it into a 3-4 c. pâté mold, cover tightly with plastic wrap, and refrigerate overnight.
- Use the thin strips of vegetables to create a vase filled with flowers or another design. All the greens should be blanched in boiling water for 10-15 seconds and cooled in cold water. Carrots should be blanched for 1 minute.
- In a saucepan, mix the egg white, gelatin, the greens of leeks, celery, and parsley; pepper, salt, and stock. Bring to a boil over high heat, stirring until it comes to a boil. When it comes to a boil, stop stirring, and cook 5 seconds. Set aside, off the heat, and let rest undisturbed for 5 minutes. Strain through a sieve lined with wet paper towels. Place over ice, and stir very gently so as to not cause bubbles, until mixture gets syrupy. This is the time to use it. Using a spoon and working quickly, coat the top of the mousse with aspic until the entire surface is covered. Refrigerate until well set.
- Serve with Melba toast or black bread.
For the mousse:
To decorate the top of
the mousse:
For the aspic:
Notes
- FAVORITE
↑ Back to top
Cold Noodles with Tomatoes Recipe (With Video)

Tags: Korean
Noodles
Servings: 4 to 6
Ingredients
- 2 pints ripe cherry tomatoes, halved
- 2 teaspoons kosher salt (Diamond Crystal)
- 12 to 14 ounces somyeon, somen, capellini or other thin wheat noodle
- ¼ cup rice vinegar
- 2 tablespoons soy sauce
- 2 tablespoons granulated sugar
- 1 large garlic clove, finely grated
- ½ teaspoon Dijon mustard
- ½ teaspoon toasted sesame oil
- 2 cups cold filtered water
- 1 tablespoon toasted sesame seeds
- 2 radishes, thinly sliced
- 2 scallions, thinly sliced at an angle
- 2 cups crushed or cubed ice
Steps
- Watch
- In a large bowl, toss together the tomatoes and salt. Let sit until juicy, about 10 minutes.
- Meanwhile, bring a large pot of water to a boil. Cook the noodles according to package instructions, drain and rinse under cold water. Set aside.
- Add the vinegar, soy sauce, sugar, garlic, mustard and sesame oil to the tomatoes, and toss with a spoon until well combined. Stir the filtered water into the tomatoes and sprinkle the surface of the broth with the sesame seeds, radishes and scallions.
- Right before serving, add the ice to the broth. Divide the noodles among bowls, and ladle in the broth and any unmelted ice, making sure each serving gets a nice sprinkling of tomatoes, radishes, scallions and sesame seeds.
Make the recipe with us:
↑ Back to top
Cold Smoked Salmon
Adapted from https://barbecuebible.com/recipe/cold-smoked-salmon/
Tags: Charcuterie
Fish Smoking
Ingredients
- 2 to 3 pounds fresh salmon fillet (preferably from the head end)
- 1 1/2 cups coarse sea salt or kosher salt
- 1 1/2 cups brown sugar
- Diced red onion
- Chopped hard-cooked egg yolk
- Chopped hard-cooked egg white
- Brined capers, drained
- Sliced lemons
- Chopped fresh dill
- Brioche toast points, toasted or grilled
- Sour cream
Optional
garnishes:
Steps
- Run your fingers over the flesh side of the salmon fillets, feeling for the sharp ends of pin bones. Pull out any you find with fish tweezers or needle nose pliers.
- Make the cure: Combine the salt and brown sugar in a mixing bowl and mix with your fingers.
- Cover the dish with plastic wrap and cure the fish in the coolest part of your refrigerator for 24 to 48 hours.
- Gently rinse the cure off the salmon under cold running water. Place the salmon in a large bowl with cold water to cover by 3 inches. Soak for 30 minutes, then drain well in a colander.
- Blot the salmon dry on both sides with paper towels. Arrange it skin side down on a wire rack over a sheet pan. Let the salmon dry, uncovered, in the refrigerator until it feels tacky, about 4 hours.
- Set up your smoker for cold smoking following the manufacturer’s instructions. Ideally, you’ll be using a smoke generator, like the Smoke Daddy or Smoke Chief, to generate the smoke.
- If you’re smoking the salmon on a warm day (temperature above 70 degrees), arrange the fish on a wire rack over a roasting pan filled with ice. (The fish should be at least 1 inch above the ice.)
- Cold smoke the salmon until the exterior is bronzed with smoke and the salmon feels semi-firm and leathery, 12 hours or more. How will you know it’s ready? Cut a slice from next to the skin at the fat end.
- Wrap the salmon in uncoated butcher paper and let it rest in the refrigerator for at least 4 hours before serving or as long as overnight.
- To serve, using a long, slender and very sharp knife held sharply on the diagonal to the fish, cut the salmon into paper-thin slices.
Spread 1/3 of the cure over the bottom of a glass baking dish just
large enough to hold the fish. Lay the salmon fillets on top of the
cure. (The cure should extend 1/2 inch beyond the edges of the fish on
each side.) Spread the remaining cure on top so it covers the fish
completely.
Notes
- For more recipes on BarbecueBible.com, try:
↑ Back to top
Cold Udon Noodles Recipe (Zaru Udon)
Servings: 4
Ingredients
- 450 g | 1 pound udon noodles frozen or freshly made
- 240 ml | 1 cup dashi made from instant powder or homemade
- 3 tablespoons Japanese or Korean soy sauce
- 3 to 4 tablespoons mirin
- 1 scallion green and green part, soaked in water to cover for 5 minutes and drained well
- 80 ml | ¼ cup dried bonito flakes katsuo bushi
- 1 teaspoon wasabi or freshly grated ginger
- 120 ml | ½ cup grated daikon radish use the same grater that you’d use for ginger
Sauce
Garnishes
(choose at least 2)
Steps
- Cook the udon noodles and then drain them, flushing them with cold water and draining well. Set them aside. (If you used the instructions for freshly made noodles, you probably already did this!)
- Combine the dashi, soy sauce and mirin in a small saucepan. Bring to a boil over medium-high heat, then remove from the heat. Set aside to cool. The flavors will intensify.
- To serve, divide the noodles among 2 or 4 plates or shallow bowls, depending on if your guests want to share not. Divide the sauce among 4 shallow bowls; choose large rice or soup bowls that you can pick up and hold for easy slurping and shoveling the noodles into your mouth. Put the garnishes on individual or communal plates.
- Set all of these components at the table and invite guests to dive in. It’s easiest if they mix the wasabi, ginger or daikon into the sauce first before adding the noodles. The scallion and bonito flakes can be added to the top of the noodles as pictured in the photo at the top.
- The sauce is intensely flavored and usually not sipped on. It's meant to merely coate the noodles with flavor.
↑ Back to top
Columbia Gold, a South Carolina Mustard Bbq Sauce
Adapted from https://amazingribs.com/tested-recipes/barbecue-sauce-recipes/columbia-gold-south-carolina-mustard-bbq-sauce-recipe
Tags: Barbecue
Sauces
Ingredients
- 2 cups prepared yellow mustard
- 2/3 cup cider vinegar
- 3 tablespoons tomato paste
- 1/2 teaspoon chipotle Tabasco sauce or you favorite hot sauce
- 3/4 cup sugar
- 1 tablespoon mustard powder
- 2 teaspoons chicken bouillon granules or 1 cube or 1 teaspoon chicken soup base
- 2 teaspoons dried rosemary leaves
- 1 teaspoon celery seed
- 2 teaspoons onion powder
- 2 teaspoons garlic powder
- 2 teaspoons Morton’s coarse kosher salt (read more about the science of salt here)
- 1 teaspoon freshly ground black pepper
- About the mustard. To be authentic, use yellow ballpark style mustard, not Dijon. Besides, it just doesn't taste right with Dijon.
- About the tomato paste. You can substitute ketchup if you wish.About the chicken bouillon. What we are looking for here is a chicken concentrate so chicken stock won't do. But there are cubes of bouillon, jars of bouillon granules, jars of bouillon paste, and jars of chicken soup stock, all of which will do the job.
Steps
- Mix the wet ingredients together in a bowl.
- If you are using a bouillon cube, crush it with a spoon in a bowl or mortar & pestle and add it to the bowl. Crush the rosemary leaves and celery seed in a mortar & pestle or in a blender or coffee grinder and add it to the bowl. Add the rest of the dry ingredients to the bowl and mix thoroughly. Simmer for 10 minutes to pasteurize it. Pour into a clean jar and store in the fridge. Leftovers will keep in the fridge for months.
↑ Back to top
Cook's Country Brunswick Stew

Ingredients
- 1 tablespoon vegetable oil
- 1 onion, chopped fine
- 3/4 cup ketchup
- 4 cups water
- 2 pounds boneless, skinless chicken thighs, trimmed
- 1 pound russet potatoes, peeled and cut into 1/2-inch chunks
- 8 ounces kielbasa sausage, sliced 1/4 inch thick
- 6 to 8 tablespoons cider vinegar
- 2 tablespoons Worcestershire sauce
- 1 tablespoon yellow mustard
- 1 teaspoon garlic powder
- Salt and pepper
- 1/4 teaspoon red pepper flakes
- 1 cup canned crushed tomatoes
- 1/2 cup frozen lima beans
- 1/2 cup frozen corn
Steps
- Heat oil in Dutch oven over medium-high heat until shimmering. Add onion and cook until softened, 3 to 5 minutes. Add ketchup and 1/4 cup water and cook, stirring frequently, until fond begins to form on bottom of pot and mixture has thickened, about 6 minutes.
- Add chicken, potatoes, kielbasa, 6 tablespoons vinegar, 1 1/2 tablespoons Worcestershire, mustard, garlic powder, 1 teaspoon salt, 1 teaspoon pepper, pepper flakes and remaining 3 3/4 cups water and bring to boil. Reduce heat to low, cover and simmer until potatoes are tender, 30 to 35 minutes, stirring frequently.
- Transfer chicken to plate and let cool for 5 minutes, then shred into bite-size pieces with 2 forks. While chicken cools, stir tomatoes, lima beans and corn into stew and continue to simmer, uncovered, for 15 minutes. Stir in shredded chicken and remaining 1 1/2 teaspoons Worcestershire and cook until warmed through, about 2 minutes. Season with salt, pepper and remaining vinegar (up to 2 tablespoons) to taste. Serve.
Notes
- FAVORITE
↑ Back to top
Copy Cat Mcdonald's Tartar Sauce & Filet 'O Fish
Sandwich
Tags: Fish
Sandwiches
Servings: 1 CUP TARTAR SAUCE/8
SANDWICHES
Ingredients
- 1/4 cup Vlasic Dill Pickle Relish
- 12 capers, minced
- 2 teaspoons dried minced onion
- 2 teaspoons milk
- 1 teaspoon parsley flakes
- 1/2 teaspoon lemon juice
- 1/8 teaspoon granulated sugar
- 1/2 cup Mayonnaise
- 8 White hamburger style buns
- 8 Van de Kamp Breaded Fish for Sandwiches
- 8 slices American cheese
MCDONALD'S
TARTAR SAUCE RECIPE:
FOR THE FILET
'O FISH SANDWICH:
Steps
- Tartar Sauce: At least one hour before you prepare the fish, make the tartar sauce by combining all of the ingredients in a container with a lid. Refrigerate for at least one hour.
- To assemble the sandwiches: Bake fish fillets according to the box. Top with a slice of American cheese while hot. Steam buns by placing them in a plastic bag with a damp paper towel. Microwave for 30 seconds to steam. Place fish, topped with cheese on bun, add tartar sauce. Enjoy!
Notes
- There is plenty of sauce to make 8 sandwiches.
- The recipe is easily cut in half.
- Store leftover tartar sauce in the refrigerator for up to one week in an airtight container.
↑ Back to top
Copycat Chiavetta's Marinade Recipe (The Best Chicken
Marinade)
Adapted from https://www.anediblemosaic.com/copycat-chiavettas-marinade-recipe-the-best-chicken-marinade/
Tags: Marinades
Sauces
Servings: 8
Ingredients
- 1/2 cup apple cider vinegar
- 1/4 cup vegetable oil or avocado oil
- 2 tablespoons Worcestershire sauce
- 2 cloves garlic crushed
- 1 tablespoon sugar
- 1 teaspoon poultry seasoning
- 1 teaspoon salt
- 1 teaspoon celery salt
- 1/4 teaspoon black pepper
- 1/4 teaspoon white pepper
Steps
- Add all ingredients to a bowl and whisk to combine.
- Use this amount of marinade for about 2 pounds of chicken.
- Marinate boneless skinless chicken breasts in Chiavetta’s for at least 15 minutes or up to 2 hours.
- Marinate bone-in skin-on chicken for at least 1 hour or up to 24 hours.
- Cook the chicken on a medium-high grill (about 400F) or in a 375F oven until fully cooked. It should reach an internal temperature of 165F for white meat (breast pieces) and 175F for dark meat (leg quarters). This will take about 35 to 50 minutes on the grill or in the oven, depending on the size of your chicken.
To Make the Marinade:
To Marinate the Chicken:
To Cook the Chicken:
Notes
- Recipe Yield: This recipe makes about 3/4 cup of marinade, which is enough to marinade about 2 pounds of chicken.
- To Thicken the Marinade: If you want a thicker marinade, whisk in 1/4 teaspoon xanthan gum.
- Apple Cider Vinegar Substitute: You can use white vinegar instead of apple cider vinegar in this recipe.
- Baste the Chicken as it Grills: If you’re grilling Chiavetta’s chicken (instead of cooking it in the oven), baste the chicken with the marinade as it cooks.
- Storage: You can store the marinade covered in a glass jar in the fridge for up to 1 month before using it to marinade meat or vegetables.
↑ Back to top
Corn Chowder
Adapted from http://www.foodandwine.com/recipes/corn-chowder

Servings: Yield Serves : 4
Ingredients
- 2 tablespoons butter
- 4 scallions, white bulbs and green tops chopped and reserved separately
- 1 red bell pepper, chopped
- 2 ribs celery, chopped
- 1 pound boiling potatoes (about 3), peeled and cut into 1/2-inch dice
- 4 cups fresh corn kernels (cut from about 8 ears)
- 1 bay leaf
- 1 quart canned low-sodium chicken broth or homemade stock
- 2 teaspoons salt
- 2 cups milk
- 1/4 teaspoon fresh-ground black pepper
- Sour cream, for serving (optional)
Steps
- In a large saucepan, melt the butter over moderately low heat. Add the scallion bulbs, bell pepper, and celery and cook, stirring occasionally, until the vegetables start to soften, about 10 minutes. Stir in the potatoes, 2 cups of the corn, the bay leaf, broth, and salt. Bring to a boil. Reduce the heat and simmer, stirring occasionally, for 15 minutes.
- In a blender or food processor, puree the remaining 2 cups corn with the milk. Stir the puree into the soup along with the black pepper. Simmer until the soup thickens slightly, 5 to 10 minutes. Remove the bay leaf. Stir in the scallion greens. Top each serving with a dollop of sour cream, if using.
Notes
- Frozen-Corn Variation
- If you want to use frozen corn, puree two cups of it with the milk as directed above, and add the remaining two cups to the soup along with the puree. Since the corn is already cooked, it might toughen if it goes in earlier. You could add a pinch of sugar, too.
↑ Back to top
Corn Starch Glaze
Servings: 1 cup
Ingredients
- 1 cup plus 1/4 cup water
- 2 Tablespoons cornstarch.
Steps
- Dissolve cornstarch in 1/4 cup cold water. Bring 1 cup water to a boil. Stir in slurry until thickened.
Notes
- FAVORITE
↑ Back to top
Cornbread, No Chaser
Tags: Baking
Quickbread
Ingredients
- 1 1/2 cups or 7 1/4 oz. cornmeal, preferably stone ground
- 1 1/4 cups or 10 oz milk
- 1 cup or 4 3/4 oz. all purpose flour
- 1 Tb or 1/4 oz. baking powder
- 1 Tbl sugar
- 1 1/2 tsp. or 1/4 oz. kosher salt (or 1 tsp/ 1/4 oz regular salt)
- 1/2 c or 3 3/4 oz. vegetable oil
- 2 large eggs
Steps
- Place a skillet on an oven rack and preheat to 450 degrees.
- In a large bowl, soak the cornmeal in the milk for 15 minutes.
- Mix together the flour, baking powder, and salt in a large bowl.
- After the cornmeal has soaked, add the eggs and vegetable oil to the cornmeal mixture and beat/stir to combine well.
- Pour the cornmeal mixture over the flour mixture and stir to incorporate, taking care not to overmix.
- Using an oven mitt, remove the skillet from the hot oven, grease with butter, and pour in the batter. Bake about 25 minutes or until the cornbread is golden brown.
- Remove the skillet from the oven, invert the cornbread onto a serving plate and then flip again onto a cutting board. Slice the cake of cornbread into 8 wedges and return it to the plate.
Notes
- FAVORITE
↑ Back to top
Corned Beef Brisket
Adapted from https://www.seriouseats.com/homemade-corned-beef-brisket-with-potatoes-cabbage-carrots-recipe
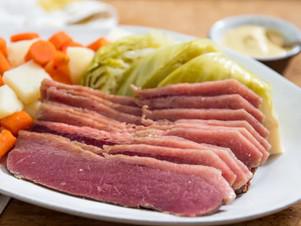
Potatoes, Cabbage, and Carrots for St. Patrick's
Day
Servings: 6 to 10
Ingredients
- 1 whole flat or point cut beef brisket, trimmed, about 2250 grams/ 5 pounds
- 100 grams/3 1/2 ounces (about 3/4 cup) Diamond Crystal kosher salt
- 10 grams/ .325 ounces (about 1 1/2 teaspoons) of pink salt or 7.5 grams/.25 ounces (about 2 teaspoons) saltpeter
- 30 grams/1 ounce (about 2 tablespoons) packed brown sugar
- 2 tablespoons whole black peppercorns
- 2 tablespoons yellow mustard seeds
- 2 tablespoons whole coriander seeds
- 1 tablespoon allspice berries
- 6 whole cloves
- 1 tablespoon ground ginger
- 6 bay leaves, roughly torn
- 2 pounds carrots, peeled and roughly chopped
- 2 pounds russet potatoes, peeled and roughly diced
- 1 whole head white or green cabbage, cut into 6 to 8 wedges (2 to 3 pounds total)
Steps
- Eight days before serving, combine salt, pink salt (or saltpeter), and brown sugar in a small bowl and whisk until homogeneous. Rub evenly over every surface of brisket. Combine peppercorns, mustard, coriander, allspice, cloves, ginger, and bay leaves and sprinkle evenly over both sides of beef, pressing spices gently into the meat until they stick. Seal the beef in a vacuum sealed bag or a zipper-lock bag with all of the air pressed out of it. Place in the coldest part of the refrigerator and let rest for 7 days, flipping once a day.
- To Cook in a Sous-Vide Cooker: The day before serving, remove beef from the bag and rinse off all spices under cold, running water. Pat dry with paper towels. Re-seal in a vacuum bag and cook at 180°F until tender, about 10 hours. Proceed to step 4.
- To Cook in a Dutch Oven: The day before serving, remove beef from the bag and rinse off all spices under cold, running water. Pat dry with paper towels. Preheat oven to 200°F. Place brisket in large Dutch oven, cover with water by several inches, and bring to a simmer over high heat. Remove from heat, cover with lid slightly ajar, place in oven, and cook until completely tender, about 10 hours. Proceed to step 4.
- Once beef is cooked, transfer to an airtight container along with cooking liquid. Let rest in refrigerator at least overnight, and up to 3 days.
- The day of: Transfer cooking liquid to a large saucepan or Dutch oven along with carrots, potatoes, and cabbage. Top up with water until vegetables are submerged. Slice beef thinly against the grain and fan slices out in large skillet. Add 1 cup of liquid from pot to skillet and place skillet on top of pot. Cover skillet. Bring the pot to a boil over high heat, then reduce to a simmer. Cook until vegetables are completely tender and beef is heated through, about 45 minutes. Serve immediately with hot mustard.
- Special Equipment
- Immersion circulator or Dutch oven, scale, pink salt
Notes
- You can also make this recipe using store-bought corned beef. Just skip to step 2.
- Make-Ahead and Storage
- Corned beef can be cooked up to a week before serving. Once cooked, corned beef can be kept, well-wrapped and refrigerated, for about two weeks.
↑ Back to top
Corned Beef Brisket, Potatoes, Cabbage, and Carrots for
St. Patrick's Day
Adapted from https://www.seriouseats.com/recipes/2011/03/homemade-corned-beef-brisket-with-potatoes-cabbage-carrots-recipe.html
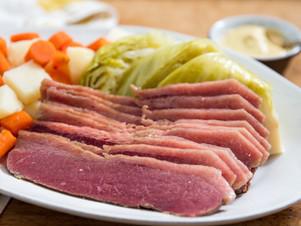
Tags: Beef
Charcuterie Cured
Servings: 6 to 10
Ingredients
- 1 whole flat or point cut beef brisket, trimmed, about 2250 grams/5 pounds
- 100 grams/3 1/2 ounces (about 3/4 cup) Diamon Crystal kosher salt
- 10 grams/.325 ounces (about 1 1/2 teaspoons) of pink salt or 7.5 grams/.25 ounces (about 2 teaspoons) saltpeter
- 30 grams/1 ounce (about 2 tablespoons) packed brown sugar
- 2 tablespoons whole black peppercorns
- 2 tablespoons yellow mustard seeds
- 2 tablespoons whole coriander seeds
- 1 tablespoon allspice berries
- 6 whole cloves
- 1 tablespoon ground ginger
- 6 bay leaves, roughly torn
- 2 pounds carrots, peeled and roughly chopped
- 2 pounds russet potatoes, peeled and roughly diced
- 1 whole head white or green cabbage, cut into 6 to 8 wedges (2 to 3 pounds total)
Steps
- 8 days before serving, combine salt, saltpeter (or pink salt), and brown sugar in a small bowl and whisk until homogenous. Rub evenly over every surface of brisket. Combine peppercorns, mustard, coriander, allspice, cloves, ginger, and bay leaves and sprinkle evenly over both sides of beef, pressing spices gently into the meat until they stick. Seal the beef in a vacuum sealed bag or a zipper-lock bag with all of the air pressed out of it. Place in coldest part of refrigerator and let rest for 7 days, flipping once a day.
- To Cook in a Sous-Vide Cooker: The day before serving, remove the beef from the bag and carefully rinse off all spices under cold running water. Pat dry with paper towels. Re-seal in a vacuum bag and cook at 180° until tender, about 10 hours. Proceed to step 4.
- To Cook in a Dutch Oven: The day before serving, remove the beef from the bag and carefully rinse off all spices under cold running water. Pat dry with paper towels. Preheat oven to 200°F. Place brisket in large Durch oven, cover with water by several inches, and bring to a simmer over high heat. Remove from heat, cover with lid slightly ajar, place in oven, and cook until completely tender, about 10 hours. Proceed to step 4.
- Immersion circulator or Dutch oven, scale, pink salt
Once beef is cooked, transfer to an airtight container along with
cooking liquid (if cooked in a water oven, just store it in its vacuum
bag). Let rest at least overnight, and up to 3 days.
The day of: transfer cooking liquid to a large saucepan or Dutch oven
along with carrots, potatoes, and cabbage. Top up with water until
vegetables are submerged. Slice beef thinly against the grain and fan
slices out in large skillet. Add 1 cup of liquid from pot to skillet
and place skillet on top of pot. Cover skillet. Bring the pot to a
boil
over high heat, then reduce to a simmer. Cook until vegetables are
completely tender and beef is heated through, about 45 minutes. Serve
immediately with hot mustard.
Special Equipment:
Notes
- You can also make this recipe using store-bought corned beef. Just skip to step 2.
- Make-Ahead and Storage
- Corned beef can be cooked up to a week before serving. Once cooked, corned beef can be kept, well-wrapped and refrigerated, for about two weeks.
↑ Back to top
Corned Beef, Home-Cured, Wet
Tags: Beef
Charcuterie Cured
Ingredients
- 450 grams cups salt*
- 100 grams sugar
- 4 teaspoons - 25 gr pink salt (sodium nitrite), optional
- 3 cloves garlic, minced
- 20 grams pickling spice
- 1 5-pound beef brisket
- 1 carrot, peeled and roughly chopped
- 1 medium onion, peeled and cut in two
- 1 celery stalk, roughly chopped.
Steps
- In pot large enough to hold brisket, combine 1 gallon of water with kosher salt, sugar, sodium nitrite (if using), garlic and 2 tablespoons pickling spice. Bring to a simmer, stirring until salt and sugar are dissolved. Remove from heat and let cool to room temperature, then refrigerate until chilled.
- Place brisket in brine, weighted with a plate to keep it submerged; cover. Refrigerate for 5 days.
- Remove brisket from brine and rinse thoroughly. Place in a pot just large enough to hold it. Cover with water and add remaining pickling spice, carrot, onion and celery. Bring to a boil over high heat, reduce heat to low and cover. Simmer gently until brisket is fork-tender, about 3 hours, adding water if needed to cover brisket.
- Keep warm until ready to serve. Meat can be refrigerated for several days in cooking liquid. Reheat in the liquid or serve chilled. Slice thinly and serve on a sandwich or with additional vegetables simmered until tender in the cooking liquid.
Notes
- A note about the salt. Salt level not hugely critical here because it’s basically boiled and excess salt moves into cooking liquid. You can weigh out 12 ounces here if you feel better using a scale (approximately a 10% brine). Or you can simply make a 5% brine of however much water you need to cover (6.4 ounces per gallon). When you cook it, season the cooking liquid to the level you want your meat seasoned. Another option is wrapping the brisket in foil and cooking it in a 225 degree oven till tender, but only do this if you’ve used the 5% brine.
↑ Back to top
Cornstarch Solution for Glazing Bread
Tags: Breads
Steps
- Before slashing the top of the bread and placing it in the oven, the tops may be brushed (painted) with a pastry brush dipped in a cornstarch solution made as follows: While bringing 1 cup water to a boil, dissolve 2 tablespoons cornstarch in l/4 cup cold water; then whisk into the boiling water until it thickens. This solution may be kept for several days. For a high shine, brush a second time as soon as the bread emerges from the oven. I use the cornstarch solution for breads that should have a glaze, such as Sour Rye Bread; I use water for French- and Italian- style breads.
Notes
- 1 Tbl. starch is fine
↑ Back to top
Cottage Cheese- Reloaded
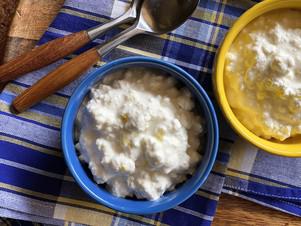
Tags: Cheese
Dairy Homemade
Servings: 5 CUPS
Ingredients
- 1 gallon whole milk (not ultra-pasteurized)
- 3/4 cup distilled white vinegar
- 1 teaspoon kosher salt
- 3/4 cup heavy cream or half and half
- 1/4 cup buttermilk
- 1 teaspoon fresh lemon zest
- 8-quart pot with fitted lid
- kitchen tea towel or "flour sack" towel (needs to be smooth, not terrycloth)
Software
Specialized
Hardware
Steps
- Add the milk to the pot and stir over medium heat until it reaches 185 F-190 F, about 20 minutes then remove from heat.
- Stir in the vinegar with a large wooden spoon then as soon as the milk proteins start to coagulate gently herd them toward the middle of the pot for about 30 seconds. Lid the pot and leave undisturbed for 1 hour.
- Meanwhile, line a colander with the clean kitchen towel or flour sack towel and place inside a large bowl. Scoop the curds gently into the lined colander and leave to drain for 15 minutes.
- Rinse the curds under gently running cool water for 2 minutes, then gather the edges of the towel together and twist to wring out as much liquid as possible.
- Line a half sheet pan with another clean towel (or paper towels), and spread out the curds evenly, breaking them apart with your fingers. Season with the salt and toss to evenly distribute.
- Place curds in a lidded container and refrigerate for up to a week. To serve, stir in the cream, buttermilk, and lemon zest.
Notes
- Note: Once the cream and buttermilk have been added, the cottage cheese will absorb some of the liquid after refrigeration so you may want to adjust the consistency after about 12 hours by adding a bit more of the buttermilk/cream combo.
↑ Back to top
Cowboy Cookies
Servings: 16
Ingredients
- 1 1/4 cups (6 1/4 ounces) all-purpose flour
- 3/4 teaspoon baking powder
- 1/2 teaspoon baking soda
- 1/2 teaspoon salt
- 1 1/2 cups packed (10 1/2 ounces) light brown sugar
- 12 tablespoons unsalted butter,
- melted and cooled
- 1 large egg plus 1 large yolk
- 1 teaspoon vanilla extract
- 1 1/4 cups (3 3/4 ounces) old-fashioned rolled oats
- 1 cup pecans, toasted and chopped coarse
- 1 cup (3 ounces) sweetened shredded coconut
- 2/3 cup (4 ounces) semisweet chocolate chips
Steps
- Whisk sugar, melted butter, egg and yolk, and vanilla in large bowl until combined. Stir in flour mixture until no dry streaks remain. Stir in oats, pecans, coconut, and chocolate chips until fully combined (mixture will be sticky).
- Lightly spray 1/4-cup dry measuring cup with vegetable oil spray. Drop level 1/4-cup portions of dough onto prepared sheets, staggering 8 portions per sheet and spacing them about 2 1/2 inches apart. Divide any remaining dough among portions.
- Bake cookies, 1 sheet at a time, until edges are browned and set and centers are puffed with pale, raw spots, 15 to 17 minutes, rotating sheet halfway through baking. Do not overbake.
- Let cookies cool on sheet for 5 minutes, then transfer to wire rack and let cool completely before serving. (
Notes
- TO MAKE AHEAD: At end of step 3, wrap sheets tightly in plastic wrap and refrigerate for up to 2 days. When ready to bake, increase baking time to 16 to 18 minutes. To freeze, portion dough onto parchment-lined sheet and freeze until solid. Transfer frozen portions to zipper-lock bag and freeze for up to 2 months. Do not thaw before baking. Increase baking time to 17 to 19 minutes.
↑ Back to top
Crackling Bread
Ingredients
- 1 1/2 cups water-ground white meal
- 1 teaspoon salt
- 1 teaspoon baking powder
- 1 egg
- 1 cup milk
Steps
- Bake in very hot oven until brown (about 15 minutes).
Notes
- Result: one pan crackling bread serving 6. Total cost: about $250, depending upon size of pig. Some historians say this recipe alone fell the Confederacy.
↑ Back to top
Cranberry and Orange Almond Rugelach

Tags: Pastry
Ingredients
- 1-7 oz box Odense Almond Paste (grated using large hole side of box grater)
- 2 cups flour
- 1/4 teaspoon salt
- 1-8 oz package chilled cream cheese, cut into 1/2 inch pieces
- 2 sticks chilled butter (1 cup), cut into 1/2 inch pieces
- 1 cup almonds
- 1-6 oz package sweetened dried cranberries
- 1 teaspoon grated orange rind
- 1-18 oz jar orange marmalade
- 1 beaten egg
- Granulated sugar for dusting
Crust:
Filling:
Steps
- Combine Almond Paste (grated using large hole side of box grater), flour and salt in a food processor fitted with a metal blade. Pulse to combine.
- Add cream cheese and butter. Pulse until mixture looks like coarse corn meal.
- Pour dough out onto a lightly floured work surface. Press and knead into a ball and divide into 4 equal balls. Shape each ball into a flat disk, about 5 inches, and wrap well. Refrigerate while making filling.
- In processor bowl, combine almonds, cranberries and rind. Pulse until very finely chopped. Set aside.
- Preheat oven to 375°F. Line cookie sheets with parchment paper or foil.
- On a lightly floured table, roll one of the disks into a 9 inch circle, keeping other disks refrigerated. Use a 9 inch plate or cake pan for a guide and trim edges neatly. Save trimmings for 5th circle.
- Spread 3 tablespoons of marmalade over dough. Sprinkle 1/2 cup of filling over marmalade. Press firmly into dough. Cut circle into 12 equal pie shaped wedges.
- Beginning with the wide end of the wedge, roll cookie to the point. Shape into a crescent and place on cookie sheets.
- Brush rugelach with egg and sprinkle with sugar. Bake for 22-25 minutes or until golden. Cool on wire rack. Repeat with remaining disks.
↑ Back to top
Cranberry Coffee Cake with Almond Crunch
Adapted from https://www.kingarthurbaking.com/recipes/cranberry-coffee-cake-with-almond-crunch-recipe

Tags: Cakes and Pastries
Servings: one 8” square or 9”
round coffee cake
Ingredients
- one 8” square or 9” round coffee cake
- Crumbs
- 1 cup (120g) King Arthur Unbleached All-Purpose Flour
- 6 tablespoons (75g) granulated sugar
- 2 tablespoons (14g) confectioners' sugar, sifted if lumpy
- 1/4 teaspoon table salt
- 6 tablespoons (85g) unsalted butter, cut into 1/2" cubes; at room temperature
- 2 teaspoons King Arthur Pure Vanilla Extract
- 1/4 cup (36g) whole almonds, roughly chopped
- Cake
- 2 cups plus 1 tablespoon (248g) King Arthur Unbleached All-Purpose Flour, divided
- 3/4 cup (149g) granulated sugar
- 1 1/2 teaspoons baking powder
- 3/4 teaspoon table salt
- 1/2 teaspoon baking soda
- 8 tablespoons (113g) unsalted butter, cut into 1/2" cubes; at room temperature
- 2 large eggs
- 2 teaspoons King Arthur Pure Vanilla Extract
- 1/2 teaspoon almond extract
- 1 cup (227g) sour cream or plain Greek yogurt
- 1/2 cup (49g) cranberries, fresh or frozen; roughly chopped
- Glaze
- 2 tablespoons (13g) cranberries, fresh or frozen; roughly chopped
- 2 tablespoons (28g) water, hot
- 3/4 cup (85g) confectioners' sugar, sifted if lumpy
- 1/4 teaspoon almond extract
SAVE RECIPE
PRINT:
* Whole milk or
full-fat yogurt (about 5% fat) preferred for the most tender cake.
* Or dust with Snow
White Non-Melting Sugar or confectioners’ sugar.
Steps
- Preheat the oven to 350°F. Prepare an 8" square pan with a parchment sling or reusable silicone liner, then lightly grease the sides of the pan. Alternatively, line a 9" cake pan with a round piece of parchment or round reusable liner and lightly grease the sides.
- To make the crumbs: Weigh your flour; or measure it by gently spooning it into a cup, then sweeping off any excess. In a medium bowl, whisk together the flour, sugars, and salt. Add the butter and vanilla; toss to combine. Using a bowl scraper, a fork, or your fingers, work in the butter until crumbs form and no dry spots remain. The crumbs should be irregular, ranging in size from a pea to walnut.
- Add the almonds and toss until incorporated. Set aside.
- To make the cake: In a large bowl or bowl of a stand mixer, combine 2 cups (240g) of the flour, sugar, baking powder, salt, and baking soda. Add the butter and mix at low speed using an electric hand mixer or the flat beater attachment of a stand mixer until the mixture looks sandy, about 1 to 2 minutes. (This mixing method is called reverse creaming , also known as the paste method.)
- Beat in the eggs and extracts, then mix until no dry spots of flour remain. Stop the mixer and scrape the bowl and beater attachment as needed; the mixture will be thick.
- Add the yogurt or sour cream all at once before starting to mix. Stir until the batter is smooth. Stop to scrape the bowl and then mix again at medium-low speed for 30 seconds to 1 minute; this final mix is key to ensuring the best texture, so don’t skip it.
- Combine the cranberries with the remaining 1 tablespoon (8g) flour and toss to combine. Add the floured-coated cranberries (and any residual flour) to the batter and mix until incorporated.
- To assemble and bake the cranberry coffee cake: Transfer the batter into the prepared pan and spread it evenly all the way to the edges. (A small offset spatula is a helpful tool here.)
- Sprinkle the crumbs evenly over the top of the batter. Gently press to adhere.
- Bake the cranberry coffee cake for 52 to 56 minutes, until it's set in the middle and the crumbs are golden brown. (Check for doneness after 52 minutes and add additional time only as needed to avoid overbaking.) The coffee cake is done when a toothpick or paring knife inserted into the center comes out with just a few moist crumbs clinging to it.
- Remove the cranberry coffee cake from the oven and allow it to cool in the pan for 20 minutes. While the coffee cake is cooling, prepare the glaze.
- To make the glaze: Finely dice the cranberries and place them in a small bowl. Pour the hot water over the diced cranberries, then cover for 10 minutes.
- Strain the cranberries through a fine-mesh strainer, reserving the cranberry liquid. Press firmly to release the most vibrant and flavorful liquid; discard the diced cranberries.
- In a separate small bowl, combine the confectioners’ sugar, almond extract, and 2 teaspoons of the cranberry liquid. Add additional cranberry liquid (1/2 to 1 teaspoon) as needed until the glaze is the consistency of molasses.
- Gently lift the cranberry coffee cake from the pan using the overhanging edges of the parchment as handles. (If you used a silicone liner or parchment round, run a nylon spreader or dull knife around the edges of the pan to loosen the cake and then gently tip it out.) Place the cake, still on the parchment if a sling was used, on a wire rack to cool slightly.
- Drizzle the glaze over the cranberry coffee cake, or finish by dusting it with non-melting sugar or confectioners’ sugar. Cut into slices and serve slightly warm or at room temperature.
- Storage information: Store leftover cranberry coffee cake, well wrapped, at room temperature for several days; freeze for longer storage.
Notes
- For easiest handling, cut your butter into cubes while it’s still cold and then let it come to room temperature. Cubing room temperature butter can be messy.
- Fresh or frozen cranberries are best used in this coffee cake to provide pops of tart cranberry flavor. We do not recommend using dried cranberries in this instance.
- Looking for more incredible coffee cake? Check out the other flavorful variations of this coffee cake. Bake them all to find your favorite!
- Want to make this coffee cake gluten-free? For great results, substitute King Arthur Gluten-Free Measure for Measure Flour for the all-purpose flour in this recipe, and make sure all your other ingredients are gluten-free. When making the crumbs, melt the butter before incorporating it into the dry ingredients. Be sure to bake thoroughly; gluten-free baked goods often need a bit more time in the oven.
↑ Back to top
Cranberry Orange Cookies

Tags: Cookies
Ingredients
- 1 cup butter (unsalted, at room temperature)
- 1 cup granulated sugar
- 1 large egg
- 1 tablespoon orange zest
- 1 teaspoon vanilla extract
- 2 tablespoon orange juice (freshly squeezed)
- 2 ¼ cups all-purpose flour
- ¾ teaspoon baking soda
- ½ teaspoon salt
- 2 cups fresh cranberries (or frozen, chopped)
- 1 cups icing sugar
- 2 tablespoon orange juice (freshly squeezed)
- Before You Begin! If you make this, please leave a review and rating letting us know how you liked this recipe! This helps our business thrive & continue providing free recipes.
Cookies
Glaze
Steps
- Prep: Preheat the oven to 375°F. Line a baking sheet with parchment paper and set aside.
- Mix Wet Ingredients: In the bowl of your mixer, add the butter and sugar and mix on medium speed for 2 minutes. Add the egg, orange zest, vanilla and orange juice and mix for 1 more minute until well combined. Scrape down the sides of the bowl.
- Add Dry Ingredients: Add the flour, baking soda and salt to the mixer and mix on low until just combined. Fold in the chopped cranberries.
- Form Cookies: Using a medium cookie scoop, scoop out cookie balls and place them on the prepared baking sheet.
- Bake: Transfer the baking sheet to the preheated oven and bake for 9 to 11 minutes, or until the edges of the cookies are slightly golden. Do not over-bake.
- Cool: Cool the cookies on the baking sheet for 5 minutes, then transfer to a cooling rack to finish cooling.
- Make Glaze & Set: Whisk together the icing sugar and orange juice in a medium size bowl. Using a teaspoon, drizzle glaze over each cookie. Allow the glaze to set before serving.
Notes
- If you want to skip the glaze, be my guest! I like the sweetness it adds to the cookie. It really compliments the flavors.
- Fresh or frozen cranberries and fresh oranges are a must in my opinion!
- Do not ever grease your cookie sheets. I always line them with parchment paper or a silpat and this way there’s no cleaning required afterwards.
- Make sure you DO NOT over bake your cookies. Keep in mind that they will continue to bake once you take them out of the oven.
- Use a medium cookie scoop to form your cookies perfectly.
- Store leftovers cookies in an airtight container, in the fridge for up to a week. If you have any leftover glaze, it can be stored in an airtight container in the fridge for up to a week as well.
- To freeze them, store them in an airtight container for up to a month.
↑ Back to top
Cranberry Sauce
Tags: Condiments
Holidays Sauces
I made this. Is starred. Rated 5/5
Ingredients
- 3/4 cup water
- 1 cup sugar
- 1/4 teaspoon salt
- 1 ounce bag cranberries picked through
Steps
- Bring water, sugar, and salt to boil in medium
- nonreactive saucepan over high heat, stirring
- occasionally to dissolve sugar. Stir in
- cranberries; return to boil. Reduce heat to
- medium; simmer until saucy, slightly thickened,
- and about two-thirds of berries have popped open,
- about 5 minutes. Transfer to nonreactive bowl,
- cool to room temperature, and serve. (Can be
- covered and refrigerated up to 7 days; let stand
- at room temperature 30 minutes before serving.)
- Orange juice adds little flavor, but we found that
- zest and liqueur pack the orange kick we were
- looking for in this sauce.
- Follow recipe for Simple Cranberry Sauce, heating
- 1 tablespoon grated orange zest with sugar
- mixture. Off heat; stir in 2 tablespoons orange
- liqueur (such as Triple Sec or Grand Marnier).
- This recipe published with BigOven, and can be imported instantly by BigOven users viewing this page. Download your free trial at www.bigoven.com.
CRANBERRY-ORANGE SAUCE:
Notes
- FAVORITE
↑ Back to top
Cream Cheese Pound Cake
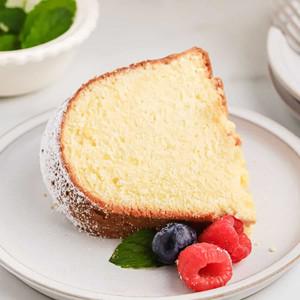
Tags: Baking
Cakes and Pastries
Ingredients
- 1 ½ cups unsalted butter room temperature
- 2 tablespoons oil or shortening
- 8 ounces cream cheese, room temperature one brick
- 2 3/4 cups granulated sugar
- 6 large eggs room temperature
- 3 cups sifted cake flour
- 1/2 teaspoon salt
- 1 tablespoon vanilla extract
- powdered sugar for garnish
Steps
- Start by preheating your oven to 325°F then liberally spray a 12-cup bundt pan with non-stick baking spray or greasing with butter or shortening and then flour.
- In your mixer bowl, add butter, oil or shortening, and cream cheese and beat for 2 minutes on high speed. Slowly add in sugar beat on high speed for an additional seven minutes until very pale yellow and fluffy. There is no leavening in this cake because we add ample air to this cake by having a very long creaming period.
- Next, add eggs, one at a time, combining well after each addition and scraping down the sides as needed.
- Turn your mixer down to its lowest speed, and slowly add flour into batter in two increments then add salt. Be careful not to overbeat.
- Lastly, add in vanilla extract, scrape down sides and mix until just combined and turn off mixer.
- Pour cake batter into prepared bundt pan, and bake for 1 hour and 15 -20 minutes or until a toothpick inserted in the center of the cake comes out clean.
- Cool in pan on a wire rack for 10 minutes, then invert cake on serving plate for at least an hour or until the cake is cool to the touch.
- Dust with powdered sugar and serve.
Notes
- Don’t underestimate the importance of the creaming process! This step involves mixing the fat and sugar together. As you cream, the jagged edges of the sugar crystals drag in air, lightening the butter and creating a fluffy mixture. This is what makes for the most tender and moist cake ever!
- Room temperature butter and cream cheese are essential! It speeds things up but also ensures that you incorporate enough air during the cream process.
- Make sure that you do not over mix once you add your flour to this cake. Because flour has gluten, if you over mix it, the texture will change. As soon as your flour is incorporated into the batter, stop mixing.
- Be sure to grease your Bundt pan VERY well. Even the non-stick pans need a little extra love. This homemade cake release is a godsend but you can totally use a spray or butter and a dusting of flour.
↑ Back to top
Cream Filled Cupcakes

Ingredients
- 3 cups all-purpose flour
- 2 cups white sugar
- 1/3 cup unsweetened cocoa powder
- 2 teaspoons baking soda
- 1 teaspoon salt
- 2 eggs
- 1 cup milk
- 1 cup water
- 1 cup vegetable oil
- 1 teaspoon vanilla extract
- 1/4 cup butter
- 1/4 cup shortening
- 2 cups confectioners' sugar
- 1 pinch salt
- 3 tablespoons milk
- 1 teaspoon vanilla extract
Steps
- Preheat oven to 375 degrees F (190 degrees C). Line 36 muffin cups with paper liners.
- In a large bowl, mix together the flour, sugar, cocoa, baking soda and 1 teaspoon salt. Make a well in the center and pour in the eggs, 1 cup milk, water, oil and 1 teaspoon vanilla. Mix well. Fill each muffin cup half-full of batter.
- Bake in the preheated oven for 15 to 20 minutes, or until a toothpick inserted into the center of the cake comes out clean. Allow to cool.
- Make filling: In a large bowl, beat butter and shortening together until smooth. Blend in confectioners' sugar and pinch of salt. Gradually beat in 3 tablespoons milk and 1 teaspoon vanilla. beat until light and fluffy. Fill a pastry bag with a small tip. Push tip through bottom of paper liner to fill each cupcake.
Notes
- FAVORITE
↑ Back to top
Cream Puffs and Éclairs

Servings: 12 cream puffs or 20 to
24 éclairs
Ingredients
- Choose your measure: Volume Ounces Grams
- 1 cup water
- 1/2 cup (8 tablespoons) unsalted butter
- 3/8 teaspoon salt
- 1 1/4 cups King Arthur Unbleached All-Purpose Flour
- 4 large eggs
- 2 cups heavy or whipping cream
- 1/4 cup granulated sugar, or to taste
- 1 teaspoon vanilla extract
- pastry cream filling
- 1 cup chocolate chips or chopped semisweet chocolate
- 1/2 cup heavy or whipping cream
PASTRY SHELLS:
CREAM PUFF
FILLING:
CHOCOLATE
ÉCLAIR FILLING:
* See easy
substitute in tips, below.
ICING:
Steps
- Before you begin: note that the pastry recipe will make 12 cream puffs OR 20 to 24 éclairs. The filling recipes (whipped cream, and pastry cream) make enough for 12 pastries each. The icing recipe is a generous amount for icing 2 dozen éclairs. If you simply want to drizzle the éclairs with icing, cut both the chocolate and cream in half.
- Preheat the oven to 425°F. Lightly grease (or line with parchment) two baking sheets.
- Combine the water, butter, and salt in a medium-sized saucepan, heat until the butter has melted, and bring to a rolling boil.
- Remove the pan from the heat, and add the flour all at once, stirring vigorously.
- Return the pan to the burner and cook over medium heat, stirring all the while, until the mixture smooths out and follows the spoon around the pan; this should take less than a minute.
- Remove the pan from the heat, and let the mixture cool for 5 to 10 minutes. It'll still feel hot, but you should be able to hold a finger in it for a few seconds. If you have an instant-read thermometer, the temperature should be below 125°F.
- Transfer the mixture to a mixer, and beat in the eggs one at a time; it'll look curdled at first, but when you add the last egg it should become smooth. Beat for at least 2 minutes after adding the last egg.
- Using a generously filled tablespoon cookie scoop, or a level muffin scoop, drop the thick batter onto the prepared baking sheets in 3- to 4-tablespoon mounds. Space the mounds about 3" apart, to allow for expansion. For éclairs, pipe the batter into 5" logs about 1/2" to 3/4" in diameter.
- Bake the pastries for 15 minutes, then reduce the oven temperature to 350°F and bake for an additional 25 minutes, until pastries are a medium golden brown. Don't open the oven door while the pastries are baking.
- Remove the pastries from the oven. Make a small slit in the top of each, and return them to the oven for 5 minutes, to allow the steam to escape. Place them on a rack to cool. When they're cool enough to handle, split each in half to make top and bottom pieces; splitting and exposing the centers to air will help keep them from becoming soggy.
- To make the cream puff filling: Pour the cream into a mixing bowl, and begin to whip it on high speed (using your mixer's whisk attachment, if you have one). Sprinkle in the sugar gradually as the cream whips. Whip until stiff, but be careful not to over-whip; cream should still look smooth.
- Fill the bottom halves of the puffs with whipped cream, then replace their tops. Dust with confectioners' sugar, and serve.
- To make the éclair filling: Prepare your favorite pastry cream filling; see tips below for our favorite. You'll need about 3 cups of filling.
- Spoon the filling into the éclair shells.
- To make the icing, place the chocolate chips or chunks and cream in a microwave-safe bowl or measuring cup.
- Heat over low heat (or in the microwave) until the cream is very hot.
- Remove from the heat, and stir until the chocolate melts and the icing is smooth. Spoon over the éclairs, spreading to the edges. Serve immediately.
Notes
- Want to make profiteroles? Fill cream puff shells with ice cream, and drizzle with the sauce of your choice; chocolate is traditional.
- Our pastry cream filling mix is a real time-saver; you'll need about 3 cups. Or, pour 3 cups milk into a bowl (the higher-fat the milk, the richer the filling); add the contents of 2 regular-size boxes of vanilla instant pudding mix, plus 2 teaspoons vanilla extract. Beat until thick, and refrigerate until ready to use.
- If you want to make the whipped cream a day ahead, be sure to stabilize it with whipped cream stabilizer. If you don't, it'll become watery overnight.
- To shape éclairs without a pastry bag, place a sandwich bag into a glass, rolling its edge over the rim to hold it in place. Spoon the batter into the bag. Cut off 1 corner of the bag, making a 1/2" cut. Squeeze the batter onto the baking sheet through the hole in the corner.
- Want to prepare pastries ahead? Make the shells, and store them at room temperature, lightly covered. Your best bet is to whip the cream no more than several hours ahead of time, unless you stabilize it with whipped cream stabilizer (see tip above). Pastry cream filling/pudding can be made several days ahead. Icing can be made several days ahead, and reheated. Fill (and ice) pastries just before serving.
↑ Back to top
Creamy Alka-Seltzer Nacho Cheese Sauce

Servings: 2/3 cup
Ingredients
- 1/4 cup ( 60 ml) water
- 2 original flavor, non-aspirin Alka-Seltzer tablets (see note)
- 2 tablespoons ( 30 g) unsalted butter
- 1 1/2 cups shredded melting cheese ( 5 1/4 ounces; 150 g), such as cheddar, Gruyere, Swiss, provolone, and/or Jack
- Optional Flavorings
- 1/2 teaspoon pickled jalapeño juice
- 1/2 teaspoon yellow mustard
- 1/4 teaspoon cayenne pepper
Steps
- In a microwave-safe bowl, stir together water and Alka-Seltzer. Let stand until fizzing stops, about 1 minute.
- Add butter to the bowl and microwave until the butter is melted, about 30 seconds.
- Add the shredded cheese to the bowl. Microwave in 30-second increments until cheese is melted and bubbly.
- Using a fork or small whisk, stir until the sauce is smooth, adding any optional flavorings if desired. Let stand until perfectly thickened, 1 to 2 minutes.
- Special Equipment
- Microwave and microwave-safe bowl
Notes
- It is essential that you use non-aspirin Alka-Seltzer, which is often sold under the Alka-Seltzer Gold label. Do not—we repeat: DO NOT—make this cheese sauce with Alka-Seltzer with aspirin; doing so could pose a significant health risk, as aspirin is a potent medicine with potentially dangerous side effects,the dosage would be particularly unsafe in this sauce, and heating the aspirin can increase its potency even more. We also recommend reading the full Alka-Seltzer ingredient list just in case it contains anything you or a diner may be specifically allergic to.
- This sauce can also be made on stove top: In a saucepan, combine water with Alka-Seltzer and let stand until fizzing ceases. Add butter and heat over medium heat until melted, then whisk in shredded cheese until fully melted and a smooth sauce has formed. Season with flavorings of choice, let cool slightly, then use as desired.
↑ Back to top
Creamy Banana Pudding
Servings: Makes about 8 5-ounce
servings
Ingredients
- 28 ounces milk, any percentage will do (about 3 1/2 cups; 790g)
- 16 ounces peeled, ripe banana from about 5 medium bananas, sliced into 1/2-inch pieces (about 3 cups; 455g)
- 1 empty vanilla bean pod, left over from another project, optional
- 7 ounces plain or toasted sugar (about 1 cup; 195g)
- 1 1/4 ounces cornstarch (about 1/3 cup; 35g)
- 1/2 teaspoon (2g) Diamond Crystal kosher salt; for table salt, use about half as much by volume or the same weight
- 1/8 teaspoon (.5g) ground cloves
- 5 ounces egg yolk (from about 10 large eggs; 140g)
- 1/4 ounce vanilla extract (1 1/2 teaspoons; 7g)
Steps
- Infuse the Milk: Combine milk, sliced banana, and empty vanilla bean pod (if using) in 3-quart stainless steel saucier and bring to simmer over medium heat, stirring from time to time with flexible spatula to prevent scorching along bottom. When dairy comes to simmer, remove from heat, cover, and let stand until cooled to room temperature, about 4 hours. Proceed to next step or refrigerate up to 24 hours to extract stronger banana flavor. The exact timing will depend on both personal preference and convenience.
- Make the Custard: Return banana milk to simmer over medium heat, stirring as before; then strain through a fine-mesh sieve into medium bowl. Press gently on banana pulp to release liquid, but don't allow pulp to pass through sieve. The pulp can be refrigerated to use in muffins, pancakes, or smoothies, but it will not benefit the custard. If using vanilla pod, scrape out the flavorful milk inside each half with flexible spatula before discarding.
Using same 3-quart saucier as before (no need to wash), whisk sugar,
cornstarch, salt, and cloves together until well combined, followed by
egg yolks. Whisk in infused milk. Return to stovetop and warm over
medium-low heat, whisking gently until custard is steaming hot, about
5
minutes.
Increase heat to medium and continue cooking until custard thickens,
about 5 minutes longer. When it begins to bubble, set timer and
continue whisking for 90 seconds. This step is important to neutralize
starch-dissolving protein found in egg yolks. Off-heat, stir in
vanilla
extract and season to taste with additional vanilla, salt, or cloves,
as needed. If desired, strain custard through same sieve as before
(again, no need to wash) to remove bits of chalazae that may remain or
any accidentally curdled custard.
Portion warm custard into parfait dishes and serve immediately, plain
or topped with toasted nuts, cocoa nibs, fresh fruit, unsweetened
whipped cream, or whatever toppings you desire.
↑ Back to top
Creamy Dreamy Cookie
Ingredients
- 3/4 cup Creamy Peanut Butter
- 1 stick butter
- 1 1/4 cups firmly packed brown sugar
- 3 tablespoons milk or Godiva Chocolate liqueur
- 1 tablespoon vanilla extract
- 1 large egg
- 1 3/4 cups All Purpose Flour
- 3/4 teaspoon baking soda
- 3/4 teaspoon salt
- 1/2 cup Nutella- Chocolate Hazelnut spread
- 1/2 (12oz) bag of Milk Chocolate chips
- 1/2 cup of Shredded Coconut (optional)
- Parchment Paper –Place on baking sheet
Steps
- HEAT oven to 375°F. Combine peanut butter, butter, brown sugar, milk/Godvia and vanilla in large bowl. Beat at medium speed of electric mixer until well blended. Add egg. Beat just until blended.
- COMBINE flour, baking soda and salt. Add to creamed mixture at low speed. Mix just until blended.
- MIX in Nutella, Chocolate Chips and Coconut so they are even throughout the mixture.
- DROP by rounded tablespoonful’s 2-inches apart onto greased baking sheet. Flatten slightly.
- BAKE one baking sheet at a time 7 to 8 minutes, or until set and just beginning to brown. Cool 2 minutes on baking sheet. Remove cookies to cooling racks to cool completely.
Notes
- FAVORITE
↑ Back to top
Creamy Homemade Yogurt

Tags: Dairy
Homemade
Servings: 1 3/4 quarts
Ingredients
- 2 quarts whole milk, the fresher the better
- ¼ cup heavy cream (optional)
- 3 to 4 tablespoons plain whole milk yogurt with live and active cultures
Steps
- Rub an ice cube over the inside bottom of a heavy pot to prevent scorching (or rinse the inside of the pot with cold water). Add milk and cream, if using, and bring to a bare simmer, until bubbles form around the edges, 180 to 200 degrees. Stir the milk occasionally as it heats.
- Remove pot from heat and let cool until it feels pleasantly warm when you stick your pinkie in the milk for 10 seconds, 110 to 120 degrees. (If you think you’ll need to use the pot for something else, transfer the milk to a glass or ceramic bowl, or else you can let it sit in the pot.) If you’re in a hurry, you can fill your sink with ice water and let the pot of milk cool in the ice bath, stirring the milk frequently so it cools evenly.
- Transfer 1/2 cup of warm milk to a small bowl and whisk in yogurt until smooth. Stir yogurt-milk mixture back into remaining pot of warm milk. Cover pot with a large lid. Keep pot warm by wrapping it in a large towel, or setting it on a heating pad, or moving to a warm place, such as your oven with the oven light turned on. Or just set it on top of your refrigerator, which tends to be both warm and out of the way.
- Let yogurt sit for 6 to 12 hours, until the yogurt is thick and tangy; the longer it sits, the thicker and tangier it will become. (I usually let it sit for the full 12 hours.) Transfer the pot to the refrigerator and chill for at least another 4 hours; it will continue to thicken as it chills.
- If you want to make Greek yogurt, set a colander or sieve over a bowl and line the colander with cheesecloth. Take your finished yogurt, either before or after you've chilled it, pour the yogurt into the colander, and let it sit in the refrigerator for 2 to 6 hours to drain. (Keep an eye on it, and when it looks thick enough to your liking, transfer it to a jar; if it becomes too thick, stir some of the whey back in.) Reserve remaining whey for smoothies, soups or lemonade, or for marinating poultry.
- Hungry for more recipes? Get recipes, tips and special offers in your inbox. Opt out or contact us anytime.Sign Up
Notes
- All 387
- Most Helpful 161
- Private 0
- Linty2 years ago
- A crockpot is the way to go: Heat on high for 2 hours and 45 minutes or until 180 degrees. Put a towel under the lid to absorb moisture. Let cool 3 hours or until 110 degrees. Remove skin if needed. Add 1/2 c. yogurt. Do not stir.
- Wrap and/or put in warm place for 12 hours.
↑ Back to top
Creamy White Chili

Ingredients
- 1 pound boneless skinless chicken breasts, cut into 1/2-inch cubes
- 1 medium onion, chopped
- 1 to 1/2 teaspoons garlic powder
- 1 tablespoon canola oil
- 2 cans (15-1/2 ounces each) great northern beans, rinsed and drained
- 1 can (14-1/2 ounces) chicken broth
- 2 cans (4 ounces each) chopped green chilies
- 1 teaspoon salt
- 1 teaspoon ground cumin
- 1 teaspoon dried oregano
- 1/2 teaspoon pepper
- 1/4 teaspoon cayenne pepper
- 1 cup (8 ounces) sour cream
- 1/2 cup heavy whipping cream
Steps
- In a large saucepan, saute the chicken, onion and garlic powder in oil until chicken is no longer pink. Add the beans, broth, chilies and seasonings. Bring to a boil. Reduce heat; simmer, uncovered, for 30 minutes.
- Remove from the heat; stir in sour cream and cream. Yield: 7 servings.
Notes
- FAVORITE
↑ Back to top
Creamy, Nutty Za’Atar Roasted Carrot Dip

Servings: 4
Ingredients
- 4 medium carrots (4 ounces; 113 g each), peeled and cut into 1-inch pieces
- 4 medium cloves garlic (about 3/4 ounces; 20 g)
- 2 teaspoons za’atar, homemade or store-bought (see notes)
- 1/4 cup ( 60 ml) extra-virgin olive oil, divided
- 2 tablespoons ( 30 ml) fresh lemon juice from 1 medium lemon
- 2 tablespoons ( 30 ml) tahini
- 1 1/2 teaspoons Diamond Crystal kosher salt; for table salt, use half as much by volume
- 1/4 teaspoon Aleppo pepper, plus more for garnish
- 1/4 cup ( 60 ml) ice-cold water, plus more as needed
- 1/4 cup salted roasted pistachios ( 1 ounce; 30 g), coarsely chopped
- Pita chips for serving
Steps
- Adjust oven rack to middle position and preheat oven to 400°F (205°C). On a 13- by 18-inch rimmed baking sheet, toss carrots, garlic, and za’atar with 1 tablespoon of olive oil until evenly coated. Roast until tender, 30 to 35 minutes, tossing halfway through.
- Let carrots cool slightly, about 5 minutes. In a blender, combine roasted carrots, lemon juice, tahini, salt, Aleppo pepper, and 2 tablespoons oil. Blend until a thick paste forms, about 2 minutes, stopping to scrape down sides as needed.
- With the blender running, slowly pour ice-cold water through the opening of the lid. Blend until smooth and creamy, about 2 minutes. If necessary, add additional water, 1 tablespoon at a time, until carrot mixture reaches desired consistency.
- Transfer carrot mixture to a shallow serving bowl; drizzle with remaining 1 tablespoon oil, sprinkle with chopped pistachios, and garnish with additional Aleppo pepper. Serve with pita chips.
↑ Back to top
Crema De Coco
Adapted from https://patijinich.com/recipe/crema-de-coco/

Ingredients
- 3/4 cup sweetened coconut flakes or angel flakes
- 1/4 teaspoon fleur de sal or sea salt
- 1/2 teaspoon ground canela or true cinnamon
- 2 14-ounce cans coconut milk
- 1 14-ounce can sweetened condensed milk
- 1/2 cup cornstarch
- 1 cup milk
Steps
- Preheat oven to 325 degrees Fahrenheit.
- Spread the sweetened coconut flakes on a small baking sheet, sprinkle with the salt and cinnamon, and mix and spread again. Bake 7 to 8 minutes, or until the coconut flakes barely begin to toast (don't let them brown entirely). They should be slightly crisp and still chewy. Remove from the oven and immediately transfer to a small bowl.
- Pour the coconut milk and sweetened condensed milk into a medium saucepan.
- In a small bowl, mix the cornstarch with the regular milk and stir until completely dissolved. Pour it into the pan with the coconut milk and sweetened condensed milk.
- Place the saucepan over medium heat and cook, stirring continuously, until the mixture begins to simmer and thicken, about 8 to 10 minutes, until it coats the back of a wooden spoon. Remove from heat.
- Immediately ladle into custard bowls or ramekins, sprinkle with the toasted coconut. Serve warm right away. Or serve cold later on by letting cool completely, then covering with plastic wrap and chilling in the refrigerator for a couple of hours.
Notes
- FAVORITE
↑ Back to top
Creme Brulee French Toast
Ingredients
- 1 stick butter
- 1 cup brown sugar
- 2 tbsp corn syrup
- Crusty bread
- 5 large eggs
- 1-½ cup half and half
- 1 tsp vanilla\
- 1tbsp Grand Marnier
- ¼ tsp salt
Steps
- Melt butter and brown sugar in small heavy saucepan
Pour into 9x13 pan
Cut bread 1 inch thick
arrange on top of sugar mixture
Whisk together all other
ingredients until well combined and pour over bread
cover and chill for 8 hours
but not longer than 1 day
Bake at 350° 35-40 minutes
serve with fruit, syrup,
powdered sugar or whipped cream
↑ Back to top
Creme Brulee French Toast

Servings: YIELD 6 servings ACTIVE
TIME 20 mins
Ingredients
- 1/2 cup unsalted butter
- 1 cup packed brown sugar
- 2 tablespoons corn syrup
- 6 (1-inch thick) slices French bread
- 5 eggs
- 1 1/2 cups half-and-half cream
- 1 teaspoon vanilla extract
- 1 teaspoon brandy-based orange liqueur (such as Grand Marnier®)
- 1/4 teaspoon salt
Steps
- Melt butter in a small saucepan over medium heat. Mix in brown sugar and corn syrup, stirring until sugar is dissolved. Pour into a 9x13 inch baking dish.
- Remove crusts from bread, and arrange in the baking dish in a single layer. In a small bowl, whisk together eggs, half and half, vanilla extract, orange brandy, and salt. Pour over the bread. Cover, and chill at least 8 hours, or overnight.
- Preheat oven to 350 degrees F (175 degrees C). Remove the dish from the refrigerator, and bring to room temperature.
- Bake uncovered 35 to 40 minutes in the preheated oven, until puffed and lightly browned.
Notes
- FAVORITE
↑ Back to top
Creme Caramel
Adapted from https://www.kalofagas.ca/2017/11/15/creme-caramel/

Tags: Puddings
Ingredients
- 4 cups milk + 1 cup full fat (whipping) cream
- 2 tsp vanilla extract
- 200 g sugar
- 4 eggs
- 8 egg yolks
- 1 cup sugar
- 2 tbsp water
- Preheat the oven to 350 degrees Fahrenheit.
Steps
- Put the eggs and the 1 cup of sugar in a stainless steel bowl and mix them. Put the milk and cream in a medium pot and add your vanilla. Over a medium-high heat, bring the milk to just below a boil. Remove it from the heat. Pour the milk over the egg mixture stirring while you do so. Mix well. Let the mixture cool.
- Meanwhile, make your caramel. Put the sugar (200 gr) and the water in a small non-stick pan over a medium heat. Wait until the sugar caramelizes and turns a nut-brown colour (colour of a penny). Remove the pan from the heat and pour a small amount of the caramel into the bottom of each ramekin. Allow it to set.
- Pour the custard mix over the caramel in each ramekin. Pour hot water (bain-marie) halfway up the ramekins and bake for 40-45 minutes. When cooled place in the refrigerator over night, then unmold them by running a knife around the edge, placing the plate on top then inverting the custard onto the plate.
↑ Back to top
Creole Seasoning
Ingredients
- 1/3 cup cayenne pepper
- 1 teaspoon sweet paprika
- 1/4 cup kosher salt
- 1/4 cup freshly ground white pepper
- 3 tablespoons dried thyme
- 1 tablespoon freshly ground black pepper
- 2 teaspoons dried sage
- 1 teaspoon onion powder
- 1 teaspoon garlic powder
Steps
- Add all ingredients to airtight container and shake to combine. Store up to 3 months.
Notes
- FAVORITE
↑ Back to top
Creole-Style Red Jambalaya with Chicken, Sausage, and
Shrimp
Servings: 8
Ingredients
- 1 (28-ounce; 795 g) can peeled whole tomatoes, packed in juice (see note)
- About 3 cups (720ml) homemade chicken stock or low-sodium store-bought broth, plus more as needed
- 1 1/4 pounds (565g) boneless, skinless chicken thighs
- Kosher salt and freshly ground black pepper
- 1 tablespoon (15ml) vegetable, canola, or other neutral oil, plus more if needed
- 3/4 pound (340g) cooked Cajun or Creole sausage, such as andouille or chaurice (or other similar smoked or spiced pork sausage), sliced into thin rounds
- 1 medium yellow onion (8 ounces; 225 g), diced
- 2 medium green bell peppers (10 ounces total; 280g), stemmed, seeded, and diced
- 4 celery ribs ( 6 ounces total; 170g), diced
- 4 medium cloves garlic, minced
- 1 teaspoon (5ml) tomato paste
- 1 tablespoon (15ml) Louisiana-style hot sauce, plus more for serving
- 2 teaspoons minced fresh thyme leaves or 1 teaspoon dried thyme
- 1 teaspoon dried oregano
- 1/4 teaspoon cayenne pepper, or to taste
- 1/4 teaspoon garlic powder
- 2 bay leaves
- 2 cups long-grain rice (12 ounces; 370 g)
- 3/4 pound (340g) peeled and deveined shrimp
- 6 scallions, white and light green parts only, thinly sliced
Steps
- Strain tomatoes and add juice to a 4-cup measuring cup. Place tomatoes in a medium bowl. Using your fingers, carefully tear each tomato open to release the liquid inside its seed compartments. Strain all this liquid into measuring cup. Crush tomatoes well with your hands. Add enough chicken stock to tomato juices to total 4 cups (960ml). Set aside.
- Preheat oven to 325°F (160°C). Season chicken all over with salt and pepper. In a Dutch oven, heat oil over medium-high heat until shimmering. Add chicken and cook, turning, until browned on both sides, about 6 minutes per side. Transfer chicken to a cutting board and let rest for 5 minutes, then cut into 1/2-inch chunks and set aside.
- Meanwhile, add sausage to Dutch oven and cook, stirring often, until just starting to darken, about 3 minutes; lower heat and/or add oil at any point to prevent burning. Add onion, bell pepper, celery, and garlic and cook, stirring and scraping bottom of Dutch oven, until browned bits have come loose and vegetables just begin to turn lightly golden, about 8 minutes.
- Stir in tomato paste and cook, stirring, until lightly browned, about 1 minute. Add hot sauce, thyme, oregano, cayenne, garlic powder, and a very generous dose of black pepper. Add crushed tomatoes, tomato/stock mixture, diced chicken, and bay leaves and bring to a simmer. Season with salt, tasting liquid to ensure it is well seasoned.
- Stir in rice and return to a simmer. Cover with lid and transfer to oven. Bake until liquid is fully absorbed and rice is tender, about 40 minutes.
- Gently stir in shrimp and scallions and return to oven until shrimp are just cooked through, about 5 minutes. Cover pot and let rest 15 minutes. Remove bay leaves, if desired (see note).
- Serve, passing hot sauce at the table for diners to add to taste.
Notes
- You'll need the juice from the tomatoes to function as a portion of the rice-cooking liquid, so be sure to check the ingredients and get canned peeled whole tomatoes packed in juice, not in purée.
- Typically, the bay leaves in this recipe would be removed after the 15-minute rest following cooking. However, since over-stirring the jambalaya can cause the rice to break, I don't recommend digging through the rice to find the leaves. Just remove them if you see them, and otherwise be careful to avoid them while eating.
↑ Back to top
Crepe
Ingredients
- ⅓ cup flour
- ½ cup flour
- 1 egg
- dash salt
- ½ teaspoon sugar
- 2 tbsp water
- 1½ tablespoon butter
Steps
- In a medium bowl combine the flour, half the milk, egg, salt, and sugar, whisk until smooth. Add the rest of the milk and whisk in the water.
In
a 7inch non-stick pan melt the butter over medium high heat. Pour the
melted butter into the batter and whisk to combine
Using a small ladle or measuring cup, pour a scant 1/4 cup of the
batter into the pan swirl to cover the base, cook until set and begin
to brown about 1-1/2 minutes on the first side.Flip andcook 30
seconds.
↑ Back to top
Crisp Rosemary Flatbread Crackers
Ingredients
- 1 3/4 cups flour, plus more for the work surface
- 1 teaspoon baking powder
- 3/4 teaspoon salt
- 2 tablespoons coarsely chopped rosemary
- 1/2 cup water
- 1/3 cup olive oil, plus more for brushing
- Flaked sea salt, such as Maldon
Steps
- Place a heavy baking sheet on the middle rack of the oven; preheat to 450 degrees.
- Lightly flour a work surface.
- Stir together the flour, baking powder, salt and 1 tablespoon of the chopped rosemary in a mixing bowl. Make a well in the center, then add the water and oil, gradually stirring them into the flour until a soft, shaggy dough forms. Turn the dough out onto the work surface and knead gently 4 or 5 times to bring the dough together into a soft, smooth ball.
- Divide the dough into 6 equal pieces. Work with one piece at a time and keep the remaining pieces covered with plastic wrap. Divide the first piece into 4 equal pieces; roll each one out on a sheet of parchment paper into a long oval shape, roughly 2 inches wide and 9 inches long, or into a circle with a diameter of at least 5 inches. The dough should be very thin. Use the tines of a fork to prick the cracker several times.
- Alternatively, and for crisper results, use a pasta machine to roll out each piece of dough until very thin, usually the fifth setting on the machine. Transfer to a sheet of parchment paper.
- Right before baking, lightly brush the top of each cracker with oil. Scatter a little of the remaining chopped rosemary on top, then a little of the flaked salt, pressing slightly so the flakes adhere.
- Slide the parchment onto the preheated baking sheet and bake until pale golden and browned in spots, 4 to 6 minutes. Transfer the crackers to a wire rack to cool.
- Repeat to use all of the remaining dough.
Notes
- Note: The crackers can be stored in an airtight container for up to five days.
↑ Back to top
Crisp-Skinned Spatchcocked (Butterflied) Roast Turkey with
Gravy
Adapted from https://www.seriouseats.com/recipes/2012/11/butterfiled-roast-turkey-with-gravy-recipe.html
Tags: Poultry
Servings: 10 to 12
Ingredients
- 3 large onions, roughly chopped (about 1 1/2 quarts)
- 3 large carrots, peeled and roughly chopped (about 1 quart)
- 4 stalks celery, roughly chopped (about 1 quart
- 12 thyme sprigs
- 1 whole turkey (12 to 14 pounds total), butterflied according to these instructions, backbone, neck, and giblets reserved
- 2 tablespoons vegetable oil
- Kosher salt and freshly ground black pepper
- 1 1/2 quarts low-sodium homemade or store-bought chicken or turkey broth
- 2 bay leaves
- 3 tablespoons butter
- 4 tablespoons flour
Steps
- Adjust oven rack to middle position and preheat oven to 450°F. Line a rimmed baking sheet or broiler pan with aluminum foil. Scatter 2/3rds of onions, carrots, celery and thyme sprigs across bottom of pan. Place slotted broiler rack or wire rack directly on top of vegetables.
- Pat turkey dry with paper towels and rub on all surfaces with 1 tablespoon oil. Season liberally on all surfaces with salt and black pepper (if using a brined, salted, or Kosher turkey, omit salting step, see note). Tuck wing tips behind back. Place turkey on top of rack, arranging so that it does not overlap the edges, pressing down on the breast bone to flatten the breasts slightly.
- Transfer turkey to oven and roast, rotating occasionally, until an instant read thermometer inserted into the deepest part of the breast registers 150°F, and the thighs register at least 165°F, about 80 minutes.
- While turkey roasts, make the gravy. Roughly chop the neck, backbone, and giblets. Heat remaining 1 tablespoon oil in a 3 quart saucepan over high heat until shimmering. Add chopped turkey parts and cook, stirring occasionally, until lightly browned, about 5 minutes. Add remaining onions, carrots, and celery and continue to cook, stirring occasionally, until vegetables start to soften and brown in spots, another 5 minutes. Add chicken stock, remaining thyme, and bay leaves. Bring to a boil and reduce to a bare simmer. Allow to cook 45 minutes, then strain through a fine mesh strainer into a 2 quart liquid measuring cup and discard solids. Skim off any fat from the surface of the broth.
- Melt butter over medium-high heat in a 2 quart saucepan. Add flour and cook, stirring constantly until flour is golden brown, about 3 minutes. Whisking constantly, add broth in a thin, steady stream until it it all incorporated. Bring to a boil, reduce to a simmer, and cook until reduced to about 1 quart, about 20 minutes longer. Season to taste with salt and pepper, cover, and keep gravy warm.
- When turkey is cooked, remove from oven and transfer rack to a new baking sheet. Allow to rest at room temperature for 20 minutes before carving. Carefully pour any collected juices from out of the roasting pan through a fine-mesh strainer into a liquid measuring cup. Skim off excess fat and dicard. Whisk juices into gravy.
- Carve turkey and serve with gravy
↑ Back to top
Crispy Baked Potato Wedges
Servings: 4
Ingredients
- Cooking spray, for the baking sheet
- 1/4 cup (60ml) vegetable oil
- 2 1/2 pounds ( 1.1 kg) russet potatoes, washed and scrubbed
- 2 quarts (1.9L) water
- 2 tablespoons (25g) Diamond Crystal kosher salt, plus extra for seasoning; for table salt use half as much by volume or an equal amount by weight
- 1/2 teaspoon baking soda
- Freshly ground black pepper
Steps
- Adjust oven rack to lower position and preheat oven to 450°F (230°C). Spray a rimmed baking sheet with cooking spray. Pour oil over baking sheet and tilt until evenly coated with oil. Using a sharp knife, halve potatoes lengthwise. Place potato halves cut side down on cutting board and cut lengthwise into 1- to 1 1/2-inch-thick wedges (3 to 4 wedges per half potato, depending on size).
- In a large pot, bring water to a boil over high heat. Add salt, baking soda, and potatoes and stir to combine. Return to a boil, then reduce heat to a simmer, and cook until potatoes are barely tender, offering some resistance when poked with a paring knife or cake tester (the texture should be similar to that of a firm poached pear or lightly cooked apple), about 7 minutes from when potatoes are added to the pot. Drain potatoes, taking care not to break the wedges, and transfer to a large bowl.
- Season potatoes with salt and pepper and toss to coat, shaking bowl roughly, until a thick layer of mashed potato–like paste has built up on the surface of the wedges. Transfer wedges to prepared baking sheet, arranging them in a single layer with one flat cut side down, and space between each piece.
- Transfer to oven and roast, without moving, until potatoes are golden brown on bottom side, 18 to 22 minutes. Using a thin, flexible metal spatula, flip potatoes onto second flat cut side and continue to roast until golden brown on second side, 18 to 22 minutes longer.
- Transfer baking sheet to a heatproof surface, season wedges with salt and pepper to taste, and toss on baking sheet to evenly coat. Transfer to a paper towel-lined plate and blot away excess oil. Discard paper towels and serve with your favorite condiments.
↑ Back to top
Crispy Cheese- and Kimchi-Topped Skillet Rice
Tags: Cheese
Korean Rice
Servings: 4
Ingredients
- 1 tablespoon (15g) unsalted butter, softened
- 4 cups cooked short-grain rice (see notes)
- 3 tablespoons (45ml) gochujang
- 3 tablespoons (45ml) soy sauce
- 1 tablespoon (15ml) rice vinegar
- 4 thinly sliced scallions (80g), white and green parts divided
- 3 ounces ( 85 g) grated low-moisture mozzarella cheese (see notes), divided
- 2 ounces ( 57 g) grated Gruyère cheese (see notes), divided
- 5 ounces ( 141 g) chopped drained kimchi (see notes)
- 1 ounce ( 28 g) grated Cotija cheese (see notes)
Steps
- Preheat oven to 400°F (200°C). Grease a 10-inch cast iron pan with 1 tablespoon (15g) butter, making sure to fully cover both the bottom and the sides.
- In a medium mixing bowl, combine rice, gochujang, soy sauce, rice vinegar, and sliced scallion whites. Using a flexible spatula, mix thoroughly.
- Scrape half of rice mixture into buttered cast iron skillet and, using the bottom of a drinking glass or measuring cup, press down firmly to create a single even layer of seasoned rice. Distribute half of the mozzarella and Gruyère over the layer of rice, then scrape the rest of the rice mixture over grated cheese. Using the bottom of a drinking glass or measuring cup, press down firmly to create an even top layer of seasoned rice. Transfer pan to oven and cook for 35 minutes.
- Remove pan from oven. Turn off oven and turn broiler on high. While broiler preheats, top rice with chopped kimchi. Distribute remaining Gruyère and mozzarella over kimchi and sprinkle Cotija over the other cheeses.
- Place pan under broiler for about 2 minutes, or until Gruyère and mozzarella melt and bubble and Cotija begins to char in spots. Remove pan from under broiler, top with sliced scallion greens, and serve immediately.
↑ Back to top
Crispy Home Fries with Red Onions and Roasted Poblano
Pepper
Adapted from http://www.seriouseats.com/recipes/2016/06/crispy-potato-home-fries-red-onion-poblano-pepper-recipe.html

↑ Back to top
Crispy Home Fries with Red Onions and Roasted Poblano
Pepper
Adapted from https://www.seriouseats.com/recipes/2016/06/crispy-potato-home-fries-red-onion-poblano-pepper-recipe.html
Servings: 4
Ingredients
- 1 medium fresh Poblano pepper (optional; see note)
- 1 1/4 pounds (575g) small new or fingerling potatoes
- Kosher salt
- 1 tablespoon (15ml) distilled white vinegar
- 1/4 cup (60ml) vegetable oil, divided
- 1 small red onion, cut into thick slices
- 2 teaspoons (about 4g) minced fresh thyme
- Freshly ground black pepper
- Small handful minced fresh cilantro or parsley
Steps
- If using, place Poblano pepper directly over the flame of a gas burner, turning with tongs until well charred on all surfaces. Alternatively, place on a foil-lined rimmed baking sheet directly under a preheated broiler and broil, turning occasionally, until charred on all sides, about 8 minutes. Wrap charred pepper in foil to trap steam, and set aside. When cool enough to handle, carefully remove skin from pepper (it should slip right off). Remove and discard stems and seeds. Cut into strips.
- Meanwhile, place potatoes in a pot and cover with 2 quarts (2L) of cold water. Add 2 tablespoons (30g) kosher salt and vinegar. Bring to a boil over high heat and boil until potatoes are tender, about 5 minutes after they reach a boil. Drain. As soon as potatoes are cool enough to handle, split into quarters and toss with 1 tablespoon (15ml) vegetable oil in a bowl.
- To Finish: Heat 2 tablespoons (30ml) vegetable oil in a large nonstick or cast iron skillet over medium-high heat until shimmering. Add potatoes and cook, tossing, until crisp and golden brown on all sides, about 6 minutes. Return to bowl.
Add
remaining tablespoon (15ml) oil to skillet and add red onion (see
note). Cook, tossing occasionally, until softened and lightly browned,
about 6 minutes. Add thyme and cook, stirring, until fragrant, about
30
seconds. Return potatoes to skillet and add roasted pepper strips, if
using. Toss to combine and season to taste with plenty of salt and
pepper. Add cilantro or parsley and toss to combine. Serve
immediately.
Notes
- The recipe can be prepared through the end of step 2 before completing. Store the roasted chilies and the parboiled potatoes in the refrigerator for up to 3 days before continuing. I love the flavor of roasted Poblano pepper strips in this dish, but it adds quite a bit of prep time, and the home fries will be delicious even without them. If you decide not to roast the pepper, you can either omit it completely or simply slice a Poblano or bell pepper and sauté it along with the onion in step 4.
↑ Back to top
Crispy Rosemary Chicken and Fries
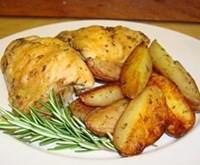
Ingredients
- 8 chicken thighs
- 6 small red potatoes, quartered
- 1/2 cup extra-virgin olive oil, or as needed
- 1 tablespoon chopped fresh rosemary
- 1 1/2 teaspoons chopped fresh oregano
- 1 1/2 teaspoons garlic powder
- salt and pepper to taste
Steps
- Preheat the oven to 375 degrees F (190 degrees C).
- Place chicken and potatoes into a large bowl. Pour olive oil over them, and stir to coat. Scatter the chicken and potato pieces in a large baking dish, or cookie sheet with sides. Sprinkle with rosemary, oregano, garlic powder, salt and pepper.
- Bake for 1 hour in the preheated oven, uncovered. Baste during the last 15 minutes for extra crispness.
Notes
- FAVORITE
↑ Back to top
Crunchy Broccoli Salad
Ingredients
- 8 cups fresh broccoli florets (about 1 pound)
- 1 bunch green onions, thinly sliced
- 1/2 cup dried cranberries
- 3 tablespoons canola oil
- 3 tablespoons seasoned rice vinegar
- 2 tablespoons sugar
- 1/4 cup sunflower kernels
- 3 bacon strips, cooked and crumbled
Steps
- In a large bowl, combine broccoli, green onions and cranberries. In a small bowl, whisk oil, vinegar and sugar until blended; drizzle over broccoli mixture and toss to coat. Refrigerate until serving. Sprinkle with sunflower kernels and bacon before serving. Yield: 10 servings.
Notes
- FAVORITE
↑ Back to top
Crusty Rolls

Ingredients
- 3/4 cup of water (177 ml or 6 oz)
- 1/2 teaspoon instant or active yeast* (1.5 grams)
- 1 cup All Purpose Flour or Bread flour** (125 grams or 4.25 oz)
- 3 Cup All Purpose Flour (375 grams or 13.23 oz)
- 1 1/2 teaspoon instant or active yeast (5 grams or 0.22 oz)
- 2 teaspoons of salt (11 grams or 0.40 oz)
- 1/4 cup of shortening melted and cooled.*** (50 grams or 1.76 oz)
- 1 cup of warm water NOT HOT(235 ml or 8 fl oz)
STARTER
DOUGH
Steps
- FOR THE STARTER: The night before baking, place yeast and water in a small bowl, mix well and add the flour. Mix again. You don’t need to knead here. Cover with a plastic wrap and let sit on your kitchen counter top all night or at least 8 hours. Making this starter will increase the flavor of your bread. The next morning the starter will have a larger volume and will have formed lots of bubbles.
- BAKING DAY. In a large bowl or your heavy-duty mixer, place the starter, flour, salt, yeast and melted shortening. Start kneading the dough, adding the warm water slowly right at the beginning of the kneading process. IMPORTANT: If you live in a very humid place, you will need to reduce the amount of water by about 2 tablespoons less than indicated. If using a mixer, knead for 7 minutes on speed 2; if kneading by hand, knead the dough for about 15 minutes. The dough will separate from your mixing bowl like it shows in the above picture while kneading.
- Remove dough from the bowl and place on your working surface to form a ball. It should look soft but still a little rough.
- Grease a large bowl with shortening, oil or PAM spray. Place the dough and turn it all over to make sure all sides are covered with a coating of the grease. Cover with a plastic wrap and let it rest in a warm place for 2 to 3 hours or until the dough has doubled in volume. If you live in a warm and humid weather this step will take less time.
- After the dough has doubled in volume, gently push your fist in to deflate it. Divide the dough into 10 pieces. (About 110 grams each). Place the pieces of dough into your slightly greased working surface and cover with a greased plastic wrap and let them rest for 15 minutes to allow the gluten to develop and help to shape your bollillos/rolls easier.
- To form the bolillos-rolls, dust your work surface with flour very lightly, flatten one piece of dough with the palm of your hand and fold 1/3 of the dough towards you and press down with your fingers, sealing it very well. Fold the dough again, repeating the sealing process until you form a roll, pinching the dough tightly. Make sure all the ends are sealed.
- To shape the rolls, place your hands over the dough and press gently but firmly, cupping your fingers, rolling back and forth. While doing this, press the heel of your hands to leave some dough uncovered to form the traditional bolillo ears.
- Place each bolillo/roll seam side down on the greased baking sheet and cover with a greased plastic. Allow them to rise until they’ve doubled in volume. About 1 and 1/2 hour.
- At least 20 minutes before the end of the rising period, turn on your oven at 450 degrees F. Place the metallic pan for the water on the oven floor.
- Once the rolls have doubled in volume, and just before placing them inside the oven, make a deep cut using a sharp serrated knife or a razor blade, holding your hand at a 45-degree angle.
- Spray the rolls with warm water, place them in a preheated oven and add 1 1/2 cup of cold water to the metallic tray you placed on the oven floor. The steam will create that beautiful thin and crunchy crust. Bake for 20 to 25 minutes until they are golden, remove form the oven, and let them cool on a wire rack.
Notes
- The bread keeps well for a couple of days in a plastic bag, or it can be frozen for up to a month. To reheat: thaw bread lightly, spray water, and place in preheated 400 degrees F oven until crispy. About 12-15 minutes until warm and crunchy.
↑ Back to top
Cuban Bread
Adapted from http://www.food.com/recipe/cuban-bread-147540

Servings: YIELD 2 servings TOTAL
TIME 1 hr
Ingredients
- 1 (1/4 ounce) package active dry yeast
- 2 cups lukewarm water
- 1 tablespoons salt
- 1 tablespoon sugar
- 6 to 7 cups flour
Steps
- Dissolve the yeast in the water and add the salt and sugar, stirring thoroughly.
- Add flour, one cup at a time, beating it with a wooden spoon.
- You can also use the dough hook on an electric mixer at low speed.
- Add enough flour to make a fairly stiff dough.
- Shape dough into a ball, place in a greased bowl and grease the top.
- Cover with a towel and let rise in a warm place until doubled in bulk.
- Turn dough out onto a lightly floured board and shape into two round Italian style loaves.
- Arrange onto a baking sheet, heavily sprinkled with cornmeal and allow to rise for 5 minutes.
- Slash the tops of the loaves in 2 or 3 places with a knife or scissors.
- Brush the loaves with water and place them into a cold oven.
- Set the oven control at 400° and place a pan of boiling water on the bottom of the oven.
- Bake loaves until they are crusty and done for about 40 to 45 minutes.
Notes
- FAVORITE
↑ Back to top
Cucumber Raita (Indian Yogurt Condiment)
Adapted from https://www.seriouseats.com/recipes/2018/06/cucumber-raitha-indian-yogurt-condiment.html
Tags: Condiments
Dairy Dips and Spreads
Servings: 2 cups
Ingredients
- 1 cup full-fat yogurt (8 ounces; 230g)
- 1 Thai green chili, minced (about 2g)
- One 1-inch piece fresh ginger, peeled and grated finely (about 6g)
- 1 1/2 teaspoons chaat masala (see note)
- 1 teaspoon sugar
- 3/4 teaspoon kala namak (Himalayan black salt); see note
- 1 cup coarsely grated unpeeled cucumber (4 ounces; 120g)
- 1/4 cup (15g) chopped fresh cilantro leaves and tender stems
Steps
- In a medium bowl, using a flexible rubber spatula, stir together yogurt, Thai green chili, ginger, chaat masala, sugar, and black salt. Fold in grated cucumber and cilantro. Serve right away or store in the refrigerator for 3 to 5 days.
Notes
- The chaat masala recipe linked here is easy on the salt and packed with flavorful spices. If you're using a store-bought chaat masala, you may need to decrease the amount of salt and add extra spices to taste.
- Kala namak is funky and aromatic unrefined salt. If you cannot find it, you can substitute an equal volume of kosher salt.
↑ Back to top
Cucumber Salad with Asian Flavors
Servings: YIELD Serves 4
Ingredients
- 2 large thin-skinned cucumbers (about 1 1/2 pounds), sliced thin
- Salt to taste
- 3 tablespoons seasoned rice vinegar
- 1 tablespoon soy sauce
- 1 teaspoon sugar
- 1 small garlic clove, minced or pureed
- 1 teaspoon minced fresh ginger
- 1/8 teaspoon cayenne (more to taste)
- Freshly ground pepper
- 2 tablespoons dark sesame oil
- 3 tablespoons sunflower oil or grapeseed oil
- 1 bunch scallions, white and light green parts, sliced very thin
Steps
- Sprinkle the cucumbers with a generous amount of salt and let sit in a colander in the sink for 15 minutes. Rinse and dry on a kitchen towel. Transfer to a salad bowl.
- Whisk together the vinegar, soy sauce, sugar, garlic, ginger, cayenne, and pepper. Whisk in the sesame oil and the sunflower or grapeseed oil. Toss with the cucumbers, scallions, and cilantro. Chill until ready to serve.
Notes
- Advance preparation: This will keep for a day or two in the refrigerator but the dressing will become more watery.
↑ Back to top
Daddy Pasta (Ricotta–Red Pepper Sauce with Burnt Lemon
Oil)

Tags: Cheese
Pasta
Servings: 4
Ingredients
- Unsalted butter — 90 g (6½ Tbsp)
- Olive oil — 10 g (2 tsp)
- Anchovy Paste — 7 g
- Shallots — 40 g (1 medium), minced fine
- Garlic — 4 g (1 small clove), microplaned
- Red Pepper Paste — 45 g (3 Tbsp)
- Tomato Paste -- 1 Tbsp
- Chopped Calabian Chillies - 1 tsp
- Dry vermouth or dry white wine — 50 mL (scant ¼ cup)
- Fresh ricotta — 200 g (about ¾ cup)
- Grated Romano - 1/4 cup
- Pasta cooking water — 150–200 mL, as needed
- Kosher salt — to taste
- Freshly ground black pepper — to taste
- Lemons — 2, halved crosswise
- Olive oil — 80 ml (⅓ cup)
- Aleppo pepper — 1 tsp
- Flaky sea salt — pinch
- Chopped flat-leaf parsley — 2 Tbsp
- Shaved bottarga or pecorino — optional
For the sauce:
For the burnt
lemon oil:
For garnish:
Steps
- Heat a cast iron skillet until just smoking.
- Place lemons cut-side down, press lightly for even contact, char 3–4 minutes until blackened.
- Squeeze juice into a bowl, strain out seeds.
- Whisk juice into 80 mL olive oil with Aleppo pepper and flaky salt. Keep warm (~40–50 °C / 105–120 °F).
- In a wide sauté pan, melt butter with 10 g olive oil over medium heat.
- Once foaming subsides, stir until solids turn golden and smell nutty.
- Drop in anchovies, stir until completely dissolved.
- Add shallots to the anchovy butter, cook until translucent (don’t crisp).
- Add garlic, cook 20–30 seconds.
- Stir in biber salçası, Tomato Paste and chillies and bloom 1–2 min over low heat.
- Add vermouth/wine, reduce until almost dry.
- Reduce heat to minimum. Fold in ricotta and romano, whisk gently to smooth.
- Add hot pasta water a little at a time, whisking until glossy nappé texture forms.
- Taste and adjust — salt likely minimal, pepper to preference.
- Add al dente pasta directly to sauce. Toss over low heat until coated and silky.
- Plate pasta in warm bowls.
- Drizzle each with burnt lemon oil — don’t mix it in; you want the aromatic pop when eating.
- Garnish with parsley, plus bottarga or pecorino if desired.
1. Burn the lemons (do
first):
2. Brown the butter
& melt anchovies:
3. Aromatics &
pepper paste:
4. Deglaze & reduce:
5. Ricotta
emulsification:
6. Marry pasta &
sauce:
7. Finish & plate:
↑ Back to top
Daffodil Cake

Ingredients
- 6 large eggs
- ¼ teaspoon salt
- ½ teaspoon cream of tartar
- ¾ cup granulated sugar
- 1 teaspoon vanilla extract
- ½ cup All-purpose flour
- 2 Tablespoons warm water
- ½ cup granulated sugar
- 1 teaspoon vanilla extract
- 1 teaspoon baking powder
- ½ cup All-purpose flour
Steps
- Preheat the oven to 350 degrees Fahrenheit. Position the oven rack in the bottom third of the oven.
- Separate all six eggs, placing the egg whites in a large bowl that has been wiped clean with a paper towel moistened with white vinegar. Place the egg yolks in a medium bowl and set aside.
- Add the salt to the egg whites and beat at medium-high speed using a hand mixer or stand mixer until foamy. Add the cream of tartar and continue to beat at high speed, adding the ¾ cup sugar a few Tablespoons at a time until the mixture forms stiff, glossy peaks. Set the meringue aside as you prepare the egg yolk mixture.
- Add the warm water to the egg yolks and mix on medium speed using a whisk or mixer. Add ½ cup sugar, vanilla extract, baking powder, and flour. Mix until the batter is completely smooth.
- Using a spatula, gently move a portion of the meringue away from the side of its mixing bowl.
- Add the vanilla and ½ cup flour to the space created by moving the meringue. This step prevents the weight of the flour from deflating the airy meringue. Using the spatula, gently fold the meringue until the flour and vanilla extract are fully incorporated and the mixture is smooth.
- Transfer two thirds of the meringue mixture to an ungreased angel food cake pan, spreading lightly if necessary to cover the bottom of the pan. Add the egg yolk mixture to the pan. There is no need to spread the yolk mixture or completely cover the meringue. Add the remaining meringue to the pan. Using a skewer or toothpick, lightly swirl the two batters by moving in a random pattern around the pan.
- Transfer the pan to the preheated oven and bake for 35-40 minutes. When fully baked, a toothpick inserted into the center of the cake should come out with crumbs attached. Remove the pan from the oven and allow the cake to cool.
- Once cool, run a sharp knife or small metal offset spatula around the outside of the pan to loosen the cake. Invert the cool cake onto a plate. Slice the cake into slices and serve plain or dressed with fresh berries and whipped cream.
Notes
- To prevent batter from falling into the center tube as you are transferring the batter to the pan, place an overturned cupcake wrapper over the tube. Fill the pan, remove the wrapper, and bake as directed without letting any of the batter go to waste.
↑ Back to top
Daikon and Carrot Pickle Recipe (Do Chua)
Adapted from https://www.vietworldkitchen.com/blog/2009/05/daikon-and-carrot-pickle-recipe-do-chua.html
Tags: Japanese
Pickles Vietnam
Servings: about 3 cups
Ingredients
- 1 large carrot, peeled and cut into thick matchsticks
- 1 pound daikons, each no larger than 2 inches in diameter, peeled and cut into thick matchsticks
- 1 teaspoon salt
- 2 teaspoons plus 1/2 cup sugar
- 1 1/4 cups distilled white vinegar
- 1 cup lukewarm water
Steps
- Place the carrot and daikons in a bowl and sprinkle with the salt and 2 teaspoons of the sugar. Use your hands to knead the vegetables for about 3 minutes, expelling the water from them. They will soften and liquid will pool at the bottom of the bowl. Stop kneading when you can bend a piece of daikon so that the ends touch but the daikon does not break. The vegetables should have lost about one-fourth of their volume. Drain in a colander and rinse under cold running water, then press gently to expel extra water. Return the vegetables to the bowl if you plan to eat them soon, or transfer them to a 1-quart jar for longer storage.
- To make the brine, in a bowl, combine the 1/2 cup sugar, the vinegar, and the water and stir to dissolve the sugar. Pour over the vegetables. The brine should cover the vegetables. Let the vegetables marinate in the brine for at least 1 hour before eating. They will keep in the refrigerator for up to 4 weeks. Beyond that point, they get tired.
↑ Back to top
Danmuji (Korean Pickled Daikon Radish)
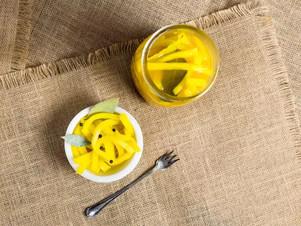
Tags: Korean
Pickles
Servings: 1 jar
Ingredients
- 1 1/2 cups ( 355 ml) water
- 1 1/2 cups ( 355 ml) unseasoned rice vinegar
- 1/2 cup ( 100 g) sugar
- 1 tablespoon ( 15 g) Kosher salt
- 2 medium cloves garlic, halved lengthwise
- 1 teaspoon ground turmeric
- 15 whole black peppercorns
- 2 bay leaves
- 1 pound ( 450 g) daikon radish, peeled and cut into 4- by 1/4-inch strips (see note)
Steps
- In a medium saucepan, stir together water, vinegar, sugar, salt, garlic, turmeric, peppercorns, and bay leaves. Bring to a boil over medium-high heat, stirring to ensure that sugar fully dissolves. Remove from heat and add daikon. Press a paper towel directly against the surface of the brine and let cool to room temperature, 1 to 2 hours.
- Transfer pickles and brine to an airtight glass container and store in the refrigerator. (The turmeric will stain a plastic container yellow.) Pickles will last about 1 month.
↑ Back to top
Danmuji (Korean Pickled Daikon Radish)
Adapted from http://www.seriouseats.com/recipes/2017/03/danmuji-korean-pickled-daikon-radish-recipe.html
Servings: YIELD Makes 1 large jar
Ingredients
- 1 1/2 cups (355ml) water
- 1 1/2 cups (355ml) unseasoned rice vinegar
- 1/2 cup (100g) sugar
- 1 tablespoon (15g) kosher salt
- 2 medium cloves garlic, halved lengthwise
- 1 teaspoon turmeric powder
- 15 whole black peppercorns
- 2 bay leaves
- 1 pound (450g) daikon radish, peeled and cut into 4- by 1/4-inch strips (see note)
Steps
- In a medium saucepan, stir together water, vinegar, sugar, salt, garlic, turmeric, peppercorns, and bay leaves. Bring to a boil over medium-high heat, stirring to ensure that sugar fully dissolves. Remove from heat and add daikon. Press a paper towel directly against the surface of the brine and let cool to room temperature, 1 to 2 hours.
- Transfer pickles and brine to an airtight glass container and store in the refrigerator. (The turmeric will stain a plastic container yellow.) Pickles will last about 1 month.
Notes
- The radish can also be sliced into thin rounds, which is how you'll often find it.
↑ Back to top
Dark Chocolate Brown Sugar Cookies > Call Me Pmc

Tags: Cookies
I made this.
Ingredients
- 1/2 cup unsalted butter at room temperature
- 3/4 cup brown sugar light or dark brown sugar
- 1 large egg at room temperature
- 1 teaspoon pure vanilla extract
- 1 and ½ cup all-purpose flour sift then measure correctly (see post above) if you incorrectly measure the flour these cookies may be dry!
- 1/2 cup unsweetened dark cocoa powder like Hershey's Special Dark (regular cocoa powder or Dutch-processed may be substituted, but have a slightly different taste)
- 1 teaspoon cornstarch
- 3/4 teaspoon baking soda
- 1/8 teaspoon salt optional
Steps
- In the bowl of a stand mixer, combine butter and sugar. Mix with the paddle attachment on medium speed until the mixture is light and fluffy. About 3 minutes.
- Add egg and vanilla and mix another 2 to 3 minutes.
- Scrape down the sides of the bowl and add the remaining ingredients with the mixer on low just until the ingredients are combined about 1 to 2 minutes.
- Cover and refrigerate the dough at least one hour.
- Preheat oven to 350° F.
- Scoop cookie dough onto a room temperature sheet pan lined with a Silpat Non-Stick Baking Mat or spray with a non-stick vegetable spray 2-inches apart. I used a 1.5-inch spring release scoop that holds just over 1 tablespoon of dough to scoop uniform cookies. Spray the bottom of a glass with non-stick spray and flatten cookies slightly.
- Bake for 8 to 9 minutes or until the edges have set and the tops are just beginning to set. They will turn from being 'shiny' to be more 'matte'. They will firm up as they cool so be careful not to overcook them.
- Remove the cookies from the oven and allow to rest on the cookie sheet for 2 minutes. After 2 minutes remove with a thin spatula to a wire rack to cool completely.
- Storage tips above.
- I recommend you Calibrate your Oven at least once a year to ensure it's baking at the correct temperature.
↑ Back to top
Dark Chocolate Mousse

Tags: Desserts
Puddings
Servings: 6 servings Prep Time
Ingredients
- 4 whole ripe avocados peeled and pitted (weighing about 1 1/2 lbs unpeeled)
- 1/2 cup cocoa powder
- 4 oz dairy free dark chocolate, melted double check to make sure it is dairy free
- 1/4 tsp cinnamon Ceylon cinnamon is best
- 1/4 heaping tsp salt
- 1/2 cup agave or 3/4 cup granulated white sugar or natural sweetener of your choice (add more or less to taste if desired)
- 1 tbsp vanilla
- Raspberries and fresh mint leaves (optional garnish)
Steps
- In the bowl of a food processor, combine all ingredients and process until smooth.
- Divide into bowls or dessert dishes and chill until ready to serve, at least 2 hours. Garnish with raspberries and fresh mint leaves, if desired.
↑ Back to top
David Rosengarten's Pullman Loaf
Adapted from http://citp.net76.net/index.html
Tags: Breads
Ingredients
- 6 cups bread flour dough
- 4 tbl sugar
- 1.5 cups cool water
- 1 cup whole milk
- 3.5 tbl rapid-rise, (instant) yeast
- 3 tbl kosher salt
- 2 1/2 tbl unsalted butter, melted
- Olive, oil for greasing the bowl and pans
- Egg, Wash
Steps
- Place the 6 cups bread flour, sugar, water, milk, yeast, salt, and butter in the large bowl of a stand mixer fitted with a dough hook attachment.
- Mix the ingredients on very slow speed until all the ingredients are just combined. Increase the mixer speed to medium-high and continue to mix the dough for 6 minutes more. Dough should be a bit sticky.
- Lightly oil a large bowl. Remove the ball of dough from the mixer and place in the oiled bowl. Cover and place in a warm spot until the dough ball has doubled in size, about 1 hour.
- Lightly flour a rolling pin and a counter-top with a little extra flour. Remove the risen dough to the counter. Using the rolling pin, flatten the dough to expel all the gases that have developed inside.
- Using a serrated knife, divide the dough into 3 equal pieces. Place dough pieces on the countertop so that they are not touching each other and cover the group with a damp cloth. Let rest for 20 minutes.
- Lightly oil 3 (8½ by 4½ by 2½-inch) loaf pans and set aside. Lightly flour a rolling pin and a countertop with extra flour. Remove 1 piece of the dough to the counter. Using the rolling pin, flatten the dough to expel all the gases that have developed inside; form it into a rectangle approximately 5 inches wide and 8 inches long. Place a 5-inch end in front of you.
- Using lightly floured hands, pick up the 5-inch end in front of you and roll it toward the other 5-inch end. As you roll, stop frequently and lightly pinch the crease that you’re rolling over. Continue rolling forward until you reach the other 5-inch end. The bread you’re forming should also spread from side to side as you’re rolling; just make sure it doesn’t spread out to more than 8 inches or it will not fit into your loaf pans. This process is like rolling a jelly roll without any filling. When you’ve reach the other end, be sure to seal well by pinching the seam together with your fingers. Place the dough in a loaf pan, seam side down. Make sure the ends of the loaf touch the inside ends of the pan. Repeat with remaining 2 pieces of dough. Cover each pan with a piece of clear plastic wrap and let each one rise in a warm area until it has doubled in size, about 1¼ hours.
- While dough rises, preheat the oven to 375 degrees. When the loaves are ready to be baked, brush the tops with egg wash (see following recipe).
- Place the loaf pans in the oven, on the center rack, and bake until they are golden brown, about 20 to 24 minutes. The internal temperature should be 200 degrees and the loaves should sound hollow when tapped.
- Remove the loaf pans from the oven and let cool for 5 minutes before using your hands to remove the loaves from the pans. Allow them to cool down to room temperature before serving.
Notes
- Let’s face it — everyone takes the basic white bread for granted. As with vanilla ice cream, however, a white bread can be wonderful and comforting. Confession: I sometimes even love the supermarket white (such as around a good old-fashioned tuna salad sandwich)! But because most of us have succumbed to the convenience of that supermarket white, many have forgotten the pleasures of a white bread with a little more texture and flavor. Such a loaf is the Pullman loaf — so named either (depending on your source) because it used to be served in Pullman dining cars or because its shape resembles a Pullman car. You can find the Pullman loaf, and related serious whites, in good bakeries today. Or best of all, you can make your own. While you’re at it...why not make three? They freeze well, and there’s always canned tuna in the cupboard....
↑ Back to top
David Tanis's Crispy Fried Shallots
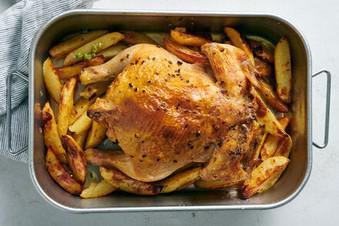
Tags: Alliums
Condiments
Ingredients
- 1 cup vegetable oil
- 3 large shallots, peeled and sliced lengthwise about ⅛-inch thick
- Salt
Steps
- Put oil in a small saucepan. Add shallots and place pot over medium heat. Cook gently, stirring occasionally, for about 15 minutes (turn down heat if they seem to be coloring too quickly), until they gradually become brown.
- Place a fine-meshed sieve over a bowl. Transfer shallots to sieve and let drain well. (Save oil for another purpose.) Blot shallots on paper towels. They will become crisp as they cool. Sprinkle lightly with salt.
↑ Back to top
Decadent German Chocolate Pecan Pound Cake Delight

Servings: 12
Ingredients
- 1 cup unsalted butter, softened
- 2 cups white sugar
- 4 eggs
- 1 tsp vanilla extract
- 2 cups all-purpose flour
- ½ tsp baking powder
- ¼ tsp salt
- 1 cup sour cream
- 1 cup German chocolate, chopped
- 1 cup pecans, chopped and toasted
- 1 cup German chocolate, chopped
- ½ cup heavy cream
- ½ cup pecans, chopped and toasted
For the Cake:
For the German
Chocolate Pecan Glaze:
Steps
- Preheat Oven: Preheat the oven to 325°F (165°C) and grease and flour a 10-inch bundt pan.
- Heat Cream: In a small saucepan, heat the heavy cream until it just begins to simmer.
Cream Butter and Sugar: In a
large bowl, cream together the softened butter and white sugar until
light and fluffy.
Add Eggs and Vanilla: Beat in
the eggs one at a time, then stir in the vanilla extract.
Combine Dry Ingredients: In a
separate bowl, whisk together the flour, baking powder, and salt.
Mix Batter: Gradually add the dry ingredients to the butter mixture,
alternating with the sour cream, mixing until just combined.
Fold in Chocolate and Pecans:
Fold in the chopped German chocolate and toasted pecans.
Prepare for Baking: Pour the
batter into the prepared bundt pan and smooth the top.
Bake: Bake the cake in the preheated oven for 60-70 minutes, or until
a
toothpick inserted into the center comes out clean.
Cool: Allow the cake to cool in the pan for 10 minutes before removing
it from the pan to cool completely on a wire rack.
For the German Chocolate
Pecan Glaze:
Melt Chocolate: Remove the saucepan from heat and add the chopped
German chocolate. Let it sit for a few minutes, then stir until smooth
and creamy.
Glaze the Cake: Drizzle the
glaze over the cooled pound cake and sprinkle with toasted pecans.
Enjoy!
↑ Back to top
Deep-Fried Onion Rings
Servings: This recipe yields 6
servings
Ingredients
- Oil; for deep-frying
- 3 cButtermilk
- Black Pepper; freshly ground
- 6 lgSweet onions; (such as Vidalia; Walla, Maui; and/or Texas Sweet)
- Salt; to taste
- 4 cFlour
- 1 1/2 tsBaking soda
Steps
- In a large bowl combine buttermilk and baking soda; season well with salt and pepper. Peel onions and slice thinly, no thicker than 1/4-inch; a mandoline works well. Add to buttermilk mixture and stir well to submerge all onions. Set aside, unrefrigerated, for 2 hours. In a deep-fryer or heavy, deep pot, heat at least 1 quart oil to 375 degrees. Working in batches, place about 1/6 of flour in a large bowl. With your hands, remove about 1/6 of onions from buttermilk. Dont let the liquid run off. Add to flour and mix vigorously with your hands until onions are well-coated. Separate them by hand and lay them in a deep-fry basket. Lower into hot oil, maintaining temperature. Stir every 2 minutes. When onions are golden brown and crisp, about 6 minutes, drain on paper towels and sprinkle with salt. Keep warm in a 200 degree oven while you finish the rest. This recipe yields 6 servings.
Notes
- FAVORITE
↑ Back to top
DELI-STYLE RYE BREAD

Tags: Breads
Staples
If you don’t have a stand mixer, you can mix the
dough by hand following the instructions on this page. Don’t forget to
reduce the oven temperature immediately after putting the loaf in the
oven. We prefer to use light or medium rye flour in this bread; tasters
found dark rye flour overpowering. This loaf takes two days to make,
but for a faster version, see the same-day variation on this page; it
will be slightly less flavorful but still very good. If you don’t have
a baking stone, bake the bread on an overturned and preheated rimmed
baking sheet set on the lower-middle oven rack.
I made this. Is starred. Rated 5/5
Ingredients
- ¾ cup warm water (110 degrees)
- ¾ cup (4⅛ ounces) light or medium rye flour 120 g
- ¼ cup (1⅓ ounces) bread flour 37 g
- ½ teaspoon instant or rapid-rise yeast
- Rye Sour
- 1/2 cup light or medium rye flour
- Bread flour to bring total flour weight to 624g
- 1 tablespoon caraway seeds
- 1 tablespoon vegetable oil
- 1 tablespoon honey
- 1½ teaspoons instant or rapid-rise yeast
- 1 tablespoon Sour
- 1½ cups warm water (110 degrees)
- 2 teaspoons salt
- Vegetable oil spray
SPONGE:
DOUGH:
Steps
- DO NOT USE KA MIXER BOWL FOR SPONGE!
- Stir all ingredients together in medium bowl until combined. Cover with plastic wrap and let sit at room temperature until sponge has risen and fallen, at least 6 hours or up to 24 hours.
- 2. FOR THE DOUGH: Using stand mixer fitted with dough hook, combine 3 cups bread flour, rye flour, caraway seeds, oil, honey, and yeast. With mixer on low speed, add water and mix until dough comes together, about 2 minutes. Stop mixer, cover bowl with plastic (no need to remove bowl from mixer), and let sit at room temperature for 20 minutes.
- 3. Remove plastic, add sponge and salt, and knead dough on medium-low speed until it is smooth and elastic, about 8 minutes. If after 4 minutes more flour is needed, add remaining ½ cup bread flour, 2 tablespoons at a time, until dough clears sides of bowl, but sticks to bottom.
- 4. Turn dough out onto lightly floured counter and knead by hand to form smooth, round ball. Place dough in large, lightly oiled bowl and cover tightly with greased plastic. Let rise in warm place until doubled in size, 1 to 1½ hours.
- 5. Top pizza peel with parchment paper. Turn dough out onto lightly floured counter, press it into 10-inch square without tearing it, and gently dimple it with your fingertips. Fold top corners into middle of dough, then gently roll and pinch dough into torpedo shape. Transfer to prepared peel, seam side down, and gently tuck dough into taut loaf. Mist loaf with vegetable oil spray, cover loosely with plastic, and let rise in warm place until nearly doubled in size and dough barely springs back when poked with knuckle, 1 to 1½ hours.
- 6. FOR THE GLAZE: One hour before baking, adjust oven rack to lower-middle position, place baking stone on rack, and heat oven to 500 degrees. Score top of loaf with razor blade or sharp knife. Brush loaf with egg-water mixture, then spray lightly with water. Carefully slide loaf and parchment onto hot baking stone. Immediately reduce oven temperature to 425 degrees and bake until center of loaf registers 210 degrees and crust is deep golden brown, 35 to 40 minutes, rotating loaf halfway through baking.
- 7. Transfer loaf to wire rack, discard parchment, and let cool to room temperature, about 2 hours, before slicing and serving.
1. FOR THE SPONGE:
Notes
- If you don’t have time for a sponge, this loaf can be made the same day, but the flavor won’t be as complex, and the crumb will be finer and more uniform (like sandwich bread).
- Omit sponge. When assembling dough in step 2, increase amount of bread flour to 3¼ cups, increase rye flour to 1¾ cups, increase yeast to 2¼ teaspoons, and increase water to 2¼ cups.
↑ Back to top
Delicious Homemade Dijon Mustard
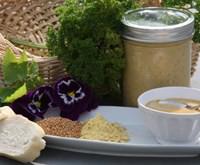
Servings: YIELD 2 servings TOTAL
TIME 16 mins
Ingredients
- 2 cups dry white wine
- 1 large onion, chopped
- 3 garlic cloves, minced
- 1 cup mustard powder (4 oz)
- 3 tablespoons honey
- 1 tablespoon vegetable oil or 1 tablespoon canola oil
- 2 teaspoons salt
Steps
- In a non-stick saucepan combine the wine, onion and garlic; heat to boiling, simmer 5 minutes.
- Cool, and discard solids.
- Add the dry mustard to the cooked liquid, stirring constantly until smooth.
- Blend in honey, oil and salt; heat slowly until thickened (keep nose away; fumes are strong!), stirring constantly.
- Pour into a glass jar; cool, let sit on counter at room temperature overnight.
- Refrigerate for 2-8 weeks to age flavor before using.
Notes
- FAVORITE
↑ Back to top
Delightful Banana Cake

Ingredients
- 2 eggs, separated
- 1/4 cup plus 1 tablespoon butter, softened, divided
- 1 to 1/2 cups sugar, divided
- 1 cup mashed ripe bananas (2 to 3 medium)
- 1/3 cup reduced-fat sour cream
- 1/4 cup unsweetened applesauce
- 1 teaspoon McCormick® Pure Vanilla Extract
- 2 cups all-purpose flour
- 2 to 1/2 teaspoons baking powder
- 1/2 teaspoon salt
- 1/4 teaspoon baking soda
- 1/2 cup semisweet chocolate chips
- 1 tablespoon water
- 1/2 cup chopped walnuts or chopped pecans
- 2 tablespoons butter
- 1 cup confectioners' sugar
- 1/2 teaspoon McCormick® Pure Vanilla Extract
- 1 to 2 tablespoons fat-free milk
DRIZZLE:
Steps
- Place egg whites in a small bowl; let stand at room temperature for 30 minutes.
- In a large bowl, beat 1/4 cup butter and 1 cup sugar until crumbly, about 2 minutes. Add egg yolks; mix well. In a small bowl, beat the bananas, sour cream, applesauce and vanilla until blended. Combine the flour, baking powder, salt and baking soda; add to the butter mixture alternately with banana mixture. In a microwave, melt chocolate chips and remaining butter; stir until smooth. Cool slightly; stir in water.
- Beat egg whites on medium speed until soft peaks form. Gradually beat in remaining sugar, 1 tablespoon at a time, on high until stiff glossy peaks form and sugar is dissolved. Fold into batter. Fold in walnuts.
- Coat a 10-in. fluted tube pan with cooking spray and sprinkle with flour; add a third of the cake batter. Drizzle with half of the chocolate mixture. Repeat layers; top with remaining batter.
- Bake at 350° for 40-45 minutes or until a toothpick inserted near the center comes out clean. Cool for 10 minutes before removing from pan to a wire rack to cool completely.
- For drizzle, in a small heavy saucepan, melt butter until lightly browned. Remove from the heat; stir in the confectioners' sugar, vanilla and enough milk to achieve desired consistency. Drizzle over cake. Yield: 16 servings.
Notes
- FAVORITE
↑ Back to top
Deviled Egg Macaroni Salad
Tags: Pasta
Salad
Ingredients
- 8 large eggs (hard boiled)
- 12 ounces elbow macaroni (uncooked)
- ¼ teaspoon salt (or to taste)
- ¼ teaspoon black pepper (ground, or to taste)
- 2 tablespoons Dijon mustard
- 1 cup mayonnaise
- 3 medium dill pickles (chopped)
- ½ medium red onion (chopped)
- 2 ribs celery (chopped)
- ½ cup black olives (sliced)
- ½ teaspoon smoked paprika
- 1 tablespoon chives (chopped)
- Before You Begin! If you make this, please leave a review and rating letting us know how you liked this recipe! This helps our business thrive & continue providing free recipes.
Steps
- Cook the pasta. Use the box as a guide and cook according to package instructions. Rinse well with cold water after straining.
- Prepare the eggs. Peel your eggs and cut them in half. Scoop out the yolks and set them aside in a bowl. Chop the whites into pieces.
- Prepare the dressing. Mash the yolks with a fork until smooth. Season them with salt and pepper, then add the mustard and mayo. Stir everything until well combined.
- Assemble the salad. Add the macaroni to a large mixing bowl. Add the dressing, egg whites, the rest of your mix-ins, and paprika. Mix everything until evenly coated in the dressing.
- Garnish and serve. Sprinkle the salad with smoke paprika and chives, then enjoy!
Notes
- To get perfect hard boiled eggs all the time, add your eggs eggs to a saucepan, cover with at least 2 inches of cold water. Bring the water to a full boiling, you should see big boiling bubbles, turn off the heat and cover the pot. Keep the saucepan on the burner for about 10 to 12 minutes. At this point I like to run cold water over the eggs and peel them under the tap, this way it’s easy to peel the eggs and you get perfectly peeled eggs every single time.
- Adding a bit of salt or vinegar to your water for the eggs, will prevent the eggs from cracking while cooking.
- Rinse the pasta: After you strain your noodles, rinse them well with cold water. This will halt the cooking process and prevent your macaroni from sticking together and forming a huge noodle blob.
- Peeling the eggs: For easier peeling, transfer the eggs straight from the boiling water to an ice bath. This will cause the hardboiled egg to shrink inside its shell. Once they’ve fully cooled, give the eggs a quick tap around the circumference and peel.
- Use a variety of mix-ins: When choosing what I want to add to my macaroni salad, I look for a few factors: crunch, salt, and tang. Using pickled veggies is such a great way to brighten the dish up.
- Chill before serving: Let everything hang out together in the fridge for at least one hour before serving. When those ingredients get to sit together, the flavors get even better!
- Store leftovers in an airtight container in the fridge for up to 5 days.
↑ Back to top
Di San Xian (Stir Fried Eggplant, Potato and Pepper, 地三鲜)
Adapted from https://omnivorescookbook.com/di-san-xian-recipe/
Tags: Chinese
Vegetables Vegetarian
MORE SAUCE
Servings: 2 to 4
Ingredients
- 1/4 cup water
- 1 tablespoon light soy sauce
- 1/2 tablespoon dark soy sauce (*Footnote 1)
- 1 tablespoon Shaoxing wine (or dry sherry)
- 1/2 tablespoon sugar
- 1/4 teaspoon salt
- 1 teaspoon cornstarch
- 1/2 regular eggplant or 1 large Asian eggplants (around 10 ounces / 300 grams in total) , chopped into bite size pieces (*Footnote 2)
- 2 teaspoons cornstarch
- 1/3 cup peanut oil (or vegetable oil)
- 1 small russet potato or 2 yukon potatoes (about 1/2 pound / 230 grams in total) , halved and sliced into 1/4-inch (1/2-cm) pieces
- 1 bell pepper , chopped into bite-size pieces
- 2 green onions , chopped
- 2 cloves garlic , minced
Make more
Sauce:
Stir fry:
Steps
- Place eggplant into a large bowl and sprinkle with 2 teaspoons of salt. Add tap water to cover and stir to dissolve the salt. Use a small plate or a lid to cover the eggplant pieces and submerge them in the water. Soak for 15 to 20 minutes.
- Drain the eggplant and dry thoroughly with a paper towel. Sprinkle with cornstarch and gently mix by hand, until the eggplant pieces are lightly coated.
- Combine the sauce ingredients in a small bowl. Mix well and set aside.
- To cook the stir fry
- Heat a 12” pan (or a wok) with 1/3 cup oil over medium-high heat until hot. Spread the potato pieces in the pan without overlapping. Cook without moving until the bottom turns golden. Flip to cook the other side, until golden. Transfer the potatoes to a big plate.
- Your pan should still have plenty of oil. Place the eggplant in the pan and spread the pieces without overlapping. Cook the eggplant without moving it until the bottom turns golden brown. If the oil in the pan is fully absorbed by the eggplant before cooking through, add a bit more oil to the pan. Turn to medium heat if the pan starts to smoke. Flip the pieces to cook the other side until golden brown. Transfer to a plate with the potatoes.
- If your pan still has too much oil, carefully remove some of it with a folded paper towel and leave only about 1 teaspoon of oil in the pan. Add the green onion and garlic and stir a few times until fragrant.
- Add the peppers and stir a few times to mix well.
- Mix the sauce again to dissolve the cornstarch completely. Pour the sauce into the pan. Stir a few times.
- Return the eggplant and potato to the pan. Cook and stir until the sauce has thickened and evenly coated the vegetables. Transfer everything to a plate.
- Serve hot with steamed rice as a main or as a side.
For the sauce:
Notes
- Dark soy sauce adds an appetizing dark brown color to the sauce. Regular soy sauce will work just fine but your dish will turn out lighter in color.
- Regular eggplant contains more liquid and is more difficult to crisp up. You’ll obtain better results if you use Asian eggplant.
↑ Back to top
Diane Kochilas's Mediterranean Rice Recipe Will Help You
Live Longer
Adapted from https://katiecouric.com/lifestyle/recipes/mediterranean-rice-recipe-live-longer-diane-kochilas/
Servings: 4 to 6
Ingredients
- 1 pound (½ kilo) Swiss or rainbow chard
- ½ pound (½ kilo) spinach, trimmed
- ²⁄³ cup extra-virgin Greek olive oil
- 1 large leek, trimmed, washed, and finely chopped
- 1 large red onion, finely chopped
- 1 medium fennel bulb, trimmed and finely chopped
- 2 carrots, peeled and chopped
- 3 garlic cloves, finely chopped
- 1 cup long or medium-grain rice or parboiled brown rice
- Salt and freshly ground black pepper to taste
- 2 cups vegetable stock, or more as needed
- ½ cup chopped fresh dill
- ½ cup chopped fresh mint
- ½ cup chopped fresh chervil
- ½ cup chopped fresh flat-leaf parsley
- 3 tablespoons chopped fresh oregano
- Strained juice of 1 lemon
- Feta cheese or plain Greek yogurt, for serving (optional)
Steps
- Trim the chard and spinach, separating the stems from the leaves. Trim away any rough or tough part of the stems, usually on the bottom, finely chop the stems, and set aside. Chop the leaves, then swish them around in a basin or bowl and either spin dry in a salad spinner or let them drain very well in a colander.
- Heat ½ cup of olive oil in a wide pot over medium heat. Sauté the leek, onion, fennel, carrot, and greens stems until soft, about 10 minutes. Stir in the garlic. Add the rice and stir to coat with the olive oil. Add greens in batches and stir to cook down, until all of the chard and spinach have been added.
- Season with salt and pepper. Add 2 cups of vegetable stock. Cook over low heat, covered, until rice is very tender, about 45 minutes. Add more stock, if necessary, to keep the mixture moist and retain enough liquid for the rice to cook. The greens will let out their own liquid, too, so you have to use your judgment.
- About 5 minutes before removing from heat, stir in all the fresh herbs and half the lemon juice. Stir in remaining olive oil and adjust seasoning with additional lemon juice, salt, and pepper to taste. Serve, if desired, with a small wedge or a little crumbled Greek feta or a few spoonfuls of plain Greek yogurt on top.
↑ Back to top
Dinner Tonight: Korean Barbecue Beef Bulgogi

Tags: Beef
Korean
Servings: 2 to 3
Ingredients
- 1/4 cup soy sauce
- 2 tablespoons sugar
- 1 tablespoon sesame oil
- 1 tablespoon mirin
- 1/2 medium onion
- 2 cloves garlic, minced
- 1 teaspoon ginger, grated
- 1 teaspoon sesame seeds, toasted
- 1/4 teaspoon black pepper
- 1 pound rib eye, thinly sliced
- Lettuce, romaine or bibb
- 1 cup cooked white rice
- 1/2 cup kimchi
- 4 teaspoons hot bean paste
For the
Marinade:
For the
bulgogi:
Steps
- Add the soy sauce, sugar, sesame oil, mirin, onion, garlic, ginger, sesame seeds, and black pepper to a large bowl. Whisk until combined. Toss in the meat, cover, and set in the fridge for 30 minutes.
- Preheat a grill pan or a large iron skillet to high heat. Remove the meat from the marinade, and then toss in the pan. Cook for a few minutes on each side, until nicely browned.
- Serve the beef with lettuce, white rice, kimchi, and hot bean paste.
↑ Back to top
Diy Feta Cheese
Ingredients
- 2 quarts whole goat's, cow's or sheep's milk, preferably pasteurized but not homogenized, at room temperature (see headnote)
- 1/8 teaspoon (1/2 packet) mesophilic culture (see headnote)
- 1/4 teaspoon rennet (see headnote)
- 1 teaspoon kosher salt
Steps
- Line a colander with two layers of cheesecloth or one layer of muslin. A thin cotton tea towel will also work. Set the colander over a deep bowl.
- Add the milk to a 4-quart or larger stainless-steel or other nonreactive heavy-bottomed pot with a cover. Clip on a thermometer. Gently heat the milk to 86 degrees. If it gets warmer than 90 degrees, let it return to 86 degrees before proceeding. Remove the pot from the heat.
- Sprinkle the mesophilic culture across the surface of the warm milk. Let it sit, to bloom, for 5 minutes, then stir using an up-and-down motion just two times, very gently, to incorporate. Cover the pot for 1 hour. If your kitchen is cold, wrap the pot in a bath towel and place it away from any cool breezes, and away from stone or other cold surfaces.
- Add the rennet to the milk and stir in an up-and-down motion just two times, very gently, to incorporate. Cover the pot for 45 minutes. Keep the pot warm with the bath towel and away from cold surfaces to maintain a temperature between 86 and 90 degrees.
- Examine the curds, looking for a distinctive line of whey at the edge of the pot. When a knife is plunged into the curd and pulled back, the cut should remain clean, not soupy.
- Use a long, flexible palette knife or spatula to cut the curds in the pot into 2-inch cubes. Let them sit for 10 minutes to tighten up. Gently and gradually stir the curds with a slotted spoon or spider for 10 minutes, then scoop them into the lined colander set over the bowl. Let them sit for 10 minutes. Tie the fabric into a hobo bundle, securing it with a long piece of kitchen twine.
- Suspend the bundle from upper cabinet handles, the faucet or a pot rack. Center the deep bowl directly underneath. Let the bundle drip for 6 to 8 hours. (More time makes for a firmer set.)
- Remove the cheese from the bundle and break or cut it into cubes. Add the cheese to a stainless-steel, ceramic or glass bowl, sprinkle with salt, stir well and cover. Refrigerate for 8 hours or overnight to firm up.
- (To form the curds into a shaped cheese, line a perforated plastic basket with cheesecloth, spoon the curds into the basket and set over a deep bowl for an hour. Flip the cheese, sprinking salt on each side, wrap it up again and return it to the basket and bowl for another hour. Pour off the whey. Refrigerate for 8 hours or overnight before serving.)
- Refrigerate the feta in cheese paper or wax paper for up to 5 days.
Notes
- FAVORITE
↑ Back to top
Diy Oyster Crackers for Soup
Servings: 2 cups
Ingredients
- 5 ounces (1 cup) all-purpose flour
- 1 teaspoon kosher salt
- 1 teaspoon sugar
- 1 teaspoon baking powder
- 2 tablespoons cold unsalted butter, cut into 1/4-inch cubes
- 1/3 cup cold water, plus additional as needed
Steps
- Adjust oven rack to middle position and preheat oven to 375°F. Measure flour, salt, sugar, and baking powder into a medium bowl and whisk to combine. Add butter and using a pastry cutter or fingertips, work into flour until it resembles coarse meal. Add water and lightly knead dough until it comes together into a ball.
- Set dough on a lightly floured surface and cover with an overturned mixing bowl. Allow to rest for 15 minutes.
- Roll dough out on a well floured surface to a thickness of 1/8th inch. Cut dough into 1/2-inch squares, rectangles, or diamonds. Transfer to a parchment-lined baking sheet and space the shapes out as much as possible.
- Bake until crackers are showing color around the bottom edges, about 15 minutes. Turn oven off and crack the door open about eight inches. Leave crackers inside to cool and continue to crisp, about 30 minutes. Remove from oven, season with salt, and allow to cool completely. Crackers can be stored in a sealed container for up to a week
↑ Back to top
Diy Oyster Crackers for Soup

↑ Back to top
Don & Bob's Hot Sauce
Adapted from file:///K:/OneDrive/Recipe%20Scans/Hot%20sauce.htm
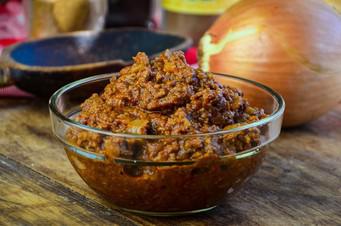
Tags: Condiments
Rochester
Ingredients
- 1/3 cup chopped green pepper
- 1/3 cup chopped onion
- 1 pound hamburger
- 1 quart warm water
- 15 ounces tomato sauce or 3 cans tomato paste
- 1 teaspoon to I tablespoon chili powder
- I tablespoon red pepper
- 1 tablespoon paprika
- 1 tablespoon allspice
- 1 tablespoon Worcestershire sauce
- 1 teaspoon garlic salt
- 1 teaspoon onion salt
Steps
- Sauté vegetables. Brown hamburger. Combine,all ingredients and simmer for 2 hours on top of the stove. Or put all the ingredients in a slow cooker and simmer for 2 hours.
↑ Back to top
Donut Pops
Adapted from http://moscatomom.com/cake-pop-donut-holes-recipe/

Ingredients
- 1 1/3 c all-purpose flour
- 1/3 c sugar
- 1 tbsp baking powder
- 1/2 tsp salt
- 1/2 c milk
- 1/4 c vegetable oil
- 1/4 c sour cream
- 1 egg
- 1 teaspoon vanilla
- Glaze
- 1/4 c melted butter
- 1 1/3 c powdered sugar
- 1 tsp vanilla
- 1 tbsp hot water
Steps
- Mix all ingredients and spoon into your Baby Cakes Cake Pop Maker. Fill each “hole” about half full as the batter will rise. Bake 4-5 minutes until you can stick the little pitch fork thingie that comes with the maker into the center and it comes out clean. Pop them out and either roll in powdered sugar or coat in glaze!
Notes
- FAVORITE
↑ Back to top
Doro Wat (Ethiopian Spiced Chicken)
Adapted from https://www.daringgourmet.com/wprm_print/45037
Tags: Chicken
Ethiopia
Servings: 6
Ingredients
- 3 lbs chicken thighs cut into 1 inch pieces, or 3 chicken breasts, cut into 1/2 inch pieces
- 2 tablespoons fresh lemon juice
- 2 tablespoons niter kibbeh
- 2 tablespoons extra virgin olive oil
- 3 cups yellow onions finely minced to a chunky puree in food processor
- 3 tablespoons butter
- 1 tablespoon finely minced garlic
- 1 tablespoon finely minced ginger
- 1/4 cup Ethiopian berbere
- 1 1/2 teaspoons salt
- 1/2 cup Tej Ethiopian honey wine, if you have it, or white wine mixed with 1 teaspoon honey
- 1 cup chicken stock
- 4 hard-boiled eggs pierced all over with fork about 1/4 inch deep
or use
HOMEMADE BERBERE (HIGHLY recommended!):
Steps
- Place the chicken pieces in a bowl and pour lemon juice over. Let sit at room temperature for at least 30 minutes.
- Heat the niter kibbeh or butter along with the olive oil in a Dutch oven. Add the onions and saute, covered, over low heat for 45 minutes, stirring occasionally.
- Add the garlic, ginger, and 1 tablespoon butter and continue to saute, covered, for another 20 minutes, stirring occasionally.
- Add the berbere and the 2 remaining tablespoons of butter and saute, covered, over low heat for another 30 minutes, stirring occasionally.
- Add the chicken, broth, salt and wine and bring to a boil. Reduce the heat to low, cover, and simmer for 45 minutes, stirring occasionally.
- Adjust the seasonings, adding more berbere according to heat preference. Add the boiled eggs and simmer on low heat, covered, for another 15 minutes.
- Half or quarter the eggs and arrange on the plates with the stew. Serve hot with injera, bread or rice.
↑ Back to top
Doro Wat (Ethiopian-Style Spicy Chicken)

Tags: Chicken
Ethiopia
Servings: 4 to 6
Ingredients
- 8 to 10 boneless, skinless chicken thighs
- Juice of 1 lemon
- 1 tablespoon white vinegar
- 4 to 5 large onions, peeled and quartered
- Fresh ginger (1-inch piece), peeled and grated
- ½ head of garlic, peeled
- ⅓ cup olive oil
- 1 to 2 tablespoons hot chile powder like cayenne
- 1 tablespoon sweet paprika
- ½ teaspoon ground ginger
- ½ teaspoon ground coriander
- 1 teaspoon ground cardamom
- ¼ teaspoon dried thyme
- ¼ teaspoon ground fenugreek
- ¾ teaspoon salt or to taste
- Pinch of freshly ground black pepper
- Injera, pita, naan or rice, for serving
- Hard-boiled eggs, for serving (optional)
Steps
- Heat the oven to 350 degrees and rub the chicken with the lemon juice and vinegar.
- Put the chicken in a rimmed baking sheet and bake, discarding the juices after 20 minutes, then draining again after 10 more minutes. Remove meat from oven and set aside.
- As the chicken cooks, put the onions, ginger and garlic in a food processor with a steel blade and finely chop until almost ground, leaving a bit of texture.
- Heat oil in a deep skillet over medium heat. Add the onion mixture and simmer, stirring frequently, about 20 minutes or until the onions have turned golden. Then stir in 1 tablespoon of the chile powder, the sweet paprika, ginger, coriander, cardamom, thyme, fenugreek, salt and pepper.
- Cook for a few minutes, taste the sauce, and if you prefer more bite, add more chile. Add the chicken and simmer, covered, for about 15 more minutes, adding as much as a cup of water to reach the consistency of a thick sauce. Add more salt and pepper, if desired.
- Serve with injera, pita, naan or rice and, if you wish, hard-boiled eggs.
↑ Back to top
Dou Chi Ji Ding (Black Bean Chicken)
Tags: Chicken
Chinese
Servings: Tested size: 2 servings
Ingredients
- 1 tablespoon Shaoxing wine
- 1/4 teaspoon fine sea salt
- 1 1/2 teaspoons potato flour, cornstarch or potato starch
- 1 teaspoon light soy sauce (not the same as reduced-sodium soy sauce)
- 1 teaspoon dark soy sauce, plus more as needed
- 8 ounces skinless, boneless chicken thighs (about 2 thighs)
- 1 small green bell pepper, or 1/2 each red and green bell pepper, (about 8 ounces total)
- 3 tablespoons canola oil, divided
- 3 garlic cloves, sliced
- An equivalent amount (to the garlic) of ginger, peeled and sliced
- 2 tablespoons fermented black beans, rinsed and drained
- 1 to 2 teaspoons ground chiles, to taste
- Fine sea salt, to taste
- 2 tablespoons finely sliced scallions, green and white parts
- 1 teaspoon toasted sesame oil
FOR THE
MARINADE:
FOR THE
CHICKEN:
Steps
- In a small bowl, stir together the wine, salt, potato flour, light soy sauce and dark soy sauce. Cut the chicken into 3/8- to 3/4-inch cubes and add it to marinade, tossing to coat.
- Cut the pepper(s) into small squares to match the size of the chicken cubes. In a wok or large nonstick skillet over a high heat, add 1 tablespoon of the oil and heat until shimmering. Add the peppers, and stir-fry until hot and slightly cooked, but still crisp, about 2 minutes. Transfer the peppers to a plate.
- In the wok, add the remaining oil, swirl it around until it shimmers. Add the marinated chicken and stir-fry, tossing and separating the pieces. When they are starting to become opaque, add the garlic and ginger and stir-fry until fragrant. Add the fermented black beans and stir a few times until fragrant. Then, add the ground chiles and return the peppers to the wok.
- Continue to stir-fry until the chicken is cooked through, about 3 minutes. Taste and add salt or soy sauce, as needed. Stir in the scallions and, off the heat, the sesame oil. Serve sizzling hot.
↑ Back to top
Double Chocolate Banana Bread
Ingredients
- 3 medium-to-large very ripe bananas
- 1/2 cup (115 grams) butter, melted
- 3/4 cup (145 grams) brown sugar (I use dark here; either light or dark work)
- 1 large egg
- 1 teaspoon pure vanilla extract
- 1 teaspoon baking soda
- 1/4 teaspoon table salt
- 1/2 teaspoon ground cinnamon (optional; I skip it)
- 1 cup (125 grams) all-purpose flour
- 1/2 cup Dutch-process cocoa powder
- 1 cup (about 6 ounces or 170 grams) semisweet or bittersweet chocolate chunks or chips
Steps
- Heat your oven to 350°F. Butter a 9×5-inch loaf pan, or spray it with a nonstick baking spray.
- Mash bananas in the bottom of a large bowl. (You’ll have a little over 1 cup mashed banana total.) Whisk in melted butter, then brown sugar, egg, and vanilla. Place baking soda, salt, cinnamon (if using), flour and cocoa powder in a sifter or fine-mesh strainer and sift over wet ingredients. (My cocoa is almost always lumpy, so this is essential for me.) Stir dry and wet ingredients with a spoon until just combined. Stir in chocolate chunks or chips.
- Pour into prepared pan and bake 55 to 65 minutes, until a tester or toothpick inserted into the center of the cake comes out batter-free. (A melted chocolate chip smear is expected, however.) Cool in pan for 10 to 15 minutes, then run a knife around the edge and invert it out onto a cooling rack. Serve warm or at room temperature.
- The banana bread will keep for up to 4 days at room temperature. I keep mine wrapped in foil. It goes without saying that it has never actually lasted that long.
Notes
- FAVORITE
↑ Back to top
Double Chocolate Coconut Brownies

Ingredients
- 1 package fudge brownie mix (13-inch x 9-inch pan size)
- 1/2 cup canola oil
- 1/4 cup water
- 3 eggs
- 1/2 cup semisweet chocolate chips
- 1/2 cup white baking chips
- 1/2 cup chopped walnuts
- 1 can (14 ounces) sweetened condensed milk
- 2 to 1/2 cups flaked coconut
- 1/4 cup butter, softened
- 1/4 cup evaporated milk
- 2 tablespoons baking cocoa
- 2 cups confectioners' sugar
- 1 teaspoon vanilla extract
FROSTING:
Steps
- Beat the brownie mix, oil, water and eggs on medium speed in a large bowl until blended; stir in chips and walnuts. Pour into a greased 13x9-in. baking pan.
- Bake at 350° for 20 minutes. Remove from oven. Combine condensed milk and coconut in a small bowl; spread over top. Bake 20-25 minutes longer or until center is set. Cool on a wire rack.
- Place frosting ingredients in a small bowl; beat until smooth. Spread over cooled brownies. Yield: 2-1/2 dozen.
Notes
- FAVORITE
↑ Back to top
Dough

Ingredients
- 3 ½ cups (440g) all-purpose flour
- 1 ½ cups (360ml) warm milk or water
- 2 tbsp sugar
- 2 ¼ tsp (1 packet) instant yeast
- 1 ½ tsp salt
- 3 tbsp oil
Steps
- In a bowl, mix warm milk (or water), sugar, and yeast. Let it sit for 5-10 minutes until foamy.
Add flour, salt, and oil.
Stir until combined—no kneading needed!
Cover and let rise for about
1 hour, or until doubled in size.
Use it for pizza, rolls, cinnamon rolls, or bread! Shape as needed,
let
it rise again for 30 minutes, then bake at 375°F (190°C) until golden
brown.
↑ Back to top
Dry Chimichurri Rub
Tags: Rubs and Blends
Spices
Servings: YIELD Makes about 3/4
cup
Ingredients
- 3 tablespoons dried oregano leaves
- 3 tablespoons dried basil leaves
- 2 tablespoons dried parsley flakes
- 2 tablespoons dried thyme leaves
- 2 tablespoons coarse kosher salt
- 1 tablespoon freshly ground black pepper
- 1 tablespoon dried savory leaves
- 1 tablespoon smoked paprika*
- 2 teaspoons garlic powder
- 1 to 2 teaspoons dried crushed red pepper
Steps
- Whisk all ingredients in medium bowl. Transfer to airtight container. DO AHEAD: Can be made 1 month ahead. Store at room temperature.
- Sometimes labeled Pimentón Dulce or Pimentón de La Vera Dulce; available at some supermarkets, at specialty foods stores, and from tienda.com.
Notes
- FAVORITE
↑ Back to top
Dry Jerk Seasoning
Ingredients
- 1/4 cup allspice
- 1 tablespoon dried thyme
- 1 tablespoon paprika
- 1 tablespoon Hatch chile powder
- 1 teaspoon ancho chile powder
- 2 teaspoons onion powder
- 1 teaspoon garlic powder
- 1 or 2 Scotch bonnet or habanero peppers, crushed
- 1/4 teaspoon freshly ground pepper
- 1/2 teaspoon salt
Steps
- With mortar and pestle, mash ingredients together. Place into sealable container until ready to use.
Notes
- FAVORITE
↑ Back to top
Dry Rub
Tags: Rubs and Blends
Seasonings Spices
Is starred.
Ingredients
- 1 tablespoon cumin
- 1 tablespoon paprika
- 1 tablespoon granulated garlic
- 1 tablespoon granulated onion
- 1 tablespoon chili powder
- 1 tablespoon brown sugar
- 2 tablespoons kosher salt
- 1 teaspoon cayenne pepper
- 1 teaspoon black pepper
- 1 teaspoon white pepper
Steps
- Combine all ingredients in a large bowl and mix well. Store in an airtight container. Pack on the dry rub onto your next rack of ribs.
Notes
- FAVORITE
↑ Back to top
Dry Rub Ii
Adapted from http://www.foodnetwork.com/recipes/alton-brown/who-loves-ya-baby-back-recipe/index.html
Ingredients
- 8 tablespoons light brown sugar, tightly packed
- 3 tablespoons kosher salt
- 1 tablespoon chili powder
- 1/2 teaspoon ground black pepper
- 1/2 teaspoon cayenne pepper
- 1/2 teaspoon jalapeno seasoning
- 1/2 teaspoon Old Bay Seasoning
- 1/2 teaspoon rubbed thyme
- 1/2 teaspoon onion powder
Steps
- In a bowl, combine all dry ingredients and mix well.
Notes
- FAVORITE
↑ Back to top
Dry Rub Iii
Ingredients
- 1 tablespoon dry mustard
- 1 tablespoon paprika
- 1 tablespoon dark brown sugar
- 1 1/2 teaspoons garlic powder
- 1 1/2 teaspoons onion powder
- 1 1/2 teaspoons celery salt
- 1 teaspoon cayenne pepper
- 1/2 teaspoon ground allspice
↑ Back to top
Dry-Brined Turkey (A.K.A. the 'Judy Bird')

Ingredients
- 1 (12- to 16-pound) turkey
- Kosher salt
Steps
- Wash the turkey inside and out, pat it dry and weigh it. Measure 1 tablespoon of salt into a bowl for every 5 pounds the turkey weighs (for a 15-pound turkey, you'd have 3 tablespoons).
- Sprinkle the inside of the turkey lightly with salt. Place the turkey on its back and salt the breasts, concentrating the salt in the center, where the meat is thickest. You'll probably use a little more than a tablespoon. It should look liberally seasoned, but not over-salted.
- Turn the turkey on one side and sprinkle the entire side with salt, concentrating on the thigh. You should use a little less than a tablespoon. Flip the turkey over and do the same with the opposite side.
- Place the turkey in a 2 1/2 -gallon sealable plastic bag, press out the air and seal tightly. Place the turkey breast-side up in the refrigerator. Chill for 3 days, turning it onto its breast for the last day.
- Remove the turkey from the bag. There should be no salt visible on the surface and the skin should be moist but not wet. Place the turkey breast-side up on a plate and refrigerate uncovered for at least 8 hours.
- On the day it is to be cooked, remove the turkey from the refrigerator and leave it at room temperature at least 1 hour. Preheat the oven to 425 degrees.
- Place the turkey breast-side down on a roasting rack in a roasting pan; put it in the oven. After 30 minutes, remove the pan from the oven and carefully turn the turkey over so the breast is facing up (it's easiest to do this by hand, using kitchen towels or oven mitts).
- Reduce the oven temperature to 325 degrees, return the turkey to the oven and roast until a thermometer inserted in the deepest part of the thigh, but not touching the bone, reads 165 degrees, about 2 3/4 hours total roasting.
- Remove the turkey from the oven, transfer it to a warm platter or carving board; tent loosely with foil. Let stand at least 30 minutes to let the juices redistribute through the meat. Carve and serve.
Notes
- Each of 15 servings: 564 calories; 77 grams protein; 0 carbohydrates; 0 fiber; 26 grams fat; 8 grams saturated fat; 261 mg. cholesterol; 856 mg. sodium.
↑ Back to top
Dry-Rubbed Flank Steak with Grilled Corn Salsa
Adapted from http://www.epicurious.com/recipes/food/views/dry-rubbed-flank-steak-with-grilled-corn-salsa-56389977
Tags: Beef
Servings: 4
Ingredients
- 2 tablespoons light brown sugar
- 1 tablespoon ancho chile powder
- 1 tablespoon paprika
- 2 teaspoons kosher salt
- 2 teaspoons freshly ground black pepper
- 1 teaspoon cayenne pepper
- 1 teaspoon granulated garlic
- 1 teaspoon English mustard powder
- 1/2 teaspoon ground coriander
- 1/2 teaspoon ground cumin
- 2 tablespoons olive oil, plus more for grill
- 3 ears of corn, shucked
- 1/4 red onion, finely chopped
- 1 jalapeño, seeds removed, finely chopped
- 1 pint cherry tomatoes, halved
- 1 cup fresh cilantro, coarsely chopped
- 1/3 cup fresh lime juice
- Kosher salt, freshly ground pepper
- 1 1/2 pound flank steak
Dry Rub:
Steak and
Salsa:
Steps
- Combine brown sugar, chile powder, paprika, salt, pepper, cayenne, granulated garlic, mustard powder, coriander, and cumin in a small bowl.
- Prepare a grill for medium-high heat; oil grate. Grill corn, turning occasionally, until lightly browned all over, 8–10 minutes; let cool. Cut kernels from cobs and place in a medium bowl. Add onion, jalapeño, tomatoes, cilantro, and lime juice to corn and toss to combine; season with salt and pepper. Set salsa aside.
- Meanwhile, coat steak with all of dry rub, packing on more than once if needed, and drizzle with 2 tablespoons oil to help rub adhere. Grill steak, turning occasionally and moving to a cooler spot on grill as needed to control flare-ups, until nicely browned and an instant-read thermometer inserted into the thickest part registers 130°F, about 4 minutes per side for medium-rare. Transfer to a cutting board and let rest 10 minutes.
- Return steak to grill just to recrisp exterior, about 1 minute per side. Transfer back to cutting board and slice against the grain. Serve topped with salsa.
- Salsa can be made 1 day ahead. Cover and chill.
Dry rub:
Steak and salsa:
Do Ahead:
Notes
- FAVORITE
↑ Back to top
Dumpling and Smashed Cucumber Salad with Peanut Sauce
Adapted from https://cooking.nytimes.com/recipes/1025695-dumpling-and-smashed-cucumber-salad-with-peanut-sauce

Servings: 4
Ingredients
- ⅓ cup smooth peanut butter, well stirred
- 1 garlic clove, finely chopped
- ½ cup just boiled water (or more as needed)
- 2 tablespoons soy sauce
- 1 tablespoon rice vinegar
- 2 teaspoons granulated sugar
- 2 teaspoons chile crisp or oil (or use amount to your liking)
- 6 Persian cucumbers
- Salt
- Vegetable oil or other neutral oil
- 1 pound frozen potsticker dumplings (not thawed)
- Big handful cilantro
- Toasted white sesame seeds or chopped roasted peanuts, for topping
- Chile crisp or chile oil, for serving
FOR THE PEANUT
SAUCE:
FOR THE SALAD:
Steps
- Prepare the sauce: Place the peanut butter, garlic and hot water into a medium bowl and whisk well to combine. (If the peanut butter separates and looks curdled, that’s OK. It will come back together after you add the other seasonings.) Add the soy sauce, rice vinegar, sugar and chile crisp and whisk again until smooth and well combined. (It may look runny, but it will thicken up as it sits.)
- Prepare the salad: Cut the cucumbers in half lengthwise and then into 2-inch lengths. Lay them cut side-down on a cutting board and, using the flat side of a chef’s knife or a rolling pin, smack the cucumbers until they break apart. Tear or cut them into bite-size pieces, if necessary.
- Place the cucumbers in a colander and sprinkle with a pinch or 2 of salt. Allow to sit for 10 minutes to draw out excess moisture.
- Meanwhile, heat a large (12-inch) nonstick or well-seasoned cast-iron skillet over medium-high for 1 to 2 minutes, until very hot. Add 1 to 2 tablespoons of oil and, working in batches, add the dumplings, flat-side down, and cook until the bottoms are lightly browned, 1 to 2 minutes.
- Carefully add about ¼ cup of water to the pan, just enough to cover the base of the dumplings, then immediately cover and cook until the water has evaporated, 3 to 4 minutes. (If your dumplings contain meat, cook for an extra 1 to 2 minutes, or according to package instructions.) Transfer the cooked dumplings to a plate and continue cooking the remaining dumplings. (If you prefer to steam the dumplings, see Tip.)
- To serve, divide the dumplings among 4 plates or shallow bowls and top with the cucumbers. Spoon over a generous amount of peanut sauce, top with cilantro, sesame seeds or peanuts and a few drops of chile crisp/oil. Serve right away, while the dumplings are still warm, or at room temperature.
Notes
- To steam, arrange the dumplings in a steaming basket lined with baking paper or cabbage leaves, place over a pan of boiling water and steam for 10 to 15 minutes or according to package directions.
↑ Back to top
The Easiest Way to Make Vanilla Ice Cream at Home
Tags: Dairy
Desserts Ice
Cream
Ingredients
- 2 cups of heavy cream
- 1 cup of whole milk
- 6 large eggs
- 3/4 cup of sugar
- Vanilla extract to taste
- Salt to taste
The ingredient
list is so small and flexible it barely needs a formal recipe, but
here goes. You'll need:
Steps
- Separate egg yolks
- Whisk egg yolks and sugar together until completely combined
- Whisk in your dairy until completely combined
- Cook your base on medium heat until it forms a custard
- Add flavorings
- Strain into a container and let rest in fridge until cold, preferably overnight
- Churn ice cream and harden it in the freezer
- Eat
Notes
- Unlike a lot of baked goods, ice cream ingredient amounts have some wiggle room. To make a more rich and creamy ice cream, use a higher ratio of cream to milk, add an egg yolk or two, or use more sugar, depending on whether you want a milkier, eggier, or sweeter end result. Want a lighter ice cream? Just do the opposite. The base written above is plenty rich but not overwhelming, and sweet enough to carry flavors well.
↑ Back to top
East Carolina Vinegar Bbq Sauce and Mop
Adapted from https://amazingribs.com/tested-recipes/barbecue-sauce-recipes/east-carolina-vinegar-bbq-sauce-and-mop-recipe
Tags: Condiments
Mop Sauces
Southern
Servings: about 1 3/4 cups
Ingredients
- 1 1/2 cups of distilled vinegar
- 1 teaspoon hot sauce
- 2 tablespoons sugar (white, light brown, or dark brown)
- 1 tablespoon salt
- 2 teaspoons crushed red pepper
- 2 teaspoons finely ground black pepper
- About the vinegar. Seems to me that the best sauces in the area were made with distilled white vinegar, not cider vinegar. So I tried my recipe with both and I liked the distilled better. If you want to use cider, feel free.
- About the hot stuff. Use the hot sauce of your choice. Texas Pete is big in North Carolina. I usually use Tabasco's Chipotle. And if you want something more interesting than crushed red peppers, get crushed chipotles. You can even make your own by smoking jalape–os split lengthwise until they are dried.
- Optional. Some folks like to add warm melted butter to this recipe for richness. Butter also helps release fat soluble flavors in the peppers. Up to a stick would be fine. Do it just before serving, and warm the sauce first so the butter doesn't harden.
Steps
- Pour all the ingredients into a jar and shake. Let it sit for at least 12 hours to allow the flavors to meld. A week is better.
- You can use it as a mop when you cook, you can use it as a finishing sauce when you serve the meat, or both. In the Carolinas it is usually used as both a mop and a finishing sauce.
- To use it as both a mop and finishing sauce, warm it, pour a few ounces into a cup and paint it on the meat with a basting brush once every hour or so while it is cooking. If you use it as a mop, the sauce in the cup can get contaminated with uncooked meat juices on the brush. That's why you don't want to dip the brush in the whole bottle. Discard contaminated mop and serve untouched sauce at the table.
↑ Back to top
Easter Ham-Horseradish Puff Pastry Wreath

Tags: Breads
Goyim Holidays
Pork
Ingredients
- 500 g (~17 2/3 oz) puff pastry (store-bought or homemade)
- 2-3 heaping tbsp sour cream
- 2 tbsp prepared horseradish
- salt and pepper to taste
- 150 g (~5 1/3 oz) smoked, boiled ham, ground or cut into tiny cubes
- 150 g (~5 1/3 oz) grated cheese, semi-hard
- 1 egg
- sesame seeds
Steps
- Line a baking sheet with parchment paper, and preheat the oven to 200°C / 392°F.
- On a floured surface roll out the puff pastry into a 40×50 cm / 15×19 inch oblong. Cut the top one third of the dough into 2 cm / 3/4 inch wide strips. Combine sour cream, prepared horseradish, salt and pepper, and spread the mixture on the two-thirds of the rectangle. Scatter the ham all over it, then cover with grated cheese.
- Roll up the dough, place it on the prepared baking sheet and curve into a wreath. Stick the ends by pressing them together. Brush the top with beaten egg and sprinkle sesame seeds over it. Bake the pastry for 25-30 minutes or until golden brown.
↑ Back to top
Easy 4-Ingredient Chicken Paprikash
Adapted from http://www.seriouseats.com/recipes/2015/11/easy-four-ingredient-chicken-paprikash-recipe.html

Servings: Serves 4
Ingredients
- 1 tablespoon vegetable oil
- 1 large onion, diced or thinly sliced (about 1 1/2 cups)
- Kosher salt
- 1/4 cup (1 ounce) high-quality Hungarian sweet paprika (see note above)
- 4 whole chicken legs, split into thighs and drumsticks (about 2 pounds)
- 1/2 cup sour cream, plus more for garnish
- Egg noodles, boiled potatoes, or spaetzle for serving
- Minced fresh parsley leaves or dill (optional)
Steps
- Heat oil in a large straight-sided sauté pan or Dutch oven over medium heat until shimmering. Add onions, season with salt, and cook, stirring, until completely softened and just starting to brown, about 8 minutes. Add paprika and cook, stirring, until nutty and fragrant, about 1 minute. Add chicken pieces, season with a little more salt, and turn them with tongs until well-coated in the onion/paprika mixture. Nestle the chicken in a single layer in the bottom of the pan, cover with a tight-fitting lid, reduce heat to the lowest setting, and cook until chicken is completely tender and pulls easily from the bone, 30 to 45 minutes.
- Remove chicken pieces and set aside on a large plate. Pour liquid into a 2-cup liquid measuring cup. Skim off excess fat and discard. There should be about 1 cup of liquid remaining in the cup. If not, add water or low-sodium chicken broth to the measuring cup for a total of 1 1/2 cups. Return liquid to the pan and whisk in the sour cream. Season to taste with salt and more paprika if desired. Return chicken to the pan and turn to coat in the sauce.
- Serve immediately over noodles, boiled potatoes, or spaetzle, tossing the noodles or potatoes with the sauce and placing the chicken on top. Garnish with more sour cream, paprika, and minced fresh parsley or dill (if using)
↑ Back to top
Easy and Quick Halushki
Tags: Noodles
Polish
Servings: 6
Ingredients
- 1 pound bacon
- 1 onion, diced
- 1 (16 ounce) package egg noodles
- 1 head cabbage, sliced
- salt and ground black pepper to taste
Steps
- Snip bacon into small pieces with a scissors and cook in a large skillet over medium heat until crisp, stirring often, about 10 minutes. Cook and stir onion with bacon until translucent, about 5 more minutes; set bacon and onion aside, leaving drippings in the skillet.
- Bring a large pot of lightly salted water to a boil. Cook egg noodles in the boiling water, stirring occasionally until cooked through but firm to the bite, about 5 minutes. Drain.
- Transfer bacon and onion mixture with drippings into the pot used to cook the noodles and cook and stir cabbage until coated with drippings. Cover pot and cook until cabbage is tender, 10 to 12 minutes, stirring occasionally. Gently stir in noodles and season to taste with salt and black pepper.
↑ Back to top
Easy Apple Tart
Adapted from https://www.kalofagas.ca/2020/11/03/easy-apple-tart/
Tags: Fruit
Pies and Tarts
Servings: (serves 6)
Ingredients
- 1 sheet of puff pastry, defrosted
- 4 apples (like Granny Smith)
- 1/4 cup granulated sugar
- 1/4 cup brown sugar
- 1 tsp. ground cinnamon
- 1 stick unsalted butter, room temperature
- 1/2 cup apricot jam
- 2 Tbsp. brandy (I used Metaxa)
- pre-heated 400F oven
Steps
- Pre-heat your oven. Like a baking sheet with parchment paper. I like using puff pastry sheets that don’t need to be rolled out but if you have to, use a rolling pin, roll out your puff pastry to approx. 10×14″. Place the puff pastry on parchment-lined baking sheet.
- Peel and core your apples. Cut in half and then cut into 1/4 inch slices. Place a row of overlapping slices diagonally down the middle. Continue to make diagonal overlapping rows on both sides of the middle row.
- Sprinkle with white and brown sugar, cinnamon and dot the apple slices with butter.
- Place on middle rack of pre-heated oven and bake for 50-60 minutes or until pastry is golden-brown and apples fork-tender and golden.
- Quickly warm up the apricot jam, add the brandy and stir-in. Carefully brush the apples with the jam and allow to cool.
- Cut into square pieces, serve room temp. or slightly re-heat to warm with vanilla ice cream.
↑ Back to top
Easy Beef Lo Mein
Tags: Beef
Chinese Noodles
Servings: 4
Ingredients
- 8 ounces lo mein noodles or spaghetti
- 1/2 teaspoon kosher salt, plus more
- 1/2 cup oyster sauce
- 1/4 cup low-sodium soy sauce
- 1/4 cup rice wine vinegar
- 3 tablespoons honey
- 1 1/2 pounds flank steak, chilled
- 1/2 teaspoon freshly ground black pepper, plus more
- 2 tablespoons plus 1 teaspoon toasted sesame oil, divided
- 2 large garlic cloves, pressed with a garlic press or finely chopped
- 1 1/2 teaspoons finely grated ginger
- 3 scallions, thinly sliced, divided
- 8 ounces snow peas
- 1 medium red bell pepper, cut into 1/4"-thick strips
Steps
- Cook noodles in a medium pot of boiling salted water according to package directions. Drain and rinse with cool water; set aside.
- Meanwhile, whisk oyster sauce, soy sauce, vinegar, and honey together in a medium bowl.
- Slice beef against the grain as thinly as possible. Transfer to a medium bowl and toss with 1/2 tsp. salt and 1/2 tsp. pepper.
- Heat 2 Tbsp. oil in a large wok or skillet over high. Add beef and cook, tossing often, until medium-rare, about 3 minutes. Transfer to a plate.
- Heat remaining 1 tsp. oil in same skillet over high. Cook garlic, ginger, and half of the scallions, stirring, for 30 seconds. Add peas and bell pepper and cook until vegetables are softened, about 1 minute. Add oyster sauce mixture and reserved noodles and cook, tossing with tongs, until everything is coated and sauce thickens slightly, 1–2 minutes more. Add beef and stir to combine.
- Divide among plates and top with remaining scallions and black pepper.
Notes
- If you have a few extra minutes, sliced carrots or mushrooms would be a great addition to this stir-fry. Add them to the skillet with the garlic, ginger, and scallions and cook until tender. Then add the peas and bell pepper and continue with the recipe as written.
↑ Back to top
Easy Cinnamon Rolls

Tags: Rolls and Buns
↑ Back to top
Easy Coconut Cream Pie

Ingredients
- 3/4 cup sugar
- 3 tablespoons all-purpose flour
- 1/8 teaspoon salt
- 3 cups milk
- 3 eggs, beaten
- 1 to 1/2 cups flaked coconut, toasted, divided
- 1 tablespoon butter
- 1 to 1/2 teaspoons vanilla extract
- 1 pastry shell (9 inches), baked
Steps
- In a medium saucepan, combine sugar, flour and salt. Stir in milk; cook and stir over medium-high heat until thickened and bubbly. Reduce heat; cook and stir 2 minutes longer. Remove from the heat; gradually stir about 1 cup of hot mixture into beaten eggs. Return all to saucepan; cook and stir over medium heat until nearly boiling. Reduce heat; cook and stir about 2 minutes more (do not boil). Remove from the heat; stir in 1 cup coconut, butter and vanilla. Pour into pie shell; sprinkle with remaining coconut. Chill for several hours before serving. Refrigerate leftovers. Yield: 6-8 servings.
Notes
- FAVORITE
↑ Back to top
Easy Crusty French Bread
Tags: Baking
Breads
Servings: 1 loaf (about 6- 8
servings)
Ingredients
- 2 ¼ teaspoons active dry yeast ( 9 grams)
- 1 teaspoon sugar ( 4 grams) (use honey if you prefer)
- 1 ¼ cups warm water ( 300 grams)
- 1 ¼ teaspoons ( 8 grams) kosher salt
- 2 ½ to 3 ½ cups All-Purpose Flour ( 400 grams) plus extra for dusting (see recipe notes)
Steps
- Combine yeast, sugar, and warm water in a large mixing bowl (you can also use a stand mixer fitted with a dough hook).
- Let the yeast proof for about 5 minutes, until the mixture is foamy.
- Add flour to bowl. Mix with a sturdy spatula until the dough starts to come together, then add salt and mix until all ingredients are incorporated. For best results, mix until no dry bits of flour remain. Note: This is a relatively slack (wet) dough, so it may seem a bit shaggy and sticky at this point. Don't worry - it will become more smooth and elastic as we go!
- Cover bowl with a clean tea towel and let rise on the counter for about 1 hour, until dough has doubled in size.
- When dough has risen, lightly flour a large cutting board.
- Tip the dough out of the bowl and onto the cutting board. DO NOT PUNCH THE DOUGH DOWN - you want to keep all those nice air bubbles intact so you have an airy, delicious loaf of bread. (Note: If the dough is sticking to the bowl a little bit, wet your hand with a bit of cold water and gently separate the dough from the bowl to get it all out).
- Shape the dough into a round loaf: Pull each corner of the dough in towards the center (like you're folding an envelope) and repeat until the dough feels tight and begins to resist your folds. Flip the dough over and pull it into a round loaf. Watch the video(s) above to see exactly how we do this!
- Flour a proofing basket or a medium bowl and place your loaf into it seam-side down. Cover with a tea towel and let rise another 30 minutes or so while you preheat the oven. Note: I like to line my proofing basket or mixing bowl with a clean linen napkin to distribute the flour more evenly and help with cleanup.
- While bread is rising, place an empty dutch oven (with the lid on) in your oven and heat to 460 degrees Fahrenheit.
- BAKE!
- When the oven is hot, you're ready to go! Use oven mitts to pull the dutch oven out and remove the lid.
- Lay a piece of parchment paper down on your counter or cutting board (optional - it makes transferring the bread easier!)
- Tip your bread dough gently out of the proofing basket onto the parchment paper. Make sure the seam side is up this time - this is what will create those beautiful cracks on top of the bread!
- VERY CAREFULLY (without burning yourself!) use the sides of the parchment to lift the bread up and place it into the hot Dutch oven.
- Put your oven mitts back on, place the dutch oven lid back on the pot, and slide the whole thing back into your hot oven.
- Cook bread for 30 minutes.
- After 30 minutes, remove the lid from your dutch oven. The bread should be taller, crusty, and very lightly browned. Continue cooking the bread, uncovered, for 10-15 minutes more until the bread has deepened in color and you have a beautiful brown crust.
- When bread is done, use oven mitts to pull the pot out of your oven.
- Use a long spatula or the corners of your parchment paper to lift the bread out of the dutch oven and onto a cooling rack. Let cool for at least 30 minutes before cutting into it.
- Slice, slather with butter, and enjoy!
MIX THE DOUGH &
FIRST RISE (1 HOUR):
SHAPE THE DOUGH &
FINAL RISE (30 MIN):
HEAT THE OVEN :
Notes
- How to measure flour: If you have a kitchen scale, please use it! Measuring by weight is MUCH more accurate than measuring by volume (with cups) and will give you more consistent bread. That being said, you can certainly make great bread without a kitchen scale! To measure flour in cups: If you measure flour by dipping your cup straight into the bag or bin and shaking off the excess, plan to use about 2 ½ cups of flour. If you measure by stirring the flour with a spoon or scoop before scooping it into a measuring cup and leveling it off, plan to use about 3 cups of flour. You can always add more flour if you need to - just be aware that this is a relatively slack (wet) dough, so it will be a bit shaggy and sticky at first (but it will smooth out and become more elastic as it rises and again as you shape it!)
- Equipment. We recommend a 4- to 6-quart Dutch oven for best results. Le Creuset and Staub are our favorites, but Marquette Castings and Lodge also make solid options that are more budget-friendly. If you don't have a Dutch oven, see this post for alternative baking methods (you can still make great bread without fancy equipment!) Please make sure that your Dutch oven is fitted with a metal (rather than plastic) knob on its lid for best results, and please check the care instructions on your individual equipment before baking. We use this 8.5-inch proofing basket, but an 8- or 9-inch banneton or medium-sized mixing bowl also work well for the final rise.
- PLEASE READ THE POST ABOVE FOR OUR COMPLETE FAQs, TIPS, AND ADVICE. We've gotten so many amazing questions from you - we wanted to be sure to answer as many as we can as thoroughly as we can, but if we put our answers here in the recipe it would make it very annoying to print. Please check the FAQ section in the post above if you have a question or run into a problem!
- Love this recipe? We'd love to see you in our online course, Everyday Artisan Bread, where we share exclusive training videos, worksheets, and ad-free recipes!
↑ Back to top
Easy Flatbread
Tags: Breads
Ingredients
- FLATBREADS
- 350 g self-raising flour , plus extra for dusting
- 1 teaspoon baking powder
- 350 g natural yoghurt
- GARLIC AND HERB BUTTER (OPTIONAL)
- 2 cloves of garlic
- a bunch of fresh soft herbs, such as flat-leaf parsley, tarragon, basil, dill
- 40 g unsalted butter
Steps
- Add all the flatbread ingredients to a mixing bowl and mix together with a spoon, then use clean hands to pat and bring everything together.
- Dust a clean work surface with flour, then tip out the dough.
- Knead for a minute or so to bring it all together (this isn’t a traditional bread recipe, so you don’t need to knead it for long – just enough time to bring everything together).
- Put the dough into a floured-dusted bowl and cover with a plate, then leave aside.
- If making the garlic butter: peel the garlic cloves and crush them with a garlic crusher.
- Pick the herb leaves onto a chopping board and finely chop them, discarding the stalks.
- Melt the butter in a small pan over a medium heat, then stir through the garlic and chopped herbs, then set aside.
- Dust a clean work surface and rolling pin with flour, then divide the dough in half, then divide each half into 6 equal-sized pieces (roughly the size of a golf ball).
- With your hands, pat and flatten the dough, then use a rolling pin to roll each piece into 12cm rounds, roughly 2mm to 3mm thick.
- Use a knife to cut 6 lines into the centre of each round, leaving about 3cm at each end.
- Place the griddle pan on a high heat, then once hot, cook each one for 1 to 2 minutes on each side, or until bar-marked and puffed up, turning with tongs.
- Brush the flatbreads all over with herby garlic butter as they come off the griddle, then pile onto a serving board so everyone can dig in and help themselves.
Notes
- I’ve given you a recipe for garlic butter here too, but these flatbreads are lovely just as they are alongside some soup, with a fresh salad or dunked in some homemade dip.
↑ Back to top
Easy Flatbreads
Ingredients
- FLATBREADS
- 350 g self-raising flour , plus extra for dusting
- 1 teaspoon baking powder
- 350 g natural yoghurt
- GARLIC AND HERB BUTTER (OPTIONAL)
- 2 cloves of garlic
- a bunch of fresh soft herbs, such as flat-leaf parsley, tarragon, basil, dill
- 40 g unsalted butter
Steps
- Add all the flatbread ingredients to a mixing bowl and mix together with a spoon, then use clean hands to pat and bring everything together.
- Dust a clean work surface with flour, then tip out the dough.
- Knead for a minute or so to bring it all together (this isn’t a traditional bread recipe, so you don’t need to knead it for long – just enough time to bring everything together).
- Put the dough into a floured-dusted bowl and cover with a plate, then leave aside.
- If making the garlic butter: peel the garlic cloves and crush them with a garlic crusher.
- Pick the herb leaves onto a chopping board and finely chop them, discarding the stalks.
- Melt the butter in a small pan over a medium heat, then stir through the garlic and chopped herbs, then set aside.
- Dust a clean work surface and rolling pin with flour, then divide the dough in half, then divide each half into 6 equal-sized pieces (roughly the size of a golf ball).
- With your hands, pat and flatten the dough, then use a rolling pin to roll each piece into 12cm rounds, roughly 2mm to 3mm thick.
- Use a knife to cut 6 lines into the centre of each round, leaving about 3cm at each end.
- Place the griddle pan on a high heat, then once hot, cook each one for 1 to 2 minutes on each side, or until bar-marked and puffed up, turning with tongs.
- Brush the flatbreads all over with herby garlic butter as they come off the griddle, then pile onto a serving board so everyone can dig in and help themselves.
Notes
- I’ve given you a recipe for garlic butter here too, but these flatbreads are lovely just as they are alongside some soup, with a fresh salad or dunked in some homemade dip.
↑ Back to top
Easy Fried Rice
Tags: Chinese
Rice
Is starred.
Servings: 2 to 3
Ingredients
- 2 cups cooked white rice (12 ounces; 350g; see note)
- 2 tablespoons (30ml) vegetable or canola oil, divided
- 1 small onion, finely chopped (4 ounces; 115g)
- 1 medium carrot, peeled and cut into small dice (3 ounces; 85g)
- 2 scallions, thinly sliced (1 ounce; 30g)
- 2 medium cloves garlic, minced (about 2 teaspoons; 5g)
- 1 teaspoon (5ml) soy sauce
- 1 teaspoon (5ml) toasted sesame oil
- Kosher salt and ground white pepper
- 1 large egg
- 4 ounces (115g) frozen peas
Steps
- If using day-old rice (see note), transfer to a medium bowl and break the rice up with your hands into individual grains before proceeding. Heat 1/2 tablespoon (7ml) vegetable oil in a wok over high heat until smoking. Add half of rice and cook, stirring and tossing, until the rice is pale brown and toasted and has a lightly chewy texture, about 3 minutes. Transfer to a medium bowl. Repeat with another 1/2 tablespoon oil and remaining rice.
Return all the rice to the wok and press it up the sides, leaving a
space in the middle. Add 1/2 tablespoon (7ml) oil to the space. Add
onion, carrot, scallions, and garlic and cook, stirring gently, until
lightly softened and fragrant, about 1 minute. Toss with rice to
combine. Add soy sauce and sesame oil and toss to coat. Season to
taste
with salt and white pepper.
Push rice to the side of the wok and add remaining 1/2 tablespoon
(7ml)
oil. Break the egg into the oil and season with a little salt. Use a
spatula to scramble the egg, breaking it up into small bits. Toss the
egg and the rice together.
Add frozen peas and continue to toss and stir until peas are thawed
and
every grain of rice is separate. Serve immediately.
Notes
- For the best results, use Chinese-style medium-grain rice, jasmine rice, or sushi rice. Rice should either be cooked fresh, spread on a tray, and allowed to cool for five minutes, or, alternatively, transferred to a loosely covered container and refrigerated for at least 12 hours and up to 3 days.
↑ Back to top
Easy Homemade Mac and Cheese (Stovetop)
Adapted from https://joyfoodsunshine.com/homemade-mac-and-cheese/

Tags: Cheese
Pasta
Servings: 8
Ingredients
- 8 oz elbow macaroni uncooked
- 2 TBS butter
- 2 TBS all-purpose flour
- ½ tsp sea salt
- ¼ tsp garlic powder (optional but recommended)
- 1 cup whole milk
- ¼ cup sour cream or Greek yogurt
- 2 cups shredded cheddar cheese
Cheese Sauce:
Steps
- Cook elbow macaroni according to package instructions. Be sure to add ¼ tsp salt to the water used to boil the noodles. Drain, and set aside.
- Mix flour, sea salt, and garlic powder together in a small bowl. Set aside.
- In a medium saucepan over medium heat, melt the butter.
- Add flour mixture and whisk to combine.
- Cook for 1 minute until mixture is slightly brown.
- Add 1 cup milk and whisk until the mixture is smooth.
- Add sour cream (or Greek yogurt) and whisk until smooth.
- Cook on medium-high heat until the mixture is thickened (about 3-5 minutes). Do not let it boil.
- Once mixture is thick (sticks to the back of the spatula), reduce heat to low and add cheese. Whisk until cheese is melted and mixture is smooth. Taste and add more salt/seasoning if desired.
- Add cooked pasta to the pot of cheese sauce and stir until the sauce is evenly distributed.
- Let the mac and cheese cool for 3-5 minutes or until the cheese sauce has thickened a little bit and sticks to the noodles. Serve warm!
Make the cheese sauce:
Notes
- Storage & reheating
↑ Back to top
Easy Microwave Chocolate Mug Cake Recipe (With Video)
Servings: Original recipe (1X)
yields 1 servings
Ingredients
- Original recipe (1X) yields 1 servings
- ¼ cup all-purpose flour
- ¼ cup white sugar
- 2 tablespoons unsweetened cocoa powder
- ⅛ teaspoon baking soda
- ⅛ teaspoon salt
- 3 tablespoons milk
- 2 tablespoons canola oil
- 1 tablespoon water
- ¼ teaspoon vanilla extract
Steps
- Gather all ingredients.
- Mix flour, sugar, cocoa powder, baking soda, and salt together in a large microwave-safe mug; stir in milk, canola oil, water, and vanilla extract.
- Cook in the microwave until cake is done in the middle, about 1 minute 45 seconds.
- Enjoy!
Dotdash Meredith Food
Studios:
Dotdash Meredith Food
Studios:
Notes
- For a healthier version, use 1 ½ tablespoons of plain unsweetened applesauce instead of canola oil, and use 3 tablespoons plus 1 teaspoon of water instead of milk.
↑ Back to top
Easy Mixed-Cheese Quiche

Servings: Makes one 8-inch pie
Ingredients
- 1/2 recipe Easy Pie Dough, rolled out to a 12-inch circle (see note)
- 1 cup heavy cream (see note)
- 1 cup whole milk (see note)
- 3 large eggs
- 1 teaspoon kosher salt
- Freshly ground black pepper
- 8 ounces mixed rindless soft and semi-soft cheeses (such as Gruyere, Fontina, Cheddar, Gorgonzola, Stilton, Jack, etc.), cubed or broken into small clumps
- Minced chives, for garnish (optional)
Steps
- Lay pie dough into an 8-inch tart pan or pie dish (at least 1 1/2 inches deep), and trim excess dough around the edge. Press dough gently into edges, then, with a docker or the tines of a fork, poke holes in even rows across the base and around the wall of dough. Freeze for at least 30 minutes and up to overnight.
- Preheat oven to 425°F and set rack to center position. Line the dough with parchment paper, allowing it to overhang the sides, and fill the pan with pie weights, dried beans, or dry rice. Bake the crust for 10 minutes. Remove weights and parchment paper, wrap edges of the pie dough with tin foil, and return to the oven. Bake until lightly golden brown, 3 to 5 minutes. Remove and lower oven temperature to 350°F.
- In a large bowl, whisk cream and milk with eggs until thoroughly incorporated. Whisk salt and pepper into custard base.
- Scatter cheese all over bottom of pie and set on a rimmed baking sheet. Transfer to the oven, then carefully pour custard base into pie (you can slide the oven rack out slightly to help with this, but be sure to push it back gently to avoid spilling the pie filling). Bake until center is just barely set but still jiggles when touched, about 35 minutes. Remove from oven and allow to cool at least 15 minutes before serving. Serve warm, sprinkling minced chives on top, if desired.
↑ Back to top
Easy Pork Rillettes (Slow-Cooked Pork Spread)
Servings: 12 to 16
Ingredients
- 2 pounds boneless, skinless pork shoulder, cut into 1 1/2-inch chunks (about 1kg)
- Kosher salt
- 1/2 cup vegetable oil, lard, or duck fat (120ml)
- 4 bay leaves
- 6 fresh thyme sprigs
- 2 large shallots, very roughly chopped
- 4 medium cloves garlic, split in half
- Freshly ground nutmeg, to taste
Steps
- Adjust oven rack to lower position and preheat oven to 275°F (140°C). Season pork gently with salt and pack into a Dutch oven, roasting pan, or casserole dish. It should fit in a layer about 2 inches deep. Pour oil over the pork (if using lard or duck fat, heat until just melted before pouring over pork). Nestle bay leaves, thyme sprigs, shallots, and garlic in with the pork. Cover pan tightly with aluminum foil, transfer to oven, and cook until pork is completely tender and shows very little resistance when pierced with a knife, about 3 hours.
- Remove from oven and using tongs, discard bay leaves, thyme, shallots, and garlic. Set a large strainer over a heatproof bowl and carefully pour pork mixture into it. Reserve drained fat and juices.
- Transfer pork chunks to the bowl of a stand mixer fitted with a paddle attachment (see notes). Turn mixer on to low speed and gradually increase speed to medium, allowing pork to break down and shred. Slowly drizzle in the fat and juices a few tablespoons at a time, tasting in between each addition until the mixture is as loose and creamy as you like it. Season to taste aggressively with salt (the mixture will get blander as it chills, so add salt until it almost tastes too salty).
- Carefully pack mixture into jars, spooning it in a little bit at a time and making sure to remove all air bubbles. Smooth tops of mixture with the back of a spoon, wipe rims of jars with a clean cloth, then pour a quarter inch of fat on top of each one. Close lids and refrigerate for at least 2 hours and up to a week before serving. Serve lightly chilled with bread or crackers and cornichons, whole grain mustard, and fruit preserves. Rillettes can also be frozen directly in their jars and held for several months. Defrost in the refrigerator overnight before serving.
Notes
- You can also make the rillettes with a potato masher in a large bowl if you do not have a stand mixer.
↑ Back to top
Easy Queso Fresco
Tags: Cheese
Servings: 1 quart cheese curds
Ingredients
- 1 gallon whole milk, not ultra-pasteurized
- 2/3 cup fresh juice from about 5 lemons, or 2/3 cup white vinegar
- Kosher or table salt
Steps
- Line colander with four layers of cheesecloth or 2 layers of food-safe paper towels and set over large bowl. Heat milk in a large pot over medium-low heat, stirring frequently, until it registers 165 to 180°F on an instant-read thermometer. Add the lemon juice or vinegar 1 tablespoon at a time, stirring gently after each addition. Stop adding the acid when the curds separate from the whey: you will see white clumps of curd suspended in a pale translucent whey. Let sit uncovered for at least 5 minutes and up to 20 while the separation finishes.
- Using slotted spoon or wire skimmer, transfer curds to prepared colander, cover exposed top with plastic wrap, and allow to drain until desired texture is reached, about 20 minutes if using for pressed cheese (see step 3), or an hour for fresh curds. Gently stir in salt to taste.
- For pressed cheese, gather curds into a ball in the middle of the cloth and press them into a hockey-puck shape. Tie the cloth closed around the cheese. Place the bound cheese back in the colander and place a heavy can or pan on top. Let sit until cheese has reached desired texture, about an hour and a half.
↑ Back to top
Easy Swedish Meatballs and Smashed Potatoes
Adapted from http://www.seriouseats.com/recipes/2012/09/easy-swedish-meatballs-smashed-potatoes-recipe.html
Ingredients
- 1 pound baby new potatoes
- Kosher salt and freshly ground black pepper
- 14 ounces of sweet pork sausage, removed from its casing
- 1/4 cup breadcrumbs (preferably fresh)
- 1/4 cup milk, plus 6 tablespoons
- 1/2 teaspoon ground nutmeg or allspice (or a combination of the two), divided
- 2 teaspoons olive oil
- 1 cup low sodium canned or homemade chicken broth
- 1/4 cup plus 2 tablespoons crème fraîche or sour cream
- 2 tablespoons chopped flat leaf parsley
- Lingonberry jam (optional)
Steps
- Put the potatoes in a stockpot, and cover by an inch of water. Season with salt and boil until tender, about 10 minutes.
- In a large bowl, gently mix together the sausage meat, breadcrumbs, 1/4 cup milk, 1/4 teaspoon of nutmeg or allspice, and 1/2 teaspoon pepper. Using wet hands or a scoop, divide mixture into 20 balls.
- Heat olive oil in a large nonstick skillet over medium-high heat until shimmering. Add meatballs and brown on all sides, about 5 minutes total. Add broth, cover the pot, and simmer until the meatballs are cooked through, about 10 minutes. Add the remaining nutmeg or allspice and 2 tablespoons crème fraîche or sour cream. Stir to combine and simmer until sauce thickens lightly. Season to taste with salt and pepper.
- Drain the potatoes, and return back to their hot pot. Add 6 tablespoons milk and 1/4 cup of crème fraîche or sour cream, and season with salt and pepper. Add half the parsley, if using, and smash the potatoes. Plate the potatoes, and pour the meatballs and sauce over the top. Top with the remaining parsley. Serve with lingonberry jam
Notes
- FAVORITE
↑ Back to top
Ebi No Chiri-Sōsu (Japanese Shrimp in Chile Sauce)
Servings: 4
Ingredients
- 2 tablespoons (3/4 ounce; 20 g) plus 1 teaspoon ( 3 g) unmodified potato starch, divided
- 14 ounces extra large shrimp (about 12 to 15 shrimp; 400g), peeled, deveined
- 1/4 teaspoon baking soda
- 1 large egg white (1 ounce; 30g)
- 1/4 teaspoon Diamond Crystal kosher salt, plus more if needed; for table salt, use half as much by volume
- 8 1/2 ounces (250ml) vegetable oil, for frying
- One 1/3-inch knob fresh ginger ( 1/4 ounce; 8g), peeled and minced
- 2 medium garlic cloves, minced
- 1 tablespoon (15g) Sichuan-style chile bean paste, such as Chinese doubanjiang or Japanese tobanjan (see note)
- 3/4 cup (175ml) homemade or store-bought chicken stock or water
- 1/4 cup (2 ounces; 60g) ketchup
- 2 teaspoons sugar, plus more if needed
- 2 teaspoons rice vinegar, plus more if needed
- 1 tablespoon (15ml) sake
- 1 negi (Welsh onion) or 1/2 small leek (2 ounces; 55 g), white part only, rinsed well and minced (see note)
Steps
- In a small bowl, whisk together 1 teaspoon potato starch with 1/4 cup (60ml) cold water until well combined; set aside.
- Rinse the shrimp under cold running water, massaging the shrimp with your hands, for 1 minute. In a medium bowl, combine the rinsed shrimp, baking soda, egg white, and salt. Add remaining 2 tablespoons potato starch and, using a spoon or clean hands, toss to coat shrimp.
- Place a wire rack over a rimmed baking sheet. In a carbon-steel wok or 10-inch carbon steel or stainless-steel skillet, heat oil over high heat to 330°F (165°C). Add shrimp, discarding any excess marinade and dropping from as close to the oil’s surface as possible to minimize splashing, and fry, stirring and turning occasionally, until cooked through, about 2 minutes. (Potato starch will not brown significantly like wheat flour would, so the cooked shrimp will still appear quite pale.) Using a spider or slotted spoon, transfer shrimp to prepared baking sheet. Carefully ladle oil through a fine-mesh strainer set over a medium heatproof bowl.
- Return 2 tablespoons (30ml) oil to now-empty wok and return the wok to high heat (allow remaining oil to fully cool before storing). Add ginger and garlic and cook, stirring constantly, until softened but not browned, about 10 seconds. Add chile-bean paste and cook, stirring, until fragrant, about 30 seconds. Stir in chicken stock, ketchup, sugar, vinegar, sake, and negi (or leek). Bring to a boil, then reduce heat to a simmer and cook, stirring, until negi (leek) is softened and tender, about 2 minutes. Adjust seasoning to taste with sugar, vinegar, or salt as required.
- Add reserved shrimp and toss to coat. Stir in potato starch slurry, a teaspoon or two at a time, until sauce thickens enough to coat the shrimp in a glaze; discard any remaining potato starch-water mixture or reserve for another use. If sauce over-thickens and becomes gloppy, loosen by stirring in water 1 tablespoon at a time.
- Transfer to a plate and serve immediately.
Notes
- Tobanjan, the versions of Sichuanese doubanjiang available in Japan, tends to be sweeter and less spicy than Chinese originals. For this recipe, I prefer to use Sichuan Pixian doubanjiang, but most Japanese, whether at home or in restaurants, will use the local Japanese varieties. Varieties from Pixian are often chunky in texture with the broad beans and erjingtiao chiles left whole, so you may need to chop them into a paste by hand before using. You may need to adjust the amount of sugar used depending on the type of paste used.
- Negi, also known as a Welsh onion, is basically a giant scallion with a higher ratio of white part to green shoot; it can be found at Asian markets.
- The common technique used when thickening sauces with a starch mixture is to add the starch in 3 additions, using your judgement to adjust the amount added each time. This is to avoid too much starch being added too quickly, which will produce a gloopy sauce.
↑ Back to top
Ed's Banana Cream Pie
Ingredients
- Crust
- 1 1/2 cup coconut
- 4 tbsp butter
- Filling
- Mix together
- 1/4 c sugar
- 1 1/2 tsp. flour
- 2 tbsp + 1/2 tsp cornstarch
- 2 eggs (add one at a time)
- 3/4 cup milk
- In a saucepan mix together
- 1/2 cup milk
- 3/4 cup half n half
- sprinke with
- 1/2 cup sugar
- heat over medium heat
- stir only when it begins to boil
- reduce heat to low
- whisk in egg mixture
- Whisk constantly until it boils
- whisk an additional 2 minutes
- remove from heat
- add
- 3 tbsp butter
- 1 1/2 tsp vanilla
- let cool
Steps
- Crust
- Melt butter in pie pan
- add coconut
- mix together
- press up bottom and sides
- Bake at 350 until coconut is toasted
- 15 minutes
- Spread 1/3 of the filling
- place layer of sliced bananas
- layer 1/3 filling
- more sliced bananas
- top with remaining filling
- refridgerate 3 hours
- Top with whipped cream
Notes
- FAVORITE
↑ Back to top
Egg Bake
Ingredients
- ¼ cup butter
- 18 eggs
- 1 cup sour cream
- 1 cup milk
- 2 tsp salt
- ¼ cup green onion chopped
- ½ green pepper chopped
- Grated Cheddar cheese
Steps
- Melt Butter in 9x13 pan
Mix rest of ingredients
together
Bake at 325° for 35 minutes
Sprinkle more cheese over top
bake until melted
↑ Back to top
Egg Rolls in a Bowl
Adapted from https://www.alirada.tn/egg-rolls-in-a-bowl/

Tags: Chinese
Ingredients
- 1 lb ground pork (or chicken, turkey, or beef)
- 1 tablespoon sesame oil
- 3-4 cloves garlic, minced
- 1 tablespoon ginger, freshly grated
- 4-5 green onions, sliced
- 1 small head of cabbage, shredded
- 2-3 carrots, julienned or shredded
- 1/4 cup soy sauce or tamari (for a gluten-free version)
- 2 tablespoons hoisin sauce (optional)
- 1 teaspoon Sriracha or chili sauce (adjust according to your spice preference)
- Salt and pepper to taste
Steps
- Brown the Meat: In a large skillet or wok, brown the ground pork over medium-high heat, breaking it up into small pieces as it cooks. Once fully cooked, remove the pork from the skillet and set aside.
- Sauté Veggies: In the same skillet, add the sesame oil. Add the garlic, ginger, and white parts of the green onions. Sauté for a minute or two until fragrant.
- Add Cabbage and Carrots: Add the shredded cabbage and carrots to the skillet. Stir-fry for 5-7 minutes or until the vegetables are tender. You want them to be slightly crunchy and not overly soft.
- Combine: Return the browned pork to the skillet. Stir in the soy sauce, hoisin sauce (if using), and Sriracha or chili sauce. Mix everything well and cook for another 2-3 minutes until everything is heated through.
- Serve: Transfer to bowls and garnish with the green parts of the sliced green onions. If desired, you can also top with more chili sauce, sesame seeds, or even fried wonton strips for added crunch.
Notes
- Note: This recipe is quite versatile. You can add other vegetables like bell peppers, mushrooms, or snap peas if you like. Adjust the seasoning according to your preference. Enjoy your deconstructed egg roll!
↑ Back to top
Eggnog
Adapted from https://altonbrown.com/recipes/aged-eggnog/

Tags: Beverages
Holidays
Servings: 8 TO 10
Ingredients
- 12 large eggs, pasteurized if you need peace of mind
- 1 pound sugar
- 1 teaspoon freshly grated nutmeg
- 1 pint half-and-half
- 1 pint whole milk
- 1 pint heavy cream
- 1 cup Jamaican rum
- 1 cup cognac
- 1 cup bourbon
- 1/4 teaspoon kosher salt
Steps
- Separate the eggs and store the whites for another application.
- Beat the yolks with the sugar and nutmeg in a large mixing bowl until the mixture lightens in color and falls off the whisk in a solid ribbon.
- Combine dairy, booze, and salt in a second bowl or pitcher and then slowly beat into the egg mixture.
- Move to a large glass jar (or a couple of smaller ones) and store in the fridge for a minimum of 2 weeks. A month would be better, and 2 better still. In fact, there’s nothing that says you couldn’t age it a year, but I’ve just never been able to wait that long. And yes, you can also drink it right away.
- Serve in mugs or cups topped with a little extra nutmeg grated on top.
↑ Back to top
Eggnog
Ingredients
- 4 egg yolks
- 1/3 cup sugar, plus 1 tablespoon
- 1 pint whole milk
- 1 cup heavy cream
- 3 ounces bourbon
- 1 teaspoon freshly grated nutmeg
- 4 egg whites*
Steps
- In the bowl of a stand mixer, beat the egg yolks until they lighten in color. Gradually add the 1/3 cup sugar and continue to beat until it is completely dissolved. Add the milk, cream, bourbon and nutmeg and stir to combine.
- Place the egg whites in the bowl of a stand mixer and beat to soft peaks. With the mixer still running gradually add the 1 tablespoon of sugar and beat until stiff peaks form.
- Whisk the egg whites into the mixture. Chill and serve.
- Cook's Note: For cooked eggnog, follow procedure below.
- In the bowl of a stand mixer, beat the egg yolks until they lighten in color. Gradually add the 1/3 cup sugar and continue to beat until it is completely dissolved. Set aside.
- In a medium saucepan, over high heat, combine the milk, heavy cream and nutmeg and bring just to a boil, stirring occasionally. Remove from the heat and gradually temper the hot mixture into the egg and sugar mixture. Then return everything to the pot and cook until the mixture reaches 160 degrees F. Remove from the heat, stir in the bourbon, pour into a medium mixing bowl, and set in the refrigerator to chill.
- In a medium mixing bowl, beat the egg whites to soft peaks. With the mixer running gradually add the 1 tablespoon of sugar and beat until stiff peaks form. Whisk the egg whites into the chilled mixture.
Notes
- FAVORITE
↑ Back to top
Eggplant Bolognese
Tags: Italian
Pasta Vegetarian
Servings: 4
Ingredients
- Salt and pepper
- 6 tablespoons extra-virgin olive oil
- 1 pound Italian eggplant, peeled and chopped into ¼-inch pieces (4 packed cups)
- 6 ounces cremini (or white button) mushrooms, finely chopped (2 cups)
- ½ cup finely chopped white onion
- ½ cup finely chopped carrot
- 3 garlic cloves, minced
- 2 tablespoons tomato paste
- 3 cups mushroom broth (or vegetable stock)
- 1 cup canned whole tomatoes, crushed with your hands
- 1 teaspoon dried oregano
- 1 basil sprig, plus chopped basil for garnishing
- 1 pound rigatoni, fusilli or other short pasta
- 2 tablespoons unsalted butter
- Freshly grated Parmesan, for serving
Steps
- Bring a large pot of salted water to a boil over high.
- In a large Dutch oven or other heavy lidded pot, heat 2 tablespoons of the oil over medium-high. Add half of the eggplant, season with salt and pepper and cook, stirring occasionally, until softened and lightly golden, 5 minutes. Transfer eggplant to a plate. Adjust heat to medium and repeat with 2 tablespoons of the oil and the remaining eggplant, transferring the eggplant to the plate.
- Add the remaining 2 tablespoons oil and the mushrooms to the pot. Season with salt and pepper and cook, stirring occasionally to scrape up any browned bits, until golden, 5 minutes. Add onion and carrot, season with salt and pepper and cook, stirring occasionally, until onion is softened, 3 minutes. Adjust heat to low, add garlic and tomato paste and stir until caramelized, about 2 minutes.
- Stir in broth, tomatoes, oregano, basil sprig and the browned eggplant, then bring to a boil over medium-high. Cover, adjust heat to medium and cook, stirring occasionally, until eggplant is very tender, 15 minutes. Uncover and cook, stirring and mashing half of the eggplant, until sauce is thickened, 2 minutes.
- While the sauce comes to a boil, drop pasta in the boiling water and cook according to package directions until al dente. Reserve 1 cup of the pasta water before draining.
- Add pasta, butter and ½ cup of the pasta water to the eggplant mixture and cook, stirring vigorously, until pasta is nicely coated and mixture is saucy, 2 to 3 minutes. Season with salt and pepper.
- Divide pasta among bowls. Top with chopped basil and cheese; serve warm.
↑ Back to top
Eggplant Dip (Baba Ghanoush)

Tags: Dips and Spreads
Middle-East
Servings: YIELD Makes 10 servings
Ingredients
- 2 to 3 medium eggplants (about 3 pounds total)
- 2 to 3 tablespoons olive oil
- 1/3 cup tahini
- 2 cloves garlic, peeled and crushed
- Juice of 2 lemons (about 1/2 cup)
- Kosher salt and freshly ground black pepper
- N/A freshly ground black pepper
Steps
- Preheat the oven to 450°F. Rub the outside of the eggplants with olive oil and place them in a roasting plan. Roast the eggplant until the skin has charred and the interior is tender, 15 to 20 minutes. Let cool.
- Peel and seed the cooled eggplant, roughly chop the flesh, and then transfer it to the bowl of a food processor.
- Into the processor bowl add the tahini, garlic, lemon juice, some salt and pepper to taste, and a few teaspoons of cold water. Process the mixture to a coarse paste, adding a bit more water as needed to allow the mixture to blend.
- Adjust the seasoning with salt and pepper to taste and serve.
Notes
- FAVORITE
↑ Back to top
Eggs Benedict
Adapted from https://altonbrown.com/recipes/eggs-benedict/
Servings: 8
Ingredients
- 12 ounces all-purpose flour
- 1 1/2 ounces nonfat dry milk
- 1 tablespoon sugar
- 1 envelope active dry yeast
- 1 teaspoon kosher salt
- 10 fluid ounces water
- 1 tablespoon shortening
- 8 teaspoons rolled quick oats
- 4 quarts water
- 1/4 cup white vinegar
- 1 teaspoon kosher salt
- 8 large eggs
- 3 large egg yolks
- 1 teaspoon water
- 1/4 teaspoon sugar
- 12 tablespoons (1 1/2 sticks) unsalted butter, chilled and cubed
- 0.5 teaspoon kosher salt
- 2 tablespoons freshly squeezed lemon juice
- 1/4 teaspoon ground cayenne
- 8 slices Canadian bacon, thinly sliced
- 8 (3 3/4-inch diameter by 2-inch tall) cans with tops and bottoms removed or 8 English muffin rings
- Digital instant-read thermometer
- 4 (6-ounce) custard cups
ENGLISH
MUFFIN:
POACHED EGGS:
HOLLANDAISE
SAUCE:
EGGS BENEDICT:
Specialized
Hardware:
Steps
- Combine the flour, nonfat dry milk, sugar, yeast, and salt in the bowl of a stand mixer fitted with the paddle attachment. Mix on low for 10 seconds.
- Put the water and shortening in microwave-safe container and heat to 120 to 130ºF, approximately 2 minutes. Stir until the shortening is thoroughly melted. Add the water mixture to the dry ingredients and mix on medium speed until well combined, stopping to scrape down the bowl halfway through mixing, about 3 minutes. Cover the bowl with plastic wrap and refrigerate overnight.
- The next morning, remove the dough from the refrigerator, uncover, and mix on medium speed for 3 minutes.
- Position the 8 cans on a half-sheet pan and generously spray the rings and pan with nonstick spray. Sprinkle 1/2 teaspoon of oats in the bottom of each ring. Using a 2-ounce ice cream scoop or disher, scoop the dough into the rings, dividing it evenly between the rings. Sprinkle each top with 1/2 teaspoon of oats. Cover with parchment and let sit in a warm place for 60 minutes.
- Heat oven to 400ºF.
- Leave the parchment in place and set a second half-sheet pan on top. Bake for 20 minutes then remove the top half-sheet pan. Continue to bake until the muffins reach an internal temperature of 210ºF on an instant-read thermometer and are lightly browned, 5 to 10 minutes.
- With the muffins still in the rings, remove the pan to a cooling rack for 10 minutes. Slide a knife around the perimeter of each ring to loosen. Set aside to cool completely.
- Put 4 (6-ounce) custard cups in a deep, 6-quart straight-sided saute pan or rondeau. Add 4 quarts of water or enough to cover the cups by at least 1/4 inch. Add the vinegar and salt to the water and put the pan over high heat. Heat just until the water begins to boil and the cups clatter against the bottom of the pan, 20 to 25 minutes.
- Adjust the heat to maintain a water temperature of 205ºF outside the cups. Break the eggs, 1 at a time, into another custard cup or ladle. Pour the eggs slowly into each of the cups, timing them about 10 seconds apart. Cook for 5 minutes each.
- Remove eggs from cups and transfer to an ice bath to stop cooking. Refrigerate for up to 6 hours in the ice bath. Repeat with the remaining eggs.
- Put one inch of water in a large saucepanover medium heat and bring to a simmer. Once simmering, reduce the heat to low.
- Place egg yolks and water in a medium mixing bowl and whisk until it lightens in color, 1 to 2 minutes. Add the sugar and whisk for another 30 seconds.
- Set the bowl over the simmering water and whisk constantly until there is a clear line that is drawn in the mixture when you pull your whisk through, or the mixture coats the back of a spoon, 3 to 5 minutes.
- Remove the bowl from over the pan, gradually add the butter, one piece at a time, and whisk until all of the butter is incorporated. Place the bowl back over the simmering water occasionally so it will be warm enough the melt the butter. Add the salt, lemon juice and cayenne pepper. Serve immediately or hold in a thermos to keep warm.
- To build Eggs Benedict: Put the julienned Canadian bacon in 10-inch saute pan set over medium heat. Cook, stirring frequently, until heated through and beginning to turn lightly brown around the edges, 4 to 5 minutes. Turn off the heat, but leave the bacon in the pan to keep warm until serving.
- Reheat eggs: Bring water to a simmer, turn off the heat, and add the eggs. Wait 1 to 2 minutes or until warmed through.
- For each serving, put 2 small dollops of hollandaise on a plate and set half an English muffin on top of each dollop. Put a small amount of Canadian bacon on top of each half and top with 1 warm poached egg and drizzle with hollandaise. Repeat with remaining ingredients and serve immediately.
ENGLISH MUFFIN:
POACHED EGGS:
HOLLANDAISE SAUCE:
EGGS BENEDICT:
↑ Back to top
Eggs Benedict Casserole

Ingredients
- 12 ounces Canadian bacon, chopped
- 6 English muffins, split and cut into 1-inch pieces
- 8 eggs
- 2 cups 2% milk
- 1 teaspoon onion powder
- 1/4 teaspoon paprika
- 4 egg yolks
- 1/2 cup heavy whipping cream
- 2 tablespoons lemon juice
- 1 teaspoon Dijon mustard
- 1/2 cup butter, melted
HOLLANDAISE
SAUCE:
Steps
- Place half of the Canadian bacon in a greased 3-qt. or 13x9-in. baking dish; top with English muffins and remaining bacon. In a large bowl, whisk eggs, milk and onion powder; pour over top. Refrigerate, covered, overnight.
- Preheat oven to 375°. Remove casserole from refrigerator while oven heats. Sprinkle top with paprika. Bake, covered, 35 minutes. Uncover; bake 10-15 minutes longer or until a knife inserted near the center comes out clean.
- In top of a double boiler or a metal bowl over simmering water, whisk egg yolks, cream, lemon juice and mustard until blended; cook until mixture is just thick enough to coat a metal spoon and temperature reaches 160°, whisking constantly. Reduce heat to very low. Very slowly drizzle in warm melted butter, whisking constantly. Serve immediately with casserole. Yield: 12 servings (1-2/3 cups sauce).
Notes
- FAVORITE
↑ Back to top
Elegant and Easy Gourmet Gefilte Fish Pâté
Adapted from http://www.seriouseats.com/recipes/2009/09/gefilte-fish-pate-appetizer-joan-nathan-recipe.html
Servings: YIELD 20 appetizer
portions
Ingredients
- 3 pounds fish fillets (whitefish and pike, 1 1/2 pounds each)
- 4 medium Bermuda onions, peeled and diced (about 2 pounds)
- 3 tablespoons vegetable or canola oil
- 4 large eggs
- 2 cups cold water
- 6 tablespoon matzah meal
- 1 tablespoon salt or to taste
- 2 teaspoons ground white pepper
- 2 tablespoons sugar
- 2 large carrots, peeled
- Parsley for garnish
Steps
- Have your fish store grind the fillets or grind them yourself in a food processor or meat grinder. Do not puree, but grind fine.
- Sauté the diced onions in the oil until soft and transparent but not brown. Cool.
- In the bowl of an electric mixer place the fish, onions, eggs, water, matzah meal, salt, white pepper, and sugar. Beat at medium speed for 15 minutes. Grate in the carrots and mix well.
- Pour the mixture into a greased 12-cup bundt pan. Smooth the top with a spatula and bake in a preheated 325 °F oven for 1 hour in a larger pan filled with 2 inches water.
- Cover with aluminum foil and continue baking for 1 hour or until the center is solid. Cook for 5 minutes and then invert onto a flat serving plate.
- Refrigerate for several hours or overnight. Slice as you would a torte and serve as an appetizer, garnished with parsley and served with red horseradish sauce. Leftovers keep for up to five days.
Notes
- FAVORITE
↑ Back to top
Emeril's Essence (Bam)
Tags: Rubs and Blends
Spices
I made this. Is starred.
Servings: YIELD Yield: 2/3 cup
TOTAL TIME --
Ingredients
- 2 1/2 tablespoons paprika
- 2 tablespoons salt
- 2 tablespoons garlic powder
- 1 tablespoon black pepper
- 1 tablespoon onion powder
- 1 tablespoon cayenne pepper
- 1 tablespoon dried oregano
- 1 tablespoon dried thyme
Steps
- Combine all ingredients thoroughly.
Notes
- FAVORITE
↑ Back to top
Empanadas De Plátano Maduro (Ripe Plantain Empanadas with
Cheese)
Adapted from https://www.mycolombianrecipes.com/empanadas-de-platano-maduro-ripe-plantain-empanadas-with-cheese
Ingredients
- 4 very ripe plantains
- 1 egg
- 2 tablespoons of butter, at room temperature
- 3 tablespoons all-purpose flour
- 1/2 teaspoon vanilla extract
- 1 tablespoon sugar
- 1 cup mozzarella cheese, grated
- Oil spray for cooking
Steps
- Wash and cut the plantains in half. Cook them with the skin on over medium-high heat in a large pot with water, until plantains are cooked and soft, about 10 minutes.
- Peel and mash the cooked plantains with a fork or a potato masher until you get a soft mixture. Let it rest for 5 minutes.
- Add the egg, butter, flour, vanilla extract and sugar and mix well.
- Form the dough into a ball and let rest in a bowl at room temperature for about 20 minutes. Form 12 balls with the plantain dough and press down each ball to make a disc with the palm of your hand. Add cheese in the middle, fold it in half and press to seal with your fingers, or use a fork to help seal the edges, so the cheese is sealed and does not melt out. Spray oil on a baking sheet or cover with wax paper. Preheat the oven to 400F.
- Place the empanadas on the baking sheet and bake in the oven for about 15 minutes, then turn the empanadas and cook for about 15 minutes more or until golden. Serve warm.
↑ Back to top
Energy Bars
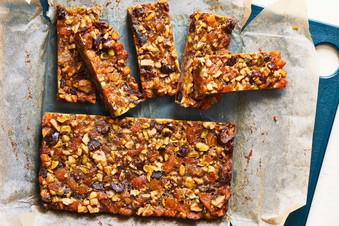
Servings: 10 bars
Ingredients
- Nonstick cooking spray
- 2 large eggs
- ¼ cup/65 grams maple syrup
- ½ teaspoon coarse kosher or sea salt, plus more for sprinkling
- ¼ cup/32 grams whole wheat flour
- ½ teaspoon ground cinnamon
- 1½ cups/138 grams coarsely chopped walnuts, pecans, pistachios or a combination
- 1½ cups/245 grams coarsely chopped dates, dried apricots, dried cranberries or a combination
Steps
- Heat oven to 350 degrees. Using cooking spray, grease an 8-inch square metal baking pan. Line the bottom and sides with foil or parchment paper and grease the foil.
- In a large bowl, whisk the eggs, syrup and salt until smooth. Add the flour and cinnamon and whisk until smooth. Add the nuts and dried fruit and mix until evenly coated, then spread in an even layer in the pan.
- Bake until set and golden brown, about 30 minutes. When you press the top, it should feel firm. Immediately sprinkle lightly with salt.
- Cool completely in the pan on a rack. Use the foil to slide the slab out of the pan; discard the foil. Cut in half, then cut each half into 5 bars. The bars can be kept in an airtight container for up to a week at room temperature or up to a month in the freezer.
↑ Back to top
English Bangers and Mash with Onion Gravy
Servings: 4
Ingredients
- 4 medium russet potatoes, peeled and cut into 2-inch chunks
- Kosher salt
- 6 tablespoons butter
- 1 cup milk
- Freshly ground black pepper
- 3 medium onions, thinly sliced (about 3 cups sliced onions)
- 1 bay leaf
- 2 1/2 tablespoons flour
- 2 1/2 cups store-bought or homemade low-sodium beef or chicken broth
- 2 tablespoons vegetable oil
- 8 bangers (see notes)
Steps
- Place potatoes in a saucepan and cover with cold water. Season well with salt. Bring to a boil over high heat, reduce to a simmer, and cook until potatoes are soft, about 10 minutes. Drain and place back in saucepan, add 3 tablespoons butter and ⅔ cup milk, and mash with a potato masher, adding more milk if a looser consistency is desired. Season to taste with salt and pepper. Keep warm.
- Heat remaining 3 tablespoons butter in a large non-stick skillet over medium-high heat until melted. Add onions and bay leaf and cook, stirring often, until onions are brown, about 15 minutes.
- Sprinkle with flour and mix until flour is evenly incorporated with onions. Stirring constantly, slowly pour stock over onion mixture. Bring to a simmer over high heat, stirring often, then lower heat to medium and cook until thickened, about 6 minutes. Remove and discard bay leaf. Season to taste with salt and pepper, and keep warm.
- Heat vegetable oil in a large stainless steel skillet over medium-high heat until shimmering. Reduce heat to medium-low. Place bangers in the skillet and cook until browned on one side, about 5 minutes; flip bangers and cover. Cook until bangers are fully cooked, about 6 minutes longer.
- Divide mash between 4 plates, place 2 bangers on each pile of mash, and top with onion gravy. Serve with brown ale and extra gravy and strong mustard passed alongside.
Notes
- Bangers are a British pork sausage. If they are unavailable, any mild pork sausage can be used in their place.
↑ Back to top
English Breakfast Sausage

I made this. Is starred. Rated 5/5
Servings: Yield: 15-20 Sausages
Ingredients
- 4 Pounds Of Lean Shoulder Pork
- 1 Pound Of Pork Fat
- 3 Teaspoons of Salt
- 2 Teaspoons Of White Pepper
- ½ Teaspoon Of Mace
- ½ Teaspoon Of Nutmeg
- 1 Teaspoon Of Sage
- 1 Teaspoon Of Onion Powder
- 2 Teaspoons Of Thyme
- 1 Teaspoons Of Ginger
- 2 Cups Of Breadcrumbs
- Hog Casings
Steps
- First things first, prepare your seasoning. Mix together two teaspoons of thyme, three teaspoons of salt, one teaspoon of sage, half a teaspoon of nutmeg, one teaspoon of onion powder, half a teaspoon of mace and one teaspoon of ginger, then mix in two cups of breadcrumbs.
- Now you can start grinding your meat and fat, make sure its cold with a temperature of less than 30°F and grind the meat through a coarse meat grinding plate, a 10mm plate will be ideal. As long as the meat stays cold, grind it again to make sure its as fine as it can be.
- Throughout the grinding process it is important that the meat is kept at below 30°F, put the meat back into the freezer for a while if it falls below this temperature.
- When the temperature of the meat drops down, properly mix in your seasoning with your hands to make sure it is thoroughly mixed in, then put it back in the freezer to cool down to below 30°F again.
- Once your mix is cold enough you can start stuffing your sausages into the hog casing (pig intestines). Stuff the sausage mix into the casing, it should not be too loose and make your sausages as long as you want them to be, twisting them into sausage links.
- When you have made a string of five bangers, cut off the link and roll the bangers in your hands to fill out the casing properly and get their shapes nice and rounded. If there are air pockets gently prick the casing with a sterile needle and tighten the link to eject the air and fill out the casing.
- Keep doing this until you have used up all of your bangers mix and once you have rolled all of your bangers into nice looking sausages, tightened the links and properly tied off the ends.
- Now hang your links for a couple of hours, if you do not want to hang them you can let them sit uncovered overnight in the fridge, do this before freezing them. Your bangers should stay fresh for a week in the fridge and keep for up to a year in the freezer if you vacuum seal them.
- Alternatively just cook and eat them! There is nothing quite like the taste of a freshly cooked English pork sausage in an English breakfast, or with mashed potato and onion gravy in Bangers & Mash.
↑ Back to top
English Muffins

Servings: 8 to 10 muffins
Ingredients
- 1/2 cup non-fat powdered milk
- 1 tablespoon sugar
- 1 teaspoon salt
- 1 tablespoon shortening
- 1 cup hot water
- 1 envelope dry yeast
- 1/8 teaspoon sugar
- 1/3 cup warm water
- 2 cups all-purpose flour, sifted
- Non-stick vegetable spray
Steps
- In a bowl combine the powdered milk, 1 tablespoon of sugar, 1/2 teaspoon of salt, shortening, and hot water, stir until the sugar and salt are dissolved. Let cool. In a separate bowl combine the yeast and 1/8 teaspoon of sugar in 1/3 cup of warm water and rest until yeast has dissolved. Add this to the dry milk mixture. Add the sifted flour and beat thoroughly with wooden spoon. Cover the bowl and let it rest in a warm spot for 30 minutes.
- Preheat the griddle to 300 degrees F.
- Add the remaining 1/2 teaspoon of salt to mixture and beat thoroughly. Place metal rings onto the griddle and coat lightly with vegetable spray. Using #20 ice cream scoop, place 2 scoops into each ring and cover with a pot lid or cookie sheet and cook for 5 to 6 minutes. Remove the lid and flip rings using tongs. Cover with the lid and cook for another 5 to 6 minutes or until golden brown. Place on a cooling rack, remove rings and cool. Split with fork and serve.
Notes
- Small tuna cans with tops and bottoms removed work well for metal rings.
↑ Back to top
Escarole with Italian Sausage and White Beans
Adapted from http://www.epicurious.com/recipes/food/views/Escarole-with-Italian-Sausage-and-White-Beans-15600

Ingredients
- 3 tablespoons olive oil
- 12 Italian sausages (about 3 pounds), casings removed
- 1 cup chopped onion
- 1/2 cup chopped prosciutto (about 2 ounces)
- 1 tablespoon minced garlic
- 1/2 teaspoon dried crushed red pepper
- 1 large head escarole, chopped (about 10 cups)
- 3/4 cup dry white wine
- 4 15-ounce cans Great Northern beans, rinsed, drained
- 1 cup chicken stock or canned low-salt chicken broth
- Freshly grated Parmesan cheese (optional)
Steps
- Heat oil in heavy large pot over medium-high heat. Working in batches, sauté sausage until cooked through, breaking up with back of spoon, about 6 minutes per batch. Using slotted spoon, transfer sausage to bowl, leaving drippings in pot. Reduce heat to medium; add onion to pot and sauté until translucent, about 5 minutes. Add prosciutto and sauté 1 minute. Mix in garlic and crushed red pepper. Add escarole and sauté until wilted, about 2 minutes. Add wine and cook 2 minutes. Add beans, stock and sausage and simmer 10 minutes to blend flavors. Season to taste with salt and pepper. Transfer to large bowl. Top with grated Parmesan, if desired.
Notes
- FAVORITE
↑ Back to top
Ethiopian Chicken Stew (Doro Wot)
Servings: SERVES 6
Ingredients
- 4 tbsp. Ethiopian spiced butter (called nit'r qibe), ghee, or melted butter
- 2 1⁄2 tbsp. minced ginger
- 5 small red onions, finely chopped
- 5 cloves garlic, minced
- 3 tbsp. Ethiopian spice mix (called Berbere)
- 1 plum tomato, chopped
- 3⁄4 tsp. ground cardamom
- 8 chicken drumsticks
- Kosher salt and freshly ground black pepper, to taste
- 4 hard-boiled eggs
Steps
- Heat spiced butter in a 6-qt. saucepan over low heat. Add ginger, onions, and garlic; cook, stirring, until soft, about 30 minutes. Add spice mixture and tomato; cook, stirring, until reduced and darkened, about 15 minutes. Add 4 cups of water, cardamom, and chicken, season with salt and pepper; boil. Reduce heat to medium-low; cook, covered, until chicken is done, about 1 hour. Transfer chicken to a plate; cook sauce until reduced, about 15 minutes. Add eggs and warm. Pour reduced sauce over chicken. Serve with rice or flatbread.
↑ Back to top
Extra Crispy Baked Chicken Wings

Tags: Appetizers and Dim
Sum Chicken
Ingredients
- 2 lbs chicken wings (tips removed, separated into wingettes and drumettes)
- 1 Tbsp BAKING POWDER (whatever you do, do NOT use baking soda)
- 1 tsp kosher salt (plus more to taste)
- 1 Tbsp butter (melted)
- 1/3 cup hot wing sauce (e.g. Duff's hot sauce)
Steps
- Preheat oven to 450F.
- Dry chicken with a paper towel really well. Place the wings in a large bowl. Sprinkle baking powder over the wings. Toss until all wings are evenly covered in baking powder. Better yet, mix by hand to ensure even coverage.
- Line a large baking sheet with aluminum foil. Place a cooling rack (see note) on top and spray with Pam or rub with cooking oil to prevent sticking.
- Lay the chicken wings on the rack, leaving space between the wings.
- Place the baking sheet in the oven. Turn the heat down to 425F and set the mode to convection.
- Bake for 30-40 minutes, until the wings are nicely browned and crisp.
- Let the wings rest for 5 minutes. This will preserve crispiness of the skin.
- Meanwhile, prepare the Buffalo wing sauce by combining the butter and the hot wing sauce in a small bowl.
- Season the wings with salt and whatever other seasonings you like. Toss with the Buffalo sauce or serve with the sauce on the side.
Notes
- While a cooling rack helps with getting the melted chicken drain off the wings, it's a major pain getting it cleaned afterwards. I stopped using a cooling rack and bake the wings on parchment paper. I don't notice much difference, if any.
- If you don't have a convection oven
- Method 1
- This comes from readers of this blog and worked for them very well.
- Bake at 450 for 40 minutes, then 350 for an additional 40 minutes. Seems like it worked very well for a few people.
- Method 2
- This is the original method proposed by America's Test Kitchen
- Adjust oven racks to upper-middle and lower-middle positions and preheat oven to 250 degrees.Arrange wings in single layer on a wire rack placed over a backing sheet. Bake wings on lower-middle oven rack for 30 minutes. Move to upper-middle rack, increase oven temperature to 425 degrees, and roast until the wings are golden brown and crisp, 40-50 minutes longer, rotating sheet halfway through baking.
↑ Back to top
Extreme Chocolate Cake

Ingredients
- 2 cups white sugar
- 1 3/4 cups all-purpose flour
- 3/4 cup unsweetened cocoa powder
- 1 1/2 teaspoons baking soda
- 1 1/2 teaspoons baking powder
- 1 teaspoon salt
- 2 eggs
- 1 cup milk
- 1/2 cup vegetable oil
- 2 teaspoons vanilla extract
- 1 cup boiling water
- 3/4 cup butter
- 1 1/2 cups unsweetened cocoa powder
- 5 1/3 cups confectioners' sugar
- 2/3 cup milk
- 1 teaspoon vanilla extract
Steps
- Preheat oven to 350 degrees F (175 degrees C). Grease and flour two 9 inch cake pans.
- Use the first set of ingredients to make the cake. In a medium bowl, stir together the sugar, flour, cocoa, baking soda, baking powder and salt. Add the eggs, milk, oil and vanilla, mix for 3 minutes with an electric mixer. Stir in the boiling water by hand. Pour evenly into the two prepared pans.
- Bake for 30 to 35 minutes in the preheated oven, until a toothpick inserted comes out clean. Cool for 10 minutes before removing from pans to cool completely.
- To make the frosting, use the second set of ingredients. Cream butter until light and fluffy. Stir in the cocoa and confectioners' sugar alternately with the milk and vanilla. Beat to a spreading consistency.
- Split the layers of cooled cake horizontally, cover the top of each layer with frosting, then stack them onto a serving plate. Frost the outside of the cake.
Notes
- FAVORITE
↑ Back to top
Falafel
Ingredients
- 8 ounces dried chickpeas, picked over and rinsed
- 3/4 cup fresh cilantro leaves and stems
- 3/4 cup fresh parsley leaves
- 1/2 onion, chopped fine
- 2 garlic cloves, minced
- 1 1/2 teaspoons ground coriander
- 1 teaspoon ground cumin
- 1 teaspoon salt
- 1/4 teaspoon cayenne pepper
- 1/4 cup all-purpose flour
- 2 teaspoons baking powder
- 2 quarts vegetable oil,
- Tahini Sauce
- 1/3 cup tahini
- 1/3 cup plain Greek yogurt
- 1/4 cup lemon juice (2 lemons)
- 1/4 cup water
- Salt
for frying
Steps
- This recipe requires that the chickpeas be soaked for at least 8 hours. Use a Dutch oven that holds 6 quarts or more. An equal amount of chickpea flour can be substituted for the all-purpose flour; if using, increase the water in step 4 to 1/2 cup. Do not substitute canned or quick-soaked chickpeas; they will make stodgy falafel. Serve the falafel with the tahini sauce as an appetizer or in Pita Bread with lettuce, chopped tomatoes, chopped cucumbers, fresh cilantro, Quick Pickled Turnips and Carrots with Lemon and Coriander, and Tomato-Chile Sauce. Serve the first batch of falafel immediately or hold it in a 200-degree oven while the second batch cooks.
- INSTRUCTIONS
- For the Tahini Sauce: Whisk tahini, yogurt, and lemon juice in medium bowl until smooth. Whisk in water to thin sauce as desired. Season with salt to taste; set aside. (Sauce can be refrigerated for up to 4 days. Let come to room temperature and stir to combine before serving.)
- Process cilantro, parsley, onion, garlic, coriander, cumin, salt, and cayenne in food processor for 5 seconds. Scrape down sides of bowl. Continue to process until mixture resembles pesto, about 5 seconds longer. Add chickpeas and pulse 6 times. Scrape down sides of bowl. Continue to pulse until chickpeas are coarsely chopped and resemble sesame seeds, about 6 more pulses. Transfer mixture to large bowl and set aside.
- Whisk flour and 1/3 cup water in bowl until no lumps remain. Microwave, whisking every 10 seconds, until mixture thickens to stiff, smooth, pudding-like consistency that forms mound when dropped from end of whisk into bowl, 40 to 80 seconds. Stir baking powder into flour paste.
- Add flour paste to chickpea mixture and, using rubber spatula, mix until fully incorporated. Divide mixture into 24 pieces and gently roll into golf ball–size spheres, transferring spheres to parchment paper–lined rimmed baking sheet once formed. (Formed falafel can be refrigerated for up to 2 hours.)
- Heat oil in large Dutch oven over medium-high heat to 325 degrees. Add half of falafel and fry, stirring occasionally, until deep brown, about 5 minutes. Adjust burner, if necessary, to maintain oil temperature of 325 degrees. Using slotted spoon or wire skimmer, transfer falafel to paper towel–lined baking sheet. Return oil to 325 degrees and repeat with remaining falafel. Serve immediately with tahini sauce.
For the Falafel: Place chickpeas in large container and cover with
water by 2 to 3 inches. Soak at room temperature for at least 8 hours
or up to 24 hours. Drain well.
Notes
- FAVORITE
↑ Back to top
Falafel in Waffle Iron
Servings: 4
Ingredients
- cooking spray
- 2 (15 ounce) cans garbanzo beans (chickpeas), drained and rinsed
- 1 medium onion, chopped
- 2 large egg whites
- ¼ cup chopped fresh cilantro
- ¼ cup chopped fresh parsley
- 3 cloves roasted garlic, or more to taste
- 1 ½ tablespoons all-purpose flour
- 2 teaspoons ground cumin
- 1 ¾ teaspoons salt
- 1 teaspoon ground coriander
- ¼ teaspoon ground black pepper
- ¼ teaspoon cayenne pepper
- 1 pinch ground cardamom
Steps
- Preheat a waffle iron according to manufacturer's instructions. Spray the inside of the waffle iron with cooking spray.
- Process garbanzo beans in a food processor until coarsely chopped. Add onion, egg whites, cilantro, parsley, garlic, flour, cumin, salt, coriander, black pepper, cayenne pepper, and cardamom to garbanzo beans. Pulse, scraping down the sides of the bowl occasionally, until falafel batter resembles a coarse meal. Pour batter into a bowl and stir with a fork.
- Spoon about 1/4 cup falafel batter onto each section of the preheated waffle iron. Cook until evenly browned, about 5 minutes. Repeat with remaining batter.
↑ Back to top
Falafels with Yogurt-Dill Sauce
Ingredients
- 1 (15 ounce) can chickpeas (garbanzo beans), drained and mashed with fork
- 3/4 cup panko bread crumbs
- 1 small unpeeled red potato, shredded
- 1/4 cup diced red onion
- 2 cloves garlic, crushed
- 1 egg
- 1 tablespoon olive oil
- 1 tablespoon chopped fresh cilantro
- 1 teaspoon lemon juice
- 1 teaspoon ground cumin
- 1/4 teaspoon salt
- 1/4 teaspoon ground black pepper
- 1/4 cup panko bread crumbs
- 1 cup canola oil for frying
- 1 cup plain yogurt
- 1/3 cup finely chopped fresh dill
- 1/2 lemon, juiced
- 1/2 teaspoon garlic salt
Steps
- Combine chickpeas, 3/4 cup panko bread crumbs, red potato, red onion, garlic, egg, 1 tablespoon olive oil, cilantro, 1 teaspoon lemon juice, cumin, salt, and black pepper in a large bowl.
- Form mixture into 2-inch patties. Place 1/4 cup panko crumbs in a shallow bowl. Gently press patties into the crumbs to coat.
- Heat canola oil in a large skillet over medium-high heat.
- Fry patties in the hot oil until golden brown, about 4 minutes per side. Set patties aside.
- Stir yogurt, dill, lemon juice, garlic salt, and white pepper together in a bowl. Serve sauce drizzled over falafels.
Notes
- FAVORITE
↑ Back to top
Famous Pork Chops
Servings: Original recipe (1X)
yields 4 servings
Ingredients
- Original recipe (1X) yields 4 servings
- 1 cup crushed buttery round crackers
- garlic salt to taste
- ground black pepper to taste
- 3 eggs, beaten
- 4 pork chops
- ½ cup unsalted butter
Steps
- Preheat the oven to 375 degrees F (190 degrees C).
- Combine crushed crackers, garlic salt, and black pepper in a shallow dish. Beat eggs in a separate bowl.
- Dip pork chops in beaten eggs, letting excess drip off, then dredge in cracker mixture. Place chops in a casserole dish; drop chunks of butter around chops. Cover dish.
- Bake in the preheated oven for 45 minutes.
↑ Back to top
Farfel Pilaf
Ingredients
- About 2 cups farfel (a 12-ounce package equals 2 - 2 1/2 cups, depending on the size of the farfel bits)
- 4 tablespoons schmaltz or oil, plus additional for greasing pan
- 3 cups chicken broth or vegetable stock, preferably homemade
- Salt and freshly ground black pepper
- about 1/2 pound fresh mushrooms (your choice: plain button or more exotic varieties), wiped clean with a damp paper towel, trimmed and thinly sliced (2 cups)
- 2 teaspoons finely chopped fresh garlic
- 2 cups chopped onion (about 1/2 pound)
Steps
- If farfel is not pre-toasted (if package is not marked, you can tell by the color: untoasted farfel is the yellow of egg noodles; toasted, it is a light golden brown), spread farfel out in a single layer in a large greased baking dish. Bake until lightly browned, 15-20 minutes, stirring or shaking pan occasionally so the farfel toasts evenly. Cool farfel to room temperature.
- If farfel is pre-toasted, put it in a large greased baking dish.
- Bring the broth to a simmer, then add it to the farfel. Season well with salt and pepper and stir well. Cover the baking dish (if you don't have a lid, cover with heavy-duty aluminum foil) and bake for 45 minutes to 1 hour, or until most of the liquid has evaporated and the farfel is tender.
- While the farfel is in the oven, heat 2 tablespoons schmaltz or oil in a large, heavy skillet over moderately high heat. Add the mushrooms and sauté until they release some liquid, about 5 minutes. Sprinkle with salt and pepper, add the garlic, and continue sautéing, lifting and turning often until all the liquid has evaporated and the mushrooms are golden-brown, about 7 minutes. Transfer the mushrooms to a bowl.
- Heat 2 more tablespoons oil in the skillet (don't bother rinsing it out) over medium heat until shimmering. Add the onions and cook, lifting and tossing occasionally, until deep golden. Sprinkle with salt and pepper.
- Remove the farfel from the oven, and stir in the mushrooms and the onions. Baked, uncovered, until heated through.
Notes
- FAVORITE
↑ Back to top
Farmhouse Cream Cheese from 'Mastering Fermentation'
Tags: Cheese
Fermented
Servings: 1 pound
Ingredients
- 1 quart pasteurized whole, 2 percent, or 1 percent cow milk, at room temperature for 1 hour
- 1 quart pasteurized heavy cream, at room temperature for 1 hour
- 1/4 teaspoon mesophilic starter (preferably MA 4001)
- 2 drops calcium chloride, diluted in 2 tablespoons cool non-chlorinated water
- 3 drops rennet, diluted in 2 tablespoons cool non-chlorinated water
- 1 teaspoon kosher salt (preferably Diamond Crystal)
Steps
- Set up a water-bath system by nesting a 4-quart pot inside a 6-quart pot and pour water into the large pot to come about halfway up the side of the smaller pot. Remove the smaller pot and place the large pot over low heat. When the water reaches about 85 degrees, put the smaller pot back in the water to warm slightly, then pour the milk and cream into the smaller pot.
- Slowly heat the milk mixture to 75 degrees over low heat. This should take 10 to 15 minutes. Take the entire water bath off the heat.
- Sprinkle the starter over the milk and let it hydrate for 5 minutes. Whisk the starter into the milk, using an up-and-down motion to distribute thoroughly. Add the diluted calcium chloride and gently whisk in, using an up-and-down motion, for 1 minute, then add the rennet in the same way.
- Cover the smaller pot and leave in the water bath. Leave at room temperature until the curds are firm, about 12 hours. The milk protein will coagulate into solid curds; the liquid whey will be almost clear and light green in color.
- Line a strainer with dampened fine-weave butter muslin or cheesecloth, leaving excess cloth hanging over the sides of the strainer. Gently ladle the creamy curds into the prepared strainer. Tie the corners of the cloth together to create a draining sack, slip a wooden spoon handle through the knot, and hang over a deep cooking pot or bucket to drain until the desired consistency is achieved, 6 to 8 hours.
- Remove the curds from the sack, place in a bowl, and toss with the salt. Stir or knead to combine. Form into a brick or roll into a log, wrap with plastic wrap or store in a covered container, and keep refrigerated for up to 2 weeks.
↑ Back to top
Farro and Roasted Pepper Salad
Tags: Grains
Salad
Is starred. Rated
5/5
Servings: 4
Ingredients
- 1 tablespoon fresh lemon juice (from about 1 medium lemon)
- 3 tablespoons olive oil
- 1 tablespoon honey
- 1/4 teaspoon ground allspice
- 1/4 teaspoon smoked paprika, plus more for garnish
- 1/2 garlic clove, crushed
- 1/4 teaspoon fine sea salt
- 3/4 cup farro
- 2 red bell peppers
- 10 black olives, pitted and quartered lengthwise
- 1 tablespoon fresh thyme, chopped
- 3 scallions, thinly sliced
- 4 ounces feta, crumbled
For the
Dressing:
For the Farro
Salad:
Steps
- For the Dressing: Whisk together all of the ingredients and set aside.
- For the Farro Salad: Bring a large pot of water to a boil over high heat. Add farro, reduce heat to maintain a simmer, and cook according to the directions on the packaging, anywhere from 15 minutes to an hour. When done, drain in a colander or sieve, rinse under cold water, and set aside to drain.
- Meanwhile, using a small pairing knife, cut around the stem of each pepper, removing the stem along with all the seeds. Set a grill pan over high heat. Place peppers on the grill pan and cook, flipping occasionally, until totally black on all sides, 20 to 30 minutes. When done, transfer to a bag and set aside for a few minutes to steam. Once cool, remove the blackened skin, and cut the flesh into 3/8-inch-wide slices.
- In a large mixing bowl, combine cooked farro, red pepper slices, olives, thyme, scallions, most of the feta, and dressing. Toss gently, and season to taste with salt. Serve with remaining feta and a sprinkle of paprika.
↑ Back to top
Farro Salad with Blue Cheese, Pine Nuts, and Tomatoes
Servings: 6
Ingredients
- 2 medium cloves garlic, minced
- 3 tablespoons red wine vinegar
- 1/3 cup extra-virgin olive oil
- Kosher salt and freshly ground black pepper
- 10 ounces farro (about 1 1/2 cups)
- 4 cups water
- 1 small white or yellow onion, quartered
- 1 medium clove garlic, smashed
- 1 medium carrot, peeled and cut into large chunks
- 2 teaspoons kosher salt, plus more for seasoning
- 1 medium tomato, chopped
- 1 small seedless cucumber, finely chopped
- 1/4 cup minced, fresh flat-leaf parsley
- 1/4 cup chopped fresh basil
- 1 1/2 tablespoons minced, fresh lemon thyme or regular thyme
- 3 ounces crumbled blue cheese
- 1/4 cup pine nuts, lightly toasted
- Freshly ground black pepper
For the
Vinaigrette:
For the Salad:
Steps
- For the Vinaigrette: Whisk together ingredients for the vinaigrette in a small bowl, seasoning generously with salt and pepper. Reserve.
- For the Salad: Place farro and water in a medium saucepan with onion, garlic, carrot, and 2 teaspoons salt and bring to a boil over medium-high heat. Reduce heat to medium-low, partially cover, and simmer until farro is just tender, about 20 minutes (see notes). Drain, discard onion, garlic, and carrot and transfer to a bowl to cool.
- Gently fold remaining salad ingredients into cooled farro. Add vinaigrette, starting with a few tablespoons at a time. Taste, season with salt and pepper, and add additional vinaigrette as needed. Serve immediately.
Notes
- Be careful not to overcook the farro. You want it to stand up to the vinaigrette, so remove it from the heat just when it loses its bite.
↑ Back to top
Fattoush Salad Dressing
Adapted from https://littlespicejar.com/lebanese-fattoush-salad/
Tags: Dressings
Lebanese Salad
Servings: 5
Ingredients
- 1 ½ teaspoon ground sumac
- ¼ cup olive oil
- 3 tablespoons lemon juice
- 2 cloves garlic, pressed
- 2 tablespoons pomegranate molasses
- 1 tablespoon honey
- ½ teaspoon dried mint
- ¼ teaspoon kosher salt
Dressing:
Steps
- DRESSING: In a mason jar, add all the ingredients for the dressing and shake to combine. You can also add the ingredients to a blender and blend, the dressing stays better emulsified that way!
Notes
- This makes some extra dressing, depending on your preference you may or may not need all of it.
- You can add in diced or shredded rotisserie or cooked chicken to make this salad more of a heartier meal. If serving as a main if you up the lettuce to 2 1/2 or even 3 hearts of romaine, it will feed about 3-4 people.
↑ Back to top
Faux Gras

Tags: Appetizers and Dim
Sum Vegan
Vegetarian
Time: 10 Minutes of Preparation + 20 Minutes of
Cooking + 3 Hours in the Refrigerator
Ingredients
- 2 tbsp olive oil
- 1 shallot
- Pinch of salt
- 2 cloves garlic
- 18 button mushrooms
- 2 tsp rosemary
- 2 tsp thyme
- 2 tsp sage
- 2 tbsp cognac
- 400g cooked lentils
- 150g toasted walnuts
- 2 tbsp soy sauce
- 2 tbsp beetroot puree
- dairy-free butter (optional)
- Equipment
- Frying pan
- Food processor
- Ramekins (or small jars)
Steps
- Heat 2 tbsp of olive oil in a frying pan.
Roughly chop the shallot and
add to the pan. Add a pinch of salt and cook the onions until they are
translucent.
Roughly chop the garlic cloves and add to the pan. Cook this off and
add the chopped button mushrooms. Stir until everything is well
cooked.
Add the rosemary, thyme, sage and cognac.
Add the contents of the frying pan to a food processor along with the
lentils, walnuts and soy sauce. Pulse the mixture until combined then
add in the beetroot puree. Process until almost smooth, add an extra
splash of cognac if needed.
Transfer the mixture to a jar, adding on a thin layer of dairy-free
butter to the top (optional). Refrigerate for a few hours before
serving. Best served with good quality bread.
↑ Back to top
Fava Garnished with Capers and Onions
Ingredients
- 1 pound / 450 g yellow split peas
- 1 large onion
- 2 bay leaves
- 1 to 1 ½ cups extra virgin Greek olive oil
- Juice of 1 large lemon
- Salt to taste
Steps
- Saute the onion in ½ cup olive oil in a wide pot over medium heat. Add the yellow split peas and toss to coat in the oil. Add the bay leaves, salt and pepper and enough water to cover by 1 inch. Simmer, adding small quantities of water as needed, until the yellow split peas disintegrate and are like chunky mashed potatoes. The total quantity of water absorbed by the split peas can be anywhere between 8 to 12 cups.
- Remove and puree using an immersion blender, adding salt, lemon juice and olive oil in alternating streams until the mixture is very smooth.
- Garnish with capers, raw red onion and even more olive oil!
↑ Back to top
Fettuccine Alfredo
Adapted from https://www.modernhoney.com/fettuccine-alfredo/
Tags: Italian
Pasta
Ingredients
- 1 lb Fettuccine Pasta
- 6 Tablespoons Butter
- 1 Garlic Clove (minced)
- 1 1/2 cups Heavy Cream
- 1/4 teaspoon Salt
- 1 1/4 cup Shredded Parmesan Cheese
- 1/4 teaspoon Pepper
- 2 Tablespoons Italian Parsley (optional)
Steps
- In a large pot, heat water over high heat until boiling. Add salt to season the water. Once it is boiling, add fettuccine and cook according to package instructions.
- In a large skillet or pan, heat butter over medium heat. Add minced garlic and cook for 1 to 2 minutes. Stir in heavy cream.
- Let heavy cream reduce and cook for 5 to 8 minutes. Add half of the parmesan cheese to the mixture and whisk well until smooth. Keep over heat and whisk well until cheese is melted.
- Save some pasta water. The pasta water is full of flavor and can be used to thin out the sauce.
- Toss alfredo sauce with fettuccine pasta and add half of the parmesan cheese. Once it is tossed, garnish with the remaining parmesan cheese. Add a little pasta water if it needs to be thinned out.
- Garnish with Italian parsley, if so desired.
Notes
- Use real parmesan cheese, which is refrigerated.
- If you like it to be more "saucy", you may use less than 1 lb. of fettuccine pasta.
- Leftover pasta water may be used to thin out pasta sauce.
↑ Back to top
Fideuà
Adapted from https://www.ming.com/food-and-wine/recipes/simply-ming-season-13/lobster-fideu%C3%A0.htm

Servings: 4 - 6
Ingredients
- 1 lb angel hair pasta
- 3 oz (+ drizzle) extra virgin olive oil
- 1 cup fava beans, shelled
- 1 pint morel mushrooms, broken into large pieces
- 1 tablespoon+ 1/4 teaspoon pimenton, smoked Spanish paprika
- 3 tablespoons tomato paste
- 2 bunch scallions
- 2 lobster, blanched, shelled and chopped into large pieces
- 2 quarts chicken stock
- 1 cup mayonnaise
- 2 cloves garlic, smashed and finely minced
- 1 tablespoon extra virgin olive oil
- kosher salt and fresh ground pepper
- 1 bunch cilantro, stems removed, rough chopped
- 1 lemon, cut into wedges
Steps
- In a paella pan, add olive oil and scallions. Break pasta into pieces and sauté until brown.
- Add morels, tomato paste, 1 tablespoon pimenton and lobster. Season with salt and pepper.
- Add chicken stock until pasta is just covered. Brring to a boil. Cook until all liquid is reduced but not dry and pasta is al dente about 5-7 minutes. Turn off heat and rest.
- Add favas on top and warm through.
- Meanwhile, combine mayonnaise, garlic, olive oil and 1/4 teaspoon pimenton in a small bowl. Season with salt and pepper. Set aside.
- Top with chopped cilantro and dollops of mayo mixture. Squeeze lemon wedges over and place around the side. Drizzle with olive oil. Rest for 2 minutes before serving.
Notes
- FAVORITE
↑ Back to top
Fiery Stir-Fried Iceberg Lettuce with Basil
Ingredients
- 1 tablespoon canola oil
- 3 oil-packed anchovy fillets, drained and chopped
- 2 garlic cloves, finely chopped
- 1 head iceberg lettuce (1 pound), leaves torn into large pieces
- 1 Thai bird chile, thinly sliced
- 1 teaspoon Asian fish sauce
- 2 teaspoons fresh lemon juice
- Kosher salt
- Freshly ground pepper
- 1/4 cup coarsely chopped Thai basil
Steps
- In a large skillet, heat the oil. Add the anchovies and garlic and stir-fry over moderately low heat until the anchovies dissolve, 2 minutes. Add the lettuce, chile and fish sauce and stir-fry until the lettuce is just wilted and coated in the sauce, 2 minutes. Stir in the lemon juice and season with salt and pepper. Stir in half of the basil and transfer the lettuce mixture to a large platter. Garnish with the remaining basil and serve.
Notes
- FAVORITE
↑ Back to top
Figgy Pudding
Tags: British
Holidays Puddings
Servings: 10
Ingredients
- 1 cup/150 grams currants, (see Tip 1)
- 1 cup/150 grams raisins
- 1 cup/150 grams golden raisins or sultanas
- ¾ cup/175 milliliters brandy, plus more for serving
- 5 ounces/150 grams packaged, not fresh, beef suet, or ¾ cup/172 grams unsalted butter (see Tip 2)
- 120 grams fresh white bread (3 to 4 slices)
- 1 cup/150 grams packed dark brown sugar
- ½ cup/70 grams all-purpose flour
- ½ teaspoon baking powder
- 1 teaspoon pumpkin pie spice (see Tip 3)
- ½ teaspoon kosher salt (such as Diamond Crystal)
- 1 medium tart apple, preferably Granny Smith
- 2 large eggs
- 1 tablespoon black treacle or molasses, to taste (optional)
- ½ teaspoon lemon zest
- ⅓ cup/50 grams blanched slivered almonds
- Unsalted butter, for greasing
- Hard sauce, ice cream, fresh heavy cream or English custard, for serving (optional)
- 8 tablespoons/115 grams unsalted butter, softened at room temperature
- ¾ cup/93 grams confectioners’ sugar, plus more to taste
- 2 to 3 tablespoons brandy, to taste
FOR THE
PUDDING
FOR THE HARD
SAUCE
Steps
- Set aside a 2-liter pudding mold or similarly sized heat-proof bowl, as well as a lidded pot or steamer large enough to hold the mold. (A tall pot, like a stock pot or a pasta pot with a steamer basket, works well.)
- Place the currants and both types of raisins in a medium bowl. Add the brandy, mix, cover with plastic wrap and set aside at room temperature to soak overnight. Place the suet or butter in the freezer to make grating easier in Step 4.
- The following day, cube the bread, including the crust, transfer it to a food processor and pulse until you have fine crumbs. (Alternatively, you can shred the bread by hand.)
- Transfer the bread crumbs to a large mixing bowl. Add the brown sugar, flour, baking powder, pumpkin spice and salt; mix, breaking up any clumps of brown sugar. Peel the apple, then grate it and the suet (or butter) on the large hole of a box grater over the dry ingredients. Add the eggs, black treacle and lemon zest. Mix well with a wooden spoon; the mixture will be thick. Stir in the almonds and the brandy-soaked currants and raisins, along with any of the liquid.
- At this point, the pudding can be steamed; or covered and refrigerated for up to 1 week for the flavors to deepen, and then steamed. To steam: Generously butter the pudding mold and transfer the mixture to it, filling the mold only ¾ of the way (the pudding will expand as it cooks). Pack down the mixture and smooth the top.
- Cut a round piece of parchment that will fit on top of the pudding mixture; butter one side and place it, buttered-side-down, on top. Cover the top of the mold with another piece of parchment that has a little overhang. Secure the parchment tightly to the rim of the mold with a rubber band or string, then trim the overhang. (Two sets of hands make this job easier.) Repeat with another piece of parchment paper. (This is important to do even if your mold comes with a lid. If a lid is included, place it over the parchment and cover the top of the lid tightly with foil. If you don’t have a lid, cover the parchment with 2 pieces of foil. You want to ensure you have a water-tight seal on the mold as it steams.)
- Place the steamer basket in the pot. (If not using a steamer basket, place an inverted heat-proof plate or trivet, a folded cotton kitchen towel, or a couple of layers of aluminum foil on the bottom of the pot. Anything heat-proof that the pudding mold can safely sit on to prevent direct contact with the heat source will work.) Fill the pot ¼ of the way with water and bring to boil. Bring a separate kettle or small pot of water to boil. Carefully lower the pudding mold into the steamer basket, or rest it on top of whatever is in the bottom of the pot to prevent scorching. The water should come halfway up the sides of the mold. If it doesn’t, slowly add more boiling water from the kettle along the sides of the pot. Cover the pot, adjust the heat to medium-low or low —the water should be at a constant gentle simmer, but not boiling — and steam the pudding for 6 hours.
- Check the pudding every 30 minutes to make sure the water is always at the halfway mark, adding more boiling water as needed. After 6 hours, carefully remove the mold from the pot and cool to room temperature. Store the pudding, covered in its mold, in the fridge for at least 3 weeks and up to 6 weeks, or in the freezer for up to one year (see Storage Tips).
- Prepare the hard sauce, if using: Two days and up to 1 week before serving, place the butter in the bowl of a stand mixer fitted with the paddle attachment. (Alternatively, use a hand-held beater and a mixing bowl.) Beat on medium until light and creamy, about 2 minutes. Add the confectioners’ sugar and beat on medium just until smooth. Taste and add more sugar, if desired. Add the brandy, to taste, 1 tablespoon at a time, and mix by hand with a spatula until combined. Transfer to a serving dish, smooth the top, cover and refrigerate until hard.
- About 2 hours before serving the pudding, reheat the pudding by steaming as directed in Step 7, this time for 1 hour. Remove the mold from the pot and peel off all the coverings, being mindful of the steam. Place a serving dish over the mold and invert the pudding. Don’t remove the mold right away. Give it a little time and a jiggle to help release the pudding.
- Pour 2 to 3 tablespoons of brandy in a heat-proof ladle. Hold the ladle over the pudding and carefully light it. As soon as the brandy catches fire, pour it over the pudding. The pudding will light up in a blue haze; it will extinguish quickly on its own.
- Slice the pudding and serve it warm, topped with hard sauce or ice cream, or drizzled with heavy cream or custard. The pudding will keep in the fridge for up to 1 week, wrapped well in parchment and again in plastic wrap or aluminum foil.
Notes
- Tip 1: Feel free to substitute a variety of dried fruits for the currants and raisins, such as diced figs, apricots or cherries.
- Tip 2: Beef suet, a fat used in many British recipes, is traditional here. It comes packaged in a hard block or pellets. Fresh suet has a strong, meatier odor and taste, so it is not recommended here.
- Tip 3: Traditionally, an English spice mix is used that includes many of the spices used in American pumpkin spice mix, as well as ground coriander and mace. If you like, you can add a tiny pinch of those to the pumpkin spice.
- Tip 4: If you’d like to remove the steamed pudding from the mold before storing it, wrap it very tightly with plastic wrap, then in foil. Before reheating, unwrap the pudding and transfer it back to the mold.
↑ Back to top
Filipino Grilled Pork Chops
Adapted from https://www.foodnetwork.com/recipes/food-network-kitchen/filipino-grilled-pork-chops-4665129
Tags: Grilled
Philipino Pork
Servings: 4
Ingredients
- 3/4 cup sugar cane vinegar
- 2 tablespoons soy sauce
- 1 tablespoon fish sauce
- 1/4 cup sugar
- 1/2 teaspoon red pepper flakes
- 3 cloves garlic, finely chopped
- 4 bone-in pork blade chops (1/2 inch thick; 6 to 7 ounces each)
- 1 lemon, halved
- 2 bunches scallions, trimmed
- 2 tablespoons vegetable oil, plus more for the grill
- Kosher salt and freshly ground pepper
- 1 cup jasmine rice
Steps
- Combine the vinegar, soy sauce, fish sauce, sugar, red pepper flakes and garlic in a medium bowl and stir until the sugar is dissolved. Transfer 1/4 cup sauce to a small bowl and set aside for serving.
- Combine the pork chops and remaining sauce in a 1-gallon zip-top bag. Squeeze in the lemon juice and add the squeezed lemon halves; seal the bag. Let marinate 20 minutes at room temperature, massaging the pork every 5 minutes. Toss the scallions with the vegetable oil on a plate and season with salt and pepper.
- Meanwhile, cook the rice as the label directs. Preheat a grill or grill pan to medium high.
- Remove the pork chops from the marinade, pat dry and season with salt and pepper. Oil the grill or grill pan, add the pork and grill until just cooked through, 3 to 4 minutes per side. Transfer to a plate to rest. Grill the scallions, turning, until marked and wilted, 1 to 2 minutes. Divide the rice, scallions and pork chops among plates. Serve with the reserved sauce.
- Photograph by Ryan Dausch
Notes
- My Private Notes
- Add a Note
- Categories:
↑ Back to top
Filmjölkslimpa (Seeded Buttermilk Bread)
Ingredients
- Unsalted butter, for greasing
- 2 cups whole wheat flour, plus more for dusting
- 2 cups buttermilk
- 1/2 cup molasses
- 2 cups rye flour
- 1/2 cup sliced almonds
- 1/3 cup flaxseed
- 1/3 cup sunflower seeds
- 1/4 cup pumpkin seeds
- 3 tbsp. sesame seeds
- 1 tbsp. kosher salt
- 1 tsp. baking soda
Steps
- Heat oven to 350°. Grease a 9" x 5" x 23/4" loaf pan and dust with flour; set aside. Stir buttermilk and molasses in a bowl. Add flours, almonds, seeds, salt, and baking soda; mix until dough forms and transfer to prepared pan. Bake until a toothpick inserted in the center of the bread comes out clean, about 1 hour.
Notes
- FAVORITE
↑ Back to top
The Final Pizza
Adapted from http://altonbrown.com/pizza-dough-recipe/

Tags: Pizza
Ingredients
- 690 grams bread flour, (plus 1/2 cup or so for shaping)
- 9 grams active, dry yeast (I use Red Star and no, they don't pay me to say that)
- 15 grams sugar
- 20 grams kosher salt
- 455 grams bottled water
- 15 grams olive oil (plus extra for brushing crust)
- Sauce and pizza toppings as desired
Steps
- Scale the dry ingredients together and place all the dry ingredients in the work bowl of your stand mixer. Scale the liquids into a measuring cup then add to the dry ingredients.
- Install the bowl on the mixer and attach the dough hook and turn the mixer to "stir."
- Mix until the dough just comes together, forming a ball and pulling away from the sides of the bowl. Increase the mixer speed to medium (4 on a Kitchen Aid) and knead for 5 minutes.
- Remove the dough to a lightly floured countertop and smooth into a ball. Spray a mixing bowl (or the mixer’s work bowl) with no-stick spray or rub with the oil. Place dough in bowl. Cover with plastic wrap and refrigerate for 18 to 24 hours.
- Remove dough to counter and punch down into a rough rectangle shape then tightly roll into a log 12-15 inches in length. Split the dough into 3 equal parts using the scraper or either a large serrated knife or a dough scraper. Flatten each into a disk, then shape it into a smooth ball by folding the edges of the round in toward the center several times and rolling it between your hands on the counter. You may want to moisten the counter with water to up the surface tension a bit so that the ball tightens up instead of sliding across the counter.
- Cover each ball with a clean tea towel and allow to rest for 30 minutes. (At this point you can also transfer doughs to air-tight plastic containers and refrigerate for up to 8 hours. Just make sure you bring them to room temp for half an hour before forming.)
- To bake, heat oven (pizza stone inside on lower rack) to 500 degrees F, or hotter if possible. Give the oven a good half hour to heat up.
- When you're ready to build the pizzas, sprinkle a couple teaspoons of flour on a peel and place the dough right in the middle. Pound the dough into a disk with your hands, then pick it up and pull it through your fingers to create the outer lip, a critical feature that cannot be created with a rolling pin. (In fact, rolling rather than stretching will just ruin the whole gosh-darned thing.)
- At this point you need to start stretching the dough. The most-efficient way to do this is to spin the dough so that the weight of the outer lip stretches the dough via centrifugal force. You can also stretch the dough on the board by turning and pulling it, and turning and pulling. Shake the peel from time to time to make sure the dough doesn't stick. Sticking would be bad.
- Brush the lip with oil, then dress the pizza with olive oil and tomato sauce. Even distribution is tricky, so you may want to ladle an ounce or two into the middle and then spread it out with the back of the ladle. Top with fresh herbs (oregano and basil) and a good melting cheese. I usually go with a mixture of mozzarella, Monterery Jack and provolone, but that's me.
- Slide the pizza onto the hot pizza stone. To do this, position the front edge of the peel about 1-inch from the back of the stone. Lift the handle and jiggle gently until the pizza slides forward. As soon as the dough touches the stone, start pulling the peel back toward you while still jiggling. While a couple of inches of dough are on the stone, quickly snap the peel straight back. As long as the dough isn't stuck on the peel, it will park itself nicely on the stone.
- Keep an eye on the dough for the first 3 to 4 minutes. If any big bubbles start ballooning up, reach in with a paring knife or fork and pop them. Bake for 7 minutes or until the top is bubbly. Then slide the peel under and lift to check the underside, which should be nicely brown.
- Slide the peel under the pizza and remove to the counter or a cutting board. Let it rest for at least 2 minutes before slicing with a chef's knife or pizza cutter (one of my favorite multitaskers).
Notes
- FAVORITE
↑ Back to top
Fire & Ice Appetizer

Tags: Chillis
Condiments Fruit Salsas
Is starred.
Ingredients
- 1 /3 cup sugar
- 1 /4 cup lime juice
- 1 (20-ounce) can crushed pineapple
- 1 teaspoon finely chopped fresh gingerroot
- 1 /4 cup finely chopped onion
- 2 tablespoons chopped fresh cilantro
- 4 (6-inch) pita breads
- 1 cup Land O Lakes® Butter, melted
- 4 teaspoons chili powder
- 1 teaspoon garlic salt
- 2 teaspoons hot pepper sauce
SALSA:
PITA CRISPS:
Steps
- Combine all salsa ingredients except onion and cilantro in 3-quart saucepan. Cook over medium-high heat 3-5 minutes or until mixture comes to a boil. Continue cooking, stirring occasionally, 9-12 minutes or until mixture is thickened. Refrigerate at least 2 hours until chilled.
- Heat oven to 375°F.
- Cut each pita into 6 wedges; separate each wedge in half (48 wedges total).
- Stir together butter and seasonings in bowl. Add pita wedges; toss with seasoned butter until well coated.
- Place pita wedges onto ungreased 15x10x1-inch baking pans in single layer. Bake 6 minutes. Turn each wedge over; continue baking 2-4 minutes or until wedges are golden brown.
- Stir onion and cilantro into salsa mixture. Serve with pita crisps.
↑ Back to top
Fire & Ice Appetizer

Tags: Condiments
Dips and Spreads
Salsas
Is starred. Rated
2/5
Ingredients
- 1 /3 cup sugar
- 1 /4 cup lime juice
- 1 (20-ounce) can crushed pineapple
- 1 teaspoon finely chopped fresh gingerroot
- 1 /4 cup finely chopped onion
- 2 tablespoons chopped fresh cilantro
- 4 (6-inch) pita breads
- 1 cup Land O Lakes® Butter, melted
- 4 teaspoons chili powder
- 1 teaspoon garlic salt
- 2 teaspoons hot pepper sauce
SALSA:
PITA CRISPS:
Steps
- Combine all salsa ingredients except onion and cilantro in 3-quart saucepan. Cook over medium-high heat 3-5 minutes or until mixture comes to a boil. Continue cooking, stirring occasionally, 9-12 minutes or until mixture is thickened. Refrigerate at least 2 hours until chilled.
- Heat oven to 375°F.
- Cut each pita into 6 wedges; separate each wedge in half (48 wedges total).
- Stir together butter and seasonings in bowl. Add pita wedges; toss with seasoned butter until well coated.
- Place pita wedges onto ungreased 15x10x1-inch baking pans in single layer. Bake 6 minutes. Turn each wedge over; continue baking 2-4 minutes or until wedges are golden brown.
- Stir onion and cilantro into salsa mixture. Serve with pita crisps.
↑ Back to top
Fish and Chips with Malt Vinegar Mayonnaise

Servings: 4
Ingredients
- 1 large egg yolk*
- 2 Tbsp. malt vinegar, divided
- 1 cup vegetable oil
- Kosher salt and freshly ground black pepper
- Vegetable oil (for frying; about 4 cups)
- 2 cups all-purpose flour
- 2 tsp. baking powder
- 1 tsp. baking soda
- 1 tsp. kosher salt plus more
- 1/2 tsp. freshly ground black pepper plus more
- 12 oz. (or more) chilled light lager
- 1 cup chilled club soda
- 1 Tbsp. malt vinegar
- 1 cup corn flour or all-purpose flour
- 1 1/2 lb. cod, haddock or pollack, cut into long, 11/2”-wide strips
- French fries (for serving; see Recipe Index)
- Old Bay seasoning, flaky sea salt (such as Maldon), and chopped fresh dill
- Lemon wedges (for serving)
Fish and
assembly
Steps
- A deep-fry thermometer
- Corn flour, which is more finely ground than cornmeal, is available at Latin markets, natural foods stores, and bobsredmill.com.
- Whisk egg yolk and 1 Tbsp. vinegar in a small bowl. Whisking constantly, slowly drizzle in oil, drop by drop at first, until mayonnaise is thickened and smooth. Add remaining 1 Tbsp. vinegar; season with salt and pepper. Cover and chill.
- Mayonnaise can be made 1 day ahead. Keep chilled.
- Fit a large pot with thermometer; pour in oil to measure 3”. Heat over medium-high heat until thermometer registers 375°.
- Meanwhile, whisk all-purpose flour, baking powder, baking soda, 1 tsp. kosher salt, and 1/2 tsp. pepper in a large bowl. Whisking constantly, slowly add beer, club soda, and vinegar, adding more beer if batter is too thick (it should be the consistency of thin pancake batter).
- Place corn flour in a shallow bowl. Season fish with kosher salt and pepper. Dredge fish in corn flour, shaking off excess, then dip in batter, letting excess drip back into bowl. Working in batches and returning oil to 375° between batches, fry fish until golden brown and crisp, about 2 minutes per side. Transfer to paper towelâlined baking sheet.
- Season fish and fries with Old Bay, sea salt, and dill; serve with malt vinegar mayonnaise and lemon wedges.
ingredient info:
malt vinegar Mayonnaise
fish and assembly
Notes
- Raw egg is not recommended for infants, the elderly, pregnant women, people with weakened immune systemsâ¦or people who don't like raw egg.
↑ Back to top
Fish-Fragrant Eggplants (Sichuan Braised Eggplant with
Garlic, Ginger, and Chiles)
Adapted from https://www.seriouseats.com/fish-fragrant-eggplants-sichuan-braised-eggplant-with-garlic-ginger-and-chilies
Servings: 4
Ingredients
- 1 pound 5 ounces ( 600 g) eggplants (1–2 large)
- Salt
- Cooking oil, for deep-frying
- 1 1/2 tablespoons Sichuan chile bean paste (see note)
- 1 1/2 tablespoons finely chopped garlic
- 1 tablespoon finely chopped ginger
- 10 tablespoons ( 150 ml) hot stock or water
- 4 teaspoons superfine sugar
- 1 teaspoon Chinese light soy sauce
- 3/4 teaspoon potato starch, mixed with 1 tablespoon cold water
- 1 tablespoon Chinkiang vinegar (see note)
- 6 tablespoons thinly sliced scallion greens
Steps
- Cut the eggplants into batons about 3/4 inch thick and 2 3/4 inches long. Sprinkle with salt, mix well, and set aside for at least 30 minutes.
- Rinse the eggplant, drain well, and pat dry with paper towels. Heat the deep-frying oil to around 390°F (200°C) (hot enough to sizzle vigorously around a test piece of eggplant). Add the eggplant, in 2 or 3 batches, and deep-fry for about 3 minutes, until tender and a little golden. Drain well on paper towels and set aside.
- Carefully pour off all but 3 tablespoons oil from the wok and return to medium heat. Add the chile bean paste and stir-fry until the oil is red and fragrant; take care not to burn the paste (move the wok away from the burner if you think it might be overheating). Add the garlic and ginger and stir-fry until they smell delicious.
- Tip in the stock or water, sugar, and soy sauce. Bring to a boil, then add the eggplant, nudging the batons gently into the sauce so they do not break apart. Simmer for a minute or so to allow the eggplant to absorb the flavors.
- Give the potato starch mixture a stir and add it gradually, in about 3 stages, adding just enough to thicken the sauce to a luxurious gravy (you probably won’t need it all). Tip in the vinegar and all but 1 tablespoon of the scallion greens, then stir for a few seconds to fuse the flavors.
- Turn out onto a serving dish, scatter over the remaining scallion greens, and serve.
- Special Equipment
- Wok or Dutch oven
Notes
- If you want to scale up this recipe for a party, rinse and dry the salted eggplants, toss in a little cooking oil, then roast for 15–20 minutes in a 425°F (220°C) oven until golden. Make the sauce, but don’t thicken it with starch; instead, pour it over the roasted eggplants and set aside to allow the flavors to mingle. Serve at room temperature.
- You can find chile bean paste and Chinkiang vinegar online at The Mala Market.
↑ Back to top
Five Bean Hotdish
Tags: Beans and Other
Legumes Sides
Ingredients
- 1/2 pound bacon
- 1 (15 oz.) can butter beans, rinsed and drained
- 1 (15 oz.) can lima beans, rinsed and drained
- 1 (15 oz.) can red kidney beans, rinsed and drained
- 1 (15 oz.) can white kidney beans, rinsed and drained
- 1 (15 oz.) can navy beans, rinsed and drained
- 1 medium white onion, diced
- 3/4 cup brown sugar
- 1/2 cup cider vinegar
- 1/2 teaspoon garlic powder
- 1/4 teaspoon salt
Steps
- Preheat oven to 350º F.
- Cook bacon in a medium pan over medium-high heat. Once crispy, set aside on a paper towel-lined plate.
- Add diced onion to bacon fat, season with salt and garlic powder, and cook until soft and translucent.
- In a large roasting pot, combine beans, brown sugar, cider vinegar and bacon (crumbled into pieces). Stir well.
- Cover and bake for 80-90 minutes. Stir again and bake uncovered for 30-40 minutes.
- Stir well and serve hot.
Notes
- FAVORITE
↑ Back to top
Five Spice Powder
Ingredients
- 3 tablespoons Sichuan peppercorns or black peppercorns
- 2 star anise
- 6 cloves
- 2 tablespoons fennel seeds
- 2 (2-inch) cinnamon sticks, broken
Steps
- Using a spice grinder or mortar and pestle, process all ingredients until ground.
Notes
- FAVORITE
↑ Back to top
Flat Hand-Pulled Noodles (Biang Biang Mian) with Chili Oil
Vinaigrette

Tags: Chinese
Noodles
Servings: 4
Ingredients
- 2⅓ cups (12¾ ounces) bread flour
- ¾ teaspoon salt
- 1 cup (8 ounces) water
- 1 tablespoon vegetable oil
- 10 to 20 bird chiles, ground fine
- ½ cup vegetable oil
- 2 garlic cloves, sliced thin
- 1 (1-inch) piece fresh ginger, peeled and sliced thin
- 1 tablespoon Sichuan peppercorns
- ½ cinnamon stick
- 1 star anise pod
- 2 tablespoons soy sauce
- 2 tablespoons black vinegar
- 1 tablespoon toasted sesame oil
- 1 teaspoon sugar
- 4 quarts water
- 1 tablespoon salt
- 12 fresh cilantro sprigs, trimmed and cut into 2-inch pieces
- 6 scallions, sliced thin on bias
Dough:
Chili
Vinaigrette:
Steps
- For the Dough: Whisk flour and salt together in bowl of stand mixer. Add water and oil. Fit stand mixer with dough hook and mix on low speed until all flour is moistened, 1 to 2 minutes. Increase speed to medium and knead until dough is smooth and satiny, 10 to 12 minutes. (Alternatively, mix dough in food processor, following instructions above.) Transfer dough to counter, knead for 30 seconds, and shape into 9-inch log. Wrap log in plastic wrap and refrigerate for at least 12 hours or up to 48 hours.
- For the Chili Vinaigrette: Place chiles in large heatproof bowl. Place fine-mesh strainer over bowl and set aside. Combine vegetable oil, garlic, ginger, peppercorns, cinnamon, and star anise pod in small saucepan and heat over medium-high heat until sizzling. Reduce heat to low and gently simmer until garlic and ginger are slightly browned, 10 to 12 minutes. Pour through strainer into bowl with chiles; discard solids in strainer. Stir chile oil to combine and let cool for 5 minutes. Stir in soy sauce, vinegar, sesame oil, and sugar until combined; set aside.
- Unwrap dough, transfer to lightly oiled counter, and, using bench scraper or knife, divide into 6 equal pieces (each 1½ inches wide). Cover with plastic wrap and let rest for 5 minutes. Meanwhile, bring water and salt to boil in large pot; reduce heat to low and cover to keep hot. Working with 1 piece at a time, oil both sides of dough and flatten into 7 by 3-inch rectangle, with long side parallel to edge of counter. With both hands, gently grasp short ends of dough. Stretch dough and slap against counter until noodle is 32 to 36 inches long (noodle will be between 1/16 and 1/8-inch-thick). (If dough is hard to stretch to this length or is snapping back significantly, set aside on counter and let rest for 10 minutes. Meanwhile, continue stretching remaining portions of dough.) Place noodle on counter. Pinch center of noodle with forefingers and thumbs of both hands and pull apart with even pressure in both directions to rip seam in middle of noodle and create 1 continuous loop. Cut loop to create 2 equal-length noodles. Set noodles aside on lightly oiled counter (do not let noodles touch) and cover with plastic wrap. Repeat stretching and cutting with remaining pieces of dough.
- Return water to boil over high heat. Add half of noodles to water and cook, stirring occasionally, until noodles float and turn chewy-tender, 45 to 60 seconds. Using wire skimmer, transfer noodles to bowl with chili vinaigrette; toss to combine. Return water to boil and repeat with remaining noodles. Divide noodles among individual bowls, top with cilantro and scallions, and serve.
To Prepare:
↑ Back to top
The Food Lab's Ultra-Gooey Stovetop Mac and Cheese

Tags: Cheese
Dairy Pasta
Servings: 4 to 6
Ingredients
- 1 pound elbow macaroni
- Kosher salt
- One 12- ounce can evaporated milk
- 2 large eggs
- 1 teaspoon Frank’s RedHot or other hot sauce
- 1 teaspoon ground mustard
- 1 pound extra-sharp cheddar, grated (see notes)
- 8 ounces American cheese, cut into 1/2-inch cubes (see notes)
- 1 tablespoon cornstarch
- 8 tablespoons ( 1 stick) unsalted butter, cut into 4 chunks
Steps
- Place the macaroni in a large saucepan and cover it with salted water by 2 inches. Bring to a boil over high heat, stirring occasionally to keep the pasta from sticking. Cover the pan, remove from the heat, and let stand until the pasta is barely al dente, about 8 minutes.
- Meanwhile, whisk together the evaporated milk, eggs, hot sauce, and mustard in a bowl until homogeneous. Toss the cheeses with the cornstarch in a large bowl until thoroughly combined.
- When the pasta is cooked, drain it and return it to the saucepan. Place over low heat, add the butter, and stir until melted. Add the milk mixture and cheese mixture and cook, stirring constantly, until the cheese is completely melted and the mixture is hot and creamy. Season to taste with salt and more hot sauce. Serve immediately, topping with toasted bread crumbs if desired.
Notes
- Use a good melting cheese or combination thereof, like American, cheddar, Jack, Fontina, young Swiss, Gruyere, Muenster, young provolone, and/or young Gouda. To reheat the pasta, add a few tablespoons of milk to the pan and cook, stirring gently, over medium-low heat until hot.
↑ Back to top
Foolproof 2-Minute Hollandaise

Servings: YIELD makes about 1 1/2
cups
Ingredients
- 1 egg yolk (about 30 grams)
- 1 teaspoon water (about 10 grams)
- 1 teaspoon lemon juice from 1 lemon (about 10 grams)
- Kosher salt
- 1 stick butter (8 tablespoons, about 112 grams)
- Pinch cayenne pepper or hot sauce (if desired)
Steps
- Combine egg yolk, water, lemon juice, and a pinch of salt in the bottom of a cup that barely fits the head of an immersion blender. Melt butter in a small saucepan over high heat, swirling constantly, until foaming subsides. Transfer butter to a 1 cup liquid measuring cup.
- Place head of immersion blender into the bottom of the cup and turn it on. With the blender constantly running, slowly pour hot butter into cup. It should emulsify with the egg yolk and lemon juice. Continue pouring until all butter is added. Sauce should be thick and creamy. Season to taste with salt and a pinch of cayenne pepper or hot sauce (if desired). Serve immediately, or transfer to a small lidded pot and keep in a warm place for up to 1 hour before serving. Hollandaise cannot be cooled and reheated. Check here for a full video walkthrough of the process.
Notes
- FAVORITE
↑ Back to top
Foolproof Cheese Fondue
Adapted from http://www.seriouseats.com/recipes/2015/02/cheese-fondue-emmentaler-gruyere-recipe.html
Servings: YIELD Serves 4 to 6
Ingredients
- 1 medium clove garlic, cut in half
- 1 cup dry white wine, such as sauvignon blanc or pinot grigio, plus more as needed
- 1/2 pound Emmentaler cheese, grated
- 1/2 pound Gruyère cheese, grated
- 1 tablespoon cornstarch
- 1 tablespoon fresh juice from 1 lemon
- 1 tablespoon kirsch (optional)
- Kosher salt and freshly ground white or black pepper
- Toasted bread cubed and/or lightly blanched vegetables, for dipping
Steps
- Rub cut faces of garlic cloves around the inside of a fondue pot, double boiler, or stainless steel mixing bowl set over a pot of simmering water (do not allow bowl to come into direct contact with the water). Add wine and heat until steaming. Meanwhile, in a large bowl, toss together both cheeses with cornstarch until evenly coated.
- Working over low heat, add cheese 1 handful at a time, stirring until mostly melted before adding next handful. Continue until all cheese is melted into the wine, forming a smooth, glossy melted cheese sauce, about 10 minutes;it is very important that the fondue stay below a simmer once you start adding the cheese, or there's a risk it could break. Stir in lemon juice and kirsch, if using, until fully incorporated. Season with salt and pepper. If not already in a fondue pot, transfer fondue to a fondue pot to keep it warm and melted at the table. Serve with toasted bread cubes and lightly blanched vegetables for dipping. If fondue begins to thicken too much, add a small splash of wine to loosen it.
Notes
- FAVORITE
↑ Back to top
Foolproof Pan Pizza

Servings: makes two 10-inch
pizzas
Ingredients
- 400g bread flour (14 ounces; about 2 1/2 cups), plus more for dusting
- 10g kosher salt (0.35 ounces; about 2 teaspoons), plus more for sprinkling
- 4g instant yeast (0.15 ounces; about 1 teaspoon), such as SAF Instant Yeast
- 275g water (9.5 ounces; about 1 cup plus 3 tablespoons)
- 8g extra-virgin olive oil (0.25 ounces; about 2 teaspoons), plus more to coat pans and for drizzling
- 1 1/2 cups pizza sauce, such as our New York–style pizza sauce
- 12 ounces grated full-fat, low moisture (dry) mozzarella cheese (see note)
- Toppings as desired
- Small handful torn fresh basil leaves (optional)
- 2 ounces grated Parmesan or Pecorino Romano cheese (optional)
Steps
- Combine flour, salt, yeast, water, and oil in a large bowl. Mix with hands or a wooden spoon until no dry flour remains. (The bowl should be at least 4 to 6 times the volume of the dough to account for rising.)
- Cover bowl tightly with plastic wrap, making sure that the edges are well sealed, then let rest at cool room temperature (no warmer than 75°F) for at least 8 hours and up to 24. Dough should rise dramatically and fill bowl. In a hot kitchen, the dough may overproof near the end of that range.
- Sprinkle top of dough lightly with flour, then transfer it to a well-floured work surface. Divide dough into 2 pieces and form each into a ball by holding it with well-floured hands and tucking the dough underneath itself, rotating it until it forms a tight ball.
- Pour 1 to 2 tablespoons oil in the bottom of two 10-inch cast iron skillets or round cake pans (see note). Place 1 ball of dough in each pan and turn to coat evenly with oil. Using a flat palm, press dough around the pan, flattening it slightly and spreading oil around the entire bottom and edges of the pan. Cover tightly with plastic wrap and let dough sit at room temperature for 2 hours (at room temperatures above 75°F, the dough may require less time to rise; at temperatures below 65°F/18°C deg;F, it may require more time). After the first hour, adjust an oven rack to the middle position and preheat oven to 550°F (290°C).
- After 2 hours, dough should be mostly filling the pan up to the edges. Use your fingertips to press it around until it fills in every corner, popping any large bubbles that appear. Lift up one edge of the dough to let any air bubbles underneath escape, then repeat, moving around the dough until there are no air bubbles left underneath and the dough is evenly spread around the pan.
- Top each round of dough with 3/4 cup sauce, spreading sauce to the very edge with the back of a spoon. Sprinkle evenly with mozzarella cheese, all the way to the edges. Season with salt. Add other toppings as desired. Drizzle with olive oil and scatter a few basil leaves over the top of each pizza, if desired.
- Transfer pan to oven and bake until top is golden brown and bubbly and bottom is golden brown and crisp when you lift it with a thin spatula, 12 to 15 minutes. Immediately sprinkle with grated Parmesan or Pecorino Romano cheese, if using. Using a thin spatula, loosen pizza and peek underneath. If bottom is not as crisp as desired, place pan over a burner and cook on medium heat, moving the pan around to cook evenly until it is crisp, 1 to 3 minutes. Remove the pizzas and transfer to a cutting board. Cut each pizza into 6 slices and serve immediately.
- Digital scale with gram measurements, two 10-inch cast iron skillets or 10-inch round cake pans
Special Equipment
Notes
- Although mozzarella is standard, any good melting cheese, such as cheddar, Jack, or young provolone, will work for this recipe. This recipe is intended to be made with dry (aged) mozzarella cheese, the yellowish variety that comes in firm blocks. Do not use fresh mozzarella, as it is too moist. If you want to bake only one pizza at a time, you can transfer one ball of dough to a sealed zipper-lock bag or container in step 3 and store it in the refrigerator for up to three days. Continue with step 4 when ready to bake.
↑ Back to top
French Bread
Servings: Makes two loaves of
french bread.
Ingredients
- 2 1/2 cups very warm water (I just use the hot water from my kitchen sink)
- 2 tablespoons dry active yeast
- 1/4 cup sugar
- 1 tablespoon salt
- 1 tablespoon oil (vegetable oil or olive oil work great)
- 6 cups all-purpose flour
- 1 tablespoon butter
Steps
- In a large bowl, mix together water, yeast, and sugar until the yeast is completely dissolved. Add in salt, oil, and flour. Stir with a large wooden spoon or mixer until it becomes too difficult, then knead for two minutes on a floured surface.
- Spray a large bowl with non-stick cooking spray and place dough in the bowl. Cover with a dish towel and let it raise until it doubles in size (I usually place the bread in my kitchen window sill where there is sunlight and it's a little warmer. I have found that on cooler days - like in the winter time - it sometimes take a little longer to double in size).
- Dump dough out onto a floured surface. Cut in half and shape into a smooth, worm-like shape (or a bread loaf shape . . . ha ha!). If you want to get fancy and make your bread look the way that it does in the picture, use a sharp knife and slice about 1/3 of the way down into the bread, opening up little cracks about 2" apart. The cracks will separate more as they rise and bake.
- Place dough loaves on a greased cookie sheet and let rise again until doubled (about 25-30 minutes). Bake at 375 degrees for 20-30 minutes, or until the top is golden brown and the bread sounds hollow when tapped.
- Remove bread from oven and run butter on top.
- Makes two loaves of french bread.
Notes
- FAVORITE
↑ Back to top
French Butter Cookies
Servings: 18-20 cookies
Ingredients
- ½ cup butter, softened to room temperature
- ½ cup powdered sugar, sifted
- 1 egg yolk, at room temperature
- ½ teaspoon vanilla extract
- 1 ⅛ cups all-purpose or cake flour
- ¼ cup granulated sugar, for coating
Steps
- Make the dough: In a mixing bowl, cream together butter and powdered sugar until pale and fluffy. Mix in the egg yolk and vanilla extract until well combined. Gently sift in the flour, and fold to form a soft dough.
Refrigerate the dough: Wrap
the dough in plastic wrap and refrigerate for 20 minutes to firm up.
Divide and roll: After chilling, divide the dough in half. Roll each
half into a log approximately 4 inches long and 1 inch in diameter.
Freeze: Wrap each log in
plastic wrap and freeze for 45 minutes.
Prep for baking: Preheat oven to 356°F (180°C). Line a baking sheet
with parchment. Unwrap dough logs and roll in granulated sugar to coat
evenly. Slice each log into ⅜-inch thick rounds and place on prepared
sheet.
Bake: For 15-18 minutes until golden. Allow to cool on the sheet for 5
minutes before transferring to a wire rack to cool completely.
↑ Back to top
French-Style Bread
Adapted from http://www.cookstr.com/recipes/french-style-bread

Servings: YIELD 2 longs loaves
Ingredients
- 1 1/2 packages active dry yeast
- 1 tablespoon granulated sugar
- 2 cups warm water (l00° to 115°, approximately)
- 1 tablespoon salt
- 5 to 6 cups all-purpose or hard-wheat flour
- 3 tablespoons yellow cornmeal
- 1 tablespoon egg white, mixed with 1 tablespoon cold water
Steps
- Combine the yeast with sugar and warm water in a large bowl and allow to proof. Mix the salt with the flour and add to the yeast mixture, a cup at a time, until you have a stiff dough. Remove to a lightly floured board and knead until no longer sticky, about 10 minutes, adding flour as necessary. Place in a buttered bowl and turn to coat the surface with butter. Cover and let rise in a warm place until doubled in bulk, 11/2 to 2 hours.
- Punch down the dough. Turn out on a floured board and shape into two long, French bread-style loaves. Place on a baking sheet that has been sprinkled with the cornmeal but not buttered. Slash the tops of the loaves diagonally in two or three places, and brush with the egg wash. Place in a cold oven, set the temperature at 400°, and bake 35 minutes, or until well browned and hollow sounding when the tops are rapped.
Notes
- For a wheaten loaf, use half white flour and half whole-wheat flour.
- Substitute equal parts of whole-wheat flour and cracked wheat for half of the white flour.
- For a more involved, more tightly textured loaf: Use either the original recipe or the whole-wheat variation. After the first rising, remove from the bowl, punch down, and knead again for 5 to 10 minutes. Return to the buttered bowl for a second rising. When it has doubled in bulk, form into two loaves and place on a baking sheet sprinkled with cornmeal. Cover and let rise for 30 minutes. Slash with a sharp razor or knife, brush with slightly beaten egg white or water, and place in a cold oven set for 375° or 400°. Bake until nicely browned and hollow sounding when tapped with the knuckles.
- Line the oven rack with tiles (see page 12), preheat the oven to 400°, and slide your bread loaves from the baking sheet directly onto the tiles, which have been sprinkled with cornmeal.
- Add to the liquid in the first step 4 to 5 tablespoons olive oil and then proceed with either the original recipe or the whole-wheat variation. You may need to use a small additional amount of flour.
- Use 1/3 white flour, 1/3 whole-wheat, and 1/3 cracked-wheat. This will give a very nice coarse, nutlike texture to the bread. With this mixture I would advise adding olive oil in the beginning to give tenderness.
↑ Back to top
Fresh Mozzarella from Scratch
Tags: Cheese
Servings: 3 medium balls
mozzarella
Ingredients
- 1 gallon ( 3.8 L) non-homogenized, low-temperature-pasteurized whole milk (see notes)
- 1 1/2 teaspoons citric acid
- 1/4 teaspoon rennet or 1/4 tablet rennet, diluted in 2 tablespoons (30ml) filtered or distilled water
- 1 tablespoon ( 12 g) kosher salt
Steps
- Pour milk into a large stainless steel pot and whisk to disperse butterfat. Sprinkle citric acid into milk and stir well to fully dissolve.
- Stirring every few minutes, bring the milk to 88°F (31°C) over medium-low heat. (This should take about 5 minutes.) Add rennet and stir to combine, about 30 seconds. Milk will begin to curdle into small clumps and separate from liquid whey. Reduce heat to low and continue heating until whey registers a temperature of 105°F (41°C) on an instant-read thermometer , about 3 to 5 minutes. Remove from heat and let stand 5 to 10 minutes.
- Using a slotted spoon, transfer curds to a strainer set over a bowl, pressing gently to drain. Curds should form a single mass. Allow to drain until whey is no longer dripping, about 10 to 15 minutes. Transfer drained curds to a cutting board. Slice into 1-inch cubes and divide into 3 even portions.
- Meanwhile, season whey with 1 tablespoon (12g) kosher salt (or more to taste), stirring well to dissolve. Transfer 1/3 of whey to a heatproof bowl and set aside.
- If Using the Stovetop Method: Bring remaining 2/3 of whey to 180°F (82°C) over high heat. Working with one portion of curds at a time, place in a heatproof bowl and add enough hot whey to cover. Wait 15 to 20 seconds, until curd is soft, sticky, and clumping together.
- If Using a Microwave: Working with one portion of curds at a time, place in a microwave-safe dish and heat on high in 15-second intervals until curd is soft and sticky.
- For Both Methods: Put on clean rubber gloves. Pick up ball of curds and slowly draw hands apart, allowing gravity to stretch curds; avoid forcing, tearing, or kneading curds. Continue folding and stretching curds, reheating in microwave or whey as necessary, until curds are shiny and smooth. (This should take approximately 2 to 6 stretches.)
- Fold curd into a mass that's roughly the size of your palm and make a C shape with the forefinger and thumb of one hand. Push curd through those fingers, exerting pressure to shape it into a sphere. Press hard enough to prevent large bubbles from forming under the skin. Alternatively, make a closed loop with thumb and forefinger and make several small, egg-shaped bocconcini.
- Gently lower ball(s) into room-temperature whey and let rest 20 to 30 minutes before eating. Meanwhile, repeat with remaining portions of curd. Cheese should be eaten immediately or within a few hours; to store, wrap tightly in plastic and follow these reheating guidelines .
↑ Back to top
Fresh Orange Cookies
Ingredients
- 1 1/2 cups all-purpose flour
- 1/2 tsp. baking soda
- 1/4 tsp. salt
- 1/2 cup butter or margarine, softened
- 1/2 cup granulated sugar
- 1/2 cup packed light brown sugar
- 1 egg
- 1 Sunkist® orange, unpeeled and finely chopped (chop the orange in a blender or food processor, or by hand, to equal 3/4 cup chopped fruit, drained.)
- 1/2 cup chopped walnuts
Steps
- Sift together the flour, baking soda, and salt.
- In a large bowl, cream together the butter and sugars.
- Add the egg and chopped orange and beat well.
- Gradually blend in dry ingredients.
- Stir in the walnuts.
- Cover and chill for 1 hour or longer.
- Drop dough by teaspoons onto lightly greased cookie sheets.
- Bake at 375º F for 10 to 12 minutes.
Notes
- FAVORITE
↑ Back to top
Fresh Pasta
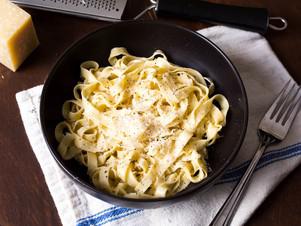
Tags: Pasta
Servings: Makes about 1 pound
(serving 4 to 6)
Ingredients
- 10 ounces (280g; about 2 cups) all-purpose flour, plus more for dusting
- 2 whole large eggs (110g; about 4 ounces)
- 4 yolks from 4 large eggs (70g; about 2.5 ounces)
- 1 teaspoon kosher salt, plus more for salting water
Steps
- To Make the Dough: On a large, clean work surface, pour flour in a mound. Make a well in the center about 4 inches wide. Pour whole eggs, egg yolks, and salt into well and, using a fork, beat thoroughly. When combined, gradually incorporate flour into the eggs until a wet, sticky dough has formed.
- To Roll the Pasta: Meanwhile, place a sheet of parchment paper on a tray or cutting board and dust lightly with flour. Unwrap rested dough and cut into quarters. Set one quarter on work surface and re-wrap remaining dough. With a rolling pin, flatten the quarter of dough into an oblong shape about 1/2 inch thick.
- To Cut Noodles: Adjust pasta machine to noodle setting of your choice. Working one dough segment at a time, feed dough through the pasta-cutter. Alternatively, cut folded dough by hand with a chef's knife to desired noodle width.
- To Cook: Bring a large pot of salted water to a rolling boil. Add pasta, stir gently with a wooden spoon, chopsticks, or a cooking fork, and cook, tasting at regular intervals until noodles are just set with a definite bite, about 1 1/2 to 2 minutes. Drain, toss with sauce, and serve.
Using a bench knife, scrape excess dough from fork and fingers. Begin
to fold additional flour into the dough with the bench knife, turning
the dough roughly 45 degrees each time, until dough feels firm and
dry,
and can form a craggy-looking ball, 2 to 5 minutes.
Press the heel of your hand into the ball of dough, pushing forward
and
down. Rotate the ball 45 degrees and repeat. Continue until dough
develops a smooth, elastic texture similar to a firm ball of Play-Doh.
If dough feels too wet, add flour in 1 teaspoon increments. If dough
feels too dry, add water slowly using a spray bottle.
Wrap ball of dough tightly in
plastic wrap and rest on countertop for 30 minutes.
Set pasta maker to widest
setting and pass dough 3 times through the machine at this setting.
Place dough on a lightly floured work surface. Fold both ends in so
that they meet at the center of the dough, and then fold the dough in
half where the end points meet, trying not to incorporate too much air
into the folds. Using rolling pin, flatten dough to 1/2-inch thick.
Pass through the rollers 3 additional times.
Narrow the setting by 1 notch and repeat Step 7. Repeat once more (the
dough should now have passed through the third widest setting).
Continue passing the dough through the rollers, reducing the thickness
by 1 setting each time until it reaches the desired thickness. It
should now be very delicate and elastic to the touch, and slightly
translucent.
Place rolled dough onto a work surface or baking sheet lightly dusted
with flour or lined with parchment paper, folding the dough over as
necessary so that it fits; sprinkle with flour or line with parchment
between folds to prevent sticking.
Cover dough with plastic wrap or a kitchen towel to prevent drying,
then repeat Steps 5 through 9 with remaining dough quarters. If making
noodles, cut dough into 12- to 14-inch segments.
Divide the cut noodles into individual portions, dust lightly with
flour, and curl into a nest. Place on parchment-lined rimmed baking
sheet and gently cover with kitchen towel until ready to cook. Pasta
can be frozen directly on the baking sheet, transferred to a
zipper-lock freezer bag, and stored in the freezer for up to three
weeks before cooking. Cook frozen pasta directly from the freezer.
↑ Back to top
Fresh Peach BBQ Sauce
Adapted from https://recipesage.com/#/edit-recipe/new
Tags: Barbecue
Sauces
Servings: 6 Serves
Ingredients
- 2 tsp extra virgin olive oil
- 1/4 cup diced brown onion
- 3 cloves garlic minced
- 1 tsp fresh ginger minced
- 2 peaches pits removed and sliced
- 2/3 cup apple cider vinegar
- 1 6 oz can of tomato paste
- 1 tbsp fresh lemon juice
- 1 tbsp dijon mustard
- 1 tsp smoked paprika
- salt and pepper to taste
Steps
- In a large saucepan, heat olive oil over medium heat. Add the onion and cook until soft, about 5 minutes. Add the minced garlic and peaches and cook for another 2 minutes.
- Store in an airtight container in the fridge for up to 2 weeks.
Reduce the heat to low and add the apple cider vinegar, tomato paste,
lemon juice, paprika, mustard, salt and pepper. Give everything a good
stir until it is relatively smooth. Simmer for around 5 minutes, until
the mixture has thickened.
Remove from heat. Using an
immersion blender or a high powered blender, blend until smooth.
↑ Back to top
Fresh Rice Sheets with Shrimp
Ingredients
- 1/2 cup vegetable oil
- 1 cup fresh cilantro leaves
- White parts of 2 scallions, thinly sliced
- 1/4 cup light soy sauce
- 12 medium shrimp
- 2 6'' x 9'' sha ho fen (fresh rice sheets)
Steps
- Heat vegetable oil in a small saucepan over medium-high heat, then add cilantro leaves and scallions. Fry until fragrant, 2-3 minutes, then transfer to a bowl, stir in soy sauce, and set aside.
- Pour about 2 cups water into a wok and place a covered bamboo steamer (or substitute) in wok over water. Bring water to a boil over high heat.
- Meanwhile, shell and devein shrimp, then slice each shrimp in half lengthwise. Unfold sha ho fen (fresh rice sheets) on a clean surface and cut each sheet into 6 squares (each about 3'' x 3''). Place 2 shrimp halves on one side of each square and fold over twice to enclose shrimp. Place 6 shrimp rolls on a plate small enough to fit inside steamer.
- Place plate in steamer, cover, and steam until shrimp turn opaque, about 5 minutes. Remove plate from steamer, spoon about half of sauce over top, and serve at once. Repeat steaming process with remaining shrimp rolls, spooning remaining sauce over them when done.
Notes
- FAVORITE
↑ Back to top
Fresh Spring Rolls

Tags: Appetizers and Dim
Sum Vietnam
Servings: 12 rolls
Ingredients
- Salt
- 18 medium shrimp (about ½ pound), peeled and deveined
- 6 ounces thin rice vermicelli noodles
- 12 (8-inch) rice paper wrappers
- 2 Persian or mini seedless cucumbers
- 12 butter or Boston lettuce leaves
- 1 large carrot
- 1½ packed cups mixed fresh herb leaves, such as cilantro, mint, basil, shiso and/or dill
- ½ cup store-bought or homemade fried shallots (optional)
- Nước chấm or peanut sauce, for serving
Steps
- Bring a large pot of salted water to a boil and make an ice bath by filling a large bowl with ice and cold water. When the water is boiling, turn off the heat, add the shrimp and cook until opaque throughout, about 1 minute. Use a slotted spoon to transfer the shrimp to the ice bath.
- Add the noodles to the hot water and let sit, with the heat off, until tender, 10 to 20 minutes, depending on the brand. While the noodles are soaking, halve the cucumbers crosswise, quarter lengthwise, then thinly slice into thin matchsticks. Remove the ribs from the lettuce leaves. Using the large holes of a box grater, grate the carrot until you have ¾ cup.
- When the shrimp are cool enough to handle, pat dry; reserve the water bath. When the noodles are ready, drain and transfer them to the ice bath to cool. Place a shrimp on a cutting board on its side and press down with your non-dominant hand. Slice the shrimp in half lengthwise from head to tail and remove the black vein. Set aside and repeat with remaining shrimp.
- When ready to assemble, drain and shake dry the noodles. Fill a large, deep dish or pie plate with a couple inches of warm water and gather all your ingredients at your work surface.
- Working one at a time, submerge a rice paper wrapper in the warm water for 3 seconds; the wrapper will still be firm. Transfer to a work surface (avoid wood, which can dry out the wrapper). Pretend the wrapper is a clock face: fold the lettuce in half and place between 4 and 8 o’clock, leaving a 1-inch border on both sides. Top the lettuce with about 2 tablespoons of herbs, 1 tablespoon carrots, 4 pieces of cucumber, a pinch of fried shallots (if using) and about 3 tablespoons (1½ ounces) of noodles. Press the filling down to flatten. Grab the wrapper at 6 o’clock and pull it snugly over the filling. Roll tightly away from you once so the lettuce is facing up. As you roll, use your fingers to tuck the filling under the wrapper.
- Fold in the short sides (3 and 9 o’clock) over the filling and press to seal (if this is proving difficult, you can leave one or both sides open). Place 3 slices of shrimp cut sides up on the wrapper between the fillings and top of the wrapper (12 o’clock). Continue rolling tightly until sealed. Transfer to a platter and repeat with the remaining wrappers, spacing the finished rolls apart so they don’t touch. When your water is cool, replace it with more warm water as needed. Serve with peanut sauce and/or nước chấm for dipping.
↑ Back to top
Fresh Strawberry Pie
Ingredients
- 4 pints (about 3 pounds) fresh strawberries, gently rinsed and dried, hulled (see note)
- 3/4 cup (5 1/4 ounces) sugar
- 2 tablespoons cornstarch
- 1 1/2 teaspoons Sure-Jell for low-sugar recipes (see note)
- Pinch table salt, generous amount
- 1 tablespoon juice from 1 lemon
- 1 recipe Baked Pie Shell (see related recipe)
- 1 cup cold heavy cream
- 1 tablespoon sugar
WHIPPED CREAM
Steps
- FOR THE FILLING: Select 6 ounces misshapen, underripe, or otherwise unattractive berries, halving those that are large; you should have about 11/2 cups. In food processor, process berries to smooth puree, 20 to 30 seconds, scraping down bowl as needed. You should have about 3/4 cup puree.
- Whisk sugar, cornstarch, Sure-Jell, and salt in medium saucepan. Stir in berry puree, making sure to scrape corners of pan. Cook over medium-high heat, stirring constantly with heatproof rubber spatula, and bring to full boil. Boil, scraping bottom and sides of pan to prevent scorching, for 2 minutes to ensure that cornstarch is fully cooked (mixture will appear frothy when it first reaches boil, then will darken and thicken with further cooking). Transfer to large bowl and stir in lemon juice. Let cool to room temperature.
- Meanwhile, pick over remaining berries and measure out 2 pounds of most attractive ones; halve only extra-large berries. Add berries to bowl with glaze and fold gently with rubber spatula until berries are evenly coated. Scoop berries into pie shell, piling into mound. If any cut sides face up on top, turn them face down. If necessary, rearrange berries so that holes are filled and mound looks attractive. Refrigerate pie until chilled, about 2 hours. Serve within 5 hours of chilling.
- FOR THE WHIPPED CREAM: Just before serving, beat cream and sugar with electric mixer on low speed until small bubbles form, about 30 seconds. Increase speed to medium; continue beating until beaters leave trail, about 30 additional seconds. Increase speed to high; continue beating until cream is smooth, thick, and nearly doubled in volume and forms soft peaks, 30 to 60 seconds.
- Cut pie into wedges. Serve with whipped cream.
Notes
- FAVORITE
↑ Back to top
Fried Calamari
Adapted from https://altonbrown.com/recipes/fried-calamari/
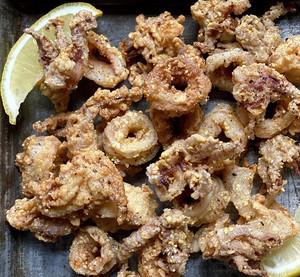
Servings: 4 APPETIZER SERVINGS
Ingredients
- 1 pound squid, tubes and tentacles
- 1 cup buttermilk
- 1 1/2 teaspoons kosher salt, plus more to taste
- 1 teaspoon hot sauce
- 1/2 cup all-purpose flour
- 1/4 cup medium grind cornmeal
- 2 tablespoons cornstarch
- 2 quarts peanut oil
- Freshly ground black pepper, to taste
- 5-quart Dutch oven
- Digital or candy/fry thermometer
- Spider strainer or slotted spoon
- 2 half sheet pans with fitted wire racks
Software
Specialized
Hardware
Steps
- Rinse the squid thoroughly and pat dry. Cut any large tentacles in half lengthwise and the tubes into 1/2-inch rings.
- Whisk the buttermilk, 1 1/2 teaspoons salt, and the hot sauce in a medium bowl. Drop the squid into the mixture and soak for 30 minutes.
- Combine the flour, cornmeal, and cornstarch in a medium mixing bowl. Drain the squid from the buttermilk mixture using a mesh strainer then dredge the squid, in small handfuls, into the flour mixture, tossing with your fingers to prevent clumping. Place on a half sheet pan fitted with a wire rack and set aside while you heat the oil.
- Place a 5-quart Dutch oven over medium-high heat until the temperature reaches 375℉. Set a wire rack over a paper towel lined half sheet pan and have standing nearby your cooktop.
- Gently place small handfuls of dredged squid into the hot oil and fry for 1 minute. Remove from the oil with a spider or slotted spoon and place on the paper towel lined sheet pan. Season while hot with additional kosher salt and freshly ground black pepper. Repeat with the remaining squid. Serve immediately.
↑ Back to top
Fried Cornmeal Mush

Servings: 14-16 servings
Ingredients
- 4 cups water, divided
- 1 cup cornmeal
- 1 teaspoon salt
- Oil for frying
- Maple syrup
Steps
- Boil 3 cups water. Combine remaining water with cornmeal and salt; add to boiling water. Stir until mixture returns to a boil. Reduce heat; cover and simmer for 1 hour, stirring occasionally.
- Pour into a greased 8x4-in. loaf pan. Chill for 8 hours or overnight. Cut into 1/2-in. thick slices.
- In a large skillet, fry slices in oil until browned on each side. Serve with syrup. Yield: 14-16 servings.
↑ Back to top
Fried Shallots

Tags: Alliums
Condiments
Servings: About 1½ cups
Ingredients
- 1 pound shallots, peeled
- 2 cups vegetable oil
- Kosher salt
Steps
- Using a mandoline, slice the shallots into 1/16-inch-thick rounds. Line a rimmed baking sheet with 6 layers of paper towels. Set a fine-mesh strainer over a large heatproof bowl or medium saucepan.
- Combine shallots and oil in a medium saucepan or wok. Place over medium-high heat and cook, stirring frequently, until the shallots begin to bubble, 2 to 3 minutes. Continue cooking, stirring constantly as the shallots fry to ensure even cooking, until the shallots turn pale golden brown, 8 to 10 minutes longer. (The shallots will continue cooking for a brief period after draining, so do not allow them to get too dark.) Working quickly, pour the contents of the saucepan into the strainer. Save oil for another use, like stir-frying noodles or fried rice, or for using in marinades, or as the base of homemade chili oil.
- Immediately transfer the shallots to the prepared baking sheet, spread them out into an even layer, and season with salt. Allow the shallots to drain, then carefully lift the top layer of paper towels and roll the shallots onto the second layer, blotting gently with the first. Repeat until the shallots are on the last layer of paper towels and mostly grease-free. Allow the shallots and oil to cool to room temperature, then store separately in airtight containers and refrigerate.
↑ Back to top
Fromage Fort
Tags: Dips and Spreads
From Jacques Pepin
Servings: Enough for about 50
pieces of toast
Ingredients
- 3 to 4 garlic cloves, peeled
- 1 pound leftover pieces of cheese, a combination of as many hard and soft varieties as you desire (like Brie, cheddar, Swiss, bleu, mozzarella or goat), trimmed to remove surface dryness and mold (see note)
- ½ cup dry white wine or vegetable broth or a mixture of both
- 1 teaspoon freshly ground black pepper
- Salt, if needed
Steps
- Place the peeled garlic in the bowl of a food processor and process for a few seconds, until coarsely chopped. Add the cheese, white wine (or broth), pepper, and salt (if needed) and process for 30 to 45 seconds, until the mixture is soft and creamy but not too smooth. Place in a crock, cover with plastic wrap and refrigerate until ready to use.
Notes
- If you use only unsalted cheese or a large amount of unsalted farmer's cheese, for example, you may want to add a little salt. Usually, cheese is salty enough so additional salt is not necessary.
↑ Back to top
Fuchsia Dunlop's Mapo Tofu
Tags: Chinese
Vegetarian
Servings: 4
Ingredients
- 500g plain white tofu
- 6 tbsp cooking oil
- 100g minced beef
- 2½ tbsp Sichuan chilli bean paste
- 1 tbsp fermented black beans
- 2 tsp ground chillies
- 1 tbsp finely chopped garlic
- 1 tbsp finely chopped ginger
- 175ml stock or water
- ¼ tsp ground white pepper
- 2 stalks Chinese green garlic or 2 spring onions, cut into 2cm lengths
- 1 tbsp potato starch, mixed with 2½ tbsp cold water
- ¼ -1 tsp ground roasted Sichuan pepper
Steps
- Cut the tofu into 2cm cubes and leave to steep in very hot, lightly salted water while you prepare the other ingredients.
- Heat a seasoned wok over a high flame. Pour in 1 tbsp of the cooking oil and heat until the sides of the wok have begun to smoke. Add the beef and stir-fry until it is fully cooked and fragrant, breaking the clumps of meat into tiny pieces as you go. Remove from the wok with a slotted spoon and set aside.
- Rinse and dry the wok if necessary, then re-season it and return to a medium flame. Pour in remaining cooking oil and swirl it around. Add the chilli bean paste and stir-fry until the oil is a rich red colour and smells delicious. Next add the black beans and ground chillies and stir-fry for a few seconds more until you can smell them too, then do the same with the garlic and ginger. Take care not to overheat the aromatics – you want to end up with a thick, fragrant sauce, and the secret is to let them sizzle gently, allowing the oil to coax out their flavours.
- Remove the tofu from the hot water with a perforated ladle, shaking off any excess liquid, and lay it gently into the wok. Sprinkle over the beef, then add the stock or water and white pepper. Nudge the tofu tenderly into the sauce with the back of your ladle or wok scoop to avoid breaking up the cubes. Bring to the boil, then simmer for a couple of minutes to allow the tofu to absorb the flavours of the seasonings.
- If you're using green garlic, stir this in now. When just cooked, add a little of the potato starch mixture and stir gently as the liquid thickens. Repeat this twice more, until the sauce clings deliciously to the seasonings and tofu (don't add more than you need). If you're using spring onion, add this now, nudging it gently into the sauce.
- Pour everything into a deep serving bowl. Sprinkle with the ground roasted Sichuan pepper and serve.
This is an edited extract
from The Food of Sichuan by Fuchsia Dunlop (Bloomsbury), RRP $55.
↑ Back to top
Fudgy Oatmeal Bars
Servings: YIELD Serves 28
(serving size: 1 bar)
Ingredients
- 4.5 ounces all-purpose flour (about 1 cup)
- 1 cup old-fashioned rolled oats
- 1/4 cup packed brown sugar
- 1/4 teaspoon baking soda
- 1/4 cup canola oil
- 2 tablespoons unsalted butter, melted
- Baking spray with flour
- 3.4 ounces all-purpose flour (about 3/4 cup)
- 1 cup granulated sugar
- 3/4 cup unsweetened cocoa
- 1/2 cup packed brown sugar
- 1/2 teaspoon baking powder
- 1/4 teaspoon salt
- 1/3 cup evaporated fat-free milk
- 1 tablespoon instant espresso granules
- 3 tablespoons canola oil
- 3 tablespoons butter, melted
- 1 teaspoon vanilla extract
- 2 large eggs, lightly beaten
- 1/2 cup bittersweet chocolate chips
Filling
Steps
- Preheat oven to 350°.
- To prepare crust, weigh or lightly spoon 4.5 ounces flour into a dry measuring cup; level with a knife. Combine flour and next 3 ingredients (through baking soda) in a medium bowl. Add 1/4 cup canola oil and 2 tablespoons butter; toss with a fork until crumbly. Remove 3/4 cup of oat mixture; set aside. Press remaining oat mixture into the bottom of an 11 x 7-inch glass or ceramic baking dish coated with baking spray. Bake at 350° for 13 minutes or until lightly browned. Cool slightly.
- To prepare filling, weigh or lightly spoon 3.4 ounces flour into a dry measuring cup; level with a knife. Combine flour and next 5 ingredients (through salt) in a large bowl. Combine milk and espresso granules in a bowl, stirring with a whisk until espresso dissolves. Add 3 tablespoons canola oil, 3 tablespoons butter, vanilla, and eggs to milk mixture, stirring with a whisk. Add milk mixture to flour mixture, stirring to combine. Fold in chocolate.
- Spread batter over prepared crust in pan. Sprinkle with reserved 3/4 cup oat mixture. Bake at 350° for 32 minutes or until a wooden pick inserted in center comes out with moist crumbs clinging. Cool in pan on a rack. Cut into 28 bars.
Notes
- FAVORITE
↑ Back to top
Fwd: Re: Baklava - Scottycooks@Gmail.Com - Gmail
Ingredients
- 2 cups sugar
- 2/3 cup water
- 1 lemon, halved and juice
- 1 orange, halved
- 1 1/2 (3-inch) cinnamon sticks
- 1 cup honey
- 3 1/4 cups whole almonds with skins (1 lb), finely chopped
- 2 1/3 cups walnuts (1/2 lb), finely chopped (or any mix of nuts)
- 1 1/4 cups sugar (or less)
- 1 tablespoon cinnamon
- 2 teaspoons freshly grated nutmeg
- 1/4 teaspoon ground cloves
- 1/4 teaspoon salt
- 3 sticks (1 1/2 cups) unsalted butter, melted and cooled slightly
- 1 (1-lb) package phyllo dough (17 by 12 inches; about 28 sheets), thawed if frozen
For syrup:
For baklava:
Steps
- Combine sugar and water in a 2 1/2- to 3-quart saucepan. Squeeze juice from lemon and orange into sugar mixture. Add fruit halves and cinnamon sticks. Bring mixture to a boil over moderate heat, uncovered, stirring occasionally, until sugar is dissolved, then simmer 10 minutes. Stir in honey and return to a boil. Remove from heat and cool to room temperature. Pour through a sieve into a large measuring cup or bowl, pressing hard on, and then discarding solids. Chill uncovered, until cold, about 1 hour.
- Put oven rack in middle position and preheat oven to 350°F.
Make syrup:
Assemble and bake
baklava:
Whisk together almonds,
walnuts, sugar, cinnamon, nutmeg, cloves, and salt until combined
well.
Generously brush a 13- by 9- by 2-inch glass baking dish with melted
butter. Halve phyllo sheets crosswise and stack sheets. Keep stack
covered with 2 overlapping sheets of plastic wrap and then a dampened
clean kitchen towel. Lay 2 sheets of phyllo in bottom of baking dish
and brush top sheet generously with butter. Continue to layer 2 sheets
at a time, staggering sheets in each double layer slightly to cover
bottom of dish, then brushing every second sheet generously with
butter, until you have used 10 sheets of phyllo total. After brushing
top layer of phyllo with butter, spread a rounded 1 1/2 cups of nut
mixture over it. Drizzle with 2 tablespoons butter.
Repeat layering 3 more times. Top with 10 more sheets of phyllo. (You
will use 50 sheets of phyllo total.) Butter top and let baklava stand
at room temperature to harden slightly (to facilitate cutting), 10 to
15 minutes.
Using a sharp knife, cut baklava into 16 equal rectangles, then cut
each piece in half diagonally. (Be sure to cut all the way through.)
Bake baklava until golden, 50 minutes to 1 hour. Transfer dish to a
rack to cool, then slowly pour cold syrup around edges of hot baklava,
in between all cuts, and over top. Let stand at room temperature at
least 8 hours. (Cover once baklava is at room temperature.) Do not
chill.
Notes
- Syrup can be made up to 5 days ahead and chilled, covered.
- Baklava keeps in an airtight container up to 1 week
- Use black roasting pan and two packs of phyllo sheets; can increase amount of nuts and syrup.
↑ Back to top
Gado-Gado (Indonesian Vegetable Salad with Peanut
Dressing)
Adapted from http://www.saveur.com/article/recipes/gado-gado-indonesian-vegetable-salad-with-peanut-dressing
Servings: 6
Ingredients
- 1 1/2 cups roasted unsalted peanuts
- 1 1/2 tsp. Indonesian shrimp paste
- 1/4 cup grated palm or dark brown sugar
- 2 cloves garlic, peeled
- 1 Holland chile, chopped
- 3/4 cup unsweetened coconut milk, preferably UHT from a carton
- 1 tbsp. palm or rice vinegar
- Kosher salt, to taste
- Peanut oil, for frying
- 1 lb. medium Yukon gold potatoes, peeled and sliced 1/3" thick
- 7 oz. firm tofu, drained, pressed, and cut into 1/2"-thick triangles
- 5 oz. Chinese water or regular spinach, tough stems trimmed, leaves cut into 2" pieces
- 4 oz. long beans or regular green beans, trimmed and cut into 2" pieces
- 2 cups mung bean sprouts
- 2 medium carrots, sliced 1/4" thick on an angle
- 1/4 head green cabbage, cored and cut into 11/2" pieces
- 1 kirby cucumber, sliced 1/2" thick on an angle
- 15 Indonesian shrimp chips, fried
- 3 eggs, hard-boiled, peeled, and halved
Steps
- Heat a 12" nonstick skillet over medium heat. Cook peanuts until golden, 8–10 minutes; let cool. Transfer to a food processor; pulse until ground. Return skillet to medium-high heat. In a piece of aluminum foil, wrap shrimp paste into a flat package; cook, flipping once, until toasted and fragrant, 2–4 minutes. Let cool, unwrap, and transfer to food processor. Add sugar, garlic, and chile; purée into a paste. Transfer paste to skillet and add coconut milk; cook over medium heat, stirring constantly, until mixture begins to separate, 5–7 minutes. Stir in vinegar, salt, and 1/2 cup water; simmer until sauce is thickened, 2–3 minutes.
- Heat 2" oil in a 6-qt. saucepan until a deep-fry thermometer reads 350°. Working in batches, fry potatoes until golden and cooked through, 3–4 minutes. Using a slotted spoon, transfer to paper towels to drain. Fry tofu until puffed and golden, about 2 minutes; drain on paper towels. Bring a large pot of salted water to a boil; working in batches, cook spinach, beans, sprouts, carrots, and cabbage until just tender, 30 seconds to 1 minute for spinach, beans, and sprouts and 2–3 minutes for carrots and cabbage. Using a slotted spoon, transfer vegetables to a bowl of ice water until chilled; drain, spread on paper towels to dry, and transfer to a large platter. Add potatoes, tofu, and cucumber. Top with reserved sauce, shrimp chips, and eggs.
Notes
- FAVORITE
↑ Back to top
Gai Pad Krapow (Thai Basil Chicken)
Adapted from https://www.seriouseats.com/eat-for-eight-bucks-gai-pad-krapow-thai-basil-chicken-recipe
Servings: 2
Ingredients
- 2 tablespoons vegetable oil
- Chiles, finely chopped (use 2-3 serrano peppers for very mild heat; 2-3 bird's eye chiles for medium heat)
- 1 large shallot, finely sliced
- 3 cloves garlic, minced
- 1/3 pound green beans, trimmed, chopped in 1 1/4-inch lengths
- 1/2 pound ground chicken
- 2 tablespoons fish sauce
- 2 teaspoons sugar
- 1 bunch basil, leaves only
- Boiled rice
- Fried eggs, 1 per person (optional)
- Nam pla prik (recipe follows) or fresh lime wedges
- For Nam Pla Prik (Chile Fish Sauce)
- Fish sauce
- Fresh lime juice
- Chiles, finely chopped
- Shallots, finely sliced
To serve:
Steps
- Heat the oil over high heat in a wok or large frying pan. When you can see waves forming in the hot oil, add the chilis, shallots, and garlic and stir-fry until golden, about 30 seconds.
- Add the green beans and stir-fry until cooked but still crunchy, 3 to 4 minutes.
- Add the ground chicken, using a wooden spoon or spatula to break up the meat into small pieces. Stir-fry until chicken is cooked through.
- Add the fish sauce and sugar to the pan, and stir to distribute. Taste, and add more fish sauce or sugar if desired.
- Reduce heat to medium-low. Add the basil leaves and stir-fry until completely wilted. Remove from heat.
- Serve with boiled rice, fried egg (optional), and nam pla prik or lime wedges.
↑ Back to top
Garlic Butter Shrimp

Tags: Seafood
Ingredients
- 2 tablespoons olive oil
- 4 tablespoons butter (unsalted)
- 1 pound shrimp (large or jumbo, shelled)
- ¼ teaspoon salt (or to taste)
- 6 cloves garlic (minced)
- ½ teaspoon red pepper flakes
- 3 tablespoons lemon juice (freshly squeezed)
- ¼ cup fresh parsley (chopped)
- Before You Begin! If you make this, please leave a review and rating letting us know how you liked this recipe! This helps our business thrive & continue providing free recipes.
Steps
- Cook the shrimp: Heat the olive oil and 2 tablespoons of the butter to a large skillet, over medium high heat. Add the shrimp to the skillet and cook for 2 to 3 minutes until the shrimp turns pink. Season with salt. Flip over and cook for another 2 minutes.
- Add garlic: Add the garlic and red pepper flakes and cook for about 30 seconds or until aromatic. Do not burn.
- Finish the shrimp: Stir in the remaining butter, lemon juice and parsley. Turn off the heat. Serve immediately.
Notes
- When buying fresh shrimp, it should not have a fishy smell. Fresh shrimp, like other seafood, should smell clean, like saltwater, or the sea.
- Press the body of the shrimp with your finger. If your finger leaves an indentation, that shrimp isn’t fresh.
- Never thaw shrimp on the counter as this can be dangerous, always thaw it in the refrigerator.
- Freshly cooked shrimp is really at it’s best when served immediately, but is perfectly fine in the fridge for up to 2-3 days in an airtight container.
- Allow cooked shrimp to cool completely before placing in airtight freezer bags or containers, and store up to 3-4 months. When ready to use, take them directly from the freezer to your pan for reheating.
↑ Back to top
Garlic Parmesan Roasted Zucchini
Adapted from https://www.eatwell101.com/roasted-zucchini-recipe

Tags: Vegetables
Ingredients
- 3 or 4 medium-sized zucchini, thoroughly washed
- 4 tablespoons melted butter
- 1 cup parmesan
- 1/2 teaspoon fresh cracked black pepper
- 1 tablespoon minced garlic (or garlic powder)
- 1 tablespoon paprika
- 1 teaspoon salt
- 1 teaspoon Italian seasoning
- Fresh parsley, chopped for garnish
Steps
- To make the roasted zucchini: Preheat your oven to 400°F (200°F).
- Cut a thin lengthwise slice off the bottom of each zucchini to make them more stable. Place 2 chopsticks on opposite long sides of 1 zucchini on your cutting board. Cut zucchini crosswise into thin slices, stopping when your knife hits the chopsticks. Repeat with remaining zucchinis.
- Transfer the zucchinis to a baking dish. Pour melted butter on top of zucchinis and brush to coat in between the slices.
- In a shallow plate or bowl, combine parmesan, black pepper, minced garlic, paprika, salt, and Italian seasoning. Sprinkle and rub the mixture over the zucchinis and between the slices to coat them completely. The zucchini will curb because of the stuffing between the slices, but it will get back to its original shape while baking.
- Bake the zucchinis in the oven for 25-30 minutes, until crisp, golden and cooked through. Sprinkle the garlic parmesan roasted zucchini with chopped parsley and serve immediately. Enjoy! ❤️
- If your zucchinis are pretty large, you can make the cuts, brush with olive oil and bake for 10 to 15 minutes. Then brush the garlic parmesan mixture and finish in the oven for 25- 30 minutes. This way the zucchini will be evenly cooked without drying out the stuffing.
- Sure! Make the slits, brush the mixture over the zucchinis then transfer to the baking dish and cover with plastic wrap, and store in the refrigerator until ready to bake the zucchini in the oven.
- You can keep the roasted zucchini leftovers for up to 3 days in your refrigerator. Reheat in the oven covered with foil, or in the microwave on medium power until heated through.
PHOTO CREDIT: ©
EATWELL101.COM:
TIPS FOR THE ROASTED
ZUCCHINI RECIPE:
We like to pop the Hasselback
zucchini under the broiler so that the garlic/parmesan becomes nice
and crisp.
These Hasselback roasted zucchinis are great as a weeknight side dish,
but they are also delicious as a light vegetarian lunch or a side dish
at a party.
CAN WE PREP THE ZUCCHINI
IN ADVANCE?:
HOW LONG TO KEEP THE
ROASTED ZUCCHINI LEFTOVERS?:
↑ Back to top
Garlicky Lamb Chop
Tags: Lamb
Servings: Serves : 4
Ingredients
- Eight 1/2-inch-thick lamb loin chops (about 2 pounds), fatty tips trimmed
- Salt and freshly ground pepper
- Pinch of dried thyme
- 3 tablespoons extra-virgin olive oil
- 10 small garlic cloves, halved
- 3 tablespoons water
- 2 tablespoons fresh lemon juice
- 2 tablespoons minced parsley
- Pinch of crushed red pepper
Steps
- Season the lamb with salt and pepper and sprinkle lightly with thyme. In a very large skillet, heat the olive oil until shimmering. Add the lamb chops and garlic and cook over moderately high heat until the chops are browned on the bottom, about 3 minutes. Turn the chops and garlic and cook until the chops are browned, about 2 minutes longer for medium meat. Transfer the chops to plates, leaving the garlic in the skillet.
- Add the water, lemon juice, parsley and crushed red pepper to the pan and cook, scraping up any browned bits stuck to the bottom, until sizzling, about 1 minute. Pour the garlic and pan sauce over the lamb chops and serve immediately.
↑ Back to top
Gateau Basque
Adapted from https://bonapeti.com/recipes/r-214802-Gateau_Basque

Tags: Baking
Cakes and Pastries Pies and Tarts
Servings: 10
Ingredients
- DOUGH
- flour - 11.5 oz (330 g)
- eggs - 1 pc.
- almonds - 1.8 oz (50 g) ground
- powdered sugar - 5.3 oz (150 g)
- butter - 6.4 oz (180 g)
- CREAM
- milk - 26 fl oz (760 ml)
- eggs - 3 pcs.
- sugar - 5.3 oz (150 g)
- starch - 1.8 oz (50 g) organic
- cinnamon - 1 stick
- lemons - 1/2 peel
- oranges - 1/2 peel
- eggs - 1 pc.
FOR SPREADING:
Steps
- Prepare a cream that will serve as a filling for the cake.
- For it, heat the milk with the sugar, cinnamon and citrus peels (only the yellow and orange parts) for 10 minutes on low to moderate heat. The milk should not boil.
- Remove the mixture from the heat, cover it with a lid and leave it for 10 minutes, then strain and place it back onto the heat.
- Beat the eggs with the starch and pour them in a thin stream over the milk.
- Boil the cream for 6 minutes, by stirring constantly, then pour it into a bowl and cover with cling film, so that it sticks to the cream so that no crust forms.
- Make the cake batter by sifting the flour with the powdered sugar into a bowl. Beat the egg with them, pour the ground almonds and cut the butter into small pieces - it should be very cold (you can leave it for 20-30 minutes in the freezer).
- Rub with your fingers to form crumbs and then gather them into a ball of dough with a crumbly structure.
- Divide it into two parts, one slightly larger than the other and roll out the larger between two layers of baking paper into a round crust with a diameter of 12″ (30 cm). To make it easier, put the crust along with the bottom layer of paper directly in the cake tin in which you will bake - diameter 9″ (22 cm) and walls not lower than 2″ (5 cm). Press the dough along the edges and stick it to the walls to form a border. Pour the cream into it and flatten it out.
- Roll out the other part of the dough in the same way into a smaller crust - about 9″ (22 cm) and place it on top of the cream. Cut the protruding edges and fold them, so that it seals nicely where the two layers meet.
- From the cut outs you can optionally create the Basque symbol, which you will see in the photos. For it, make two S-shaped pieces and cross them.
- Preheat the oven to 360°F (180°C). Spread the Basque cake with the beaten egg and bake for 35-40 minutes or until it aquires a golden brown color.
- Once you remove the almond cake from the oven, leave it to cool and carefully separate it from the cake tin (it is best to use a cake tin with a detachable bottom).
- Wait another 2 hours before cutting it.
- Enjoy!
↑ Back to top
Gefilte Fish a La Veracruzana

Tags: Passover
Ingredients
- 1 pound red snapper fillets skin and bones removed
- 1 pound flounder fillets skin and bones removed
- ½ white onion about ½ pound, quartered
- 2 carrots about ¼ pound, peeled and roughly chopped
- 3 eggs
- ½ cup matzo meal
- 2 teaspoons kosher salt or to taste
- 1 teaspoon ground white pepper or to taste
- 3 tablespoons vegetable oil
- 1 cup chopped white onion
- 1 28oz. can crushed tomatoes
- 3 cups fish broth or water
- 2 tablespoons tomato paste
- 1 teaspoon kosher salt or to taste
- 1 teaspoon ground white pepper or to taste
- 1 cup manzanilla olives stuffed with pimientos
- 12 to 15 pepperoncini peppers in vinegar brine or more to taste
- 2 tablespoons capers
For the fish
patties:
For the red
sauce:
Steps
- Rinse the fish fillets under a thin stream of cool water. Slice into smaller pieces and place in the food processor. Pulse for 5-10 seconds until the fish is finely chopped but hasn’t turned into a paste.
- Turn the fish mixture into a large mixing bowl. Then place the onion, carrots, eggs, matzo meal, salt and white pepper into the same bowl of the food processor. Process until smooth and turn into the fish mixture. Combine thoroughly.
- Heat the oil in a large pot over medium-high heat. Add the chopped onion and let it cook for 5-6 minutes, stirring, until soft and translucent. Pour the crushed tomatoes into the pot, stir, and let the mix season and thicken for about 5 minutes. Incorporate the fish broth, tomato paste, salt and white pepper. Give it a good stir and bring to a boil. Reduce to a gentle medium simmer, while you roll the gefilte fish.
- Place a small bowl with lukewarm water to the side of the simmering sauce. Start making the patties. I make them about 3” long, 2” wide and 1” high, in oval shapes. Wet your hands as necessary, so the fish mixture will not stick to your hands. As you make them, gently slide each into the simmering sauce.
- Once you finish making the patties, cover the pot and turn the heat to low. Cook for 25 minutes more. Take off the lid, incorporate the manzanilla olives, pepperoncini peppers and capers. Give it a gentle stir and simmer uncovered for 10 more minutes, so the gefilte fish will be thoroughly cooked and the sauce will have seasoned and thickened nicely.
- Serve hot with slices of challah and pickles.
To prepare the fish
patty mixture:
To prepare the red
sauce:
↑ Back to top
Gefilte Fish Terrine
Servings: 6 - 8
Ingredients
- 3 tbsp. olive oil
- 1 medium white onion, minced
- 12 oz. boneless, skinless carp or pike fillet, roughly chopped
- 12 oz. boneless, skinless salmon fillet, roughly chopped
- 1 cup heavy cream
- 2 tbsp. matzo meal
- 1 tbsp. minced dill, plus sprigs for garnish
- 2 tsp. kosher salt, plus more to taste
- 1 tsp. freshly ground pepper, plus more to taste
- 2 eggs, beaten
- 1 carrot, coarsely shredded
- Zest of 2 lemons, plus 3 tbsp. juice, and wedges for serving
- 2 cups baby arugula
- 4 red radishes, thinly sliced
- 1 (1") piece horseradish, peeled and finely shredded
- 1 shallot, thinly sliced
- Matzos, for serving
Steps
- Heat oven to 325°. Line a 9"x 5" loaf pan with plastic wrap, letting at least 4" hang over the edges. Heat 1 tbsp. oil in an 8" skillet over medium; cook onion until soft, 8–10 minutes, and transfer to a bowl. Combine carp and salmon in a food processor; pulse until coarsely ground and transfer to bowl with onion. Add cream, matzo meal, minced dill, salt, pepper, eggs, carrot, lemon zest plus 1 tsp. juice, and 3/4 cup cold water; stir to combine and spread into prepared pan. Wrap plastic wrap over top and cover with parchment paper. Place loaf pan in a 9"x 13" baking dish; pour boiling water into pan to come halfway up outside of loaf pan. Bake until an instant-read thermometer inserted into the center reads 160° or a knife inserted into the center comes out clean, about 1 hour 15 minutes. Transfer loaf pan to a wire rack; let cool. Remove paper and invert terrine onto a platter; discard plastic wrap. Chill terrine until cold and then cut into slices. Toss remaining olive oil and lemon juice, the dill sprigs, arugula, radishes, horseradish, shallot, salt, and pepper in a bowl; sprinkle over terrine. Serve with lemon wedges and matzos.
Notes
- FAVORITE
↑ Back to top
German Chocolate Cake Cookies
Ingredients
- Chocolate Cookie
- 2 sticks butter, softened
- 1 cup light brown sugar
- 1 cup granulated sugar
- 2 teaspoons vanilla extract
- 2 large eggs, beaten
- 2 1/4 cups all-purpose flour
- 1/2 cup unsweetened cocoa powder
- 1 teaspoon baking soda
- Pinch salt
- German Chocolate Frosting
- 1 cup evaporated milk
- 1 cup sugar
- 3 egg yolks
- 1/2 cup butter
- 1 teaspoon vanilla
- 1 1/3 cup sweetened shredded coconut
- 1 cup chopped pecans
- Optional: 1/4 cup chocolate candy coating, melted for drizzle
Steps
- Chocolate Cookie
- Preheat the oven to 375 degrees F. Line baking sheets with parchment paper.
- In a stand mixer or large bowl using a hand mixer, blend the butter, brown sugar, granulated sugar, vanilla and eggs. In a medium bowl, stir together the flour, cocoa, baking soda and salt. Gradually add the flour mixture into the butter mixture and blend until combined.
- Drop the dough by tablespoonful onto the prepared baking sheets, 12 cookies per sheet, and bake 8 to 10 minutes. Cool on a baking rack.
- German Chocolate Frosting
- Add evaporated milk, sugar, egg yolks, butter and vanilla to a large pan and place on stovetop over medium heat.
- Stir so that it becomes well combined. Continue stirring until thickened, this takes approximately 11-12 minutes. I set my time for 11 minutes and 30 seconds, this seems to work every time.
- Once thickened remove from heat and add coconut and pecans. Beat until thick enough to spread.
- Spread frosting over the tops of cooled cookies.
- Optional: Drizzle with melted candy coating and let set up. Top with white chocolate heart. See note.
- Note: I melted some pink chocolate candy coating, put it into a Ziplock lunch baggie, snipped off a small corner. Then on some wax paper drew hearts with the chocolate. I let them harden, then gently placed them on top of the cookies. A great decoration for upcoming Valentine’s Day.
Notes
- FAVORITE
↑ Back to top
German Chocolate Pie
Servings: 8
Ingredients
- 1 to 1/4 cups all-purpose flour
- 1/4 teaspoon salt
- 6 tablespoons cold lard
- 3 to 4 tablespoons ice water
- 4 ounces German sweet chocolate, chopped
- 2 ounces unsweetened chocolate, chopped
- 1 can (14 ounces) sweetened condensed milk
- 4 egg yolks
- 1 teaspoon vanilla extract
- 1 cup chopped pecans
- 1/2 cup packed brown sugar
- 1/2 cup heavy whipping cream
- 1/4 cup butter, cubed
- 2 egg yolks
- 1 cup flaked coconut
- 1 teaspoon vanilla extract
- 1/4 cup chopped pecans
FILLING:
TOPPING:
Steps
- In a small bowl, mix flour and salt; cut in lard until crumbly. Gradually add ice water, tossing with a fork until dough holds together when pressed. Shape into a disk; wrap in plastic wrap. Refrigerate 30 minutes or overnight.
- Preheat oven to 400°. On a lightly floured surface, roll dough to a 1/8-in.-thick circle; transfer to a 9-in. pie plate. Trim pastry to 1/2 in. beyond rim of plate; flute edge. Line unpricked pastry with a double thickness of foil. Fill with pie weights, dried beans or uncooked rice.
- Bake 11-13 minutes or until bottom is lightly browned. Remove foil and weights; bake 6-8 minutes longer or until light brown. Cool on a wire rack. Reduce oven setting to 350°.
- In a microwave, melt chocolates in a large bowl; stir until smooth. Cool slightly. Whisk in milk, egg yolks and vanilla; stir in pecans. Pour into crust. Bake 16-19 minutes or until set. Cool 1 hour on a wire rack.
- Meanwhile, in a small heavy saucepan, combine brown sugar, cream and butter. Bring to a boil over medium heat, stirring to dissolve sugar. Remove from heat.
- In a small bowl, whisk a small amount of hot mixture into egg yolks; return all to pan, whisking constantly. Cook 2-3 minutes or until mixture thickens and a thermometer reads 160°, stirring constantly. Remove from heat. Stir in coconut and vanilla; cool 10 minutes.
- Pour over filling; sprinkle with pecans. Refrigerate 4 hours or until cold. Yield: 8 servings.
Notes
- FAVORITE
↑ Back to top
German Oven Pancakes
Adapted from https://www.bettycrocker.com/recipes/german-oven-pancakes/319273e2-2f36-4cbf-8cce-3fede62a94b4

Tags: Breakfast
Germany Pancakes
I made this.
Servings: 4
Ingredients
- 1/2 cup Gold Medal™ all-purpose flour, sifted
- 3 eggs
- 1/2 cup milk
- 2 tablespoons melted butter
- 1 tablespoon sugar
- 1/4 teaspoon of salt
- fresh fruit of your choice, cut into bite-sized pieces
- whipped cream
Steps
- Preheat oven to 450°F. If you have a convection oven, set it at 425°F (the pancakes rise even higher on the convection setting).
- In a large bowl, lightly beat the eggs with a whisk or fork. Stir in the milk, melted butter, salt and sugar. Add the flour to the egg mixture, a big spoonful at a time as you continue to whisk. Be careful not to over-mix, to keep the pancake light and fluffy.
- Lightly spray a 9"-11" oven-safe skillet with cooking spray.
- Pour the batter into a heated skillet (this will yield a more golden brown, puffier pancake). Bake 12-18 minutes, just until the edges are golden. Check your pancake at the 12 minute mark. Top with the fresh fruit and whipped cream just before serving.
Notes
- “I'm Chinese, born in Hong Kong; and my husband is Scottish-German, born in Buffalo, New York. Our house is full of wonderful traditions, spanning from red envelopes during Chinese New Year to a Christmas tree adorned with over 100 German Old World glass ornaments. On Sunday mornings, making German Oven Pancakes is our family tradition that the kids love to help with. They'll get busy sifting the flour and whisking the eggs while I cut the fresh fruit. It's always fun to cook together as a family every weekend!” -Crack eggs in a separate bowl to make sure egg is okay, and you do not get any shell into the rest of your mixture -Sifting flour can be a fun family activity, if you do not have a flour sifter, a fine mesh strainer/sieve can be used to sift flour. -This pancake is dense, yet very tender versus traditional pancakes it's more “eggy” than traditional pancakes – much more “hearty.” -You can top with syrup, honey, cinnamon/sugar, pie filling, etc.
↑ Back to top
Giant Black-And-White Layer Cake

Ingredients
- 6 cups cake flour (28 ounces or 800 grams)
- 2 tablespoons baking powder
- 1 1/2 teaspoons table salt
- 2 cups milk
- 1 1/2 tablespoons pure vanilla extract
- 3 sticks unsalted butter, softened
- 4 cups sugar
- 8 large eggs, at room temperature
- Confectioners’ sugar, for dusting
- 1 quart heavy cream
- 2 cups sugar
- 1 1/2 pounds extra-dark (75 to 85 percent) chocolate, chopped
- 4 sticks unsalted butter (1 pound), softened
- 2 cups confectioners’ sugar
cake
frosting and
filling
Steps
- MAKE THE CAKE Preheat the oven to 350°; arrange 3 racks in the oven. Line three 12-by-17-inch baking sheets with parchment paper and spray with vegetable oil.
- In a large bowl, whisk the cake flour with the baking powder and salt. In a measuring cup, combine the milk and vanilla. In the bowl of a standing electric mixer fitted with the paddle, beat the butter until creamy. Add the sugar and beat at medium speed until fluffy, about 5 minutes. Add the eggs, one at a time, beating well between additions. At low speed, beat in the dry and wet ingredients in 3 alternating batches.
- Spread the batter (there will be about 14 cups) evenly on the 3 baking sheets. Bake for about 30 minutes, just until springy; shift the pans halfway through for even baking. Let the cakes cool completely in the pans.
- Dust the cake tops generously with confectioners’ sugar. Invert the cakes onto cutting boards or sturdy cardboard and remove the sheets and peel off the parchment. Shake the boards to make sure the cakes don’t stick.
- MAKE THE FROSTING AND FILLING In a very large saucepan, combine 3 1/2 cups of the cream with the sugar and bring to a boil. Simmer over low heat for 10 minutes, stirring until slightly reduced. Remove from the heat. Add the chocolate. Let stand for 5 minutes, then whisk until smooth. Let the ganache cool.
- Using an electric mixer at moderate speed, beat the remaining 1/2 cup of cream into the ganache. Add the butter and beat until creamy, about 1 minute. Transfer half of the ganache (about 3 1/2 cups) to a bowl and beat in the confectioners’ sugar to make the filling.
- Immediately spread half of the filling over the top of a cake layer. Top with a second layer and spread with the remaining filling. Top with the third cake layer. Chill for 20 minutes.
- Trim the cake neatly. Slide parchment paper strips under the cake to catch frosting. Spread a thin layer of frosting around the side of the cake, then top with the remaining frosting. Refrigerate until set, about 2 hours.
- Remove the paper strips. Bring the cake to room temperature before serving.
Notes
- FAVORITE
↑ Back to top
Giardiniera
Servings: About 2 quarts
Ingredients
- 4 serrano chiles, thinly sliced, with seeds removed
- 2 red sweet peppers, cut into ½-inch pieces
- 1 or 2 celery ribs, sliced or julienned
- 1 or 2 carrots, sliced or julienned
- 1 medium head cauliflower, cut into small florets
- ½ cup salt
- 2 cloves garlic, slivered
- 3 teaspoons dried oregano
- 1 teaspoon red pepper flakes
- ½ teaspoon celery seeds
- 1 teaspoon crushed black peppercorns
- 1 cup white vinegar
- ½ cup olive oil (not extra virgin)
- ½ cup grapeseed or safflower oil
Steps
- In a large bowl, using your hands, mix the vegetables and salt until well combined. Cover the vegetables with water. Cover the bowl and allow the mixture to sit, unrefrigerated, for 8 to 12 hours.
- Drain the vegetables and rinse thoroughly. Sterilize 2 quart-size glass jars, with lids, in the dishwasher or by submerging them in boiling water for 10 minutes.
- In one sterilized jar, combine the garlic and all the herbs and spices; add the vinegar and oil and shake well to emulsify the dressing. Pour half the dressing into the other jar.
- Pack the vegetables into the jars. If vegetables are not completely coated, make and add more dressing. Screw lids onto jars and refrigerate. Allow the mixture to mellow for a couple of days before serving.
↑ Back to top
Gigante Beans with Sausage
Servings: 8
Ingredients
- 8 cups cold water
- 2 tablespoons kosher salt
- 1 pound dried gigante beans or large lima beans
- 1 (8-ounce) soppressata log
- 5 cups lower-sodium chicken broth
- 1 (15-ounce) can crushed tomatoes
- 1/3 cup ( 2 2/3 ounces) dry white wine
- 2 (about 1-ounce) Parmesan cheese rinds, plus grated Parmesan, for garnish
- 5 large garlic cloves, thinly sliced (about 1/4 cup)
- 1 1/2 teaspoons dried Italian seasoning
- 1/2 teaspoon crushed red pepper
- Extra-virgin olive oil, for drizzling
- Chopped fresh flat-leaf parsley, for garnish
- Toasted bread, for serving
Steps
- Stir together 8 cups cold water and salt in a large bowl or container until salt dissolves; add beans. Cover and refrigerate at least 8 hours or up to 12 hours.
- Drain beans, and rinse well under running water. Transfer to a 6- to 7-quart slow cooker. Cut half of the soppressata into 1/2-inch-thick rounds. Chop remaining soppressata into bite-size pieces; refrigerate bite-size pieces in an airtight container until ready to use.
- Stir soppressata rounds, broth, tomatoes, wine, Parmesan rinds, garlic, Italian seasoning, and crushed red pepper into beans in slow cooker. Cover and cook on low until beans are tender, 8 to 9 hours, stirring in reserved chopped soppressata during final 30 minutes of cooking.
- Remove and discard Parmesan rinds. Serve beans and broth drizzled with oil. Garnish with parsley and grated Parmesan; serve with toasted bread.
↑ Back to top
Glazed Chinese Long Beans
Adapted from https://www.foodnetwork.com/recipes/aaron-mccargo-jr/glazed-chinese-long-beans-recipe-1945206
Tags: Chinese
Vegetables
Servings: 4
Ingredients
- 1/2 pound Chinese long beans
- 2 tablespoons butter
- 2 tablespoons sliced scallion
- 1 tablespoon freshly minced ginger
- 1 tablespoon minced garlic
- Pinch red pepper flakes
- 1/2 cup chicken stock
- 1 tablespoon honey
- 1 tablespoon sesame oil
- Salt and freshly cracked black pepper
- 2 tablespoons sesame seeds, optional
Steps
- In a large pot of boiling water, blanch long beans for 2 minutes until slightly tender. Allow to cool.
- In a large skillet over medium-high heat, add butter. Add scallions, ginger and garlic. Mix together. Add red pepper flakes and long beans. Allow to cook for a few minutes. Stir in chicken stock, honey and sesame oil. Season with salt and pepper, to taste, and add sesame seeds, if desired. Mix together.
Notes
- My Private Notes
- Add a Note
↑ Back to top
Goat Cheese Guacamole
Servings: 4
Ingredients
- 3 Hass avocados
- 1/3 cup crumbled goat cheese
- 1/4 cup chopped chives
- 1/4 cup chopped sun dried tomatoes
- 1 tbsp fresh lemon juice
- Coarse salt and freshly ground black pepper to taste
↑ Back to top
Gochujang-Glazed Ham
Steps
- Position rack in middle of oven. Preheat oven to 375°F. Whisk together 1/2 cup gochujang, 1/2 cup apple juice, 1/4 cup maple syrup, 2 Tbsp espresso or strong coffee and 1 tsp Worcestershire sauce.
- Cut 1/4-inch-deep slits 2 inches apart on the surface of 1 (6- to 7-pound) bone-in cooked ham in a crosshatch pattern. Place ham fat-side-up on a baking sheet, and brush generously with gochujang mixture.
- Bake 1 hour and 25 minutes, basting every 20 minutes. If ham browns too quickly, tent with foil. Remove ham from oven; let stand 10 minutes.
- Place remaining gochujang mixture in a small saucepan; bring to a boil. Slice ham and serve on a platter with gochujang sauce.
Notes
- FAVORITE
↑ Back to top
Golden Diner Pancakes

Ingredients
- 2¼ teaspoons/7 grams active dry yeast (one ¼-ounce packet)
- 2 cups/260 grams all-purpose flour, divided
- 1¼ cups/300 grams buttermilk
- 2 tablespoons sugar
- ¾ teaspoon baking soda
- ½ teaspoon fine salt
- 2 large eggs
- ¼ cup/60 grams canola oil or other neutral-tasting oil
- ½ cup/113 grams unsalted butter, softened
- 3 tablespoons honey
- 2 tablespoons pure maple syrup
- ¾ teaspoon fine salt
- ½ cup/113 grams unsalted butter
- ⅓ cup/100 grams honey
- 1½ tablespoons maple syrup
- 1 teaspoon soy sauce
- ½ teaspoon fine salt
- 14 ounces/400 grams mixed berries, such as blueberries, raspberries and stemmed strawberries, cut to the same size as the small berries
- ⅓ cup/67 grams sugar
- 1½ teaspoons cornstarch
FOR THE
PANCAKE BATTER:
FOR THE
MAPLE-HONEY BUTTER:
FOR THE
MAPLE-HONEY SYRUP:
FOR THE BERRY
COMPOTE:
Steps
- Start the pancake batter: In a small bowl, whisk the yeast with 1 cup flour. In a small saucepan, heat the buttermilk with ¼ cup/60 grams water over medium-low heat, stirring often, until lukewarm (about 100 degrees), about 5 minutes. Pour the buttermilk into the flour and whisk until smooth. Cover with plastic wrap and let sit for 1 hour to create a pre-ferment. This will give the pancakes a deeper flavor and some additional rise.
- Meanwhile, make the maple-honey butter: In a medium bowl, whisk the butter, honey, syrup and salt until smooth. Keep at room temperature if using within a few hours. Otherwise, refrigerate in an airtight container for up to 1 week. Soften the butter and whisk it again before serving.
- Make the maple-honey syrup: Combine the butter, honey, syrup, soy sauce and salt in a small saucepan. Heat over medium-low, whisking often, until the butter melts completely. While whisking, add 1 ½ tablespoons water. Keep whisking until emulsified, then reduce the heat to the lowest setting to keep warm.
- Make the berry compote: In a large bowl, gently mix the berries, sugar and cornstarch until the berries are evenly coated. Heat a large, deep skillet over high until very hot. A drop of water sprinkled on the pan should immediately sizzle away. Add the berry mixture and cook, stirring once in a while, until the blueberries look like they’re about to pop, about 2 minutes. Remove from the heat.
- Finish the pancakes: Heat the oven to 350 degrees with a rack in the center. Set a metal rack in a sheet pan and place on the center oven rack.
- After the pre-ferment has proofed for an hour, whisk the remaining 1 cup flour with the sugar, baking soda and salt in a small bowl. In a large bowl, whisk the eggs and oil until smooth. Scrape the pre-ferment into the egg mixture, then add the dry ingredients. Gently stir with the whisk until no traces of dry ingredients remain. It’s OK if the batter is lumpy.
- Heat one or two 7- to 8-inch nonstick skillets (5- to 6- inches across the bottom) or extremely well-seasoned cast-iron pans over medium until very hot. Nonstick works best because you won’t be greasing the pans at all. Fill each pan with batter to about ⅓-inch depth. Smooth the top to ensure the batter reaches the edges of the pan and forms a nice round. Cook until the bottom is crisp and evenly golden brown, 2 to 4 minutes, turning down the heat if the bottom browns too quickly. Flip and cook until the other side crisps and browns evenly, 1 to 3 minutes, tucking in the edges to give the pancake a nice dome.
- Transfer the pancake from the skillet to the rack-lined pan in the oven for the centers to cook through, 2 to 5 minutes. To check, poke a paring knife in the middle and peek to see if any wet batter remains. Repeat with the remaining batter, reheating the pan between pancakes. You can serve the pancakes as they’re done or keep the earlier batches in the oven until all of the pancakes are ready.
- To serve, center one or two hot pancakes on serving plates and evenly drench with the maple-honey syrup right away. Spoon the berry compote on top, then scoop maple-honey butter over the berries (see Tip). Serve immediately.
Notes
- At Golden Diner, the butter is formed into the football shape known as quenelles. You can do the same if you want: Use one spoon to scoop a round of soft maple-honey butter along its long side, then run another spoon of the same size against the first spoon to shape the butter into a football.
↑ Back to top
Golden Honey Pan Rolls

Ingredients
- 1 cup warm 2% milk (70° to 80°)
- 1 egg
- 1 egg yolk
- 1/2 cup canola oil
- 2 tablespoons honey
- 1 to 1/2 teaspoons salt
- 3 to 1/2 cups bread flour
- 2 to 1/4 teaspoons active dry yeast
- 1/3 cup sugar
- 2 tablespoons butter, melted
- 1 tablespoon honey
- 1 egg white
- Additional honey, optional
GLAZE:
Steps
- In bread machine pan, place the first eight ingredients in order suggested by manufacturer. Select dough setting (check dough after 5 minutes of mixing; add 1 to 2 tablespoons of water or flour if needed.)
- When cycle is completed, turn dough onto a lightly floured surface. Punch down; cover and let rest for 10 minutes. Divide into 24 pieces; shape each into a ball. Place 12 balls each in two greased 8-in. square baking pans. Cover and let rise in a warm place until doubled, about 30 minutes.
- For glaze, combine the sugar, butter, honey and egg white; drizzle over dough. Bake at 350° for 20-25 minutes or until golden brown. Brush with additional honey if desired. Yield: 2 dozen.
Notes
- FAVORITE
↑ Back to top
Goong Pad Nam Prik Pao (Thai Stir-Fried Shrimp with Chile
Jam)
Servings: 2 to 4
Ingredients
- 2 tablespoons (45g) homemade or store-bought nam prik pao (Thai chile jam)
- 1 tablespoon (15ml) Thai oyster sauce
- 1 tablespoon plus 2 teaspoons ( 25 ml) Thai light soy sauce
- 1 teaspoon (10g) tamarind paste
- 2 teaspoons (10g) sugar
- 2 tablespoons (30ml) water
- Pinch of kosher salt
- 12 large shrimp (about 8 ounces; 225g), peeled and deveined
- Kosher salt
- 6 small garlic cloves (25g), thinly sliced
- 2 to 3 fresh Thai chiles (2 to 3g total), stemmed (see note)
- 2 tablespoons (30ml) vegetable oil
- 4 ounces (120g) oyster mushrooms, firm central stems removed, mushroom caps separated, large caps torn by hand vertically into smaller pieces
- 1/4 small yellow onion (40g), sliced 1/4-inch thick (see note)
- 2 long beans (about 30 g), ends trimmed, cut crosswise into 1-inch pieces
- 2 scallions, green parts only, cut crosswise into 1-inch pieces (about 10 g total)
- 1/2 packed cup (about 1/2 ounce; 15g) fresh sweet basil leaves (a.k.a. Thai basil)
- Cooked jasmine rice, for serving
For the
Stir-Fry Sauce:
For the
Stir-Fry:
Steps
- For the Stir-Fry Sauce: In a small bowl, stir together nam prik pao, oyster sauce, light soy sauce, white sugar, water, and salt until well combined. Set aside.
- For the Stir-Fry: In a small bowl, combine shrimp with a pinch of salt and mix to evenly coat. Set aside.
- Combine garlic, chiles, and a pinch of salt in a granite mortar and pestle and pound until a rough paste forms, about 20 seconds. Set aside.
- Heat a wok over high heat until lightly smoking. Add oil and swirl to coat. Add shrimp and spread in an even layer. Cook undisturbed until rosy orange in color on one side, about 30 seconds. Using a wok spatula, flip shrimp and continue to cook until rosy orange in color on second side and shrimp are nearly cooked through, about 20 seconds longer. Transfer shrimp to a medium bowl, leaving residual oil in the wok.
- Return wok to high heat until smoking, add mushrooms, and toss to evenly coat with oil. Use wok spatula to spread mushrooms into an even layer and cook without moving them until mushrooms are lightly browned on bottom side, about 45 seconds. Add the garlic-chile mixture and stir to combine. Cook, stirring constantly, until fragrant, about 30 seconds. Add onion, and continue to cook, stirring frequently, until onion is slightly softened, about 1 minute. Immediately transfer mushroom mixture to the bowl with the shrimp.
- Add stir-fry sauce to wok and cook until sauce is slightly reduced and thickened, about 45 seconds. Add long beans along with the shrimp and mushroom mixture. Cook, stirring constantly, until the sauce has been absorbed, about 30 seconds. Remove from heat, add scallions and sweet basil, and stir until well-combined and basil is slightly wilted. Serve immediately with cooked jasmine rice.
Notes
- You can adjust the spiciness of this dish to your taste by reducing or increasing the amount of fresh Thai chiles in the recipe.
- Since this stir fry pushes the limit of what I recommend cooking in a wok at once, especially on a home stove top, if you'd like to double it, I suggest cooking the components in multiple batches.
↑ Back to top
Gougères

Servings: YIELD Makes about 36
gougères
Ingredients
- 1/2 cup whole milk
- 1/2 cup water
- 8 tablespoons (1 stick) unsalted butter, cut into 4 pieces
- 1/2 teaspoon salt
- 1 cup all-purpose flour
- 5 large eggs, at room temperature
- 1 1/2 cups coarsely grated cheese, such as Gruyère or cheddar (about 6 ounces; see above)
Steps
- Position the racks to divide the oven into thirds and preheat the oven to 425 degrees F. Line two baking sheets with silicone baking mats or parchment paper.
- Bring the milk, water, butter, and salt to a rapid boil in a heavy-bottomed medium saucepan over high heat. Add the flour all at once, lower the heat to medium-low, and immediately start stirring energetically with a wooden spoon or heavy whisk. The dough will come together and a light crust will form on the bottom of the pan. Keep stirringwith vigorfor another minute or two to dry the dough. The dough should now be very smooth.
- Turn the dough into the bowl of a mixer fitted with the paddle attachment or into a bowl that you can use for mixing with a hand mixer or a wooden spoon and elbow grease. Let the dough sit for a minute, then add the eggs one by one and beat, beat, beat until the dough is thick and shiny. Make sure that each egg is completely incorporated before you add the next, and don't be concerned if the dough separatesby the time the last egg goes in, the dough will come together again. Beat in the grated cheese. Once the dough is made, it should be spooned out immediately.
- Using about 1 tablespoon of dough for each gougère , drop the dough from a spoon onto the lined baking sheets, leaving about 2 inches of puff space between the mounds. Using about 1 tablespoon of dough for each gougère, drop the dough from a spoon onto the lined baking sheets, leaving about 2 inches of puff space between the mounds. Slide the baking sheets into the oven and immediately turn the oven temperature down to 375 degrees F. Bake for 12 minutes, then rotate the pans from front to back and top to bottom. Continue baking until the gougères are golden, firm, and, yes, puffed, another 12 to 15 minutes or so. Serve warm, or transfer the pans to racks to cool.
- Gougères are good straight from the oven and at room temperature. I like them both ways, but I think you can appreciate them best when they're still warm. Serve with kir, white wine, or Champagne.
- The best way to store gougères is to shape the dough, freeze the mounds on a baking sheet, and then, when they're solid, lift them off the sheet and pack them airtight in plastic bags. Bake them straight from the freezerno need to defrostjust give them a minute or two more in the oven. Leftover puffs can be kept at room temperature over night and reheated in a 350-degree-F oven, or they can be frozen and reheated before serving.
Serving
Storing
Notes
- FAVORITE
↑ Back to top
Grandma B's Super Waffles
Tags: Breakfast
Servings: 6-8
Ingredients
- 2 cups sifted all-purpose flour
- 3 teaspoons baking powder
- 1 teaspoon baking soda
- 1 teaspoon salt
- 2 cups sour milk (note below) or 2 cups buttermilk (note below)
- 4 eggs, well beaten
- 3⁄4 cup melted margarine (I use margarine or butter) or 3/4 cup salad oil (I use margarine or butter)
Steps
- note: if you do not have sour milk or buttermilk measure 2 tablespoons vinegar into your 2-cup measuring cup and fill to the two-cup mark with sweet milk and let it stand while you prepare other ingredients.
- Sift together: 2 cups all-purpose flour 3 teaspoons baking powder 1 teaspoon baking soda 1 teaspoon salt.
- Combine: 2 cups sour milk or butter milk 4 eggs well beaten Add the milk and eggs to dry ingredients,beat until smooth with a hand mixer or electric mixer on high speed.
- Stir in 3/4 cup melted margarine or salad oil.
- Bake in preheated waffle iron until crisp and golden. For large maker 2 cups for small maker 1 cup batter.
- Serve with your favorite toppings.
↑ Back to top
Grandma's Braciole
Ingredients
- 3 cups day old bread, cut into half inch pieces. For a quicker result shred the bread in a food processor
- 1 1/2 cup whole milk
- 4 tablespoons extra virgin olive oil
- 6 garlic cloves, sliced thick
- 1/2 teaspoon red pepper flakes
- 1/2 cup onions, finely chopped
- 6 ounces chopped Italian dry salami, I prefer soppressata
- 1/2 cup white wine
- 2 tablespoons fresh parsley, chopped
- 1 egg
- 1/2 cup grated pecorino or Romano cheese
- 2 1/2 to 3 pounds of top round beef cut into slices, pounded thin and each cut into a rectangular shape, approximately 4 x 5 each
- 3 tablespoons extra virgin olive oil
- 1 1/2 cup Italian style breadcrumbs
- 3 tablespoons extra light olive oil
- 3 cups tomato sauce
- 1 cup beef stock
For the
stuffing
For the
Braciole
Steps
- Start with the stuffing. In a bowl mix the bread and the milk and let it sit for 10 minutes until most of the milk has been absorbed then squeeze out as much of the milk as you can and set the bread aside.
- In a large saucepan, pour the extra virgin olive oil, add the red pepper flakes and cook over medium heat until it is hot, about two to three minutes. Now add the garlic, onions and stir for two minutes until the onions start to soften.
- Add the chopped salami, stir into the mixture and cook for two minutes.
- Now add the white wine, increase the heat to high and stir until the wine reduces by half, about two to three minutes, then add the parsley and mix.
- Turn off the heat, add the bread stir into the mixture until all the contents are well mixed.
- Add the egg, cheese and additional bread crumbs to absorb excess moisture and combine with all the ingredients in the pan.
- Set aside and let the stuffing mixture cool down to room temp before you stuff the Braciole.
- Place about two tablespoons of the mixture in the middle of the rectangular piece of meat. Fold the top and bottom pieces of the meat over the stuffing. Next, fold the two short sides of the meat over the stuffing, fold over the long side and continue rolling to completely cover the stuffing. Now secure each Braciole closed with three wood toothpicks. (Do not use plastic toothpicks.) Repeat this process for all your pieces of meat.
- Now brush each Braciole, or roll in a bowl, with olive oil and coat with Italian breadcrumbs.
- In a large saucepan pour the tomato sauce, the beef stock and bring to a simmer over medium heat.
- In a large sauté pan heat the extra virgin olive oil until sizzling hot. Add the Braciole and brown on all sides to sear in the juices. Once browned place the Braciole in the pot with the simmering tomato sauce. Cook on simmer for 30-40 minutes.
- Serve the Braciole family style accompanied by a steaming pot of mashed potatoes.
Notes
- REMOVE FROM SHOPPING LIST
↑ Back to top
Grandma's Rice Pudding
Ingredients
- 1 to 1/2 cups cooked rice
- 1/4 cup raisins
- 2 eggs
- 1 to 1/2 cups milk
- 1/2 cup sugar
- 1/2 teaspoon ground nutmeg
- Additional milk, optional
Steps
- Place rice and raisins in a greased 1-qt. casserole. In a small bowl, whisk the eggs, milk, sugar and nutmeg; pour over rice.
- Bake, uncovered, at 375° for 45-50 minutes or until a knife inserted in the center comes out clean. Cool. Pour milk over each serving if desired. Refrigerate leftovers. Yield: 4-6 servings.
Notes
- FAVORITE
↑ Back to top
Gravlax

Ingredients
- 1 1/2 cups kosher salt
- 1 cup sugar
- 1 tablespoon pepper, freshly ground
- 2 tablespoons juniper berries, coarsely cracked
- 1 bunch fresh dill
- Wide, heavy-duty aluminum foil
- Plastic wrap
- 2 small mixing bowls
- 2 sheet pans or boards long enough to hold fish
- Clean pair of needle nose pliers
- Really big knife (if you plan on breaking the fish down yourself. If you don't want to your fishmonger will be happy to. If not, get a new fishmonger.)
- About 5 pounds worth of weight
the cure for
an 8-10 pound fish (amounts depend on the size of the fish of course)
hardware
Steps
- Mix salt and sugar in one bowl and the spices in another.
- Lay out a sheet of foil several inches longer than the sides or fillets of salmon. Top this with plastic wrap. Position the salmon sides on the plastic wrap so that they are mirror images of each other. Pat them dry with paper towels. Strew the dill along each of the sides, concentrating it where the meat is the thickest.
- Sprinkle the spice mix on top of the dill, again concentrating it where the meat is thickest; you don't have to use all the mixture. Sprinkle on enough of the salt/sugar mix so that you don't see any of the fish.
- Lift the foil corners furthest from you so that the far salmon side rolls over onto the other one. Seal the plastic wrap around the fish, and then crimp the foil so that the folded part runs along the back of the fish (or where the back used to be.) Place this wrapped fish on one of the pans (or boards) and top it with the other.
- Place this rig in the bottom of the refrigerator, or better yet, a cooler containing several inches of ice in the bottom. Flip the fish every 12 hours for 3 days. (I usually duct tape the pans or boards together for easy flipping.)
- Remove fish from its cocoon. Drain, rinse and pat it dry. Slice on the bias as thin as possible cutting the piece away from the skin. The colder you can keep the fish during carving the better.
- Serve on bagels with cream cheese and capers.
Notes
- FAVORITE
↑ Back to top
Greek Juicy Orange Cake
Tags: Baking
Servings: 16
Ingredients
- sugar - 6 oz (170 g)
- butter - 5.5 oz (155 g)
- eggs - 3 pcs.
- flour - 5.65 oz (160 g)
- baking powder - 1 pc.
- large oranges - 2 pcs.
- salt - 1 pinch
- butter - to spread on the pan
- orange juice - from one orange
- sugar - 3.5 oz (100 g)
FOR THE SYRUP:
Steps
- Melt the butter, add the sugar and beat the mixture well with a mixer.
- Add the eggs and beat them into a fluffy cream, sift the flour and add the baking powder and a pinch of salt, add them to the egg mixture and stir.
- Mix the juice of the first orange with the grated peels of the two oranges and add them to the mixture, while stirring the mixture at all times.
- Grease the pan with butter and pour the mixture in it evenly. Place the baking pan in a preheated 360°F (180 degree) oven and bake until the cake is fully baked for about 40 minutes.
- Boil the syrup by mixing the juice of the other orange with the sugar and boil it for 2-3 minutes, after which you can leave it to cool.
- After removing the baked cake from the oven, pour the syrup over it evenly and leave to cool and absorb the syrup.
- Serve the chilled syrup cake.
- The Greek Juicy Orange Cake is ready.
↑ Back to top
Greek Sea Bass Baked with Santorini Assyrtico Wine, Capers
Leaves, and Herbs
Adapted from https://www.dianekochilas.com/greek-sea-bass-baked-with-santorini-assyrtico-wine-capers-leaves-and-herbs/
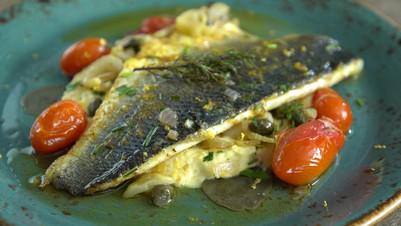
Ingredients
- 6 sea bass or sea bream fillets, skin on
- 1 cup assyrtico wine
- 2 teaspoons greek or dijon mustard
- 1 fennel bulb, sliced
- 1 red onion, halved and chopped
- 2 garlic cloves, minced
- 3 cups cherry or teardrop tomatoes, whole
- 2 tablespoons capers
- 2 tablespoons caper leaves
- 1/2 cup extra virgin greek olive oil
- Grated zest of 1 lemon
- ½ cup chopped parsley
- 4 - 5 whole thyme sprigs
- Salt, pepper to taste
- 3 tablespoons snipped chives
Steps
- Preheat oven to 400F / 200C. maybe less. 375/180
- Score skin side of sea bass or bream fillets. Whisk together ½ c wine, mustard and 1 garlic clove in a medium bowl. gently toss fillets in marinade. Refrigerate for a half hour.
- Place fennel, onion, remaining garlic clove, cherry tomatoes, capers, caper leaves, olive oil, remaining wine in ovenproof glass or ceramic baking dish. Roast for 20 to 30 minutes, until thick and bubbling. careful not to burn. Stir up occasionally.
- Place the fish fillets over the vegetables. Sprinkle with lemon zest, thym sprigs, salt, pepper. Bake (covered or uncovered???), for 10 to 12 minutes, until the fillets are fork tender. Remove, sprinkle with chives and parsley and serve.
- This is great served over the fava or the roasted eggplant dish.
↑ Back to top
Greek Spice Rub
Ingredients
- 2 Tbsp Ground Coriander
- 1 Tbsp Ground Cumin
- 1/2 Tbsp Paprika
- 1/2 Tbsp Granulated Garlic
- 2 Tsp Dried Parsley
- 2 Tsp Dried Oregano
- 2 Tsp Dried Thyme
- 1 Tsp Cinnamon
- 1 Tsp Nutmeg
- 2 Tsp Salt
- 1 Tsp Pepper
↑ Back to top
Greek-Style Lamb Pita Sandwiches with Tzatziki Sauce
(Gyros)

Tags: Greece
Lamb Sandwiches
I made this. Is starred. Rated 5/5
Ingredients
- 1 cup plain whole-milk yogurt
- 1/2 medium cucumber , peeled, seeded, and diced fine (about 1/2 cup)
- 3/8 teaspoon table salt
- 1 tablespoon juice from 1 lemon
- 1 small garlic clove , minced or pressed through a garlic press (about 1/2 teaspoon)
- 1 tablespoon finely chopped fresh mint leaves or dill
- 4 (8-inch) pita breads (see note above)
- 1/2 medium onion , chopped coarse (about 3/4 cup)
- 4 teaspoons fresh lemon juice
- 1/2 teaspoon table salt
- 1/4 teaspoon ground black pepper
- 1 tablespoon minced fresh oregano leaves
- 2 medium garlic cloves , minced or pressed through a garlic press (about 2 teaspoons)
- 1 pound ground lamb or ground chuck
- 2 teaspoons vegetable oil
- 1 large tomato , sliced thin
- 2 cups shredded iceberg lettuce
- 2 ounces crumbled feta cheese (about 1/2 cup)
Tzatziki
Sauce:
Lamb Patties:
Accompaniments:
Steps
- For the Tzatziki Sauce: Line fine-mesh strainer set over deep container or bowl with 3 paper coffee filters or triple layer of paper towels. Spoon yogurt into lined strainer, cover, and refrigerate for 30 minutes.
- Meanwhile, combine cucumber, 1/8 teaspoon salt, and lemon juice in colander set over bowl and let stand 30 minutes.
- Discard drained liquid from yogurt. Combine thickened yogurt, drained cucumber, remaining 1/4 teaspoon salt, garlic, and mint in clean bowl.
- For the Patties: Adjust oven rack to middle position and heat oven to 350 degrees. Cut top quarter off each pita bread. Tear quarters into 1-inch pieces. (You should have 3/4 cup pita pieces.) Stack pitas and tightly wrap with aluminum foil. Process onion, lemon juice, salt, pepper, oregano, garlic, and pita bread pieces in food processor until smooth paste forms, about 30 seconds. Transfer onion mixture to large bowl; add lamb and gently mix with hands until thoroughly combined. Divide mixture into 12 equal pieces and roll into balls. Gently flatten balls into round disks, about 1/2 inch thick and 2 1/2 inches in diameter.
- Place foil-wrapped pitas directly on oven rack and heat for 10 minutes. Meanwhile, heat oil in 12-inch nonstick skillet over medium-high heat until just smoking. Add patties and cook until well browned and crust forms, 3 to 4 minutes. Flip patties, reduce heat to medium, and cook until well browned and crust forms on second side, about 5 minutes longer. (See below for tips on flipping patties.) Transfer patties to paper towel-lined plate.
- Using soup spoon, spread 1/4 cup Tzatziki Sauce inside each pita. Divide patties evenly among pitas; top each sandwich with tomato slices, 1/2 cup shredded lettuce, and 2 tablespoons feta. Serve immediately.
- Note: Folding a Pocketless Pita Sandwich Although pocketed pitas are easier to find, we prefer the pocketless versions for their thick, pillowy texture and deeper flavor. If you can’t find them in your supermarket, look for them in Mediterranean grocery stores. They require a slightly different assembly technique, as shown here. When layering ingredients on the pita in step 1, leave a 1-inch border on all sides. 1. Place pita on top of aluminum foil, layer sandwich ingredients on pita, and fold one side of pita over filling. 2. Fold opposite side of pita over filling so it overlaps first side. 3. Fold one side of foil over sandwich. 4. Fold up bottom of foil. 5. Wrap other side of foil over sandwich to fully enclose it.
Notes
- FAVORITE
↑ Back to top
Green Bean Casserole
Ingredients
- 2 tablespoons salt
- 1 teaspoon salt
- 2 lbs fresh green beans, ends trimmed, cut on the diagonal into 2 inch pieces
- 1/2 ounce dried porcini mushrooms, rinsed well
- 6 tablespoons unsalted butter
- 1 onion, minced
- 12 ounces white button mushrooms, cut into 1/4 inch slices
- 12 ounces cremini mushrooms, cut into 1/4 inch slices
- 2 tablespoons fresh thyme, minced
- 1/4 teaspoon pepper
- 3 garlic cloves, minced
- 2 tablespoons all-purpose flour
- 1 cup low sodium chicken broth
- 2 cups heavy cream
Steps
- For the topping: pulse the bread, softened butter, salt and pepper in a food processor until the mixture resembles coarse crumbs, about ten 1-second pulses. Transfer to a large bowl and toss with the onions; set aside.
- For the beans: Adjust an oven rack to the middle position and heat the oven to 375 degrees. Bring 4 qt water to a boil in a large pot. Add 2 tbsp salt and the beans. Cook until bright green and slightly crunchy, 4 to 5 minutes. Drain the beans and plunge immediately into a large bowl filled with ice water to stop cooking. Spread the beans out on a paper towel-lined baking sheet to drain.
- Meanwhile, cover the dried porcini mushrooms with 1/2 cup hot tap water in a small microwave-safe bowl; cover with plastic wrap, cut several steam vents with a paring knife, and microwave on high power for 30 seconds. Let stand until the mushrooms soften, about 5 minutes. Lift the mushrooms from the liquid with a fork and mince using a chef's knife (you should have about 2 tablespoons). Pour the liquid through a paper towel-lined sieve and reserve.
- Melt the butter in a large nonstick skillet over medium-high heat until the foaming subsides, about 1 minute. Add the onion, button and cremini mushrooms and cook until the mushrooms release their moisture, about 2 minutes. Add the porcini mushrooms along with their strained soaking liquid, thyme, 1 tsp salt and pepper; cook until all the mushrooms are tender and the liquid has reduced to 2 tablespoons, about 5 minutes. Add the garlic and saute until aromatic, about 30 seconds. Add the flour and cook for about 1 minute. Stir in the broth and reduce the heat to medium. Stir in the cream and simmer gently until the sauce has the consistency of a dense soup, about 15 minutes.
- Arrange the beans in a 3-quart gratin dish. Pour the mushroom mixture over the beans and mix to coat the beans evenly. Sprinkle with the breadcrumb mixture and bake until the top is golden brown and the sauce is bubbling around the edges, about 15 minutes. Serve immediately.
Notes
- FAVORITE
↑ Back to top
Green Bean Salad
Adapted from https://www.muydelish.com/caesar-green-bean-salad/
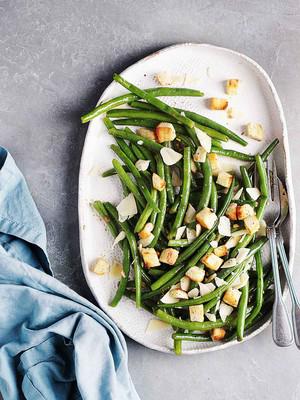
Tags: Salad
Vegetables
I made this.
Ingredients
- 1 1½ Tbsp lemon juice
- 1 Tbsp Worcestershire sauce
- 1 Tbsp Dijon mustard
- 3 large garlic cloves minced
- 3 anchovy fillets minced to paste
- ½ tsp black pepper
- ¼ tsp kosher salt
- 3 Tbsp extra virgin olive oil
- 1 1½ lbs fresh green beans ends trimmed
- 2 oz parmesan cheese, shaved with vegetable peeler
- 3 oz baguette cut into 1/2 inch squares
- 2 Tbsp extra virgin olive oil
- ¼ tsp ground black pepper
To make the
croutons:
Steps
- In a small bowl, add the lemon juice, Worcestershire, mustard, garlic, anchovies, salt & peppered whisk until combined. Slowly whisk in the oil until emulsified; set aside.
- Boil the green beans in a large pot for about 5 to 7 minutes. Drain the beans and spread in even layer on top of a dish towel. Cool completely.
- In a large bowl, toss the baguette, oil & pepper until the all pieces are coated with oil.
- Transfer the croutons to a 12 inch nonstick skillet and cook over medium-high heat, stirring often, until golden brown and crispy. About 5 minutes.
- Reserve the bowl to use in next step.
- Add the green beans, parmesan & croutons to the reserved bowl and toss with the dressing until combined. Season with salt & pepper if needed.
Dressing & Green
Beans:
Make the croutons:
↑ Back to top
Green Chile Chicken Tamales *(Tamales Con Salsa Verde Y
Pollo)*
Servings: YIELDMakes about 26
Ingredients
- 1 (8-ounce) package dried corn husks
- 1 pound tomatillos, husked, rinsed
- 4 (3-inch-long) serrano chiles, stemmed, chopped
- 4 large garlic cloves, chopped
- 1 1/2 tablespoons olive oil
- 2 cups low-salt chicken broth
- 4 cups (packed) coarsely shredded cooked chicken (about 1 pound; from purchased rotisserie chicken)
- 2/3 cup chopped fresh cilantro
- 1 1/3 cups lard or solid vegetable shortening
- 1 1/2 teaspoons salt (omit if masa mixture contains salt)
- 1 1/2 teaspoons baking powder (omit if masa mixture contains baking powder)
- 4 cups freshly ground masa dough for tamales (34 to 36 ounces), or make masa dough with 31/2 cups masa harina (corn tortilla mix; about 17 ounces) mixed with 2 1/4 cups warm water
- 2 cups (about) low-salt chicken broth
Filling:
Dough:
Steps
- Place husks in large pot or large bowl; add water to cover. Place heavy plate on husks to keep submerged. Let stand until husks soften, turning occasionally, at least 3 hours and up to 1 day.
- Preheat broiler. Line heavy baking sheet with foil. Arrange tomatillos on prepared sheet. Broil until tomatillos blacken in spots, turning once, about 5 minutes per side. Transfer tomatillos and any juices on sheet to processor and cool. Add chiles and garlic to processor and blend until smooth puree forms. Heat oil in medium saucepan over medium-high heat. Add tomatillo puree and boil 5 minutes, stirring often. Add broth. Reduce heat to medium; simmer until sauce coats spoon thickly and is reduced to 1 cup, stirring occasionally, about 40 minutes. Season with salt. Mix in chicken and cilantro. (Can be made 1 day ahead. Cover and chill.)
- Using electric mixer, beat lard (with salt and baking powder, if using) in large bowl until fluffy. Beat in fresh masa or masa harina mixture in 4 additions. Reduce speed to low and gradually beat in 1 1/2 cups broth, forming tender dough. If dough seems firm, beat in enough broth, 2 tablespoons at a time, to soften.
- Fill bottom of pot with steamer insert with enough water (about 2 inches) to reach bottom of insert. Line bottom of insert with some softened corn husks. Tear 3 large husks into 1/4-inch-wide strips to use as ties and set aside. Open 2 large husks on work surface. Spread 1/4 cup dough in 4-inch square in center of each, leaving 2- to 3-inch plain border at narrow end of husk. Spoon heaping tablespoon filling in strip down center of each dough square. Fold long sides of husk and dough over filling to cover. Fold up narrow end of husk. Tie folded portion with strip of husk to secure, leaving wide end of tamale open. Stand tamales in steamer basket. Repeat with more husks, dough, and filling until all filling has been used. If necessary to keep tamales upright in steamer, insert pieces of crumpled foil between them.
- Bring water in pot to boil. Cover pot and steam tamales until dough is firm to touch and separates easily from husk, adding more water to pot as necessary, about 45 minutes. Let stand 10 minutes. (Can be made 2 days ahead. Cool 1 hour. Cover and chill. Before serving, re-steam tamales until hot, about 35 minutes.)
For filling:
For dough:
↑ Back to top
Green Chili and Tomatillo Hot Sauce
Tags: Condiments
Mexican Salsas
Ingredients
- 3
- MEDIUM TOMATILLOS (ABOUT 6 OUNCES), HUSKED, CORED AND HALVED LENGTHWISE
- 1
- MEDIUM POBLANO CHILI, STEMMED, HALVED LENGTHWISE AND SEEDED
- 1
- SERRANO CHILI, STEMMED AND HALVED LENGTHWISE
- 1
- MEDIUM GARLIC CLOVE, SMASHED AND PEELED
- 2
- TEASPOONS WHITE VINEGAR
- 1
- TEASPOON GROUND CUMIN
- KOSHER SALT
Steps
- Heat the boiler with a rack about 6 inches from the element. Line a rimmed baking sheet with foil. Place the tomatillos and both chilies cut sides down on the prepared baking sheet, then add the garlic. Broil until the chilies are deeply charred and the tomatillos are softened, 5 to 8 minutes, rotating the baking sheet about halfway through. Remove from the oven and cool for about 5 minutes. SEE IT
- In a food processor, combine the broiled vegetables, vinegar, cumin, 1 teaspoon salt and ¼ cup water. Process until smooth, scraping down the bowl as needed, about 1 minute. Transfer to a small bowl, then taste and season with salt. Cover and let stand at room temperature for 30 minutes before serving. SEE IT
↑ Back to top
Green Tomato Chutney
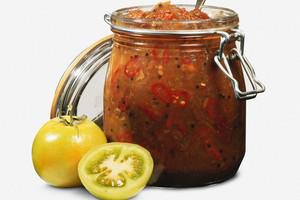
Servings: Yield: 6 Half-Pints (96
servings)
Ingredients
- 2 1/2 pounds firm green tomatoes (about 6 cups diced)
- 1 cup golden raisins
- 1 cup onion (chopped)
- Optional: 1 sweet red bell pepper (or a few small mild or hot red chile peppers, sliced or chopped)
- 1 1/2 cups light brown sugar (firmly packed)
- 1 teaspoon salt
- 1 1/4 cups cider vinegar
- 1 tablespoon mixed pickling spices
- 1 teaspoon chili powder
Steps
- Trim the stem and blossom ends from tomatoes and cut into 3/4-inch dice (you should have about 6 cups). Combine all ingredients in a heavy kettle; bring to a boil. Reduce the heat and cook for about 1 hour, until reduced and thickened.
- Spoon the chutney into hot sterilized jars, leaving 1/4-inch headspace; wipe jar rims. Cover immediately with metal lids and screw on bands. Tighten, but do not over-tighten the bands.
- Process for 15 minutes in a boiling-water bath canning pot, or 20 minutes for altitudes of 1001 to 6,000 feet. Over 6,000 feet, process for 25 minutes.
↑ Back to top
Green Tomato Chutney
Adapted from http://www.geniuskitchen.com/recipe/green-tomato-chutney-traditional-english-recipe-292790

Servings: YIELD: 4-6 jars UNITS:
US
Ingredients
- 1 lb green tomato
- 1 lb onion
- 1 lb apple (granny smith or other firm, tart apple)
- 1 lb brown sugar
- 1 pint malt vinegar
- 1 ⁄2 teaspoon mixed spice
- 1 teaspoon dry mustard
- 1 ⁄2 teaspoon cayenne pepper
- 2 ounces salt
Steps
- Finely chop the tomatoes, apples and onions. Put them in a bowl and sprinkle with the salt. Cover and leave somewhere cool overnight.
- Strain off the resulting salty juice and discard. Put the remains of the onion, tomato, apple mix into a pan and add the vinegar, spice, mustard, ginger and pepper. Bring to the boil and simmer for about 1½ hours, stirring occasionally. You will know when it is ready because the chutney will start to become 'thick' in texture.
- Turn off the heat and leave it in the pan to cool. Once it is at room temperature then decant it into clean storage jars, seal and put to one side for use. This can be eaten immediately after cooking, but you will find that the flavour improves if left for a few weeks in the jars before eating.
↑ Back to top
Green Tomato Pickles

Servings: Yield: 4 Pints (16
servings)
Ingredients
- 4 quarts green tomatoes (sliced and loosely packed)
- 1 quart onion (sliced and loosely packed)
- 1 cup pickling salt (divided)
- 2 pounds light brown sugar
- 6 cups vinegar (5% acidity)
- 2 small red chile peppers
- 1/3 cup mustard seeds
- 1/4 cup celery seeds
- 1 teaspoon ground black pepper
- 1 tablespoon whole allspice
- 2 teaspoons whole cloves
Steps
- Place sliced tomatoes and sliced onion in separate bowls; sprinkle 3/4 cup salt over tomatoes and 1/4 cup salt over onion; stir both mixtures. Cover both bowls and let stand at room temperature for 4 to 6 hours.
- Place the tomatoes in a cheesecloth bag and squeeze gently to remove excess juice. Repeat this procedure for onion. Discard the salt liquid.
- Combine tomatoes, onion, sugar, vinegar, chile peppers, mustard seeds, celery seeds, and pepper in a large kettle.
- Tie allspice and cloves in a small cheesecloth bag; add to tomato onion mixture. Bring mixture to a boil. Reduce heat to low and simmer, uncovered, for 20 minutes or until vegetables are tender.
- Pack tomato mixture and liquid into hot sterilized pint jars (with 1 piece of the chile pepper in each jar - cut if necessary), leaving 1/2 inch headspace; wipe jar rims.
- Cover at once with metal lids, and screw on ring bands.
- Process in a boiling water bath 10 minutes.
- Store in a cool dark place. Once opened, store pickles in the refrigerator. Makes four 1-pint jars.
↑ Back to top
Grilled Beef and Jicama Salad
Ingredients
- 1/4 cup fresh lime juice
- 2 1/2 tablespoons fish sauce
- 2 1/2 to 3 tablespoons sugar
- 1 tablespoon water
- 1 or 2 Thai chiles, minced
- 2 large cloves garlic, minced
- 1/4 plus 1/8 teaspoon ground black pepper
- 1 tablespoon kecap manis (sweet Malay soy sauce) or dark soy sauce
- 1 tablespoon light (regular) soy sauce
- 1 1/2 tablespoons canola oil
- 1/8 to 1/4 teaspoon salt
- 1 pound beef steak, such as flank, top sirloin or bottom sirloin (cut thicker cuts into 1/2-inch thick pieces)
- 1 2/3 pounds jicama, peeled, quartered, and cut into thick matchsticks
- 1 carrot, cut into julienne or fine shreds
- 1 Granny Smith apple or other tart apple, cut into matchsticks and tossed with generous 1 teaspoon lime juice to prevent browning
- 1/2 lightly packed cups coarsely chopped Thai or Italian basil
- 1/4 cup fried shallot or chopped unsalted, roasted peanuts
Steps
- Combine all the ingredients for the dressing, using the lesser quantity of sugar. Taste and add more sugar for a more sweet finish than a tart one. Set aside.
- Make the marinade by combining the garlic, pepper, kecap manis, soy sauce and oil on a plate. Taste and add extra salt as needed. Add the steaks and coat well. Set aside to marinate for at least 1 hour and up to 3.
- Combine the jicama, carrot, and apple in a bowl. Toss to distribute well. Set aside.
- Grill the steak over medium-high heat for about 3 minutes per side for medium. Transfer to a plate, cover with a foil tent and let rest for 5 to 7 minutes. Slice thinly on the diagonal into 3-inch long pieces.
- To serve, add the basil and fried shallots to the jicama mixture. Add the dressing and toss. Let things sit for about 2 minutes, or until the salad has slightly softened. Divide the vegetables among the plates, leaving any excess dressing behind. Top with the beef and bring to the table.
Notes
- For the kecap manis, go to an Asian market and check the Indonesian and Malay section. It comes in a tall slender dark bottle and is thick like molasses. Kecap manis is one of my favorite ingredients. You have to add salt as it's not salty like soy sauce.
↑ Back to top
Grilled Beef Galbi (Korean-Style Marinated Short Ribs)
Tags: Beef
Korean
Servings: 4
Ingredients
- 1 medium onion (about 7 ounces; 200g), cut into 1-inch pieces
- 1 Asian pear (about 6 ounces; 170g), peeled and cut into 1-inch pieces (see note)
- 5 garlic cloves (25g)
- 1- inch piece (1/2 ounce; 14g) fresh ginger, peeled and cut into 1/4-inch pieces
- 1 cup (240ml) soy sauce
- 1/2 cup (120ml) water
- 1/4 cup (50g) packed brown sugar
- 2 tablespoons (30ml) mirin
- 1 tablespoon (6g) freshly g round black pepper
- 4 scallions (80g), thinly sliced
- 2 tablespoons (30ml) toasted sesame oil
- 2 tablespoons (12g) toasted sesame seeds, lightly crushed
- 3 pounds (1.4kg) flanken-style beef short ribs, about 1/2-inch-thick (see note)
- Ssamjang
- Lettuce and perilla leaves, steamed rice, thinly sliced garlic, chiles, and scallions, and assorted banchan
For the Galbi:
For serving:
Steps
- For the Galbi: Combine onion, Asian pear, garlic, and ginger in the bowl of a food processor and process to a coarse purée, scraping down sides of food processor bowl as needed, about 30 seconds. Stop processor and add soy sauce, water, brown sugar, mirin, and black pepper to food processor bowl. Continue processing until liquids and sugar are well-combined with vegetables, 15 to 30 seconds longer. Transfer mixture to a medium bowl, and stir in scallions, sesame oil, and sesame seeds.
- Place beef in a gallon zipper-lock bag or large baking dish, and pour marinade over the short ribs. Toss to evenly distribute the marinade, then seal bag, removing as much air as possible (if using baking dish, wrap tightly with plastic wrap). Transfer short ribs to refrigerator, and marinate for at least 1 hour and up to 24 hours.
- Light one chimney full of charcoal. When all the charcoal is lit and covered with gray ash, pour out and arrange the coals on one side of the charcoal grate. Set cooking grate in place, cover grill, and allow to preheat for 5 minutes. Alternatively, set half the burners on a gas grill to the highest heat setting, cover, and preheat for 10 minutes. Clean and oil grilling grate.
- Remove short ribs from marinade and wipe off excess. Place directly over the hot side of the grill. If using a charcoal grill, leave uncovered; if using a gas grill, cover. Cook, turning occasionally, until beef is cooked through and lightly charred on both sides, 6 to 8 minutes total (3 to 4 minutes per side). Transfer to a serving platter and allow to rest for at least 2 minutes before serving.
- For Serving: Serve short ribs immediately with a pair of kitchen shears on-hand for cutting the meat off the bone and into bite-size pieces. Pass ssamjang, lettuces, garnishes, and banchan at the table.
Notes
- Bosc pear or apple can be substituted for Asian pear.
- Flanken-style beef short ribs are thin, long pieces of short rib that have been cut crosswise through the rib bones. They can be found at Korean markets, where they are usually labeled "LA-Style Galbi," or can be cut to order at good butcher shops.
↑ Back to top
Grilled Beef Rolls with Nuoc Cham Dipping Sauce
Ingredients
- 2 pounds ground sirloin
- 3 garlic cloves, finely grated
- 3 tablespoons tomato paste
- 2 tablespoons cornstarch
- 2 tablespoons soy sauce
- 2 tablespoons rice wine or sherry
- 1 tablespoon Asian fish sauce
- 1 tablespoon sambal oelek or other Asian chile sauce
- 1 tablespoon sugar
- 1 teaspoon freshly ground black pepper
- 40 jarred brined grape leaves-drained, rinsed and patted dry
- Vegetable or peanut oil, for grilling
- Chopped cilantro, for serving
- Mint leaves, for serving
- Lettuce leaves, for serving
- 1/4 cup sugar
- 1/3 cup hot water
- 1/3 cup fish sauce
- 3 tablespoons lime juice
- 1 tablespoon finely grated fresh ginger
- 3 garlic cloves, minced
- 1/2 jalapeño, seeded and minced (about 1 tablespoon)
- 3 tablespoons unsalted roasted peanuts, finely chopped
Beef Rolls
Nuoc Cham
Steps
- MAKE THE BEEF ROLLS In a large bowl, combine the ground beef with all of the ingredients up to but not including the grape leaves. Cover with plastic wrap and refrigerate for at least 4 hours or overnight.
- Snip off any stems from the grape leaves. Spread 4 leaves on a work surface. Form a 1-tablespoon-size log of the beef filling at the stem end of each leaf. Fold the sides of the leaves over the filling, then tightly roll up the leaves to form cylinders, tucking in the sides as you go. Repeat with the remaining grape leaves and filling.
- MAKE THE NUOC CHAM In a medium bowl, whisk the sugar into the hot water until dissolved. Whisk in the remaining ingredients. Transfer the nuoc cham to a serving bowl.
- Light a grill or preheat a grill pan. Lightly brush the grill and the beef rolls with oil. Arrange the rolls on the grill with at least 1 inch between them and grill over moderate heat, turning often to prevent burning, until firm and just cooked through, about 8 minutes. Sprinkle the rolls with cilantro and mint and serve warm with lettuce leaves for wrapping and the nuoc cham for dipping. make ahead The nuoc cham can be refrigerated overnight.
Notes
- FAVORITE
↑ Back to top
Grilled Brussels Sprouts
Adapted from http://www.foodnetwork.com/recipes/alton-brown/grilled-brussels-sprouts-recipe/index.html
Ingredients
- 1 pound Brussels sprouts, as uniform in size as possible*
- 2 tablespoons olive oil
- 1 tablespoon minced garlic
- 1 teaspoon dry mustard
- 1 teaspoon smoked paprika
- 1 teaspoon kosher salt
- 1/4 teaspoon freshly ground black pepper
Steps
- Cook's Note: In order to facilitate even cooking, it is important that the Brussels sprouts be as uniform in size and shape as possible.
- Heat a grill to medium.
- Cut off the stem end of the Brussels sprouts and remove any yellowing outer leaves. Place the Brussels sprouts into a large, microwave safe mixing bowl and heat in the microwave on high for 3 minutes. Add the olive oil, garlic, mustard, paprika and salt and toss to combine. Allow the sprouts to cool until you can handle them. Skewer 4 to 5 Brussels sprouts onto each metal skewer with the stem ends facing in the same direction, leaving at least 1/2-inch in between each sprout. Place the skewers onto the grill with stem end closest to the flame. Cover and cook for 5 minutes. Turn the skewers over and continue to cook for another 5 minutes. Serve as is or for additional flavor, remove the sprouts from the skewers, return them to the original mixing bowl and toss with any of the remaining oil and garlic mixture before serving.
Notes
- FAVORITE
↑ Back to top
Grilled Brussels Sprouts
Adapted from http://www.foodnetwork.com/recipes/alton-brown/grilled-brussels-sprouts-recipe/index.html

Ingredients
- 1 pound Brussels sprouts, as uniform in size as possible*
- 2 tablespoons olive oil
- 1 tablespoon minced garlic
- 1 teaspoon dry mustard
- 1 teaspoon smoked paprika
- 1 teaspoon kosher salt
- 1/4 teaspoon freshly ground black pepper
Steps
- Cook's Note: In order to facilitate even cooking, it is important that the Brussels sprouts be as uniform in size and shape as possible.
- Heat a grill to medium.
- Cut off the stem end of the Brussels sprouts and remove any yellowing outer leaves. Place the Brussels sprouts into a large, microwave safe mixing bowl and heat in the microwave on high for 3 minutes. Add the olive oil, garlic, mustard, paprika and salt and toss to combine. Allow the sprouts to cool until you can handle them. Skewer 4 to 5 Brussels sprouts onto each metal skewer with the stem ends facing in the same direction, leaving at least 1/2-inch in between each sprout. Place the skewers onto the grill with stem end closest to the flame. Cover and cook for 5 minutes. Turn the skewers over and continue to cook for another 5 minutes. Serve as is or for additional flavor, remove the sprouts from the skewers, return them to the original mixing bowl and toss with any of the remaining oil and garlic mixture before serving.
Notes
- FAVORITE
↑ Back to top
Grilled Naan

Tags: Breads
Indian
Servings: 12 pieces
Ingredients
- 22 ounces (about 4 cups) bread flour 623g
- 0.25 ounces (1 packet, about 2 teaspoons) instant or rapid rise yeast 7.2g
- 0.44 ounces salt (about 2 1/2 teaspoons) salt 12.5
- 0.8 ounces (about 2 tablespoons) sugar 22.33g
- 14 ounces (about 1 3/4 cups) full fat yogurt or whole milk 397g
- 1 stick butter, melted
Steps
- Combine flour, yeast, salt, and sugar in the bowl of a stand mixer and whisk until combined. Add yogurt and knead with dough hook on low speed until dough comes together into a smooth ball. Dough should stick slightly to bottom of bowl as it kneads (add slightly more yogurt or milk as necessary). Continue to knead for 5 minutes. Cover tightly with plastic wrap and allow to rise at room temperature until roughly doubled in volume, about 2 hours.
- Turn dough out onto floured work surface. Using a bench scraper or a knife, cut the dough into 12 even pieces. Roll each piece into a ball, then place on a well-floured surface (leaving a few inches of space between each one) and cover with a floured cloth. Alternatively, place each ball of dough in an individual covered pint-sized deli container. Allow dough to rise at room temperature until doubled in volume, about 2 hours.
- Ignite a large chimney full of coals (about 5 quarts of coals) and spread evenly over half of the grill. Set grill grates in place, cover, and allow to preheat for 5 minutes. Scrape grill grates clean with a brush.
- Working with two to three balls of dough at a time, stretch with your hands into an oblong roughly 10-inches long and 6-inches across (you can use a rolling pin for this as well). Once you have two or three pieces stretched, lay them out on the grill above the coals. Cook without moving until bottom side is charred in spots and light golden brown. Flip with a large spatula, pizza pell, or with tongs and cook until second side is charred and browned. Remove naan from the grill and immediately brush with melted butter. Transfer the naan to a large plate and cover it with a clean dish towel while you cook the remaining bread.
↑ Back to top
Grilled Pork Shoulder Bo Ssam
Servings: 6
Ingredients
- 2 large Honeycrisp apples, divided
- 1 small yellow onion, quartered
- 1 (1-inch) piece fresh ginger, peeled and chopped
- 3 tablespoons canola oil, plus more for grill
- 1 tablespoon light brown sugar
- 1 teaspoon instant coffee granules (optional)
- 6 tablespoons doenjang, divided
- 7 garlic cloves, divided
- 3 (3/4 to 1-inch thick) bone-in pork shoulder steaks (about 1 lb each)
- 2 tablespoons gochujang
- 2 tablespoons thinly sliced scallions
- 1 tablespoon toasted sesame oil
- Bibb lettuce leaves, kimchi, and toasted sesame seeds, for serving
Steps
- Roughly chop 1 apple. Place chopped apple, onion, ginger, oil, brown sugar, instant coffee granules (if using), 3 tablespoons doenjang, and 6 garlic cloves in a blender; process until smooth, about 1 minute, gradually increasing blender speed from low to high. Pour onion mixture into a 9- x 13-inch baking dish; add pork shoulder steaks, and turn to coat evenly in marinade. Cover and refrigerate for at least 1 hour.
- Preheat grill to medium (350°F to 400°F). Remove pork steaks from marinade, letting excess drip off; discard marinade. Place pork steaks on oiled grates, and grill, uncovered, turning occasionally, until browned on all sides and a thermometer inserted into thickest portion of pork registers 145°F (for medium), 10 to 15 minutes, or until desired degree of doneness. Transfer steaks to a cutting board, and let rest for 10 minutes.
- Grate remaining apple to yield 1 cup. Grate remaining garlic clove. Transfer apple and garlic to a small bowl; stir in gochujang, scallions, sesame oil, and remaining 3 tablespoons doenjang. Set apple ssamjang aside.
- Thinly slice pork steaks against the grain; discard bones. Serve pork with apple ssamjang, lettuce leaves, kimchi, and sesame seeds.
↑ Back to top
Grilled Steak Ramen

Ingredients
- 2 cups beer (we recommend a lager)
- 3 tablespoons soy sauce
- 1 tablespoon grated fresh ginger
- 1/2 cup canola oil
- 1 tablespoon chili flakes, *optional, skip if you don't like spicy
- 6 tablespoons freshly squeezed lime juice
- 1 (2 pound) flank steak
- 3 (3 ounce) package ramen noodles
- 3 scallions, thinly sliced
Steps
- Combine the beer, soy sauce, ginger, oil, chili flakes, and lime juice in a zip-top bag. Add the steak, seal the bag, and turn to coat. Refrigerate for 4 to 8 hours, turning occasionally. Remove steak from refrigerator and bring to room temperature. Reserve marinade.
- In a small sauce pan bring the marinade to a boil, reduce by a quarter and reserve.
- Heat the grill to medium-high.
- Season the steak generously with salt and pepper. Place the steak on the grill and cook, turning once, until cooked to your desired liking. For rare (3 to 5 minutes per side for a 1 1/2-inch-thick steak) or medium rare (5 to 8 minutes per side for a 2-inch thick steak). Transfer to platter and let rest for at least 5 minutes. Then slice the steak against the grain into 1/4-inch-thick slices.
- As the steak is resting, cook the ramen noodles according to the package instructions. Strain.
- To serve, divide the steak and the noodles between four shallow soup bowls. Top each with a drizzle of the remaining heated marinade. Sprinkle each with sliced scallions.
Notes
- FAVORITE
↑ Back to top
Grilled Watermelon Salsa
Servings: YIELD Makes 3 cups.
Ingredients
- 2 Tbsp extra-virgin olive oil, divided
- 1/2 tsp ground chili powder
- 1 1/2 lb watermelon, sliced 3/4-inch thick
- Kosher salt, to taste
- 1 cup cherry tomatoes, coarsely chopped
- 1/3 cup chopped English cucumber
- 2 Tbsp chopped fresh cilantro
- 1 Tbsp chopped red onion
- 1/2 jalapeño pepper, seeded and chopped
- 1 Tbsp fresh lime juice
- Black pepper, to taste
Steps
- Preheat grill.
- In a small bowl, combine 1 Tbsp olive oil and chili powder. Brush on both sides of watermelon slices; sprinkle with salt. Grill watermelon 3-5 minutes per side or until grill marks form. Transfer to a cutting board. When cool enough to handle, remove rind and seeds; coarsely chop.
- In a large bowl, combine watermelon, tomatoes, cucumber, cilantro, onion, jalapeño and remaining 1 Tbsp olive oil. Stir in juice. Refrigerate 1 hour to let flavors meld. Just before serving, season with salt and pepper.
Notes
- FAVORITE
↑ Back to top
Grilled-Peach Pizzas with Prosciutto

Servings: YIELD Makes three
9-inch pizzas
Ingredients
- 2 peaches, cut into 1/2-inch wedges
- 1 pound fresh mozzarella cheese, thinly sliced
- 3 Grilled Pizza Dough crusts
- 12 thin slices prosciutto, cut in half
- 1/3 cup fresh basil
- Extra-virgin olive oil, for drizzling
Steps
- Heat grill to high. Grill peach wedges, flipping, until caramelized, about 2 minutes per side.
- Preheat oven to 400 degrees (or heat grill to medium). Sprinkle cheese on grilled pizza crusts. Bake or grill, covered with lid, directly on grates, until cheese melts and is bubbling, about 8 minutes (time may vary slightly if grilling). Remove from oven or grill. Top with peaches, prosciutto, and basil. Drizzle with oil.
Notes
- FAVORITE
↑ Back to top
Ground Beef and Andouille Jambalaya
Tags: Beef
Cajun and Creole Sausage
Ingredients
- 1 tablespoon vegetable oil
- 1½ pounds ground beef
- 4 pounds andouille smoked sausage (preferred) or any other good smoked pure pork sausage, such as Polish sausage (kielbasa), cut into -inch slices
- 1 tablespoon salt
- 1 teaspoon ground red pepper (preferably cayenne)
- 1 teaspoon black pepper
- 2 cups chopped green bell peppers
- 1½ cups chopped onions
- 1 cup chopped celery
- 1 cup chopped green onions (tops only)
- 1/2 cup, packed, chopped fresh parsley
- 1 tablespoon minced garlic
- 1 ¼ cups Canned Tomatoes
- 7 cups coarsely chopped cabbage
- 4 ¾ cups, in all, Basic Beef or Pork
- 2 cups uncooked rice (preferably converted)
Steps
- Place the oil in a heavy 6-quart saucepan or large Dutch oven. Add the beef and place over high heat, breaking meat up into small chunks. Add the sausage and cook until the ground beef is browned, about 4 minutes, stirring occasionally and continuing to break up meat chunks. Stir in the salt and red and black peppers; cook about 2 minutes, stirring occasionally. Add the bell peppers, onions, celery, green onions, parsley, and garlic; cook about 5 minutes, stirring occasionally. Add the tomatoes and cook and stir about 2 minutes more.
- Now add the cabbage and do not stir. Cover pan and cook about 25 minutes, stirring only occasionally after mixture on the bottom of the pan has browned and then scraping pan bottom well. Stir in 1½ cups of the stock, scraping pan bottom until all browned sediment is dissolved. Cook uncovered about 15 minutes, stirring and scraping occasionally. Add 12 cups more stock, stirring until all sediment is dissolved from pan bottom, then stir in the remaining 14 cups stock. Add the rice, stirring well.
- Cover pan, reduce heat to very low, and cook about 25 minutes. Check after about 20 minutes to make sure mixture isn't scorching. Remove pan from heat and let sit covered until rice is tender but still a bit crunchy, about 25 minutes more. Stir well and serve immediately.
Notes
- Serve about 1½ cups of the jambalaya as a main course, about ½ cup as a side dish.
↑ Back to top
Ground Lamb with Almond Hummus, Almond Flatbread, and
Pickled Onions
Adapted from http://www.foodnetwork.ca/recipe/ground-lamb-with-almond-hummus-almond-flatbread-and-pickled-onions/9191/
Ingredients
- 1 tablespoon olive oil
- 1/2 cup red onion, diced
- 2 cloves garlic, finely chopped
- 1 1/2 pounds ground lamb
- 1 sprig rosemary, leaves removed
- 1 bay leaf
- 1/2 cup raisins or chopped dried apricots
- 1 1/2 cups red wine
- salt and pepper
- 1 cup warm water
- 1 teaspoon instant dry yeast
- 2 cups all-purpose flour
- 1/3 cup ground almonds
- 1 teaspoon cumin seeds
- 1 teaspoon salt
- 1 1/2 cups ground almonds, toasted
- 1/3 cup almond oil
- salt
- 1 can chickpeas, drained and rinsed
- 1 cup almond tahini (see recipe)
- 1/4 cup almond oil
- 1/4 cup olive oil
- 1/2 clove garlic, minced
- juice and zest of 1 lemon
- salt
- 1 cup water
- 1/2 cup red wine vinegar
- 1/4 cup sugar
- 1 bay leaf
- 1 pinch pinch of salt
- 1/2 red onion, sliced
- 1/2 cup sliced almonds, toasted
- 1/2 teaspoon paprika (smoked or sweet)
Steps
- In a large pot over medium high heat, heat oil. Add onions and sauté onions, 2-3 minutes, or until translucent. Add garlic and sauté 1-2 minutes, or until fragrant.
- Add ground lamb, rosemary and bay leaf. Sauté until excess liquid evaporates and meat is lightly browned.
- Add raisins and stir to combine. Add red wine to deglaze pan, scraping up brown bits. Remove from heat and season with salt and pepper.
- In a bowl of a stand mixer, stir water and yeast. Let stand 5 minutes or until a foam develops.
- Add flour, ground almonds, cumin, and salt. Mix with the paddle attachment on low speed until dough pulls away from the sides of the bowl (if dough seems sticky add more flour 1 tbsp at a time).
- Switch to dough hook and work 5 minutes on low speed until dough becomes smooth and elastic. Cover and allow to rise 20 - 30 minutes in a warm place.
- Preheat oven to 425 F.
- Divide dough into 8 pieces. Roll into balls and flatten with hands or a rolling pin.
- Place dough onto a baking sheet and bake for 10 minutes. Flip dough over and place directly on oven rack and bake for another 10 minutes or until golden brown.
- In a food processor or blender, mix ground almonds and almond oil until smooth. Season with salt.
- In a food processor or blender mix chickpeas, almond tahini, almond oil, olive oil, garlic, lemon juice and zest together until smooth. Transfer to a bowl and season with salt.
- In a medium saucepan, bring water, red wine vinegar, sugar, bay leaf and salt to a boil. Add red onion, remove from heat and let cool, covered for 15 minutes.
- Drain and serve.
- Spread hummus on large plate. Top with lamb, toasted almonds, pickled onions, cilantro and paprika. Serve with almond flatbread.
Notes
- FAVORITE
↑ Back to top
Gâteau Au Yaourt (Yogurt Cake)

Servings: 1 cake
Ingredients
- Baking spray with flour
- 1 (4.9-ounce) pot whole-milk vanilla French-style yogurt (such as La Fermière) (about 9 tablespoons), plus more for serving
- 3 large eggs
- 2 pots granulated sugar (1 1/3 cups)
- 1 pot vegetable oil (2/3 cup)
- 1 teaspoon orange zest
- 1 teaspoon vanilla extract
- 3 pots all-purpose flour (2 cups) (about 8 3/4 ounces)
- 2 teaspoons baking powder
- 1/2 teaspoon kosher salt
- Powdered sugar, for dusting
- Berry compote or preserves, for serving
Steps
- Preheat oven to 350°F. Lightly coat a 9-inch round cake pan with baking spray; set aside.
- Whisk together yogurt, eggs, granulated sugar, oil, orange zest, and vanilla extract in a large bowl until smooth. Add flour, baking powder, and salt; whisk until dry ingredients are just incorporated. Pour batter into prepared cake pan, and smooth top.
- Bake in preheated oven until golden brown and a wooden pick inserted into center of cake comes out clean, 35 to 40 minutes. Let cake cool in pan for 10 minutes. Run a knife around the edge of the pan to loosen; invert cake onto a wire rack. Let cake cool completely on rack, 1 to 2 hours.
- Dust cake with powdered sugar. Serve slices with berry compote and additional yogurt.
↑ Back to top
Hakka Style Eggplant with Mint
Tags: Chinese
Vegan Vegetables Vegetarian
Martin Yan
Servings: 2
Ingredients
- 1/4 cup chicken broth
- 2 tablespoons oyster flavored sauce
- 1/2 teaspoon chile garlic sauce
- 1/2 teaspoon sesame oil
- 1/2 cup mint leaves, lightly packed
- 3/4 pound Asian eggplant
- Cooking oil for deep frying
- 6 cloves peeled garlic
- 2 teaspoons cooking oil
- 1 Jalapeno chile (use red Jalapeno chile) seeded and thinly sliced
- 1/2 small onion, cut into 1/2 inch cubes
- 1 small Organic Bell Pepper (use green Bell Pepper) cut into 1-inch diamond-shaped pieces
- 1/2 cup Thai basil leaves, lightly packed
Steps
- Combine the sauce ingredients in a bowl.
- Wash mint leaves and dry thoroughly.
- Roll-cut the eggplants.
- In a wok or 2-quart pan, heat oil for deep-frying to 375° F.
- Deep fry the eggplants and garlic until golden brown, about 2 minutes.
- Lift out with a slotted spoon and drain well on paper towels.
- Deep fry the mint leaves until crisp, about 30 seconds.
- Remove with a slotted spoon and drain well on paper towels. Place a wok over high heat until hot.
- Add 2 teaspoons of oil, swirling to coat the sides.
- Add the jalapeno, onion, and bell pepper; cook, stirring, until fragrant, about 30 seconds.
- Add eggplants, garlic, basil, and sauce. Reduce heat to medium and cook until eggplants are tender, 5-6 minutes.
Notes
- If you can’t find Thai Basil, use regular basil.
↑ Back to top
Ham and Grits
Adapted from https://thesouthernladycooks.com/ham-and-grits/

Tags: Charcuterie
Southern
Maybe a shallower pan
I made this.
Servings: 6
Ingredients
- 4 cups water
- 1 cup quick cooking grits
- 1/2 teaspoon salt
- 4 tablespoons butter
- 2 eggs beaten
- 1/4 teaspoon garlic powder
- 1 cup ham cooked and chopped
- 1/4 cup green onions chopped (can use regular onions)
- Several drops hot sauce Optional
- Add some Outrage and Black Pepper
- 1 cup shredded cheddar cheese or cheese of your choice divided (can use more cheese if you like a lot)
Steps
- Bring water and salt to a boil, add grits and cook five minutes until thick. Remove from stove and add butter, eggs, garlic powder, ham, green onions, hot sauce and half the shredded cheese.
- Mix together and pour into sprayed casserole.
- Sprinkle rest of the cheese on top. (I use a 9 x 5 loaf pan). Bake in preheated 375 degree oven for 30 to 35 minutes uncovered.
↑ Back to top
Ham Haystack
Adapted from http://sassy-spoon.com/2012/04/12/ham-haystack/
Ingredients
- 6 cups ham, in medium chunnks two 8 oz. pkgs. cream cheese
- 1 1/3 cups mayonaise 3 tablespoons Meyer lemon juice (you can use other lemons, I just love Meyers)
- 2/3 cup sliced green onion 1/4 cup finely chopped mint
- 1 jar of Branston pickle relish 1 cup blanched, slivered almonds
Steps
- Toast the slivered almonds on a silpat at 350 degrees for 20-30 minutes watching closely, till golden brown.
- Stir the lemon juice into the mayonnaise
- Chop the ham in a food processor till it is finely chopped
- Combine ham with 8oz. of the cream cheese, 2/3 cup of the mayonaise, 1/2 cup slivered almonds (chop before adding), onion, mint & pickle relish. Mix well. Chill.
- Shape into a cone-shaped mound.
- Combine remaining mayonaise & remaining cream cheese and mix well (i used a food processor)
- Frost mound with this mixture.
- Chill slightly.
- Cover with toasted, slivered almonds.
- Serve with crackers or party rye bread.
Notes
- FAVORITE
↑ Back to top
Hamantaschen- Easy Pareve Hamantaschen

Tags: Cookies
Holidays Jewish
Servings: 35 servings Prep Time
Ingredients
- 2 large eggs
- 2/3 cup sugar
- 1/4 cup canola oil
- 1 tsp orange zest
- 1 tsp vanilla
- 2 1/4 cups flour
- 1 tsp baking powder
- 1/4 tsp salt
- 1-5 tsp water (if needed)
- Nonstick cooking oil spray
Steps
- Before you begin making the hamantaschen, choose and make your filling and have it on hand to work with. This dough will dry out quickly if left to rest too long, so it's best to have everything ready to assemble when you start.
- Preheat your oven to 350 degrees F. In a mixing bowl, whisk together the eggs, sugar, canola oil, orange zest and vanilla.
- In another bowl, sift together the flour, baking powder, and salt.
- Slowly stir the dry ingredients into the wet, using a large wooden spoon and using circular motions till a crumbly dough begins to form.
- Knead until smooth and slightly tacky to the touch. Try not to overwork the dough, only knead till the dough is the right consistency. If the crumbles are too dry to form a smooth dough, add water slowly, 1 teaspoon at a time, using your hands to knead the liquid into the dough. Knead and add liquid until the dough is smooth and slightly tacky to the touch (not sticky), with a consistency that is right for rolling out. It can easily go from the right consistency to too wet/sticky, so add water very slowly. If the dough seems too wet, knead in a little flour till it reaches the right texture.
- Lightly flour a smooth, clean surface. Use a rolling pin to roll the dough out to 1/4 inch thick. Scrape the dough up with a pastry scraper, lightly reflour the surface, and flip the dough over. Continue rolling the dough out very thin (less than 1/8 of an inch thick). The thinner you roll the dough, the more delicate and crisp the cookies will turn out-- just make sure that the dough is still thick enough to hold the filling and its shape! If you prefer a thicker, more doughy texture to your cookies (less delicate), keep the dough closer to 1/4 inch thick. Lightly flour the rolling pin occasionally to prevent sticking, if you need to.
- Use a 3-inch cookie cutter (not smaller) or the 3-inch rim of a glass to cut circles out of the dough, cutting as many as you can from the dough.
- Gather the scraps and roll them out again. Cut circles. Repeat process again if needed until you've cut as many circles as you can from the dough. You should end up with around 35 circles.
- Place a teaspoon of filling (whichever filling you choose) into the center of each circle. Do not use more than a teaspoon of filling, or you run the risk of your hamantaschen opening and filling spilling out during baking. Cover unused circles with a lightly damp towel to prevent them from drying out while you are filling.
- Assemble the hamantaschen in three steps. First, grasp the left side of the circle and fold it towards the center to make a flap that covers the left third of the circle.
- Grasp the right side of the circle and fold it towards the center, overlapping the upper part of the left side flap to create a triangular tip at the top of the circle. A small triangle of filling should still be visible in the center.
- Grasp the bottom part of the circle and fold it upward to create a third flap and complete the triangle. When you fold this flap up, be sure to tuck the left side of this new flap underneath the left side of the triangle, while letting the right side of this new flap overlap the right side of the triangle. This way, each side of your triangle has a corner that folds over and a corner that folds under-- it creates a "pinwheel" effect. This method if folding is not only pretty-- it will help to keep the cookies from opening while they bake.
- Pinch each corner of the triangle gently but firmly to secure the shape.
- Repeat this process for the remaining circles.
- When all of your hamantaschen have been filled, place them on a lightly greased baking sheet, evenly spaced. You can fit about 20 on one sheet... they don't need to be very spaced out because they shouldn't expand much during baking.
- Place them in the oven and let them bake at 350 degrees F for 20-25 minutes, till the cookies are cooked through and lightly golden.
- Cool the cookies on a wire rack. Store them in a tightly sealed plastic bag or Tupperware.
↑ Back to top
Hamburger Buns
Tags: Baking
Rolls and Buns
Rated 2/5
Ingredients
- 2 tablespoons active dry yeast
- 1 cup plus 2 tablespoons warm water (110° to 115°)
- 1/3 cup vegetable oil
- 1/4 cup sugar
- 1 egg
- 1 teaspoon salt
- 3 to 1/2 cups all-purpose flour
Steps
- In a large bowl, dissolve yeast in warm water. Add oil and sugar; let stand for 5 minutes. Add the egg, salt and enough flour to form a soft dough.
- Turn onto a floured surface; knead until smooth and elastic, about 3-5 minutes. Do not let rise. Divide into 12 pieces; shape each into a ball. Place 3 in. apart on greased baking sheets.
- Cover and let rest for 10 minutes. Bake at 425° for 8-12 minutes or until golden brown. Remove from pans to wire racks to cool. Yield: 1 dozen.
Notes
- FAVORITE
↑ Back to top
Hamburger Buns

Ingredients
- 3/4 to 1 cup lukewarm water
- 2 tablespoons unsalted butter, cold, cut into pieces
- 1 large egg
- 3 1/2 cups King Arthur Unbleached All-Purpose Flour
- 1/4 cup granulated sugar
- 1 1/4 teaspoons salt
- 1 tablespoon instant yeast
- 3 tablespoons butter, plus more for the baking sheet
Steps
- Mix and knead all of the dough ingredients except for the melted butter by hand, mixer, or bread machine until a soft, smooth dough forms. Cover the dough and let it rise for 1 to 2 hours, or until it’s nearly doubled in bulk.
- Gently deflate the dough and divide it into 12 pieces. Shape each piece into a round ball, then flatten it to a squat round blob about 2 1/2 inches across. (Another easy way to shape buns, besides rolling them into balls and flattening, is to gently deflate the dough and form it into a smooth 8-inch log. Using a serrated knife, slice the log into 12 pieces. Gently tug the edges of each piece underneath the ball of dough to form a squat ball.) Place the buns on a lightly buttered or parchment-lined baking sheet, cover, and let rise for about an hour, until noticeably puffy.
- Preheat the oven to 375°F (190°C).
- Brush the buns with about half of the melted butter and bake until golden, 12 to 18 minutes. As soon as you remove the buns from the oven, brush them with the remaining melted butter, which will lend the buns a satiny, buttery crust. Place the buns on a wire rack to cool completely.
- Get more deliciousness at Hamburger Buns Recipe | Leite's Culinaria
Notes
- The following bun recipe created quite a stir when it was first posted in our original online community. Baker after baker tried these buns and declared them THE BEST. Soft, vaguely sweet, and lightly golden from the butter and egg, these simple buns are perfect for burgers, but also fine for any kind of sandwich.
- Brushing the buns with melted butter will give them a soft, light golden crust. To instead give them a shinier, darker crust, brush them instead with an egg-white wash (1 egg white beaten with 1/4 cup water). For seeded buns, brush the buns with the egg wash prior to sprinkling, as it’ll make the seeds adhere–and feel free to add the extra yolk to the dough, reserving the white for the wash.
- Credit for the original version of this recipe goes to “Moomie” (Ellen), one of the original members of our online community, The Baking Circle. Thanks, Moomie, for the joy you’ve brought to bun lovers everywhere!–The Bakers at King Arthur Flour
- LC Size Matters Note: We all know that one-size-fits-all cliché is a bunch of baloney. Take hamburger buns. Sometimes you need something that’ll accommodate a brontosaurus-sized burger. Sometimes you need something that’ll suit wee sliders. And sometimes you need something that’s perfectly in between. We understand. So do the folks at King Arthur Flour, who suggest that, for slightly larger buns, you divide the dough into 8 pieces instead of 12 and bake the buns for 15 to 18 minutes. And for those wee slider buns—about 3 inches in diameter–divvy the dough into 24 pieces and bake for 12 to 15 minutes.
- Get more deliciousness at Hamburger Buns Recipe | Leite's Culinaria
↑ Back to top
Hamburger Dill Pickle Chips
Tags: Pickles
Ingredients
- About 3 1/2 tablespoons (50 grams) kosher salt
- 11 cups cold water (nonchlorinated)
- 2 pounds pickling cucumber
- 4 stems fresh dill, preferably with seed heads (may substitute 2 tablespoons dill seed)
- 2 teaspoons yellow mustard seed
- 2 cups distilled white vinegar
- 4 cloves garlic, root ends trimmed
Steps
- Combine half the salt and 8 cups of the water in a large glass or ceramic bowl. Stir well to dissolve. Add the whole cucumbers, and place a plate on top of them to keep them submerged. Brine in a cool spot for 8 hours.
- Drain and rinse the cucumbers; dispose of the brine. Remove and dispose of a small slice from both ends of each cucumber. Using a mandoline, or a very sharp knife and a steady hand, slice the cucumbers 1/8-inch thick. Divide the cucumber slices among the four jars. Divide the dill and mustard seed among the jars.
- Bring the remaining salt, the remaining 3 cups of water, the vinegar and the garlic cloves to a boil in a 3-quart nonreactive pot over medium-high heat. Pour the hot brine over the cucumber slices, adding one garlic clove to each jar and leaving ½ inch of head space. You may have brine left over; dispose of it.
- Run a bubbler, chopstick or non-metal knife around the inside of the jar to remove the air bubbles from the brine. Clean each jar rim with a damp paper towel, place the lids and rings on the jars, and finger-tighten the rings. Process in a boiling-water bath for 10 minutes.
- Lift the jars from the boiling water, keeping them upright, and place them on a folded towel. Let them cool for several hours, then remove the rings, test the seals and wash the jars well before labeling. Let the pickles cure in a cool, dark spot for 1 month. Chill thoroughly before serving.
Notes
- NOTE: Water-bath canning safely seals high-acid, low-pH foods in jars. The time for processing in the water bath is calculated based on the size of the jar and the consistency and density of the food. For safety's sake, do not alter the jar size, ingredients, ratios or processing time in any canning recipe. If moved to change any of those factors, simply put the prepared food in the refrigerator and eat within a month.
↑ Back to top
Hamburger Steak with Onions and Gravy
Tags: Beef
Servings: 4
Ingredients
- 1 pound ground beef
- 1 egg
- ¼ cup bread crumbs
- ⅛ teaspoon ground black pepper
- ½ teaspoon seasoned salt
- ½ teaspoon onion powder
- ½ teaspoon garlic powder
- 1 teaspoon Worcestershire sauce
- 1 tablespoon vegetable oil
- 1 cup thinly sliced onion
- 2 tablespoons all-purpose flour
- 1 cup beef broth
- 1 tablespoon cooking sherry
- ½ teaspoon seasoned salt
Steps
- In a large bowl, mix together the ground beef, egg, bread crumbs, pepper, salt, onion powder, garlic powder, and Worcestershire sauce. Form into 8 balls, and flatten into patties.
- Heat the oil in a large skillet over medium heat. Fry the patties and onion in the oil until patties are nicely browned, about 4 minutes per side. Remove the beef patties to a plate, and keep warm.
- Sprinkle flour over the onions and drippings in the skillet. Stir in flour with a fork, scraping bits of beef off of the bottom as you stir. Gradually mix in the beef broth and sherry. Season with seasoned salt. Simmer and stir over medium-low heat for about 5 minutes, until the gravy thickens. Turn heat to low, return patties to the gravy, cover, and simmer for another 15 minutes.
↑ Back to top
Hamburger Steaks with Onion Gravy
Tags: Beef
Steps
- I combined ground beef, bread crumbs, eggs, onion and garlic powder, Worcestershire sauce, and finally, I added a half teaspoon of salt and another half of black pepper.
- I formed 8 balls, and form into steaks
- I fried the patties and kept them warm.
- Using the same skillet, I cooked onions with garlic powder and flour, and I added Worcestershire and broth gradually. I cooked this mixture for 7 minutes.
- I returned patties back into the pan and cooked them for more than 10 minutes.
THE LAST STEP :
↑ Back to top
Harissa
Servings: 1 Cup
Ingredients
- 8 dried guajillo chiles, stemmed
- and seeded (about 2 oz.)
- 8 dried new mexico chiles, stemmed
- and seeded (about 1 1⁄2 oz.)
- 1 ⁄2 tsp. caraway seeds
- 1 ⁄4 tsp. coriander seeds
- 1 ⁄4 tsp. cumin seeds
- 1 tsp. dried mint leaves
- 3 tbsp. extra-virgin olive oil,
- plus more as needed
- 1 1⁄2 tsp. kosher salt
- 5 cloves garlic
- Juice of 1 lemon
Steps
- Put chiles into a medium bowl, cover with boiling water, and let sit until softened, about 20 minutes. Heat caraway, coriander, and cumin in an 8" skillet over medium heat. Toast spices, swirling skillet constantly, until very fragrant, about 4 minutes. Transfer spices to a grinder with the mint and grind to a fine powder. Set aside.
- Drain chiles and transfer to the bowl of a food processor with the ground spices, olive oil, salt, garlic, and lemon juice. Purée, stopping occasionally to scrape down the sides of the bowl, until the paste is very smooth, about 2 minutes. Transfer to a sterilized 1-pint glass jar and fill with oil until ingredients are submerged by 1⁄2". Refrigerate, topping off with more oil after each use. Harissa paste will keep for up to 3 weeks.
Notes
- FAVORITE
↑ Back to top
Hash Brown Waffles

Servings: 2 waffles
Ingredients
- cooking spray
- 1 pound yellow potatoes, shredded
- 2 tablespoons vegetable oil
- 1 clove garlic, minced
- ½ teaspoon salt
- ¼ teaspoon ground black pepper
- ¼ teaspoon smoked paprika
- 2 large eggs, lightly beaten
Steps
- Preheat the waffle iron according to manufacturer's instructions. Grease the waffle iron with cooking spray.
- Place potatoes in a medium bowl. Pour in enough cold water to cover potatoes; soak for 2 to 3 minutes. Drain and rinse to remove starch. Squeeze water from potatoes by hand or roll in a clean kitchen towel and twist the towel to wring out water.
- Toss potatoes with oil, garlic, salt, pepper, and paprika in a large bowl until evenly coated. Stir eggs into potato mixture until well combined.
- Spoon 1/2 of the potato mixture into the preheated waffle iron; close and cook until potatoes are tender and golden brown, 5 to 8 minutes. Repeat with remaining potato mixture.
Notes
- This recipe is sized for a large Belgian waffle maker but can be made with any type of waffle maker. I usually set up the waffle iron on my stove and turn on the vent fan to capture the steam.
- You can use frozen packaged potato shreds and skip Step 2.
- You can add veggies and meats (like diced onions, peppers, and ham) to the waffle batter. Cheese tends to burn before the potatoes are cooked.
↑ Back to top
Hasselback Chicken
Ingredients
- 1 teaspoon olive oil
- 11/2 cups fresh baby spinach
- 1/4 cup ricotta cheese
- 2 – 1-pound chicken breasts
- 1/8 cup white cheddar cheese, grated
- Paprika
- Salt
- Pepper
Steps
- Preheat the oven to 400 degrees Fahrenheit (200 degrees Celsius or Gas Mark 6).
- In a sauté pan over medium heat, add the oil and cook the spinach in it for 3 to 5 minutes, until it is slightly wilted.
- Stir in the ricotta and cook for a further 30 to 60 seconds. Allow to cool.
- Cut slits into the chicken breasts, about 1 centimeter (0.39 inches) apart and 75% of the way through the chicken. You don’t have to be too stressed about the depth of the cuts, so long as you don’t cut all the way through it!
- Stuff all of the spinach and ricotta mixture into the cuts.
- Season the chicken with salt and pepper, to taste. Sprinkle the white cheddar cheese generously on top. Generously sprinkle the paprika, adding color and flavor.
- Bake in the center of the oven for 20 to 25 minutes, until the cheese has melted and the juices are clear.
Notes
- FAVORITE
↑ Back to top
Healthier Restaurant-Style Buffalo Chicken Wings
Adapted from http://allrecipes.com/Recipe/Healthier-Restaurant-Style-Buffalo-Chicken-Wings/Detail.aspx

Ingredients
- 1/2 cup all-purpose flour
- 1/4 teaspoon paprika
- 1/4 teaspoon cayenne pepper
- 1/4 teaspoon salt
- 10 chicken wings
- 2 tablespoons butter
- 1/4 cup hot sauce
- 1 clove garlic, minced
- 1 dash ground black pepper
Steps
- Mix together flour, paprika, cayenne pepper, and salt in a small bowl. Place chicken wings in a large dish and sprinkle flour mixture over them until well coated. Place on baking sheet and refrigerate for 1 hour, uncovered.
- Preheat oven to 400 degrees F (204 degrees C).
- Bake wings in preheated oven until no longer pink at the bone and juices run clear, about 15 minutes per side.
- Combine butter, hot sauce, pepper, and garlic in a small saucepan over low heat. Cook and stir until butter is melted and mixture is well blended, about 3 minutes. Place chicken wings in serving bowl and add hot sauce mixture, mixing well.
Notes
- FAVORITE
↑ Back to top
Healthy Ham and Cheese Casserole with Apples and Sage
Adapted from https://www.wellplated.com/ham-cheese-casserole/
Tags: Casseroles
Ingredients
- 1 pound whole wheat penne
- 12 ounces diced ham — (I used thickly sliced Virginia ham from our deli)
- 3 medium sweet apples, — cored and cut into 1/2-inch dice (I used Gala)
- 1/2 cup loosely packed fresh sage leaves — thinly sliced, dived
- 3 tablespoons unsalted butter
- 1 small yellow onion — chopped
- 3 teaspoons garlic
- 1/4 cup all-purpose flour
- 2 1/2 cups non-fat milk
- 1/4 cup half and half
- 3/4 teaspoon salt
- 1/4 teaspoon ground nutmeg
- 1/2 cup plain non-fat Greek yogurt
- 1 cup freshly grated sharp white cheddar cheese
- 3/4 cup Panko bread crumbs
- 3 tablespoons extra virgin olive oil
FOR THE PASTA:
FOR THE SAUCE:
FOR THE BREAD
CRUMB TOPPING:
Steps
- Bring a large pot of salted water to boil. Add the pasta to the water and cook until al dente, according to package directions. Drain and set aside. Preheat the oven to 350 degrees F, and lightly grease a 9x13 or similar baking dish.
- Melt the butter in a Dutch oven or similar large, deep pot over medium heat. Add the onion and sauté until beginning to soften, about 6 minutes. Sprinkle in the flour and garlic, then cook whisking often, until the flour is golden brown, about 2 minutes. Gradually pour in milk, whisking constantly, then the half and half. Continue to cook until the sauce simmers and thickens, about 7 minutes. Remove from heat, then stir in the salt and nutmeg, then the Greek yogurt, cheddar, and 1/2 the total amount of sage. Add the drained pasta, apples and ham, toss gently to coat, then transfer to the prepared baking dish.
- Combine the bread crumbs and olive oil in a small bowl and sprinkle over the top of the pasta. Cover the dish with foil, then bake for 10 minutes covered, then uncover and bake 10 additional minutes, until the crumbs are golden and the pasta is hot and bubbly. If necessary, turn your broiler to high to finishing browning the crumbs, watching them carefully so that they do not burn. Remove baked pasta from the oven, sprinkle with remaining sage, and serve.
↑ Back to top
Henry Bain Sauce

Ingredients
- 1/3 cup mango or peach chutney, best available
- 4 tablespoons of your favorite steak sauce
- 4 tablespoons Worcestershire sauce
- 4 tablespoons chili sauce
- 2 tablespoon ketchup kosher salt and freshly ground black pepper to taste
- Hot sauce, to taste
- 4 tablespoons chopped watercress, optional
Steps
- In a small pot set over medium heat, stir all the ingredients except the watercress. Heat until slightly thickened, then remove from heat. Allow to cool and refrigerate until ready to use.
- Just before serving, if you like, stir chopped watercress into the sauce.
Notes
- FAVORITE
↑ Back to top
Herbed Greek Chicken Salad
Servings: 4
Ingredients
- 1 teaspoon dried oregano
- 1/2 teaspoon garlic powder
- 3/4 teaspoon black pepper, divided
- 1/2 teaspoon salt, divided
- Cooking spray
- 1 pound skinless, boneless chicken breast, cut into 1-inch cubes
- 5 teaspoons fresh lemon juice, divided
- 1 cup plain fat-free yogurt
- 2 teaspoons tahini (sesame-seed paste)
- 1 teaspoon bottled minced garlic
- 8 cups chopped romaine lettuce
- 1 cup peeled chopped English cucumber
- 1 cup grape tomatoes, halved
- 6 pitted kalamata olives, halved
- 1/4 cup (1 ounce) crumbled feta cheese
Steps
- Combine oregano, garlic powder, 1/2 teaspoon pepper, and 1/4 teaspoon salt in a bowl. Heat a nonstick skillet over medium-high heat. Coat pan with cooking spray. Add chicken and spice mixture; sauté until chicken is done. Drizzle with 1 tablespoon juice; stir. Remove from pan.
- Combine remaining 2 teaspoons juice, remaining 1/4 teaspoon salt, remaining 1/4 teaspoon pepper, yogurt, tahini, and garlic in a small bowl; stir well. Combine lettuce, cucumber, tomatoes, and olives. Place 2 1/2 cups of lettuce mixture on each of 4 plates. Top each serving with 1/2 cup chicken mixture and 1 tablespoon cheese. Drizzle each serving with 3 tablespoons yogurt mixture.
Notes
- FAVORITE
↑ Back to top
Herby-Beet Deviled Eggs

Tags: Appetizers and Dim
Sum Eggs
Pickles Snacks
Servings: 12
Ingredients
- 1 cup water
- 1 cup white wine vinegar
- ⅓ cup organic cane sugar
- 2 medium beets, peeled, halved and cut into 1/4 inch half moons
- 1 teaspoon kosher salt, plus more to taste
- ½ teaspoon whole peppercorns
- ½ teaspoon whole coriander seeds
- ½ teaspoon whole fennel seeds
- 6 large eggs
- 3 tablespoons Vermont Creamery Crème Fraîche
- 2 tablespoons Vermont Creamery classic goat cheese, at room temperature
- 1 teaspoon Dijon mustard
- 2 teaspoons lemon zest
- 1 tablespoon lemon juice
- 3 tablespoons finely chopped chives
- 2 tablespoons finely chopped dill
- 2 teaspoons finely chopped tarragon or chervil (optional)
- 2 teaspoons lemon zest
- 1 tablespoon lemon juice
- Smoked salmon or trout
- Salmon or trout roe
- Thinly sliced radishes
- Everything-but-the-bagel seasoning
- Chives
- Dill
FOR THE BEET
DEVILED EGGS:
SUGGESTED
GARNISHES:
Steps
- Combine the water, vinegar, sugar, beets, salt, black pepper, coriander, and fennel in a medium saucepan, and bring to a boil over high heat. Reduce the heat to medium, cover, and gently boil until the beets are fully cooked through, 20 to 25 minutes. Transfer the pickling liquid and the beets to a clean 32-ounce mason jar and let cool completely.
- Meanwhile, bring a large pot of water to a boil. Add the eggs and boil for 10 minutes. Using a slotted spoon, transfer the hard-boiled eggs to an ice bath, and let cool for at least 15 minutes. Peel and set aside (refrigerate if not using within 30 minutes).
- Place the peeled hard-boiled eggs in the cooled pickling liquid, making sure they are all submerged. If there isn’t enough liquid, you can add a little bit of water to make sure they are totally covered. Place the lid on the jar and refrigerate for at least 12 hours, up to 24 hours (see headnote).
- Remove the eggs from the pickling liquid and place on a paper towel to dry off any excess moisture. Cut the eggs in half, reserve the whites, and transfer the yolks to a medium bowl. Add crème fraîche, goat cheese, mustard, lemon zest, and lemon juice to the egg yolks, and mash with a fork until completely smooth. Mix in the chives, dill, and tarragon, taste, and season with salt, if necessary. Transfer the filling to a zip-top bag.
- Arrange the egg white halves on a platter. Snip off a small corner of the zip-top bag and pipe the filling into the eggs. Garnish with your desired toppings and enjoy!
TO PICKLE THE EGGS:
TO MAKE THE DEVILED
EGGS:
Notes
- These deviled eggs bring the wow factor simply garnished with a sprig of dill, but are also a stunning canvas for a variety of toppings, like smoked salmon, trout roe, thinly sliced radish, and everything-but-the-bagel seasoning. Mix and match toppings for a festive platter or set out the ungarnished deviled eggs alongside bowls of toppings to create a build-your-own experience for your guests
↑ Back to top
Hit Pause On the Takeout and Make Pad Thai at Home with
This Pro-Chef
Adapted from https://www.seriouseats.com/pad-thai-recipe-11680356
Servings: 2
Ingredients
- 4 ounces ( 113 g) dried medium rice noodles
- 4 ounces ( 112 g) pork shoulder, sliced very thinly into roughly 1- by 1 1/2-inch pieces (1/2 cup) (see notes)
- 2 teaspoons ( 10 ml) fish sauce
- Pinch of granulated sugar
- 2 tablespoons ( 40 g) palm sugar
- 2 tablespoons ( 35 g) tamarind concentrate (see notes)
- 2 tablespoons plus 1 teaspoon ( 35 ml) fish sauce
- 2 tablespoons plus 1 teaspoon ( 35 ml) neutral oil such as canola oil
- Marinated pork, from above
- 70 g pressed tofu, cut into 1- by 1/2- by 1/4-inch pieces ( 1/2 cup)
- 2 packed tablespoons (25 g) sweet preserved radish
- 2 tablespoons ( 10 g) small or medium dried shrimp
- 1 small Asian shallot ( 20 g), cut into 1/4-inch dice
- 1 large egg
- Rehydrated rice noodles, from above
- Sauce, from above
- 1 tablespoon plus 2 teaspoons ( 25 g) water, plus more as needed
- 1 1/2 ounces ( 40 g) Chinese flat garlic chives, cut into 1 1/2–inch pieces (1 cup), divided
- 2 cups ( 80 g) mung bean sprouts, divided
- 3 tablespoons ( 25 g) crushed unsalted dry-roasted peanuts, plus more for serving
- Lime wedges, for serving
- Thai chile powder, for serving
- Fish sauce, for serving
For the Rice
Noodles:
For the Pork:
For the Sauce:
For the
Stir-Fry:
Steps
- For the Rice Noodles: In a medium bowl, cover noodles with slightly warm water (about 110°F; 43°C). Allow noodles to hydrate until pliable, about 30 minutes.
- Meanwhile, for the Pork: In a mixing bowl, stir together pork, fish sauce, and sugar until well combined.
- For the Sauce: In a small saucepan, combine palm sugar and tamarind and set over low heat, stirring until sugar is dissolved (if sugar is slow to dissolve, add 1 tablespoon water). Remove from the heat and stir in fish sauce until well combined.
- For the Stir-Fry: Heat a wok or large carbon steel or cast iron skillet over high heat until lightly smoking. Add oil and swirl to coat the surface. Immediately add pork and, using a wok spatula or large spoon, stir until about halfway cooked, about 20 seconds.
- Add tofu, sweet preserved radish, dried shrimp, and shallot and continue to stir rapidly until aromatic and heated through, about 40 seconds. Push everything to one side of wok.
- Crack egg into now-empty side of the wok, and using wok spatula or large spoon, break yolk and briefly stir to distribute yolk, then cook without stirring until egg is mostly set (you want to avoid scrambling the egg as it sets). Once set, fold the aromatic mixture over the egg, flipping and scraping with the spoon or wok spatula to ensure nothing sticks. Stir until everything is well combined and egg is broken up into smaller pieces.
- Add rehydrated noodles, then pour sauce around edges of wok followed by 1 tablespoon plus 2 teaspoons water. Continue stirring until sauce is absorbed, about 2 minutes.
- Add a 1/4 cup Chinese flat garlic chives and 1/4 cup mung bean sprouts and continue stirring until wilted, about 30 seconds.
- Turn off heat and add remaining Chinese flat garlic chives and mung bean sprouts, along with peanuts and stir to combine. Serve immediately with additional crushed peanuts, sugar, lime wedges, Thai chile powder, and fish sauce on the side.
- Special Equipment
- Large carbon steel wok or large carbon steel or cast iron skillet, wok spatula or large spoon
Notes
- You can buy boneless pork shoulder and slice it very thinly yourself; par-freezing helps for thinner slices. You want roughly 1/8 inch–thick slices that are about 1x1.5 inches in size. You can also buy pre-sliced pork as it is sold in Asian markets for hot pot instead.
- Look for tamarind concentrate from a Thai brand; Indian and other South Asian brands of tamarind concentrate or tamarind paste are not a good substitute here. Alternatively, you can buy a block of tamarind pulp and prepare it as follows: Remove any seeds, then soak the pulp in an equal volume of boiling water; let stand until softened, then squeeze by hand until tamarind and water are fully blended.
↑ Back to top
Home-Style Inner Beauty Hot Sauce

Ingredients
- 15 habanero chiles -- roughly chopped
- 1 ripe mango -- peel, pit, mash
- 1 cup cheap yellow prepared mustard
- 1/4 cup packed brown sugar
- 1/4 cup white vinegar
- 1 tablespoon curry powder
- 1 tablespoon ground cumin
- 1 tablespoon chili powder
- salt and pepper -- to taste
Steps
- Mix all the ingredients together and stand back. This will keep, covered and refrigerated, until the year 2018. Be careful though: If it spills, it will eat a hole in your refrigerator. If you ever want to dispose of it, call the local toxic waste specialists.
Notes
- WARNING: Hottest sauce in North America. Use this to enhance dull and boring food. Keep away from pets, open flames, unsupervised children, and bad advice. This is not a toy. This is serious. Stand up straight, sit right, and stop mumbling.
- Be careful no to rub your nose, eyes, or mouth while working with habaneros. you may actually want to wear rubber gloves while chopping and mixing -- these babies are powerful.
- This style of hot sauce, widely used in the West Indies, is basically habanero peppers (also known as Scotch Bonnets), fruit, and yellow mustard, with a few other ingredients thrown in. Use this recipe as a guideline. Habaneros are at the top of the chile pepper heat scale, so feel free to substitute other peppers of your choice.
- Funnel the sauce into an old pint liquor bottle, then let your imagination run free as to what whopper you can lay on your guests regarding its origins. If you're having trouble, here's a start: "One day in Jamaica I was in this dingy bar and met this old guy who..." and you take it from there.
↑ Back to top
Homemade Bagels

Tags: Bagels
Baking Breads
Servings: makes 8 three-inch
bagels
Ingredients
- 6 ounces cold water (3/4 cup; 170g)
- 3 1/2 ounces bread flour (about 3/4 cup, spooned; 100g)
- 12 1/2 ounces bread flour (about 2 3/4 cups, spooned; 355g)
- 1/2 ounce sugar (1 tablespoon; 15g)
- 2 1/2 teaspoons (9g) Diamond Crystal kosher salt; for table salt, use half as much by volume or use the same weight
- 1 teaspoon instant dry yeast (4g)(see note)
- 3 1/2 ounces water (1/2 cup minus 1 tablespoon; 100g)
- 1 ounce barley malt syrup (4 teaspoons; 30g), optional
For the
Yukone:
For the Dough:
To Boil:
Steps
- For the Yukone: In a 10-inch skillet, whisk water and flour over medium heat until the paste is a thick lump, about 2 minutes. Scrape onto a plate, spread into a 1-inch layer, cover and cool until to about 75°F (23°C), around 30 minutes.
- For the Dough: Pulse flour, sugar, salt, and instant yeast in a food processor fitted with a metal blade. Once combined, add cooled yukone and water (if using active dry yeast, first dissolve with the water). Process until dough is silky smooth, about 90 seconds. Turn dough onto a clean, un-floured surface, and divide into 8 roughly equal portions (3 ounces or 85g each).
- To Shape: Cup a portion of dough beneath your palm and work in quick, circular motions to form a tight skin around the ball, with only a tiny seam along the bottom. If the seam is large or irregular, continue rounding until the bottom is nearly smooth. Cover with plastic and let rest 15 minutes. Poke a hole into the center of each portion with a damp fingertip, then gently stretch into a 3 1/4-inch ring, wetting your hands in cold water as needed to prevent sticking. Arrange on a well greased, parchment-lined half sheet pan, cover with plastic, and refrigerate 24 to 36 hours, depending on your schedule.
- To Boil: Adjust oven rack to lower-middle position and preheat to 425°F (218°C). Fill a stainless steel pot with about 3 inches of water, stir in malt (if using), and bring to a boil over high heat. Meanwhile, line a baking sheet or cutting board with a thick layer of paper towels. Working two or three at a time, boil the bagels about 30 seconds per side. Place on paper towels, then immediately transfer to a parchment-lined half sheet pan (if left on the paper towels too long, the bagels will stick; if this happens, quickly dip the bagel back into the hot water, and the wet paper towel will peel right off).
- To Finish: Bake until blistered and golden brown all over, about 25 minutes. Cool at least 15 minutes. To serve, split horizontally with a serrated knife. Uncut, bagels can be stored up to 48 hours in a paper bag (or loosely wrapped in parchment), then sliced and briefly toasted to serve.
↑ Back to top
Homemade Bratwurst, the Best of the Wurst

Tags: Charcuterie
Pork Sausage Smoking
Ingredients
- 2 1/2 pounds pork shoulder or butt
- 1/2 pound beef or pork fat or a blend
- 1 tablespoon of Morton’s coarse kosher salt (read more about the science of salt here)
- 1 teaspoon of sugar
- 2 teaspoons of black pepper
- 4 teaspoons of garlic powder
- 2 teaspoons of dry mustard
- 4 teaspoons of ground ginger
- 1/2 teaspoon of savory
- 1/2 teaspoon of mace
- 1/2 cup of ice cold milk
- Optional. About 4 1/2' of pork casings.
- The secret ingredients. Mace and savory, and don't skip them. Note that we speak often of savory flavors, but that is different from the herb named savory.
Steps
- Prep. Before making sausage, please familiarize yourself with best practices as described in our article on The Science Of Sausage Making.
- Slice the meat and fat into cubes removing gristle and sinew. Place it on a plate or pan in the freezer, along with the grinder parts that will contact the meat. Leave it there for about 20 minutes until it is firm but do not let it freeze. This makes grinding easier.
- Grind it with a 1/4" die. Mix in the other ingredients. To get the right classic brat texture, transfer the mix to a food processor and pulse till smoothly emulsified.
- Pinch off a small piece of the sausage and cook it in a frying pan let it cool and taste to see if the seasoning is to your taste. Brats are almost always served as links, but if you wish, nobody will arrest you if you form it into patties, meatballs, or skinless tubes. At least not outside of Wisconsin.
- Cook. You can then grill or smoke it, or store it in the fridge for about 5 days or in the freezer for about a month.
↑ Back to top
Homemade Chili Garlic Sauce Recipe (Tuong Ot Toi)
Ingredients
- 6 ounces hot chiles (e.g., cayenne, Fresnos, habanero, jalapeno, long, serrano, Thai, or a combination of them), stemmed and chopped
- 4 cloves garlic, chopped
- ½ teaspoon salt
- 1 ½ tablespoons sugar
- 1 ½ tablespoons distilled white vinegar
Steps
- Put all the ingredients in an electric mini-chopper or food processor. Process to a coarse texture. Take a whiff and it should make you sweat a bit. Taste and adjust the flavor with add extra salt or sugar. Transfer to a small saucepan, bring to a vigorous simmer over medium heat, lower the heat to gently simmer for about 5 minutes, or until it no longer smells raw. Remove from the heat and set aside to cool. Transfer to a jar and store in the refrigerator. Makes a scant ⅔ cup.
↑ Back to top
Homemade Claussen Pickles
Tags: Pickles
Servings: 80 pickles
Ingredients
- 35 to 40 small to medium pickling cucumbers
- 1 gallon cold water
- 1 cup cider vinegar, preferably raw
- 2/3 c. coarse canning or kosher salt Do NOT fine or use iodized salt!
- 4 cloves garlic or more to taste
- 4 fresh dill heads ~or~ 4 tablespoons dried dill seed not weed!
- 2 tablespoons mixed pickling spices
Steps
- Wash cucumbers but do not scrub them.
- Trim 1/8-inch from the blossom end of each cucumber and slice in half lengthwise or into quarters, depending on how large your cucumbers are and how big you want them to be when they’re done.
- In a gallon jar (or large, wide-mouth, food-safe container) layer the dill heads or seed, garlic cloves, pickling spices and sliced cucumbers.
- In a separate pitcher or bowl, stir together the remaining ingredients until the salt is dissolved.
- Pour the brine over the cucumbers, taking care to make sure all of them are fully submerged. If needed, place a plate or mug or other non-reactive heavy item on the cucumbers to weigh them down and keep them under the brine!
- Cover lightly with a lid just perched on top or secure a piece of cheesecloth over the jar with a rubber band to keep fruit flies away.
- Leave out of direct sunlight on the counter for two to four days, or until the cucumbers taste like pickles throughout.*
- Fix your lid onto your jar or container and chill. These can be stored in the refrigerator for up to six months provided you keep them covered with brine.
Notes
- If at any point in the proceedings “fuzz” or “foam” develops on top of the brine, use a spoon to remove it. If there is “fuzz” attached to any of the cucumbers, remove the ones affected and be sure the others are still fully submerged.
- If at any point in the proceedings “fuzz” or “foam” develops on top of the brine, use a spoon to remove it. If there is “fuzz” attached to any of the cucumbers, remove the ones affected and be sure the others are still fully submerged.
- Please remember to check your pickles every day to test for doneness!
↑ Back to top
Homemade Cultured Butter
Servings: YIELD About 3/4 pound
Ingredients
- 4 cups good quality heavy cream
- 1/2 cup plain whole milk yogurt
- 1/4 teaspoon fine sea salt, or to taste
Steps
- Combine cream and yogurt in a large jar or bowl. Seal jar well and shake aggressively until combined, or whisk well if using a bowl. Cover jar or bowl with a clean kitchen towel and let mixture sit in a warm area of your kitchen for 18 to 36 hours; it should thicken and taste rich and tangy.
- Seal the jar or cover bowl tightly with plastic wrap and refrigerate until it reaches 60 degrees, 1 to 2 hours. If you refrigerate it longer, allow mixture to warm slightly at room temperature before proceeding.
- Line a fine-mesh sieve with a double layer of cheesecloth and place it over a large bowl. Make sure there is plenty of extra overhang of cheesecloth.
- In the bowl of a food processor, add the thickened butter mixture and process on high until the yellow curds begin to separate from the buttermilk, 2 to 3 minutes. It will have the appearance of liquidy cottage cheese.
- Slowly pour the buttermilk through the mesh sieve and then dump the butter curds in. Let sit for 1 to 2 minutes, allowing buttermilk to drip through. Gather the ends of the cheesecloth up and around the butter, pushing the curds down and into a ball. Twist the cheesecloth and squeeze the ball to extract as much buttermilk as possible. You will be left with a butterball.
- Pour the buttermilk into a separate container and reserve for another use. Place the butterball in the empty bowl. Be sure to squeeze out all excess butter from the cheesecloth. Pour 1/3 cup of ice water over the butter and, using a spatula, “wash” the butter, folding it over itself and pressing down to extract the extra buttermilk. Drain off the milky liquid and discard it; repeat this process until the liquid is clear, 4 to 6 times. The butter will start to harden; at that point your hands may work better than the spatula.
- Place the butter on a clean kitchen towel and pat lightly to remove excess moisture. Knead a few times with your hands and pat dry again; this will help extend its storage life. Sprinkle the finished butter with salt and knead a few more times to combine.
- Lay out a sheet of parchment paper, or two if you would like to divide the batch in half, and place the butter on the paper. Form the butter into a log and then roll it up in the paper and twist the ends to seal. Make sure the log has a uniform thickness throughout. Refrigerate until ready to use. The butter will last about a month in the refrigerator.
Notes
- FAVORITE
↑ Back to top
Homemade Cultured Butter

Ingredients
- 1 quart heavy cream
- 1/2 cup buttermilk or plain yogurt (not Greek)
- Flaky sea salt (for serving; optional)
- A stand mixer; cheesecloth
Special
Equipment:
Steps
- Whisk cream and buttermilk in a large bowl. Cover loosely with plastic and let sit at room temperature until thickened and tastes tangy, at least 12 hours and up to 36 hours (how long this takes will depend on the temperature of your kitchen). Chill until crème fraîche is cool, about 2 hours.
- Transfer crème fraîche to the bowl of a stand mixer fitted with the whisk attachment. Cover space between top of bowl and head of mixer with plastic wrap (this is a must, unless you want cream all over your kitchen). Beat on high speed until butterfat has separated and starts to clump around bottom of whisk, about 5 minutes.
- Line a fine-mesh sieve with cheesecloth. Strain butter mixture through sieve into a small bowl. Pull cheesecloth tightly over butter and form into a ball. Squeeze to drain any excess buttermilk; reserve buttermilk for another use.
- Transfer butter to a clean bowl and knead, adding a few tablespoons of ice water at a time. Drain water off butter as it becomes cloudy; repeat 3–4 times (the water you drain off should become clearer each time). Continue to knead until no liquid remains. Transfer butter to an airtight container or roll into parchment-wrapped logs. Wrap in plastic and chill until ready to use. Serve with sea salt, if desired.
- Butter can be made 2 weeks ahead; keep chilled, or freeze up to 3 months.
Do Ahead:
↑ Back to top
Homemade Farmers Cheese On Grilled Bread
Adapted from https://www.ming.com/food-and-wine/recipes/simply-ming-season-12/homemade-farmer-cheese-on-grilled-bread.htm

Ingredients
- 9 cups whole milk
- 3 cups heavy cream
- Finishing salt and freshly ground black pepper
- Serves 2
- 2 thick slices of farm loaf bread (1")
- 1 tablespoon paprika paste
- 1/2 red onion, thinly sliced
- 1 cup farmers cheese
- 1 oz butter, softened
- Freshly cracked pepper
- Course sea salt
Farmers Cheese
Grilled Cheese
Sandwich
Steps
- In a 3 qt nonreactive ovenproof dish, combine the milk and cream, cover, and let stand at between 67°F and 72°F until the whey should start to become visible on the sides of the curd mass in 48 to 72 hours. Try not to move the cheese too much during this time as movement can break the curd, and we've noticed it doesn't curdle well if jostled too much.
- Preheat the oven to 300°F. Place the covered dish in the oven. After 45 minutes, check to see if curds have begun to coagulate. Use caution when removing the lid, as the butterfat on the surface of the cheese can be hot. If the liquid seems loose without defined curds place it back in the oven checking every 15 minutes. When the cheese has fully separated into curds, and the whey starts to become clear, remove from the oven and cool for at least 30 minutes prior to straining.
- Line a colander with cheesecloth and place over a container large enough to hold the whey. Transfer the curds to the prepared colander and let drain at room temperature. Strain for 15-30 minutes and serve immediately. At this point most of the whey will have drained off but enough will remain that the butterfat is still floating with the curds.
- After the curds have drained for 30 minutes transfer the warm cheese to a warm serving bowl, making sure to scoop up the butterfat with the cheese and season with salt and pepper. Leftover cheese can be stored in an airtight container in the refrigerator for up to 7 days.
- Preheat griddle.
- Spread butter over both sides of bread. Place slices on griddle and toast until golden, brown and delicious on both sides, roughly 2-3 minutes.
- Remove slices from griddle. Spread chile paste in thin layer on each piece. Layer next the sliced onions. Top with cheese. Season the top of the sandwich with salt and pepper. Slice pieces in half and serve immediately.
Farmers Cheese
Grilled Cheese Sandwich
Notes
- FAVORITE
↑ Back to top
Homemade Feta Cheese
Tags: Cheese
Homemade
Ingredients
- 1 gallon whole cow or goat milk, not ultra-pasturized
- 1/8 teaspoon mesophilic starter culture
- 1 1/4 teaspoons calcium chloride, divided
- 1/2 tablet rennet (plus 1/4 cup water; or 1/2 teaspoon liquid rennet)
- 2 quarts cool water
- 1 to 1 1/4 pounds kosher salt, or other non-iodized salt
- 2 1/2 teaspoons vinegar (white or cider vinegar)
Steps
- Gather the ingredients and equipment needed.
- Pour the milk into a large pot. Place the pot in a sink, filling the sink with hot water 3/4 up the sides of the pot. Alternatively, you can put the pot full of milk into an even larger pot of hot water. What you're after is a double-boiler effect of very gradually heating the milk—you don't want to put the pot of milk over direct heat.
- Heat the milk slowly to 86 F.
- Gently stir in the mesophilic starter culture. Keep the mixture at 86 F for 1 hour. It's typically best to take the pot out of the surrounding hot water during this hour. It maintains the heat fairly well but tends to overheat if left in the hot water.
- Stir in 1/4 teaspoon of calcium chloride.
- If using the rennet tablet, crush it and then dissolve it in 1/4 cup of cool water. Add to the milk. If using liquid rennet, add it directly to the milk. Gently stir for 1 minute.
- Leave the mixture alone for 30 minutes, maintaining the 86 F temperature as closely as possible. This may mean putting it back into the sink of hot water for a couple of minutes if it starts to cool off too much.
- The milk mixture will set up and look something like yogurt. Poke a clean finger about an inch deep into the curd (the semi-solid milk mixture) and gently pull your finger toward you. The curd is set when it forms a "clean break," separating around your finger. It will feel like firm yogurt.
- With a long-bladed knife, cut the curd from one side to the other, making slices about 1-inch apart that go all the way through the curd.
- Turn the pot a quarter turn around and cut 1-inch slices; the second round of slices should cross the first like a tic-tac-toe pattern.
- Cut the curd one last time, coming in with the knife diagonally across the squares made by your previous slices, and at a 45-degree angle to the surface of the curd. This doesn't have to be exact. You want to end up with approximately 1-inch chunks of curd.
- Stir the chunks of curd very gently. Put the pot back into the sink or larger pot of hot water and gradually raise the temperature to 95 F. You want it to take about an hour. The curds will start to separate from the whey, which is the yellowish liquid. Note that the temperature should not exceed 106 F.
- Line a colander with butter muslin or several layers of cheesecloth. Pour the curds and whey into the colander.
- Bring the 4 corners of the muslin up and tie it into a tight knot. Let drain for 4 hours at room temperature.
- The curds will congeal together while they drain. Cut the mass that has formed into rough blocks about 3 inches wide and let drain in the muslin for another 30 minutes.
- Make a saturated brine by dissolving 1 to 1 1/4 pounds of kosher or another non-iodized salt in 2 quarts of water: Add the salt a little at a time, and stop adding salt when it won't dissolve any further. Add 1 teaspoon of calcium chloride and 2 1/2 teaspoons of vinegar.
- Remove the blocks of feta from the muslin and submerge them in the saturated brine for 10 to 12 hours. Note: Do not leave them in longer than this. This will result in cheese that is too salty.
- Drain the feta. Leave it out uncovered at room temperature for one to two days.
- Transfer the feta to covered containers. Store in the refrigerator or a cool cellar or garage. Eat within one to two weeks and enjoy.
If the curd hasn't reached
the clean break stage yet, wait another 30 minutes.
Notes
- You can get mesophilic starter culture, rennet, and calcium chloride from home cheese-making suppliers online.
- The starter culture is typically sold in packets that are measured by activity level rather than weight. When using bulk culture, check the manufacturer's instructions for making a small batch of cheese for this feta recipe. The amount needed depends on the type of milk you're using: In general, for this 1-gallon recipe, you may need 1/8 teaspoon of culture with pasteurized milk and 1/16 teaspoon with raw milk.
- Note that a large amount of salt is for making a brine to cure the feta in and is not added directly to the cheese.
- For long-term storage, make a lighter brine of 2 tablespoons non-iodized salt in 2 cups of water with 1/4 teaspoon vinegar and 1/4 teaspoon calcium chloride mixed in. Feta cheese will keep in this brine for several months.
- Feta stored in brine may soften and start to fall apart. If you are planning to store the cheese in brine for a long time, leave it out to dry for the full two days after its saturated brine bath.
- Can I reuse the brine to make more feta?
- The cheese brine can be stored in the refrigerator and used to make more feta; just discard it when it becomes too cloudy. You do need to add another tablespoon of salt before brining to make up for the salt that was absorbed.
- You can also use the brine as a marinade for chicken, vegetables, and tofu, add it to grains and legumes, and mix it into salad dressings.
↑ Back to top
Homemade Fig Newtons
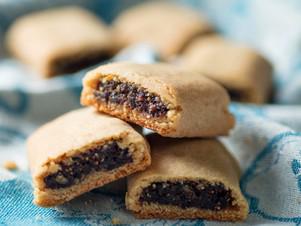
Ingredients
- 10 1/2 ounces all purpose flour, such as Gold Medal, plus more for dusting (2 1/4 cups, spooned; 295g)
- 5 ounces unsalted butter, soft but cool, about 65°F (1 1/4 sticks; 140g)
- 4 ounces light brown sugar, gently packed (1/2 cup; 110g)
- 1/2 plus 1/8 teaspoon (3.6g) baking soda
- 1/4 teaspoon (1g) Diamond Crystal kosher salt; for table salt, use about half as much by volume or the same weight
- 1/4 teaspoon ground cinnamon
- 1 ounce honey (about 2 tablespoons, ungreased; 30g)
- 1 teaspoon orange zest
- 1/2 ounce freshly squeezed orange juice (about 1 tablespoon; 15g)
- 3 large egg yolks, straight from the fridge (approximately 1 1/2 ounces; 40g)
- 12 ounces plump, sticky dried Mission figs, stems trimmed (about 2 1/2 cups; 340g)
- 3 1/2 ounces sweetened or unsweetened applesauce (about 1/3 cup; 100g)
- 1 ounce freshly squeezed orange juice (about 2 tablespoons; 30g)
Cakey Cookie
Dough:
No-Cook Fig
Preserves:
Steps
- Prepare the Dough: Combine butter, brown sugar, baking soda, salt, cinnamon, honey, and orange zest in the bowl of a stand mixer fitted with a paddle attachment. Mix on low speed to moisten, then increase to medium and cream until light and fluffy, about 5 minutes. Add orange juice, then add the egg yolks one at a time and continue beating until smooth. Reduce the speed to low and sprinkle in the flour, mixing until well combined.
- Prepare the Preserves: Cut the figs in half. Pulse with applesauce and orange juice in a food processor until roughly chopped, then process to a thick, smooth paste. Scrape the bowl and blade with a flexible spatula, then process a minute more to ensure absolutely no chunks remain. Transfer to a sturdy piping bag fitted with a 1⁄2-inch plain tip and set aside until needed, up to 24 hours. (The preserves can be refrigerated in an airtight container for up to 3 weeks; bring to room temperature before using.)
- To Assemble the Cookies: Adjust oven rack to middle position and preheat to 350°F (175°C). Knead the cool dough on a bare work surface until pliable and smooth, then dust with flour and roll into an 8-inch square. Sprinkle both sides with flour and roll into a 15-inch square. Slide an offset spatula under the dough to loosen it, brush off excess flour, and cut into four 3 1/4-inch strips.
Knead the dough against the sides of the bowl to form a smooth ball.
Flatten into a disc and wrap in plastic. Refrigerate until cool and
firm but not hard, about 1 hour. (The dough can be refrigerated for up
to 1 week; soften for 30 minutes at room temperature.)
Holding the bag at a 90-degree angle just above the surface of the
dough (this will force the preserves to flatten as they leave the
bag),
pipe a 1-inch-wide strip down the center of each portion. Fold a long
flap of dough over each strip, brush away excess flour, and roll each
bar over, seam side down. Gently flatten each bar with your
fingertips,
then transfer to a parchment-lined half sheet pan (all four bars will
fit on a single sheet).
Bake until the bars are puffed and firm, without any significant
browning, about 18 minutes. Immediately cut into 1-inch pieces with a
bench scraper, then transfer to an airtight container, with a paper
towel between each layer and on top. This will steam the cookies and
retain moisture for them to reabsorb, creating a uniquely soft and
cakey texture. Cover and “mature” for at least 6 hours before serving;
prior to that, the cookies will taste dry. Store for up to 1 week at
room temperature or up to a month in the fridge.
Notes
- This recipe works best with an all-purpose flour made from a blend of hard red and soft white wheat, such as bleached Gold Medal.
↑ Back to top
Homemade Flour Tortillas Recipe from Good Eats
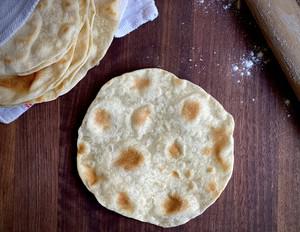
Servings: 8 TORTILLAS
Ingredients
- 9 ounces all-purpose flour, plus extra for kneading and rolling
- 1 teaspoon kosher salt
- 1/3 cup lard
- 1/2 cup cool water
- Food processor
- Electric nonstick griddle
Software
Specialized
Hardware
Steps
- Combine the flour and salt in the bowl of a food processor and pulse 2 to 3 times.
- Add the lard to the flour mixture in 4 to 5 chunks and pulse until the mixture resembles coarse crumbs, 10 to 15 pulses. With the processor running, add the water in a steady stream just until a ball of dough begins to form, about 30 seconds.
- Sprinkle about 1/4 cup of flour on a clean surface. Remove the dough from the bowl of the processor and knead until well incorporated and less sticky, 2 to 3 minutes. Wrap the dough ball in plastic wrap and let it rest at room temperature for 1 hour.
- Evenly divide the dough into 8 pieces and, using your hands, form them into balls. Keep the dough balls covered with a tea towel. Roll each ball into a 7-inch round with a rolling pin on a lightly floured surface.
- Heat an electric nonstick griddle to 375ºF.
- Put the tortillas, 2 to 3 at a time, on the griddle and cook until light golden, about 4 minutes per side. Can be held for up to 2 hours at room temperature wrapped in a barely damp tea towel. Repeat with the remaining tortillas. To reheat, microwave for 1 minute in the damp tea towel.
↑ Back to top
Homemade Fresh Poultry Seasoning
Ingredients
- 3 tbsp. finely chopped thyme
- 3 tbsp. finely chopped rosemary
- 3 tbsp. finely chopped sage
- 1 tbsp. finely chopped marjoram
- 1/2 tbsp. freshly ground black pepper
- 1 tsp. celery seed
- 1 tsp. freshly grated nutmeg
- 1 tsp. ground ginger
- 1 tsp. smoked paprika
Steps
- Stir together all ingredients in a bowl. Seasoning will keep, refrigerated, for about 3 days.
Notes
- FAVORITE
↑ Back to top
Homemade Haggis
Adapted from https://www.bigoven.com/recipe/homemade-haggis/97499
Tags: Puddings
Sausage Scotland
Servings: 6
Ingredients
- 1 lg Egg
- 1/2 lb Lamb liver, cut into pieces
- 3/4 ts Black Pepper ; ground
- 1/8 ts Ground cloves
- 1 lb Boneless lamb shoulder or
- 1/8 ts Ground nutmeg
- 1 sm Onion, coarsely chopped
- 1/4 ts Ground ginger
- 1/2 c Water
- 1/2 ts Sugar
- 1 c Old fashioned rolled oats
- Pieces, or use ground lamb
- 3/4 ts Salt
Steps
- Servings: 6 Notes: This skinless haggis is planned for American tastes, yet contains many of the ingredients found in the real thing. You can unmold the loaf and serve it in place of the purchased haggis recipes. DIRECTIONS: Heat oven to 350-F. Greas an 8 1/2 by 4 1/2 inch loaf pan. In food processor with chopping blade, process together half of the lamb, the liver, water, onion, egg, salt, pepper, sugar, ginger, cloves, and nutmeg until well combined. Add the remaining half of the lamb and the oats; process until well combined. Spoon lamb mixture into the greased pan; pat surface to level. Bake 45 to 55 minutes or until center feels firm when gently pressed. Cool 5 minutes in pan; unmold onto platter; slice and serve. Source: Country Living, March, 1991
↑ Back to top
Homemade Italian Beef Sandwich

Tags: Beef
Chicago Sandwiches
Servings: 8
Ingredients
- 3 pounds (1.4kg) beef necks, or other inexpensive, meaty beef bones like beef shin
- 2 pounds (900g) oxtails
- 1 tablespoon (15ml) vegetable, canola, or other neutral oil
- 1 medium yellow onion (8 ounces; 225g), diced (about 1 cup)
- 1 large carrot (6 ounces; 170g), chopped (about 3/4 cup)
- 4 medium cloves garlic, peeled and left whole
- 2 bay leaves
- 10 whole black peppercorns
- 4 cloves
- Kosher salt and freshly ground black pepper
- 2 green bell peppers
- 8 Italian rolls
- 2 pounds (900g) very thinly sliced roast beef (see notes)
Steps
- Adjust oven rack to lower-middle position and preheat to 450°F (230°C). Meanwhile, trim as much of the meat off the beef neck bones and oxtails as you easily can. Slice large pieces of meat into thin, 1/4-inch-wide strips. Add meat and bones to a rimmed baking sheet and roast, stirring every 10 minutes, until well browned, about 45 minutes total.
- Meanwhile, in a large Dutch oven, heat oil over medium-high heat until shimmering. Add onion, carrot, and garlic, and cook, stirring often, until onion starts to brown, about 7 minutes. Set aside.
- Transfer browned beef and bones to Dutch oven. Set baking sheet over medium heat, add 1 cup water, and bring to a simmer while scraping up any browned bits, then pour liquid into Dutch oven.
- Add enough additional water to almost cover the beef and bones (about 8 cups; 2L). Add bay leaves, peppercorns, and cloves. Bring to a simmer over medium-high heat, then reduce heat to maintain a very slow simmer. Cook, skimming off any foam that rises to the surface, until liquid reduces to 4 cups, 4 to 5 hours.
- Meanwhile, place green peppers in a cast-iron or oven-safe stainless-steel skillet. Transfer to the 450°F oven and cook, flipping every 10 minutes, until lightly blackened all over, about 40 minutes total. Carefully remove from the oven and set aside. When cool enough to handle, remove skin, stems, and seeds. Slice into 1/4-inch thick strips. Set aside.
- Strain beef broth into a medium-sized saucepan, discarding the meat (or saving for another use), bones, and vegetables. Using an instant-read or probe thermometer, heat over medium-low heat until it reaches 140°F (60°C), then adjust heat as needed to maintain temperature. Season broth with salt and black pepper.
- Wrap the rolls in aluminum foil and place in the 450°F oven. Cook until hot, 8 to 10 minutes. Remove rolls from oven, but keep them wrapped.
- Divide roast beef into 1/4-pound (113g) portions. Add one portion of roast beef to the broth one slice at a time, then slowly stir with a fork until all slices are warmed through, about 30 seconds. Unwrap one roll, and carefully slice horizontally most of the way through, making sure top and bottom are still attached. Use a fork to remove meat from the broth and stuff it in the roll. Top with some giardiniera and roasted peppers. Repeat with remaining beef and bread.
- If you want the sandwich dipped, use a pair of tongs to dip the finished sandwich back in the broth. Eat at once, with a lot of napkins close by.
Notes
- For best results, use high quality freshly-sliced roast beef from the deli counter, and ask for it to be sliced as thinly as possible.
↑ Back to top
Homemade Old Bay Seasoning
Ingredients
- 1 tablespoon celery salt
- 1/4 teaspoon paprika
- 1/8 teaspoon black pepper
- 1/8 teaspoon cayenne pepper
- 1 pinch ground dry mustard
- 1 pinch ground mace (may substitute a teensy pinch nutmeg)
- 1 pinch ground cinnamon
- 1 pinch ground cardamom
- 1 pinch ground allspice
- 1 pinch ground cloves
- 1 pinch ground ginger
Steps
- Combine all of the ingredients in a small bowl. Transfer to a container of some sort that has a tight-fitting lid, preferably a glass jar. Set aside in a cool, dark place and use within a couple of months for optimal flavor.
Notes
- FAVORITE
↑ Back to top
Homemade Old Bay Seasoning
Ingredients
- Email Grocery List
- 1 tablespoon celery salt
- 1/4 teaspoon paprika
- 1/8 teaspoon black pepper
- 1/8 teaspoon cayenne pepper
- 1 pinch ground dry mustard
- 1 pinch ground mace (may substitute a teensy pinch nutmeg)
- 1 pinch ground cinnamon
- 1 pinch ground cardamom
- 1 pinch ground allspice
- 1 pinch ground cloves
- 1 pinch ground ginger
Steps
- Stir together all the ingredients in a small bowl. Transfer to a container of some sort that has a tight-fitting lid—a glass jar with a screw-top lid works spectacularly. Set aside in a cool, dark place and use within a couple months.
↑ Back to top
Homemade Pita Bread

Tags: Flatbreads
Middle-East
Servings: 6 pitas
Ingredients
- 1 cup water (8 ounces; 240ml), 105–110°F (41–43°C)
- 1 tablespoon (15ml) extra-virgin olive oil, plus more for oiling the bowl
- 1 tablespoon granulated sugar
- 2 1/4 teaspoons instant yeast
- 1 teaspoon kosher salt
- 1/2 cup whole wheat flour (2 1/2 ounces; 70g)
- 2 cups all-purpose flour (10 ounces; 280g), plus more for dusting
- 350g total flour.
Steps
- In a medium mixing bowl, combine water, oil, sugar, yeast, salt, and whole wheat flour with a wooden spoon until combined and smooth. Stir in all-purpose flour until the mixture comes together into a shaggy mass.
- Using clean hands, knead the dough in the bowl for 10 minutes or until it becomes smooth and very elastic, adding only very small amounts of extra flour if dough is extremely sticky (see note). Alternatively, knead dough at low speed in a stand mixer fitted with the dough hook attachment until dough is very elastic and smooth, about 8 minutes.
- Turn dough out onto a lightly floured work surface and form into a smooth ball. Lightly oil a clean mixing bowl and place dough inside, then rub oiled hands over the top of the dough. Cover bowl with a damp cloth and let rise in a warm place for 1 hour.
- Meanwhile, place a baking steel or 12-inch cast iron skillet on the top oven rack and preheat oven to 500°F (260°C). Line a plate with a large, clean kitchen towel and set aside.
- Punch down the dough, transfer to a lightly floured work surface, and cut into 6 even pieces. Form each dough piece into an even ball. Cover with a damp towel and let rest for 10 minutes.
- Roll each piece of dough into about a 7-inch circle, no more than 1/4 inch thick, taking care not to tear dough and keeping the thickness even all around. Place dough disks on a lightly floured surface, cover with a damp towel, and let proof until slightly puffy, about 30 minutes.
- Working with as many pitas as will fit on the steel at once, pick up each pita and place on the steel top side down. (If using a cast iron skillet, bake one pita at a time.) Immediately close the oven door and bake until pitas have puffed and are slightly golden around the edges, about 3 minutes. Be careful not to over-bake.
- Place baked pitas onto towel-lined plate and wrap with the overhanging towel. Repeat with any remaining pitas.
- For an extra-charred finish, heat a cast iron skillet on the stovetop over high heat until smoking. Working with one pita at a time, briefly heat each side until charred in a few spots, about 30 seconds. Return pita to towel and cover. Repeat with remaining pitas and serve immediately.
↑ Back to top
Homemade Ramen Noodles
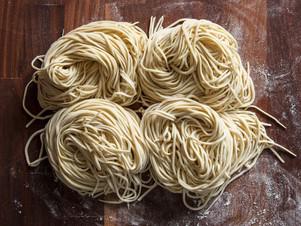
Tags: Pasta
Servings: 4 portions of alkaline
noodles
Ingredients
- 8g baked baking soda
- 4g Diamond Crystal kosher salt; for table salt or other kinds of salt, use the same weight
- 164mL water
- 396g King Arthur bread flour (see note)
- 4g vital wheat gluten (see note)
Steps
- To Make Noodles: Add baked baking soda to water and stir to dissolve completely, about 1 minute. Add salt, and stir until dissolved completely.
- Before Cooking Noodles (optional): Gather noodles into a ball and compress with your palms on a clean, dry surface, using a similar amount of pressure you would use to compress a snowball. Loosen noodles and repeat process, gathering them into a ball and compressing with your palms. (This brief compression gives the noodles their signature curls.)
- To Cook Noodles: Bring large pot of unsalted water to rolling boil over high heat. If using noodle baskets, add noodles to baskets and plunge in water, rapidly stirring noodles with tongs or chopsticks in basket to prevent sticking. If not using noodle baskets, add noodles to boiling water and stir vigorously with tongs or chopsticks to prevent sticking. Cook, stirring occasionally, for about 2 minutes if using hand-cut noodles; cook for about 1 minute and 30 seconds if using noodles cut on spaghetti cutter. (The exact cooking time will depend on your preferences and on the thickness of the noodles.) Drain thoroughly, shaking off as much excess water as possible, and add to hot ramen broth.
- Digital scale, manual pasta machine or pasta roller attachment for a stand mixer, stand mixer or food processor, rolling pin (optional), bench scraper (optional), noodle basket (optional)
Combine vital wheat gluten and bread flour in the bowl of a food
processor fitted with metal blade, or in the bowl of stand mixer
fitted
with the paddle attachment. Process until thoroughly mixed, about 30
seconds in a food processor or 1 minute on low speed in a stand mixer.
Increase speed to medium-low and, with machine running, add 1/3 of
liquid at a time, allowing time between each addition for liquid to be
fully absorbed, about 30 seconds. After final addition, allow machine
to run until flour and water mixture looks pebbly, about 1 minute. If
using food processor, stop machine and let rest for 30 minutes. If
using stand mixer, stop machine, cover bowl with plastic wrap, and let
rest for 30 minutes. (This pause is to allow the flour to more fully
absorb the liquid.)
Press dough into a ball and divide into two roughly equal portions.
Place both in a bowl and cover with plastic wrap to prevent them
drying
out.
Working with one portion at a time, flatten balls to a thickness of
about 1/5 inch (the dough will be very stiff, so do the best you can,
as it will make it easier to run through the pasta rollers). Run
flattened disk through widest setting of pasta roller, followed by the
second widest setting, followed by the third widest setting, followed
by the fourth widest setting. Fold dough sheet in half, so it is half
of its original length, then repeat entire process two times (it will
become significantly harder to run the doubled up dough through the
rollers in each iteration). If done correctly, longitudinal lines will
form on the sheet of dough. Wrap dough sheet in plastic wrap or place,
folded, in zip top bag, and repeat process with the remaining portion.
Let dough sheet rests for at least 30 minutes before proceeding.
Working with one dough sheet at a time, run dough through
progressively
narrower settings on your pasta machine, until it reaches the
thickness
you desire (~1-1.5 mm). Run final dough sheet through the spaghetti
cutting attachment; dust noodles with flour or corn starch to prevent
sticking, shake off excess starch or flour, and fold into loose nests.
Alternatively, dust dough sheet with flour, fold it, dust again with
flour, and fold again, to form a stack of dough. Using a sharp knife,
cut through dough at regular intervals to produce noodles. Once
finished cutting, shake noodles to loosen, and fold into loose nests.
Place noodles in zip-top bag and refrigerate overnight. (Noodles can
be
used immediately, but they improve significantly in texture and flavor
if allowed to age slightly.)
SAVE:
Special Equipment:
Notes
- King Arthur bread flour has one of the highest protein percentages of the many bread flours on the market, and for that reason is specified here. In order to determine the exact amount of time the noodles need to boil, you will have to test them. Cut a single noodle into 5 or 6 pieces, place them in boiling water, and remove them at 10 second intervals, starting at 1 minute and 30 seconds. Repeat the process as many times as necessary to confirm the correct boiling time, according to your preferences. When you have determined the exact time, subtract 10 seconds, to account for the noodles sitting in the hot bowl of broth.
- Vital wheat gluten is a protein supplement that is used to give breads and noodles more "chew." It is available at most supermarkets, health food stores, and chains like Whole Foods.
↑ Back to top
Homemade Rice Noodles, ( Cheung Fun) Two Ways
Ingredients
- 1 1/2 cups rice flour
- 3 tablespoons tapioca starch
- 2 tablespoons wheat starch
- 1/2 teaspoon salt
- 2 tablespoons canola oil, plus more for greasing the pan
- 1 1/2 cups lukewarm water
- 1 cup boiling water
- 2 teaspoons sugar in the raw or light brown sugar
- 1/2 cup water
- 2 tablespoons dark soy sauce
- 2 tablespoons oyster sauce
- 1/2 batch cheung fun batter
- 1/4 cup dried shrimp (optional)
- 1 tablespoon oil
- 1/4 teaspoon salt
- 1/4 cup chopped scallions
- toasted sesame seeds
- 1 batch cheung fun batter
- 1 package Chinese crullers (our homemade recipe is under development)
For the
homemade rice noodles:
For the
dipping sauce:
For the shrimp
& scallion rolls:
For the fried
dough rolls:
Steps
- Combine the rice flour, tapioca starch, wheat starch, and salt in a mixing bowl. Add the canola oil and 1 1/2 cups lukewarm water and whisk until smooth. Whisk in the boiling water. Set aside and allow the batter to rest for 45 minutes.
- We used an aluminum 10” square cake pan for steaming the rice noodles. You can also use a 9-inch round cake pan and simply adjust the amount of batter per batch. The noodles should be about 1/8” thick, so the batter should just cover the bottom of the pan in an even layer. This homemade noodle may come out a little thicker than what you get with dim sum in restaurants, but you can practice making them thinner!
- Use a wok or a deep skillet for the steaming, but whatever you use, it must have a lid. Fill your chosen vessel with at least 2 inches of water. The cake pan with the batter in it should be able to float on the surface of the water, and then the entire cooking vessel should be able to be covered. Bring the water to a gentle simmer.
- Very generously brush the bottom and sides of the cake pan with oil. Place the oiled pan on the simmering water to warm it up. Give your batter a good stir, and then carefully pick up the pan (it’ll be hot), and pour some batter in. Swirl it around quickly so it evenly coats the bottom of the pan. For my 10” square pan, I used a 1/3 cup of batter at a time. (Make sure that you give the batter a good stir each time before using it, because the rice flour and water tends to separate a bit).
- Once the pan is coated, place it on top of the simmering water, cover the pan, and steam for 3 minutes.
- Add the sugar and water to a saucepan and heat until all of the sugar is fully dissolved. Add the dark soy sauce and oyster sauce and let simmer very very gently until the sauce is thin but coats the back of a spoon in a translucent layer. Set aside.
- When your cheung fun batter is ready, you can start making these. In a strainer, rinse the dried shrimp (if using) under running water. Soak them in warm water for 10 minutes. Drain, and roughly chop the shrimp. Set aside.
- Add oil and chopped shrimp to a small pan over medium heat, and sauté for about 2 minutes. Add the salt and scallions, and stir until combined. Remove from the heat and set aside. If you’re not using the shrimp, simply sauté the scallions with oil and salt for 1 minute, and set aside.
- Cook your rice noodle according to the instructions above and take the cake pan off the simmering water (if using storebought rice noodle sheets, simply lay the noodle out in a flat layer on a clean surface).
- Spread 2 tablespoons of the shrimp and scallion mixture all over the surface of the noodle, and sprinkle some toasted sesame seeds over it as well. Use a rubber spatula to carefully part one side of the rice noodle from the pan, and roll it up in a tight cigar.
- Remove to a cutting board and slice into 1-2 inch pieces with a sharp knife dipped in warm water. Plate and garnish with sesame seeds, scallions, and serve with your dipping sauce.
- To make this Chinese fried dough rice roll, toast 2 crullers in the oven until crispy (instructions on the package. Usually a few minutes at 350 degrees F will do the trick). Split each cruller in half, since they often come with 2 stuck together.
- Take your cooked rice noodles, and roll each half of a cruller in a rice noodle sheet. Cut into pieces and serve with your dipping sauce. (Note: the rice noodle I used for the cruller in these pictures was a little bit too thick, but you can adjust the thickness with practice and to your own personal preferences).
TO MAKE THE RICE
NOODLES:
TO MAKE THE DIPPING
SAUCE:
TO MAKE THE SHRIMP &
SCALLION ROLLS:
TO MAKE THE FRIED DOUGH
ROLLS:
Notes
- FAVORITE
↑ Back to top
Homemade Ricotta
Adapted from https://www.seriouseats.com/homemade-ricotta
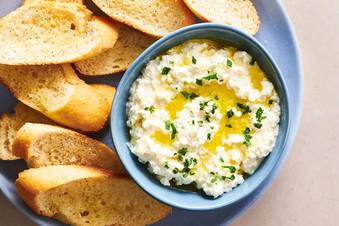
Tags: Cheese
Servings: 1 1/3 cups
Ingredients
- 1/2 gallon (1.9L) whole milk, not ultra-pasteurized (see note)
- Pinch kosher salt, optional (see note)
- 2 tablespoons plus 2 teaspoons ( 40 ml) distilled white vinegar or fresh lemon juice (see notes)
Steps
- Fill a pot with milk. Stir in salt, if using. Heat over medium heat until milk registers 185°F (85°C) on an instant-read thermometer. Add vinegar or lemon juice and stir briefly to incorporate. Curds should begin forming almost immediately; stop stirring as soon as they've formed throughout the pot.
- Without stirring, continue to hold curdled-milk mixture at 185°F for 20 minutes. It's okay if the temperature fluctuates down to 175°F (79°C) or up to 190°F (88°C), but try to keep it in that zone for the full 20 minutes.
- Line a fine-mesh strainer with paper towels or cheesecloth. Using a slotted spoon, transfer curds to strainer and let stand until excess liquid has drained away. Exactly how long to let it drain depends on whether you want a moister final product or a drier one. Do not try to pour all the milky liquid through the strainer, as this will clog it and prevent the liquid from flowing through.
- Drained ricotta can be refrigerated, covered, for up to 2 days, though it is best when freshly made.
↑ Back to top
Homemade Self-Rising Flour
Servings: 1 cup
Ingredients
- 1 cup (120g) King Arthur Unbleached All-Purpose Flour
- 1 1/2 teaspoons baking powder
- 1/4 teaspoon salt
Steps
- Whisk all of the ingredients together in a bowl; use as directed in your recipe.
↑ Back to top
Homemade Sriracha
Ingredients
- 1 1/2 pounds red jalapeno chiles, stemmed and seeded
- 12 garlic cloves, peeled
- 1 cup water
- 3/4 cup distilled white vinegar
- 1 cup sugar
- 3 tablespoons table salt
Steps
- Puree jalapenos, garlic, water, and vinegar in blender and until smooth, about 2 minutes. Transfer mixture to large saucepan, and stir in sugar and salt.
- Bring to boil over high heat, then reduce heat to medium-low and simmer, skimming any surface foam and stirring occasionally, until mixture is thickened and reduced to about 2 cups, 20 to 25 minutes. Remove from heat and let cool 5 minutes.
- Return mixture to blender and blend on low speed (you don’t want to incorporate too much air) until smooth, about 20 seconds. Transfer to glass measuring cup and cool to room temperature. Transfer to container with tight-fitting lid (plastic squeeze bottle), cover, and refrigerate for 1 day before using. Sauce can be stored refrigerated for up to 1 month.
Notes
- FAVORITE
↑ Back to top
Homemade Tacos Al Pastor
Adapted from https://www.seriouseats.com/tacos-al-pastor-recipe

Servings: 6 to 8
Ingredients
- 2 whole ancho chiles, seeds and stems removed
- 2 whole pasilla or guajillo chiles, seeds and stems removed
- 1/2 cup homemade or store-bought low-sodium chicken stock
- 2 teaspoons vegetable oil
- 1 teaspoon dried Mexican oregano
- 1 teaspoon dried ground cumin seed
- 1 tablespoon achiote powder or paste
- 1 chipotle chile packed in adobo sauce, plus 2 teaspoons sauce from can
- 1/4 cup distilled white vinegar
- 2 1/2 teaspoons kosher salt
- 2 teaspoons sugar
- 3 cloves garlic
- 2 pounds boneless blade-end loin or sirloin pork roast
- 8 ounces ( 1/2 pound) sliced bacon
- 1 small pineapple, peeled, cored, and cut into quarters lengthwise
- 32 to 48 corn tortillas, heated and kept warm
- 1 medium white onion, finely diced (about 1 cup)
- 1/2 cup finely minced fresh cilantro leaves and tender stems
- 1 cup basic salsa verde or your favorite salsa
- 3 to 4 limes, cut into 8 wedges each
For the Pork:
To Finish and
Serve:
Steps
- Place chiles in a large saucepan over medium high heat and cook, turning chiles occasionally, until puffed, pliable, lightly browned in spots, and very aromatic, about 5 minutes. Add chicken stock (it should boil immediately), then pour contents of pan into a small bowl. Cover loosely and set aside.
- Wipe out saucepan, add oil, and return to medium-high heat until oil is shimmering. Add cumin, oregano, and achiote and cook, stirring frequently, until aromatic but not browned, about 30 seconds. Add chipotle chile and sauce and cook until aromatic, about 30 seconds longer. Add vinegar, salt, and sugar and remove from heat.
- Scrape contents of saucepan into a blender along with garlic and chiles with their soaking liquid. Blend on high speed until completely smooth, about 1 minute, scraping down sides as necessary. Set sauce aside to cool slightly.
- Using a very sharp chef's knife or slicing knife, slice pork sirloin as thin as possible. If necessary, place meat in freezer for 15 minutes to firm it up. Split the sides of a heavy duty zipper-lock bag. Place one slice of meat inside bag and pound with the bottom of a heavy 8-inch skillet or a meat pounder until less than 1/4-inch thick. Transfer to a large bowl. Repeat with remaining meat.
- Add marinade to bowl and toss with hands until every piece of meat is evenly coated in marinade.
- Line the bottom of a disposable aluminum loaf pan with a layer of bacon. Add a layer of thin-sliced marinated meat. Continue layering in bacon and meat until all the meat is used. (It may pile above the pan a little bit. This is ok.) Cover tightly with plastic wrap and refrigerate for at least 4 hours and up to 36.
- To cook indoors: Preheat the oven to 275°F. Uncover aluminum loaf pan and place on a foil-lined rimmed baking sheet. Transfer to oven and cook until meat is completely tender (It will drip lots of fat), about 4 hours. Remove from oven, allow to cool slightly, cover with aluminum foil, and refrigerate for at least 2 hours and up to overnight.
- To cook outdoors : Light half a chimney of charcoal and allow to preheat until coals are mostly covered in gray ash. Spread out under one half of coal grate, and place cooking grate on top. Alternatively, set one set of burners on a gas grill to low and leave the remaining burners off. Unwrap aluminum loaf pan and place directly over cooler side of grill, placing a drip pan underneath if desired. Cover grill and cook until loaf registers 180 to 190°F in the center, about 4 hours, adding more coals to grill or adjusting burners as necessary to maintain an air temperature of around 275°F for the duration of cooking. Remove from grill, allow to cool slightly, cover with aluminum foil, and refrigerate at least 2 hours and up to overnight.
- To Serve: Preheat oven to 350°F. Remove cooked meat from aluminum tray, scraping off any fat or jellied juices from its sides. Use a spoon to collect fat and juices from tray, reserving each separately. Using a sharp chef's knife or slicing knife, slice meat as thinly as possible to create fine shavings of meat and fat. Transfer to a bowl.
- If fat from meat is solid, heat gently in the microwave or in the oven until melted. Transfer pineapple pieces to a rimmed baking sheet lined with aluminum foil. Brush with fat. Transfer to oven and roast until completely tender, about 25 minutes. Remove from oven and allow to cool slightly.
- About 10 minutes before pineapple is done roasting, transfer meat and 1 tablespoon of fat to a large cast iron or non-stick skillet. Heat over medium-high heat, stirring occasionally, until meat crisps and deeply browns in spots. Add any reserved juices and toss to combine, allowing it to cook until reduced to a moist glaze. Transfer meat to a warmed serving bowl.
- Chop roasted pineapple into large chunks. Serve meat and pineapple immediately with warmed tortillas, onion, cilantro, salsa, and lime wedges. Meat will be very moist and should be packed into double-stacked tortillas for serving.
↑ Back to top
Homemade Thai Sweet Chili Sauce
Ingredients
- 3/4 cup of Sugar
- 1/4 cup Rice Vinegar
- 1/4 cup of water
- 1 tbsp finely minced garlic (about 5-6 garlic cloves)
- 1 teaspoon crushed red pepper flakes
- 1 teaspoon Sriracha (or less)
- 1 tbsp of cornstarch
- 1 tbsp of cold water
- 1/2 teaspoon salt
Steps
- Add 1/4 cup water, rice vinegar, and sugar to a pot over medium-high heat. When the mixtures starts to boil, add the garlic and red pepper flakes. Bring the boil down to a simmer and let it simmer for another couple of minutes. This will make sure all of the flavors get infused nicely.
- Add the sriracha.
- In a separate small bowl, mix the cornstarch and 1 TB cold water until the cornstarch is dissolved.
- Bring the sauce to a low boil again and add the cornstarch/water mixture and salt.
- The sauce will begin to thicken up immediately. Cook, while constantly stirring, until the mixture reaches desired thickness…about 3-5 minutes.
- Let the sauce cool and then dip away!
Notes
- FAVORITE
↑ Back to top
Homemade Toffee
Adapted from https://anitalianinmykitchen.com/homemade-toffee/

Tags: Candy
Servings: 25 pieces
Ingredients
- 1 cup butter
- 1 cup sugar (very fine/caster)
- 1 teaspoon vanilla
- ¼ teaspoon salt
- ¾-1 cup almonds
- 1-1¼ cup chocolate chips (milk, dark or a mix)
EXTRAS
Steps
- Place the raw almonds (skinned) on a cookie sheet and toast in a pre-heated oven at 350F (180C) for about 4-5 minutes, stir then continue roasting for 3 minutes, remove them from the oven and move immediately to a clean bowl. Do not leave them on the cookie sheet or they will continue to bake and you could end up with burnt nuts. Once cool chop until medium coarsely chopped.
- Sprinkle half the nuts on the bottom of a parchment paper lined 8 or 9 inch (20 or 22 cm) square pan (I used an 8 inch/20 cm)), set aside.
- In a medium pot over medium heat add the butter and sugar, once the butter starts to melt, start to stir, and continue stirring until it becomes a dark amber colour, or 300-305F (148-152C) on a candy thermometer.
- Remove the pot from the heat and stir in the vanilla. Pour the toffee onto the top of the nuts in the pan, sprinkle with chocolate chips, cover with foil for 5-10 minutes then spread evenly, top with remaining chopped almonds. Once the toffee is firm, approximately 1-2 hours, break into pieces. Enjoy!
Notes
- Instead of almonds you can substitute with hazelnut, walnuts or even pecans.
- Store the toffee in an airtight container, place parchment paper between the layers. It will keep up to 2 weeks at room temperature, if you home is too hot, then refrigerate.
- It can also be frozen, freeze in a freezer safe container or bag, separated with parchment paper between the layers. It will keep for up to 2 months in the freezer.
↑ Back to top
Homemade Udon Noodles
Servings: Makes about 1 1/2
pounds noodles
Ingredients
- 1 pound (3 cups plus 2 tablespoons) unbleached all-purpose flour, Gold Medal preferred
- 1 tablespoon salt
- 1 cup water
Steps
- Put the flour and salt in a food processor bowl. Pulse a few times to blend. Remove the feed tube and run the machine while you pour the water in a slow, steady stream.
- Transfer the dough and all the bits to your work surface. Start kneading it vigorously. You should not need any water. Knead for about 5 minutes, slapping the dough onto the work surface occasionally to work the gluten. You’re done when the dough is smooth and feels firm-soft, nearly as soft as your earlobe but not quite. Shape the dough into a ball and slide it into a zip-top plastic bag. Seal well, pressing out all the air. Set aside to rest for at least 2 hours or up to 4 hours in summer and 8 hours in winter.
- Before you roll out the dough, set a big pot of water on the stove and heat it up. You’ll be making the noodles and cooking them at the same time.
- Remove the dough from the bag and put it on lightly floured work surface. Roll the dough out to a thickness of 1/8 inch, turning it and flouring it occasionally to prevent sticking. Aim for a rectangle-like shape.
- Then fold it in half, dust the underside, then fold back 1/4 of the dough on each side to create flaps. Watch the video for guidance.
- Use a knife to cut strips of noodles, each a scant 1/4 inch wide. Cut about a quarter of the dough then pause to unfold the strips into noodles. Use your fingers to pull on the noodles to stretch them out to about twice their width. Cut the longer strands in half to yield noodles about 12 to 16 inches long. Gently dust the noodles with flour.
- Drop the noodles into the boiling water. Let them cook for about 3 minutes (the water may not return to a boil), until the float to the top and are chewy tender. Then use a slotted spoon to remove the noodles from the hot pot. Deposit them into a bowl of cold water to cool for a few minutes. Drain into a strainer and set aside to cool. Replace the water in the bowl to cool the next batch of noodles.
- The noodles are ready to use or eat. You can store them cooked for several days. Return them to room temperature before using. You can refresh them with a dunk in a pot of boiling water.
After all the water has been added, the dough will look crumbly. Let
the machine run for a little more to moisten all the flour. It may not
gather into a ball. That’s okay. (Alternatively, put the flour in a
bowl, make a well in the middle, and slowly work in the water by
hand.)
While the noodles cook, cut more noodles from the dough, pausing again
to unfold and stretch the strips. If you work on a quarter of the
dough
at a time and cook them, you’ll get into a rhythm. Or, get someone to
help you.
↑ Back to top
Homemade Whole-Milk Ricotta
Servings: 1 gal
Ingredients
- 1 gallon whole milk
- 1 tsp citric acid dissolved in 1/4 cup of water
- 1 tsp cheese salt (optional)
- 1 tbsp heavy cream (optional)
Steps
- Add citric acid and optional salt into the milk and mix thoroughly. In a medium saucepan, directly heat this mixture to between 185F and 195F (I did this over medium-high heat). Do not boil. Stir often to prevent any burning. Once it gets up to this temperature range, the curds should start separating from the whey (the leftover liquid). Make sure that the curds separate enough that the whey is not milky, and turn off the heat. Allow it to set, undisturbed, for 10 minutes.
- Line a colander with butter muslin/cheesecloth and ladle the curds into the colander. Tie the corners of the cloth into a knot and hang the bag to drain, with a bowl under it to catch the drips. Carroll says to hang it for 20-30 minutes, but as this recipe makes only a quarter of the quantity she suggests in her book, it should be ready within about 15 minutes. It is really up to you how long you hang it for; do it until it reaches a consistency that you like.
Notes
- FAVORITE
↑ Back to top
Homemade Yellow Mustard
Ingredients
- 1 cup cold water
- 3/4 cup yellow dry mustard
- 3/4 teaspoon coarse sea salt or kosher salt
- 1/2 teaspoon ground turmeric
- 1 teaspoon garlic purée, or 1/8 teaspoon garlic powder
- 1/8 teaspoon paprika
- 1/2 cup white distilled vinegar
Steps
- Place the water, dry mustard, salt, turmeric, garlic, and paprika in a small nonreactive saucepan and whisk until smooth. Cook the mixture over medium-low to low heat, stirring often, until it bubbles down to a thick paste, 30 to 45 minutes. [Editor's Note: You're definitely going to want to do this in a well-ventilated kitchen. Trust us.]
- Whisk the vinegar into the mustard mixture and continue to cook until it’s thickened to the desired consistency-you know, the usual prepared mustard consistency, which ought to take anywhere from 7 to 15 minutes.
- Let the mustard cool to room temperature. Transfer the mustard to an airtight container, cover, and refrigerate for up to 3 months. The mustard will be quite pungent the first few days or even weeks, but will mellow with time.
Notes
- FAVORITE
↑ Back to top
Honey Baklava Cheesecake
Ingredients
- 1 1/4 cups (160 grams) chopped pistachios separated
- 1 1/4 cups (150 grams) chopped walnuts separated
- 1 teaspoon (2 grams) ground cinnamon optional
- 1/2 teaspoon (1 gram) ground cardamom
- 8 ounce package (230 grams) phyllo dough, thawed or 1/2 of a 16-ounce (454 gram) box, thawed
- 1 1/4 stick (10 tablespoons or 142 grams) unsalted butter melted
- 1/4 cup honey
- 1/4 cup (60 milliliters) water
- 1 small lemon juiced and zested (you'll use 1 teaspoon or 5 milliliters of lemon juice)
- 1 teaspoon vanilla extract
- 4 8-ounce packages (900 grams) cream cheese at room temperature
- 1 cup (340 grams) honey
- 1 1/2 teaspoons lemon zest (from the lemon you zested earlier)
- 1/2 teaspoon (3 grams) kosher salt
- 4 large eggs at room temperature
- 1 1/2 teaspoons (7 milliliters) vanilla extract
- 1/4 cup (30 grams) cornstarch
For the
Baklava Crust:
For the Honey
Lemon Simple Syrup:
For the Honey
Cheesecake:
Steps
- Heat an oven to 350°F (180°C).
- Use your hand or a large spoon to mix 1 cup (130 grams) of the chopped pistachios, 1 cup (120 grams) of the chopped walnuts, ground cinnamon, and cardamom in a small bowl.
- Remove the phyllo dough from the plastic and unroll it onto a clean countertop.
- Place a second layer of dough across the first to form a "T," and brush the top of this layer with more butter.
- Brush the 5th layer of phyllo with another layer of butter.
- Repeat layering and buttering the phyllo dough, ensuring you have 5 sheets of phyllo between each layer of nut filling.
- Use a very sharp knife to score the dough in a diamond pattern to allow the baklava soak up the honey lemon simple syrup. Try to cut through just the top two layers of nuts and phyllo, don't go all the way to the bottom of the pan.
- While the baklava crust bakes, stir the honey, water, lemon juice, and vanilla extract in a small saucepan.
- Reserve 1 tablespoon (15 milliliters) of the honey lemon simple syrup to use for the topping.
- Add the remaining crushed pistachios and walnuts to a small bowl.
- Once the cheesecake pan is cool enough to handle, wrap the bottom and sides in a double layer of heavy-duty aluminum foil.
- Before mixing the cheesecake batter, heat 4 cups of water to boiling over medium heat in a saucepan or microwave to create the steam bath for the cheesecake will bake in. It usually takes about 5 minutes on high in the microwave.
- Use an electric hand mixer or a stand mixer fitted with the paddle attachment to blend the cream cheese, honey, lemon zest, and kosher salt on medium speed until smooth in a large bowl or in the bowl of a stand mixer.
- Add the eggs to the mixture, one at a time, scraping down the bowl and beaters after each egg has been mixed in.
- Add the cornstarch to the filling in the bowl and blend it at low speed for 30-45 seconds.
- Set the foil-wrapped pan into a 12-14" pan, then pour the boiling water into the outer pan to create a water bath.
Assemble the Baklava
Crust:
Set the bowl aside.
Use a pastry brush to brush
the inside of a 9" springform pan with a thin layer of melted butter.
Lay a phyllo dough sheet across the inside of the cheesecake pan,
gently pressing it onto the bottom and up the sides of the pan. The
sheet should stick to the buttered insides.
Gently brush the top of this sheet with a thin layer of butter,
ensuring you brush the sides and corners of the pastry in the pan.
Repeat this process with the 3rd, 4th, and 5th layers of dough.
Overlap
the sheets to completely cover the inside of the spring form pan. It's
okay if the phyllo sheets are ruffled on the sides of the pan.
Sprinkle a generous handful
of nuts (about a 1/2 cup or 50 grams) on top of the fifth layer.
Use your fingers to spread
the nuts evenly over the dough.
The final layer will be the
final 5 sheets of phyllo lying on the countertop.
Press the dough down to
ensure it sits in the bottom of the pan.
Par-Bake the Baklava
Crust:
Bake the baklava in the hot
oven for 15 minutes or until it begins to take on a golden brown
color.
Make the Honey Lemon
Simple Syrup:
Bring the mixture to a boil
over medium heat, stirring to incorporate the ingredients.
Reduce the heat to low once the mixture boils and allow the syrup to
simmer, stirring occasionally, for 9 to 10 minutes or until the
baklava
crust is finished baking.
Sweeten the Baklava
Crust and Make the Nut Topping:
Remove the baklava crust from
the oven, but leave the oven on.
Quickly, pour the remaining honey lemon simple syrup over the hot
baklava. The crust will bubble and steam, so be careful not to put
your
face over it.
Set the crust aside to cool
for 10 minutes.
Stir in the reserved honey
lemon simple syrup to form a sticky mixture, adding more honey as
needed.
Set this bowl aside.
Set the pan aside while you
make the honey cheesecake filling.
Make the Honey
Cheesecake Batter:
Blend these ingredients for
2-3 minutes, then stop the mixer and scrape down the bowl and beaters.
Add the vanilla extract to the cream cheese mixture with the final
egg,
then stop the mixer and scrape down the bowl and beaters.
Blend the mixture at medium
speed for 2 more minutes.
Pour the prepared honey cheesecake batter into the baklava crust. Tap
the pan against the countertop to burst any air bubbles in the batter.
Bake, Top, Then Cool the
Honey Baklava Cheesecake:
Carefully place the pan in
the preheated oven and bake for 1 hour.
↑ Back to top
Honey Fried Chicken

Servings: 4
Ingredients
- 1/2 cup salt
- 1/2 cup sugar
- 3 pounds bone-in chicken pieces (split breasts cut in half, drumsticks, and/or thighs), trimmed
- 1 1/2 cups cornstarch
- 3/4 cup cold water
- 2 teaspoons pepper
- 1 teaspoon salt
- 3 quarts peanut or vegetable oil
- 3/4 cup honey
- 2 tablespoons hot sauce
BRINE
BATTER
HONEY GLAZE
Steps
- FOR THE BRINE: Dissolve salt and sugar in 2 quarts cold water in large container. Add chicken, cover, and refrigerate for 30 minutes or up to 1 hour.
- FOR THE BATTER: Whisk 1 cup cornstarch, water, pepper, and salt together in bowl until smooth. Refrigerate batter while chicken is brining.
- Set wire rack inside rimmed baking sheet. Sift remaining 1/2 cup cornstarch into medium bowl. Remove chicken from brine and dry thoroughly with paper towels. Working with 1 piece at a time, coat chicken thoroughly with cornstarch, shaking to remove excess; transfer to platter.
- Add oil to large Dutch oven until it measures about 2 inches deep and heat over medium-high heat to 350 degrees. Whisk batter to recombine. Transfer half of chicken to batter and turn to coat. Remove chicken from batter, allowing excess to drip back into bowl, and add chicken to hot oil. Adjust burner, if necessary, to maintain oil temperature between 325 and 350 degrees. Fry chicken, stirring to prevent pieces from sticking together, until slightly golden and just beginning to crisp, 5 to 7 minutes. (Chicken will not be cooked through at this point.) Transfer parcooked chicken to platter. Return oil to 350 degrees and repeat with remaining raw chicken and batter. Let each batch of chicken rest for 5 to 7 minutes.
- Return oil to 350 degrees. Return first batch of chicken to oil and fry until breasts register 160 degrees and thighs/drumsticks register 175 degrees, 5 to 7 minutes. Transfer to wire rack. Return oil to 350 degrees and repeat with remaining chicken.
- FOR THE HONEY GLAZE: Combine honey and hot sauce in large bowl and microwave until hot, about 11/2 minutes. Add chicken pieces one at a time to honey mixture and turn to coat; return to wire rack, skin side up, to drain. Serve.
Notes
- 6 quart dutch oven
↑ Back to top
Honey Ginger Lemonade
Ingredients
- 1 cup (250ml) honey (I use wildflower honey)
- 1 cup (250ml) water (filtered or spring)
- 4 oz (115g) fresh ginger root, peeled and finely grated (I use a microplane zester)
- 1 cup (250ml) fresh squeezed lemon juice, strained (about 5 large lemons)
- 3 cups (750ml) cold filtered or spring water (flat or sparkling)
- 1/2 cup (125ml) vodka (optional)
- Ice for serving
- Sliced lemons and mint sprigs for garnish (optional)
For the honey
ginger syrup:
For the
lemonade:
Steps
- Place the honey and water in a medium saucepan, bring to a boil and simmer until honey is completely dissolved.
- Turn off heat and add the freshly grated ginger and any juices. Cover and let steep for 30 minutes.
- Strain syrup thorough a fine mesh sieve into a bowl, pressing hard on the ginger pulp and then discarding the solids.
- Pour into a bottle or jar, let cool completely and then chill until cold, about 1 hour. The syrup will keep in your refrigerator for up to two weeks.
- Add the freshly squeezed lemon juice and the honey ginger syrup to a large pitcher.
- Add 3 cups of cold water (more or less depending on how strong you like your lemonade). If you are using sparkling water don’t add it until you are ready to serve so that it doesn’t lose its fizz. Add the vodka now as well if using. Refrigerate until ready to serve.
- Pour lemonade over ice filled glasses, top with a slice of lemon, and garnish with a sprig of mint.
To make the honey ginger
syrup:
To make the lemonade:
Notes
- You can also steep the syrup with mint or basil in the hot syrup for a different variation.
- The honey ginger syrup is also great for sweetening iced tea and other beverages.
↑ Back to top
Hot and Numbing Sichuan Chicken Salad (Bang Bang Ji Si)
Adapted from https://www.seriouseats.com/sichuan-chicken-salad-chinese-bang-bang-hot-and-numbing-recipe
Tags: Chicken
Chinese Salad
Servings: 3 to 4
Ingredients
- 1 3/4 pounds whole bone-in, skin-on split chicken breast halves (2 to 3 breast halves)
- Kosher salt and freshly ground black pepper
- 6 cloves garlic, smashed, divided
- 6 whole scallions, 2 roughly chopped, 4 thinly sliced at a sharp bias
- 1 ( 1-inch) knob peeled fresh ginger, thinly sliced
- 2 teaspoons toasted whole Sichuan peppercorns
- 1 tablespoon sugar
- 2 teaspoons black or plain sesame seeds, plus more for garnish
- 1 tablespoon sesame paste, preferably Chinese
- 1 tablespoon soy sauce
- 4 teaspoons Chinkiang or black vinegar
- 1/4 cup chili oil with sediment (see notes)
Steps
- Season chicken generously with salt and pepper. Place chicken in zipper-lock bags or vacuum bags and add half of garlic, roughly chopped scallions, and all of ginger. Remove air from zipper-lock bags by closing the bags, leaving the last inch of the top un-sealed. Slowly lower into a pot of water, sealing the bag completely just before it fully submerges. If using a vacuum bag, seal according to manufacturer instructions.
- If Cooking in a Sous-Vide Precision Cooker : Preheat a sous-vide cooker to 150°F. Add chicken and cook for at least 1 hour and up to 4. Transfer to an ice bath and let chill for 15 minutes.
- If Cooking in a Cooler : Heat 2 quarts of water in a large, heavy-bottomed saucepan or Dutch oven over medium-high heat until it registers 155°F on an instant-read thermometer. Transfer to a small cooler, add chicken, and seal cooler. Cook for at least 1 hour and up to 4, topping up with boiling water as necessary to maintain temperature of 150°F. Transfer to an ice bath and let chill for 15 minutes.
- While chicken cooks, grind Sichuan peppercorns in a mortar and pestle until a rough powder is formed. Add sugar, remaining 3 cloves garlic, and sesame seeds and pound until a rough paste is formed. Add sesame paste, soy sauce, and vinegar and pound until a smooth paste is formed. Stir in chili oil and sediment. Set dressing aside.
- When chicken is cooked, remove from bags and discard garlic, scallions, and ginger. Stir 2 tablespoons of juices from the bag into the dressing. Remove skin and bones from chicken and discard. Shred meat and transfer to a large bowl. Add dressing and sliced scallions. Toss chicken to coat in dressing and adjust seasoning with salt and pepper. Serve immediately, sprinkled with more scallions and sesame seeds and drizzled with additional chili oil if desired.
- Special equipment
- Sous vide precision cooker or a small beer cooler
Notes
- Chili oil with sediment can be found in most Chinese supermarkets. Alternatively make your own by toasted 1/4 cup of dried ground Sichuan or Korean chilies in a dry wok until fragrant. Add 1/2 cup of neutral oil like canola and heat until lightly bubbling. Immediately transfer to a cool pot and let rest until cool. Chili oil can be stored in a sealed container in the refrigerator indefinitely.
↑ Back to top
Hot and Sour Shrimp with Noodles

Ingredients
- 1-1/4 lbs shrimp, peeled and deveined
- 12 ounces cellophane noodles (see notes)
- 1-1/2 tablespoons lime juice
- 1 tablespoon seasoned rice vinegar
- 2 teaspoons fish sauce (or soy sauce)
- 1 clove garlic, very finely chopped
- 1 teaspoon sriracha or your favorite hot sauce (use more or less to taste)
- 1-1/2 tablespoons sugar
- 1 to 2 tablespoons tomato paste
- 2 medium tomatoes, seeded and chopped
- 1 tablespoon vegetable oil
- 2 carrots, peeled and cut into 1-inch matchstick pieces
- 1/2 cup green bell pepper, chopped
- 4 scallions, sliced
- 1/4 cup fresh cilantro, chopped
Steps
- Bring a pot of water to a simmer, remove from the heat and add the cellophane noodles. Soak just until the noodles are clear and tender, anywhere from 3 to 10 minutes depending on the brand ~ check frequently.
- Drain, rinse with cool water, drain again and set aside. While in the strainer you can snip them here and there with a pair of kitchen shears so they'll be a little easier to portion out.
- Combine the lime juice, rice vinegar, fish sauce, garlic, sriracha and sugar in a small bowl. Stir until the sugar dissolves, then add 1 tablespoon of the tomato paste and stir until well blended. Add the chopped tomatoes, let stand for 5 minutes. If the sauce is too thin after standing, add a little more tomato paste. The consistency should be similar to ketchup. Set aside.
- Heat a wok or large frying pan over high heat. Add the vegetable oil and shrimp and stir-fry just until the shrimp turns pink and opaque, about 3 minutes. Add the carrots, bell pepper and reserved sauce. Remove from the heat, toss to coat the shrimp, then add the scallions.
- To serve, make a bed of cellophane noodles on each of 4 plates. Add a portion of shrimp, spoon some sauce over the top and sprinkle with chopped cilantro.
Notes
- If you don't want to use cellophane (bean thread) noodles, substitute thin rice noodles, angel hair or steamed white rice.
↑ Back to top
Hot and Sour Shrimp with Noodles

Ingredients
- 1-1/4 lbs shrimp, peeled and deveined
- 12 ounces cellophane noodles (see notes)
- 1-1/2 tablespoons lime juice
- 1 tablespoon seasoned rice vinegar
- 2 teaspoons fish sauce (or soy sauce)
- 1 clove garlic, very finely chopped
- 1 teaspoon sriracha or your favorite hot sauce (use more or less to taste)
- 1-1/2 tablespoons sugar
- 1 to 2 tablespoons tomato paste
- 2 medium tomatoes, seeded and chopped
- 1 tablespoon vegetable oil
- 2 carrots, peeled and cut into 1-inch matchstick pieces
- 1/2 cup green bell pepper, chopped
- 4 scallions, sliced
- 1/4 cup fresh cilantro, chopped
Steps
- Bring a pot of water to a simmer, remove from the heat and add the cellophane noodles. Soak just until the noodles are clear and tender, anywhere from 3 to 10 minutes depending on the brand ~ check frequently.
- Drain, rinse with cool water, drain again and set aside. While in the strainer you can snip them here and there with a pair of kitchen shears so they'll be a little easier to portion out.
- Combine the lime juice, rice vinegar, fish sauce, garlic, sriracha and sugar in a small bowl. Stir until the sugar dissolves, then add 1 tablespoon of the tomato paste and stir until well blended. Add the chopped tomatoes, let stand for 5 minutes. If the sauce is too thin after standing, add a little more tomato paste. The consistency should be similar to ketchup. Set aside.
- Heat a wok or large frying pan over high heat. Add the vegetable oil and shrimp and stir-fry just until the shrimp turns pink and opaque, about 3 minutes. Add the carrots, bell pepper and reserved sauce. Remove from the heat, toss to coat the shrimp, then add the scallions.
- To serve, make a bed of cellophane noodles on each of 4 plates. Add a portion of shrimp, spoon some sauce over the top and sprinkle with chopped cilantro.
Notes
- If you don't want to use cellophane (bean thread) noodles, substitute thin rice noodles, angel hair or steamed white rice.
↑ Back to top
Hot Buttered Fluffy Pretzels

Servings: 8 pretzels
Ingredients
- 12.5 oz all purpose flour (2.5 cups)
- 1/2 tsp sea salt
- 1 tsp sugar
- 2.25 tsp instant quick rise yeast
- 1 cup warm water (110 degrees F)
- 1/2 cup warm water
- 1 tbsp baking soda
- vegetable oil for greasing the sheet pan
- coarse sea salt, for sprinkling
- 3 tbsp unsalted butter, melted
For the Dough:
For the
Topping:
Steps
- Hot Buttered Fluffy Pretzels
- posted by Joanne Ozug in Breads & Biscuits
- Soft Pretzels
- Have you ever waited in one of those really long lines at the mall for a soft pretzel? You know…the ones for Auntie Anne’s, or Wetzel’s Pretzels? You just can’t help it, right? You can smell that darned cinnamon sugar and butter wafting over from like 100 feet away.
- Well try these at home, and you’ll never buy those mall pretzels ever again. There’s just no reason to anymore, because these homemade soft baked pretzels taste better and only cost a buck or two to make a whole tray.
- Start by making a simple yeasted dough, and shape it into a ball.
- Soft Pretzel Dough
- Let the yeast work its magic and create these gorgeous bubbles.
- Sometimes I just stare at the dough because it’s sooooo prettyyyyyy…
- Soft Pretzel Dough Recipe
- Divide up the dough into pieces, and roll each into a long rope.
- Shape into pretzels by looping the rope through.
- Sprinkle each pretzel with coarse sea salt and send them into the oven.
- Shaped Soft Pretzels
- Bake until golden and puffed, then brush with butter.
- Baked Soft Pretzels
- Enjoy while they are hot!
- Whole Wheat Soft Pretzels
- Click here to check it out.
- Copyright Notice: Fifteen Spatulas images and content are copyright protected. Please do not publish these materials without prior permission.
- Hot Buttered Fluffy Pretzels
- Yield: 8 pretzels
- Hot Buttered Fluffy Pretzels
- 5 oz all purpose flour (2.5 cups)
- 1/2 tsp sea salt
- 1 tsp sugar
- 25 tsp instant quick rise yeast
- 1 cup warm water (110 degrees F)
- 1/2 cup warm water
- 1 tbsp baking soda
- vegetable oil for greasing the sheet pan
- coarse sea salt, for sprinkling
- 3 tbsp unsalted butter, melted
- Combine all the dough ingredients in the bowl of a stand mixer, and mix with the paddle attachment until somewhat combined (or just mix by hand with a wooden spoon). Change to the dough hook and knead on medium low for 5 minutes. The dough should feel soft and smooth, not sticky to the touch.
- Lightly dust the dough with flour, then place in a ziploc bag and let the dough rise for 30 minutes.
- Preheat the oven to 450 degrees F, and lightly grease a baking sheet with vegetable oil. You could also do parchment paper if you can find one that's rated high enough (most parchment papers I've seen only go up to 420 degrees F).
- Remove the dough from the bag and place onto a lightly oiled countertop. Divide the dough into 8 pieces (just cut it with a knife).
How to Shape Soft
Pretzel
How to Shape a Soft
Pretzel
UPDATE: I have posted a
100% Whole Wheat Version of these pretzels (cinnamon sugar ones!):
Ingredients:
For the Dough:
For the Topping:
Directions:
↑ Back to top
Hot Dog Buns
Adapted from http://ruhlman.com/2012/09/hotdog-buns-recipe/
Ingredients
- 900 grams/30 ounces flour (about 6 cups)
- 300 grams/10 ounces buttermilk
- 275 grams/9 ounces milk
- 7 grams/0.25 ounce instant dry yeast
- 14 grams/0.5 ounce sugar (1 tablespoon)
- 2 eggs
- 18 grams/0.6 ounce salt (1 tablespoon Morton’s kosher salt)
- Melted butter as needed
Steps
- Combine all ingredients except the butter in a mixing bowl and mix on medium till the dough is elastic, about 10 minutes. This is a fairly sticky dough. Allow the dough to rise for 2 to 3 hours or till doubled in size. To make it easier to work with, you can turn it out every hour, fold it in thirds, and return it to the fermenting bowl. (More on this technique from expert baker Matt McDonald in November.)
- Turn out the dough onto a board and cut the dough into 80-gram/3-ounce pieces. Fold the pieces into rectangles, cover with a towel, and let them rest for 15 minutes.
- Gently roll the pieces into cylinders to fit a hot dog bun pan or, if you’re baking them free form, to your desired length. Put them in your buttered pan. Their sides should be touching if you’re using a sheet pan (you may want to use a support of some kind on either side). Cover with a towel for 1 hour.
- Preheat your oven to 350˚F/175˚C.
- Baste the buns with melted butter and bake until done, about 45 minutes. Baste with more butter. Allow them to cook before separating them.
- This recipe will make 16 to 20 buns. The recipe can be halved by weight.
Notes
- FAVORITE
↑ Back to top
Hot Fudge Sauce
I made this.
Ingredients
- 4 oz bittersweet chocolate
- 4 tbsp. butter
- 1/4 C sugar
- pinch salt
- 1 tsp vanilla
- 1/3 c corn syrup
Steps
- Bring to a boil turn the heat to low and cook for ten minutes until thick and shiny
↑ Back to top
Hot Fudge Sauce
Chewy and Fudgy
I made this.
Ingredients
- 4 oz bittersweet or semi-sweet chocolate
- 4 tbsp butter
- 1/4 sugar
- Pinch salt
- 1/3 c corn syrup
- 1 tsp vanilla
Steps
- Combine ingredients (except vanilla) in a small saucepan, bring to a boil, turn the heat to low cook for 5-10 minutes until thick and shiny add vanilla
Notes
- 10 minutes is too long 7-8 minutes is best
↑ Back to top
Hot Pepper Spread
Servings: YIELD makes 2-3 1/4
pint jars
Ingredients
- 1 3/4 C chopped hot peppers (I used cherry peppers, long hots and a couple habaneros)
- 1 C cider vinegar
- 1 Tbsp salt
- 1/2 C sugar (I want to lower this a tad next time)
Steps
- Prepare your 1/4 pint jelly jars and prepare your water bath. Chop all of your hot peppers (I used a food processor). Put the hot peppers in a small saucepan and add the salt. Let the peppers sit for about an hour. After the hour you will see a lot of the liquid has left the peppers. Add the vinegar and sugar to the pot and simmer for about 30-45 minutes. The liquid will get thicker and almost to a syrup consistency. Ladle into a hot sterilized jars, leaving 1/4" headspace. After wiping the jars, place lids and bands on and process in the water bath for 10 minutes.
Notes
- FAVORITE
↑ Back to top
Hot Stone
Adapted from http://www.hotstones.com/inst.html
Steps
- (1) Before using your Hot Stone for the first time, thoroughly clean it with soap and hot water, and dry.
- (2) Place the Hot Stone in the Chromed Wire Oven Holder and put it into your oven.
- (3) Set the oven to 450°; once your oven reaches that temperature, set the timer for 20 to 30 minutes.
- (4) While your Hot Stone is heating, put down your Chromed Wire Table Stand wherever you plan to cook and entertain, and place the Alcohol Burners into the stand. If they are low or empty, fill them with 70% isopropyl alcohol (rubbing alcohol).
- (5) Light the burners. If you are having trouble lighting the burners try partially submerging the bottle of isopropyl alochol to gently warm it up. Once lit, adjust the burners by sliding the handle to the right and left - just enough to allow the burners to burn without giving off any noticeable smoke. Your estimated burning time for a full burner is 70 minutes.
- (6) Now that your Hot Stone has been in the oven for 20 to 30 minutes, remove it using heavy, heat-protective gloves. Your Hot Stone will be extremely hot and both the stone and chromed wire rack may burn anything they come into contact with. Place the heated Hot Stone onto the chromed wire table stand. Allow ten minutes on the stand with the alcohol burners running before starting to cook.
- (7) If desired, sprinkle a small amount of coarse sea salt on the stone, then lightly spray the top of your Hot Stone with cooking oil.
- (8) You're ready to cook! Most anything is suitable - meat, fish, veggies, anything raw or marinated, etc. Let your imagination and good taste take over!
- (9) After use, turn off the alcohol burners and allow your Hot Stone to cool completely. Once cool and rested for at least 30 minutes, wash your Hot Stone in warm, soapy water using the Hot Stone Cleaning Tool.
- (10) The appearance of thin cracks in the stone under normal useage is fine; they will not affect the strength, durability or function of the Hot Stone.
Notes
- FAVORITE
↑ Back to top
Hot-And-Sour Shrimp Soup Tom Yum Kung
Ingredients
- 6 cups Chicken Stock (page 72) or canned chicken broth 1 large stalk lemon grass, tough outer leaves discarded, trimmed to 12 inches and angle-cut into 2-inch pieces
- 10 (5 pairs) fresh Kaffir lime leaves (bai magroot). or strips of peel from 1 small lime
- 2 tablespoons Chili-Tamarind Paste
- 4 tablespoons Thai fish sauce (nam pla)
- 1/2 cup fresh lime juice
- 1/4 cup coconut-palm sugar or golden brown sugar
- I pound medium shrimp
- 1/2 pound oyster mushrooms or button mushrooms, wiped clean and sliced
- 5 small Thai chilies (phrik khce nu), stemmed and lightly crushed
- Sprigs of cilantro
Steps
- Put the stock and lemon grass in a soup pot II using Kaffir lime leaves, tear each leaf in
- half and add to the pot If using lime peel, add to the pot (iradually bring to a low boil
- over medium-high heat. Keep at a low boil (or 1 minute. Stir in the chili tamarind paste
- Add the fish sauce and lime juice. Add the sugar and stir until it is dissolved and
- blended. Add the shrimp and mushrooms and simmer just until cooked, about 1 minute
- Float the chilies on top and turn oil the heat. Ladle the soup into a steamboat, a soup
- tureen, or individual serving bowls. Tear a sprig or two of cilantro over each serving
- NOTE: This soup is the classic form ot a verv popular soup style called Kirmj torn yum
- Replace the shrimp with chicken and you will create another version torn yum irui
- Frequent customers of Thai restaurants know that the lemon gras and hme leaves
- that flavor Thai soups are not meant to be eaten Eating the chilies is optional
Notes
- FAVORITE
↑ Back to top
Hot-Water Pie Crust

Ingredients
- 544 g high-protein all-purpose flour ( 19 ounces; 4 1/4 cups), such as King Arthur or Heckers, see notes
- 2 teaspoons Diamond Crystal kosher salt; for table salt, use half as much by volume
- 180 g lard or beef suet ( 6 1/3 ounces; 3/4 cup plus 1 tablespoon)
- 3/4 cup ( 180 ml) water
Steps
- In a large mixing bowl, whisk flour and salt to combine.
- In a small saucepan, combine lard or suet and water. Bring to a simmer over medium-high heat; when fat has melted completely, immediately pour it over dry ingredients. Using a flexible spatula, stir mixture until it forms a shaggy dough.
- When dough is cool enough to handle, use your hands to shape it into a mass. Flip dough onto a lightly-floured surface and knead until it becomes a smooth dough, about 1 minute.
- Use dough immediately in any recipe calling for a hot water crust. To roll dough, place it between two 13-by-18-inch pieces of parchment and roll to desired thickness.
↑ Back to top
Hotteok (Sweet Filled Pancakes)

Tags: Breakfast
Korean
Servings: 10 hotteok
Ingredients
- 1 ½ cups/360 milliliters whole milk
- 2 tablespoons granulated sugar
- 1 packet/7 grams instant yeast
- 1 ½ cups/225 grams bread flour, plus more for dusting (see Tip)
- 1 cup/150 grams sweet rice flour
- 1 ½ tablespoons cornstarch
- ½ teaspoon coarse kosher salt
- Vegetable oil, for greasing and frying
- ½ cup/125 grams firmly packed muscovado or dark brown sugar
- ½ cup/75 grams roasted unsalted peanuts, coarsely chopped
- 1 tablespoon ground cinnamon
- ¾ teaspoon coarse kosher salt
FOR THE DOUGH:
FOR THE
FILLING:
Steps
- Make the dough: In a small saucepan over medium heat, heat the milk to about 105 degrees. (If you don’t have a thermometer, heat the milk until it feels like a warm bath — hot but not scalding). Remove from heat, stir in the granulated sugar and yeast, and whisk until the sugar has dissolved. Let stand in a warm place for 3 to 5 minutes, or until bubbling, to activate the yeast.
- In a large bowl, combine the bread flour, rice flour, cornstarch and salt. Slowly stir in the warm milk mixture until a sticky dough forms. Grease your hands with a little oil to prevent sticking and shape the dough into a ball. Transfer the dough ball to another large bowl greased lightly with vegetable oil, and cover with a clean, damp kitchen towel. Let the dough rise in a warm place until doubled in size, 1 1/2 to 2 hours. Punch it down, cover again and let it rise until doubled in size again, about 1 1/2 hours more.
- Meanwhile, make the filling: In a small bowl, mix together the muscovado sugar, peanuts, cinnamon and salt. Muscovado sugar has a tendency to clump — use your fingers to squish any clumps.
- After the dough has risen a second time, dust a clean work surface with bread flour and turn the dough out onto it. Dust the top of the dough with some more flour and knead it a few times. Shape the dough into a fat, long log.
- Cut the dough into 10 equal pieces, shape each piece into a ball, set on the floured work surface, and cover with a clean kitchen towel or plastic wrap. Dusting with flour as needed to prevent sticking, press a dough ball into a 4-inch-wide disk using your fingertips. Make sure the disk is uniformly thick so the finished pancake will be evenly filled.
- Put the disk in your hand and slightly cup it. Spoon 2 packed tablespoons of the filling into the center of the disk. Seal the disk closed by wrapping the dough around the filling and pinching the edges together at the top. Once sealed, reshape gently to form a ball, set with the seam side down on the floured work surface and cover with a clean kitchen towel or plastic wrap. Repeat with the remaining dough balls and filling. (You may have some leftover filling. Sprinkle it on buttered toast or roti. Combine it with peeled, sliced apples and bake it into a pie or crumble.)
- In a large nonstick skillet, heat 3 tablespoons oil over medium-high. Put 2 or 3 dough balls seam-side down in the skillet and immediately flatten them with a spatula to a diameter of about 4 inches. Reduce the heat to medium and fry the pancakes until golden brown and crisp on the bottom, 3 to 4 minutes. Flip them and cook until the other side is golden brown and the hotteok feel slightly springy to the touch, 3 to 4 minutes more.
- Transfer the hotteok to a wire rack or paper towel-lined plate when done. Repeat with the remaining dough balls, wiping the skillet clean and adding fresh oil for each batch. Let the hotteok cool slightly before serving; it’s easy to burn yourself in your haste to gobble these up, as the insides are hot and oozing. Any leftovers can be cooled completely and frozen in an airtight container for up to a month. Reheat in a 350-degree oven, and re-fry in a pan with a little oil to crisp them again.
Notes
- You can substitute all-purpose flour for bread flour, using 1 2/3 cups/225 grams all-purpose flour.
↑ Back to top
How I Got Hooked On (Crick) Crack
Tags: Baking
Crackers
Ingredients
- 1 1/2 cups (204 grams) all-purpose flour, plus more for rolling
- 1/2 cup (86 grams) yellow cornmeal (not coarse polenta), plus more for sprinkling
- 1 tablespoon sugar
- 1/2 teaspoon kosher salt, plus more for sprinkling
- 1 1/4 sticks (5 ounces; 141 grams) cold unsalted butter, cut into 1/4-inch cubes
- 3/4 cup (180 ml) cold buttermilk
- About 2 tablespoons toasted sesame seeds
- About 2 tablespoons nigella seeds, or sesame seeds (see above)
- Water, for brushing
- Kosher salt, for sprinkling
For the dough:
For the
topping:
Steps
- To make the dough: Combine the flour, cornmeal, sugar and salt in the bowl of a stand mixer fitted with a paddle attachment. (Alternatively, you can make the dough in a large bowl with a sturdy hand mixer.) Add the bits of butter. Mix on low speed until the butter breaks down to almost invisible pieces; the mixture will resemble sand. Add the buttermilk. The dough will come together and be quite wet.
- Lightly flour a work surface. Transfer the dough to the work surface and form it into a flat rectangle about 8 by 4 inches and about 1 inch thick. Wrap in plastic and refrigerate overnight.
- Divide the dough into quarters – work with one piece at a time and keep the remaining dough in the fridge. Lightly flour a work surface and the top of the dough. Roll out the first quarter of the dough into a rectangle approximately 12 inches by 14 inches and 1/16 inch thick. Don’t worry about rolling the dough into a perfect rectangle; it is more important that it rolls out to the thickness. Keep dusting the work surface and the top of the dough with flour – it’s a soft, wet dough and needs flour (see above) – and turning the dough over to check that it’s not sticking.
- Line a baking sheet with parchment paper and sprinkle with about 1 tablespoon of cornmeal. Carefully lift the rolled sheet of dough and place on the prepared baking sheet. Place another sheet of parchment paper on the top of the rolled dough on the baking sheet. Roll out the remaining pieces of dough, layering them on the baking sheet, each separated by parchment paper sprinkled with cornmeal; cover the last piece of dough with a sheet of parchment paper. Refrigerate for at least 4 hours, or for up to overnight. If you have room for the dough in your freezer, pop it in there – the dough is very soft, so the freezer is your friend here.
- Center a rack in the oven and preheat it to 350 degrees F.
- To make the topping (see above): Combine the sesame and nigella seeds. Have a small bowl with cold water, a pastry brush and some kosher salt at hand.
- Transfer one sheet of dough on parchment to a baking sheet. Leave the others in the refrigerator or freezer.
- Using a dough docker or a fork, prick holes over the surface of the dough to prevent the dough from bubbling up as it bakes – or don’t (see above). Brush the dough with water (don’t overdo it). Sprinkle with about 1/4 teaspoon salt and about one-quarter of the seed mixture (no need to be exact here). Using a ruler, a pizza or ravioli cutter or a knife, cut the dough into 3-inch squares – or don’t (see above). Don’t worry about separating the crackers – they’ll do that themselves in the oven. When this batch goes into the oven, pull the next sheet of dough out of the refrigerator or freezer and top and cut it.
- Bake, rotating the pan, until lightly browned, 15 to 17 minutes. Watch the first pan for exact timing. Transfer the baking sheet to a rack and let the crackers cool on the sheet.
- Continue baking the remaining dough.
- STORING: The crackers will keep in an airtight container for up to 3 days.
↑ Back to top
How to Make Banh Mi at Home
Servings: Makes 6 rolls
Ingredients
- 500 milligrams vitamin C from a capsule or crushed tablet
- 1 teaspoon (0.2 ounces) fine sea salt (like La Baleine)
- 1 1/2 teaspoons (0.2 ounces) sugar
- About 2 teaspoons (0.25 ounces; 1 envelope) instant dry yeast (SAF/Red Star and Flesichman's both work well)
- 2 tablespoons lightly packed (0.6 ounces) vital wheat gluten, plus more as needed (like Bob's Red Mill or Giusto's)
- Scant 3 1/4 cups (3 cups plus 3 1/2 tablespoons; 16 ounces) unbleached all-purpose flour, plus more as needed (like Gold Medal or Whole Foods brand; if using King Arthur flour, reduce the amount of VWG to 4 teaspoons)
- 1 1/2 tablespoons (0.6 ounces) shortening, in 3 or 4 chunks, at room temperature (like Crisco, Earth Balance, or Spectrum)
- 1 1/4 cups (10 ounces) very warm tap water (about 110° F)
Steps
- Mix and rise: Put the vitamin C, salt, sugar, yeast, vital wheat gluten (VWG), and flour in the bowl of a heavy-duty stand mixer. With the paddle attachment in place, mix on the lowest speed for 1 minute, adding the shortening midway. Stop to add water. Restart on the lowest speed and continue mixing for about 1 minute to form a shaggy ball. Let sit for 5 minutes, uncovered, to hydrate. Lightly oil a bowl for rising the dough. Set aside.
- Pull the dough off the paddle, attach the dough hook, and mix on medium-low (speed 2 on a KitchenAid) for 2 minutes, until smooth and medium-firm. The dough should wrap around the hook in the last 30 seconds. If the dough is soft and wraps around the hook early on, add 1 to 2 teaspoons of VWG to stiffen and build structure.
- Transfer the dough to an unfloured work surface and briefly knead it into a ball. If the dough feels soft and moist (think perspiration on a humid day), lightly dust the work surface with flour and knead it in. The finished dough should be barely tacky; when you lightly press a finger into the dough, it should bounce back immediately yet a shallow indentation should remain. Put it into the oiled bowl, turn to coat, then tightly cover with plastic wrap. Set it in a warm spot to rise for 45 minutes, or until it doubles in volume.
- Cut, round, and shape: Uncover the bowl and set the plastic wrap aside to reuse later. Invert the dough onto your work surface. Cut the dough in half. Form each half into a brick shape, then cut crosswise into 3 pieces to yield 6 pieces total.
- To round each dough piece, use both hands to cup it, then pull, tuck, and gather the edges toward the center to form a small mound. Aim to create a taut outer surface. Put the mound, seam side down, on your work surface, then loosely cover with the saved plastic. Let the balls rest and rise for 10 minutes. Line a heavy-duty rimmed baking sheet (I use a half sheet pan) with parchment paper. Set aside.
- Uncover the mounds and save the plastic (you’ll need it again). To shape each roll, put the dough smooth side-down on your work surface. Press and pat it into a big thick disk, about 4 1/4 inches wide and 5/8 inch thick.
- Imagine a scroll that rolls inward from the top and bottom. Roll the top down and over twice, pressing each time to seal well. When done, the top should be rolled to the midline. Roll the bottom up and over twice, sealing well each time. Firmly pinch the top and bottom together to form a center seam and create surface tension. Pinch the ends to seal.
- Gently roll and rock the dough back and forth to form a torpedo about 6 1/2 inches long and 1 3/4 inches wide at its center. Place the roll, seam side-down, on the lined baking sheet. Repeat, arranging the rolls in a 3 by 2 formation on the prepared baking sheet.
- Proof and bake: Smear a little oil (or use nonstick spray) on 2 pieces of plastic wrap (use the saved one plus a new piece), then use them to loosely cover the rolls. Let them rise until more than doubled, close to a full rise, which will take about 1 hour at moderate room temperature. If it’s a hot day, preheat the oven after shaping the rolls.
- After 20 minutes of rising, or when most rolls are 2 inches wide, set up the oven for baking. Place a broiler pan or a heavy-duty rimmed baking sheet on the oven floor, its rim positioned near the oven edge (you’ll be pouring hot water into this pan). Put a rack in one of the lower positions, about 5 inches from the water pan, to safely pour water into the pan later. Place a baking stone (or an inverted heavy-duty rimmed baking sheet) on the rack. Preheat to 475° F.
- At 45 minutes, or when the rolls have nearly doubled, remove the plastic wrap. Let the rolls dry and finish rising for 10 to 15 minutes. Meanwhile, bring some water (about 1 cup) to a boil, then lower the heat to keep it hot. Find a 1-quart measuring cup or similar vessel -- you'll use it later to pour hot water into the pan in the oven. Partially fill a spray bottle with water. Set aside.
- Around the 1 hour mark, or when the rolls are porpoise-like and 2 1/2 to 2 3/4 inches at the middle, it’s time to bake. Pour a good 1⁄2 cup of hot water into the pouring vessel. Set near the stove.
- To slash each roll, hold a sharp knife nearly horizontal to the roll surface and make one angled cut on the midline. Mist the rolls 5 or 6 times with the spray bottle of water. Slide the baking sheet onto the stone or invetred sheet, carefully pour the hot water into the pan that's on the oven floor, then close the door. Lower the heat to 425° F and bake for 22 to 24 minutes, or until golden brown and hollow sounding (check by thumping the bottom crust).
- When the rolls are light golden, usually after baking for 15 minutes, rotate the pan and/or shift the rolls to expose them equally to the oven temperature variation. (If the rolls achieve that color after baking for only 10 minutes, lower the temperature to 400° F.)
- When done, turn the oven off. Let the rolls further crisp and brown in the oven for 8 to 10 minutes. Remove the rolls from the oven and let them cool on a rack for about 45 minutes before eating. The sides will slightly soften. If the rolls are a little flat, don’t fret because you’ll be filling them to a beautiful plumpness. Use the rolls as is, or reheat them to achieve a shattering crispness, like I do in my master banh mi recipe.
Monitor the rolls via
these benchmarks:
↑ Back to top
How to Make Buldak (Korean-Style Fire Chicken)
Steps
- The fire (bul) of buldak starts with its sauce, which uses a number of Korean pantry staples to build layers of nuanced heat. This heat is tempered by sweet and savory ingredients, as well as fresh aromatics, to make a sticky, spicy glaze that acts as a marinade as well as a sauce.
- Gochujang and gochugaru chili powder form the base layer of heat for the sauce, with gochujang lending its characteristic fermented funk and gochugaru providing floral and smoky notes. Gochugaru is sold both coarsely and finely ground. For this application, we want the gochugaru to meld into a mostly smooth sauce, so I use finely ground gochugaru. The coarse ground version will work in a pinch, but your sauce will be slightly gritty.
- I whisk the gochugaru and gochujang together with soy sauce (for umami), chicken stock (meaty richness), toasted sesame oil (nutty and slightly bitter), and Korean rice syrup (sticky sweet). It's easy to draw a comparison between this combination of spicy, sweet, and savory ingredients with that of a traditional American barbecue sauce. Buldak's elements just have more heat, age, funk, and depth to them. As with American barbecue sauce, getting these flavors into balance is crucial; too much heat won't make you any friends, but veering too far into the sweet lane would be even worse. With the foundation of the sauce squared away, I wanted to build on it by adding aromatics and fresh pops of heat to the mix.
- I start this process by sweating minced garlic and grated fresh ginger just until they release their aroma. We're looking to rein in the aggressive punch of raw garlic without taking away all of its bite, while also coaxing out the floral heat of the ginger. Next, I up the heat levels by adding a tablespoon of freshly ground black pepper and some minced fresh chilies. Blooming these ingredients in hot oil releases their fat-soluble aromas, creating more layers of spiced heat for the buldak sauce. The fresh chilies bring bright, vegetal heat that you can taste up-front, while the toasted piquancy of black pepper complements the smoky, sweet heat of the gochujang mixture.
- That mixture then gets added to the saucepan along with one final ingredient: Sprite. During initial rounds of testing, I couldn't quite get my buldak sauce to the shiny glaze consistency that I wanted. I tried adding a touch more rice syrup, but that made the sauce too sweet. Simply reducing it more wouldn't work either; the sauce should coat the chicken, not blanket it like a meatloaf glaze.
- Frustrated, I reached out to someone I used to cook with in Chicago, a Korean-American friend with whom I've shared a few orders of late-night, postservice, pre-karaoke buldak. He immediately diagnosed my sauce issue: "You gotta have Sprite. It's the key to getting that glazed sheen." I ran out, grabbed a couple of sodas, and was in business. All I had to do was reduce the sauce until it coated the back of a spoon. Problem solved.
- Once you reduce the sauce, it just needs to be cooled to room temperature, or it can be refrigerated for up to a week.
- The chicken in buldak needs to be able to stand up to both the high heat of the sauce and the grill. Just like with American barbecue, the protein needs to have enough fat to cut through its hot and sweet glaze, and lean chicken breasts just won't do here. They would also dry out too quickly during cooking, as we are looking to get a good amount of char, particularly on the skin of the chicken.
- Our best bet for juicy, chargrilled chicken is bone-in, skin-on thighs. Because buldak is a shareable anju dish, the meat will eventually end up being cut into bite-size pieces, but it's easier to start the chicken out on the grill as whole deboned thighs.
- To debone the thighs, make incisions running along the length of the bone. Use the tip of your knife to fully expose the bone and then run the blade underneath it to separate it from the flesh. Normally, I would scrape the meat away from the bone as I release it from the thigh but not in this case. The bones will get grilled alongside the thighs, and leaving some meat on them makes for a more enticing snack to gnaw on. Toss the thighs and bones with half of the gochujang sauce and leave them to marinate while you fire up the grill.
- Side note: If you are hosting a game-day party and would prefer to use wings instead of chicken thighs, go for it. I tested the recipe with chicken wings, and it works really well. You'll just need to adjust grilling times accordingly.
- For the best buldak, use a charcoal grill. I'm not looking to fuel or settle the charcoal versus gas debate here. Odds are you've picked a grilling lane at this point and are going to stick with that. But during testing, tasters unanimously preferred buldak cooked with charcoal rather than gas. Either way, I start the thighs skin-side down over direct high heat, and the bones on the outer edges of the grill.
- The fat on the skin will begin to render, and sauce will drip down onto the coals, producing aromatic compounds that vaporize and are deposited back into the chicken as it cooks. Once the skin on the thighs is well-charred, I flip them over and char them lightly on the flesh-side until the thighs are barely cooked through. During this time I also constantly turn the bones, making sure they pick up some char without getting burnt to a crisp.
- It's now time to cut the thighs into bite-size pieces. I do this with poultry shears, which are commonly used for this purpose at Korean barbecue restaurants. Snipping the chicken into chunks directly over the grill is quick, and makes for less cleanup, but you can always dice the thighs up on a cutting board with your knife. Brush the chicken with the rest of the gochujang sauce, making sure the pieces are well-coated with the glaze. Once the chicken is fully cooked through, transfer the morsels and bones to a small cast iron skillet for the cheesy finale.
- The first time I had buldak, I can't say I was sold on the optional topping of melted mozzarella cheese. I misread it as an unnecessary and over-the-top flourish that would muddy the flavor of the dish. I was wrong; this is down and dirty bar-food alchemy. The gooey cheese melds with juicy bites of charred chicken, while also cooling the fire of the buldak sauce. And you will want that cooling effect, because the fire chicken burn is very real. I'd rather get the fire-extinguishing properties of dairy in melted cheese form than with a glass of milk.
- Scatter shredded, low-moisture mozzarella over the thigh pieces (I leave the bones uncovered so people know where they are) and pop the skillet under the broiler until the cheese is molten and bubbly. All you need now is some makgeolli, soju, and maybe some karaoke tunes.
Raging Bul: Building and
Balancing Heat
Thigh Maintenance
The Char Side
Say Cheese
↑ Back to top
How to Make Crusty Rolls

Servings: 10 Bolillos
Ingredients
- 3/4 cup of water (177 ml or 6 oz)
- 1/2 teaspoon instant or active yeast* (1.5 grams)
- 1 cup All Purpose Flour or Bread flour** (125 grams or 4.25 oz)
- 3 Cup All Purpose Flour (375 grams or 13.23 oz)
- 1 1/2 teaspoon instant or active yeast (5 grams or 0.22 oz)
- 2 teaspoons of salt (11 grams or 0.40 oz)
- 1/4 cup of shortening melted and cooled.*** (50 grams or 1.76 oz)
- 1 cup of warm water NOT HOT(235 ml or 8 fl oz)
STARTER:
DOUGH:
Steps
- FOR THE STARTER: The night before baking, place yeast and water in a small bowl, mix well and add the flour. Mix again. You don’t need to knead here. Cover with a plastic wrap and let sit on your kitchen counter top all night or at least 8 hours. Making this starter will increase the flavor of your bread. The next morning the starter will have a larger volume and will have formed lots of bubbles.
- BAKING DAY. In a large bowl or your heavy-duty mixer, place the starter, flour, salt, yeast and melted shortening. Start kneading the dough, adding the warm water slowly right at the beginning of the kneading process. IMPORTANT: If you live in a very humid place, you will need to reduce the amount of water by about 2 tablespoons less than indicated. If using a mixer, knead for 7 minutes on speed 2; if kneading by hand, knead the dough for about 15 minutes. The dough will separate from your mixing bowl like it shows in the above picture while kneading.
- Remove dough from the bowl and place on your working surface to form a ball. It should look soft but still a little rough.
- Grease a large bowl with shortening, oil or PAM spray. Place the dough and turn it all over to make sure all sides are covered with a coating of the grease. Cover with a plastic wrap and let it rest in a warm place for 2 to 3 hours or until the dough has doubled in volume. If you live in a warm and humid weather this step will take less time.
- After the dough has doubled in volume, gently push your fist in to deflate it. Divide the dough into 10 pieces. (About 110 grams each). Place the pieces of dough into your slightly greased working surface and cover with a greased plastic wrap and let them rest for 15 minutes to allow the gluten to develop and help to shape your bollillos/rolls easier.
- To form the bolillos-rolls, dust your work surface with flour very lightly, flatten one piece of dough with the palm of your hand and fold 1/3 of the dough towards you and press down with your fingers, sealing it very well. Fold the dough again, repeating the sealing process until you form a roll, pinching the dough tightly. Make sure all the ends are sealed.
- To shape the rolls, place your hands over the dough and press gently but firmly, cupping your fingers, rolling back and forth. While doing this, press the heel of your hands to leave some dough uncovered to form the traditional bolillo ears.
- Place each bolillo/roll seam side down on the greased baking sheet and cover with a greased plastic. Allow them to rise until they’ve doubled in volume. About 1 and 1/2 hour.
- At least 20 minutes before the end of the rising period, turn on your oven at 450 degrees F. Place the metallic pan for the water on the oven floor.
- Once the rolls have doubled in volume, and just before placing them inside the oven, make a deep cut using a sharp serrated knife or a razor blade, holding your hand at a 45-degree angle.
- Spray the rolls with warm water, place them in a preheated oven and add 1 1/2 cup of cold water to the metallic tray you placed on the oven floor. The steam will create that beautiful thin and crunchy crust. Bake for 20 to 25 minutes until they are golden, remove form the oven, and let them cool on a wire rack.
- The bread keeps well for a couple of days in a plastic bag, or it can be frozen for up to a month. To reheat: thaw bread lightly, spray water, and place in preheated 400 degrees F oven until crispy. About 12-15 minutes until warm and crunchy.
Notes
- *If using active yeast, dissolve first with the water, mix well and let it proof for 5 minutes.
- **Bread flour will render a finer texture.
- **Traditional the bolillo recipe doesn't include shortening or any other sort of fat. But, I like to add it to preserve the softens of the bread for more days.
- You will need a large baking sheet, a metallic pan to place in the oven with water, a spray water bottle, and plastic wrap.
- I use a Baguette Pan for my bolillos, but a baking sheet or cookie sheet does the same job.
- Baking with yeast requires time to let the dough rise. Plan your day ahead of time to get the best results.
↑ Back to top
How to Make Diy Laoganma's Chili Crisp
Adapted from https://www.seriouseats.com/2018/04/chili-crisp-spicy-salty-crunchy-tingly-and-good-on-everything.html
Steps
- To fry the shallots, I start them in cold peanut oil over high heat and stir constantly. As the shallots lose their moisture and the bubbling subsides, they quickly transform from flaccid and pale to golden and crisp.
- When they're a shade lighter than tan, strain the shallots through a fine-mesh sieve, reserving the oil. They won't appear truly crisp and golden until they've come out of the oil, after which the residual heat will help them reach a crisp, golden brown.
- Return the oil to the pot and add the thinly sliced garlic, then fry over medium-low heat until it's barely browned before straining. Garlic can quickly become bitter, so it's important to stop cooking long before it hits golden brown.
- The peanut oil is now fully flavored with shallots and garlic, making it the perfect base for the chili crisp. I return the oil to the pot one more time and heat it up before pouring it over the dried chilies, spices, and peanuts. This quickly fries everything, blooming the spices and getting the flavors mingling. Once this málà base is cool, I stir in the fried shallots and garlic chips, and it’s ready.
- Sure, technically chili crisp is a condiment, but I prefer to think of it as a lifestyle. I can’t sit down to a meal without it, and making it at home has opened me up to terrifying new possibilities. No longer must it be confined to the tingling world of Sichuan; with just a few tweaks—some clever chili swaps and spice upgrades—chili crisp can go global. Pasilla and morita chilies paired with cinnamon, cloves, and achiote give it a Mexican twist, while Kashmiri red chilies combined with garam masala and diced mango pickle take it on a trip to India.
- Luckily, regardless of where you take your chili crisp, you know you can confidently put it on anything. If you’re a purist, toss it into noodles or use it as a topper for rice and ramen. Or be reckless and scoff at tradition, stirring it into creamy risotto and stuffing it inside a fluffy tamale.
↑ Back to top
How to Make Homemade Fresh Mozzarella
Adapted from https://www.thekitchn.com/how-to-make-homemade-mozzarella-cooking-lessons-from-the-kitchn-174355

Tags: Cheese
Homemade
Servings: about 1 pound of
mozzarella
Ingredients
- 1 1/4 cup water
- 1 1/2 teaspoon citric acid
- 1/4 rennet tablet or 1/4 teaspoon liquid rennet (Not Junket rennet, see note below)
- 1 gallon milk, whole or 2%, not ultra-pasteurized*
- 1 teaspoon kosher salt
- 5 quart or larger non-reactive pot
- Thermometer
- 8" knife, off-set spatula, or similar slim instrument for cutting the curds
- Microwavable bowl
- Rubber gloves
GET
INGREDIENTS:
EQUIPMENT:
Steps
- Prepare the Citric Acid and Rennet: Measure out 1 cup of water. Stir in the citric acid until dissolved. Measure out 1/4 cup of water in a separate bowl. Stir in the rennet until dissolved.
- Warm the Milk: Pour the milk into the pot. Stir in the citric acid solution. Set the pot over medium-high heat and warm to 90°F, stirring gently.
- Add the Rennet: Remove the pot from heat and gently stir in the rennet solution. Count to 30. Stop stirring, cover the pot, and let it sit undisturbed for 5 minutes.
- Cut the Curds: After five minutes, the milk should have set, and it should look and feel like soft silken tofu. If it is still liquidy, re-cover the pot and let it sit for another five minutes. Once the milk has set, cut it into uniform curds: make several parallel cuts vertically through the curds and then several parallel cuts horizontally, creating a grid-like pattern. Make sure your knife reaches all the way to the bottom of the pan.
- Cook the Curds: Place the pot back on the stove over medium heat and warm the curds to 105°F. Stir slowly as the curds warm, but try not to break them up too much. The curds will eventually clump together and separate more completely from the yellow whey.
- Remove the Curds from Heat and Stir: Remove the pan from the heat and continue stirring gently for another 5 minutes.
- Separate the Curds from the Whey: Ladle the curds into a microwave-safe bowl with the slotted spoon.
- Microwave the Curds: (No microwave? See the Notes section below for directions on making mozzarella without a microwave.) Microwave the curds for one minute. Drain off the whey. Put on your rubber gloves and fold the curds over on themselves a few times. At this point, the curds will still be very loose and cottage-cheese-like.
- Microwave the Curds to 135°F: Microwave the curds for another 30 seconds and check their internal temperature. If the temperature has reached 135°F, continue with stretching the curds. If not, continue microwaving in 30-second bursts until they reach temperature. The curds need to reach this temperature in order to stretch properly.
- Stretch and Shape the Mozzarella: Sprinkle the salt over the cheese and squish it with your fingers to incorporate. Using both hands, stretch and fold the curds repeatedly. It will start to tighten, become firm, and take on a glossy sheen. When this happens, you are ready to shape the mozzarella. Make one large ball, two smaller balls, or several bite-sized bocconcini. Try not to over-work the mozzarella.
- Using and Storing Your Mozzarella: The mozzarella can be used immediately or kept refrigerated for a week. To refrigerate, place the mozzarella in a small container. Mix a teaspoon of salt with a cup of cool whey and pour this over the mozzarella. Cover and refrigerate.
↑ Back to top
How to Make Perfect Hamantaschen

Tags: Cookies
Holidays Jewish
Servings: Adjust Total Servings 1
batch
Ingredients
- Hamantaschen dough , recipe options linked in blog post above
- Filling of your choice , filling recipes linked in blog post above
- Notes
- Nutritional Information: The values here are from my Dairy Free Hamantaschen dough recipe, 1 cookie per serving. Recipe here.
Steps
- Roll dough between 1/8 - 1/4 inch thick and cut into circles with a cookie cutter or glass rim that is at least 3 inches wide.
- Assemble the hamantaschen in three steps. First, grasp the left side of the circle and fold it towards the center to make a flap that covers the left third of the circle.
- Grasp the right side of the circle and fold it towards the center, overlapping the upper part of the left side flap to create a triangular tip at the top of the circle. A small triangle of filling should still be visible in the center.
- Grasp the bottom part of the circle and fold it upward to create a third flap and complete the triangle. When you fold this flap up, be sure to tuck the left side of this new flap underneath the left side of the triangle, while letting the right side of this new flap overlap the right side of the triangle. This way, each side of your triangle has a corner that folds over and a corner that folds under-- it creates a "pinwheel" effect. This method if folding is not only pretty-- it will help to keep the cookies from opening while they bake.
- Pinch each corner of the triangle gently but firmly to secure the shape.
- Repeat this process for the remaining dough circles. Bake according to recipe instructions.
Place a teaspoon of filling (whichever filling you choose) into the
center of each circle. Do not use more than a teaspoon of filling, or
you run the risk of your hamantaschen opening and filling spilling out
during baking. Cover unused circles with a lightly damp towel to
prevent them from drying out while you are filling.
↑ Back to top
How to Make Sourdough Bread
Servings: Makes 2 loaves
Ingredients
- 1 tablespoon active sourdough starter
- 75 grams (1/2 cup) all-purpose flour or bread flour
- 75 grams (1/3 cup) water
- 1 tablespoon salt
- 525 grams (2 1/2 cups) water
- 700 grams (5 1/2 cups) all-purpose flour or bread flour
- Small mixing bowl
- Large mixing bowl
- Plastic wrap or other covering for the bowls
- Spatula
- Pastry scraper
- Bread proofing baskets, colanders, or mixing bowls
- Dutch ovens or large heavy-bottomed pots with lids
- Lame, sharp knife, or serrated knife
For the
leaven:
For the dough:
Equipment
Steps
- Make sure your sourdough culture is active: If your sourdough has been in the fridge, take it out 2 to 3 days before you plan to bake. Feed it daily to make sure it's strong and very active before you make the bread.
- Make the leaven (overnight): The night before you plan to make the dough, combine a tablespoon of active sourdough culture with the flour and water for the leaven. Mix thoroughly to form a thick batter. Cover and let stand at room temperature overnight, for about 12 hours.
- Test that the leaven is ready: Generally, if the surface of the leaven is very bubbly, it's ready to be used. To double check, drop a small spoonful of the leaven in a cup of water; if the leaven floats, it's ready.
- Dissolve the salt: Combine the salt and 50 grams (about 1/4 cup) of the water for the dough in a small bowl. Set aside, stirring every so often to make sure the salt dissolves.
- Mix the leaven and water: Combine the leaven and the remaining 475 grams (2 cups) of water for the dough in a large mixing bowl. Stir with a spatula or use your hands to break up and dissolve the leaven into the water. It's OK if the leaven doesn't fully dissolve and a few clumps remain.
- Add the flour: Stir the flour into the water and leaven with a spatula until you see no more visible dry flour and you've formed a very shaggy dough.
- Rest the dough (30 minutes, or up to 4 hours): Cover the bowl and let the dough rest for at least 30 minutes or up to 4 hours. This is the autolyse stage where the flour is fully absorbing the water and enzymes in the flour begin breaking down the starches and proteins.
- Mix in the salt: Pour the dissolved salt over the dough. Work the liquid and salt into the dough by pinching and squeezing the dough. The dough will feel quite wet and loose at this point.
- Begin folding the dough (2 1/2 hours): To fold the dough, grab the dough at one side, lift it up, and fold it over on top of itself. Fold the dough four times, moving clockwise from the top of the bowl (or giving the bowl a quarter turn in between folds). Let the dough rest 30 minutes, then repeat. Do this a total of 6 times, every half hour for a total of 2 1/2 hours. The dough will start out shaggy and very loose, but will gradually smooth out and become tighter as you continue folding.
- Let the dough rise undisturbed (30 to 60 minutes): Once you've finished the folds, let the dough rise undisturbed for 30 to 60 minutes, until it looks slightly puffed. This dough won't double in size the way regular, non-sourdough breads will; it should just look larger than it did when you started.
- Divide the dough: Sprinkle some flour over your counter and turn the dough out on top. Work gently to avoid deflating the dough. Use a pastry scraper to divide the dough in half.
- Shape the dough into loose rounds: Sprinkle a little flour over each piece of dough. Use your pastry scraper to shape each one into loose rounds — this isn't the final shaping, just a preliminary shaping to prep the dough for further shaping. Shape them into rounds by slipping your pastry scraper under the edge of the dough and then scraping it around curve of the dough, like turning left when driving. Do this a few times to build the surface tension in the dough (it makes more sense to do it than to read about it!). Flour your pastry scraper as needed to keep it from sticking to the dough.
- Rest the dough (20 to 30 minutes): Once both pieces of dough are shaped, let them rest for 20 to 30 minutes to relax the gluten again before final shaping.
- Prepare 2 bread proofing baskets, colanders, or mixing bowls: Line 2 bread proofing baskets, colanders, or mixing bowls with clean dishtowels. Dust them heavily with flour, rubbing the flour into the cloth on the bottom and up the sides with your fingers. Use more flour than you think you'll need — it should form a thin layer over the surface of the towel.
- Shape the loaves: Dust the top of one of the balls of dough with flour. Flip it over with a pastry scraper so that the floured side is against the board and the un-floured, sticky surface is up. Shape the loaf much like you folded the dough earlier: Grab the lip of the dough at the bottom, pull it gently up, then fold it over onto the center of the dough. Repeat with the right and left side of the dough. Repeat with the top of the dough, but once you've fold it downward, use your thumb to grab the bottom lip again and gently roll the dough right-side up. If it's not quite a round or doesn't seem taut to you, cup your palms around the dough and rotate it against the counter to shape it up. Repeat with the second ball of dough.
- Transfer to the proofing baskets: Dust the tops and sides of the shaped loaves generously with flour. Place them into the proofing baskets upside down, so the seams from shaping are on top.
- Let the dough rise (3 to 4 hours, or overnight in the fridge): Cover the baskets loosely with plastic, or place them inside clean plastic bags. Let them rise at room temperature until they look billowy and poofy, 3 to 4 hours. Alternatively, place the covered basket in the refrigerator and let them rise slowly overnight, 12 to 15 hours. If rising overnight, bake the loaves straight from the fridge; no need to warm before baking.
- Heat the oven to 500°F: Place two Dutch ovens or other heavy-bottomed pots with lids in the oven, and heat to 500°F. (If you don't have two pots, you can bake one loaf after the next.)
- Transfer the loaves to the Dutch ovens: Carefully remove one of the Dutch ovens from the oven and remove the lid. Tip the loaf into the pot so the seam-side is down. Repeat with the second loaf. (See Recipe Note if your loaf sticks to the basket.)
- Score the top of the loaf: Use a lame, sharp knife, or serrated knife to quickly score the surface of the loaves. Try to score at a slight angle, so you're cutting almost parallel to the surface of the loaf; this gives the loaves the distinctive "shelf" along the score line.
- Bake the loaves for 20 minutes: Cover the pots and place them in the oven to bake for 20 minutes.
- Reduce the oven temperature to 450°F and bake another 10 minutes. Resist the temptation to check the loaves at this point; just reduce the oven temperature.
- Remove the lids and continue baking 15 to 25 minutes: After 30 minutes of baking, remove the lids from the pots to release any remaining steam. At this point, the loaves should have "sprung" up, have a dry surface, and be just beginning to show golden color. Place the pots back in the oven, uncovered.
- Bake another 15 to 25 minutes. Continue baking until the crust is deeply browned; aim for just short of burnt. It might feel a bit unnatural to bake loaves this fully, but this is where a lot of the flavor and texture of the crust comes in.
- Cool the loaves completely: When done, lift the loaves out of the pots using a spatula. Transfer them to cooling racks to cool completely. Wait until they have cooled to room temperature before slicing.
Notes
- Whole-wheat sourdough: You can replace up to half of the all-purpose flour with whole-wheat or whole-grain flour.
- All-purpose vs. bread flour: Bread flour will give your bread a sturdier, chewier texture and a loaf that's easier to slice. Loaves made with all-purpose flour will be a bit more delicate, especially when you cut them, but still work just fine.
- If your loaf sticks to the proofing basket: This still happens to me all the time! It's annoying, but not the end of your sourdough dreams. If some of the dough stays stuck to the lining of the proofing basket, try to gently disengage it or pinch it away with your fingers. Fold a pinch of dough over the tear and bake as usual. The crust will look a little rough where it was torn, but the bread will still taste delicious.
↑ Back to top
How to Make Sous Vide Chicken Wings

Steps
- I ran multiple batches of wings through a string of temperatures (150°F, 160°F, 165°F, 167°F, 170°F, 185°F) and times (1 hour; 2 hours; 3 hours) to find the best combination of the two. Which you pick will depend on your preferred result.
- If you want wings that literally fall off the bone while remaining juicy and tender, cook them at 160°F (71°C) for two hours.
- If you want the juiciest, most tender wings, but ones that have a little springiness remaining in the meat and don't separate from the bone quite so immediately, cook them at 165°F (74°C) for just one hour.
- Set up your immersion circulator to your desired temperature (as described above) and allow it to fully heat the water. While you're waiting, season the wings all over with salt.
- Fully submerge the wings in the hot water bath and cook for one or two hours, depending on the water temperature.
- Remove the bags from the water bath, open, and remove the wings. Blot them dry on towels, then arrange on wire racks set over rimmed baking sheets.
- When you're ready to finish the wings, set up a deep fryer, heating the oil to 400°F. Working in small batches, fry the wings until golden and crispy.
- The wings are now ready to be finished. In the linked recipe at the top and bottom of this article, I show how to make Buffalo wings by tossing them in that classic combo of Frank's RedHot and butter, but you can follow many other deep-fried wings recipes by cooking them sous vide first, air-drying them, and then following with a quick dunk in hot oil to finish them off (one exception: battered or breaded wings, since it is difficult to get a batter or breading to stick to fully cooked wings).
What Temperature and
Time for Sous Vide Wings?
Sous-Vide Wings
Step-By-Step
Preheat Water Bath,
Season the Wings, and Bag
Place the wings in one or more plastic bags. Because of the quick
cooking time, I find using zipper lock bags with the water
displacement
method less of a chore than dealing with my vacuum sealer (vacuum bags
tend to be more durable, which is something I want for longer cooking
times, but not something I worry about for the hour or two the wings
need).
Submerge and Cook
Remove from Bag and
Air-Dry
The
wings come out of the bags quite wet, and if you were to fry them
right
away, you'd not only get a lot of spitting and spattering as the
excess
water on the surface cooked off, but you'd also prolong the cooking
time, which risks ruining the positive effects of using sous-vide to
cook them.
Instead, move them to the fridge, uncovered, and allow them to air-dry
overnight or for about eight hours (the wire rack is important for
maximum air circulation around the wings).
Deep Fry
Transfer the fried wings to
paper towels to drain.
Finish as Desired
When your friends eat your multi-hour, multi-method chicken wings,
will
they be able to tell that they were cooked sous vide? Almost certainly
not. But you'll know it worked as planned based on their endless
raving
about how good they are.
↑ Back to top
How to Make Spaetzle, the Easy Way
Steps
- 1 cup flour (any kind should work, maybe you should try a fancy one, I just use white flour)
- a gallon size zippered plastic bag (or a pastry bag if you have one)
- In the plastic bag, mix the flour, salt, nutmeg, and pepper if you are using it. If using a pastry bag just mix in an appropriate sized bowl.
- In a separate bowl, beat the eggs and mix in the milk.
- Pour the milk and egg mixture into the plastic bag, zip it up and knead it until thoroughly mixed and sticky.
- I mean pretty big here, we're talking like a gallon of water.
- Try and smoosh all the dough into one corner of the bag, even if you doubled the recipe (you'll probably want to once you try it) there should be plenty of room in the bag. Once it's all on one side, clear the very tip of the corner (pic 2), and cut it off (pic 3.) The smaller the hole, the smaller the dumplings (that's how I like it.) Keep in mind that the hole will stretch over time, and the longer you let the dumplings cook will also determine their size.
- Gently squeeze the dumplings into the simmering water. I try not to make them too long. Let gravity help you. They will sink to the bottom and when they are done, they will float to the top. Use a slotted spoon to scoop them out and place into a frying pan. Also, clean your stove and counters before taking any pictures.
- Add the butter to the frying pan with the spaetzle. If you are making more than the recipe states, you may need to do more than one batch, or use a larger frying pan. Now, turn the heat up to medium or medium-high and saute the spaetzle in the butter until it is a nice golden brown color.
- The way I usually eat mine is with brown gravy. I just use the cheap packets that you just add to water. For this particular meal I was preparing, I served polska kielbasa cooked on sauerkraut, along with the spaetzle. If you wanna try this, just throw it in a casserole dish and bake until hot.
- Go enjoy your creation. I love this stuff and eat it all the time, especially with other eastern European foods, like wienerschnitzel, sauerkraut, corned beef, bratwurst, and whatever else I can get my hands on.
1/4 cup milk
2 eggs
1/2 teaspoon ground nutmeg
1/2 teaspoon salt
2 tablespoons butter
a pinch of freshly
ground pepper (this is totally optional, though again, try something
fancy like white pepper):
MIX THE DRY INGREDIENTS:
MIX THE WET INGREDIENTS:
MIX THE WET AND DRY
INGREDIENTS:
GET A BIG POT O' WATER
SIMMERING:
PREPARE THE BAG:
SQUEEZE 'EM OUT:
THE FINISHING TOUCHES:
SERVING SUGGESTIONS:
EAT IT!:
↑ Back to top
How to Make Sushi Rice

Tags: Japanese
Rice
Servings: 4 cups
Ingredients
- 2 cups sushi or short grain rice
- 2 cups water, plus extra for rinsing rice
- 2 tablespoons rice vinegar
- 2 tablespoons sugar
- 1 tablespoon kosher salt
Steps
- Watch how to make this recipe.
- Place the rice into a mixing bowl and cover with cool water. Swirl the rice in the water, pour off and repeat 2 to 3 times or until the water is clear.
- Place the rice and 2 cups of water into a medium saucepan and place over high heat. Bring to a boil, uncovered. Once it begins to boil, reduce the heat to the lowest setting and cover. Cook for 15 minutes. Remove from the heat and let stand, covered, for 10 minutes.
- Combine the rice vinegar, sugar and salt in a small bowl and heat in the microwave on high for 30 to 45 seconds. Transfer the rice into a large wooden or glass mixing bowl and add the vinegar mixture. Fold thoroughly to combine and coat each grain of rice with the mixture. Allow to cool to room temperature before using to make sushi or sashimi.
Notes
- My Private Notes
- Add a Note
- WATCH
↑ Back to top
How to Make the Fluffiest Brioche Ever!

Tags: Breads
Ingredients
- 200ml (3/4 cup + 2 tbsp) warm water;
- 7g (2 tsp) dry yeast;
- 350g (2 cups) all-purpose flour;
- 50g (1/4 cup) sugar;
- ½ tsp salt;
- 45g (3 tbsp) butter.
Steps
- Whisk warm water with sugar and dry yeast. Set them aside for the yeast to activate.
- Wisk the flour with salt and pour the yeast solution in.
- Work the dough with your hands until combined, then add butter and knead for 10 minutes.
- Set the ball of dough aside for 2 hours.
- Cut the dough into 6 pieces, roll each one out and roll again into a log.
- Place logs into the cake pan and set aside for 1 hour or until doubled.
- Bake for 20-25 minutes at 180°C/350°F.
↑ Back to top
How to Make the Perfect Omelet
Adapted from https://altonbrown.com/recipes/omelet/

Servings: 1
Ingredients
- 3 large eggs, warmed in hot water for 5 minutes
- Pinch salt
- 1 teaspoon room temperature butter, plus 1/2 teaspoon for finishing omelet
- 1/2 teaspoon fresh chopped chives
Steps
- Crack the warm eggs into a bowl, add salt and beat with a fork. Heat a 10-inch nonstick aluminum pan over medium heat.
- Once the pan is hot, add the butter and use a pastry brush to brush the butter around the surface of the pan. Pour the eggs into the center of the pan and stir vigorously with a rubber spatula for 5 seconds. As soon as a semi-solid mass begins to form, lift the pan and move it around until the excess liquid pours off into the pan. Using your spatula, move it around the edge of the egg mixture to help shape into a round and loosen the edge. Let the omelet sit in the pan for 10 seconds without touching.
- Shake the pan to loosen the egg from the pan. Lift up the far edge of the pan and snap it back toward you to flip the omelet. Using your spatula, fold over one-third of the omelet. Slide the omelet onto a plate and fold over so that the omelet is a tri-fold. Coat with the remaining butter and sprinkle with the chives. Serve immediately.
↑ Back to top
How to Make Zhug, the Yemenite Hot Sauce You'Ll Want to
Put On Everything
↑ Back to top
Hummingbird Cake
Adapted from http://www.myrecipes.com/recipe/hummingbird-cake-0

Servings: 12
Ingredients
- 3 cups all-purpose flour
- 2 cups sugar
- 1 teaspoon salt
- 1 teaspoon baking soda
- 1 teaspoon ground cinnamon
- 3 large eggs, beaten
- 1 1/2 cups vegetable oil
- 1 1/2 teaspoons vanilla extract
- 1 (8-ounce) can crushed pineapple, undrained
- 2 cups chopped bananas
- 1 cup chopped pecans
- Shortening
- Cream Cheese Frosting
- 1/2 cup chopped pecans
Steps
- Preheat oven to 350°. Whisk together flour and next 4 ingredients in a large bowl; add eggs and oil, stirring just until dry ingredients are moistened. Stir in vanilla, pineapple, bananas, and 1 cup chopped toasted pecans. Spoon batter into 3 well-greased (with shortening) and floured 9-inch round cake pans.
- Bake at 350° for 25-30 minutes or until a wooden pick inserted in center comes our clean. Cool cake layers in pans on wire racks 10 minutes; remove from pans to wire racks, and cool completely (about 1 hour).
- Place 1 cake layer on a serving platter. Spread 1 cup Cream Cheese Frosting over cake layer. Top with second layer, and spread 1 cup frosting over cake layer. Top with third cake layer, and spread top and sides of cake with remaining frosting. Arrange toasted pecan halves in a circular pattern over top of cake.
Notes
- FAVORITE
↑ Back to top
Hummus
Adapted from https://cooking.nytimes.com/recipes/12703-hummus
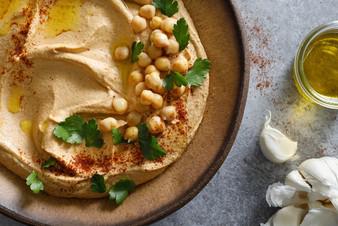
Tags: Dips and Spreads
Middle-East
Servings: 6 to 8
Ingredients
- 2 cups drained well-cooked or canned chickpeas, cooking liquid reserved if possible
- ½ cup tahini, with some of its oil
- ¼ cup extra virgin olive oil
- 2 cloves peeled garlic, or to taste
- Juice of 1 lemon, plus more as needed
- Salt and freshly ground black pepper
- 1 tablespoon ground cumin or paprika, or to taste, plus a sprinkling for garnish
- Chopped fresh parsley leaves for garnish
Steps
- Put the chickpeas, tahini, cumin or paprika, oil, garlic and lemon juice in a food processor, sprinkle with salt and pepper and begin to process; add chickpea-cooking liquid or water as needed to produce a smooth purée.
- Taste and adjust seasoning, adding more salt, pepper or lemon juice as needed. Serve, drizzled with some olive oil and sprinkled with a bit of cumin or paprika and some parsley.
↑ Back to top
Hungarian Poppy Seed and Walnut Noodles
Adapted from https://www.myjewishlearning.com/the-nosher/hungarian-poppy-seed-and-walnut-noodles-recipe/
Tags: Hungary
Noodles
Ingredients
- 1 lb tagliatelle or egg noodles
- 3 Tbsp butter
- 4 garlic cloves, sliced
- 1 oz poppy seeds
- 1.5 oz ground walnuts
- salt to taste
- zest of one lemon
Steps
- Cook the tagliatelle according to directions. Drain and set aside.
- While the tagliatelle are cooking, melt the butter in a sauce pan over medium heat. Add the garlic and cook 2-3 minutes until golden. Add poppy seeds and cook for another minute to release its fragrance. Add the walnuts and salt to pan, cook for another minute, and pour over the cooked pasta. Mix well.
- Add the lemon zest on top of the pasta. Serve immediately.
↑ Back to top
Hungarian Potato Bread
Adapted from http://www.bizzylizzysgoodthings.com/blog/hungarian-potato-bread-magyar-krumplis-kenyer
Servings: Makes two 1kg loaves
Ingredients
- (Magyar Krumplis Kenyér)
- 350g Desiree potatoes (2 medium sized potatoes)
- 35g fresh yeast or 3 teaspoons (15g) dried yeast
- 450-550mls lukewarm water*
- 1kg 'continental' wheat flour or strong baker's flour
- 1 heaped teaspoon sugar
- 1-2 teaspoons salt
HUNGARIAN
POTATO BREAD
Steps
- Wash the potatoes and boil them slowly in their skins until tender. Remove the pan from the hotplate, drain it, cool the potatoes and carefully peel and discard the skins. Mash or rice the potatoes thoroughly and set them aside.
- If you are using fresh yeast: Crumble the yeast into a mug, then cream the crumbled fresh yeast with 100 mls of the lukewarm water, half a teaspoon of the sugar and 2 tablespoons of the flour. Set this mixture in a warm place, such as a sunny window sill, until it foams and a sponge rises to the top of the mug (this may take up to 30 minutes, depending on the yeast). *Note: hot water and draughts will kill the yeast.
- Warm a large basin or mixing bowl. Combine the flour, remaining sugar and salt in the warm basin and make a well in the centre. Add the yeast mixture and potatoes, and gradually add the remaining lukewarm water. Mix this thoroughly with a clean hand and work the ingredients together, holding and turning the bowl with the other. Add a little more water if required, but take care not to make the dough sticky.
- Now this is the part I really like: turn out the dough onto a lightly floured bench or board. Using the palms and heels of your hands, vigorously fold and pummel the dough, from back to front. Turn and knead, turn and knead. Dust the dough with a light sprinkling of flour if it feels too sticky.
- If you are using dried yeast: Combine the flour, sugar, salt and dried yeast in the bowl of a stand mixer. Gradually add the water and the mashed potato. Using a dough hook, work the dough to a smooth and elastic ball. This can take 10 minutes or more.
- Note: The kneading activates the gluten in the dough and helps to regulate the temperature of the dough. Kneading can take ten minutes or more, until the dough feels smooth, shiny and elastic (your hands will tell you when the dough is ready for the next step).
- Now, cut the dough in half and knead again lightly into two smooth balls. Place the balls of dough onto two large, lightly-floured (or oiled) bread tins or slides, preferably black for a more evenly baked loaf. Sit the tins in a warm, draught-free spot and cover with clean tea towels and a warm towel. Leave until the dough balls have doubled in size.
- Turn them out onto a lightly floured board and rework the dough. Shape into two neat continental loaves, place them back onto the slides, cover with a slightly damp tea towel, and allow the dough to double in size once again.
- Test the dough by pressing on it lightly with your finger. If an imprint remains, the dough is ready for baking. Before baking, spray the oven with a light mist of water. Brush or spray the shaped loaves with a little water (for a crisp, dry crust), slash the top of each twice with a serrated knife and bake in a preheated, hot oven at 220 degrees C for the first 10-15 minutes, then reduce to 190 degrees (vent bake if possible) and mist with water during the baking time. Continue baking for 30 minutes or until bread is golden brown and sounds “hollow” when tapped. Remove the loaves from the tins/trays and allow to cool on a wire rack. Store the bread wrapped in large, clean tea towels. Makes two 1kg loaves. It toasts beautifully too!
↑ Back to top
Hungarian Potato Bread
Adapted from https://zsuzsaisinthekitchen.blogspot.com/2012/08/hungarian-potato-bread-krumplis-kenyer.html
Ingredients
- 2 large russet potatoes, with the skin on
- 1 Tbsp salt
- 2 Tbsp extra virgin olive oil
- 1-1/2 tsp dried instant yeast
- 3 cups bread flour
- all purpose flour for dusting
- spray bottle of water
Steps
- Scrub the potatoes and cut them into 1 inch chunks. Do not peel, you will loose a lot of the flavour that way.
- Place the chopped potatoes in a medium saucepan and cover with water.
- Bring to a boil, then reduce heat and simmer until tender.
- Meanwhile, measure out 3 cups of bread flour and set it aside.
- Drain the potatoes, but save 1/2 cup of potato water for use later. Set the half cup of potato water aside to cool, the rest can be discarded.
- Let the potatoes and the potato water cool down completely before proceeding with the recipe.
- After they cooled down, mash the potatoes and add to the mixing bowl.
- Add the salt, the oil, the yeast, the reserved potato water and 1 cup of bread flour.
- With the paddle attachment beat for five minutes on medium speed.
- After five minutes the dough will be very elastic.
- Change to a dough hook and begin to add the remaining flour, but only half a cup at the time.
- Beat the dough again until very elastic. Add half a cup of flour. Keep beating and adding half a cup until all the flour is gone.
- Beat the dough for 5 minutes longer. Dough should be very elastic and sticky.
- Pull the dough from the bowl onto a floured surface and form into a ball. Place ball in an oiled, medium bowl and cover with a tea towel.
- Let dough proof in a warm room until doubled in size.
- Form dough into a rectangle and, starting with a short end, roll dough away from you into a tight log. This is the part that will give you the nice big holes.
- Stop rolling just before the log is sealed, and then flatten the remaining inch of dough with your fingers.
- Dust it with flour. This will prevent the loaf from fully sealing and will cause the seam to open slightly while baking. It didn’t do it for me the second time I tried it, because I allowed the dough to rise longer.
- Line a baking sheet with parchment paper. Sprinkle it with flour.
- Place the loaf, with seam side down, on the prepared pan.
- Sprinkle the top with a little flour and let the loaf rise until doubled.
- Dough will rise slightly and feel spongy to the touch.
- Preheat the oven to 400F.
- Just before moving loaf into the oven, mist the inside of oven with a spray bottle of water.
- Carefully flip over the loaf with seam side up, on the baking sheet. Since the dough didn’t open up for me, flipping the dough seemed redundant, however I really liked the funky shape I got from it so I will continue to use the same method of shaping. I was thinking it might look rather cool if I twisted the loaf mid section when I flipped it over… Maybe next time.
- Place the loaf in the oven and bake it for 45 minutes, misting the oven one more time after the first 5 minutes.
- The finished loaf will be dark brown and sound hollow when tapped on the bottom.
- My bread ended up a different shape, because I didn’t feel comfortable with the suggested raising time. In both instances I let the dough rise until doubled. The result was a larger and fluffier loaf. If you prefer a denser loaf, follow the original recipe.
- Let it cool on a wire rack for 30 minutes if you can.
- To store the bread, wrap it in a clean kitchen towel. Never put homey breads in plastic bags. Plastic changes the texture, makes everything soft and you don't want to loose the crusty, chewy wonder that this is. I wrapped mine in a tea towel last night. The end slice dried ever so little, still delicious though, but the rest of the bread retained it lovely texture.
Place the dough on a floured
surface and flatten it with your hands.
↑ Back to top
I Made Laura Bush's Coconut Buttermilk Pie with Whipped
Cream

Tags: Pies and Tarts
Servings: The pie serves 8
Ingredients
- 1 unbaked 9-inch pie shell (store-bought, or make your own pie dough)
- 1 cup granulated sugar
- 1/3 cup buttermilk
- 1/4 cup (half a stick) unsalted butter, melted
- 2 large eggs
- 1 teaspoon vanilla extract
- 1/2 cup sweetened shredded coconut
- 1/2 to 1 cup coconut flakes, or extra sweetened shredded coconut, for garnishing
- 2 cups sweetened whipped cream
- Tools You’ll Need
NANCY MOCK FOR
TASTE OF HOME:
Steps
- Preheat the oven to 350°F. Move a rack one notch below the center of the oven. Whisk together the granulated sugar, buttermilk, melted butter, eggs, and vanilla in a large bowl. Stir in 1/2 cup of sweetened shredded coconut.
- Pour the filling into the unbaked pie shell. Place the pan on the lowered rack in the preheated oven, and bake the pie for 35 to 40 minutes—the filling and crust edges should be golden brown. Remove the pie to a cooling rack and let it cool completely.
- Spread the coconut flakes or shredded coconut on a baking sheet. Place it under the broiler in your oven for 30 seconds to one minute, watching closely, until the coconut is lightly browned. This happens fast, so don’t walk away! Remove the pan immediately and let the coconut cool.
- Spread or pipe the whipped cream over the top of the pie, then sprinkle the toasted coconut over the top.
Prepare the pie filling:
NANCY MOCK FOR TASTE OF
HOME:
Pour and bake:
NANCY MOCK FOR TASTE OF
HOME:
Toast the coconut:
NANCY MOCK FOR TASTE OF
HOME:
Editor’s Tip: If you haven’t used coconut flakes before, look for them
in pouches in the natural foods section of your store, from producers
like Bob’s Red Mill and Terrasoul. The large flakes are lightly sweet
and look fantastic when toasted and used as a garnish on this pie.
Finish the pie:
NANCY MOCK FOR TASTE OF
HOME:
↑ Back to top
Icebox Butterhorns

Ingredients
- 2 packages (1/4 ounce each) active dry yeast
- 1/4 cup warm water (110° to 115°)
- 2 cups warm milk (110° to 115°)
- 3/4 cup butter, melted
- 1/2 cup sugar
- 1 egg
- 1 teaspoon salt
- 6 to 1/2 cups all-purpose flour
- Additional melted butter
Steps
- In a small bowl, dissolve yeast in warm water. In a large bowl, combine the milk, butter, sugar, egg, salt, yeast mixture and 3 cups flour; beat on medium speed until smooth. Stir in enough remaining flour to form a soft dough (dough will be sticky).
- Do not knead. Place in a greased bowl, turning once to grease the top. Cover with plastic wrap and refrigerate overnight.
- Punch down dough. Turn onto a lightly floured surface; divide in half. Roll each into a 12-in. circle; cut each into 12 wedges. Roll up wedges from the wide ends. Place 2 in. apart on greased baking sheets, point side down. Cover with kitchen towels; let rise in a warm place until doubled, about 1 hour.
- Bake at 350° for 15-20 minutes or until golden brown. Immediately brush with additional melted butter. Remove from pans to wire racks to cool. Yield: 2 dozen.
Notes
- FAVORITE
↑ Back to top
Ikea's Famous Swedish Meatballs
Tags: Appetizers and Dim
Sum Beef
Pork Scandinavian
Servings: 16 - 20 meatballs
Ingredients
- 500 grams (1.1 pounds) ground beef
- 250 grams (slightly more than ½ pound) ground pork
- 1 onion finely chopped
- 1 clove of garlic (crushed or minced)
- 100 grams (3.5 ounces) breadcrumbs
- 1 egg
- 5 tablespoons of whole milk
- Salt and pepper to taste
- Dash of oil
- 40 grams (1.4 ounces) butter
- 40 grams (1.4 ounces) plain flour
- 150 ml (5 fluid ounces) vegetable stock
- 150 ml (5 fluid ounces) beef stock
- 150 ml (5 fluid ounces) thick double cream
- 2 teaspoons soy sauce
- 1 teaspoon Dijon mustard
Ingredients
for the meatballs:
Ingredients
for the cream sauce:
Steps
- Combine beef and pork mince and mix thoroughly to break up any lumps. Add finely chopped onion, garlic, breadcrumbs, egg and mix. Add milk and season well with salt and pepper.
- Shape mixture into small, round balls. Place on a clean plate, cover and store in the fridge for 2 hours (to help them hold their shape while cooking).
- In a frying pan, heat oil on medium heat. When hot, gently add your meatballs and brown on all sides.
- When browned, add to an ovenproof dish and cover. Place in a hot oven, 350 degrees Fahrenheit or 180 degrees Celsius, and cook for a further 30 minutes.
- Melt the butter in a frying pan. Whisk in the plain flour and continue cooking, stirring continuously for 2 minutes.
- Add the vegetable stock and beef stock and continue to stir. Add the thick double cream, soy sauce and Dijon mustard.
- Bring to a simmer and allow the sauce to thicken. Continue to stir.
- When ready to eat, serve with your favorite potatoes -- either creamy mash or mini new boiled potatoes.
Here's how you do it:
And for the cream sauce:
↑ Back to top
Immersion Circulator Rump Roast

Tags: Beef
Sous Vide
Is starred.
Servings: 4 TO 6
Ingredients
- 1 (3 1/2-pound) rump roast
- 1 tablespoon peanut oil
- 2 tablespoons kosher salt
- 1 tablespoon Worcestershire sauce
- 1 teaspoon Dijon mustard
- 1/2 teaspoon garlic powder
- 1/2 teaspoon onion powder
- 1/2 teaspoon freshly ground black pepper
- Immersion circulator
- 12-inch cast-iron skillet
- one-gallon zip-top freezer bag
Software:
Specialized
Hardware:
Steps
- Install an immersion circulator in a water bath and set it to 135ºF.
- Trim any fat and sinew from the exterior of the roast, but don't discard it.
- Heat a 12-inch cast-iron skillet over high heat for 5 minutes. Brush or rub the roast with the oil and season the roast on all sides with the salt.
- Thoroughly sear the roast on all sides, about 2 minutes per side. Add the trimmings to the skillet and brown alongside the roast.
- Combine the Worcestershire, Dijon, garlic powder, onion powder and pepper in a 1-gallon zip-top freezer bag.
- Transfer the seared roast and trimmings to the freezer bag and squish the sauce around to coat. Remove as much air from the bag as possible and seal tightly. Place the bag in the water bath, making sure the meat is completely submerged. Cover the water bath with plastic wrap to prevent evaporation.
- After 10 hours, retrieve the bag from the water bath, discard the fatty bits, and remove the roast to a carving board. Strain and reserve the jus. Thinly slice the beef across the grain and serve with the jus.
↑ Back to top
Incredible Passover Rolls

Tags: Holidays
Jewish Passover
Is starred. Rated
5/5
Ingredients
- 1 cup water
- 1/2 teaspoon salt
- 2 teaspoons sugar
- 1/2 cup vegetable oil
- 1 1/3 cups matzo meal
- 4 eggs
* /2 to 1 cup
diced, sautéed onions (optional)
Steps
- Preheat oven to 400 degrees. Cover a large cookie sheet with nonstick foil or parchment paper.
- In a medium saucepan, over low heat, combine the water, salt and sugar. Add the oil and heat until the mixture begins to simmer. Turn off the heat and immediately add the matzo meal. Stir in the matzo meal with a wooden spoon until the mixture pulls away from the sides of the pan.
- Transfer the mixture to a large bowl or a food processor and allow it to cool for about 5 minutes. Add the eggs, one at a time, either whisking briskly by hand or with the food processor. (Just blend until the eggs are incorporated, don't over-mix.) *To make onion rolls, fold in the sautéed onions now.
- Depending on how big you want the rolls to be, use an ice cream scoop or a large spoon to put rounds of dough onto the baking sheet. To create hot dog buns, shape the dough into appropriately sized ovals. You can oil or wet your hands to give the rolls the form you want, or just push them into shape with a spoon.
- Bake in a 400 degree oven for about 40-45 minutes, until the rolls are light brown and puffy. (After 30 minutes, start checking them every 5 minutes, to make sure they're not getting too brown.)
- Put the rolls on a cookie rack to cool, where they will quickly disappear. In the unlikely event that any are left over store them in an airtight container in the fridge. These rolls also freeze well.
Notes
- FAVORITE
↑ Back to top
Indian Samosas with Potatoes and Peas

Servings: SERVES 6-8
Ingredients
- 1 1⁄2 cups flour
- 1⁄4 tsp. salt
- 4 tbsp. unsalted butter, softened
- 2 tbsp. canola oil, plus more for frying
- 1 small yellow onion
- 1⁄2 cup fresh or frozen peas
- 2 tbsp. cilantro
- 1 (1") piece ginger, peeled and minced
- 1 small hot green Indian chile, stemmed, seeded, and minced
- 1 1⁄2 tsp. fresh lemon juice
- 1 1⁄2 tsp. amchoor (dried mango powder)
- 1⁄2 tsp. anardana (ground dried pomegranate seeds)
- 1⁄2 tsp. ground coriander
- 1⁄2 tsp. garam masala
- 1⁄2 tsp. cumin seeds, toasted and lightly crushed
- 1⁄8 tsp. cayenne
- 2 medium waxy potatoes, boiled, peeled, and cut in to 1⁄4" cubes
- Kosher salt, to taste
For the Dough:
For the
Filling and Serving:
Cilantro-Mint
Chutney, for serving:
Steps
- For the dough: Whisk together flour and salt in a large bowl. Add butter, and using your fingers, rub into flour until pea-size crumbs form; add 6 tbsp. warm water, and mix with your fingers until dough forms. Transfer to a work surface, and knead until dough is smooth and elastic, about 12 minutes. Cover with plastic wrap, and chill for 1 hour or up to 24 hours.
- Place dough on a lightly floured work surface, divide into 12 equal balls, and cover with a damp towel to keep from drying out. Using a rolling pin, roll 1 dough ball into a 6" round; cut round in half. Gather straight edges of 1 half-round together, overlapping them by 1⁄4" to form a cone; moisten seam with water and press to seal. Spoon 1 heaping tbsp. filling into cone. Moisten inside of top edge of cone with water, press edges together to close top of cone, and pinch along top 1⁄4" of seam to completely seal filling in dough cone. Pleat length of seam by folding over about 1⁄4" of the dough and pinching it together in about 1⁄2" increments. Repeat process with remaining dough and filling to make 24 pastries total.
- Pour oil to a depth of 2" in a 6-qt. Dutch oven, and heat over medium heat until a deep-fry thermometer reads 350°. Working in batches, fry pastries until golden brown all over, about 10 minutes. Using tongs, transfer samosas to paper towels to drain briefly. Transfer to a serving platter, and serve hot or at room temperature with Cilantro-Mint Chutney on the side.
For the filling: Heat oil in a 12" skillet over medium heat. Add
onion,
and cook until lightly browned, about 8 minutes. Add peas, cilantro,
ginger, chile, and 3 tbsp. water; cover, and reduce heat to
medium-low.
Cook, stirring occasionally, until peas are soft, about 5 minutes. Add
juice, amchoor, anardana, coriander, garam masala, cumin, cayenne,
potatoes, and salt, and cook, stirring, until potatoes are heated
through, about 5 minutes. Remove from heat, and set filling aside to
cool completely.:
↑ Back to top
Injera (Ethiopian Flatbread)
Adapted from https://www.foodnetwork.com/recipes/food-network-kitchen/injera-ethiopian-flatbread-3364733

Tags: Ethiopia
Servings: Sixteen 10-inch rounds
of injera
Ingredients
- 2 cups teff flour
- 1/8 teaspoon active dry yeast
- 1 cup self-rising flour
- Kosher salt
Steps
- Combine the teff flour and active dry yeast in a large bowl. Add 2 cups lukewarm water and whisk or, more traditionally, use your hand to mix everything together, making sure the mixture is absolutely smooth with no lumps. Cover with plastic wrap and let sit at room temperature until the mixture is bubbly and tastes sour like tangy yogurt, 36 to 48 hours. (It will start bubbling and rising in a matter of hours, but it can take anywhere from 36 to 48 hours to achieve a noticeable level of sourness, which is key to the flavor of the injera; see Cook's Note.) After about 36 hours, begin tasting the mixture; this will help you determine when it's just right and will help prevent it from souring too much.
- At this point, the batter will look separated and watery on top. If you shake the bowl a little, you should see some bubbles rising to the top. Add the self-rising flour and up to 1 cup of water a little at a time. Whisk or use your hand to thoroughly combine into a smooth, thin, pourable mixture with about the consistency of a slightly thicker crepe batter. Cover again and let sit for 1 hour.
- Heat a 10-inch nonstick skillet over medium heat for a few minutes. Have a lid for the skillet and a wire baking rack nearby. Whisk 1 teaspoon salt into the batter (it will bubble up). Pour 1/4 cup of the batter into the skillet, tilting and swirling to coat with a thin layer of batter. The batter should spread quickly and easily. (If it's too thick, whisk in a little more water.) Within a matter of seconds, you should start seeing small holes forming and the surface darkening as it cooks from the outside towards the center. When the injera is about 3/4 of the way cooked, cover the skillet and let steam for 1 minute. The injera is cooked when the edges are dry and lifting up from the pan. Carefully run a spatula underneath and transfer to the baking rack to cool completely. Repeat with the remaining batter.
- You can stack the injera only when they are completely cooled; otherwise, they will stick to each other. Wrap the stack of cooled injera with a dry, clean cloth or paper towels to keep them from drying out until ready to serve. Serve at room temperature, or microwave for 30 seconds to heat through.
Notes
- For a slightly quicker injera, add 1/2 cup plain yogurt to the teff/yeast mixture. Let ferment for 16 hours (instead of 36 to 48 hours), then proceed with the original recipe.
↑ Back to top
Instant-Cured Salmon
Tags: Appetizers and Dim
Sum Fish
Scandinavian
Ingredients
- One 3/4-pound piece boneless and skinless salmon fillet
- About 1 teaspoon kosher salt
- About 1/2 teaspoon freshly ground black pepper
- Buttered pumpernickel or rye bread
- About 1 tablespoon each: drained capers, parsley leaves, chopped red onion, chopped scallion and radishes
- A dash of extra virgin olive oil
Garnishes (per
serving):
Steps
- Cutting on a bias at about a 45-degree angle, remove thin slices, each weighing about 1 ounce, from the fillet. You should have twelve slices. Sprinkle each of six plates with some of the kosher salt and freshly ground pepper. Be generous; the salmon needs to be salted to cure.
- Arrange two slices of salmon in one layer (without overlap) on top of each seasoned plate. Sprinkle a little more salt and pepper on top, and cover the plates with plastic wrap. Set aside to cure for at least 20 minutes but as long as 1 hour.
- At serving time, sprinkle the cured salmon slices with the garnishes. Serve with the buttered pumpernickel or rye bread.
↑ Back to top
Irish Cabbage
Servings: 4 servings
Ingredients
- 1 (2 pounds) head green cabbage
- 1/4 cup high-quality unsalted butter
- 1/4 cup chicken broth
- salt and freshly ground black pepper to taste
- 2 slices crisply cooked bacon, crumbled, for garnish (optional)
Steps
- Remove the tough outer leaves of the cabbage. Cut in half vertically, and cut out the core. With the cut side down, slice into 1/2-inch slices.
- Melt butter in a Dutch oven over medium heat. Add cabbage, and toss until well coated. Stir in the chicken broth, cover, and cook, stirring occasionally, until cabbage is tender but still a bit firm, 8 to 12 minutes.
- Season with salt and pepper, and toss until well combined, Transfer to a serving dish, and sprinkle with crumbled bacon.
↑ Back to top
Irish Soda Bread
Adapted from http://www.tasteofhome.com/recipes/irish-soda-bread
Ingredients
- 2 cups all-purpose flour
- 2 tablespoons brown sugar
- 1 teaspoon baking powder
- 1 teaspoon baking soda
- 1/2 teaspoon salt
- 3 tablespoons butter
- 2 eggs
- 3/4 cup buttermilk
- 1/3 cup raisins
Steps
- In a large bowl, combine flour, brown sugar, baking powder, baking soda and salt. Cut in butter until crumbly. In a small bowl, whisk 1 egg and buttermilk. Stir into flour mixture just until moistened. Fold in raisins.
- Knead on a floured surface for 1 minute. Shape into a round loaf; place on a greased baking sheet. Cut a 1/4-in.-deep cross in top of loaf. Beat remaining egg; brush over loaf.
- Bake at 375° for 30-35 minutes or until golden brown. Yield: 6-8 servings.
Notes
- FAVORITE
↑ Back to top
Irish Soda Bread 8
Servings: 8 serving(s)
Ingredients
- 3 1/2 cups all-purpose flour, sifted
- 2/3 cup granulaed sugar
- 1 teaspoon salt
- 1 tablespoon baking soda
- 1 cup currants
- 1 tablespoon caraway seeds
- 2 large eggs, lightly beaten
- 1 1/2 cups buttermilk
- 2 tablespoons butter, melted
DRY
INGREDIENTS:
WET
INGREDIENTS:
Steps
- Preheat oven to 350 degrees F.
- Mix all dry ingredients in a bowl.
- Melt butter in separate bowl.
- Lightly beat eggs in a bowl. Whisk in buttermilk and melted butter.
- Add wet ingredients to dry ingredients.
- Mix until combined.
- Spread into a buttered/greased 9-inch cake pan or pie plate. Cut an X on top.
- Bake for 60 - 70 minutes.
Notes
- Daily Values are based on a 2,000 calorie diet. Nutrition information is estimated.
↑ Back to top
Israeli Chicken Sofrito
Ingredients
- 8 bone-in skin-on chicken thighs
- 2 tbsp extra virgin olive oil
- 2 medium Russet potatoes, peeled and cut into 1 1/2-inch chunks
- 1 medium sweet potato, peeled and cut into 1 1/2-inch chunks
- 2 medium yellow onions, sliced
- Salt and freshly ground black pepper
- 1 1/2 cups chicken stock
- 1 3/4 tsp paprika
- 1 1/4 tsp turmeric
- 1/2 tsp garlic powder
- 3 bay leaves
- You will also need
- 6 qt. Dutch oven or heavy pot with lid, slotted spatula
Steps
- Prepare the chicken thighs by sprinkling them with salt (lightly if it’s kosher chicken), then generously with black pepper.
- In a heavy pot with a lid (I prefer an enameled Dutch oven), heat olive oil over medium high heat till hot but not smoking. Oil should coat the entire bottom of the pot. Place 4 of the chicken thighs into the pan, skin side down, and cook undisturbed for about 7-8 minutes till the skin is dark golden brown (careful, it may splatter a bit!). Do not move the chicken during the initial cooking process; the skin will initially stick to the bottom of the pot, then will loosen as it browns. If the oil begins to smoke a lot, lower the heat a bit and continue to cook. When the skin is brown and crispy, turn and cook for an additional 3-4 minutes till brown.
- Remove chicken from pan with a slotted spatula and set aside. Repeat instructions for the remaining 4 pieces of chicken. Remove chicken from pan and reserve.
- You should now have plenty of cooking oil/schmaltz in the bottom of your pot. Fry the potato chunks for about 8 minutes, stirring gently 2-3 times during cooking, till potatoes are browned and crisp on the outside. You may need to do this in batches to ensure that the pot is not crowded for even browning. They should be semi-cooked and golden, but not overly soft. Raise heat if needed to make sure they brown evenly on all sides. Remove potatoes from the pot with a slotted spatula and reserve.
- Add sliced onions and 1/4 tsp of salt to the oil, stir to coat. Cover the pot and reduce heat to medium. Let the onions cook covered for about 10 minutes.
- While the onions are cooking covered in the pot, whisk together the chicken stock, paprika, turmeric, garlic powder and bay leaves to create your cooking liquid. Set aside.
- Uncover the pot and continue to cook the onions over medium high heat, continuing to stir till the onions soften and begin to caramelize. Scrape up any brown bits from the bottom of the pot as you stir. The longer you cook the onions, the more they will caramelize.
- At this point, you can drain off the excess fat and schmaltz if you wish to cut calories, or you can keep it in the dish to add flavor.
- Add chicken and cooking liquid to the pot with the onions and bring to a simmer.
- Cover, reduce heat to medium low, and cook for about 60 minutes till the chicken is very tender (you can cook it even longer for a more tender result if you wish). Add the browned potatoes back to the pot and toss to coat with sauce. Raise heat to medium and simmer, uncovered, for an additional 15 minutes or until cooking liquid has reduced and potatoes are tender and soak up some of the cooking liquid. Adjust salt and pepper to taste.
Notes
- FAVORITE
↑ Back to top
Italian Bean and Vegetable Soup
Adapted from https://library.teladochealth.com/hc/en-us/articles/360017728474-Italian-bean-and-vegetable-soup

Servings: 6
Ingredients
- 2 tsp olive oil
- 1 yellow onion, chopped
- 1 medium stalk celery, chopped
- 1 large carrot, sliced into coins
- 2 garlic cloves, minced
- 4 cups low-sodium chicken broth
- 2 (15.5 oz) cans no-salt-added Great Northern beans, drained and rinsed
- 1 (14.5 oz) can no-salt-added diced tomatoes, undrained
- 1 tsp dried oregano
- ½ tsp dried thyme
- ¼ tsp crushed red pepper flakes
- 3 cups baby spinach
- ⅓ cup grated Parmesan cheese
Steps
- In a large pot, heat the oil over medium heat. Swirl to coat the bottom. Cook the onion, celery, carrot and garlic for 4 to 5 minutes or until the vegetables are soft. Stir in the broth, beans, tomatoes with liquid, oregano, thyme and red pepper flakes. Turn up the heat to high and bring to a boil. Stir occasionally. Lower the heat to low and simmer covered for 15 minutes. Stir in the spinach. Simmer covered for 2 to 3 minutes or until the spinach is wilted. When serving, sprinkle the soup with Parmesan cheese.
↑ Back to top
Italian Bread
Adapted from https://www.browneyedbaker.com/italian-bread/
Servings: 16
Ingredients
- 2 cups ( 480 ml) lukewarm water, ~100°F
- 1 package active dry yeast, (2.25 teaspoons)
- 5 cups ( 600 g) bread flour
- 1 tablespoon light brown sugar
- 2 tablespoons olive oil
- 2½ teaspoons salt
- 1 egg white, lightly beaten
- 2 tablespoons sesame seeds
For the Dough:
For the
Topping (Optional):
Steps
- Stir the yeast into ½ cup of the warm water. Let proof as you measure out the dry ingredients.
- Combine 5 cups flour, sugar and salt in the bowl of an electric mixer. Add the yeast mixture, remaining water, and olive oil. Using a dough hook attachment, mix on the lowest speed of electric mixer (stir setting on a KitchenAid) until a dough starts to form, adding more flour as needed, up to an additional ¾ cup. Knead on low speed (2 on a KitchenAid) for 7 minutes. Transfer dough to a lightly floured surface and knead by hand for 1 to 2 minutes, or until a smooth, firm, elastic dough is formed.
- Transfer the dough to a lightly oiled bowl and spray the dough with a thin coating of cooking spray. Wrap the bowl with plastic wrap and set aside to proof in a warm, draft-free place for 1½ hours or until doubled in size.
- Remove the plastic wrap, punch down and flatten the rounded dough with the heel of your hand. Roll the dough up tightly, sealing the seam well after each roll. The dough should be elongated and oval-shaped, with tapered and rounded (not pointed) ends.
- Place a baking stone on the center oven rack and preheat the oven to 425°F. Place a metal baking pan on the lowest rack.
- Place the dough on a baker's peel heavily dusted with flour, or alternately on an inverted baking sheet. Allow the dough to proof, loosely covered with a floured dish towel, for 30 minutes, or until doubled in size.
- If using the topping, brush the dough with the egg white and sprinkle the sesame seeds over the top. Using a razor blade or sharp knife, slash the dough lengthwise about 1/4-inch deep, keeping the blade at a 45-degree angle.
- Just prior to placing the bread in the oven, pour 1 cup of water into the metal pan you placed on the bottom rack of the oven. Then, transfer the loaf from the peel to the stone in the oven.
- Bake the dough until golden brown and a hollow thud is heard when tapping the bottom of the bread (it should register at least 195 degrees F on an instant-read thermometer), about 30 to 40 minutes. Allow the bread to cool on a wire rack before slicing.
Notes
- Bread Flour – I outlined above why I’m a big advocate of bread flour for this particular recipe; you can find it in nearly all grocery stores or can buy it online. If you substitute all-purpose flour, the bread will still turn out, but there will be a definite difference in texture.
- Yeast – This recipe calls for active dry yeast, but you can substitute instant yeast without an issue or any modifications.
- Mixing by Hand – While using a stand mixer with a dough hook makes this easier, you can absolutely use a large mixing bowl and mix and knead entirely by hand.
- Extra Flour – Note that the recipe states you may need to add a little extra flour during the mixing process to get a dough to come together. I find that this varies during different times of the year, as well as what the weather is like. If it’s warmer/more humid, you may need more flour. When it’s colder and drier, I rarely, if ever, need to add more flour.
- Metal Pan – I want to emphasize once more that the pan you place on the bottom rack of the oven to create steam needs to be METAL and not glass. If you don’t already have one, I recommend this one.
- Baking Stone – This is the baking stone that I use, and this is the pizza peel you see pictured above. If you don’t have a baking stone, you can flip a baking sheet upside down, put a sheet of parchment paper on top, and bake the bread on there (you would not need to place the upside-down pan in the oven during preheating).
- Freezing Bread Dough – Once the dough is shaped, it can be placed on a lined baking sheet and placed in the freezer for 12 hours. Wrap tightly in plastic wrap and freeze in a ziploc freezer bag for up to 3 months. Thaw in the refrigerator overnight, then remove and proceed with step #5 of the recipe. The final rise may take longer since the dough has been cold.
- Freezing Baked Bread – Once the bread has been completely cooled, you can wrap a whole sliced or unsliced loaf in a double layer of plastic wrap, place in a ziploc freezer bag, and freeze for up to 3 months. Thaw in the refrigerator or at room temperature.
↑ Back to top
Italian Ricotta Cookies
Ingredients
- 1/2 lb. butter
- 2 c. sugar
- 1/2 tsp. salt
- 1 lb. Ricotta
- 2 eggs
- 1 tsp. vanilla
- Grated rind of 1 orange
- 4 1/2 c. flour
- 1 tsp. baking powder
- 1 tsp. baking soda
- 2 c. confectionery sugar
- 1/4 c. butter
- 3 tbsp. milk
- 1/2 tsp. vanilla
- Mix well and put on top of cookies and sprinkles.
FROSTING:
Steps
- Cream butter; add sugar and continue creaming. Add egg and Ricotta and vanilla; beat well. Sift together flour, baking powder and baking soda, salt; add to batter.
- Drop about a teaspoon of dough on ungreased baking sheet. Bake at 350 degree oven about 10 minutes until edges are lightly browned. Cool.
Notes
- FAVORITE
↑ Back to top
Italian Salad Dressing
Adapted from https://www.brucebradley.com/recipes/recipe-the-best-ever-classic-italian-salad-dressing/

I made this.
Ingredients
- SCALE 1x 2x 3x
- 1/2 cup vinegar (white wine, red wine, or balsamic are our favorites)
- 1 cup extra virgin olive oil
- 2 cloves garlic (minced)
- 1/2 teaspoon dried oregano
- 1/2 teaspoon dried basil
- 1/4 teaspoon onion granules (see notes)
- 1/4 teaspoon salt or less to taste
- freshly ground pepper to taste
UNITS USM:
Steps
- Choose the vinegar you want for the base of your Italian dressing and pour into a salad dressing carafe.
- Add olive oil, garlic, and dried seasonings. Shake and it’s ready to serve.
Notes
- We recommend using organic ingredients when possible.
- Organic onion granules don’t get all rock hard or dried up like onion powder does, so I prefer the granules. Onion powder will work just as well, though.
- If you’re transitioning from bottled salad dressings, you may want to add a touch of sweetness to get your kids on board. Usually, 2-3 teaspoons of sugar, honey, or maple syrup are more than enough. Gradually, over time, reduce the amount of sweetener you’re adding and your family won’t even know the difference
- Feel free to adjust the seasonings to your tastes. Basil yields a slightly sweeter flavor while oregano is more savory. And if you prefer to use fresh herbs, double the amount of basil and triple the amount of oregano.
- Making the dressing several hours or even the night before gives a chance for the flavors to come alive more … so avoid the last minute crunch and make this recipe up ahead of time!
- Store the unused portion in the fridge. The oil will solidify when cold so be sure to take it out of the refrigerator and warm it up before serving. I usually set the carafe in some warm water for a couple of minutes.
↑ Back to top
Italian Sausage, Garlic, and Red Pepper Stromboli

Servings: 8
Ingredients
- 3 cups lukewarm water
- 1 1/2 tablespoons granulated yeast
- 1 1/2 tablespoons kosher salt
- 6 1/2 cups (about 2 pounds) all-purpose flour, plus additional for dusting
- 1 pound Italian sausage, casings removed
- 3 cloves garlic, minced (about 1 tablespoon)
- 2 large red peppers, thinly sliced
- 1 ( 14.5- ounce) can crushed tomatoes, preferable San Marzano
- 8 ounces scamorza or mozzarella cheese, shredded
- Crushed red pepper
- 2 large eggs, plus 1 1/2 tablespoons water, lightly beaten
- Italian seasoning or sesame seeds (optional, see note)
For the Dough:
For the
Filling:
Steps
- In a very large, lidded container, combine water (it should be just a tad warmer than your body temperature), yeast and salt. It’s okay if it doesn’t totally dissolve. Mix in the flour in stages, and stir completely. Cover with a lid and let rise at room temperature for 2 hours. Then, refrigerate for at least 3 hours.
- Brown sausage in a large skillet over medium-high heat, breaking it into little bits. Add garlic and peppers and continue to cook until peppers just start to soften, about 3 minutes. Remove from heat and let cool.
- Adjust oven rack to lower-middle position and preheat oven to 350°F.
- Split dough into four portions. On a lightly floured surface, roll out the dough into large rectangles, about 12 inches in length, 6 inches wide and 1/4 inch this. Trim edges to create a uniform shape. Spread with tomatoes, leaving a one-inch border. Lightly season with salt. Spread sausage mixture on top of tomatoes and sprinkle with cheese and a shower of crushed red pepper. Using a pastry brush, paint the edges of the dough with the beaten egg. Roll dough into a cylinder, length-wise, and pinch edges to seal. Place stuffed loaves on two baking sheets that have been sprayed with cooking spray, and brush tops with beaten egg. Sprinkle with Italian seasoning (if desired).
- Transfer to the oven to bake for 15 minutes. Check to make sure the loaves aren’t getting too dark on the bottom and turn them as necessary. Return to the oven to continue cooking until golden brown outside and melted inside, about 10 minutes longer.
- Remove from oven and let stand for 7 minutes. Slice into thick slices and serve.
↑ Back to top
Jalapeno Pepper Jelly Sauce
Ingredients
- 1/2 cup white wine
- 1/2 cup sherry vinegar
- 2 tablespoons hot sauce
- 2 tablespoons shallots finely minced
- 1/2 cup hot pepper jelly
- 6 tablespoons butter softened
- Salt
Steps
- Place wine, vinegar, hot sauce, and shallots in a small pot and bring to a boil.
- Reduce heat and simmer until reduced to 1/4 cup, then whisk in jelly. Over low
- heat, whisk in butter 1 tablespoon at a time until sauce is creamy in
- consistency. Taste for seasoning, add salt and adjust to taste by adding a
- little vinegar, jelly or hot sauce. Keep warm.
Notes
- FAVORITE
↑ Back to top
Jalapeño Jelly
Adapted from http://file///C:/Users/James%20T.%20Kirk/Food%20And%20Recipes/My%20Big%20Oven/Publish/JALAPENO_JELLY_203.htm
Tags: Chillis
Condiments
Is starred.
Ingredients
- 5 jalapeño peppers
- 5 cups sugar
- 3/4 cup cider vinegar
- 3/4 cup herb-flavored white vinegar
- 2 large green bell peppers seeds and ribs discarded
- 6 oz liquid pectin
- Green food coloring
Steps
- In a large saucepan bring the sugar and the vinegars to a boil over moderately
- low heat, stirring. In a food processor chop the bell peppers and jalapeños
- (with some jalapeño seeds, depending upon the hotness desired). Stir the pepper
- mixture into the vinegar mixture and simmer, skimming the froth, for 10 minutes.
- Stir in the pectin and boil rapidly for 1 minute. Skim the froth and add 1 to 2
- drops of the food coloring. Transfer the jelly to sterilized 1/2-pint Mason-type
- jars, wipe the rims with a damp cloth, and seal with the lids.
Notes
- 4 tbls (1/4 cup) powdered pectin = 6 oz liquid. Add to sugar before cooking.
↑ Back to top
Japanese Milk Bread
Tags: Breads
I made this. Is starred. Rated 5/5
Ingredients
- ⅓ cup/45 grams bread flour
- ½ cup/120 milliliters whole milk
- 2 ½ cups/325 grams bread flour
- ¼ cup/60 grams sugar
- 2 teaspoons/7 grams active dry yeast (1 packet)
- 1 teaspoon/4 grams salt
- 1 egg
- ½ cup/120 milliliters warm whole milk, plus extra for brushing on the unbaked loaf
- 4 tablespoons/60 grams unsalted butter, cut into pieces and softened at room temperature, plus extra for buttering bowls and pan
FOR THE
STARTER:
FOR THE DOUGH:
Steps
- Make the starter: In a small heavy pot, whisk flour, milk and 1/2 cup water (120 milliliters) together until smooth. Bring to a simmer over medium-low heat and cook, stirring often, until thickened but still pourable, about 10 minutes (it will thicken more as it cools). When it’s ready, the spoon will leave tracks on the bottom of the pot. Scrape into a measuring cup and lightly cover the surface with plastic wrap. Set aside to cool to room temperature. (You will have about 1 cup starter; see note below.)
- Make the dough: In the bowl of a stand mixer fitted with a dough hook, combine the flour, sugar, yeast and salt and mix for a few seconds, just until evenly combined.
- Add egg, milk and 1/2 cup starter. Turn the mixer on low speed and knead 5 minutes.
- Add soft butter and knead another 10 to 12 minutes (it will take a few minutes for butter to be incorporated), until the dough is smooth and springy and just a bit tacky.
- Lightly butter the inside of a bowl. Use your hands to lift dough out of mixer bowl, shape into a ball and place in prepared bowl. Cover with a kitchen towel and let rise in a warm place until doubled in size, 40 to 60 minutes.
- Punch the dough down and use your hands to scoop it out onto a surface. Using a bench scraper or a large knife, cut dough in half. Lightly form each half into a ball, cover again and let rise 15 minutes.
- Heat the oven to 350 degrees. In the meantime, generously butter a 9-by-5-inch loaf pan.
- Using a rolling pin, gently roll out one dough ball into a thick oval. (By this time, the dough should be moist and no longer sticky. You probably will not need to flour the surface, but you may want to flour the pin.) First roll away from your body, then pull in, until the oval is about 12 inches long and 6 inches across.
- Fold the top 3 inches of the oval down, then fold the bottom 3 inches of the oval up, making a rough square. Starting from the right edge of the square, roll up the dough into a fat log, pick it up and smooth the top with your hands. Place the log in the buttered pan, seam side down and crosswise, nestling it near one end of the pan. Repeat with the other dough ball, placing it near the other end of the pan.
- Cover and let rest 30 to 40 minutes more, until the risen dough is peeking over the edge of the pan and the dough logs are meeting in the center. Brush the tops with milk and bake on the bottom shelf of the oven until golden brown and puffed, 35 to 40 minutes.
- Let cool in the pan 10 minutes, then remove to a wire rack and let cool at least 1 hour, to let the crust soften and keep the crumb lofty. (If cut too soon, the air bubbles trapped in the bread will deflate.)
Notes
- The starter recipe produces enough to bake 2 loaves, because it’s difficult to cook a smaller amount. Discard the extra starter, or double the dough recipe and bake 2 loaves.
↑ Back to top
Japanese-Style Chicken Wings (Teba No Karaage)
Adapted from http://www.saveur.com/article/recipes/japanese-fried-chicken-wings-teba-no-karaage-recipe
Ingredients
- 4 lb. chicken wings, separated at the joint, wing tips removed
- 1 cup plus 2 tbsp. mirin
- 1 cup plus 2 tbsp. sake
- 2 tbsp. sesame oil
- 1 tbsp. granulated sugar
- 1 tbsp. kosher salt
- 10 cloves garlic, minced
- 1 (6") piece ginger, peeled and minced
- 1 cup soy sauce
- 1/2 cup turbinado sugar
- Canola oil, for frying
- 3/4 cup potato starch
- Ground sansho, for garnish
- Lemon wedges, for serving
Steps
- Toss wings, 2 tbsp. each mirin and sake, the sesame oil, granulated sugar, salt, garlic, and ginger in a bowl; cover and chill 4 hours.
- Combine remaining mirin and sake, the soy sauce, and turbinado sugar in a 4-qt. saucepan over medium heat; cook until reduced by half, about 1 hour. Transfer sauce to a large bowl and cover with plastic wrap; keep warm. Heat 2" canola oil in a 6-qt. saucepan over medium until a deep-fry thermometer reads 320°. Toss wings with potato starch, shaking off excess; working in batches, fry wings until crisp, about 4 minutes. Transfer wings to paper towels to drain. Toss wings with reserved sauce; transfer to a platter and sprinkle with sansho. Serve with lemon wedges.
Notes
- FAVORITE
↑ Back to top
Jean Anderson Shrimp and Grits

Tags: Grains
Seafood Southern
I made this. Is starred.
Servings: 4
Ingredients
- 2½ cups water mixed with ½ teaspoon salt (salted water)
- 2/3 cup quick-cooking grits
- 1½ cups coarsely shredded sharp Cheddar cheese (about 6 ounces)
- ¼ cup freshly grated Parmesan cheese
- 1 medium garlic clove, crushed
- ¼ cup light cream
- 1 tablespoon butter
- 1/8 teaspoon ground hot red pepper (cayenne)
- 4 thick slices hickory-smoked bacon, cut crosswise into strips ½ inch wide
- 2 tablespoons corn oil or vegetable oil
- 1 pound raw medium-large shrimp, shelled and deveined
- ½ pound small mushrooms, stems discarded, caps wiped clean and thinly sliced
- 8 large scallions, trimmed and thinly sliced (include some green tops)
- 1 large garlic clove, finely chopped
- 1 tablespoon fresh lemon juice
- ½ teaspoon salt, or to taste
- ¼ teaspoon black pepper, or to taste
- ¼ teaspoon hot red pepper sauce, or to taste
- ¼ cup coarsely chopped parsley
Grits:
Shrimp:
Steps
- For the grits: Bring the salted water to a boil in a medium-size heavy saucepan over high heat. Slowly add the grits, whisking all the while. When the mixture returns to a boil, reduce the heat to moderately low and cook uncovered, whisking often, for 8 to 10 minutes or until thick.
- Meanwhile, begin the shrimp: Fry the bacon in a large, heavy skillet over moderate heat for about 10 minutes or until the drippings cook out and only crisp brown bits remain. Using a slotted spoon, lift the bacon to paper toweling and reserve.
- Add the corn oil to the skillet drippings and heat for 1 minute. Add the shrimp, distributing evenly, and cook for 2 to 3 minutes over moderate heat or just until they begin to turn pink.
- While the shrimp cook, mix the two cheeses and the garlic into the grits along with all remaining ingredients. Cook 1 to 2 minutes, whisking now and then, or just until the cheese melts. Set the grits off the heat, cover, and keep warm, whisking occasionally, while you finish the shrimp.
- Stir the shrimp well, add the mushrooms, and cook, stirring often, for about 5 minutes or until they release their juices and these evaporate. Add the scallions and garlic, cook and stir for 3 to 4 minutes, then mix in all remaining ingredients. Taste for salt, black pepper, and hot pepper sauce and adjust as needed.
- To serve, puddle the grits on each of four heated dinner plates and scoop the shrimp mixture on top, dividing the total amount evenly. Finally, scatter some of the reserved bacon over each portion.
↑ Back to top
Jim Lahey's No-Knead Bread
Adapted from https://www.facebook.com/
Ingredients
- 3 cups all-purpose flour
- 1/4 teaspoon instant yeast
- 1 1/2 teaspoons salt
- 1 1/2 cups water
Steps
- Mix ingredients together in a large bowl until combined into a shaggy dough. Cover bowl with plastic wrap and let rest at room temperature for 12 to 18 hours.
- Flour a work surface. Scoop the wet dough, which will be dotted with bubbles,onto the flour. Fold twice, deflating it, and let rest for 15 minutes. Don't
- worry if it sticks a bit, just scrape it off.
- Sprinkle with flour as needed to handle, and shape dough into a saggy ball.
- Let rest on floured surface for another 1 to 2 hours.
- Preheat oven to 450. Place heavy cast iron, enameled cast iron, Pyrex or similar lidded pot in oven. Heat pot for at least 30 minutes.
- Carefully tip dough into hot pot. Sprinkle with salt or seeds as desired, place lid on pot, and return to oven.
- After 30 minutes, uncover pot. Bake another 15 to 30 minutes, until browned as desired. Cool on rack.
Notes
- FAVORITE
↑ Back to top
Joan Nathan's Rugelach
Ingredients
- 8 ounces cream cheese, at room temperature
- 1 cup unsalted butter, at room temperature
- 2 cups unbleached all-purpose flour
- 1/4 teaspoon salt (optional)
- 1 cup thick apricot preserves
- 3/4 cup walnuts, roughly chopped
- 8 ounces shaved bittersweet chocolate (optional)
- 1/4 cup sugar (optional)
- 4 tablespoons unsalted butter, melted (optional)
- 1/2 cup sugar (optional)
- 2 teaspoons cinnamon (optional)
- confectioners' sugar (optional)
Dough
Apricot
filling
Chocolate
filling
Cinnamon-sugar
filling
Steps
- To make the dough, place the cream cheese and the butter in an electric mixer fitted with a paddle. Cream at a low speed until combined, about 2 minutes. Add the flour and salt and mix until a very soft dough is formed, about 2 more minutes. Cover with plastic wrap and refrigerate for at least 2 hours.
- Preheat the oven to 350 degrees and line 2 cookie sheets with baking parchment (or a Silpat baking mat).
- Mix the ingredients for the apricot or chocolate filling and divide the dough into 4 balls. On a lightly floured surface roll the balls out into 4 circles about 1/8-inch thick and 9 inches in diameter. Spread the apricot or chocolate filling over the dough. If using the cinnamon-sugar filling, brush the melted butter on first, then sprinkle the combined cinnamon and sugar.
- Using a dull knife, cut each circle into 16 pie-shaped pieces about 2 inches wide at the circumference. Roll up from the wide side to the center. Place the rugelach on the lined cookie sheets. Bake in the oven on the middle and lower racks, switching after 12 minutes, also switching back to front. Continue baking about 13 more minutes, or until golden brown. Remove the rugelach to racks to cool.
- Sprinkle the apricot and chocolate rugelach with confectioners’ sugar just before serving.
Notes
- FAVORITE
↑ Back to top
Joan Nathan's Traditional Crispy Latkes
Tags: Holidays
Jewish Potato
Is starred.
Servings: Makes 2 dozen pancakes
Ingredients
- 2 pounds russet (baking) or Yukon Gold potatoes
- 1 large egg, beaten
- 1 medium onion
- Salt & freshly ground pepper to taste
- 1/2 cup chopped scallions, including the green part
- Vegetable oil for frying
Steps
- Peel the potatoes and put in cold water. Using a grater or a food processor coarsely grate the potatoes and onions. Place together in a fine-mesh strainer or tea towel and squeeze out all the water over a bowl. The potato starch will settle to the bottom; reserve that after you have carefully poured off the water.
- Mix the potato and onion with the potato starch. Add the scallions, egg, and salt and pepper.
- Heat a griddle or non-stick pan and coat with a thin film of vegetable oil. Take about 2 tablespoons of the potato mixture on the griddle, flatten with a large spatula, and fry for a few minutes until golden. Flip the pancake over and brown the other side. Remove to paper towels to drain. Serve immediately. You can also freeze the potato pancakes and crisp them up in a 350-degree oven at a later time. Makes 2 dozen pancakes.
Notes
- Note: If you want a more traditional and thicker pancake, you can add an extra egg plus 1/3 cup of matzah meal to the batter.
↑ Back to top
Judy's Strawberry Pretzel Salad

Servings: YIELD 16 servings
ACTIVE TIME 15 mins
Ingredients
- 1 1/2 cups crushed pretzels
- 4 1/2 tablespoons white sugar
- 3/4 cup butter, melted
- 1 cup white sugar
- 2 (8 ounce) packages cream cheese
- 1 (8 ounce) container frozen whipped topping, thawed
- 1 (6 ounce) package strawberry flavored Jell-O®
- 2 cups boiling water
- 1 (16 ounce) package frozen strawberries
Steps
- Preheat oven to 350 degrees F (175 degrees C). Mix together the pretzels, 4 1/2 tablespoons sugar and melted butter. Press into the bottom of a 9x13 inch pan. Bake for 10 minutes, or until lightly toasted. Set aside to cool completely.
- In a medium bowl, beat the sugar and cream cheese until smooth. Fold in whipped topping. Spread evenly over the cooled crust. Refrigerate until set, about 30 minutes.
- In a medium bowl, stir together the gelatin mix and boiling water. Mix in frozen strawberries, and stir until thawed. Pour over cream cheese mixture in pan. Refrigerate until completely chilled, at least 1 hour.
Notes
- FAVORITE
↑ Back to top
Julia Child's Easy Blender Hollandaise Sauce
Servings: 3/4 cup hollandaise
sauce
Ingredients
- 3 egg yolks
- 1/4 tsp salt
- Pinch of pepper (I use a small pinch of cayenne)
- 1-2 tbsp fresh lemon juice (I use closer to 2 tbsp)
- 1/2 cup unsalted butter
Steps
- Kosher Key: Dairy
- This sauce should be prepared immediately before serving-- it will only take you about 3 minutes to make. Place eggs yolks, salt, pepper, and 1 tbsp lemon juice in the blender jar. You can beat in more lemon juice to taste when your sauce is done, and then you will know which proportion you prefer for next time.
- Cut the butter into pieces and place it in a small saucepan. Heat it till it's melted, hot and foamy.
- Cover the jar of the blender and blend the egg yolk mixture at top speed for 2 seconds. Uncover, still blending at top speed, and immediately start pouring the hot melted butter in a thin stream of droplets. (You may need to protect yourself with a towel during this operation.)
- By the time two thirds of the butter has gone in, the sauce will be a thick cream. Omit the milky residue at the bottom of the pan. Taste the sauce, and blend in more seasonings and lemon juice to taste.
- If not used immediately, set the blender jar in tepid (lukewarm), but not warm, water. Use the sauce within a few minutes of blending; it will solidify if not used quickly.
Notes
- RAW EGG NOTE: This sauce uses uncooked egg yolks. This is not an unusual practice (most Caesar Salad recipes contain uncooked egg), but it does carry a small amount of risk. I've been told that the friction of the blender and the scalding hot butter "cook" the egg during emulsion, but to be on the safe side I need to offer this cautionary note - use caution in consuming raw and lightly cooked eggs due to the slight risk of salmonella or other food-borne illness. To reduce this risk, use only fresh, properly refrigerated, clean grade A or AA eggs with intact shells, and avoid contact between the yolks or whites and the shell.
↑ Back to top
Julia Turshen's Potluck Quinoa Recipe Review
Tags: Salad
Servings: 4
Ingredients
- 1 cup quinoa (180g)
- Kosher salt
- 1/4 cup extra-virgin olive oil, plus more for drizzling (60ml)
- 1/2 cup whole raw hazelnuts, crushed (a rolling pin makes quick work of this) (70g)
- 2 tablespoons fresh lemon juice
- 2 large handfuls baby arugula and/or soft, leafy herbs (parsley, dill, chives, etc.), roughly chopped
- 4 ounces fresh goat cheese, crumbled (115g)
- Shop Recipe
Steps
- Rinse the quinoa thoroughly in a fine-mesh strainer (this may sound like an annoying step, but don’t skip it since quinoa’s natural coating tastes soapy). Put the rinsed quinoa in a medium saucepan with 1 3/4 cups [420 ml] water and 1 teaspoon salt. Bring to a boil, then lower the heat, cover, and simmer until the quinoa has absorbed all of the water, softened, and each grain has “spiraled,” about 12 minutes.
- Transfer the quinoa to a baking sheet and use a spoon to spread it out. Let cool to room temperature, then transfer to a large bowl and set aside.
- Meanwhile, in a skillet over medium-high heat, warm the olive oil. Add the hazelnuts, sprinkle with a large pinch of salt, and cook, stirring frequently, until the nuts are dark brown, about 5 minutes.
- Transfer the hazelnuts and all of their fragrant oil to the bowl with the quinoa, along with the lemon juice and arugula. Stir everything together and season to taste with salt. Scatter the goat cheese on top of the quinoa and drizzle the whole thing evenly with a good glug of olive oil. Serve immediately.
Notes
- Reprinted from Small Victories by Julia Turshen with permission by Chronicle Books, 2016.
- Variations:
- Mix cooked quinoa with chopped and roasted zucchini and black sesame seeds and dress with a mixture of equal parts extra- virgin olive oil, soy sauce, and rice wine vinegar.
- For a super-retro combination, combine cooked quinoa with perfectly diced carrots and frozen peas that you’ve cooked in salted water. Stir everything together with plenty of butter and serve warm.
- For a really satisfying side dish, mix cooked quinoa with roasted mushrooms and top with a few pickled red onions. For a main course, top each serving with a fried or poached egg.
↑ Back to top
Kabanosy, Polish Smoked Meat Sticks
Adapted from http://honest-food.net/2013/02/04/kabanosy-recipe/

Ingredients
- 2 1/2 pounds pork, venison, wild boar, bear or other meat
- 10 ounces pork fat
- 25 grams kosher salt, about 3 tablespoons
- 3 grams Instacure No. 1, about 1/2 teaspoon
- 4 grams sugar, about a heaping teaspoon
- 4 grams crushed black pepper, about 2 teaspoons
- 2 grams nutmeg, about 1 heaping teaspoon
- 2 grams caraway seed, 2 teaspoons
- 1 gram celery seed, about 1/4 teaspoon
- 1/3 cup ice water
Steps
- Cut the meat and fat into pieces that will fit in your grinder. Mix all the salts and spices with the meat and fat. Put everything in the freezer for 1 hour to chill. Meanwhile, take out about 20 feet of sheep casings and soak them in tepid water.
- Grind the mixture in the fine die of your grinder, making sure everything stays cold. If the meat warms beyond 40°F, stop and freeze everything for 30 minutes to cool it down. Put the ground meat in the fridge while you clean up.
- Using a Kitchenaid or other stand mixer, or your (very clean) hands, add the ice water and mix the meat and fat - use the lowest setting on a stand mixer - until it binds, about 1 to 2 minutes. Again, put the meat in the fridge while you clean up.
- Flush the sheep casings with warm water and set aside.
- Put the meat mixture in your sausage stuffer and stuff into the sheep casings. Remember that sheep casings are weaker than hog casings, so you do not want to overstuff them. As you are stuffing, fill up a link between 12 inches and 24 inches, leaving plenty of extra casing on either end. Cut the casing and continue to make these large links until you’ve used all the meat.
- Use a sterilized needle to pierce the casings wherever there are air pockets. Gently squeeze the meat in the casings to tighten. You may break some until you get the hang of it. If you do, put the meat back into the stuffer and make another link. Once all the links are firm in their casings, tie the ends together in a double or triple knot. Trim any excess casing.
- Hang the links to dry in a cool place for several hours, depending on how warm it is. If the temperature is 70°F or above, hang for only an hour.
- Move the links to a smoker and smoke until the interior of the meat hits 150° - keep your smoker cool enough so that this takes about 4 hours. You want the links to get lots of smoke time.
- Let the links cool, then move to a place to hang them. Ideally this place is between 35°F and 60°F and dark. Hang the links for 3 to 5 days to let them dry out a bit. They are now reasonably shelf stable, but I keep them in the fridge. If for some reason you plan on keeping them more than a month or so, wrap tightly (or vacuum seal) and freeze.
Notes
- To make a proper kabanosy, you will need sheep casings. Many butcher shops have them, but they are harder to find than the regular hog casings. You can also buy sheep casings online. In addition, you will need to smoke these links, preferably over cherry, apple or beech wood. If you don’t have any of these, oak, maple or hickory would be fine.
↑ Back to top
Kaiser Rolls
Tags: Breads
Is starred.
Servings: 6 rolls
Ingredients
- 361g King Arthur Unbleached All-Purpose Flour
- 1 1/2 teaspoons instant yeast
- 1 1/2 teaspoons sugar
- 1 1/4 teaspoons salt
- 1 large egg
- 28g unsalted butter, softened
- 170g lukewarm water
- 14g milk
- 18g poppy or sesame seeds
DOUGH:
TOPPING:
Steps
- Mix, then knead together all of the dough ingredients — by hand, stand mixer, or in the bucket of a bread machine programmed for the dough cycle — to make a smooth, supple dough.
- Transfer the dough to a lightly greased bowl or dough-rising bucket, cover the bowl or bucket, and allow the dough to rise until noticeably puffy, about 1 hour.
- Gently deflate the dough, and transfer it to a lightly greased work surface. Divide the dough into six equal pieces. Shape the pieces into round balls, and place them on a lightly greased or parchment-lined baking sheet.
- Center your kaiser stamp over one ball of dough. Press down firmly, cutting nearly to the bottom but not all the way through. (See "tips," below.) Repeat with the remaining rolls.
- Place the rolls cut-side down (this helps them retain their shape) onto a lightly greased or parchment-lined baking sheet. Cover the rolls, and allow them to rise for 45 minutes to 1 hour, or until they've almost doubled in volume. Towards the end of the rising time, preheat the oven to 425°F.
- Turn the rolls cut-side up. Dip their tops in milk, and coat with poppy or sesame seeds, if desired.
- Bake the rolls for 15 to 17 minutes, or until they're golden brown and feel light to the touch. Remove them from the oven, and cool on a rack.
- Serve rolls warm, or at room temperature. Store leftover rolls, well wrapped, at room temperature for a couple of days; freeze for longer storage.
Notes
- If you don't cut the unbaked rolls deeply enough, the shape disappears as they bake; if you cut too deeply (all the way through), the rolls will form "petals" as they rise and look like a daisy, not a kaiser roll.
- Note that the simplest way to give these rolls their traditional shape is with a kaiser roll stamp. If you don't have a stamp, check out our blog post on how to shape kaiser rolls.
↑ Back to top
Kar' Assali (Egyptian Baked Pumpkin Dessert)
Servings: 1 9-by-9-inch baking
dish
Ingredients
- 1 kg ( 2.2 pounds) pumpkin, such as Sugar Pie or Sugar Bush, peeled and cut into 2-inch chunks
- 1 1/4 cups granulated sugar (about 9 ounces; 250 g), see notes
- 1 teaspoon ground cinnamon
- 1/2 teaspoon ground cloves
- 1/4 teaspoon ground nutmeg
- 3 tablespoons unsalted butter or ghee ( 1 1/2 ounces; 42 g)
- 3 tablespoons ( 24 g) all-purpose flour
- 2 cups ( 480 ml) whole milk, room temperature
- 1 cup ( 240 ml) pumpkin liquid, from above
- 1/4 cup cream cheese ( 2 ounces; 57 g), optional
- 1/4 teaspoon vanilla extract
- 1/4 teaspoon ground nutmeg
- 1 teaspoon orange blossom water, optional
- 1/4 cup toasted unsweetened coconut flakes ( 3/4 ounces; 21 g)
- 1/4 cup toasted walnuts ( 1 ounce; 28 g)
- 3 tablespoons sultanas ( 1 1/2 ounces; about 40 g), see notes
- 1 tablespoon granulated sugar ( 1/2 ounce; 15 g), for sprinkling, optional
For the
Pumpkin Layer:
For the Sweet
Béchamel Layer:
To Assemble:
Steps
- For the Pumpkin: In a large bowl, toss pumpkin with sugar until evenly coated. Transfer to a colander and set over now-empty bowl. Set aside for at least 1 hour and up to 8 hours to draw out excess water. Reserve liquid; you should have at least 1 cup.
- Transfer drained pumpkin to a large Dutch oven or heavy-bottomed pan and season with cinnamon, cloves, and nutmeg. Cook over low heat, stirring occasionally, until pumpkin is tender, about 20 minutes. (If pumpkin becomes too dry and begins to stick to bottom of pot, add 1/4 cup water.)
- For the Sweet Béchamel Sauce: In a medium saucepan, melt butter or ghee over medium-high heat. Add flour and whisk to form a paste. Continue to cook, stirring, until raw flour scent is gone, about 1 minute. Whisking constantly, add 1 cup reserved pumpkin liquid and milk in a thin, steady stream, whisking thoroughly and getting into all corners of the pan to maintain a smooth texture. Whisk in cream cheese, vanilla, and nutmeg.
- Continue to cook, stirring, until sauce comes to a simmer and begins to thicken slightly, about 1 minute. Reduce the heat to low and cook, stirring, until sauce is thick enough to coat the back of a wooden spoon, about 3 minutes. Remove from heat; set aside.
- To Assemble: Adjust oven rack to middle position and preheat to 350°F (175°C).
- Using a potato masher, mash cooked pumpkin and, using a flexible spatula, spread it evenly across the bottom of a 9-by-9-inch baking dish. Sprinkle with toasted coconut, sultanas, and walnuts. Pour warm béchamel over the pumpkin and nuts, using a flexible spatula to spread it evenly from edge to edge. Sprinkle with sugar, if desired.
- Bake until béchamel is bubbly and dessert is fragrant, about 20 minutes. Preheat broiler to high, and broil, checking frequently to prevent burning, until béchamel is golden brown and caramelized, 2 to 3 minutes. Alternatively, use a kitchen torch to brown top of dessert (hold torch 1- to 2-inches away from the surface). Serve warm, at room temperature, or chilled for a more custard-like texture.
↑ Back to top
Karaage (Japanese Fried Chicken)
Servings: 2 to 4
Ingredients
- 1½ teaspoons grated fresh ginger, with its juice
- 2 teaspoons grated or smashed garlic (from about 3 cloves)
- 2 tablespoons dry sake
- 3 tablespoons soy sauce
- 2 teaspoons sugar
- 4 skin-on chicken thighs (about 1½ to 2 pounds), deboned, cut into 2-inch chunks
- Peanut oil, or a mixture of peanut and canola or safflower, for frying
- 1 cup potato starch (katakuriko)
- ¼ teaspoon fine sea salt
- ½ teaspoon black pepper
- Lemon wedge, for serving
- Lettuce and cucumber slices, for serving (optional)
Steps
- In a shallow baking dish large enough to hold the chicken, combine ginger, garlic, sake, soy sauce and sugar. Toss chicken pieces in marinade to coat. Cover and refrigerate for 24 to 48 hours.
- Fill an aluminum or thin stainless steelpot (best for quick temperature adjustments), with sides at least 5 inches tall, with about 3 inches of peanut oil. Heat the oil to 350 degrees. Place several layers of newsprint or paper towels on a sheet pan.
- While the oil heats, place a wire rack over a second sheet pan. In a bowl, combine potato starch, salt and pepper. Remove one piece of chicken at a time from marinade, and tuck in any jagged bits or skin as you roll it in starch mixture to coat. Rest it on the rack. Repeat with all chicken pieces.
- Gently shake off excess potato starch before cooking each piece of chicken. Fry 3 or 4 pieces at a time, keeping oil temperature around 325 degrees (temperature will fall when you add chicken) and no lower than 300 degrees. Fry for about 3 minutes, or until golden. Remove from oil using a wire-mesh spoon or long chopsticks, and cool on newsprint or paper towels.
- When all the chicken has been fried once, increase the oil’s temperature to 375 degrees. Fry chicken pieces a second time, keeping the oil between 350 and 375 degrees, until the crust is deep golden brown, about 1 minute. Drain on newsprint or paper towels. This second frying makes the coating stay extra crisp, even if you don’t serve it immediately.
- Serve hot or at room temperature, with a lemon wedge, and lettuce and cucumber slices for a cool, fresh contrast, if you like.
↑ Back to top
Kasha Varnishkes
Adapted from https://www.epicurious.com/recipes/food/views/kasha-varnishkes-at-wolffs-in-new-jersey-40010
Ingredients
- 2 large onions, sliced in rounds
- 2 to 3 tablespoons margarine or chicken fat
- 1 large egg or egg white, slightly beaten
- 1 cup medium or coarse kasha
- 2 cups water or bouillon
- Salt and freshly ground pepper to taste
- N/A freshly ground black pepper
- 3/4 pound large or small bow tie-shaped noodles
- 2 tablespoons chopped fresh parsley
- 2 tablespoons chopped fresh coriander (optiona
Steps
- Sauté the onions in 2 tablespoons of the margarine or chicken fat in a heavy frying pan with a cover until golden. Remove to a plate.
- Beat the egg in a small mixing bowl and stir in the kasha. Mix, making sure all the grains are coated. Put the kasha in the same frying pan, set over a high heat. Flatten, stir, and break up the egg-coated kasha with a fork or wooden spoon for 2 to 4 minutes or until the egg has dried on the kasha and the kernels brown and mostly separate.
- Add the water or bouillon, salt, and pepper to the frying pan and bring to a boil. Add the onions, cover tightly, and cook over low heat, steaming the kasha for 10 minutes. Remove the cover, stir, and quickly check to see if the kernels are tender and the liquid has been absorbed. If not, cover and continue steaming for 3 to 5 minutes more.
- Meanwhile, bring a large pot of water to a boil. Cook the bow-tie noodles according to the directions on the package. Drain.
- When the kasha is ready, combine with the noodles. Adjust the seasoning, sprinkle with the parsley and coriander. If desired, add a bit more margarine or chicken fat.
Notes
- FAVORITE
↑ Back to top
Kasha Varnishkes
Adapted from https://www.epicurious.com/recipes/food/views/kasha-varnishkes-at-wolffs-in-new-jersey-40010
Servings: YIELD 6 to 8 servings
Ingredients
- 2 large onions, sliced in rounds
- 2 to 3 tablespoons margarine or chicken fat
- 1 large egg or egg white, slightly beaten
- 1 cup medium or coarse kasha
- 2 cups water or bouillon
- Salt and freshly ground pepper to taste
- N/A freshly ground black pepper
- 3/4 pound large or small bow tie-shaped noodles
- 2 tablespoons chopped fresh parsley
- 2 tablespoons chopped fresh coriander (optional)
Steps
- Sauté the onions in 2 tablespoons of the margarine or chicken fat in a heavy frying pan with a cover until golden. Remove to a plate.
- Beat the egg in a small mixing bowl and stir in the kasha. Mix, making sure all the grains are coated. Put the kasha in the same frying pan, set over a high heat. Flatten, stir, and break up the egg-coated kasha with a fork or wooden spoon for 2 to 4 minutes or until the egg has dried on the kasha and the kernels brown and mostly separate.
- Add the water or bouillon, salt, and pepper to the frying pan and bring to a boil. Add the onions, cover tightly, and cook over low heat, steaming the kasha for 10 minutes. Remove the cover, stir, and quickly check to see if the kernels are tender and the liquid has been absorbed. If not, cover and continue steaming for 3 to 5 minutes more.
- Meanwhile, bring a large pot of water to a boil. Cook the bow-tie noodles according to the directions on the package. Drain.
- When the kasha is ready, combine with the noodles. Adjust the seasoning, sprinkle with the parsley and coriander. If desired, add a bit more margarine or chicken fat.
↑ Back to top
Kashk-O-Bādemjān (Persian Braised Eggplant with Kashk)
Servings: 4 to 8
Ingredients
- 3/4 cup (177ml) concentrated liquid kashk paste (see notes)
- Extra-virgin olive oil, neutral oil such as vegetable or avocado oil, or a combination, for frying
- 2 pounds (about 900 g) eggplant (long, thin eggplant such as Japanese eggplant preferred), trimmed, peeled, and halved lengthwise (see notes)
- 1/4 teaspoon freshly ground black pepper
- 1/4 teaspoon ground turmeric
- 2 tablespoons (30g) unsalted butter or extra-virgin olive oil
- 2 teaspoons crushed dried mint leaves
- 3 or 4 medium cloves garlic (depending on garlic preference), finely minced or very well crushed
- 1/2 cup fried shallots
- Lavash or pita bread for serving
Steps
- In a medium bowl, whisk kashk paste with 1/4 cup (60ml) water until well combined. Adjust consistency with additional water, 1 tablespoon at a time, until it is thick but pourable (similar to a crêpe batter); set aside.
- Set a wire rack in a rimmed baking sheet and line with a triple layer of paper towels. Fill a 12-inch cast-iron skillet 1/4 inch deep with oil, then heat over high heat until oil is shimmering but not smoking. Working in batches to prevent crowding the skillet, carefully add eggplant slices, flesh side down, and fry, flipping once halfway through, until eggplant is dark golden brown on both sides, about 10 minutes. Transfer eggplant to prepared rack. Add more oil to skillet, if needed, then repeat with remaining eggplant.
- In a separate large saucepan, add the fried eggplant, 3/4 cup water, pepper, and turmeric and bring to a boil over high heat. Reduce heat to medium-low, cover, and simmer for 20 minutes, adjusting heat as needed to maintain simmer.
- Uncover and add half of the reserved diluted kashk. Using a fork or potato masher, gently stir to combine and break up the eggplant until halfway mashed. Cover and continue to simmer, stirring occasionally and continuing to gently mash and break down the eggplant mixture, until eggplant is broken down and sauce has thickened, about 30 minutes. Sauce should be chunky but well blended and emulsified into a cohesive mixture. If any undesired excess oil remains, use a spoon to remove from the mixture.
- Meanwhile, in a separate small saute pan, melt butter over low heat (or heat 2 tablespoons olive oil until shimmering). Add mint and garlic and cook, stirring, until fragrant, about 1 minute.
- Transfer braised eggplant mixture to a shallow serving bowl. Drizzle with remaining diluted kashk. Top with fried onions, then spoon garlic-mint mixture over top. Serve with lavash or pita bread.
Serious Eats / Nader
Mehravari
Serious Eats / Nader
Mehravari
Serious Eats / Nader
Mehravari
Serious Eats / Nader
Mehravari
Serious Eats / Nader
Mehravari
Notes
- I prefer to use slender, purple-hued eggplant. Thin eggplants labeled as Japanese eggplant or Chinese eggplant will both work well in this recipe. You may substitute fatter round eggplants such as globe eggplant; if using this type, slice them into 1-inch-thick (2cm) disks for frying.
- The recipe calls for concentrated liquid kashk, which is the easiest form of kashk to use for cooking. However, dry kashk—whether in powder form or chunks—can also be used. Substitute 7 ounces (200g) dry kashk for each cup of concentrated liquid kashk. The dry powder needs to be rehydrated with water. The dried chunks, which are rather hard, must be soaked in water for about six hours before they become malleable enough to work with. Both dry forms, after being rehydrated, need a bit of heavy-handed stirring (preferably using a food processor, blender, or immersion blender); otherwise, they may have a slightly gritty texture.
- Kashk is available at most Persian and Middle Eastern markets. If you don’t have access to kashk of any kind, you can create your own substitute by blending TK finely grated Parmesan cheese into TK crème fraiche, thinning with water as needed. Alternatively, you can stir TK lime juice into tk sour cream.
- Make-Ahead and Storage
- Steps 1 through 4 can be done a day or two ahead and refrigerated in an airtight container. When ready to serve, heat the cooked mixture of eggplant and kashk in a saucepan over medium-low heat or in a shallow serving platter in the microwave. Perform steps 6 and 7 a few minutes before you want to serve the dish.
- The braised eggplant and kashk mixture can be stored in an airtight container and frozen for up to 3 months.
- Pan-fried eggplants freeze quite well as long as they are stored in an airtight container. Whenever I see good-quality skinny eggplants at a reasonable price, I buy several pounds, pan-fry them, and store them in 1-pound portions in freezer bags for making this or other eggplant-based dishes later.
- Store bought thick liquid kashk typically comes in 16–fluid ounce glass jars. Once opened, it must be refrigerated and will last only two to three weeks. If you don’t think you will go through a whole jar within that time period, here is a proven technique to extend its life to months: Divide any leftover thick liquid kashk into small silicone molds or in ice cube trays and freeze. Once frozen, pop the kashk cubes into individual small airtight freezer bags (three or four per bag) and store them in your freezer for future use. When you want to use them, drop a few frozen cubes into a mixing bowl, let them defrost at room temperature for 10 minutes, and dilute to a drizzle-able state by adding a tablespoon or two of water.
↑ Back to top
Kefta Tagine

Servings: 8
Ingredients
- 1 lb. ground lamb
- 1 1/2 tbsp. ground cumin
- 1 1/2 tbsp. paprika
- Kosher salt and freshly ground black pepper, to taste
- 4 tbsp. unsalted butter
- 2 tbsp. olive oil
- 4 cloves garlic, minced
- 1 large yellow onion, minced
- 1 tsp. crushed red chile flakes
- 1/2 tsp. ground ginger
- 1/2 tsp. crushed saffron threads
- 1 bay leaf
- 1 (28-oz.) can whole peeled tomatoes in juice, drained, crushed by hand
- 4 eggs
- 1/2 cup unpitted kalamata olives
- 1/4 cup finely chopped parsley
Steps
- Place lamb, 1 tbsp. cumin, 1 tbsp. paprika, and salt and pepper in a bowl, and mix until evenly combined. Form mixture into 12 balls, about 1 oz. each, and place on a plate; chill kefta until ready to use.
- Heat butter and oil in a 6-qt. Dutch oven over medium-high heat. Add garlic and onion, and cook, stirring, until soft, about 5 minutes. Add remaining cumin and paprika, chile flakes, ginger, saffron, and bay leaf, and cook, stirring, until fragrant, about 2 minutes. Add tomatoes, and cook, stirring, until broken down and sauce is slightly reduced, about 10 minutes. Add kefta, and cook, covered, until cooked through, about 10 minutes. Crack eggs over the top, and arrange olives around eggs; cover, and continue cooking until whites are cooked and yolks are slightly runny, about 8 minutes. Uncover and sprinkle with parsley before serving.
Notes
- FAVORITE
↑ Back to top
Ketchup On Spaghetti? You’Ll Never Doubt It After Trying
This Japanese Favorite
Servings: 2 to 3
Ingredients
- Kosher salt
- 1/2 pound dried spaghetti ( 8 ounces; 226 g)
- 2 tablespoons ( 30 ml) extra-virgin olive oil
- 5 mini Japanese smoked sausages ( 3 1/2 ounces; 100 g), thinly sliced at an angle (about 1 cup sliced), see note
- 1/2 medium white or yellow onion ( 3 1/2 ounces; 100 g), thinly sliced cross-wise (about 1 cup sliced)
- 4 medium cloves garlic ( 2 g), minced
- 1/2 large green bell pepper ( 5 ounces; 141 g), thinly sliced cross-wise (about 1 cup)
- 1 cup sliced white button or baby portabello mushrooms (about 2 1/2 ounces; 70 g)
- 2/3 cup ketchup (about 6 3/4 ounces; 190 g)
- 2 teaspoons soy sauce
- 1 teaspoon Worcestershire sauce
- 1 tablespoon unsalted butter ( 1/2 ounce; 14 g)
- 1/4 teaspoon freshly ground black pepper
- Fried eggs (optional)
- Grated parmesan cheese, preferably Kraft
- 1 1/2 teaspoons finely chopped fresh parsley (optional)
- Hot sauce, preferably Tabasco (optional)
To Serve:
Steps
- In a large pot of salted boiling water, cook spaghetti until just shy of al dente, about 2 minutes less than package directions. Reserve 1/2 cup pasta cooking water, and using a colander, drain spaghetti.
- While pasta is cooking, make the sauce: In a large cast iron, carbon steel, or nonstick skillet or Dutch oven, heat oil over medium-high until shimmering. Add sausages and cook, stirring occasionally, until mostly brown on all sides, about 2 minutes.
- Add onion and garlic, and reduce heat to medium. Cook, stirring constantly, until onion and garlic are tender and fragrant, about 2 minutes. Add bell peppers, mushrooms, ketchup, soy sauce, and Worcestershire sauce. Cook, stirring frequently, until ketchup thickens and darkens slightly, about 3 minutes.
- Add reserved pasta water, butter, and black pepper. Using tongs, transfer spaghetti directly into simmering sauce. Cook, stirring constantly, until pasta is al dente and sauce has thickened so it coats noodles and isn't watery, 2 to 3 minutes. Remove from heat. Divide among two to three bowls or plates, and top each portion with a fried egg (if using), cheese, parsley (if using), and hot sauce to taste.
Notes
- If you can’t get mini Japanese smoked sausages, American-style mini smoked sausages, such as Lit'l Smokies. You can also use two regular hot dogs or extra-thick-cut bacon.
↑ Back to top
Key Lime Bread
Adapted from http://www.tasteofhome.com/recipes/key-lime-bread
Ingredients
- 2/3 cup butter, softened
- 2 cups sugar
- 4 eggs
- 2 tablespoons grated lime peel
- 2 tablespoons Key lime juice
- 1 teaspoon vanilla extract
- 3 cups all-purpose flour
- 3 teaspoons baking powder
- 1 teaspoon salt
- 1 cup milk
- 1 cup chopped walnuts
- 2/3 cup confectioners' sugar
- 1 to 2 tablespoons Key lime juice
GLAZE:
Steps
- Preheat oven to 350°. In a large bowl, cream butter and sugar until light and fluffy. Beat in eggs. Beat in lime peel, juice and vanilla. Combine flour, baking powder and salt; gradually add to creamed mixture alternately with milk, beating well after each addition. Fold in walnuts.
- Transfer to two greased 9x5-in. loaf pans. Bake 50-55 minutes or until a toothpick inserted in center comes out clean. Cool 10 minutes before removing from pans to wire racks.
- Combine confectioners' sugar and enough lime juice to achieve desired consistency; drizzle over warm bread. Cool completely. Yield: 2 loaves (16 slices each).
Notes
- FAVORITE
↑ Back to top
Key Lime Pound Cake Is Better Than Pie

Servings: 6
Ingredients
- 1 1/2c. (3 sticks) butter, softened
- 1 (8-oz.) block cream cheese
- 3 c. sugar
- 5 large eggs
- 3 tbsp. lime juice
- 3 c. all-purpose flour
- 1 c. powdered sugar
- 1 tsp. lime juice
- 2 tbsp. water
- 1/2 tsp. pure vanilla extract
- Zest of 1 lime
For the Pound
Cake:
For the Glaze:
Steps
- Preheat oven to 350 degrees F.
- Make the cake: In a large mixing bowl, combine butter and cream cheese until light and fluffy. Mix in sugar, then gradually add in eggs 1 to 2 at a time, beating on low until combined.
- Mix in lime juice, then flour. Fold in lime zest.
- Grease 4 mini loaf pans and pour in cake batter until each one is about 3/4 full. Bake until a toothpick inserted in the center comes out mostly clean, 43 to 45 minutes. (If you don’t have mini loaf pans, you can grease and fill a bundt pan and bake 70 to 73 minutes.) Let cool for 15 minutes.
- Make the glaze: Whisk together powdered sugar, lime juice, water and vanilla. (If the glaze is too thick, add extra water, about a teaspoon at a time.) Pour on top of cooled pound cake, then top with lime zest and serve.
↑ Back to top
Key West Chicken

Servings: YIELD 4 servings ACTIVE
TIME 15 mins
Ingredients
- 3 tablespoons soy sauce
- 1 tablespoon honey
- 1 tablespoon vegetable oil
- 1 teaspoon lime juice
- 1 teaspoon chopped garlic
- 4 skinless, boneless chicken breast halves
Steps
- In a shallow container, blend soy sauce, honey, vegetable oil, lime juice, and garlic. Place chicken breast halves into the mixture, and turn to coat. Cover, and marinate in the refrigerator at least 30 minutes.
- Preheat an outdoor grill for high heat.
- Lightly oil the grill grate. Discard marinade, and grill chicken 6 to 8 minutes on each side, until juices run clear.
Notes
- FAVORITE
↑ Back to top
Khachapuri

Tags: Breads
Eggs Georgian
Servings: 8
Ingredients
- 1 tsp salt
- 1 tsp dry active yeast
- 1 tbsp granulated sugar
- 3 1/2 cup all-purpose flour
- 1 cup water
- 1/2 cup milk
- 1 tbsp olive oil
- 1 1/2 cup Farmers cheese
- 1 1/2 cup Shredded mozzarella
- 1 1/2 cup Feta cheese
- 4 eggs + 1 for egg wash
- unsalted butter optional
For the dough:
For the
filling:
Steps
- In the bowl of a stand mixer combine the
- salt, yeast, sugar, and flour.
- Heat water and milk to about 115 degrees Fahrenheit. Then pour it into the bowl of dry ingredients.
- Begin kneading the dough with the hook attachment until it's close to being smooth and elastic.
- Add the oil into the dough and knead for another minute.
- Drizzle a little bit of olive oil onto the bottom and sides of a deep bowl. Place the dough inside the bowl and cover with plastic wrap. Set the bowl in a warm place until the dough doubles in size, about 1 hour.
- Remove the plastic wrap and press into the dough a few times with your hands. Cover with plastic wrap once more and let it sit in a warm place for another 30 minutes.
- Meanwhile, combine the farmers cheese, feta, and mozzarella in a bowl.
- Remove the dough from the bowl and place it onto a floured surface. Then cut it into 4 equal pieces.
- Spread each piece of the dough into a circle about 9 inches in diameter. Then roll 2 opposite sides of the circle towards the center so it ends up have a boat like shape. Then pinch the corners together.
- Transfer the khachapuri onto a baking sheet lined with greased parchment paper.
- Stuff each khachapuri with the cheese mixture. Beat 1 egg with a teaspoon of water, then brush the dough with egg wash.
- Bake in a preheated 450 degrees oven for about 15 minutes or until the crust becomes golden brown.
- Make a well in the center of each khachapuri with the back of a spoon (about 3 inches in diameter) and drop 1 egg into each well. Then stick a few small pieces of butter into the cheese.
- Return the khachapuri back into the oven and bake for another 5-6 minutes. Cooking time may vary depending on your oven. The egg white should be white but still pretty runny. It will cook further as it sits in the hot cheese. When serving, mix the cheese and egg with a fork and serve immediately.
↑ Back to top
Kielbasa
Adapted from file:///C:/Users/Starfleet%20Command/Documents/Zapya/Misc/kielbasa_Dir/kielbasa_Page1.htm#131073

Tags: Charcuterie
Polish Pork Sausage
Smoking
Ingredients
- 214 pounds pork butt
- 34 pound pork back fat
- 1/2 cup water
- 2 tablespoons finely chopped garlic
- 1 tablespoon kosher salt
- 2 teaspoons dried marjoram
- 2 teaspoons coarsely ground black pepper
- 1 teaspoon dry mustard
- 1/2 teaspoon ground coriander Medium hog casings
Steps
- Grind the meat and fat together through a 1/4-inch plate. In a large bowl, mix the ground meat with the water, garlic, salt, marjoram, pepper, mustard, and coriander. Knead the mixture until everything is well blended.
Stuff into medium hog
casings, and tie into 6-inch links.
↑ Back to top
Kifli
Adapted from https://www.evernote.com/Home.action#n=8953fd33-5c92-4375-b3fe-9836ae70c561&s=s164&ses=4&sh=2&sds=5
Servings: 80 cookies
Ingredients
- 2 cups ground walnuts
- 1/2 cup sugar
- 3 large egg whites, lightly beaten
- 2 tablespoons regular or low-fat milk
- 1/2 cup golden raisins
- 6 cups flour, sifted 3 times, plus more for the work surface
- 6 tablespoons sugar, plus more for decorating
- 1 teaspoon baking powder
- 1 pound unsalted butter, cut into 1-inch pieces
- 5 large egg yolks
- 1 cup regular or low-fat sour cream
- Finely grated zest from 1 lemon
For the
filling
For the pastry
Steps
- For the filling: Combine the walnuts, sugar, egg whites, milk and raisins in a large saucepan. Place over medium-low heat; cook, stirring constantly, just until the mixture is well incorporated and heated through. Remove from the heat and cool completely.
- For the pastry: Combine the flour, the 6 tablespoons of sugar, the baking powder and butter in a mixing bowl. Use a pastry cutter or your fingers to create a crumbly mixture. Make a well in the center; add the egg yolks, sour cream and lemon zest. Knead together to form a soft dough. Cover and refrigerate for 1 hour.
- (Alternatively, the dough can be made in a food processor; divide ingredients in half and work in two batches. Do not over-process.)
- Preheat the oven to 375 degrees. Line several baking sheets with parchment paper or silicone liners.
- Lightly flour a work surface and a rolling pin. Cut the chilled dough into four equal sections; it's okay to leave the other sections on the counter as you work.
- Working with one section at a time, roll out to a thickness of 1/16 inch; it's a very stretchable dough. Cut into 20 squares; place 1 to 2 teaspoons of the filling at the center of each one. Arrange so there's a point at the top (like a diamond), then roll to form a small, tapered cigar or crescent shape. You might have scraps of dough left over; they can be re-rolled. Use all the filling.
- Dip the top side (opposite the seam side) of each cookie into the egg whites, then into the sugar. Arrange them sugared side up on the baking sheets. Bake one sheet at a time for 15 minutes or until just browned on the top and ends. Transfer the kifli to a wire rack to cool completely before serving or storing.
- Repeat to use all of the dough and filling.
- For apricot filling: Place 1 pound of dried apricots in a large saucepan; barely cover with water and bring to a boil over medium-high heat. Cook just until thoroughly softened, then remove from the heat. Add granulated sugar (to taste, in tablespoon increments), stirring and mashing to form a pastelike mixture. Cool completely before using.
- For poppy seed filling: Combine 3 cups of ground poppy seeds, 1 1/4 cups granulated sugar, 3/4 cup regular or low-fat milk, 4 tablespoons of unsalted butter and 1/2 teaspoon of vanilla extract in a large saucepan over low heat. Cook, stirring constantly, for about 5 minutes to form a thickened mixture, which will thicken further as it cools. If it seems too thick, add a little milk.
VARIATIONS
Notes
- FAVORITE
↑ Back to top
Kimchi and Spam Fried Rice

Tags: Korean
Rice
Servings: 2 to 3
Ingredients
- 2 cups cooked white rice (12 ounces; 350g) (see notes)
- 3/4 pound kimchi with juices (about 1 cup packed; 340g)
- 2 tablespoons (30ml) vegetable or canola oil, divided
- 1 (12-ounce; 340 g) can Spam, cut into 1/4- to 1/2-inch dice
- 1 large onion, finely diced (1 1/2 cups; 12 ounces; 340 g)
- 4 scallions, white and pale green parts only, thinly sliced (about 1/4 cup; 40 g)
- 2 medium cloves garlic, minced (about 2 teaspoons; 10ml)
- 1 hot red or green chile (such as jalapeño, serrano, or Thai bird), stemmed and thinly sliced
- Freshly ground black pepper
- 2 teaspoons (10ml) Asian fish sauce
- 1 teaspoon (5ml) toasted sesame oil
- 1/2 cup chopped fresh cilantro leaves and fine stems (1/2 ounce; 14g)
- Kosher salt
- Fried eggs, for serving
- Hot sauce, for serving
Steps
- If using day-old rice, transfer to a medium bowl and break rice up with your hands into individual grains before proceeding. Place kimchi in a fine-mesh strainer set over a large bowl and squeeze out excess liquid. Reserve liquid and finely chop kimchi.
- Heat 1/2 tablespoon oil in a wok over medium-high heat until shimmering. Add Spam and cook, tossing and stirring frequently, until well browned and starting to crisp. Add chopped kimchi and onion and cook, stirring and tossing regularly, until vegetables are softened, about 4 minutes. Transfer to a bowl and set aside.
- Add another 1/2 tablespoon oil to wok. Increase heat to high and heat until smoking. Add half of rice and cook, stirring and tossing, until rice is pale brown, toasted, and has a slightly chewy texture, about 3 minutes. Transfer to a medium bowl. Repeat with another 1/2 tablespoon oil and remaining rice.
- Return all rice to wok and press it up the sides, leaving a space in the middle. Add another 1/2 tablespoon oil to the space. Add scallions (reserving some for garnish), garlic, and chile. Stir gently and cook until lightly softened and fragrant, about 1 minute. Toss with rice to combine. Add onion, kimchi, and Spam mixture and toss to combine. Pour in reserved kimchi juice and season generously with black pepper. Add fish sauce, sesame oil, and cilantro (reserving some cilantro for garnish). Toss everything to combine. Season to taste with salt if necessary. When ready to serve, allow rice to sit in wok without tossing for 45 seconds to create a crisp crust underneath.
Turn rice out onto a serving platter, trying to get as much of the
crispy rice facing up as possible. Top with fried eggs, sprinkle with
reserved scallions and cilantro, and serve immediately with hot sauce.
Notes
- For best results, use Chinese-style medium-grain rice, jasmine rice, or sushi rice. Rice should either be cooked fresh, spread on a tray, and allowed to cool for 5 minutes, or transferred to a loosely covered container and refrigerated for at least 12 hours and up to three days.
↑ Back to top
Kimchi Recipe (With Video)
Adapted from https://cooking.nytimes.com/recipes/1023416-kimchi
Ingredients
- 1 medium head napa cabbage (2 to 2½ pounds), any dirty outer leaves removed
- 3 tablespoons coarse kosher salt or 5 tablespoons kosher salt (such as Diamond Crystal)
- 1 medium green apple or Asian pear, peeled, quartered and cored
- 1 small yellow onion, peeled and quartered
- 10 garlic cloves, peeled
- 1 (2-inch) piece fresh ginger, peeled
- 1 tablespoon granulated sugar
- ⅓ cup gochugaru (Korean red pepper)
- ⅓ cup fish sauce
- 3 scallions, trimmed
- 1 medium carrot or ½ medium daikon, peeled
- 1 tablespoon pine nuts (optional)
Steps
- Dry-brine the cabbage: Rinse the head of cabbage under cold running water, making sure to get in between the leaves. Trim the root end off the cabbage and cut crosswise into 1-inch-thick slices, carving out any core if it’s especially big and tough. Transfer the cabbage strips to your largest bowl. Sprinkle over the salt and toss with your hands until evenly distributed. Set aside to brine at room temperature until the hard leaves shrink and become wet and limp (but are still crunchy), 1½ to 2 hours.
- Rinse the cabbage: Fill the bowl with cold running water and swish the leaves around to rinse them of their salt (and to clean off any dirt). Lift them up out of the water and transfer to a colander. Repeat once or twice until the cabbage leaves still taste discernibly salted, but not too salty that you can’t eat it like a salad. Rinse out the bowl.
- Make the sauce: To a food processor, add the apple, onion, garlic, ginger, sugar and process until very finely chopped into a fluffy purée. Transfer the sauce to the empty bowl and stir in the gochugaru and fish sauce. Cut the scallions into 1-inch-long pieces and add to the bowl. Cut the carrot into matchsticks: slice crosswise into 1-inch lengths, then thinly slice lengthwise, stack the slices and cut lengthwise again into thin strips. Add to the bowl, along with the pine nuts, if using. Stir to combine. Add the drained cabbage to the sauce and toss with clean hands until well combined.
- Transfer the sauced cabbage to a clean ½-gallon jar, using your hands to gently pack it down. (A few air gaps are fine; they’ll fill with liquid over time.) This amount of cabbage should leave about an inch of room at the top of the jar. Top the jar with any remaining sauce left behind in the bowl. Loosely close with a lid (see Tip). Wash your hands and rinse off the outside of the jar at this stage.
- Let the jar of kimchi begin fermenting on the kitchen counter at room temperature for 2 to 3 days, “burping” it every 12 hours or so, which just means opening the lid to let out any excess build-up of gas. After this, the cabbage should have released even more of its liquid; it’s OK if the liquid doesn’t completely cover the cabbage at this point, though it may. Refrigerate the kimchi to finish fermenting until it’s sour, 2 to 3 weeks and up to 6 months, at which point it will be very, very sour and should be eaten or turned into jjigae. Check (and taste!) the kimchi every 2 to 3 days both to familiarize yourself with the fermentation process but also to allow gas to escape.
Make the recipe with us
Watch
↑ Back to top
Kimchi Stew with Pork Belly
Ingredients
- 1 pound napa cabbage kimchi (https://food52.com/recipes/44375-kimchi) 1 medium onion, sliced (about 3/4 cup) 2 tablespoons Korean chile paste 2 teaspoons sugar 1 teaspoon salt 2 teaspoons toasted sesame oil 3 scallions, 2 sliced into 3-inch pieces, 1 chopped 2 1/2 cups water or kimchi brine 5 ounces pork belly, cut into bite-sized pieces 8 ounces medium-firm tofu, cut into bite-sized pieces
Steps
- Combine kimchi, kimchi brine, onion, hot pepper flakes, sugar, sliced scallions, and sesame oil in a large pot.
- Add the water and simmer for 25 minutes. Add pork belly and tofu and cook 4 to 5 more minutes until tofu is soft and fluffy.
- Sprinkle the chopped scallion on top and serve
Notes
- FAVORITE
↑ Back to top
Knishes Turkey and Cranberry
Ingredients
- 2 sheets puff pastry, thawed for 30 minutes
- 1 cup cranberry sauce, divided
- 1 Tbsp Dijon mustard
- 1/2 tsp whole grain mustard
- 1/2 cup leftover mashed potato
- 1/2 to 3/4 cup leftover turkey, diced
- 1 egg, beaten
- All purpose flour for rolling out puff pastry
Steps
- Preheat the oven to 375 degrees.
- On a lightly floured surface, roll out the puff pastry on all sides so that dough stretches slightly. Cut into 9 even squares.
- Using fingers stretch each square just a little bit more. Add tsp of mashed potatoes, a few pieces of turkey and tsp of cranberry sauce onn each square.
- Fold each point of the puff pastry up and pinch at the top. Twist puff pastry and then push down. Repeat.
- Brush each knish with beaten egg.
- Bake for 30-35 minutes, until golden brown.
- While knishes bake, mix 1/2 cup cranberry sauce with 1 Tbsp Dijon mustard and 1/2 tsp whole grain mustard. Spicy brown mustard can also be substituted. Whisk together until smooth.
- Serve knishes while warm with cranberry mustard.
Notes
- Other variations:
- Substitute the mashed potatoes with leftover stuffing or mashed sweet potatoes.
- Substitute the cranberry sauce inside the knishes for leftover gravy.
↑ Back to top
Knäckebröd Med Frön (Seeded Crispbread)
Ingredients
- 1 1/4 cups fine cornmeal
- 1/2 cup sesame seeds
- 1/2 cup sunflower seeds
- 1/4 cup canola oil, plus more for greasing
- 1/4 cup flaxseed
- 1 tbsp. kosher salt
- 1 cup boiling water
Steps
- Heat oven to 350°. Stir cornmeal, sesame and sunflower seeds, oil, flaxseed, and 2 tsp. salt in a bowl. Slowly stir in water until a thick, chunky dough forms. Using a greased spatula, spread dough evenly over the surface of a parchment paper–lined baking sheet. Sprinkle with remaining salt; bake until golden and crisp, about 40 minutes. Let cool; break into pieces to serve.
Notes
- FAVORITE
↑ Back to top
Kofte Kebabs with Spicy Harissa Yogurt Sauce and Grilled
Flatbread (Minced Lamb Kebabs)

Tags: Lamb
Middle-East
Servings: 4
Ingredients
- 3/4 cup strained yogurt
- 4 tablespoons harissa (to taste, see note)
- 4 medium cloves garlic, minced on a microplane grater (about 4 teaspoons)
- 1 cup fresh mint or parsley leaves (or a mix), minced
- Kosher salt and freshly ground black pepper
- 2 pounds ground lamb or beef, at least 20% fat
- 1 tablespoon red chile flakes
- 2 teaspoons ground cumin
- 1 teaspoon ground coriander
- 1/4 teaspoon ground cinnamon
- 1 ( 2-inch) knob of ginger, grated on the medium holes of a box grater
- 1 small onion, grated on the medium holes of a box grater (about 1/2 cup)
- Thinly sliced red onions, soaked in cold water
- 1 lemon, cut into wedges for serving
- A handful of greens, such as arugula (optional)
- 1 recipe grilled naan, or store-bought flatbread warmed on grill
Sauce:
Kofte:
Steps
- Soak 12 large bamboo skewers in water (unless using metal skewers). Combine yogurt, half of harissa (more or less depending on spice tolerance), half of garlic, and half of herbs. Whisk to combine and season to taste with salt and pepper.
- Combine lamb, chili flakes, cumin, coriander, cinnamon, ginger, onion, remaining garlic, remaining harissa, and remaining herbs in a large bowl. Season with salt. Work the meat together with your bare hands until homogenous, then pull off a small piece and place it on a microwave safe plate. Microwave on high power until cooked through, about 15 seconds. Taste meat and add salt as necessary. Repeat the tasting process until seasoned to your liking.
- Working with wet hands, divide meat into twelve balls. Roll each ball into a long sausage-like shape, then insert skewer through center of each kebab.
- Light one chimney full of charcoal. When all the charcoal is lit and covered with gray ash, pour out and arrange the coals on one side of the charcoal grate. Set cooking grate in place, cover grill and allow to preheat for 5 minutes. Clean and oil the grilling grate.
- Place kebabs directly over coals. Cover and cook until well-charred, about 2 minutes. Carefully flip kebabs, cover, and cook until second side is well-charred. Remove cover, transfer kebabs to cooler side of grill, cover, and continue cooking until desired doneness is reached, about 2 minutes more (you can tear off a piece of one to check). Transfer to a large plate and let rest for 3 minutes.
- Serve kebabs with lemon wedges, sliced onions, greens, and yogurt sauce on boiled rice or with a grilled flatbread, such as this grilled naan .
- Special equipment
- Grill, metal or wooden skewers
↑ Back to top
Kompot a Homemade Fruit Drink
Adapted from https://polishhousewife.com/kompot/

Tags: Beverages
Ingredients
- 1 gallon water
- 1 cup sugar
- 10 dried apricots
- 1 apple, cored and sliced
- 6 ounces raspberries
- 6 ounces blueberries
Steps
- Add the sugar to the water in a large pan
- Bring to a boil, stirring until the sugar dissolves
- Add apricots and apple
- Simmer for 15 minutes
- Add berries
- Return to boil and remove from heat
- Cool
Notes
- The next time I use blueberries, I will muddle them to allow more juice to escape while steeping.
↑ Back to top
Korean Barbecue Beef Bulgogi
Tags: Korean
Servings: 2 to 3
Ingredients
- 1/4 cup soy sauce
- 2 tablespoons sugar
- 1 tablespoon sesame oil
- 1 tablespoon mirin
- 1/2 medium onion
- 2 cloves garlic, minced
- 1 teaspoon ginger, grated
- 1 teaspoon sesame seeds, toasted
- 1/4 teaspoon black pepper
- 1 pound rib eye, thinly sliced
- Lettuce, romaine or bibb
- 1 cup cooked white rice
- 1/2 cup kimchi
- 4 teaspoons hot bean paste
For the
Marinade:
For the
bulgogi:
Steps
- Add the soy sauce, sugar, sesame oil, mirin, onion, garlic, ginger, sesame seeds, and black pepper to a large bowl. Whisk until combined. Toss in the meat, cover, and set in the fridge for 30 minutes.
- Preheat a grill pan or a large iron skillet to high heat. Remove the meat from the marinade, and then toss in the pan. Cook for a few minutes on each side, until nicely browned.
- Serve the beef with lettuce, white rice, kimchi, and hot bean paste.
↑ Back to top
Korean Bbq Sauce
Ingredients
- 3 cups (700 ml) reduced-sodium soy sauce (do not use regular soy sauce)
- 3 cups (660 grams) light brown sugar, packed
- 1 1/4 cups (300 ml) water
- 1 cup (240 ml) soju or sake
- 1/2 cup (105 grams) store-bought or homemade gochujang
- 1/2 cup (120 ml) mild honey
- 1/3 cup (80 ml) rice wine vinegar
- 1/4 cup plus 2 tablespoons (57 grams) minced garlic
- 1/4 cup (57 grams) grated fresh ginger root
- 4 scallions, ends trimmed, thinly sliced
- 1 ripe pear, any variety, peeled, cored, and grated on the finest side of a box grater (about 200 grams)
- 1 teaspoon (2 grams) black pepper
- 1 teaspoon Korean chili pepper powder or crushed red pepper flakes
- 3 teaspoons (29 grams) Clear Jel, ThermFlo, or other canning starch (see below)
Steps
- In a large pot, combine the soy sauce, light brown sugar, 1 cup (240 ml) water, soju or sake, gochujang, honey, rice wine vinegar, garlic, ginger root, sliced scallions, grated pear, black pepper and chili powder or crushed red pepper flakes. Stir well while bringing to a boil. Boil for 5 minutes, stirring frequently.
- In a small measuring cup or bowl, use a fork or small whisk to combine the canning starch with the remaining 1/4 cup (60 ml) water until the starch is evenly dispersed.
- Stir the sauce vigorously while you slowly pour in the water mixture in a steady stream. Return the sauce to a boil and boil until thickened, about 1 minute.
- Ladle the sauce into sterilized pint or 24-ounce (475-ml) jars, leaving 1/2 inch (13 mm) headspace at the top of each jar. Moisten a paper towel with vinegar and wipe the rims of the jars clean. Place lids on the jars and fasten appropriately, whether it’s turning a ring to fingertip tightness or fixing clamps in place.
- Use canning tongs to transfer the jars to a canner or large pot full of boiling water that covers the jars by 2 inches (5 cm). Put the lid of the canner in place, return the water to a boil, and process for 15 minutes. Carefully transfer the jars to a towel-lined counter or wire cooling rack and let them to cool completely, preferably overnight. Make sure you do not press on the tops and create an artificial seal.You’ll hear the sound of can tops popping shortly-a sign that a secure seal has been made. Once the jars are cool, remove the rings and check the seal by lifting the jar by holding only the lid. If it stays intact, you have successfully canned your food. If the seal is loose or broken, you may reprocess in the water bath within 24 hours. Alternatively, you can refrigerate the jar immediately and use within 3 weeks.
- Wipe the jars clean and label. Store the jars in a cool, dark place for up to 1 year. Once opened, the Korean BBQ sauce will be good for up to 3 weeks when stored in the refrigerator. To use, brush the sauce onto beef, poultry, or pork while grilling as a glaze (be careful as the sugars in the sauce can lead to scorching if the temperatures are too high) or use the sauce for dipping.
Notes
- When you look at the ingredients in the recipe below, you’ll see mention of “ClearJel, ThermFlo, or other canning starch.” If you’re not familiar with them, not to worry. Veteran recipe tester and home canner Melissa Maedgen shared with us some helpful insights. As she explains, “Both ClearJel and ThermFlo are modified cornstarches. The reason they are preferred over regular cornstarch is that they will retain their thickening power in the presence of acid ingredients, and acid ingredients are a requirement for hot water bath canning. You cannot substitute regular cornstarch. You can, however, substitute arrowroot starch, which stands up to acid and to prolonged heat, which is the requirement for a canning starch. Another option, if you don’t object to a thin sauce, is to omit the starch altogether.”
↑ Back to top
Korean Flavors Punch Up Super Bowl Pulled Pork
Servings: 6 to 8
Ingredients
- 3 to 4 pounds boneless pork butt OR shoulder, trimmed and cut into 1½-inch chunks
- ¾ cup gochujang
- ¼ cup hoisin
- 1 medium yellow onion, halved and thinly sliced
- ¼ cup white miso
Steps
- Heat the oven to 325°F with a rack in the lower-middle position. In a large Dutch oven, stir together the pork, gochujang and hoisin. In a bowl, toss the onion with the miso, then distribute over the pork. Cover and cook for 2 hours. Uncover and cook until the pork is fork-tender, another 1½ to 2 hours, stirring once or twice. Skim off and discard the fat, then shred the pork.
- Optional garnish: Thinly sliced scallions OR toasted sesame seeds OR both.
Notes
- EDITOR’S NOTE: For more recipes, go to Christopher Kimball’s Milk Street at 177milkstreet.com/ap
↑ Back to top
Korean Fried Chicken
Servings: 4 to 6
Ingredients
- 1 small yellow onion, coarsely grated
- 2 cloves garlic, minced
- ½ teaspoon kosher salt, plus more for coating
- ¼ teaspoon black pepper, plus more for coating
- 8 to 10 boneless, skinless chicken thighs, quartered, or 24 wings
- 3 tablespoons gochujang paste
- 3 tablespoons ketchup
- ¼ cup granulated sugar
- 2 tablespoons toasted sesame seeds, more for garnish
- Juice of ½ lemon
- Oil for deep frying
- ½ cup all-purpose flour
- ⅔ cup cornstarch
Steps
- In a medium-size bowl, combine grated onion, garlic, salt and pepper. Add chicken and toss to coat well. Cover and set aside to marinate for about 1 hour.
- In a large bowl, stir together chili paste, ketchup, sugar, sesame seeds and lemon juice. Taste and adjust flavors to get a spicy-sweet-tangy finish. Set aside.
- Pour oil into a large heavy pot to a depth of 1½ inches. Heat to 350 degrees. Combine flour and cornstarch in a shallow bowl and season with salt and pepper.
- Working in batches to avoid crowding, lift chicken from marinade, dredge lightly in seasoned flour and cornstarch, gently drop into oil and fry for 5 to 7 minutes, turning occasionally, until golden brown and crisp. Drain on paper towels. Repeat with remaining chicken, checking oil temperature between batches.
- For wings only, when all pieces are done, increase oil temperature to 375 degrees and refry in batches for 30 to 60 seconds, until very crisp. Drain once more on paper towels. While chicken is still hot, brush all pieces thickly with chili sauce. Serve hot, sprinkled with sesame seeds.
↑ Back to top
Korean Fried Chicken Wings

Steps
Combine sesame oil, garlic, and ginger in large bowl and microwave
until mixture is bubbly and garlic and ginger are fragrant but not
browned, 40 to 60 seconds. Whisk in 1/4 cup water, sugar, gochujang,
and soy sauce until smooth; set aside.
Heat vegetable oil in Dutch oven over medium-high heat to 350 degrees.
While oil heats, whisk flour, cornstarch, and remaining 11/2 cups
water
in second large bowl until smooth. Set wire rack in rimmed baking
sheet
and set aside.
Place half of wings in batter and stir to coat. Using tongs, remove
wings from batter one at a time, allowing any excess batter to drip
back into bowl, and add to hot oil. Increase heat to high and cook,
stirring occasionally to prevent wings from sticking, until coating is
light golden and beginning to crisp, about 7 minutes. (Oil temperature
will drop sharply after adding wings.) Transfer wings to prepared
rack.
Return oil to 350 degrees and repeat with remaining wings. Reduce heat
to medium and let second batch of wings rest for 5 minutes.
Heat oil to 375 degrees. Carefully return all wings to oil and cook,
stirring occasionally, until deep golden brown and very crispy, about
7
minutes. Return wings to rack and let stand for 2 minutes. Transfer
wings to reserved sauce and toss until coated. Return wings to rack
and
let stand for 2 minutes to allow coating to set. Transfer to platter
and serve.
Notes
- NOTE FROM THE TEST KITCHEN A rasp-style grater makes quick work of turning the garlic into a paste. Our favorite rasp-style grater is the Microplane Classic Zester Grater. Gochujang, a Korean chile-soybean paste, can be found in Asian markets and in some supermarkets. Tailor the heat level of your wings by adjusting its amount. If you can’t find gochujang, substitute an equal amount of Sriracha sauce and add only 2 tablespoons of water to the sauce. For a complete meal, serve with steamed white rice and a slaw.
↑ Back to top
Korean Garlic and Chile Pork

Ingredients
- 1/4 cup gochujang
- 3 tablespoons sugar
- 3 tablespoons minced garlic
- 1 tablespoon minced peeled fresh ginger
- 1 tablespoon dry sake
- 1 tablespoon mirin
- 2 tablespoons toasted sesame oil
- 2 tablespoons gochugaru
- 1/2 small onion, thinly sliced
- 2 pounds pork shoulder or pork belly, cut into 4-by- 1/8-inch strips
- Canola oil, for frying
- Thinly sliced scallions, for garnish
- Lettuce leaves and steamed short-grain rice, for serving
Steps
- In a large bowl, combine all of the ingredients except the pork, canola oil, scallions, lettuce and rice. Add the pork and turn to coat. Cover with plastic wrap and refrigerate overnight.
- In a large nonstick skillet, heat 1 tablespoon of canola oil. Add the strips of pork in batches, taking care not to crowd the pan, and stir-fry over moderately high heat until cooked through and browned in spots, about 2 minutes per batch. Add more oil to the skillet as necessary.
- Transfer the pork to a platter and garnish with scallions. Serve with lettuce leaves and steamed rice.
Notes
- FAVORITE
↑ Back to top
Korean Grilled Chicken

Tags: Chicken
Korean
Servings: 4
Ingredients
- 1 cup soy sauce
- 3 tablespoons rice vinegar
- 2 tablespoons honey
- 1 heaping tablespoon Korean chili paste (recommended: gochujang)
- 2 tablespoons grated fresh ginger
- 6 cloves garlic, chopped
- 1 green onion, thinly sliced
- 2 teaspoons toasted sesame oil
- Freshly ground black pepper
- 1 1/2 teaspoons toasted sesame seeds
- 1 (3-pound) chicken, butterflied, cut into parts
Steps
- Whisk together the soy, vinegar, honey, chili paste, ginger and garlic in a bowl and divide the mixture in half. Add 1 half to a large baking dish, then add the chicken, turning to coat. Cover and let the meat marinate in the refrigerator for at least 4 hours or up to 8 hours. Add the green onions, sesame oil, black pepper and sesame seeds to the remaining half of the mixture. Reserve it as a dipping sauce for the finished chicken.
- Light a grill, making sure to include a zone of indirect heat.
- Remove the chicken from the marinade and put it over the charcoal, skin side down. Grill until the skin is golden brown and crisp, about 10 minutes. Relocate the chicken to the indirect heat zone, lower the cover and grill until cooked through. Remove the chicken from the grill to a cutting board and carve. Arrange the chicken on a serving platter and serve wrapped in tortillas, if desired, with dipping sauce on the side.
↑ Back to top
Korean Noodles with Beef and Vegetables
Adapted from http://www.saveur.com/article/Recipes/Chap-Chae
Ingredients
- 3 tbsp. canola oil
- 2 cups julienned carrots
- Kosher salt and freshly ground white pepper, to taste
- 2 cups thinly sliced onions
- 1 cup julienned red bell pepper
- 1 cup julienned button mushrooms
- 1 cup julienned filet mignon
- 1 clove garlic, minced
- 1/2 cup soy sauce
- 1/2 cup sugar
- 16 oz. dried Korean sweet potato noodles (called dangmyeon), soaked in boiling hot water until al dente
- 2 tbsp. toasted sesame oil
- 2 tbsp. thinly sliced scallions
- 1 tbsp. toasted sesame seeds
Steps
- Heat 1 tbsp. oil in a 12" skillet over medium-high heat; add carrots. Season with salt and pepper; cook, stirring, until half-tender, about 3 minutes. Transfer to a large bowl; repeat with 1 tbsp. oil, onions, peppers, and mushrooms. Wipe skillet clean; heat remaining oil. Add steak and garlic; cook until browned, about 4 minutes. Add soy sauce and sugar; cook until sugar dissolves. Pour over vegetables in bowl, add noodles and sesame oil, and toss. Garnish with scallions and sesame seeds.
Notes
- FAVORITE
↑ Back to top
Korean Rice Bowl (Dolsot Bibimbap)
Ingredients
- Pickles
- cup cider vinegar
- tablespoons sugar
- teaspoons salt
- cucumber, peeled, quartered lengthwise, seeded, and sliced thin on bias
- ounces (2 cups) bean sprouts
- Chile Sauce
- cup gochujang
- tablespoons water
- tablespoons toasted sesame oil
- teaspoon sugar
- Rice
- cups short-grain white rice
- cups water
- teaspoon salt
- Vegetables
- cup water
- scallions, minced
- tablespoons soy sauce
- garlic cloves, minced
- tablespoon sugar
- tablespoon vegetable oil
- carrots, peeled and shredded (2 cups)
- ounces shiitake mushrooms, stemmed, caps sliced thin
- (10-ounce) bag curly-leaf spinach, stemmed and chopped coarse
- Bibimbap
- tablespoons plus 2 teaspoons vegetable oil
- tablespoon toasted sesame oil
- large eggs
1
2
1 1/2
1
4
1/4
3
2
1
2 1/2
2 1/2
3/4
1/2
3
3
3
1
1
3
8
1
2
1
4
Steps
- FOR THE PICKLES: Whisk vinegar, sugar, and salt together in medium bowl. Add cucumber and bean sprouts and toss to combine. Gently press on vegetables to submerge. Cover and refrigerate for at least 30 minutes or up to 24 hours.
FOR THE CHILE SAUCE: Whisk
gochujang, water, oil, and sugar together in small bowl. Cover and set
aside.
FOR THE RICE: Bring rice, water, and salt to boil in medium saucepan
over high heat. Cover, reduce heat to low, and cook for 7 minutes.
Remove rice from heat and let sit, covered, until tender, about 15
minutes.
FOR THE VEGETABLES: While rice cooks, stir together water, scallions,
soy sauce, garlic, and sugar. Heat 1 teaspoon oil in Dutch oven over
high heat until shimmering. Add carrots and stir until coated. Add 1/3
cup scallion mixture and cook, stirring frequently, until carrots are
slightly softened and moisture has evaporated, 1 to 2 minutes. Using
slotted spoon, transfer carrots to small bowl.
Heat 1 teaspoon oil in now-empty pot until shimmering. Add mushrooms
and stir until coated with oil. Add 1/3 cup scallion mixture and cook,
stirring frequently, until mushrooms are tender and moisture has
evaporated, 3 to 4 minutes. Using slotted spoon, transfer mushrooms to
second small bowl.
Heat remaining 1 teaspoon oil in now-empty pot until shimmering. Add
spinach and remaining 1/3 cup scallion mixture and stir to coat
spinach. Cook, stirring frequently, until spinach is completely wilted
but still bright green, 1 to 2 minutes. Using slotted spoon, transfer
spinach to third small bowl. Discard any remaining liquid and wipe out
pot with paper towel.
FOR THE BIBIMBAP: Heat 2 tablespoons vegetable oil and sesame oil in
now-empty pot over high heat until shimmering. Carefully add cooked
rice and gently press into even layer. Cook, without stirring, until
rice begins to form crust on bottom of pot, about 2 minutes. Using
slotted spoon, transfer carrots, spinach, and mushrooms to pot and
arrange in piles that cover surface of rice. Reduce heat to low.
While crust forms, heat remaining 2 teaspoons vegetable oil in 10-inch
nonstick skillet over low heat for 5 minutes. Crack eggs into small
bowl. Pour eggs into skillet; cover and cook (about 2 minutes for
runny
yolks, 21/2 minutes for soft but set yolks, and 3 minutes for firmly
set yolks). Slide eggs onto vegetables in pot.
Drizzle 2 tablespoons chile sauce over eggs. Without disturbing crust,
use wooden spoon to stir rice, vegetables, and eggs until combined.
Just before serving, scrape large pieces of crust from bottom of pot
and stir into rice. Serve in individual bowls, passing pickles and
extra chile sauce separately.
Notes
- NOTE FROM THE TEST KITCHEN For a quick dinner, prepare the pickles, chile sauce, and vegetables a day ahead (warm the vegetables to room temperature in the microwave before adding them to the rice). You can also substitute storebought kimchi for the pickles to save time. The Korean chile paste gochujang is sold in Asian markets and some supermarkets. If you can’t find it, an equal amount of Sriracha can be substituted. But because Sriracha is more watery than gochujang, omit the water from the chile sauce and stir just 1 tablespoon of sauce into the rice in step 9. For a true bibimbap experience, bring the pot to the table before stirring the vegetables into the rice in step 9.
↑ Back to top
Korean Shrimp Dumplings
Ingredients
- 30 medium shrimp, unpeeled
- 5 ounces / 150 g firm tofu
- 1/2 cup chopped fresh shiitake mushroom caps
- 1/3 cup finely chopped green onion, green and white part
- 2 garlic cloves, minced and mashed with the side of a knife
- 3 ounces / 90 g ground pork, roughly chopped to loosen
- 1/4 teaspoon freshly ground black pepper
- 1/8 teaspoon salt
- 2 teaspoons sesame oil
- 30 dumpling or pot sticker (gyoza) wrappers
- 3 1/2 tablespoons light (regular) soy sauce
- 3 tablespoons water
- 1 tablespoon rice vinegar
- 1 1/2 teaspoons sugar
- 1 1/2 teaspoons roasted ground sesame seeds
- 2 tablespoons thinly sliced green onion, green part only
- 1 Fresno chile, cut into thin rings
Dipping Sauce
Steps
- Peel shrimp but leave the tails intact. Butterfly each shrimp by cutting each along its back but not all the way through the inside curve; you want it to splay open but stand up. Remove and discard vein.
- Break the tofu into chunks then gently squeeze in muslin or paper towel to drain and slightly mush. You should have a bit more than 3 oz (90 g). Put into a bowl.
- Use a mini food processor to mince the mushroom. Add to the tofu along with the green onion, garlic, pork, pepper and salt. Mix well with a fork. Cover and refrigerate overnight, if you like. Otherwise, set aside at your work area along with the wrappers, a small water bowl and brush. Line 2 or 3 steamer trays with parchment paper, making sure to leave some space for air ventilation.
- In a small bowl, mix together all the ingredients for the sauce. Set aside.
- To make each dumpling, center a shrimp on a wrapper, cut side down with the tail pointing up. Top with about 1 teaspoon of filling. Moisten the edge of the wrapper with water then fold up the wrapper to form a half moon. To help the dumpling sit up in the steamer, make a series of pleats along the edge, just like for the pea pod shape. (Watch this video if you need help.) Press on the edge firmly to ensure a good seal. Place dumpling, seam side up, on the lined steamer tray. Repeat to make more, putting any overflow dumpling on a parchment-paper lined baking sheet sprinkled with flour. Cover the finished dumplings loosely with a dry dishtowel to prevent drying.
- Steam the dumplings over boiling water for about 8 minutes, until the shrimp tail is pinkish orange and the skins are translucent and a little puffy. Serve immediately with the dipping sauce, inviting guests to use their fingers or chopsticks to eat.
Notes
- FAVORITE
↑ Back to top
Kosher Dill Pickles
Ingredients
- 4 quarts (scant 4l) water
- 6 tablespoons coarse white salt (kosher, if available)
- 18 to 20 Kirby cucumbers, scrubbed
- 8 cloves garlic, unpeeled and lightly-crushed
- 2 tablespoons pickling spice (see links below)
- 6 bay leaves
- 1 large bunch of dill, preferably going to seed, washed
Steps
- In a large pot, bring 1 qt (1l) water to a boil with the salt, stirring until the salt is dissolved. Remove from heat and add the remaining water.
- Prepare three 1 quart (liter) wide jars by running them through the dishwasher or filling them with boiling water, then dumping it out.
- Pack the cucumbers vertically into the jars, making sure they’re tightly-packed. As you fill the jars, divide the garlic, spices, bay leaves, and dill amongst them.
- Fill the jars with brine so that the cucumbers are completely covered. Cover the jars with cheesecloth, secured with rubber bands, or loosely with the lids. Store in a cool, dark place for 3 days.
- After 3 days, taste one. The pickles can ferment from 3 to 6 days. The longer the fermentation, the more sour they’ll become. Once the pickles are to your liking, refrigerate them.
Notes
- FAVORITE
↑ Back to top
Kreplach
Ingredients
- 2 cups all-purpose flour
- 3/4 tsp salt
- 3 large eggs, beaten
- 3 Tbsp cold water, approximately
- 2 Tbsp vegetable oil
- 1 medium onion, chopped
- 1 medium clove garlic, finely chopped (optional)
- 3 cups chopped, cooked beef (about 12 ounces – can be either ground beef or finely chopped leftover brisket or roast)
- 1 large egg
- 1 tsp paprika
- salt and freshly ground black pepper to taste
For the meat
filling:
Steps
- To make the dough: Place the flour, salt and beaten eggs in a food processor. Process while gradually adding just enough water to have the dough form into a ball. Wrap the dough in plastic wrap and let rest for at least one hour.
- To make the filling: Heat the vegetable oil in a sauté pan over medium heat. Add the onion and garlic and cook, stirring frequently, for about 2-3 minutes, or until the vegetables have softened. Place the chopped meat in a bowl. Add the softened onion (and garlic), egg, paprika and salt and pepper to taste. Mix thoroughly.
- Roll the dough, a portion at a time, on a floured surface until the dough is very thin (less than 1/8-inch). Cut dough into 2-1/2 to 3-inch squares.
- Place one heaping teaspoon of filling in the center of each square. Fold the dough over the filling to make a triangle. Pinch the dough together to seal the edges (if necessary wet two sides of the square).
- Bring a large soup pot of water to a boil. Cook the kreplach about a dozen at a time for about 15 minutes, or until they are tender.
- To serve, place the cooked kreplach in chicken soup and cook for 4-5 minutes. You may also fry the kreplach in vegetable oil.
Notes
- FAVORITE
↑ Back to top
Krispy Kremes

Servings: Original recipe makes 1
Servings
Ingredients
- 3 tablespoons Milk
- 3 tablespoons Boiling water
- 1 teaspoon Dry active yeast
- 8 ounces All purpose flour; (A little less than 2 cups)
- 1 1/2 ounces Sugar; (About 3 tbsp)
- 1 Egg
- 1 ounce Butter; Cold to room temp
- Dash Salt
- Oil; To cover a couple inches in bottom of wok or fryer
- 1/3 cup Butter
- 2 cups Powdered sugar
- 1 1/2 teaspoons Vanilla
- 4 tablespoons Hot water; (Or as needed)
GLAZE
Steps
- Combine milk 7 boiling water add a tsp of sugar cool to 110 degrees add yeast and let foam for 10 minutes Mix flour sugar and salt cut in butter until it resembles crumbs Beat egg add to flour together with yeast mixture beat until smooth.
- knead for 5 minutes let rise until double divide dough into 4 pieces make rope 1 to 1 1/2 inch cut 1 in pieces let rise fry at 375 until golden glaze
Notes
- FAVORITE
↑ Back to top
Lacquered Chicken Legs

Ingredients
- 1/2 cup honey
- 1/2 cup distilled white vinegar
- 2 T. sherry vinegar
- 1/2 cup firmly packed brown sugar
- 1 t. kosher salt
- 1 (3-inch) piece fresh ginger, crushed
- 12 to 14 chicken legs
- enough oil for frying
Steps
- In a large saucepan, combine the honey, white vinegar, sherry vinegar, brown sugar, salt, ginger and 3 1/2 quarts water and bring to a boil over high heat, stirring to dissolve the sugar.
- Lower the heat so that the liquid is a simmer and simmer for 30 minutes.
- Set up a wire rack on the rimmed baking sheet. One at a time, submerge each leg in the simmering liquid for 30 seconds, then, using a slotted spoon, transfer to the wire rack. Let the chicken legs stand until cool enough to handle.
- 2 t. kosher salt
- 1/4 t. five-spice powder
- 1/4 t. ground black pepper
- Season each leg with the spice mixture. Place the legs on a rimmed baking sheet and refrigerate, uncovered, for at least 6 hours or overnight.
- Remove the chicken from refrigerator and bring to room temperature.
- Fill a high sided pan with oil to a 2 inch depth. Heat oil to 350F. Place legs in oil. Do not over crowd the pan. I cooked the legs in two batches. I cooked the legs for about 8 minutes total, turning after 4 minutes. Place cooked chicken legs on a paper-towel lined baking sheet to drain briefly.
- Serve with dipping sauce and Sichuan Cucumber Pickles.
- 2 T. coarse sea salt
- 1 t. coarse cracked black pepper
- Juice of two limes
While the legs are
cooling, in a small bowl mix:
Notes
- FAVORITE
↑ Back to top
Lacto-Fermented Dill Pickles
Tags: Fermented
Pickles
Servings: 1 jar
Ingredients
- 1/4 cup plus 2 tablespoons pickling salt or other pure salt (3 3/4 ounces/105g), divided
- 10 pickling cucumbers (number-one or number-two-size; see note)
- 3 tablespoons whole mustard seed, divided
- 1 tablespoon whole allspice
- 1 tablespoon whole juniper berries
- 1 tablespoon ground turmeric
- 2 teaspoons coriander seeds
- 5 whole cloves
- 1 teaspoon ground ginger
- 2 bay leaves, crushed
- 1 small (2-inch) cinnamon stick, broken into pieces
- 1 whole star anise, broken into pieces (optional)
- 1/4 cup thinly sliced white onion (from about 1/4 medium onion)
- 2 cloves peeled garlic
- 1 stem of whole, mature dill weed, including flower, or a medium-size tuft of young feather-like dill
- 1 quart water (1 liter), preferably distilled (see note)
Steps
- In a large bowl, combine 1 quart (1 liter) cold water with the 1/4 cup salt, stirring to dissolve the salt. Meanwhile, wash cucumbers, then trim off the flower-end (opposite of the stem) using a paring knife. Place cucumbers in cold saltwater bath. Let stand while you prepare the spice mixture.
- In a small bowl, stir together 2 tablespoons mustard seed with the allspice, juniper, turmeric, coriander, cloves, ground ginger, bay leaves, cinnamon, and star anise, if using. Measure out 1 tablespoon pickling spice blend and reserve the rest for a future batch.
- Wash 1 (1-quart) glass canning jar with warm soapy water and rinse well. Pack the sliced onion, garlic, dill, 1 tablespoon pickling spice, and remaining 1 tablespoon mustard seed into the jar, pressing firmly into the bottom.
- In a medium bowl, stir together remaining 2 tablespoons salt with 1 quart cold water until salt is dissolved. Drain cucumbers and pack into the jar. Pour saltwater brine over cucumbers until covered. Close jar, fitting it with a Pickle Pipe or other airlock system for mason jars.
- Place fermenting vessel in a cool, dry location away from direct sunlight to ferment. Ideal fermentation temperature is 60°F (16°C) to 70°F (21°C). Dry basements are ideal as they maintain a relatively consistent temperature. Check on your fermenting vessel every few days, looking for any evidence of spoilage or rot. You may notice some whitish growth; this is yeast and can be skimmed (or, if you're like me, you can toss the batch if you see yeast, as it can affect the flavor of the pickles). Your crock should develop a sour aroma; if it smells of mold or rot and the cucumbers are gray, soft, or otherwise discolored, your batch has been contaminated and must be discarded.
- The exact fermentation time is hard to predict, but generally it takes about 3 weeks to reach the half-sour stage and 6 weeks to reach the full-sour stage. When your pickles reach your desired sourness level, transfer to the refrigerator. The finished pickles can be refrigerated for up to 2 months.
- Variation: To make a Polish-style vinegar-fermented hybrid pickle, follow the recipe as written, adding 1 cup of white vinegar for every quart of water. This method comes directly from my husband’s family.
↑ Back to top
Lady Fingers

Ingredients
- 8 eggs
- 1 ½ cups of powdered sugar (confectioners’ sugar)
- ¾ cup of granulated sugar
- 2 cups of all-purpose flour
- 1 packet of vanilla sugar (or 1 teaspoon of vanilla extract)
- Powdered sugar for dusting
- 1 pinch of salt
Steps
- Separate the egg yolks from the egg whites.
- Beat the egg whites with the powdered sugar until it becomes a firm and stiff mixture.
- In a separate bowl, beat the egg yolks with the granulated sugar until it becomes frothy.
- Gently fold the egg white mixture into the egg yolk mixture using a spatula, with a light bottom-to-top motion, being careful not to deflate the mixture.
- While still gently mixing, incorporate the sifted flour, the packet of vanilla sugar, and a pinch of salt into the mixture.
- Line a baking tray with parchment paper and use a pastry bag to form the cookies into the classic elongated shape.
- Dust the surface with powdered sugar and bake at 160°C (320°F) in a preheated oven for about 15 minutes.
- Once baked, remove from the oven and let the Sardinian ladyfingers cool in the tray.
- Dust with more powdered sugar before serving.
↑ Back to top
Lamb & Anchovy Sausage
Ingredients
- 1 pound lamb, shoulder or leg, ground
- 4 ounces lamb bacon, ground
- 4 filets from salt cured anchovies, ground
- 3 cloves garlic, minced
- 2 tablespoons mint, minced
- 8 grams salt
- Pinch of black pepper
Steps
- Step one: Combine all ingredients and bind using a paddle attachment on a stand mixer, or if looking for adventure, by hand.
- Step two: Stuff into sausage casings.
- Step three: Roast or grill and consume
Notes
- FAVORITE
↑ Back to top
Lamb Breast Recipe (Breast of Lamb)
Adapted from https://summeryule.com/lamb-breast-recipe/
Tags: Lamb
Servings: 4
Ingredients
- 3-3½ lbs. lamb breast
- 1 tablespoon olive oil
- 1 teaspoon dried rosemary
- 1 teaspoon dried thyme
- salt and pepper, to taste (optional)
- 2 cups chicken broth
- 1 medium carrot
- ½ medium onion
- ½ medium potato
Steps
- Preheat the oven to 300°F (149°C).
- If you purchased a split lamb breast, cut each piece of meat in half (i.e., you’ll have 4 pieces total). Peel or cut the silver skin away from the back of the rack. Cut the carrot, onion, and potato into large chunks.
- Heat oil in the Dutch oven over medium heat on the stove top. Brown the lamb for 5-10 minutes in the pot, flipping to brown both sides.
- Add rosemary, thyme, and chicken broth to the pot. (Add salt and pepper if not using a salty broth.) Tuck the carrot, onion, and potato in around the lamb pieces.
- Cover the Dutch oven and allow the lamb breast to braise in the oven for 2 hours at 300°F (149°C). Then take the cover off the Dutch oven, turn the heat up to 425°F (218°C), and roast for 15 minutes. The cooked lamb will pull away from the bone.
- After cooking, remove the lamb breast from the pot and let it rest for 5-10 minutes. Then cut the ribs apart and serve.
Notes
- This is a level 3 recipe (weight maintenance and active lifestyles). Is lamb breast good for you? Everyone likes to ask, “Is lamb breast healthy?” and the answer is that it depends on what your goals are.
- Lamb breast is a high fat, high calorie protein option that may help you gain weight. It provides iron, zinc, and a variety of B vitamins. However, if you want heart-healthy protein, lamb breast is not the best option since it’s high in saturated fat.
- Is lamb good for weight loss?
- It depends. Since you need a calorie deficit to lose weight, I’d argue cuts of lamb that provide the biggest volume of food for the calories are best for weight loss.
- Lamb leg is one of the leanest, lowest calorie cuts of lamb ( source ), while lamb breast is a much fattier, higher calorie cut. You save about 220 calories per 4-ounce serving when you choose lamb leg instead of lamb breast.
- What is the healthiest part of lamb to eat?
- “Healthiest” depends on your health goals, taste preferences, budget, and other individual factors. For example, if you need to gain weight, a fatty cut of lamb like lamb breast may be healthiest for you. If you want lean, heart-healthy lamb, lamb leg may be healthiest.
↑ Back to top
Lamb Ribs
Tags: Lamb
Ingredients
- 4 racks of lamb ribs
- yellow mustard
- 1 Tbsp onion powder
- 1 Tbsp garlic powder
- 1 tsp. ground pepper
- 1 tsp. ground bay
- zest of 1 lemon
- 2 tsp. dry thyme
- 1 Tbsp. fine sea salt
- 2 Tbsp. sweet paprika
- Pre-heated 350F oven
Steps
- Remove any excess fat from the ribs and using a small knife, loosen the silver skin from the underside of the ribs and pull it off and discard. You may have to also pull off a fatty cap that covers the top of the lamb rack (there’s still plenty of meat underneath).
- Mix all the above ingredients in a jar and stir to mix the contents well. Squirt some mustard on both sides and brush to spread evenly.
- Rub the ribs with seasoning and work it in with your fingers. Allow the rub to penetrate the ribs in the fridge for 3 hours or 1 hour room temperature.
- Allow the ribs to return to room temperature and place on a baking tray. Cover the ribs with aluminum foil and place in your preheated oven and roast for 2 hours. Take out of the oven and test the meat by inserting a knife. If still not tender, place back in the oven and test for doneness in 30 minute intervals.
- Remove the aluminum foil and cook uncovered for another 30 minutes or until browned and just crisp.
- Take out of the oven and tent with foil for 10 minutes. Cut the ribs and serve with fresh squeezed lemon juice, sprinkle of sea salt and dried Greek oregano as garnish.
- Serve lamb ribs with a side of homemade Tzatziki sauce.
Use the BBQ: place the ribs on your grill, using indirect heat method
for 2-3 hours (drip pan underneath to catch fat) and finish on direct
heat.
↑ Back to top
Lamb Stew from 'Stewed'
Tags: Lamb
Stew
Servings: 4 to 6
Ingredients
- 3 tablespoons olive oil, plus 3 if discarded after searing the lamb
- 2 pounds boneless lamb leg, cut into 1-inch chunks
- Kosher salt and cracked black pepper
- Flour, for dusting
- 1 stick unsalted butter, plus 2 tablespoons
- 1 cup carrots, scrubbed, 1/4-inch dice
- 2 cups Spanish onions, 1/4-inch dice
- 1/2 cup celery root, peeled, 1/4-inch dice
- 1 teaspoon chopped fresh rosemary
- 1 teaspoon chopped fresh sage
- 2 cups ruby port wine
- 5 cups beef stock
- 1 cup stewed tomatoes
- 1/2 cup turnips, scrubbed, 1/4-inch dice
- 1/2 cup parsnips, scrubbed, 1/4-inch dice
- 1 bay leaf
- 1/2 cup red grapes, thinly sliced
- Chopped fresh parsley
- Lemon zest
Garnish:
Steps
- In a large saucepan, heat the olive oil over medium-high heat. Meanwhile, season the lamb meat with the salt and pepper, dust with flour, place in the hot pan, and sear on all sides until nice and brown. Set aside.
- If the oil is burnt, then you must rinse out the pan and add more oil; if it is just brown, then it is perfect for the next phase of preparation. Next, add the butter to the pan, allow it to melt, and then add the carrots, onions, celery, and herbs. Sauté this mixture until the veggies start to brown, and then return the reserved seared lamb to the pan.
- Add the port wine, bring to a boil, and immediately add the Beef Stock, tomatoes, turnips, parsnips and bay leaf. Bring the stew to a boil, decrease the heat to low and allow it to simmer for at least 90 minutes, or until the lamb is tender. Remove from the heat, fish out the bay leaf, and stir in the grapes.
- Evenly distribute the stew among serving bowls, garnish with the parsley and lemon zest, and serve.
↑ Back to top
Lamb Tagine with Prunes, Apricots, and Vegetables
Adapted from https://www.epicurious.com/recipes/food/views/lamb-tagine-with-prunes-apricots-and-vegetables-103829/amp
Servings: YIELDMakes 4 servings
Ingredients
- 2 lb (1-inch-thick) lamb shoulder chops
- 1 tablespoon vegetable oil
- 1 large onion, chopped
- 1 1/2 cups water
- 1 pinch saffron threads, crumbled
- 3/4 teaspoon salt
- 1/4 teaspoon black pepper
- 1 1/2 large carrots, cut into 1/4-inch-thick rounds
- 1 small sweet potato, peeled and cut into 3/4-inch pieces
- 3/4 teaspoon ground ginger
- 1/8 teaspoon cinnamon
- 2/3 cup pitted prunes
- 1/2 cup dried apricots (preferably Turkish)
- 1 medium yellow squash, cut into 3/4-inch pieces
- 2 teaspoons honey (optional)
- Freshly grated nutmeg
Steps
- Cut lamb from bones, reserving bones, then cut meat into 1-inch pieces.
- Heat 1/2 tablespoon oil in a flameproof wide shallow casserole with a tight-fitting lid over moderately high heat until hot but not smoking. Brown meat on all sides in 2 batches, transferring to a plate as browned. Brown bones and transfer to plate.
- Add remaining 1/2 tablespoon oil to tagine and cook onion, stirring, until softened. Return meat and bones to pot.
- Stir in water, saffron, salt, and pepper and bring to a boil. Reduce heat and simmer mixture, covered, stirring occasionally, until lamb is tender, about 1 1/4 hours.
- Transfer lamb to a clean plate and add any meat from lamb bones, discarding bones.
- Add carrots and sweet potato to pot, then simmer, covered, stirring occasionally, until vegetables are barely tender, about 10 minutes.
- Add ginger, cinnamon, prunes, apricots, and squash, then simmer, covered, stirring occasionally, until vegetables and fruits are tender, about 5 minutes.
- Return lamb to stew and add honey. Season with salt, pepper, and nutmeg and simmer, uncovered, stirring occasionally, 5 minutes.
↑ Back to top
Lao Chicken and Rice Noodle Soup

Servings: 4
Ingredients
- 3 cups rice flour
- 2¾ cups tapioca starch, plus more for dusting
- 2 Tbsp. mochiko (glutinous rice flour)
- 1 Tbsp. miso
- 1 Tbsp. vegetable oil
- Kosher salt
- Chicken broth, for boiling (optional)
- 2 Tbsp. vegetable oil
- 1 medium onion, finely chopped
- 5 garlic cloves, thinly sliced
- One ½-in. piece fresh ginger, thinly sliced
- 1 Tbsp. mirin
- 1 Tbsp. fish sauce
- 1 Tbsp. soy sauce
- 7 cups chicken broth, plus more as needed
- 3 Tbsp. rock sugar
- 1 Tbsp. chicken bouillon powder
- ¼ tsp. MSG
- Shredded cooked chicken, chili crisp, sambal oelek, toasted sesame seeds, fried garlic or shallots, and coarsely chopped cilantro and scallions, for garnish (optional)
FOR THE
NOODLES:
FOR THE SOUP:
Steps
- Make the noodles: Bring a kettle of water to a boil, then turn off the heat. To the bowl of a stand mixer fitted with the paddle attachment, add the rice flour, tapioca starch, mochiko, miso, and oil and mix on low until combined. Maintaining low speed, gradually pour in 1 cup of the water and mix until incorporated. Continue adding water (about 1–2 cups more) until a stiff dough forms that is neither sticky nor crumbly.
- Lightly dust a work surface with tapioca starch. When the dough is cool enough to handle, turn it out and knead until it’s smooth, pliable, and slightly sticky, 1–2 minutes. (If the dough is too dry, add more hot water 1 tablespoon at a time; if it’s too wet, add more tapioca starch.) Roll the dough into a ¼-inch-thick rectangle, then cut crosswise into ¼-inch-wide noodles.
- Bring a large pot of lightly salted water (or chicken broth if desired) to a boil. Boil the noodles until they float and are chewy yet tender, 3–4 minutes. Drain, then rinse under cold water and set aside.
- Make the soup: To a large pot over medium-high heat, add the oil and onion and cook, stirring frequently, until the onion is softened and translucent, about 7 minutes. Add the garlic and ginger and cook, stirring occasionally, until the onions are golden brown, 3–4 minutes. Add the mirin, stirring and scraping up any browned bits, followed by the fish sauce and soy sauce. Add the chicken broth, rock sugar, bouillon powder, and MSG. Bring to a boil, then turn the heat to low and cover to keep hot.
- Divide the noodles among four serving bowls, then top with any combination of chicken, chili crisp, sambal oelek, sesame seeds, fried shallots or garlic, cilantro, and scallions. Ladle the soup over the toppings and noodles and serve hot.
↑ Back to top
Latke Waffles
Adapted from https://toriavey.com/toris-kitchen/latke-waffles/
Ingredients
- Make potato pancakes in a waffle iron! Hot crispy hash brown waffles for breakfast or brunch. Perfect Hanukkah breakfast or brunch recipe.
- 2 1/2 lbs russet potatoes
- 1 whole large onion
- 4 large eggs
- 1 tsp salt, or more to taste
- 1/2 tsp pepper
- Nonstick cooking oil spray
Ingredients
Steps
- Cut the potatoes into large chunks and shred using a hand grater or food processor shredding attachment with large holes (large shreds). I really recommend using the food processor, it saves a ton of time and will help you avoid onion tears when grating the onion.
- Potatoes grated in a food processor.
- Place grated potato into a bowl and immediately cover with cold water. Let soak for a few minutes.
- Shredded potatoes in a bowl of water.
- Meanwhile, grate the onion using the grater or food processor attachment with fine holes (small shreds).
- Grated onion in a food processor.
- Drain the potato shreds in a colander. Rinse and dry the bowl used to soak the shreds and set aside.
- Shredded potatoes draining in a colander.
- Place drained potato shreds and grated onion in the center of a clean tea towel or multiple layers of cheesecloth.
- Drained potatoes on cheesecloth.
- Wrap the shreds up in the cloth, twisting the cloth to secure the bundle, and squeeze firmly to remove excess liquid from the shreds. Pour potato and onion into the clean dry bowl.
- Squeezing moisture from potatoes in cheesecloth.
- Preheat the waffle iron. If there are multiple heat settings available, use the medium setting. I have a four-waffle iron which make multiple waffles at once. You could also use a single or double waffle maker to make bigger waffles. I prefer smaller waffles, which have more nice crispy edges.
- Latke Waffles - Crispy Shredded Potato Waffle Recipe
- While iron is heating, beat the eggs together with the salt and pepper. I usually add about 1 tsp salt and 1/2 tsp pepper; use less salt if you’re salt-sensitive, you can always add more later.
- Latke Waffles - Crispy Shredded Potato Waffle Recipe
- Use a fork or clean hands to mix the beaten eggs, salt and pepper into the potato and onion shreds. Take care to make sure the eggs and onion are fully mixed throughout the potato shreds.
- Latke Waffles - Crispy Shredded Potato Waffle Recipe
- When iron is heated, spray generously with nonstick cooking oil spray on both sides. Scoop up 1/4 cup of the potato mixture and squeeze gently to drain off excess liquid. I use a 1/4 cup measuring cup to keep the waffles evenly sized. It may feel like you're losing too much liquid, but don't worry; if you don't squeeze them, you'll end up with waffles that are too eggy. The egg is there to bind them together, it's not the main attraction.
- Latke Waffles - Crispy Shredded Potato Waffle Recipe
- Place the 1/4 cup of potato mixture onto the center of each waffle area. Alternatively, if using a single or double waffle maker, squeeze the liquid from about 3/4 cup of potato mixture, then add it to the center of the waffle iron. Spread out the latke mixture into a pancake-like circle, in a thin but solid circular layer. No need to spread it all the way to the edge, if it’s kept in the center in a more circular shape it will be easier to remove after cooking.
- Latke Waffles - Crispy Shredded Potato Waffle Recipe
- Close the iron and let the waffles cook for 6-10 minutes, or until fully cooked and browned. One side will likely be more browned than the other.
- Carefully remove the waffles from the iron. If you’re making multiple batches, continue cooking while keeping the finished waffles on a cookie sheet in a 200 degree F oven.
- Latke Waffles - Crispy Shredded Potato Waffle Recipe
- If waffles are not crispy enough for your liking, you can place them under a broiler for a minute or two to crisp them up. Careful, don’t let them burn!
- Latke Waffles - Crispy Shredded Potato Waffle Recipe
- Serve hot. These can be enjoyed like latkes, or like savory waffles.
- Latke Waffles - Crispy Shredded Potato Waffle Recipe
- I like them served with sour cream and applesauce, latke-style.
- They are also amazing topped with a poached egg for breakfast or brunch. Delicious!
- Latke Waffles - Crispy Shredded Potato Waffle Recipe
Notes
- You will also need: hand grater or food processor with shredding disc attachment, clean tea towel or layers of cheesecloth, colander, large mixing bowl, waffle iron, broiler (optional)
↑ Back to top
Latke Waffles

Servings: 12
Ingredients
- 2 1/2 lbs russet potatoes
- 1 whole large onion
- 4 large eggs
- 1 tsp salt, or more to taste
- 1/2 tsp pepper
- Nonstick cooking oil spray
Steps
- Cut the potatoes into large chunks and shred using a hand grater or food processor shredding attachment with large holes (large shreds). I really recommend using the food processor, it saves a ton of time and will help you avoid onion tears when grating the onion.
- Place grated potato into a bowl and immediately cover with cold water. Let soak for a few minutes.
- Meanwhile, grate the onion using the grater or food processor attachment with fine holes (small shreds).
- Wrap the shreds up in the cloth, twisting the cloth to secure the bundle, and squeeze firmly to remove excess liquid from the shreds. Pour potato and onion into the clean dry bowl.
- Preheat the waffle iron. If there are multiple heat settings available, use the medium setting. I have a four-waffle iron which make multiple waffles at once. You could also use a single or double waffle maker to make bigger waffles. I prefer smaller waffles, which have more nice crispy edges.
- While iron is heating, beat the eggs together with the salt and pepper. I usually add about 1 tsp salt and 1/2 tsp pepper; use less salt if you’re salt-sensitive, you can always add more later.
- Use a fork or clean hands to mix the beaten eggs, salt and pepper into the potato and onion shreds. Take care to make sure the eggs and onion are fully mixed throughout the potato shreds.
- When iron is heated, spray generously with nonstick cooking oil spray on both sides. Scoop up 1/4 cup of the potato mixture and squeeze gently to drain off excess liquid. I use a 1/4 cup measuring cup to keep the waffles evenly sized. It may feel like you're losing too much liquid, but don't worry; if you don't squeeze them, you'll end up with waffles that are too eggy. The egg is there to bind them together, it's not the main attraction.
- Place the 1/4 cup of potato mixture onto the center of each waffle area. Alternatively, if using a single or double waffle maker, squeeze the liquid from about 3/4 cup of potato mixture, then add it to the center of the waffle iron. Spread out the latke mixture into a pancake-like circle, in a thin but solid circular layer. No need to spread it all the way to the edge, if it’s kept in the center in a more circular shape it will be easier to remove after cooking.
- Close the iron and let the waffles cook for 6-10 minutes, or until fully cooked and browned. One side will likely be more browned than the other.
- Carefully remove the waffles from the iron. If you’re making multiple batches, continue cooking while keeping the finished waffles on a cookie sheet in a 200 degree F oven.
- If waffles are not crispy enough for your liking, you can place them under a broiler for a minute or two to crisp them up. Careful, don’t let them burn!
- Serve hot. These can be enjoyed like latkes, or like savory waffles.
- I like them served with sour cream and applesauce, latke-style.
- They are also amazing topped with a poached egg for breakfast or brunch. Delicious!
Drain the potato shreds in a
colander. Rinse and dry the bowl used to soak the shreds and set
aside.
Place drained potato shreds
and grated onion in the center of a clean tea towel or multiple layers
of cheesecloth.
↑ Back to top
Latkes-Ramen with Sriracha Mayo
Ingredients
- 2 to 3 packs instant ramen noodles, cooked and drained
- 1 egg
- 1 Tbsp garlic powder
- canola oil for frying
- 1/2 cup soy sauce
- 1 to 1.5 tsp Sriracha
- 1/2 cup mayonnaise
For the
latkes:
For the
sriracha mayo:
Steps
- Cook the ramen noodles as directed on the back of the package making sure to omit any flavor packets it came with. Drain and place in a bowl. Cover and cool for roughly 1 - 2 hours minimum.
- Once cool, mix noodles with one egg and the garlic powder.
- Divide the noodles up either in large muffin tins or ramekins, if you have them. Or, you can do what I did and divide them up amongst a variety of small bowls and glasses. You do NOT want to make these more than 1 inch of thickness so if using something other than muffin tins or ramekins, be careful of how many noodles you stack in there.
- Place divided noodles in the refrigerator uncovered. Let cool for a minimum of 2 hours and a maximum of 10.
- Once your refrigeration period is done, heat 5 Tbsp of canola oil in a small frying pan (I do recommend frying these one at a time). Test the oil to make sure it's hot by splashing a small drop of water into the oil. If the water sizzles, you're ready.
- Drop one ramekin of noodles into the hot oil and reshape into latke shape. Let fry for roughly 2 - 3 minutes and then flip. Add 1 tsp of soy sauce to latke after the first flip. Cook on the other side for another 2 - 3 minutes. Repeat until nice and brown for a total of roughly 6 - 8 minutes each.
- Remove latke from pan and let dry on a plate lined with paper towel.
- To make the sriracha mayo: combine Ssriracha and mayo in a bowl. Taste as you stir, adding more according to your preference. Serve a dollop on top of each latke and sprinkle with sliced green onions.
- Note: these can be refrigerated for up to two days. If needing to stack the latkes in order to refrigerate, make sure you place wax or parchment paper between latkes so they do not stick together. Reheat in the over at 400 degrees for 5 - 8 minutes max.
Notes
- FAVORITE
↑ Back to top
Lavender Syrup
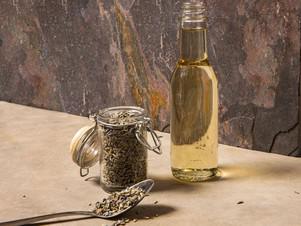
Tags: Condiments
Flavorings
Ingredients
- 1 cup (7 ounces; 198g) granulated sugar
- 1 cup (237ml) water
- 1/2 to 1 teaspoon dried food-grade lavender
Steps
- In a small saucepan, combine sugar and water. Add lavender, using 1/2 teaspoon for a more mild lavender flavor or 1 teaspoon for a stronger one. Bring to a boil over medium-high heat, then reduce heat as needed to a simmer and cook for 10 minutes.
- Strain lavender syrup through a fine-mesh strainer set over a small heatproof bowl or container; discard lavender flowers. Let cool, then use as desired.
Serious Eats / Amanda
Suarez:
↑ Back to top
Lebanese Kofta

Tags: Lamb
Middle-East
Servings: 6 to 8
Ingredients
- 2 1/2 pounds finely ground lamb
- 1 bunch of parsley, washed and coarsely chopped
- 1 large red onion, coarsely chopped
- 1/4 teaspoon cinnamon
- 1/4 teaspoon cloves
- 1/4 teaspoon nutmeg
- Salt and freshly ground pepper
Steps
- Soak bamboo skewers in water for at least 30 minutes prior to use.
- Form lamb mixture into 1 1/2" meat balls. Thread one meatball on a skewer, then form meat into a log shape around the skewer. Repeat until all lamb is used.
- Light one chimney full of charcoal. When all the charcoal is lit and covered with gray ash, pour out and spread coals out evenly over the charcoal grate. Clean and oil your grilling grate.
- Grill skewers over high heat until browned on all sides and cooked through, about 2 minutes per side. Remove from the grill and serve.
Pulse onion and parsley in a food processor until finely chopped.
Transfer to a large bowl and add the ground lamb, cinnamon, cloves,
nutmeg, salt, and pepper and mix with your hands until thoroughly
combined.
↑ Back to top
Lechon Kawali
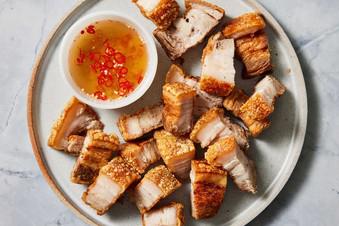
Servings: 6
Ingredients
- 2 pounds boneless pork belly, 1½ inches thick, cut into 3-inch-long slabs (see Tip)
- 1 large red or yellow onion, quartered
- 8 garlic cloves, crushed
- 4 dried bay leaves
- 3 tablespoons kosher salt (such as Diamond Crystal), plus more as needed
- 1 tablespoon whole black peppercorns
- 1 tablespoon soy sauce
- Vegetable oil, for frying (about 4 cups)
- ½ cup sugarcane vinegar, or white wine, apple cider or rice vinegar
- 2 garlic cloves, chopped
- 2 Thai or small hot chiles, chopped
- Kosher salt (such as Diamond Crystal)
- Black pepper, to taste
- Soy sauce (optional)
- Fish sauce (optional)
FOR THE PORK
BELLY
FOR THE
VINEGAR SAUCE
Steps
- Cook the pork: Place the pork, onion, garlic, bay leaves, salt, peppercorns and soy sauce in a large pot. Add enough water to cover the pork by about 2 inches. Partially cover with a lid and bring to a boil over high. Reduce to medium and cook at a lively simmer until the skin is fork tender, about 45 minutes. If desired, drain the broth and reserve to use as stock.
- Dry the pork: Heat the oven to 275 degrees. Place a wire rack on a sheet pan (you can line the sheet pan with parchment or aluminum foil for easier cleanup); place the pork on top. Pat the pork with paper towels. Grab a handful of wooden skewers, and evenly puncture the skin. (Alternatively, you can score the skin every ¼ inch.) Season both sides generously with salt. Place in the oven until the skin is completely dry, 1 to 1½ hours.
- Prepare the vinegar sauce: In a small bowl, add the vinegar, garlic, chiles, 1 teaspoon salt, black pepper, to taste, and soy and fish sauces, if using. Stir until the salt is dissolved.
- Fry the pork: Fill a deep wok or Dutch oven with about 1½ inches of oil, and heat to 370 degrees over medium-high. Using tongs, place one slab, skin side down, in the hot oil. Stand back just in case there’s excess moisture trapped in the pork; it might splatter. Fry until the pork is golden brown and the skin is crisp and bubbled, about 6 minutes. Adjust the heat as needed to maintain the temperature. Carefully flip the pork and fry the meat side, continuously ladling oil over the skin, until it takes on a little color without drying out, 1 to 2 minutes. The skin should be crispy and the meat should be tender and juicy.
- Remove the lechon kawali and return it to the wire rack to cool slightly. Repeat with the remaining pork slabs. Once cool enough to handle, chop the fried pork into bite-size pieces. Serve immediately with the vinegar sauce for dipping, and a side of rice, if you like.
Notes
- Choose a pork belly slab with a balanced ratio of fat to meat. If the pork belly is too fatty, the thinner layer of meat will become too dry as it takes longer for the skin to crisp.
↑ Back to top
Leek and Potato Casserole (Quajado)
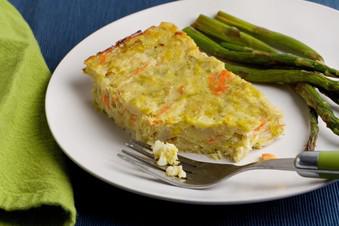
Servings: Tested size: 8-10
servings
Ingredients
- 3 large or 6 medium russet potatoes (about 3 pounds total)
- 3 tablespoons extra-virgin olive oil, plus more as needed
- 6 to 7 large leeks (3 to 3 1/2 pounds total)
- 1 large or 2 medium carrots, shredded (about 3/4 cup)
- 5 large eggs, beaten
- 1 teaspoon salt (less if using feta or another salty cheese)
- 1/2 to 1 teaspoon freshly ground black pepper, plus more as needed
- 1/2 cup crumbled feta or shredded hard cheese such as Parmigiano-Reggiano (optional)
Steps
- Preheat oven to 350 degrees. Line a baking sheet with aluminum foil.
- Scrub potatoes under cold water, then cover lightly with a teaspoon or two of oil using your hands or a pastry brush. Place potatoes on the baking sheet and prick the skin 4 or 5 times with a fork to let out the steam as they cook. Bake (middle rack) for 50 to 60 minutes, until the insides are very soft when pricked with a fork. Alternately, to cut the baking time, cook the oiled potatoes in a microwave on high for 5 minutes before baking in the oven for about 30 minutes, until soft. Once the potatoes are out of the oven, cut in half the long way and open them to cool faster.
- While the potatoes cook, clean and prepare the leeks. Cut off the dark green tops and save for making stock. (They can be washed and stored in the freezer until ready to use.) Cut off the roots and discard. Pull off a couple of layers of the tough part of the white and any damaged parts. Split the white of each leek lengthwise, then cut across into half-inch pieces. You will have 8 to 9 cups of leek pieces.
- Place the leeks in colander or strainer that fits into a large bowl (or pot) and wash under cold water. Set the colander into the bowl and fill with cold water. Let soak for a few minutes, then swish the leeks around to dislodge any grit. Give the dirt time to fall to the bottom, then lift out the colander or strainer. Toss and mix the leeks, checking for remaining grit. As needed, rinse the bowl and repeat the washing process.
- Alternatively, place the leek pieces in a large bowl and fill with cold water. Let sit for a few minutes, then swish the leeks with your hands. Wait a few moments for any grit to fall to the bottom, then scoop out the leeks with a slotted spoon, disturbing the water in the bowl as little as possible. Set the leek pieces aside, rinse the bowl and repeat washing the leeks as needed.
- Set a steamer into a pot with a few inches of water in the bottom and bring to a boil over high heat. Place the clean leek pieces in the steamer, cover the pot, reduce the heat to medium and cook for 15 to 20 minutes, until very tender.
- Transfer the cooked leeks to a colander or strainer and force out any liquid with the back of a spoon.
- Scoop out the insides of the cooled potatoes, leaving a thin layer next to the skin. The yield is about 4 cups. Mash together the leeks and potatoes, breaking up any large lumps. Add the grated carrot, beaten eggs, salt, pepper and the cheese, if using, Stir until well incorporated.
- Reheat the oven to 350 degrees.
- Use 2 tablespoons of the oil to grease a 9-by-13-inch baking dish. Place in the oven for 3 to 4 minutes, or until well heated, then remove it just long enough to spread the leek-potato mixture in the dish in an even layer. (When the pan is really hot, the mixture should sizzle as it hits the oil.) The heated baking dish and its oil will help create a crust on the bottom and sides of the casserole. Gently brush the top of the leek-potato mixture with the remaining oil. Bake (middle rack) for 30 to 35 minutes, until the mixture is firm and golden brown around the edges.
- Serve right away, or cool completely before storing.
↑ Back to top
Lekvar Apricot Butter
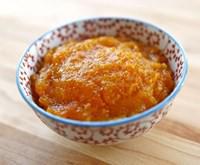
Ingredients
- 2 cups dried pitted apricots
- 1 cup water
- 1/4 cup orange juice
- 1/2 cup sugar
- 1 tbsp lemon juice
- Pinch of salt
Steps
- Reduce heat to medium low so the mixture simmers slowly and constantly. Cover the pot.
- Let the mixture simmer covered for 30 minutes, stirring every few minutes.
- Remove the lid from the pan. Let the apricots continue to simmer for 2-3 more minutes, stirring frequently, until most of the liquid has evaporated/absorbed. Keep a close eye on the pan to make sure the apricots don't burn. When there are about 3 tbsp of liquid left in the pan, remove from hea
- Mash the apricots with a potato masher till a smooth puree forms. Run a fork through the mixture to break up any pieces the potato masher missed. You can also use an immersion blender for a smoother puree, if desired.
- Let cool to room temperature before using. Store in a sealed, airtight container in the refrigerator. Refrigerating the filling to chill completely will make it easier to work with when filling hamantaschen
Notes
- FAVORITE
↑ Back to top
Lemon Blondies

Bursting with lemon flavor, the batter for
these dense and chewy bars comes together
effortlessly in a food processor. Whole pureed
Meyer lemons offer a fragrant sweetness and
faint bitterness that pairs well with the molas-
ses notes of the brown sugar. The blondies
have a soft, delicate texture when warm, so
for clean, even cuts, be sure to let them cool
completely before glazing and slicing.
Servings: 8
Ingredients
- Cooking spray
- 2 medium Meyer lemons (see Note),
- scrubbed and divided, plus thin slices,
- for garnish
- 14 cups granulated sugar
- ¼ cup packed light brown sugar
- ¼ cup unsalted butter (4 oz.), melted
- 1 large egg
- 2¼ cups all-purpose flour (about 9½ oz.)
- 1 tsp. baking powder
- 1 tsp. kosher salt
- 1¼ cups powdered sugar, divided
Steps
- 1. Preheat oven to 350°F. Coat a 9-inch
square baking pan with
cooking spray; line
pan with parchment paper. Set
aside.
2. Cut off and discard ends
from 1 lemon. Cut
lemon into quarters; remove
and discard
seeds. Transfer quartered
lemon to a food
processor, and process until
finely chopped,
about 1 minute. Measure out /
cup lemon
pulp, then discard any excess
pulp. Return ½3
cup pulp to processor.
3. Add granulated sugar,
brown sugar,
melted butter, and egg;
process until smooth
and well combined, about 15
seconds. Add
flour, baking powder, and
salt; pulse until just
incorporated, about 5 pulses,
stopping to
scrape down sides of bowl as
needed. Trans-
fer batter to prepared baking
pan, and
spread into an even layer.
4. Bake in preheated oven
until edges are set
and a wooden pick inserted
into center comes
out with a few crumbs, about
30 minutes.
Transfer baking pan to a wire
rack, and let
cool completely, about 1 hour
and 30 minutes.
5. Zest and juice remaining
lemon to yield 1
teaspoon zest and 2
tablespoons juice. Whisk
together zest, juice, and 1
cup powdered
sugar in a small bowl until
smooth. Add
remaining ¼ cup powdered
sugar, 1 table-
spoon at a time, if needed to
thicken glaze to
desired consistency; drizzle
glaze over
blondies. Cut into bars, and
garnish with small
lemon slice pieces
Notes
- MAKE AHEAD Store blondies in an airtight
- container in the refrigerator up to 3 days.
- NOTE Meyer lemons are more floral and less
- tart than Eureka or Lisbon lemons.
↑ Back to top
Lemon Blueberry Scones

Ingredients
- 2 1/3 cup ( 300 g) unbleached all-purpose flour
- 1/4 cup ( 56 g) granulated sugar
- 2 teaspoons baking powder
- 1/2 teaspoon baking soda
- 1/4 teaspoon kosher salt
- 8 tablespoons (1 stick, 4 ounces) unsalted butter, cut into 1/2-inch cubes
- 3/4 cup ( 170 g) whole milk Greek yogurt
- 1 large egg
- 1 ( 6 ounce) container fresh blueberries, picked over for stems, rinsed, and dried
- 1 tablespoon lemon zest, from 1 medium lemon
- 2 tablespoons lemon juice, from 1 medium lemon
- 1 cup ( 120 g) powdered sugar
For the
scones:
For the glaze:
Steps
- Measure the flour, sugar, baking powder, baking soda, and salt into a food processor. Process the ingredients to combine them evenly.
- Turn out the dough onto a lightly floured surface. Scatter the blueberries over top and fold the dough a few times with a spatula to incorporate. (You can also do this in a separate mixing bowl instead of on the counter, if you prefer.)
- With a bench scraper or knife, divide the dough in half and pat into two disks, about 1/2-inch thick and six inches across (you can use the length of your hand as a guide).
- Line a baking sheet with a silicon baking mat or parchment paper.
- Unwrap the disks of chilled dough and cut each one into eight wedges (16 wedges total).
- While the scones are baking, whisk together the lemon zest, lemon juice, and powdered sugar in a small bowl. The glaze should be a pourable consistency; add additional lemon juice (or milk, or water) 1 teaspoon at a time if needed.
- Transfer the scones to a cooling rack with something underneath to catch any dripping glaze (I use wax paper). While the scones are still warm, drizzle each one with a teaspoon of the glaze. Let the scones cool until the glaze has fully set, about 30 minutes.
Make the dough in a food
processor:
Sprinkle the cubed butter over the flour mixture, and process the
mixture in 1-second pulses until the butter is no longer visible and
the mixture looks somewhat sandy.
In
another mixing bowl, whisk together the yogurt and egg until no
streaks
of egg yolk remain. Pour this mixture into the food processor with the
flour and the butter.
Run the food processor for about three seconds, just until all of the
flour is absorbed and the dough begins to come away from the sides of
the bowl.
Fold in the blueberries:
Shape the dough into
disks and chill:
Wrap the disks of dough in
plastic wrap and refrigerate for at least two hours, or up to 24
hours.
Preheat the oven to
350F:
Cut and bake the scones:
Place the wedges an inch apart on the lined baking sheet. Try not to
touch the sides or handle the scones too much as you transfer them
since this can inhibit how much they rise in the oven.
Bake the scones for 15 to 18
minutes, until they are lightly browned.
Make the glaze:
Glaze and cool the
scones:
↑ Back to top
Lemon Cake (Flourless)
Ingredients
- Flourless Whole Meyer Lemon Cake
- 3 or 4 large Meyer Lemons (approximately 12 oz, total to yield 1 cup of whole lemon puree)
- 3 large eggs
- 1 cup sugar
- 3 cups almond meal
- 1 tsp baking powder
- 1 tsp lemon extract
- 3 Tbsp unsalted butter, at room temperature
- juice of 1 lemon
- 1 1/2 cups confectioner's sugar
Ingredients
for the lemon
icing
Steps
- Set oven to 325F
- Wash the lemons and put them in a pot. Cover them with water and bring to a boil. Boil for 15 minutes.
- Drain the lemons and let them cool until you can handle them. Cut them open and remove the seeds, but keep everything else. Do this on a plate so you can retain all the juices. Once you have removed all the seeds, put everything into a food processor. Process until finely pureed. You may need to pulse the machine at first, and scrape down the sides as necessary to get everything smooth. This will only take a couple of minutes. You will need one cup of lemon puree for the cake.
- Beat the eggs and the sugar until pale in color. Add the lemon extract.
- Fold in the almond meal, baking powder, and lemon puree. Mix until thoroughly combined.
- Turn the batter into a greased 9" springform pan. Smooth out the surface so it is even.
- Bake for about 50 -60 minutes, just until a toothpick inserted in the center comes out clean.
- Cool on a rack for 10 minutes, then gently release the sides of the pan and remove the cake to finish cooling.
- Make the icing while the cake is cooling. Combine the sugar with the butter and lemon juice. Beat until smooth and creamy. Adjust the texture by adding more sugar or more lemon juice. If you prefer a less tangy icing, use less lemon juice and add a little milk or cream. Spread the icing on the completely cooled cake.
Notes
- FAVORITE
↑ Back to top
Lemon Crinkle Cookies
Adapted from https://laurenslatest.com/lemon-crinkle-cookies/
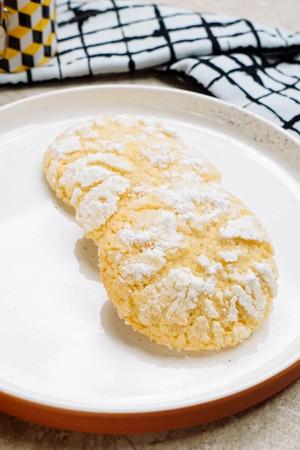
Servings: 24 cookies
Ingredients
- 1/2 cup butter softened
- 1 cup granulated sugar
- 1/2 tsp vanilla extract
- 1 whole egg
- 1 tsp lemon zest
- 1 tbsp fresh lemon juice
- 1/4 tsp salt
- 1/4 tsp baking powder
- 1/8 tsp baking soda
- 1 1/2 cup all-purpose flour
- 1/4 cup granulated sugar
- 1/2 cup powdered sugar
for the
coating:
Steps
- Preheat oven to 350° F. Grease a light colored* baking sheets with nonstick cooking spray and set aside. Or cover with parchment paper.
- In a large bowl, using a hand mixer, cream butter and sugar together until light and fluffy. Whip in vanilla extract, egg, lemon zest and lemon juice. Scrape sides and mix again.
- Switching to a rubber spatula, stir in flour, salt, baking soda, and baking powder slowly until just combined. Scrape sides of the bowl and mix again briefly.
- Pour granulated sugar onto a large plate. Pour powdered sugar onto a separate large plate. Roll a heaping teaspoon of dough into a ball and roll it first in the granulated sugar and then in powdered sugar. Place cookie ball on the baking sheet and repeat with remaining dough.
- Bake for 9-11 minutes or until bottoms begin to barely brown and cookies look matte (not melty or shiny). Remove from oven and cool cookies about 3 minutes before transferring to a cooling rack.
Notes
- If using a non stick darker baking tray, reduce baking time by about 2 minutes.
↑ Back to top
Lemon Crumble Breakfast Cake

Servings: 8
Ingredients
- 80 g granulated sugar
- Zest from 1 lemon ensure no white pith is included
- 56 g unsalted butter melted
- 100 g all-purpose flour
- 1 tablespoon of freshly squeezed lemon juice
- 170 g granulated sugar
- Zest from 2 organic lemons
- 252 g all-purpose flour
- ½ teaspoon of salt
- 2 teaspoons of baking powder
- 113 g unsalted butter at room temperature
- 2 large eggs at room temperature
- 1 ½ teaspoons of vanilla extract or vanilla bean paste
- 4 oz buttermilk ensure it is well shaken before use
- 2 oz freshly squeezed lemon juice approximately juice from 2 lemons
- Powdered sugar optional, for dusting purposes
For the
Crumble Topping:
For the Lemon
Cake:
Steps
- In a small food processor, blend the granulated sugar with the lemon zest until the sugar adopts a pale yellow hue.
- In a separate bowl, melt the unsalted butter. Following that, incorporate the previously processed lemon sugar, all-purpose flour, and lemon juice. Mix thoroughly and set aside.
- Utilize the same food processor and combine half the granulated sugar with the zest from the two lemons. Process until fully integrated.
- Preheat your oven to a temperature of 325°F (163°C). Prepare an 8″ springform pan by inverting its bottom, securing its sides, and then lightly greasing and flouring its surfaces. Place a round parchment paper on the bottom.
- In a distinct mixing bowl, sift and combine the all-purpose flour, salt, and baking powder. Set aside.
- Utilizing a stand mixer equipped with a paddle attachment, integrate the unsalted butter, the remaining granulated sugar, and the processed lemon sugar. Continue mixing until the texture is light and airy.
- Introduce the eggs into the mixture one at a time, ensuring each is fully incorporated before adding the next. Follow with the addition of vanilla and mix thoroughly.
- In a separate measuring vessel, blend together the buttermilk and lemon juice. Begin adding ⅓ of the flour mixture to the primary mixture, blending on low speed. Following this, add ⅓ of the buttermilk mixture and continue to blend. Repeat this process until all the buttermilk and flour have been integrated. Avoid overmixing.
- Transfer the completed batter to the prepared pan, ensuring it is spread uniformly. Carefully apply the crumble topping over the batter, ensuring larger clumps are evenly distributed.
- Bake the cake in the preheated oven for approximately 40 to 50 minutes or until the cake achieves a light brown hue and a toothpick inserted into its center emerges with moist crumbs, but without any raw batter. Ensure the cake is not overcooked.
- Allow the cake to cool on a wire rack for a minimum of 15 minutes if intending to serve warm, or let it cool entirely before extracting it from the pan. Once ready, transfer the cake onto a serving dish, and if desired, dust with powdered sugar prior to serving. For additional flavor, one may prepare a simple lemon glaze by combining ½ cup of powdered sugar with an adequate amount of fresh lemon juice to achieve a drizzling consistency. Apply this glaze atop the cake just before serving.
For the Crumble Topping:
For the Lemon Cake:
↑ Back to top
Lemon Drizzle Cake

Tags: Baking
Cakes and Pastries
Servings: 1 loaf cake
Ingredients
- 1 cup white sugar
- 2 lemons, zested
- 2 1/4 cups self raising flour (see Note)
- 1/2 teaspoon baking powder
- 1/4 teaspoon fine salt
- 1 cup ( 2 sticks) unsalted butter, room temperature
- 4 large eggs
- 1/4 cup milk
- 3/4 cup granulated sugar
- 1/3 cup fresh lemon juice
Cake:
Lemon Drizzle
Topping:
Steps
- Add sugar to a mixing bowl and grate in lemon zest. Stir and let sit for 1 hour if possible to intensify the lemon flavor. This step can be skipped if necessary.
- Preheat the oven to 350 degrees F (175 degrees C). Line a loaf pan with greased parchment paper.
- Combine flour, baking powder, and salt in a small bowl; add to lemon sugar. Add butter, eggs, and milk and beat with an electric mixer until batter is smooth and fluffy. Transfer batter into the prepared loaf pan and smooth out the top.
- Bake in the preheated oven until a toothpick inserted into the center comes out clean, about 50 minutes. Remove from oven and let cool for 5 minutes.
- Meanwhile for lemon drizzle topping whisk sugar and lemon juice together in a bowl until smooth.
- Poke holes all over the cake with a skewer, and ladle or pour lemon drizzle topping over the top. Let the cake cool all the way to room temperature before removing it from the pan.
Notes
- For best results, chill cake in the fridge before serving.
↑ Back to top
Lemon Magic Cake

Ingredients
- 4 eggs (separate yolks from whites) at room temperature
- 1 tsp vanilla extract
- 150 g (3/4 cup) sugar
- 125 g (1 stick or 1/2 cup) butter, melted
- 115 g (4 oz or 3/4 cup) of all purpose flour
- 1 3/4 cup milk lukewarm
- 1/4 cup fresh lemon juice
- zest from one lemon
- powdered sugar for dusting cake
Steps
- Preheat oven to 325 F degrees. Grease a 8 inch x 8 inch baking dish or line it with parchment paper.
- Separate eggs and add the egg whites to a mixer and mix until egg whites are stiff. Place egg whites in a bowl and set aside.
- Beat the egg yolks with the sugar until light. Add butter and vanilla extract and continue beating for another minute or two after which you can add the flour and mix it in until fully incorporated.
- Add lemon juice and lemon zest then slowly start adding the milk and beat until everything is well mixed together. Add the egg whites, a third at a time and gently fold them in using a spatula or a whisk, repeat until all egg whites are folded in, but there should still be white bits of egg whites floating in the batter.
- Pour batter into baking dish and bake for 40 to 70 minutes or until the top is lightly golden and the cake is firm to the touch. The baking time could vary greatly depending on the oven, so take a peek at around 40 minutes and see how it looks.
- Sprinkle some powdered sugar after cake has cooled.
Notes
- FAVORITE
↑ Back to top
Lemon Oatmeal Sugar Cookies

Tags: Cookies
Servings: 6 dozen
Ingredients
- 1 cup butter, softened
- 2 cups sugar
- 2 large eggs, room temperature
- 2 teaspoons grated lemon zest
- 3 tablespoons lemon juice
- 2-3/4 cups all-purpose flour
- 1 cup quick-cooking oats
- 2 teaspoons baking powder
- 1/4 teaspoon salt
- Additional sugar
Steps
- In a large bowl, cream butter and sugar until light and fluffy. Beat in eggs, lemon zest and lemon juice. In another bowl, whisk flour, oats, baking powder and salt; gradually beat into creamed mixture. Refrigerate, covered, 2 hours or until firm enough to shape.
- Preheat oven to 375°. Shape level tablespoons of dough into balls; place 2 in. apart on parchment-lined baking sheets. Coat bottom of a glass with cooking spray, then dip in sugar. Press cookies with bottom of glass to flatten, redipping in sugar as needed.
- Bake until edges are light brown, 6-8 minutes. Remove from pans to wire racks to cool.
↑ Back to top
Lemon Pound Cake with Aunt Evelyn's Lemon Glaze
Adapted from https://www.allrecipes.com/recipe/236915/lemon-buttermilk-pound-cake-with-aunt-evelyns-lemon-glaze/

Servings: 1 pound cake
Ingredients
- Original recipe (1X) yields 14 servings
- 3 ½ cups all-purpose flour
- ½ teaspoon salt
- ½ teaspoon baking soda
- 2 ½ cups white sugar
- 1 ½ cups unsalted butter, softened
- 4 large eggs
- 1 cup buttermilk
- 1 teaspoon lemon extract
- 2 cups confectioners' sugar
- ¼ cup lemon juice
- 2 tablespoons unsalted butter, softened
- 1 tablespoon lemon zest
1X 2X:
Lemon Pound
Cake:
Glaze:
Steps
- Gather the ingredients. Preheat the oven to 350 degrees F (175 degrees C). Grease and flour a fluted tube pan (such as Bundt).
- To make the cake: Sift flour, salt, and baking soda together in a bowl.
- Beat sugar and butter in a bowl with an electric mixer for 10 minutes. Add eggs, one at a time, beating well after each addition. Add flour mixture in three batches, alternating with buttermilk, beating well after each addition and ending with the flour mixture. Stir in lemon extract. Pour batter into the prepared pan.
- Place into the preheated oven and immediately reduce the oven temperature to 325 degrees F (165 degrees C). Bake until a toothpick inserted into the center of the cake comes out clean, 60 to 75 minutes.
- Remove from the oven and cool in the pan for 10 minutes. Tap the pan firmly a few times, then shake it gently to loosen the cake. Place a wire rack over the pan and invert to release cake onto the rack. Set the rack and cake over a sheet of parchment paper.
- To make the glaze: Beat confectioner's sugar, lemon juice, butter, and lemon zest in a bowl with an electric mixer until smooth.
- Pour about 1/2 of the glaze over the warm cake. Let cool for 20 minutes, then pour remaining glaze over top.
↑ Back to top
Lemon-Chile Green Bean Pickles
Servings: YIELD Makes 2 quarts
Ingredients
- 1 1/2 pounds green beans, trimmed
- 1 lemon, thinly sliced, seeds removed
- 4 chiles de árbol (optional)
- 4 garlic cloves, smashed
- 1 cup distilled white vinegar
- 2 tablespoons kosher salt
- 2 teaspoons sugar
- 1 teaspoon crushed red pepper flakes
- Two 1-qt. canning jars with lids
Special
Equipment:
Steps
- Divide green beans, lemon, chiles, if desired, and garlic between jars. â©
- Bring vinegar, salt, sugar, red pepper flakes, and 2 cups water to a boil in a small saucepan, stirring to dissolve salt and sugar. Pour hot brine into jars, dividing evenly, and cover. Let cool, then chill. â©
- Do Ahead: Green beans can be pickled 2 months ahead. Keep chilled.
Notes
- FAVORITE
↑ Back to top
Lemon-Rosemary Risotto
Ingredients
- 1 cup grated parmesan
- 1 tbsp. minced rosemary
- Zest of 3 lemons, plus 1 tbsp. juice
- 6 cups chicken stock
- 3 tbsp. olive oil
- 4 cloves garlic, minced
- 1 small yellow onion, minced
- 2 cups arborio rice
- 1/3 cup dry white wine
- 3 tbsp. unsalted butter
- Kosher salt and freshly ground black pepper, to taste
Steps
- Stir parmesan, rosemary, and zest in a bowl. Bring stock to a simmer in a 2-qt. saucepan; keep warm. Heat oil in a 6-qt. saucepan over medium-high heat. Cook garlic and onion until soft, 5–7 minutes. Add rice; cook until opaque, 3–4 minutes. Add wine; cook until absorbed, 1–2 minutes. Add 1/2 cup stock; cook, stirring often, until stock is mostly absorbed, 2–3 minutes. Add another 1/2 cup stock; repeat process until all the stock is used, about 25 minutes. Continue cooking until rice is al dente, 2–3 minutes. Remove from heat; stir in half the parmesan mixture plus butter, salt, and pepper. Garnish with remaining parmesan mixture.
Notes
- FAVORITE
↑ Back to top
Lemonade Layer Cake
Adapted from http://www.myrecipes.com/recipe/lemonade-layer-cake

Ingredients
- 1 1/3 cups granulated sugar
- 6 tablespoons butter, softened
- 1 tablespoon grated lemon rind
- 3 tablespoons thawed lemonade concentrate
- 2 teaspoons vanilla extract
- 2 large eggs
- 2 large egg whites
- 2 cups all-purpose flour
- 1 teaspoon baking powder
- 1/2 teaspoon salt
- 1/2 teaspoon baking soda
- 1 1/4 cups fat-free buttermilk
- Cooking spray
- 2 tablespoons butter, softened
- 2 teaspoons grated lemon rind
- 2 teaspoons thawed lemonade concentrate
- 1/2 teaspoon vanilla extract
- 8 ounces 1/3-less-fat cream cheese
- 3 1/2 cups powdered sugar
Cake
Frosting
Steps
- Preheat oven to 350°.
- To prepare cake, place first 5 ingredients in a large bowl; beat with a mixer at medium speed until well blended (about 5 minutes). Add eggs and egg whites, 1 at a time, beating well after each addition. Lightly spoon flour into dry measuring cups; level with a knife. Combine flour, baking powder, salt, and baking soda; stir well with a whisk. Add flour mixture and buttermilk alternately to sugar mixture, beginning and ending with flour mixture; beat well after each addition.
- Pour batter into 2 (9-inch) round cake pans coated with cooking spray; sharply tap pans once on counter to remove air bubbles. Bake at 350° for 20 minutes or until wooden pick inserted in center comes out clean. Cool in pans 10 minutes on a wire rack; remove from pans. Cool completely on wire rack.
- To prepare frosting, place 2 tablespoons butter and the next 4 ingredients (2 tablespoons butter through cream cheese) in a large bowl; beat with a mixer at high speed until fluffy. Add powdered sugar, and beat at low speed just until blended (do not overbeat). Chill 1 hour.
- Place 1 cake layer on a plate; spread with 1/2 cup frosting. Top with remaining cake layer. Spread remaining frosting over top and sides of cake. Store cake loosely covered in the refrigerator.
Notes
- FAVORITE
↑ Back to top
Lemongrass Pork Noodle Bowls (Bún Thịt Nướng)

Servings: 6
Ingredients
- 2 boneless pork shoulder steaks ( 2 to 2 1/2 pounds)
- 1/4 cup fish sauce (preferably Red Boat)
- 2 tablespoons neutral cooking oil (such as canola oil), plus more for grilling
- 2 tablespoons finely chopped garlic (about 6 cloves)
- 2 tablespoons finely chopped lemongrass (about 1 stalk)
- 1 1/2 tablespoons granulated sugar
- 1 teaspoon black pepper
- 1 cup water
- 1/3 cup granulated sugar
- 1/3 cup distilled white vinegar
- 1/4 cup fish sauce (preferably Red Boat)
- 1 garlic clove, finely chopped (about 1 teaspoon)
- 1 red Thai chile, finely chopped (about 1/2 teaspoon)
- 1/4 cup plus 3 tablespoons distilled white vinegar
- 1/3 cup granulated sugar
- 1/3 cup water
- 2 1/2 teaspoons kosher salt
- 10 ounces daikon radish (about 1/2 small radish), peeled and sliced into 4-inch-long matchsticks
- 4 ounces carrots (about 2 medium carrots), peeled and sliced into 4-inch-long matchsticks
- 3/4 cup thinly sliced yellow onion (about 1 small onion)
- 1 (8.8-ounce) package rice vermicelli noodles, cooked according to package directions
- Lettuce; fresh basil, mint, and shiso (perilla) leaves; sliced cucumbers; and tương ớt (Vietnamese hot chile sauce) (such as Cholimex), for serving
- 1/4 cup chopped unsalted roasted peanuts, for garnish
Pork:
Nước chấm:
Pickled
vegetables:
Additional
ingredients:
Steps
- Cut pork steaks into 1-inch cubes for skewers or in half crosswise. Place pork shoulder, fish sauce, oil, garlic, lemongrass, sugar, and black pepper in a large ziplock plastic bag. Squeeze out as much air as possible, and seal bag; gently massage fish sauce mixture into pork. Place bag on a plate or tray; refrigerate for at least 30 minutes to 1 hour for 1-inch pieces. For halved steaks, refrigerate for at least 1 hour or up to 24 hours.
- Bring 1 cup water, sugar, vinegar, and fish sauce to a simmer in a small saucepan over medium-high, stirring occasionally to dissolve sugar. Remove from heat, and stir in garlic and chile. Transfer to an airtight heatproof container; chill until ready to use.
- Bring vinegar, sugar, 1/3 cup water, and salt to a boil in a medium saucepan over medium-high. Remove from heat, and let cool slightly, about 10 minutes. Stir in radish, carrots, and onion; cover and let stand until starting to soften, about 5 minutes. Stir again, gently. Let stand 1 hour, or store in refrigerator until ready to use.
- Preheat grill to medium-high (400°F to 450°F). Remove pork from marinade. For skewers, thread 3 to 4 pieces on 6-inch skewers. Place skewers on oiled grates, and grill, covered, turning every 3 to 4 minutes, until pork is lightly charred and cooked through, 12 to 15 minutes. (For halved steaks, grill, uncovered, until lightly charred and a thermometer inserted into thickest portion of pork registers 145°F, 10 to 15 minutes, flipping occasionally. Let rest 5 minutes, then slice steak into strips.)
- Serve pork with noodles, lettuce, herbs, cucumbers, chile sauce, and pickled vegetables. Drizzle with nước chấm. (Serve remaining sauce on the side.) Garnish with peanuts.
Make the pork:
Make the nước chấm:
Make the pickled
vegetables:
↑ Back to top
The Lemony Couscous Salad I Make On Repeat All Summer
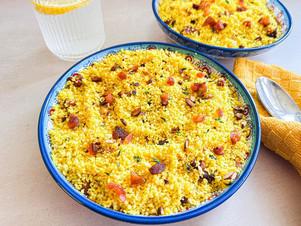
Servings: 6
Ingredients
- 1/4 cup ( 60 ml) extra-virgin olive oil
- Zest of 2 lemons plus 2 tablespoons ( 30 ml) lemon juice
- 2 tablespoons finely chopped fresh thyme leaves, plus more for garnish
- 2 cloves garlic, finely minced, grated, or pressed
- 1/2 teaspoon ground turmeric
- 1 teaspoon Diamond Crystal kosher salt, plus more to taste; for table salt, use half as much by volume
- 1/4 teaspoon freshly ground black pepper, plus more to taste
- 1 recipe for simple fluffy couscous or 3 cups dried couscous ( 510 g), cooked according to the packaging instructions (see notes)
- 1/2 cup chopped toasted almonds or other nuts (about 2 ounces; 56 g), plus more for garnish
- 1/2 cup chopped dried apricots or other dried fruit (about 2 ounces; 56 g)
Steps
- In a large bowl, whisk together olive oil, lemon zest, lemon juice, thyme, garlic, turmeric, salt, and pepper.
- Add warm cooked couscous and mix to combine with the dressing. Let sit until slightly cooled and flavors have married, about 20 minutes.
- Add almonds and dried apricots and toss gently to combine with couscous. Season with salt and pepper to taste.
- If desired, garnish with thyme leaves and toasted chopped almonds. Serve warm or at room temperature.
Notes
- Couscous should be warm when you assemble the salad.
↑ Back to top
Lentil Stew (Lencsefőzelék)

Tags: Beans and Other
Legumes Hungary
Servings: 5-6
Ingredients
- 500 grams (1 pound or 2 ¼ cups) dried brown or green lentils, rinsed
- 3 tablespoons olive oil
- 1 onion, peeled and minced
- 3 cloves garlic, peeled and minced
- 1 teaspoon salt (more to taste)
- 2 teaspoons Hungarian sweet paprika
- 3 pinches ground black pepper
- 4 bay leaves
- 2 tablespoons lemon juice
- 5 ½ cups water
- 1 tablespoon mustard
- 240 grams (1 cup) sour cream
- 2 tablespoons butter
- Slices of crusty bread
Steps
- Heat three tablespoons oil in a large pot over medium-high, then add minced onion and sauté until translucent, about 5-6 minutes. Then add minced garlic and sauté for 1 more minute. Turn off heat, then combine with paprika, salt, black pepper, and the bay leaves.
- Add the lentils, 5 ½ cups of water, and the lemon juice. Bring water to a boil, then reduce to a simmer and cook lentils until with the lid off until lentils are soft and excess water has evaporated, about 40-45 minutes.
- When lentils are ready, pour sour cream over the lentil stew. Let the stew thicken into a creamy consistency at a low simmer for 1-2 minutes. Remove pot from heat, add mustard and butter and stir well.
- Remove bay leaves. Taste for salt and pepper and add more if needed. Serve the lentil stew in shallow bowls topped with a choice of smoked meat, meatballs (fasírt), crisped-up sausages, goulash, or fried eggs and crusty bread on the side.
↑ Back to top
Light and Easy Greek Potato Salad
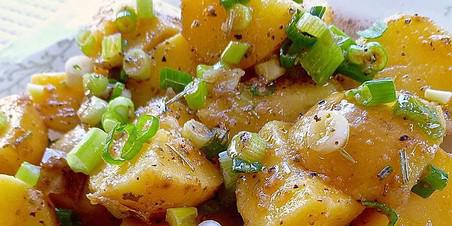
Tags: Greece
Potato
Servings: Original recipe yields
8 servings
Ingredients
- 12 red potatoes
- ¼ cup chopped green onion
- ¼ cup olive oil
- ¼ cup red wine vinegar
- 1 ½ teaspoons fresh lemon juice
- ½ teaspoon garlic powder
- ½ teaspoon onion powder
- ½ teaspoon coarse salt, or to taste
- ½ teaspoon ground black pepper, or to taste
- ¼ teaspoon dried oregano
- ¼ teaspoon white sugar
- ¼ teaspoon dried rosemary, crumbled
- 1 pinch ground red pepper
Steps
- Place red potatoes into a large pot and cover with salted water; bring to a boil. Reduce heat to medium-low and simmer until tender, about 25 minutes. Drain and chill in freezer until cold, about 30 minutes.
- Slice potatoes and place into a large salad bowl; toss potatoes with green onion. Whisk olive oil, red wine vinegar, lemon juice, garlic powder, onion powder, salt, black pepper, oregano, sugar, rosemary, and red pepper in a bowl. Pour the dressing over the potatoes and toss. Serve immediately or chill until serving time.
↑ Back to top
Light and Silky Banana Crémeux
Servings: Makes about 8 5-ounce
servings
Ingredients
- 28 ounces milk, any percentage will do (about 3 1/2 cups; 790g)
- 16 ounces peeled, ripe banana from about 5 medium bananas, sliced into 1/2-inch pieces (about 3 cups; 455g)
- 1 empty vanilla bean pod, left over from another project, optional
- 7 ounces plain or toasted sugar (about 1 cup; 195g)
- 1 1/2 ounces cornstarch (a shy 1/3 cup; 35g)
- 1/2 teaspoon (2g) Diamond Crystal kosher salt; for table salt, use about half as much by volume or the same weight
- 1/8 teaspoon (.5g) ground cloves
- 5 ounces egg yolk (from about 10 large eggs; 140g)
- 1/4 ounce vanilla extract (1 1/2 teaspoons; 7g)
- 12 ounces heavy cream (about 1 1/2 cups; 340g)
Steps
- Infuse the Milk: Combine milk, sliced banana, and empty vanilla bean pod (if using) in 3-quart stainless steel saucier and bring to simmer over medium heat, stirring from time to time with flexible spatula to prevent scorching along bottom. When dairy comes to a simmer, remove from heat, cover and let cool to room temperature, about 4 hours. Proceed to next step, or refrigerate up to 24 hours to extract stronger banana flavor. The exact timing will depend on both personal preference and convenience.
- Make the Custard: Return banana milk to simmer over medium heat, stirring as before; then strain through fine-mesh sieve into medium bowl. Press gently on banana pulp to release liquid, but don't allow pulp to pass through sieve. Pulp can be refrigerated to use in muffins, pancakes, or smoothies, but it will not benefit the custard. If using vanilla pod, scrape out flavorful milk inside each half with flexible spatula before discarding.
- Finishing the Crémeux: In the bowl of a stand mixer, whip cream to stiff peaks. Meanwhile, use flexible spatula to stir chilled custard until smooth and soft (this can be done right in the baking dish or in a separate bowl if you prefer). Add about 1/3 of the cream to banana custard; then fold and stir until smooth before folding in remaining whipped cream. Transfer to disposable piping bag fitted with a large star tip and divide between serving dishes. Serve immediately, or cover and refrigerate until needed, up to 24 hours. Pair with toasted nuts, cocoa nibs, fresh fruit, unsweetened whipped cream, or whatever toppings you desire.
Using the same 3-quart saucier as before (no need to wash), whisk
sugar, cornstarch, salt, and cloves together until well combined,
followed by egg yolks. Whisk in infused milk. Return to stovetop and
warm over medium-low heat, whisking gently until custard is steaming
hot, about 5 minutes.
Increase heat to medium and continue cooking until the custard
thickens, about 5 minutes more. When it begins to bubble, set timer
and
continue whisking for 90 seconds. This step is important to neutralize
starch-dissolving protein found in egg yolks. Off-heat, stir in
vanilla
extract and season to taste with additional vanilla, salt, or cloves.
If desired, strain custard through same sieve as before (again, no
need
to wash) to remove bits of chalazae that may remain or any
accidentally
curdled custard. Scrape into large glass or ceramic baking dish; then
cover and refrigerate until firm and cold, at least 2 hours, although
timing will vary. Alternatively, the prepared custard can be
refrigerated up to one week.
↑ Back to top
Light Brioche Buns

Tags: Breads
Is starred. Rated
5/5
Servings: 8 buns
Ingredients
- 1 cup warm water
- 3 tablespoons warm milk
- 2 teaspoons active dry yeast
- 2 ½ tablespoons sugar
- 2 large eggs
- 3 cups bread flour
- ⅓ cup all-purpose flour
- 1 ½ teaspoons salt
- 2 ½ tablespoons unsalted butter, softened
Steps
- In a glass measuring cup, combine 1 cup warm water, the milk, yeast and sugar. Let stand until foamy, about 5 minutes. Meanwhile, beat 1 egg.
- In a large bowl, whisk flours with salt. Add butter and rub into flour between your fingers, making crumbs. Using a dough scraper, stir in yeast mixture and beaten egg until a dough forms. Scrape dough onto clean, unfloured counter and knead, scooping dough up, slapping it on counter and turning it, until smooth and elastic, 8 to 10 minutes.
- Shape dough into a ball and return it to bowl. Cover bowl with plastic wrap and let rise in a warm place until doubled in bulk, 1 to 2 hours.
- Line a baking sheet with parchment paper. Using dough scraper, divide dough into 8 equal parts. Gently roll each into a ball and arrange 2 to 3 inches apart on baking sheet. Cover loosely with a clean kitchen towel and let buns rise in a warm place for 1 to 2 hours.
- Set a large shallow pan of water on oven floor. Preheat oven to 400 degrees with rack in center. Beat remaining egg with 1 tablespoon water and brush some on top of buns. Bake, turning sheet halfway through baking, until tops are golden brown, about 15 minutes. Transfer to a rack to cool completely.
↑ Back to top
Lighter-Than-Air Chocolate Roll
Tags: Baking
Cakes and Pastries
Servings: 12
Ingredients
- 6 oz fine-quality bittersweet chocolate (not unsweetened), chopped
- 3 tablespoons water
- 6 large eggs, separated, at room temperature
- 2/3 cup sugar
- 1/4 teaspoon salt
- 1 tablespoon Dutch-process unsweetened cocoa powder
- 1 cup heavy cream
- 3 tablespoons confectioners sugar, sifted
- 2 tablespoons Grand Marnier
- 1 teaspoon finely grated fresh orange zest
For cake
layer:
For filling:
Steps
- Garnish: unsweetened cocoa powder and confectioners sugar
- Preheat oven to 350°F. Oil a 15- by 10- by 1-inch shallow baking pan and line bottom lengthwise with a large piece of wax or parchment paper, letting paper hang over ends by 2 inches.
- Beat cream with confectioners sugar and Grand Marnier with cleaned beaters until it just holds stiff peaks. Fold in zest.
- Spread filling evenly over cake. Put a long platter next to a long side of cake. Using wax paper as an aid, roll up cake jelly roll–style, beginning with a long side. Carefully transfer, seam side down, to platter, using wax paper to help slide cake. (Cake will crack but will still hold together.)
Make cake layer:
Melt chocolate with water in
a small heavy saucepan over very low heat, stirring. Cool to lukewarm.
Beat yolks, 1/3 cup sugar, and salt in a large bowl with an electric
mixer until thick and pale, about 5 minutes in a standing mixer or
about 8 minutes with a hand-held mixer. Fold in melted chocolate until
blended. Beat whites with cleaned beaters until they just hold soft
peaks. Gradually add remaining 1/3 cup sugar and beat until whites
just
hold stiff peaks. Fold one third of whites into melted-chocolate
mixture to lighten, then fold in remaining whites gently but
thoroughly.
Spread batter evenly in baking pan and bake in middle of oven until
puffed and top is dry to the touch, 15 to 18 minutes. Transfer pan to
a
rack. Cover top with 2 layers of damp paper towels and let stand 5
minutes, then remove towels and cool completely. Loosen edges with a
sharp knife.
Sift cocoa powder over top of cake layer and overlap 2 layers of wax
paper lengthwise over cake. Place a baking sheet over paper and invert
cake onto it, gently peeling off wax paper lining. (Don’t worry if
cake
layer breaks; it will hold together when rolled.)
Make filling:
Fill and roll cake:
Dust cake generously with
cocoa powder and confectioners sugar.
Do ahead: Cake may be rolled
1 day ahead and chilled in a cake keeper or loosely covered with
plastic wrap.
Notes
- You can substitute the following for Grand Marnier and orange zest: 2 tablespoons Cognac and ½ teaspoon vanilla; 2 tablespoons cocoa and ½ teaspoon vanilla; or 2 teaspoons instant-espresso powder or instant-coffee granules dissolved in 2 teaspoons water plus 1/2 teaspoon vanilla.
- This batter can also be baked in an unoiled 9½-inch springform pan. Bake until cake is set but still moist in center, 35 to 40 minutes (cake will rise and then sink as it cools). Top with Grand Marnier whipped cream.
↑ Back to top
Lima Soup
Adapted from https://patijinich.com/lima-soup/

Tags: Chicken
Mexican Soups
Servings: 6
Ingredients
- 5 cloves garlic unpeeled
- 2 chicken breasts (about 1 1/2 pounds)
- 12 cups water
- 1 teaspoon dried oregano
- 1/2 teaspoon dried thyme
- 3 bay leaves
- 3 whole cloves
- 2 1/2 teaspoons kosher or coarse sea salt or more to taste
- 1/4 teaspoon freshly ground black pepper
- 2 tablespoons vegetable oil plus more for frying tortilla strips
- 1/2 red onion chopped (about 1 cup)
- 1 green or yellow bell pepper stemmed, seeded and chopped
- 1/2 pound ripe tomatoes chopped
- 1/2 teaspoon kosher or coarse sea salt
- 6 to 8 Corn tortillas cut into 2"x1/2" strips
- 1 thinly sliced lima (lemon or lime) for garnish
- 2 to 3 limas (lemon or lime) to add right before serving
- 1/2 cup fresh cilantro leaves and upper stems chopped, for garnish
- 1 habanero chile finely chopped (optional)
For the broth:
For the
sofrito:
To serve:
Steps
- Place the unpeeled garlic cloves under the broiler, or on a pre-heated comal set over medium heat, and roast or char for 10 minutes, flipping a couple times in between, until completely blackened. Set aside.
- Place chicken breasts in a soup pot and cover with 12 cups water. Add the charred garlic cloves, oregano, thyme, bay leaves, whole cloves, salt and pepper, and bring to a simmer over medium heat. Partially cover with a lid and cook for 40 minutes, until the chicken is completely cooked through yet still tender. Remove from the heat. Remove the chicken breasts and once cool enough to handle, shred into fine pieces. Strain the broth into a large bowl, incorporate the shredded chicken, and reserve.
- Rinse and dry the soup pot. Heat the oil over medium-high heat. Once hot, add the onion, bell pepper, tomato and 1/2 teaspoon salt. Cook, stirring often, for about 10 minutes until the vegetables are completely cooked through and practically mashed and mushy.
- Pour the reserved chicken broth and shredded chicken into the pot with the sofrito, bring back to a simmer, and cook partially covered for 8 to 10 minutes, until all the flavors have come together.
- Heat about 1/4" of oil in a deep skillet or casserole and set over medium heat. Once hot, working in batches, flash fry the corn tortilla strips for 10 to 15 seconds until lightly golden, and remove with a slotted spoon or spider. Place on a plate covered with paper towels, drain and lightly season with salt. Alternatively, you spread the tortilla strips on a baking sheet and bake at 275 degrees Fahrenheit for 10 to 15 minutes, flipping once in between.
- Ladle the soup into bowls and add a couple very thin slices of lima. Top with tortilla strips, and give everyone a half a lima to squeeze into their soup right before they eat it. Additionally, you may set out chopped cilantro and habanero for everyone to garnish as they please.
For the broth:
For the sofrito:
To serve:
↑ Back to top
Loaded Cauliflower Casserole
Servings: Original recipe (1X)
yields 8 servings
Ingredients
- Original recipe (1X) yields 8 servings
- 6 slices turkey bacon, or more to taste
- 1 large head cauliflower, cut into florets
- ½ cup sour cream
- ½ cup mayonnaise
- 1 clove garlic, minced
- ½ teaspoon salt
- ¼ teaspoon ground black pepper
- 2 cups shredded Colby-Monterey Jack cheese, divided
- 1 (8 ounce) package baby bella mushrooms, roughly chopped
- 6 tablespoons chopped fresh chives, divided
Steps
- Preheat the oven to 425 degrees F (220 degrees C). Grease a 9x13-inch baking dish.
- Place turkey bacon in a large skillet and cook over medium-high heat, turning occasionally, until evenly browned, about 10 minutes. Drain bacon slices on paper towels, then crumble.
- Place a steamer insert into a saucepan and fill with water to just below the bottom of the steamer. Bring water to a boil. Add cauliflower, cover, and steam until tender, 15 to 20 minutes.
- Combine sour cream, mayonnaise, garlic, salt, and black pepper in a large bowl; add cauliflower, 1/2 of the bacon, 1 cup Colby-Monterey Jack cheese, mushrooms, and 3 tablespoons chives and mix well. Transfer mixture to the prepared baking dish and top with remaining bacon and cheese.
- Bake in the preheated oven until bubbling and cheese is melted, about 20 minutes. Sprinkle remaining chives over casserole.
↑ Back to top
Loaded Sheet Pan Nachos

Servings: 6 to 8
Ingredients
- 1 tablespoon olive oil
- 1 medium onion (about 1 cup), chopped
- 1 pound ground beef (80-20 mix)
- 1 teaspoon chili powder
- 1 teaspoon coriander
- 1/2 teaspoon dried oregano
- 3/4 teaspoon Morton kosher salt (maybe more)
- 1 (16-ounce) bag tortilla chips, preferably thick and sturdy
- 1 bell pepper, cored, halved and chopped (about 1 cup)
- 1 (15-ounce) can black beans, rinsed and drained
- 1 cup frozen corn
- 1 (2.25-ounce) can sliced black olives, about 1/4 cup
- 1 to 1 1/2 cups grated cheddar cheese or shredded Mexican cheese blend
- 1 avocado, cubed
- 2 scallions, green ends sliced thinly
- 1 plum tomato, diced
- 1/2 cup cilantro, chopped
- 1 jalapeño pepper, seeded and thinly sliced
- 1/3 cup sour cream
- 1 cup sour cream
- Juice of 1 lime
- 1/3 cup cilantro
- Pinch salt
For the
nachos:
For garnish,
optional:
For the
cilantro-lime crème:
Steps
- Preheat the oven to 400°F.
- Heat the olive oil in a medium nonstick or cast iron skillet, and cook the onions for 5 minutes until they start to soften.
- This is not an exact science—I probably used 6 to 8 handfuls of tortilla chips to line the sheet pan. You want them close and touching and mostly in one layer, but not too high.
- Using a slotted spoon to drain off the fat, transfer the beef to the pan with the chips, scattering it evenly across the pan. Be generous—you’ll use it all up.
- Add the bell pepper, black beans, corn, black olives, and cheese.
- Bake the nachos in the oven for about 5 to 7 minutes, or until the cheese melts and becomes bubbly.
- While the nachos bake, place the sour cream, lime, cilantro, and salt into the bowl of a food processor fitted with the blade. Process until the ingredients become smooth and there are no lumps. Taste and add more salt if necessary.
- Remove the sheet pan from the oven and sprinkle with the fresh cilantro. Using a spoon drizzle the crème across the top of the nachos.
Cook the onions and
beef:
Add
the beef, chili powder, coriander, oregano and kosher salt. Break the
beef up with a wooden spoon and cook until it browns, about 8 to 10
minutes. Remove from the heat and set aside.
Line the pan with
tortilla chips:
Add the beef:
Add the toppings:
Bake the nachos:
Make the cilantro lime
crème:
If
you don’t want to bother with your food processor, you could finely
chop the cilantro and stir it into the sour cream with the lime juice
and salt.
Drizzle the crème and
serve:
Serve the pan as is right on
the table with little bowls of the garnishes alongside.
↑ Back to top
Lofthouse Sugar Cookies
Adapted from http://www.justapinch.com/recipes/dessert/cookies/lofthouse-sugar-cookies.html#.UlXi-Pd8q6E.gmail

Ingredients
- 1/2 c sour cream
- 1 c sugar
- 1/2 c butter, softened
- get recipes @ goboldwithbutter.com
- 2 eggs
- 1/2 tsp pure vanilla extract
- 3 c all purpose flour
- 1 1/2 tsp baking powder
- 1/2 tsp baking soda
- 1/2 tsp salt
- 4 c powdered sugar
- 2 tsp pure vanilla extract
- 2 Tbsp whole milk
- 1/2 c butter, softened
- get recipes @ goboldwithbutter.com
- 1/2 c vegetable shortening
- food coloring to color frosting (optional)
- candy sprinkles or colored sugar to decorate (optional)
COOKIE DOUGH
BUTTERCREAM
FROSTING
Steps
- COOKIE DOUGH DIRECTIONS: In a large bowl combine sour cream, sugar, butter, eggs and vanilla; mix well. In a smaller bowl combine flour, baking powder, baking soda and salt, then add to wet mixture and mix until everything is just incorporated. With a cookie scoop, scoop out even size scoops of dough and then roll in a ball in your hand and place on a cookie sheet and slightly flatten with your hand so it's in a circular shape. Bake in a pre-heated 350 degree oven until light golden brown, no more than 10 minutes. They may seem under done but they aren't. Transfer to a cooling rack and let cool completely before frosting.
- Cream together butter and shortening in mixer, with paddle attachment on medium for about 2 minutes. Add 1/2 cup powdered sugar and beat until smooth, Add another 1/2 cup and beat until smooth. Add Vanilla, mix. Add gradually the remaining sugar and milk, making sure you end with sugar. Continue to mix on medium until smooth.
BUTTERCREAM FROSTING
DIRECTIONS: Directions:
Notes
- FAVORITE
↑ Back to top
Long-Life Noodles
Tags: Chinese
Noodles
Servings: 4 - 6
Ingredients
- 8 medium dried black mushrooms
- 2 cups very hot water
- Two 9-ounce packages of fresh egg noodles or one 8-ounce package dried egg noodles
- 3 tablespoons vegetable oil, divided
- 1 tablespoon low-sodium or regular soy sauce
- 3 medium cloves garlic, grated or minced (about 1 tablespoon)
- 3 tablespoons chopped Asian shallots (see Headnote)
- 4 ounces button mushrooms (white or cremini), trimmed and sliced (about 1 cup)
- 2 ounces enoki mushrooms, trimmed and separated into bite-size pieces (1 cup)
- 3 tablespoons oyster sauce
- 5 Chinese chives or skinny scallions, cut into 2-inch lengths (See Headnote)
- 1/2 teaspoon fine salt, plus more to taste
- Freshly ground black pepper
Steps
- In a medium bowl, combine the dried mushrooms with the hot water and let stand until the mushrooms are rehydrated, about 20 to 30 minutes. Drain the mushrooms, reserving 1 cup of the soaking liquid. Slice the mushrooms into 1/4-inch-thick strips.
- Meanwhile, prepare the noodles according to the package directions. At the end of the cooking time, pour them into a colander and rinse under cold running water. Drain well and transfer the noodles to a large bowl; add 1 tablespoon of the oil and the soy sauce. Toss to combine.
- Heat a large wok or skillet over medium-high heat for 1 minute. Add the remaining 2 tablespoons oil and heat until it begins to shimmer. Add the garlic and shallots; cook for 30 to 45 seconds, until fragrant. Add the black mushrooms and button mushrooms and cook for 2 minutes, stirring, until the mushrooms are almost cooked through. Add the enoki mushrooms, the reserved mushroom liquid, oyster sauce, chives and the salt (add less salt if you are not using low-sodium soy sauce), stir to combine. Add the noodles, then stir quickly until the ingredients are well mixed and heated through (use tongs or a spatula in each hand to evenly toss the noodles, if necessary).
- Taste, and add salt and pepper as needed. Serve hot.
↑ Back to top
Longevity Noodles
Servings: YIELD Serves : 4
Ingredients
- 2 quarts water
- 5 ounces mung bean or soybean sprouts (2 cups)
- 1 1/2 teaspoons salt
- 1/2 pound fresh Chinese egg noodles
- 1/4 cup chicken stock, vegetable stock, or canned low-sodium broth
- 1 tablespoon plus 1/2 teaspoon light soy sauce
- 1/2 teaspoon Asian sesame oil
- 1 tablespoon peanut oil
- One 1/4-inch-thick slice of fresh ginger, lightly smashed
- 1/4 pound snow peas
- 3 large fresh water chestnuts, peeled and sliced 1/8 inch thick
Steps
- Bring the water to a boil in a large saucepan. Put the bean sprouts in a strainer, lower it into the boiling water and blanch the bean sprouts for 10 seconds. Remove the strainer and rinse the sprouts in cold water; drain well.
- Add the salt to the water in the saucepan and bring it back to a boil. Add the noodles and cook, stirring, for 1 minute. Drain the noodles thoroughly in a colander and rinse them in cold water; drain. Rinse again then drain, lifting them to separate and dry the strands.
- In a small bowl, combine the chicken stock with the soy sauce and sesame oil to make the sauce.
- Warm a wok over high heat for 45 seconds. Add the peanut oil and swirl to coat the wok. Stir in the ginger and cook for 10 seconds. Add the snow peas and stir-fry until bright green, about 1 minute. Add the water chestnuts and stir-fry for 30 seconds. Add the bean sprouts and stir-fry for 1 minute.
- Stir the sauce, add it to the wok and bring to a boil. Add the noodles and stir-fry until they absorb the sauce, about 1 1/2 minutes. Transfer the noodles to a platter and serve at once.
Notes
- FAVORITE
↑ Back to top
Longevity Noodles with Chicken, Ginger and Mushrooms
Adapted from https://cooking.nytimes.com/recipes/1013451-longevity-noodles-with-chicken-ginger-and-mushrooms
Servings: YIELD 2 to 3 main-dish
servings
Ingredients
- 12 ounces thin fresh noodles, like lo mein or tagliarini
- 2 teaspoons toasted sesame oil
- 12 ounces boneless, skinless chicken thighs, cut into 1/4-inch-thick, bite-size slices
- 1 tablespoon finely shredded ginger
- 1 teaspoon plus 1 tablespoon Chinese rice wine or dry sherry
- 1 teaspoon cornstarch
- 1 teaspoon plus 1 tablespoon soy sauce
- Salt
- ¼ teaspoon ground white pepper
- 2 tablespoons peanut or vegetable oil
- ¼ teaspoon red pepper flakes
- 5 ounces (about 3 cups) thinly sliced Napa cabbage
- 4 ounces (about 2 cups) fresh shiitake mushrooms, stems removed, caps thinly sliced
- ½ cup finely shredded scallions
Steps
- Bring a medium saucepan of water to boil over high heat and cook noodles until just done, 3 to 5 minutes, stirring to prevent sticking. Drain in a colander and rinse with cold water until cool, then shake well to remove water. Return noodles to pot, add sesame oil, and toss.
- Put chicken in a shallow bowl and add ginger, one teaspoon rice wine, cornstarch, one teaspoon soy sauce, 1/4 teaspoon salt and pepper. Mix gently to combine. In a small bowl, combine remaining one tablespoon rice wine and one tablespoon soy sauce.
- Heat a wok over high heat until a bead of water evaporates almost on contact. Swirl in one tablespoon peanut oil, add red pepper flakes and stir-fry 10 seconds using a metal spatula. Push pepper flakes aside and add chicken, spreading in a single layer to maximize contact with the wok. Let cook undisturbed one minute, until chicken begins to sear.
- Stir-fry chicken and pepper flakes together, tossing in the wok, for a minute or 2 until just done. Remove to a bowl. Add cabbage and mushrooms and stir-fry one minute until just wilted but not cooked. Empty into the bowl with chicken.
- Reheat wok, swirl in remaining one tablespoon peanut oil, and add noodles. Stir-fry 30 seconds, moving constantly to heat through. Swirl soy sauce-rice wine mixture and add to wok along with chicken-vegetable mixture and scallions. Sprinkle on 3/4 teaspoon salt and stir-fry a minute or 2 until chicken and vegetables are heated through.
↑ Back to top
Lop Cheong
Adapted from http://forum.sausagemaking.org/viewtopic.php?t=4413
Ingredients
- 2 1/4 lb pork butt
- 3/4 lb pork back fat
- 3 tbl brown sugar - (packed)
- 2 tsp salt
- 2 tbl soy sauce
- 1 tbl sweet sherry
- 3 tbl Scotch whiskey
- 1 tsp Chinese five-spice powder
- 2 tbl water
- Hog casings
Steps
- Grind the pork and fat in a meat grinder fitted with a 3/8-inch plate or, to be more authentic, dice the meat and fat with a knife into 1/4-inch cubes. Combine all the remaining ingredients except the casings in a large mixing bowl. Add the meat and fat and mix well.
- Stuff the meat mixture into the hog casing; tie the casing into 5-inch links. Prick the links all over with a fork. Spread them on a rack and place them in the refrigerator. Let the sausages dry overnight.
- Preheat the oven to 200 degrees. Place the sausages on a rack in a foil-lined baking sheet, making sure they do not touch each other. Bake for 5 hours. Shut off the oven but do not open the oven door. Let the sausages cool for another 2 hours. Discard any excess fat in the pan and store the sausages in the refrigerator for one to two weeks, or freeze them for two to three months.
Notes
- FAVORITE
↑ Back to top
Lop Cheong
Adapted from file:///C:/Users/Starfleet%20Command/Documents/Zapya/Misc/lop.pdf_Dir/lop.pdf_Page1.htm#196609

Tags: Charcuterie
Chinese Sausage
Servings: 2 to 3 pound
Ingredients
- 2 1/2 pounds pork
- 2 tablespoons water
- 3/4 pound pork back fat
- 1 tablespoon sweet sherry
- 3 tablespoons light brown sugar
- 2 teaspoons kosher salt
- 3 tablespoons Scotch whisky
- 1 teaspoon five-spice powder
- 2 tablespoons soy sauce
- Medium hog casings
Steps
- Grind the meat and fat through a 3/8-inch plate or hand dice the meat and fat into 1/4-inch pieces. Place in a large bowl and add the sugar, Scotch, soy sauce, water, sherry, salt, and five-spice powder. Knead until well blended.
Stuff the mixture into hog casings, and tie into flinch links. Air-dry
the sausage on a shelf in the refrigerator overnight.
The next day, preheat the oven to 200°. Place the sausages on a rack
in
a roasting pan so they do not touch and bake for about 5 hours. Turn
off the oven, and let the sausage cool for 2 hours in the oven.
↑ Back to top
Lovage and Walnut Pesto
Adapted from https://larderlove.com/lovage-walnut-pesto/
Tags: Condiments
Herbs
Ingredients
- 1 cup lovage leaves
- 2 tbsp walnuts
- 1 clove garlic chopped
- 1 lemon juice and zest
- Salt and pepper
- 3 tbsp Olive oil
- 1 tbsp parmesan
Steps
- Break up the walnuts and toast them in a dry pan for approximately 1 minute until golden and aromatic
- Allow to cool
- Whizz with all other ingredients in food processor or use pestle and mortar
Notes
- My Top Tips
- Always read the full recipe first. *Assemble all your ingredients and everything you need before you start. *For baking check the size of tins I’m using as this makes a big difference to your cakes. * I use medium sized eggs unless otherwise stated. * I use extra virgin olive oil unless otherwise stated. * I use unsalted butter unless otherwise stated. * Check out My Preserving Kit!
↑ Back to top
Lox Cheesecake
Adapted from https://altonbrown.com/recipes/savory-cheesecake/
Servings: 8 TO 10
Ingredients
- 6 tablespoons unsalted butter, melted
- 1 large egg white
- 1 1/2 cups crushed plain bagel chips
- 2 tablespoons capers, drained
- 3 (8-ounce) blocks cream cheese, at room temperature
- 3 tablespoons cornstarch
- 1 teaspoon kosher salt
- 4 ounces sour cream
- 2 large eggs
- 2 tablespoons freshly squeezed lemon juice
- 6 ounces hot smoked salmon or trout, flaked
- 1/3 cup chopped chives, plus extra for serving
Steps
- Heat oven to 350ºF and place a rack in the middle position. Lube the bottom and sides of a 9-inch diameter x 3-inch-high cake pan with no-stick spray. Cut a piece of parchment paper in a circle shape to fit snugly inside the bottom of the pan and spray again. (See note.)
- Combine the melted butter, egg white, and crushed bagel chips in a medium bowl. Press the mixture into the prepared pan using a flat bottom drinking glass to nudge it into an even layer. Bake for 8 minutes. Remove to a trivet or cooling rack and sprinkle the capers evenly across the crust. Reduce the oven temp to 250ºF.
- Place the cream cheese, cornstarch, salt, and sour cream in the work bowl of a stand mixer. Attach the paddle and mix on medium for 1 minute then stop and scrape down the sides of the bowl. Add the eggs and lemon juice and mix for 30 more seconds. Then, remove the bowl and fold in the smoked fish and chives using a silicon spatula.
- Spoon the batter into the baked crust and smooth the top with an offset spatula. Bake for 45 minutes, then turn the oven off. Leave the cheesecake in the cooling oven for 1 hour, without opening the door.
- Remove the cheesecake from the oven and cool for 2 hours before attempting to unfold. To unfold run a small offset spatula around the edges of the cake to loosen the sides. Place a round of parchment atop the cake and invert a large plate on top of it. Flip the whole cheesecake over and carefully remove the cake pan. (Remove the parchment circle if it has stuck to the bottom of the crust.) Invert another large plate onto the Botton of the cheesecake. Flip the whole thing over again and remove the parchment paper. (I know, it seems complicated but trust me, this is the easiest way to get the darn thing right-side-up on a plate.)
- Serve at room temperature with an extra sprinkling of chopped chives. Store leftover cheesecake in the refrigerator for up to 1 week.
Notes
- Note: To make a parchment round, cut a piece of parchment at least as long and wide as the pan. Fold in half, then again to quarter. Then turn and fold in half diagonally, centering the fold on one of the corners. Repeat twice more so that you end up with a narrow triangle. Measure 4 1/2 inches from the point and cut away the loose ends with scissors. When you unfold, you should have a near-perfect 9" diameter parchment circle. If you don't, I wrote something wrong. Oh, and make another one for the top while you're at it.
↑ Back to top
Lumpia
Adapted from https://cooking.nytimes.com/recipes/1024740-lumpia

Servings: 15 to 20 rolls
Ingredients
- 1 medium yellow onion, finely minced
- 1 large egg
- 1 tablespoon vegetable oil, plus more for frying (about 6 cups)
- 2 medium carrots, scrubbed or peeled, finely minced
- 3 garlic cloves, finely minced
- 1 pound ground pork
- ½ cup drained and finely chopped water chestnuts (from an 8-ounce can), or ½ cup peeled and finely diced jicama (optional)
- 2 teaspoons soy sauce
- Kosher salt (such as Diamond Crystal)
- Black pepper
- 15 to 20 frozen lumpia or spring roll wrappers (also labeled as spring roll pastry, not round rice paper rolls), thawed according to package directions
- Sweet chili sauce, for serving
Steps
- Place the onion in a fine-mesh strainer and press on it with the back of a spoon or a spatula to squeeze out most of the liquid. In a small bowl, beat the egg with 2 teaspoons of water to make an egg wash.
- In a large pan, heat 1 tablespoon of the oil over medium. Add the onion and carrots. Cook, stirring frequently, until slightly softened, about 4 minutes. Add the garlic and cook, stirring constantly, until fragrant, about 1 minute. Add the meat, and cook, stirring constantly and breaking up the meat, until just cooked through, about 6 minutes. Stir in the water chestnuts (if using) and soy sauce. Season with salt (about 1½ teaspoons) and pepper (about 1 teaspoon). Remove from the heat, taste and adjust seasonings. Set aside to cool for 10 minutes.
- Roll the lumpia: Line a large sheet pan with parchment paper. Place a wire rack on a second sheet pan. Have a small bowl of water and damp paper towels nearby to clean your hands as you roll. Peel off 1 wrapper and arrange it on a clean surface so it looks like a diamond. Keep the rest of the wrappers covered with a clean, damp kitchen towel or a couple of paper towels.
- Place 2 tablespoons of filling on the wrapper, 3 inches up from the nearest corner. Shape the filling into a log: Lift the nearest corner over the filling and cover it, making sure it’s airtight. Fold in the left and right corners tightly like an envelope, tucking in the corners. Tightly roll the log away from you, stopping about 2 inches from the top, brush the exposed portion with the egg wash and roll to tightly seal in the shape of a cigar.
- Place on the parchment-lined sheet pan, drape with a second clean, damp kitchen towel or additional paper towels, and continue until you use up all of the filling. Halfway through the rolling process, in a deep, heavy-bottomed pot, add enough oil to come 1½ inches up the sides and heat over medium until the temperature reaches 370 degrees.
- Working in batches to avoid overcrowding, fry the lumpia 4 to 5 at a time, turning them a few times with tongs, until golden brown, about 5 minutes. Adjust the heat as needed to maintain the temperature. Transfer the fried lumpia to the wire rack, and continue with the remainder. Allow to cool for 5 minutes before serving with sweet chili sauce.
Notes
- Place uncooked lumpia rolls on a parchment paper-lined sheet pan and transfer to the freezer, uncovered, overnight. The next day, transfer to a resealable plastic bag and freeze them for up to 3 months. Fry the lumpia from frozen, as directed in the recipe, until golden brown, adding an extra minute.
↑ Back to top
Lumpia Shanghai
Adapted from https://food52.com/recipes/81230-lumpia-shanghai

Ingredients
- 1 medium onion, very finely chopped
- 2 medium carrots, grated on the large holes of a box grater
- 4 scallions, white and light green parts, very finely chopped
- 4 garlic cloves, finely grated
- 1 cup cabbage, very thinly sliced
- 2 large eggs (1 whole, 1 white and yolk separated)
- 4 teaspoon kosher salt
- 1 teaspoon freshly ground black pepper
- 1 pound ground beef
- 1 pound ground pork
- 2 (11-ounce) packages lumpia wrapper or spring roll shells
- Canola oil, for frying
- 1/4 cup plus 2 tablespoons rice wine vinegar
- 1/4 cup soy sauce
- 2 garlic cloves, thinly sliced or finely chopped
- 1 Thai chile, thinly sliced
- 1 scallion, thinly sliced
Lumpia:
Vinegar-Soy
Dipping Sauce:
Steps
- In a large bowl, combine the onion, carrots, scallions, garlic, cabbage, 1 egg, 1 egg yolk, salt, and pepper until well blended. Add the beef and pork and mix with your hands until is evenly distributed.
- In a small bowl, whisk a splash of water into the remaining egg white. Working one at a time, on a work surface, place a lumpia wrapper with 1 corner facing you. Place 1 heaping tablespoon of the filling in the center of the wrapper and shape into a thin horizontal 5-inch-long log. Dip your fingers in the remaining egg white mixture and lightly brush the edges of the wrapper. Roll the bottom corner up and snugly over the filling, then tuck under the filling. Fold the left and right corners tightly over the filling to enclose. Crease the wrapper with your fingers, then continue to roll the bundle away from you. Both sides should be as close to sealed as possible; use a little egg wash to seal, as necessary.
- In a large nonstick pan, fill with oil to a depth of 1 inch. It should cover the lumpia at least halfway when frying; adjust the amount if needed. Heat the pan over medium-high heat. You’ll know the oil is hot enough if you place the tip of lumpia into the oil and it bubbles immediately. Cook the lumpia for 2 to 3 minutes per side, until deep golden brown and crisp. Transfer to a paper towel-lined wire rack. You can serve whole or cut in half. Serve with the sauce alongside.
- In a small bowl, mix the vinegar, soy sauce, garlic, chile, and scallion. Decant into a small dish.
Lumpia:
Vinegar-Soy Dipping
Sauce:
↑ Back to top
Lumpiang Shanghai (Filipino Egg Rolls)

Servings: 25 four-inch lumpia
rolls
Ingredients
- 6 tablespoons light brown sugar (3 ounces; 85g)
- 3 tablespoons (45ml) cane vinegar (see note)
- 1 tablespoon (15g) banana ketchup (see note)
- 1 teaspoon (4g) Diamond Crystal kosher salt; for table salt, use half as much by volume or the same weight
- 2 bird’s eye chiles, stemmed, seeded, and minced
- 1 1/4 pounds (565g) ground pork (at least 30% fat)
- 2 small carrots (about 4 ounces; 115g), peeled and finely diced
- 1/2 medium red onion (about 4 ounces; 115g), finely diced
- 7 medium garlic cloves, minced
- 3 tablespoons (45ml) soy sauce, preferably Filipino brands such as Silver Swan or Datu Puti
- 1 tablespoon (15ml) fish sauce
- 1 tablespoon (7g) freshly ground black pepper
- Twenty five, 5-inch-square spring roll (lumpia) wrappers (see note)
- 1 large egg, beaten
- 2 cups (475ml) canola oil or other neutral oil for frying
For the
Dipping Sauce:
For the Lumpia
Rolls:
Steps
- For the Dipping Sauce: In a small bowl, stir together sugar, vinegar, ketchup, salt, and chiles until well combined. Taste and adjust to your preference by adding more sugar, vinegar, ketchup, salt, and/or chiles incrementally (remember, we’re going for a balance of sweet and sour). Set aside.
- For the Lumpia Rolls: In a large bowl, combine pork, carrots, onion, garlic, soy sauce, fish sauce, and pepper. Using clean hands or a spoon, mix until well combined.
- On a work surface, position one spring roll wrapper so it resembles a diamond with a point facing you. Measure 1 1/2 tablespoons (28g) of filling, then, using your hands, shape into a 4-inch long cylinder, and place horizontally in the center of the wrapper.
- Starting with the point closest to you, fold the wrapper over the filling, tucking the point underneath the filling. Using your finger, moisten the left and right points of the wrapper with egg wash. Fold the left point towards the middle, fold the right point towards the middle, then roll tightly away from you, leaving about 1 inch of the top point exposed. Moisten the top point with egg wash, then finish rolling to seal. Repeat with remaining wrappers and filling.
- Heat oven to 200°F (95°C). Set a wire rack in a rimmed baking sheet and line with a double layer of paper towels. In a wok, heat oil over high heat to 375°F (190°C). Working in batches of 5 lumpia at a time, fry lumpia, turning occasionally with tongs, until golden brown all over, about 3 minutes; adjust heat as needed to return to and then maintain a frying temperature of 375°F (190°C). Transfer fried lumpia to prepared wire rack, then transfer to oven to keep warm. Repeat with remaining lumpia.
- Slice lumpia in half crosswise on a bias, transfer to a plate, and serve with dipping sauce alongside.
Notes
- Cane vinegar is the most common Filipino vinegar. It’s usually sold as white distilled vinegar (a spiced version, infused with onion, garlic, and chiles, is also available). You can find it in most Asian markets and online under the brands Datu Puti, Mama Sita, or Marca Pina.
- You can find banana ketchup at Filipino or Asian specialty markets and online. In a pinch, tomato ketchup is an acceptable substitute.
- Spring roll wrappers can be found at most Asian supermarkets. They are made with wheat flour and are often labeled as “spring roll pastry.” Chinese or Vietnamese wrappers will work as long as they are meant for frying. Do not use dried rice paper wrappers. If you cannot find square wrappers, round wrappers work well, too. To defrost the spring roll wrappers, transfer to the refrigerator the night before, or let them sit at room temperature for 30 minutes prior to using.
↑ Back to top
Lychee Coconut Rice Pudding
Ingredients
- 1 lb fresh lychees, peeled, pitted and torn into pieces (can substitute canned lychees)
- 1/2 cup sugar
- 1 cup sweetened shredded coconut
- 1 1/2 cups short-grain brown rice
- 2 cans coconut milk (400ml each)
- 3 cups milk (low-fat or whole)
- 1/2 cup dark brown sugar
- 1/2 tsp ground ginger
- 1/4 tsp salt
- dusting of cinnamon (optional)
Steps
- Mix the lychee pieces with the sugar in a bowl. Let sit about 1/2 hour, stirring occasionally. The sugar will draw the juices out of the fruit and create a syrup, which you'll add to the cooking rice. (If you're using canned lychees, open the can and drain the fruit, reserving the juice.)
- Heat the oven to 350 degrees. Spread the coconut on a baking sheet and toast in the oven until brown and fragrant, about 10-15 minutes. Set aside.
- In a saucepan, combine the rice, coconut milk, milk, brown sugar, ginger, salt, and the syrup from the lychees. Bring to a simmer and cook gently, uncovered, until the rice is very tender, at least 90 minutes. There should always be liquid covering the rice - if the mixture starts to look at all dry, add more milk or some water. You want it like soup. When the rice is tender, stir in the chopped lychees and the toasted coconut, remove from the heat, and cool. Chill in the refrigerator at least four hours before serving.
- Serve sprinkled with cinnamon, or with more toasted coconut if you have it.
Notes
- FAVORITE
↑ Back to top
Magic Cake
Ingredients
- 4 eggs (separate yolks from whites) at room temperature
- 1 tsp vanilla extract
- 150 g (3/4 cup) sugar
- 125 g (1 stick or 1/2 cup) butter, melted
- 115 g (4 oz or 3/4 cup) of all purpose flour
- 500 ml (2 cups) milk lukewarm
- powdered sugar for dusting cake
- Lemon Version
- 4 eggs (separate yolks from whites) at room temperature
- 1 tsp vanilla extract
- 150 g (3/4 cup) sugar
- 125 g (1 stick or 1/2 cup) butter, melted
- 115 g (4 oz or 3/4 cup) of all purpose flour
- 1 3/4 cup milk lukewarm
- 1/4 cup fresh lemon juice
- zest from one lemon
- powdered sugar for dusting cake
Steps
- Preheat oven to 325 F degrees. Grease a 8 inch x 8 inch baking dish.
- Separate eggs and add the egg whites to a mixer and mix until egg whites are stiff. Place egg whites in a bowl and set aside.
- Beat the egg yolks with the sugar until light. Add butter and vanilla extract and continue beating for another minute or two after which you can add the flour and mix it in until fully incorporated.
- Slowly start adding the milk and beat until everything is well mixed together. Add the egg whites, a third at a time and gently fold them in using a spatula, repeat until all egg whites are folded in. Another variation to folding in the egg whites would be to add a third of the egg whites and gently whisk them in to the cake batter, then reverse the process and add a bit of the cake mixture to the egg whites and gently whisk in, repeat until all cake batter has been whisked in.
- Pour batter into baking dish and bake for 40 to 70 minutes or until the top is lightly golden. The baking time could vary greatly depending on the oven, so take a peek at around 40 minutes and see how it looks.
- Sprinkle some powdered sugar after cake has cooled.
Notes
- FAVORITE
↑ Back to top
Mama Stamberg's Cranberry Relish

Tags: Condiments
Holidays
Servings: 1 1/2 pints
Ingredients
- 2 cups whole raw cranberries, washed
- 1 small onion
- 3/4 cup sour cream
- 1/2 cup sugar
- 2 tablespoons horseradish from a jar ("red is a bit milder than white")
Steps
- Grind the raw berries and onion together. ("I use an old-fashioned meat grinder," says Stamberg. "I'm sure there's a setting on the food processor that will give you a chunky grind — not a puree.")
- Add everything else and mix.
- Put in a plastic container and freeze.
- Early Thanksgiving morning, move it from freezer to refrigerator compartment to thaw. ("It should still have some little icy slivers left.")
- The relish will be thick, creamy, and shocking pink. ("OK, Pepto Bismol pink. It has a tangy taste that cuts through and perks up the turkey and gravy. Its also good on next-day turkey sandwiches, and with roast beef.")
↑ Back to top
Mandarin Pancakes
Tags: Breads
Chinese
Ingredients
- 2 cups plus 2 tablespoons/280 grams all-purpose flour, plus more for dusting
- ⅓ cup plus 2 tablespoons/100 milliliters boiling water
- ⅓ cup plus 2 tablespoons/100 milliliters cold water
- Vegetable oil or roasted sesame oil, for brushing
Steps
- Place flour in a medium bowl. Add the boiling water in a thin stream while stirring with chopsticks or a wooden spoon. It helps to set the bowl in a heavy saucepan lined with a dish towel to keep it stable, or a friend stabilize the bowl as you do this. Add the cold water in a thin stream, continuing to mix the whole time. Stir the mixture until it turns into a shaggy ball, then dump the ball out onto a lightly floured work surface.
- Knead the dough with your hands until it forms a smooth ball, about 5 minutes. Cover the dough ball with a damp dish towel and let rest at room temperature for at least 30 minutes or up to a couple hours.
- Roll the dough into a log roughly 10 inches long, then cut it in half crosswise. Line up the two small logs, then section each one in 6ths to form 12 pieces (for approximate 8-inch pancakes); in 8ths for 16 pieces (for approximate 7-inch pancakes) or in 10ths for 20 pieces (for approximate 6-inch pancakes).
- Roll two pieces into smooth balls between your hands, working with one piece at a time. Then, using a rolling pin or wine bottle, gently roll each of the two pieces into circular disks about 1/4-inch thick. (You’ll cook two pieces at a time and proceed through the end of Step 7 before rolling out the remaining balls.)
- Brush the top of one disk with a thin, even layer of oil, then stack the second disk on top. Using a rolling pin, roll the stacked disks into a 6- to 8-inch circle. The size will depend on the number of balls you made in Step 3.
- Heat a cast-iron, carbon steel, or nonstick skillet over medium until a drop of water flicked onto the surface immediately bubbles and evaporates (about 2 minutes), then add the rolled, stacked disk. Let cook on one side until blistered and browned in spots, about 1 minute. Flip and cook until second side is blistered and browned. Sometimes the pancakes will bubble up with steam as they cook, preventing the second side from making good contact with the pan. You can gently press down on them with a flat spatula if this happens.
- Remove the cooked disk, then carefully peel it apart into two thin pancakes while still hot. Transfer to a plate and cover with a clean dish towel.
- Repeat Steps 4 through 7 for the remaining dough balls, adjusting heat as necessary to make sure the pancakes brown in spots but don’t blacken. Finished pancakes should be served while still warm. To store leftovers, place the pancakes on large squares of plastic wrap or aluminum foil, then roll them up like a jelly roll and refrigerate. Reheat covered in the microwave, or briefly heat one at a time in a hot, dry skillet.
↑ Back to top
Mango Tomatillo Salsa
Tags: Mexican
Salsas Tex-Mex
Is starred.
Ingredients
- 1 Jalapeno Chile diced
- 2 Seranno Chili diced
- 1 Poundcof Tomatillos, blanched until soft or a12oz Can, drained
- 1/4 cup Pineapple Juice
- 1/4 cup Orange Juice
- 1/4 cup White Vinegar
- 1 1/4 tablespoon Minced Garlic
- 1/4 cup Cilantro, chopped
- 1/4 cup lime juice
- 2 Large Ripe Mangoes
- 1 Red Onion diced small
- 1 Red Bell Pepper diced small
Steps
- In a blender or Food Processor, puree the tomatillos, pineapple and orange juices, vinegar, garlic, chile, cilantro and lime juice. Put remaining ingredients in bowl and add puree. Mix well.
Notes
- Be creative. Add some honey or other sweetener. Up the heat. Use other fruit. Etc.
↑ Back to top
Mango-Tomatillo Guacamole

Ingredients
- 2 ripe Hass avocados, halved, seeded and peeled
- 2 tomatillos, husked and finely chopped
- 1 ripe mango, peeled, seeded and cubed
- 1/2 small red onion, finely chopped
- 1 serrano chile, finely chopped (remove seeds before chopping for less heat)
- 2 tablespoons fresh cilantro, chopped
- 1 tablespoon fresh mint leaves, chopped
- 1 1/2 tablespoons fresh lemon juice
- kosher salt
- baked tortilla or pita chips, for serving
Steps
- Mash the avocados in a medium bowl with a fork, leaving them still a bit chunky.
- Fold in the tomatillos, mango, onion, chile, cilantro and mint.
- Add the lemon juice and gently mix to evenly distribute the ingredients. Season with salt.
- Lay a piece of plastic wrap directly on the surface of the guacamole to discourage discoloring, and refrigerate until chilled, at least 1 hour.
- Serve with the chips for dipping.
Notes
- FAVORITE
↑ Back to top
Maple Roasted Brussels Sprouts with Bacon
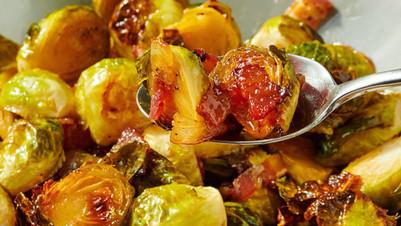
Servings: Original recipe (1X)
yields 8 servings
Ingredients
- Original recipe (1X) yields 6 servings
- 2 pounds Brussels sprouts
- 3 tbsp olive oil
- 1/2 tsp salt
- 5 slices bacon, crisp cooked and crumbled
- 1/4 teaspoon freshly ground black pepper
- 3 tablespoons pure maple syrup
Steps
- Gather all ingredients. Preheat the oven to 400 degrees F (200 degrees C). Line a rimmed baking sheet with aluminum foil.
Trim ends off Brussels
sprouts and cut any large ones in half
Arrange brussels sprouts on a
foil lined sheet pan drizzle with oil, sprinkle with salt and pepper
Roast in the preheated oven 10 minutes Drizzle with maple syrup toss
to
coat roast 10-15 minutes until brussels sprouts are tender and
beginning to brown. Toss with bacon
Serve warm and enjoy!
↑ Back to top
Maple Syrup Grandfathers (Sweet Dumplings)
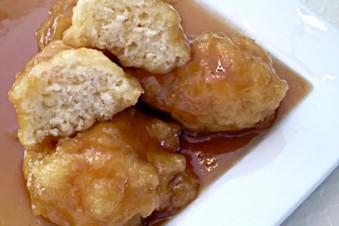
Servings: 8
Ingredients
- 1 cup water
- 1 3⁄4 cups maple syrup
- 1 1⁄2 cups all-purpose flour
- 1 tablespoon baking powder
- 1⁄2 teaspoon salt
- 1⁄4 cup butter
- 3⁄4 cup milk
Steps
- Mix water and maple syrup in a saucepan. Bring to boil and let simmer at a very low heat. Meanwhile, prepare the dough:.
- Dough: In a bowl, put flour, baking powder and salt. Add butter and rub with your hands.
- Add the milk and stir.
- With a spoon, let drop dough by spoonful directly in the boiling syrup.
- Cover and let simmer at very low heat for 15 minutes (Do not remove the cover in the 15 minutes).
↑ Back to top
Maple-Cured Bacon
Adapted from https://barbecuebible.com/recipe/maple-cured-bacon/

Tags: Charcuterie
Pork
Servings: 8
Ingredients
- 1/4 cup kosher salt
- 1/4 cup maple sugar
- 1/8 cup coarsely and freshly ground black pepper
- 1 1/2 teaspoons pink curing salt, such as Prague Powder #1
- One 3 to 4-pound pork belly, skinned
- 1/3 cup pure maple syrup, plus more for serving
- A dozen of your favorite biscuits for serving
- A dozen of your favorite biscuits for serving
For the cure:
You’ll also
need:
Steps
- Place the salt, maple sugar, pepper, and pink salt in a mixing bowl and mix well with your fingers, breaking up any lumps in the sugar.
- Place the pork belly on a wire rack over a rimmed baking sheet. Paint it on all sides with the maple syrup. Sprinkle half of the cure on top and rub it into the belly. Invert and sprinkle the remaining cure on the bottom and rub it in. Place the belly (plus any excess cure) in a large, sturdy, resealable plastic bag in a foil pan or roasting pan on the bottom shelf of your refrigerator.
- Cure the belly for 7 days, turning it over twice each day to redistribute the liquid that will accumulate.
- Drain the pork belly. Blot it dry with paper towels. Place the belly on a wire rack over a rimmed baking sheet in the refrigerator or in a cool place in front of a fan (the goal is to create good airflow) and let it dry until the surface feels tacky, 2 to 4 hours, or as long as overnight.
- Set up your smoker following the manufacturer’s instructions and preheat it to 250 degrees F. Add the maple wood chunks or chips to the coals. Place the pork belly directly on the grill grate. Smoke the pork belly until bronzed with wood smoke and firm, 3 to 4 hours. The internal temperature should reach 155 degrees F. (Insert an instant-read thermometer probe through the side of the bacon at one end.)
- Transfer the bacon to a wire rack over a baking sheet and let it cool to room temperature. Tightly wrap it in plastic wrap and refrigerate for at least 4 hours, ideally overnight.
- Slice and cook (grill, pan-fry, or bake in the oven). Split and grill or toast the biscuits. To serve, pile the cooked bacon on the biscuits. Drizzle with maple syrup and dig in!!
Notes
- Our thanks to the sponsors of Project Fire Season 3:
- Steven Raichlen’s Project Fire is a production of Maryland Public Television, Barbacoa, Inc., and Resolution Pictures. © 2021 Barbacoa, Inc. Photos by Chris Bierlein
↑ Back to top
Maple-Cured Canadian Bacon
Adapted from https://www.seriouseats.com/recipes/2012/03/maple-cured-canadian-bacon-grilled-recipe.html

Tags: Charcuterie
Cured Pork
Ingredients
- 1 gallon water, divided
- 1 cup kosher salt
- 1 cup maple syrup
- 1/3 cup light brown sugar
- 2 teaspoons pink salt (aka InstaCure, Prague Powder)
- 4 bay leaves
- 3 medium cloves garlic, smashed
- 1 tablespoon black peppercorns
- 1 boneless pork loin, trimmed of excess fat (about 4 to 5 pounds)
- 1 to 2 fist-size chunks of light smoking wood, such as apple or cherry
- Type of fire: Indirect
- Grill heat: Low
Steps
- To make the cure, combine 1 quart of water, Kosher salt, maple syrup, brown sugar, pink salt, bay leaves, garlic, and peppercorns in a medium saucepan. Bring to a boil over high heat, stirring to dissolve salts and sugar. Boil for 1 minute, then remove from heat. Transfer to a large container and stir in remaining 3 quarts of water. Place in refrigerator until completely chilled. Fully submerge pork loin in cure and let sit in refrigerator for 3 to 5 days.
- Remove pork from cure and place in large container. Add enough fresh water to fully submerge loin. Let sit for 30 minutes, then remove pork from water and pat dry with paper towels.
- Fire up the smoker or grill to 225°F, adding chunks of smoking wood chunks when at temperature. When wood is ignited and producing smoke, place pork in and cook until an instant read thermometer registers 140 degrees when inserted into thickest part of the pork loin, about 2 to 3 hours.
Let pork cool for 30 minutes.
Slice and pan fry before before serving.
↑ Back to top
Maple-Cured Canadian Bacon

Tags: Charcuterie
Cured Pork
Servings: 12 to 18
Ingredients
- 1 gallon water, divided
- 1 cup kosher salt
- 1 cup maple syrup
- 1/3 cup light brown sugar
- 2 teaspoons pink salt (aka InstaCure, Prague Powder)
- 4 bay leaves
- 3 medium cloves garlic, smashed
- 1 tablespoon black peppercorns
- 1 boneless pork loin, trimmed of excess fat (about 4 to 5 pounds)
- 1 to 2 fist-size chunks of light smoking wood, such as apple or cherry
Steps
- To make the cure, combine 1 quart of water, Kosher salt, maple syrup, brown sugar, pink salt, bay leaves, garlic, and peppercorns in a medium saucepan. Bring to a boil over high heat, stirring to dissolve salts and sugar. Boil for 1 minute, then remove from heat. Transfer to a large container and stir in remaining 3 quarts of water. Place in refrigerator until completely chilled. Fully submerge pork loin in cure and let sit in refrigerator for 3 to 5 days.
- Remove pork from cure and place in large container. Add enough fresh water to fully submerge loin. Let sit for 30 minutes, then remove pork from water and pat dry with paper towels.
- Fire up the smoker or grill to 225°F, adding chunks of smoking wood chunks when at temperature. When wood is ignited and producing smoke, place pork in and cook until an instant read thermometer registers 140 degrees when inserted into thickest part of the pork loin, about 2 to 3 hours.
- Let pork cool for 30 minutes. Slice and pan fry before before serving.
↑ Back to top
MAPLE-CURED SMOKED BACON

Tags: Charcuterie
Pork
Today, when people no longer need to preserve
food to survive, this recipe is a powerful reminder of America’s rich
culinary history. Likely made popular by English settlers in the
seventeenth and eighteenth centuries (all manner of cured pork sides
were, writes Alan Davidson in The Oxford Companion to Food, “peculiarly
a product of the British Isles”), cured or smoked pork has long been a
part of our cooking, essential in regional specialties from New England
chowders to Southern succotash. Making your own bacon embodies all the
reasons we should take the time to do it at home. There may be no
better flavor than good bacon, and even if you only have a charcoal
grill, you can achieve excellent results.
Many small producers make excellent versions of bacon in this country, varying with time of the cure and the seasonings used. This recipe is for a sweeter bacon. There should be some sugar or sweetness to balance the salt, but if you prefer a more savory taste, omit the maple syrup. If y
Many small producers make excellent versions of bacon in this country, varying with time of the cure and the seasonings used. This recipe is for a sweeter bacon. There should be some sugar or sweetness to balance the salt, but if you prefer a more savory taste, omit the maple syrup. If y
Servings: 4 pounds/2 kilograms
smoked slab bacon
Ingredients
- 2 ounces/50 grams kosher salt (about 1⁄4 cup)
- 2 teaspoons/12 grams pink salt
- 1⁄4 cup/50 grams maple sugar or packed dark brown sugar
- 1⁄4 cup/60 milliliters maple syrup
- One 5-pound/2.25-kilogram slab pork belly, skin on
THE CURE:
Steps
- 1. Combine the salt, pink salt, and sugar in a bowl and mix so that the ingredients are evenly distributed. Add the syrup and stir to combine.
- 2. Rub the cure mixture over the entire surface of the belly. Place skin side down in a 2-gallon Ziploc bag or a nonreactive container just slightly bigger than the meat. (The pork will release water into the salt mixture, creating a brine; it’s important that the meat keep in contact with this liquid throughout the curing process.)
- 3. Refrigerate, turning the belly and redistributing the cure every other day, for 7 days, until the meat is firm to the touch.
- 4. Remove the belly from the cure, rinse it thoroughly, and pat it dry. Place it on a rack set over a baking sheet tray and dry in the refrigerator, uncovered, for 12 to 24 hours.
- 5. Hot-smoke the pork belly (see page 77) to an internal temperature of 150 degrees F./65 degrees C., about 3 hours. Let cool slightly, and when the belly is cool enough to handle but still warm, cut the skin off by sliding a sharp knife between the fat and the skin, leaving as much fat on the bacon as possible. (Discard the skin or cut it into pieces and save to add to soups, stews or beans, as you would a smoked ham hock.)
- Yield: 4 pounds/2 kilograms smoked slab bacon
- A slab of pork belly should have equal proportions of meat and fat. This piece has been squared off and is ready for the cure.
- To cure bacon, the salts, sugars, and spices are mixed and spread all over the meat. The bacon can be cured in a pan or in a 2-gallon Ziploc bag.
6. Let the bacon cool, then
wrap in plastic and refrigerate or freeze it until ready to use.
↑ Back to top
Margarita's Tomato Fritters with Cod

Servings: 6 to 8
Ingredients
- 1 salt cod fillet, about 1 ½ pounds, desalted*
- 2 red onions, finely chopped
- 10 scallions, trimmed and chopped
- Salt to taste
- 3 pounds / 1 ½ kilos small, firm but not juicy tomatoes, such as grape tomatoes
- 3 small round or oblong zucchini, grated on the coarse side of a (just the outer part, not the inside with seeds)
- 1 cup chopped fresh basil leaves
- 3 tablespoons dried mint
- Black pepper to taste
- 3 to 6 cups of all-purpose flour, as needed
- Corn oil for frying
Steps
- Break up the cod into pieces about 2 inches / 5 cm square. Place in a bowl and fill with cold water. Refrigerate, changing the water every few hours, for 24 to 48 hours. Remove and break apart into shreds. Set aside.
- Chop the onions and scallions and place them in a large bowl. Add a scant teaspoon of salt and knead the onion-scallion mixture until soft. Add tomatoes whole.
- Cut the zucchini into quarters, lengthwise. Using a paring knife, remove and discard any seeds. Coarsely chop the zucchini and add it to the onion-scallion-tomato mixture. Add the chopped basil and dried mint. Chop up the shredded cod and add that, too, to the mix. Season to taste with additional salt and pepper.
- Knead the mixture, adding enough flour as you go to form a dense mass that holds its shape on a spoon when scooped up and held upside down.
- Over medium-high heat, heat 2 inches / 5 cm corn oil in a large, deep skillet or wide pot to 350F/176C. Take a teaspoon at a time of the mixture and, using a second teaspoon, slide the mixture into the oil. Do this in batches, filling but not overcrowding the pan. Fry for about 2 minutes, turn and fry on the other side, and remove with a slotted spoon when nice and golden. Drain on paper towels and serve.
↑ Back to top
Marinated Cucumbers, Onions, and Tomatoes
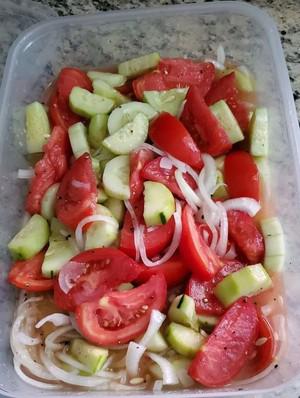
Tags: Salad
Ingredients
- 3 medium cucumbers, peeled and sliced 1/4 inch thick
- 1 medium onion, sliced and separated into rings
- 3 medium tomatoes, cut into wedges
- 1/2 cup vinegar
- 1/4 cup sugar
- 1 cup water
- 2 teaspoons salt
- 1 teaspoon fresh coarse ground black pepper
- 1/4 cup oil
- 1 teaspoon chopped fresh mint (optional)
Steps
- Combine all ingredients in a large bowl.
- Toss well to mix.
- Refrigerate at least 2 hours before serving.
↑ Back to top
Martas

Ingredients
- 3 3/4 Cups flour (Joyce uses unbleached)
- 1/2 tsp. baking powder
- 1 tsp. baking soda
- 1/2 tsp. SALT (Joyce uses SEA SALT)
- 1 tsp. PENZEYS CINNAMON
- 1/2 to 1 tsp. GROUND NUTMEG
- 1/2 tsp. GROUND ALLSPICE
- 1/4 tsp. GROUND CLOVES
- 1 Cup vegetable shortening
- 1 Cup sugar
- 1 Cup packed light brown sugar
- 2 eggs
- 1 tsp. PURE VANILLA EXTRACT
- 1 Cup buttermilk (regular milk will work)
- 3/4 Cups raisins
- 3/4 Cup finely chopped nuts (Joyce uses walnuts)
Steps
- Preheat oven to 350°. Sift together the flour, baking powder, baking soda, SALT and SPICES. In a separate bowl, cream together the shortening and sugars until blended. Add the eggs, one at a time, and beat until fluffy. Blend in the VANILLA. Add the flour mixture alternately with the buttermilk or milk until blended. Stir in the raisins and nuts. Drop by the teaspoon onto greased cookie sheets about 2 inches apart and bake for 10-15 minutes or until lightly browned. Don't over-bake. The cookies will be soft. Store in an airtight container or freeze.
↑ Back to top
Matzo Bagels/Rolls

Tags: Breads
Holidays Jewish
Ingredients
- 1 cup water
- 1/2 cup oil
- 1 1/2 cups matzo meal
- 1/2 cup matzo cake meal
- 1 tbl sugar
- 1/2 tsp salt
- 5 eggs
Steps
- Bring water and oil to a boil and let stand for 10 minutes. Add the dry ingredients. Stir in eggs, one at a time, beating well after each addition. Drop on cookie sheet. Bake at 350° for 50 minutes.
Notes
- FAVORITE
↑ Back to top
Matzo Balls

Tags: Dumplings
Jewish
From David Rosengarten
I made this. Is starred.
Servings: MAKES 8 MATZO BALLS
Ingredients
- 2 large eggs, well beaten with a fork
- 3 tablespoons unflavored seltzer, sparking mineral water, or club soda
- 2 tablespoons rendered chicken fat, melted (you could substitute vegetable oil)
- 1/4 teaspoon coarse salt
- 1/4 teaspoon freshly ground black pepper
- 1/2 cup matzo meal
Steps
- Mix the eggs, seltzer, chicken fat, salt, and pepper in a bowl. Gradually stir in the matzo meal, stirring until everything is well combined. Chill, covered, in the refrigerator for at least 4 hours and up to 8 hours.
- Bring a pot of salted water to a boil. Using cool, wet hands shape the matzo mixture into 8 balls, each about 1/2 inches in diameter. Reduce the heat to simmering and gently add the matzo balls. Cover the pot and poach the matzo balls in the barely simmering water for
↑ Back to top
Matzoh Ball Soup
Ingredients
- 2 1/2 to 3 pound chicken
- 1 large onion, studded with 3 cloves
- 2 carrots, quartered
- 2 small stalks celery, cut into 3-inch pieces
- 2 small leeks, split lengthwise
- 1 parsley root, trimmed
- 2 parsnips, quartered
- Sprig of fresh thyme or 1 teaspoon dried
- 6 parsley sprigs
- Salt to taste
- 2 large eggs, beaten lightly
- 3 tablespoons seltzer
- 2 tablespoons rendered chicken fat, melted
- 1/4 teaspoon Kosher salt
- 1/4 teaspoon black pepper
- 1/2 cup Matzoh Meal
Steps
- Place chicken in a large soup pot. Cover with water and bring to a boil. Lower the heat to a simmer and skim as needed. Simmer 10 minutes and add vegetables and herbs. Bring back to a boil and simmer, partially covered, for 1 1/2 hours. Strain, removing fat from surface, and reduce to 6 cups, to concentrate flavor.
- In a bowl mix the eggs, seltzer, chicken fat, salt and pepper. Gradually stir in the matzoh meal until everything is well combined. Chill, covered, in the refrigerator for at least 4 hours and up to 8 hours
- Bring a pot of salted water to a boil and using cool, wet hands, shape the matzoh mixture into eight balls about 1 1/2-inches in diameter. Reduce the heat to simmering and gently add the matzoh balls. Cover the pot and poach the matzoh balls in the barely simmering water for 25 minutes. Add matzoh balls to soup and serve. Drink: Seltzer
- Recipe courtesy of David Rosengarten
Notes
- FAVORITE
↑ Back to top
A Meal Fit for a Doctor

Ingredients
- 1 pound haddock or Pollock fillets
- 1 3/4 cups panko, divided
- 3 eggs, divided
- 1 tablespoon mayonnaise
- 1 tablespoon Dijon mustard
- 1/2 teaspoon onion powder
- 1/2 teaspoon kosher salt
- 1/4 teaspoon cayenne pepper
- 1/2 cup all purpose flour
- 1 cup whole milk
- 1 tablespoon cornstarch
- 1 teaspoon Dijon mustard
- 1 teaspoon freshly squeezed lemon juice
- 1/2 teaspoon kosher salt
- 1 egg yolk, whisked
- 1 teaspoon fresh chopped dill
- several grinds of white pepper
The Sticks:
The Custard:
Steps
- Fish Fingers
- Place the fish fillets in the freezer for 30 minutes or until firm. (If you bought them frozen, thaw for half an hour at room temp).
- When the fish is just soft enough to cut, finely chop.
- Place in a bowl along with 3/4 cup panko, 1egg, mayonnaise, mustard, onion powder, salt and cayenne pepper. Use your hands or a large spoon to combine well.
- Shape the fish mixture into 1 1/2 ounce finger-shaped sticks. Set on a sheet pan and refrigerate for 30 minutes.
- Beat the remaining 2 eggs in a shallow pie pan.
- Place the remaining cup of panko in a second pie pan and the flour in a third.
- Roll each stick in the flour, then egg, followed by the panko.
- Heat the oil in wide, non-stick skillet over medium heat (or an electric skillet to medium high) until it shimmers. Add the fish sticks and cook for 2 to 3 minutes on each side or until golden brown. Total cook time 8 to 12 minutes.
- Cool slightly before consuming.
- Custard
- Place all ingredients except egg yolk and dill into a lidded container and shake until no lumps remain. Pour mixture into a small, 1-quart saucepan and set over medium low heat. Cook, stirring constantly until the mixture just boils. Remove from the heat and whisk a very small amount of the hot mixture into the beaten egg a little at a time. Once half of the mixture has been incorporated, return the entire thing back to the saucepan and set over low heat. Whisk constantly until the mixture thickens enough to coat the back of a spoon. Remove from the heat, stir in the dill and pepper then transfer to a bowl and cool slightly before serving with the fish sticks!
Notes
- FAVORITE
↑ Back to top
Meat Loaf

I made this. Is starred. Rated 5/5
Ingredients
- 1/2 cup bread crumbs, preferably fresh
- 1/2 cup milk
- 2 pounds mixed ground meats: beef, veal, lamb, and/or pork (you can use turkey or chicken also if you like)
- 1 egg, lightly beaten
- 1/2 cup freshly grated Parmesan cheese
- 1/4 cup minced fresh parsley leaves
- 1/2 teaspoon minced garlic
- 1 small onion, minced
- 1 small carrot, minced
- 1 teaspoon minced fresh sage leaves or 1 pinch dried sage leaves
- Salt and freshly ground black pepper
- 3 slices bacon (optional but good, especially if the meat is very lean)
Steps
- Heat the oven to 350°F. Soak the bread crumbs in the milk until the milk is absorbed, about 5 minutes.
- Mix together all the ingredients except the bacon. Shape the meat into a loaf in a baking pan; top with the bacon if you like. Bake for 45 to 60 minutes, basting occasionally with the rendered pan juices. When done, the meat loaf will be browned lightly and firm and an instant-read thermometer inserted into the center will read 160°F.
Notes
- Free-form meat loaf has several advantages over those cooked in loaf pans: It develops a lovely crust on three sides instead of just one, and the fat can run off, rather than become trapped between pan and meat. Plus it’s easy to shape by hand and always turns out in the shape you wanted. You can also shape this mixture into meatballs if you like; just bake them for about half the time.
↑ Back to top
Meatballs
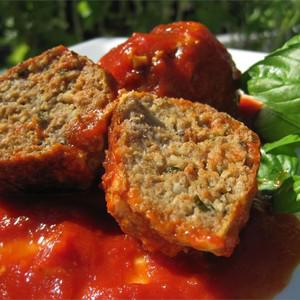
Tags: Meat
Pates and Meatloaves
Best
Servings: Original recipe yields
8 servings
Ingredients
- 1 pound ground beef
- ½ pound ground veal
- ½ pound ground pork
- 2 cloves garlic, minced
- 2 eggs
- 1 cup freshly grated Romano cheese
- 1 ½ tablespoons chopped Italian flat leaf parsley
- salt and ground black pepper to taste
- 2 cups stale Italian bread, crumbled
- 1 ½ cups lukewarm water
- 1 cup olive oil
Steps
- Combine beef, veal, and pork in a large bowl. Add garlic, eggs, cheese, parsley, salt and pepper.
- Blend bread crumbs into meat mixture. Slowly add the water 1/2 cup at a time. The mixture should be very moist but still hold its shape if rolled into meatballs. (I usually use about 1 1/4 cups of water). Shape into meatballs.
- Heat olive oil in a large skillet. Fry meatballs in batches. When the meatball is very brown and slightly crisp remove from the heat and drain on a paper towel. (If your mixture is too wet, cover the meatballs while they are cooking so that they hold their shape better.)
↑ Back to top
Melitzanosalata Me Kapari Kai Kremmydia (Roasted Eggplant
Salad with Capers and Onions)
Adapted from https://www.dianekochilas.com/melitzanosalata-me-kapari-kai-kremmydia-roasted-eggplant-salad-with-capers-and-onions/
Servings: For 6 to 8 meze
servings
Ingredients
- 3 large eggplants
- 1/2 cup extra-virgin olive oil
- Pinch of sugar if needed
- 1 medium onion finely chopped
- 3 cloves garlic, pressed through a garlic crusher or minced
- 1/4 cup small pickled capers, rinsed and drained
- 1 large firm tomato, diced
- 1/4 cup finely chopped flat-leaf parsley
- 2 tablespoons greek balsamic
- Salt and freshly ground black pepper to taste
Steps
- Wash and pat dry the eggplants. Roast them whole over an open flame on the stove or under the broiler, turning, until the skins are charred on all sides. (This may also be done on a barbecue.) Remove and cool slightly.
- Have a bowl ready with the olive oil. Cut the eggplants open lengthwise and remove as many of the seeds as possible. Scoop out the pulp and place it in the bowl with the olive oil. Salt lightly. With a fork and knife, cut the eggplant so that it is chunky. Add the onion, garlic, capers, tomato and parsley and mix with a fork to combine well. Add the vinegar, and adjust seasoning with additional salt, pepper and vinegar if desired.
↑ Back to top
Melon Basil Summer Rolls
Ingredients
- about 15 rice paper wrappers
- spicy cilantro almond pesto
- about 1/2 purple cabbage - thinly sliced
- 1/4 to 1/2 ripe sweet melon such as Honeydew
- 2 to 3 medium carrots - finely shredded
- 2 cups fresh basil leaves
- large handful
- Tamarind Dipping Sauce
- 1/4 cup almond butter
- 1/4 cup tamarind paste
- 2 tablespoons freshly squeezed lime juice
- 1 tablespoon fresh grated ginger
- 1 tablespoon maple syrup or honey
- 1/2 tablespoon olive oil
- 1 teaspoon soy sauce
- 1/2 small red chili - seeded and minced (optional)fresh mint leaves - optional
Steps
- Cut the melon in half, remove the seeds, peel and slice the flesh into strips.
- Prepare a large bowl of warm water and a working area covered with a damp dish towel. Start dipping your wrappers in the water, one at a time, for a minute or so, until it begins to soften. Don't keep the wrapper in the water too long to prevent tearing.
- Place each wrapper on a damp dish towel (one at a time) and begin to fill it. Spread about 1 teaspoon of pesto in the middle of the wrapper, followed by cabbage, 1-2 melon strips, carrots and herbs.
- Fold the bottom part of the wrapper over the filling, followed by the sides, then roll it tightly.
- Serve right away with the sauce or keep covered with a damp dish or paper towel until ready to serve. These rolls are best when eaten within a day or two.
- Sauce
- In a medium bowl, mix together all of the ingredients thoroughly. Keep refrigerated until ready to serve.
Notes
- FAVORITE
↑ Back to top
Melopita (Honey Pie)

Servings: 8
Ingredients
- 1 1/2 cups of strained ricotta cheese
- zest of 1/2 lemon
- 1 tbsp. vanilla extract
- 1/2 cup honey
- 2 large eggs
- 1 1/2 Tbsp. corn starch
Steps
- Pre-heat your oven to 325F. Into a bowl, add the strained ricotta, lemon zest, vanilla and honey and use a hand mixer to whip the ingredients together for 5 minutes.
- Add the eggs one at a time and then the corn starch and mix until incorporated.
- Grease a 7-inch round pan with oil or cooking spray and place a fitted piece of parchment paper on the bottom of the pan.
- Pour your filling into the pan, tap a couple of times and place in the middle rack of your oven and bake for approx. 50 minutes or until the center has just set (jiggles a little). Remove from the oven and allow to cool completely.
- To serve, place a plate on top of the pie and carefully invert (the pie should now be inverted on your plate.
- Cut into 8 pieces and serve with drizzled honey and ground cinnamon.
Notes
- Ricotta Cheese means recooked and it’s made from the whey leftover from making another cheese. In Greece it’s called anthotyro or fresh mizythra. At the market, buy a good quality ricotta that is thick otherwise you may have to strain it for a couple of hours in the fridge by placing in in a sieve.
↑ Back to top
Mexican Orange Cookies
I made this.
Ingredients
- 1 c shortening
- 1 1/2 c sugar
- 1 egg
- grated rind 1 orange
- 4 c flour
- 1tsp salt
- 1 tsp Baking powder
- 1 tsp cinnamon
- 1 tsp cloves
- 1/2 c ground pecans
- juic one orange
Steps
- Cream sugar and shortening
add egg and orange rind
add dry ingredients and
orange juice alternating
roll and cut
bake at 400 degrees 8-10
minutes
↑ Back to top
Mexican Pulled Pork (Carnitas)
Tags: Mexican
Pork
We like serving carnitas spooned into tacos, but
you can also use it as a filling for tamales, enchiladas, and burritos.
Servings: 6
Ingredients
- 1 (3½- to 4-pound) boneless pork butt, fat cap trimmed to ⅛ inch thick, cut into 2-inch chunks
- 1 small onion, peeled and halved
- 2 bay leaves
- 1 teaspoon dried oregano
- 1 teaspoon ground cumin
- Table salt and ground black pepper
- 2 cups water
- 2 tablespoons juice from 1 lime
- 1 medium orange, halved
- 18 (6-inch) corn tortillas, warmed
- Lime wedges
- Minced white or red onion
- Fresh cilantro leaves
- Thinly sliced radishes
- Sour cream
PORK:
TORTILLAS AND
GARNISHES:
Steps
- 1. Adjust an oven rack to the lower-middle position and heat the oven to 300 degrees. Combine the pork, onion, bay leaves, oregano, cumin, 1 teaspoon salt, ½ teaspoon pepper, water, and lime juice in a large Dutch oven (the liquid should just barely cover the meat). Juice the orange into a medium bowl and remove any seeds (you should have about ⅓ cup juice). Add the juice and spent orange halves to the pot. Bring the mixture to a simmer over medium-high heat, stirring occasionally. Cover the pot and transfer it to the oven; cook until the meat is soft and falls apart when prodded with a fork, about 2 hours, flipping the pieces of meat once during cooking.
2.
Remove the pot from the oven and turn the oven to broil. Using a
slotted spoon, transfer the pork to a bowl; remove the orange halves,
onion, and bay leaves from the cooking liquid and discard (do not skim
the fat from the liquid). Place the pot over high heat (use caution,
as
the handles will be very hot) and simmer the liquid, stirring
frequently, until thick and syrupy (a heatproof spatula should leave a
wide trail when dragged through the glaze), 8 to 12 minutes. You
should
have about 1 cup reduced liquid.
3.
Using two forks, pull each piece of pork in half. Fold in the reduced
liquid; season with salt and pepper to taste. Spread the pork in an
even layer on a wire rack set over a rimmed baking sheet or on a
broiler pan (the meat should cover almost the entire surface of the
rack or broiler pan). Place the baking sheet on the lower-middle oven
rack and broil until the top of the meat is well browned (but not
charred) and the edges are slightly crisp, 5 to 8 minutes. Using a
wide
metal spatula, flip the pieces of meat and continue to broil until the
top is well browned and the edges are slightly crisp, 5 to 8 minutes
longer. Serve immediately with the warm tortillas and garnishes.
↑ Back to top
Mexican Style Gefilte Fish
Tags: Fish
Jewish
Do You Want It Red or White?
Ingredients
- 1 pound red snapper fillets no skin or bones
- 1 pound flounder fillets no skin or bones
- 1/2 white onion quartered, about 1/2 pound
- 2 carrots peeled and roughly chopped, about 1/4 pound
- 3 eggs
- 1/2 cup matzo meal
- 2 teaspoons kosher or sea salt or to taste
- 1/2 teaspoon ground white pepper or to taste
- 3 tablespoons safflower or corn oil
- 1/2 cup white onion chopped
- 1 28-ounce can crushed tomatoes
- 3 cups fish broth or water
- 2 tablespoons ketchup
- 1 teaspoon kosher or sea salt or to taste
- 1/4 teaspoon ground white pepper or to taste
- 1 cup manzanilla olives stuffed with pimientos
- 8 pepperoncini peppers in vinegar brine or more to taste, chiles güeros en escabeche
- 2 tablespoons capers
For the fish
patties:
For the red
sauce:
Steps
- Rinse the red snapper and flounder fillets under a thin stream of cool water. Slice into smaller pieces and place in the food processor. Pulse for 5-10 seconds until fish is finely chopped but hasn’t turned into a paste. Turn fish mixture into a large mixing bowl. Then place the onion, carrots, eggs, matzo meal, salt and white pepper into same bowl of the food processor. Process until smooth and turn into the fish mixture. Combine thoroughly.
- Heat the oil in a large cooking pot over medium-high heat. Add the chopped onion, and let it cook for 5-6 minutes, stirring, until soft and translucent. Pour the crushed tomatoes into the pot, stir, and let the mix season and thicken for about 6 minutes. Incorporate 3 cups water, 2 tablespoons ketchup, salt and white pepper. Give it a good stir and bring to a boil. Reduce the heat to low and bring sauce to a gentle simmer. Continue to simmer while you roll the gefilte fish patties.
- Place a small bowl with lukewarm water to the side of the simmering tomato broth. Start making the patties. I like to make them about 3” long, 2” wide and 1” high, in oval shapes. Wet your hands as necessary, so the fish mixture will not stick to your hands. As you make them, gently slide each patty into the simmering broth. Make sure it is simmering and raise the heat to medium if necessary to keep a steady simmer.
- Once you finish making the patties, cover the pot and bring the heat to low. Cook them covered for 25 minutes. Take off the lid, incorporate the manzanilla olives, pepperoncini peppers and capers. Give it a gentle stir and simmer uncovered for 20 more minutes, so the gefilte fish will be thoroughly cooked and the broth will have seasoned and thickened nicely.
- Serve hot with slices of challah and pickles.
To prepare the fish
patty mixture:
To prepare the red
sauce:
↑ Back to top
Mexican Tamales
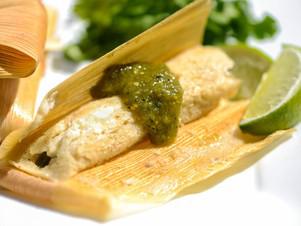

Tags: Mexican
Ingredients
- 2 pounds fresh masa for tamales from a tortilleria or 3 cups of masa harina para tamales mixed with 2 cups water or chicken stock and left to rest, covered, for 15 minutes (see note)
- 8 ounces lard, preferably back lard (see note)
- 2 teaspoons baking powder
- 2 teaspoons kosher salt
- 1 cup homemade chicken stock or store-bought low-sodium broth, plus more as needed
- 6 medium poblano peppers
- 1 pound Oaxacan cheese, pulled into thin strips approximately 3-inches long
- 6 medium guajillo chiles, stemmed and seeded
- 3 medium ancho chiles, stemmed and seeded
- 3 chiles de arbol, stemmed and seeded
- 4 medium cloves garlic, smashed and peeled
- 1/2 teaspoon ground cumin
- 1 tablespoon canola or vegetable oil
- 2 cups homemade chicken stock or low-sodium broth
- 2 pounds boneless, skinless chicken thighs
- Kosher salt and freshly ground black pepper
- 4 medium poblano peppers
- 1 medium jalapeño
- 1 pound tomatillos, husked, washed, and halved
- 3 mediums cloves garlic, smashed and peeled
- 1 cup packed roughly chopped fresh cilantro leaves and tender stems
- 1 cup homemade chicken stock or low-sodium broth
- 2 tablespoons juice from 1 lime
- Kosher salt
- Sugar, to taste
- 4 cups shredded pork carnitas
Basic Tamale
Dough:
Tamales With
Rajas and Oaxacan Cheese Recipe:
Tamales With
Red Chili and Chicken Filling:Tamales With Green Chili and Pork:
Steps
- Combine lard, salt, and baking powder and, using an electric mixer, beat at medium-high speed until well whipped, about 1 minute.
- Add one-fourth of the masa at a time to the lard, beating between additions until thoroughly incorporated. Add chicken stock and continue beating until dough is light and has a soft and spreadable hummus-like texture. Cover masa with plastic and refrigerate for 1 hour.
- Remove masa from refrigerator and re-whip, adding additional chicken stock 1 tablespoon at a time, if necessary, to return it to original hummus-like texture. Use tamale dough in any tamale recipe (see links above for ideas, assembly, and cooking instructions).
- Roast peppers directly over the flame of a gas stove, grill, or under a hot broiler, turning occasionally, until skin is completely charred and blackened all over. Place in a bowl, cover with plastic wrap, and let stand until cool enough to handle, 10 to 15 minutes. Using paper towels, rub off charred skin, then stem and seed poblanos. Slice peppers into strips 1/4 inch thick and 2 to 3 inches long.
- Combine all the dried chiles in a large Dutch oven or cast iron skillet and cook over medium-high heat, flipping chiles frequently, until slightly darkened and aromatic, about 3 minutes.
- Transfer chiles to a medium saucepan and cover with 4 cups water. Bring to a boil over high heat, then reduce heat to low and simmer until chiles are very soft, about 20 minutes. Strain chiles through a fine-mesh strainer set over a medium bowl. Transfer chilies and 1 cup of steeping liquid to the jar of a blender.
- Add garlic and cumin and puree until smooth. Using a rubber spatula, push sauce through a fine-mesh strainer set over a medium bowl. Discard solids in strainer.
- Heat oil in a large Dutch oven over medium-high heat until shimmering. Add red chili sauce and cook, stirring constantly, until thickened to the consistency of tomato paste, about 5 minutes. Stir in chicken stock and bring to a boil. Nestle chicken thighs in sauce, reduce heat to medium, cover, and cook until thickest part of thigh registers between 175-185°F on an instant-read thermometer, about 20 minutes. Transfer chicken to plate and let stand until cool enough to handle, then shred by hand or using two forks.
- While chicken is cooling, increase heat to medium-high and let sauce boil until slightly thickened. Remove from heat, let cool slightly, then season with salt and pepper. Add shredded chicken to sauce and stir to combine. Set aside.
- Preheat broiler. Roast poblanos and jalapeño peppers directly over the flame of a gas stove, grill, or under a hot broiler, turning occasionally, until skin is completely charred and blackened all over. Place in a bowl, cover with plastic wrap, and let stand until cool enough to handle, 10 to 15 minutes. Using paper towels, run off charred skins, then stem and seed peppers. Transfer to the jar of a blender and set aside.
- Meanwhile, place tomatillos on a baking sheet, cut sides down. Broil until tomatillos have charred and softened, about 10 minutes. Transfer to blender with peppers, along with any liquid.
- Add garlic, cilantro, chicken stock and lime juice and puree until smooth. Transfer salsa to a large bowl and season with salt and sugar to taste. Stir in shredded pork and set aside. See Note.
Basic Tamale Dough:
Tamales With Rajas and
Oaxacan Cheese Recipe:
Tamales With Red Chili
and Chicken Filling:
Tamales With Red Chili
and Chicken Filling:
Tamales With Green Chili
and Pork :
Notes
- If you don't have shredded pork available, you can simmer 2 pounds of cubed boneless pork shoulder in the green chile sauce, covered, until fork tender and then shred. Additional chicken stock may be required to thin out the sauce if it thickens too much during cooking.
↑ Back to top
Microwave Sticky Toffee Pudding
Adapted from https://www.instagram.com/

Ingredients
- 2 tablespoons unsalted butter
- 3 tablespoons dark brown sugar
- 3 tablespoons heavy cream
- Salt
- 2 Medjool dates, pitted and chopped
- ¼ teaspoon baking soda
- ¼ cup/28 grams all-purpose flour
- ⅛ teaspoon ground cinnamon
- Sour cream, vanilla ice cream or whipped cream, for serving
Steps
- In a small bowl or mug, melt 1 tablespoon butter in the microwave, about 30 seconds. Add 2 tablespoons brown sugar, 1 tablespoon heavy cream and a pinch of salt. Microwave in 30-second bursts, stirring between each, until the sugar is melted and the mixture comes together into a sauce, 30 seconds to 1 minute. Set aside; the sauce will thicken as it sits.
- In a microwave-safe bowl or ramekin that holds at least 12 fluid ounces/1½ cups, combine the dates, remaining 1 tablespoon butter, remaining 2 tablespoons cream and the baking soda. Microwave until the butter has melted, 30 seconds to 1 minute. Mash the dates with a fork until broken down.
- Add the flour, remaining tablespoon brown sugar, cinnamon and pinch of salt and stir just until combined. Spread into an even layer. Microwave until the top is just set, 45 seconds to 1 minute. Dollop with sour cream, vanilla ice cream or whipped cream and drizzle with the caramel sauce. Eat warm.
↑ Back to top
Minestrone alla Romagnola—Vegetable Soup, Romagna Style
Adapted from file:///C:/Users/USSENT~1/AppData/Local/Temp/calibre_8yh4g333/jhg_526a-ee-ow/Haza_9780307958303_epub_c03_r1.htm

Tags: Italian
Soups
Servings: 6 to 8
Ingredients
- 1 pound fresh zucchini
- ½ cup extra virgin olive oil
- 3 tablespoons butter
- 1 cup onion sliced very thin
- 1 cup diced carrots
- 1 cup diced celery
- 2 cups peeled, diced potatoes
- ¼ pound fresh green beans
- 3 cups shredded Savoy cabbage OR regular cabbage
- 1½ cups canned cannellini beans, drained, OR ¾ cup dried white kidney beans, soaked and cooked as directed
- 6 cups Basic Homemade Meat Broth, OR 2 cups canned beef broth plus 4 cups water
- OPTIONAL: the crust from a 1- to 2-pound piece of parmigiano-reggiano cheese, carefully scraped clean
- ⅔ cup canned imported Italian plum tomatoes, with their juice
- Salt
- ⅓ cup freshly grated parmigiano-reggiano cheese
Steps
- Soak the zucchini in a large bowl filled with cold water for at least 20 minutes, then rinse them clean of any remaining grit. Trim both ends on each zucchini and dice the zucchini fine.
- Choose a stockpot that can comfortably accommodate all the ingredients. Put in the oil, butter, and sliced onion and turn on the heat to medium low. Cook the onion in the uncovered pot until it wilts and becomes colored a pale gold, but no darker.
- Add the diced carrots and cook for 2 to 3 minutes, stirring once or twice. Then add the celery, and cook, stirring occasionally, for 2 or 3 minutes. Add the potatoes, repeating the same procedure.
- While the carrots, celery, and potatoes are cooking, soak the green beans in cold water, rinse, snap off both ends, and dice them.
- Add the diced green beans to the pot, and when they have cooked for 2 or 3 minutes, add the zucchini. Continue to give all ingredients an occasional stir and, after another few minutes, add the shredded cabbage. Continue cooking for another 5 to 6 minutes.
- Add the broth, the optional cheese crust, the tomatoes with their juice, and a sprinkling of salt. If using canned broth, salt lightly at this stage, and taste and correct for salt later on. Give the contents of the pot a thorough stirring. Cover the pot, and lower the heat, adjusting it so that the soup bubbles slowly, cooking at a steady, but gentle simmer.
- When the soup has cooked for 2½ hours, add the drained, cooked cannellini beans, stir well, and cook for at least another 30 minutes. If necessary, you can turn off the heat at any time and resume the cooking later. Cook until the consistency is fairly dense. Minestrone ought never to be thin and watery. If you should find that the soup is becoming too thick before it has finished cooking, you can dilute it a bit with some more homemade broth or, if you started with canned broth, with water.
- When the soup is done, just before you turn off the heat, remove the cheese crust, swirl in the grated cheese, then taste and correct for salt.
↑ Back to top
Misir Wat
Tags: Beans and Other
Legumes Ethiopia
Servings: 4
Ingredients
- 125 g (½ cup) unsalted butter
- ½ red onion, chopped
- 1 garlic clove, sliced
- 3 cm (1¼ inch) ginger, chopped
- ½ teaspoon korekima or 4 green cardamom pods, bruised
- ½ teaspoon black peppercorns
- ¼ teaspoon ground turmeric
- 2 tablespoons neutral oil
- 2 red onions, finely chopped
- 4 tablespoons berbere
- 1 teaspoon fine sea salt
- 6 tablespoons finely chopped tinned tomatoes
- 300 g (1½ cups) split red lentils, well washed
- 7 garlic cloves, minced
- 5 cm (2 inches) ginger, peeled and minced (1½ tablespoons)
- 2 ripe tomatoes, chopped
- ½ red onion, finely chopped
- 2 garlic cloves, finely chopped
- 2 green finger chillies, finely chopped
- 1 tablespoon extra-virgin olive oil
- Juice of ½ a lemon
- Ethiopian injera bread, to serve (optional)
FOR THE NITE
KIBBEH:
SPICED BUTTER:
FOR THE MISIR
WAT:
FOR THE
ETHIOPIAN SALAD:
Steps
- Put all the nite kibbeh ingredients in a small pan and melt over a low heat. Simmer gently for about 20 minutes. The butter solids should separate but be sure they don’t burn. Leave to cool and infuse, but not solidify. Strain through a fine sieve or muslin to remove both the foam and aromatics.
For
the misir wat, heat the oil and 2 tablespoons of the nite kibbeh over
a
medium-high heat. Add the onion and soften. Stir in the berbere and
salt and fry, stirring until aromatic. Add the tomatoes and cook for a
few minutes until rich and dark - keep stirring. Stir in the lentils,
wet from washing, and lower the heat. Cover and cook for 3 minutes.
Stir, then add 600 ml (2⅓ cups) water. Cover, bring to the boil and
cook at a lively bubble for 10 minutes. Mix in the garlic, ginger and
a
splash of water if it looks too thick. Cover and cook for 5 minutes.
Meanwhile, combine all the ingredients for the salad, waiting until
the
last moment before adding the lemon juice. Season with salt.
Either drizzle melted nite kibbeh over each serving or stir a
tablespoon of it into the pot. Eat by scooping up with the injera
bread
and serve the salsa-like salad alongside.
↑ Back to top
Misir Wat (Ethiopian Spiced Red Lentils)
Tags: Ethiopia
I made this.
Ingredients
- 4 tablespoons niter kibbeh , divided
- Homemade Niter Kibbeh (strongly recommended)
- 1 large yellow onion, very finely diced
- 3 cloves garlic, finely minced
- 1 Roma tomato, very finely chopped
- 3 tablespoons tomato paste
- 2 tablespoons bebere , divided
- Homemade Berbere (strongly recommended)
- 1 cup red lentils, rinsed
- 2 1/2 cups Aneto All-Natural Chicken Broth
- vegetarians: use Aneto Vegetable Broth
- 1 teaspoon salt
Steps
- Melt 3 tablespoons of the niter kibbeh in a medium stock pot. Add the onions and cook over medium-high heat for 8-10 minutes until golden brown.
- Add the garlic, tomatoes, tomato paste and 1 tablespoon of the berbere and cook for 5-7 minutes. Reduce the heat if needed to prevent burning.
- Add the broth and salt, bring it to a boil, reduce the heat to low and cover and simmer the lentils, stirring occasionally, for 40 minutes (adding more broth if needed) or until the lentils are soft.
- Stir in the remaining tablespoon of niter kibbeh and berbere. Simmer for a couple more minutes. Add salt to taste.
- Serve with Ethiopian injera.
↑ Back to top
Misir Wot, Ethiopian Lentil Stew (Misr Wot)

Tags: Ethiopia
Servings: SERVES 4-6
Ingredients
- 1 cup red lentils
- 4 tbsp. nit'r qibe ( Ethiopian Spiced Butter) or unsalted butter
- 1 small yellow onion, finely chopped
- 4 cloves garlic, finely chopped
- 2 tbsp. berbere ( Ethiopian Spice Mix)
- 1 small tomato, cored and chopped
- Kosher salt, to taste
Steps
- Rinse the lentils in a sieve under cold running water and set aside.
- Heat the butter in a medium saucepan over medium heat. Add the onions and cook, stirring occasionally, until golden brown, about 10 minutes. Add the garlic and cook, stirring constantly, until fragrant, about 30 seconds. Add the reserved lentils, 1 tbsp. of the berbere, tomato, and 4 cups water to the saucepan. Reduce heat to medium-low and simmer, stirring occasionally, until thick and the lentils are tender, 45–50 minutes. Stir in the remaining berbere and season generously with salt. Serve immediately.
↑ Back to top
Miso Gochujang Pulled-Pork
Ingredients
- 4 pound Pork Butt ; cut into 2-inch pieces
- 1/2 cup Gochujang
- 1/4 cup Hoisin sauce
- 2 tablespoons White miso
- 1 bunch Cilantro ; Stems for pulled pork, leaves for garnish
- 3 ounces Ginger
- 1 cup water
- 2 tablespoons Oil
- 2 large Onions ; sliced
- 1/2 teaspoon Salt
- 4 tablespoons White miso
- 4 tablespoons Gochujang
- 3 tablespoons rice vinegar
ONION MISO
MIXTURE:
TO FINISH
Steps
- Cut pork shoulder into 2 inch chunks and put in dutch oven. Add gochujang, hoisin white miso, cilantro stems, ginger, and 1 cup water to pot. Bring to simmer and then cook in 325 degree F oven for 3 hours.
Onion miso mixture - add 2 tablespoons oil to pan, add sliced onions
and 1/2 teaspoon salt. Cook until softened and then add white miso.
Cook until golden brown. Be careful not too burn as it can take on a
bitter flavor.
To
finish - remove pork from pan, skim fat off liquid, reduce liquid
until
thickened (a spatula draws a line through it). In the meantime shred
the pork. Add gochujang, shredded pork to reduced liquid. Add in the
onion miso mixture and rice vinegar and mix.
To serve: spread gochujang
mayonnaise on buns, pile on pulled pork, add cilantro leaves, pickled
vegetables.
↑ Back to top
Miso-Sesame Vinaigrette That's Good On Anything
Adapted from https://cooking.nytimes.com/recipes/1021463-miso-sesame-vinaigrette-thats-good-on-anything
Servings: 1 cup
Ingredients
- 2 medium garlic cloves, smashed with the side of a knife
- 1 small shallot, roughly chopped
- 2 tablespoons shoyu or tamari
- 2 tablespoons balsamic vinegar
- 2 tablespoons red or white wine vinegar
- 1 tablespoon light miso paste
- 1 tablespoon dark brown sugar
- ½ cup grapeseed, vegetable or canola oil
- 2 tablespoons toasted sesame oil
- 2 tablespoons toasted white or black sesame seeds
Steps
- Combine garlic, shallot, shoyu, vinegars, miso and sugar in a blender and blend on high speed until homogenous. (Alternatively, mash garlic and shallots in the bowl of a large granite or marble mortar and pestle into a fine paste using the pestle, then stir in the shoyu, vinegars, miso and sugar.)
- With the blender running on medium speed (the liquid should form a vortex but not jump up and splatter on the walls of the blender), slowly drizzle in the grapeseed oil. (If using a mortar and pestle, slowly drizzle in the oil as you stir vigorously with the pestle.)
- Transfer to a lidded jar. Stir in the sesame oil and sesame seeds with a spoon. Dressing can be stored in the refrigerator for up to 3 weeks. Shake well before using.
↑ Back to top
Moist Apple Cider Doughnut Loaf Cake!
Tags: Cakes and Pastries
I made this.
Servings: 10
Ingredients
- 1 cup apple cider
- 1/2 cup sour cream
- 2 tsp vanilla extract
- 1/2 cup unsalted butter, melted
- 2 large eggs at room temperature
- 3/4 cup brown sugar, lightly packed
- 1 1/4 cups plus 2 Tbsp all purpose flour
- 2 Tbsp cornstarch
- 1 1/4 tsp baking powder
- 1/2 tsp baking soda
- 1/2 tsp salt
- 1/2 tsp cinnamon
- 1/4 tsp freshly grated nutmeg (more to taste)
- 3 Tbsp unsalted butter, melted
- 1/4 cup granulated sugar
- 1/2 tsp cinnamon
TOPPING:
Steps
- Preheat oven to 325F. Spray a 9×5 loaf pan and line with a sheet of parchment paper so you can lift the bread out after baking.
- Put the cider in a small saucepan and bring to a boil. Boil for about 10 minutes, or until reduced to 1/2 cup. Pour the cider into a small bowl and set aside to cool slightly. Then stir in the sour cream and vanilla.
- Melt the butter in the same saucepan. Let cool slightly.
- Meanwhile beat the eggs and brown sugar until smooth and frothy. I do this in my stand mixer but you can also just use a whisk.
- Drizzle the melted butter into the egg mixture, while the machine is running on low. If doing by hand, keep whisking while you add the butter to get everything incorporated.
- Whisk together the flour, cornstarch, baking powder, baking soda, salt, cinnamon, and nutmeg until well combined.
- Add the dry ingredients to the egg mixture, alternately with the cider/sour cream mixture, beginning and ending with the dry ingredients. Mix just until combined but don't over mix.
- Pour the batter into your prepared pan and bake for about 55 minutes, or until a toothpick inserted in the center comes out without we batter on it. Note: if you use a slightly smaller loaf pan your cake may take longer to bake.
- Let the pan cool on a rack for ten minutes, then remove the cake from the pan using the parchment paper sling. Let cool for 5 more minutes.
- For the sugar coating, mix the sugar with the cinnamon. Brush the outside of the cake with melted butter and coat thickly with the cinnamon sugar. I do the top first, then each side, one at a time. For the sides I cup the sugar in my hand and quickly press up against the cake. Do this a few times until you get the surface well covered.
- Do not slice the cake until ready to enjoy. Store at room temperature loosely covered with foil.
Notes
- The low 325F oven temperature encourages this cake to cook slowly and evenly, making for a nice soft texture. Be sure your oven is accurate! I recommend an inexpensive oven thermometer so you can know for sure.
↑ Back to top
Mole Verde
Adapted from https://simple-note.appspot.com/
Ingredients
- 3 tablespoons roasted pumpkin seeds
- 4 tablespoons roasted sesame seeds
- 1 tablespoon quality lard
- 4 cloves garlic
- 2 cloves
- 6 black peppercorns
- 10 tomatillos (also known as tomate verde or tomate de cascara), paper husk removed
- 1 serrano chile, chopped
- 1 small bunch epazote
- 1 tablespoon Rancho Gordo Oregano Indio
- 1 cup parsley, chopped
- 1 bunch radish greens, chopped
- 2 hoja santa leaves, lightly toasted
- salt to taste
- 1 cup white runner beans (Runner Cannellini, Ayocote Blanco, Cassoulet, etc.), previously cooked and drained
Steps
- If your seeds aren’t toasted, you can heat a comal or metal frying pan over medium heat and constantly moving them around until golden. Pumpkin seeds will pop when they’re ready. While the pan is hot, now would be a good time to toast thegarlic and hoja santa leaf, too.
- In a blender, mix the pumkin seeds, the sesame seeds and one half cup of water.
- Heat the lard in a large pan or clay cazuela and fry the ground mixture for about five minutes. Stir constantly until you have a thickish paste.
- Mix the garlic, cloves, pepper, tomatillos and chile with one half cup of water. Add this mixture to the seed mix and cook on a medium low heat for about 15 minutes, stirring constantly from the bottom of the pan.
- When you’re about ready to serve, blend the rest of the ingredients with one cup of water. Add the blended greens to the pan, add the beans and continue to cook for five minutes.
Notes
- FAVORITE
↑ Back to top
Mom's Apple Fritters

Ingredients
- 1 quart vegetable oil for deep-frying
- 1 1/2 cups all-purpose flour
- 1 tablespoon white sugar
- 2 teaspoons baking powder
- 1/2 teaspoon salt
- 2/3 cup milk
- 2 eggs, beaten
- 1 tablespoon vegetable oil
- 3 cups apples - peeled, cored and chopped
- 1 cup cinnamon sugar
Steps
- Heat the oil in a deep-fryer or electric skillet to 375 degrees F (190 degrees C).
- In a large bowl, stir together the flour, sugar, baking powder and salt. Pour in the milk, eggs and oil and stir until well blended. Mix in apples until they are evenly distributed.
- Drop spoonfuls of the batter into the hot oil and fry until golden on both sides, about 5 minutes depending on the size. Fry in smaller batches so they are not crowded. Remove from the hot oil using a slotted spoon and drain briefly on paper towels. Toss with cinnamon sugar while still warm.
Notes
- FAVORITE
↑ Back to top
Momofuku's Bo Ssam
Servings: 6 to 10
Ingredients
- 1 whole bone-in pork butt or picnic ham (8 to 10 pounds)
- 1 cup white sugar
- 1 cup plus 1 tablespoon kosher salt
- 7 tablespoons brown sugar
- 2½ cups thinly sliced scallions, both green and white parts
- ½ cup peeled, minced fresh ginger
- ¼ cup neutral oil (like grapeseed)
- 1½ teaspoons light soy sauce
- 1 scant teaspoon sherry vinegar
- ½ teaspoon kosher salt, or to taste
- 2 tablespoons fermented bean-and-chili paste (ssamjang, available in many Asian markets, and online)
- 1 tablespoon chili paste (kochujang, available in many Asian markets, and online)
- ½ cup sherry vinegar
- ½ cup neutral oil (like grapeseed)
- 2 cups plain white rice, cooked
- 3 heads bibb lettuce, leaves separated, washed and dried
- 1 dozen or more fresh oysters (optional)
- Kimchi (available in many Asian markets, and online)
PORK BUTT:
GINGER-SCALLION SAUCE:
SSAM SAUCE:
ACCOMPANIMENTS:
Steps
- Place the pork in a large, shallow bowl. Mix the white sugar and 1 cup of the salt together in another bowl, then rub the mixture all over the meat. Cover it with plastic wrap and place in the refrigerator for at least 6 hours, or overnight.
- When you’re ready to cook, heat oven to 300. Remove pork from refrigerator, brush any excess sugar mixture off the fat cap and discard any juices. Place the pork in a roasting pan and set in the oven and cook for approximately 6 hours, or until it collapses, yielding easily to the tines of a fork. (After the first hour, baste hourly with pan juices.) At this point, you may remove the meat from the oven and allow it to rest for up to an hour.
- Meanwhile, make the ginger-scallion sauce. In a large bowl, combine the scallions with the rest of the ingredients. Mix well and taste, adding salt if needed.
- Make the ssam sauce. In a medium bowl, combine the chili pastes with the vinegar and oil, and mix well.
- Prepare rice, wash lettuce and, if using, shuck the oysters. Put kimchi and sauces into serving bowls.
- When your accompaniments are prepared and you are ready to serve the food, turn oven to 500. In a small bowl, stir together the remaining tablespoon of salt with the brown sugar. Rub this mixture all over the cooked pork. Place in oven for approximately 10 to 15 minutes, or until a dark caramel crust has developed on the meat. Serve hot, with the accompaniments.
↑ Back to top
Morimoto's Sushi Rice
Servings: 8
Ingredients
- One 2-inch (5-cm) piece of kombu (dried kelp)
- 1 cup (8 fl. oz./250 ml) unseasoned rice vinegar
- 1/2 cup (4 oz./125 g) granulated sugar
- 1/4 cup (1 1/4 oz./35 g) kosher salt
- 3 cups (21 oz./655 g) short-grain white rice (“sushi rice”)
For the sushi
vinegar:
For the rice:
Steps
- To make the sushi vinegar, briefly and gently wipe the kombu with a damp towel to remove any dirt or grit, but do not scrub off the white stuff, which is full of umami.
- Combine the vinegar, sugar, salt and kombu in a small saucepan and set it over medium-high heat. Cook, stirring often, just until the sugar has dissolved, about 1 minute. Do not let it boil. Let the mixture cool to room temperature.
- Measure 1/2 cup (4 fl. oz./125 ml) of the vinegar mixture and set it aside. Store the rest, including the kombu, in an airtight container in the fridge for up to several months.
- To make the rice, put the rice in a large mixing bowl and add enough water to cover the rice by 1 inch (2.5 cm). Use your hands to stir and agitate the rice to release the starch from the exterior of the grains. Empty the water, fill the bowl again and repeat the process until the fresh water no longer becomes cloudy when you stir the rice. Drain the rice in a mesh strainer, shaking well to help drain any excess water. Let the rice sit in the strainer, stirring it once or twice, until it’s more or less dry to the touch, 15 to 30 minutes.
- Combine the rice and 3 cups (24 fl. oz./750 ml) fresh water in a rice cooker and cook according to the manufacturer’s instructions.
- While the rice is hot, gently scoop it into a bowl. Sprinkle the reserved 1/2 cup sushi vinegar over the rice. Gently fold the rice to make sure the vinegar is well distributed without smashing the grains. Cover with a clean kitchen towel pressed to the surface of the rice and let the rice cool to just slightly above room temperature before using. Makes about 8 cups (2 1/2 lb./1.25 kg) rice.
↑ Back to top
Muhammara
Tags: Dips and Spreads
Middle-East
Is starred. Rated
5/5
Servings: 8
Ingredients
- 1 cup ( 4 ounces; 113 g), plus 2 tablespoons ( 3/4 ounce; 21 g) unroasted walnuts, divided
- 1/2 cup panko breadcrumbs ( 1.5 ounces; 43 g)
- 2 pounds ( 907 g) red bell peppers, seeded and chopped
- 1 small yellow onion ( 6 ounces; 170 g), chopped
- 1/3 cup ( 80 ml) extra-virgin olive oil, plus more for drizzling
- 1/4 cup plus 1 teaspoon Middle Eastern jarred mild red pepper paste or spread ( 2 1/2 ounces; 71 g) (see notes)
- 1/4 cup ( 60 ml) pomegranate molasses (see notes)
- 2 teaspoons ( 10 ml) fresh lemon juice
- 2 3/4 teaspoons Diamond Crystal kosher salt; for table salt use half as much by volume
- 1 1/2 teaspoons ground coriander
- 1 1/2 teaspoons ground cumin
- 1 teaspoon ground Aleppo pepper (see notes)
- 1/2 teaspoon ground allspice
- 1/4 teaspoon black pepper
- 2 tablespoons pomegranate seeds ( 1 ounce; 28 g), optional
- Mint sprig or 5 to 7 picked mint leaves for garnish, optional
- Pita bread for serving
Steps
- In the bowl of a food processor, process 1 cup walnuts until very finely chopped (do not process into a paste), about 30 seconds. Transfer to a large bowl and set aside.
- Add panko to the now-empty food processor bowl and process until fine, about 45 seconds. Transfer to the same bowl with the walnuts; set aside.
- Line a fine-mesh strainer with cheesecloth and place it over a separate large bowl. Process peppers until very finely chopped, scraping sides of bowl as needed, about 1 1/2 minutes. Transfer to prepared strainer. Process onions in now-empty food processor bowl until fine, scraping sides of bowl as needed, about 1 minute. Add onions to strainer with processed peppers. Allow mixture to strain, occasionally pressing it with a rubber spatula and discarding liquid as it accumulates, until mixture is thickened and most of liquid has drained, about 30 minutes. Once strained, wrap the cheesecloth around the mixture and squeeze firmly over strainer until only a light stream of liquid is released.
- Transfer drained pepper-onion mixture to bowl with walnuts. Add olive oil, red pepper paste, pomegranate molasses, lemon juice, salt, coriander, cumin, Aleppo pepper, allspice, and black pepper. Mix well to combine. Cover and refrigerate for at least 1 hour to allow the flavors to meld.
- Transfer muhammara to a serving dish and drizzle generously with olive oil. Cut the remaining 2 tablespoons walnuts in half lengthwise. Top muhammara decoratively with walnuts and pomegranate seeds, if using. Garnish with a mint sprig or leaves for decoration, if using. Serve with pita.
- Special Equipment
- Kitchen scale, food processor, fine-mesh strainer, cheesecloth, rubber spatula
Notes
- This recipe can easily be doubled or halved. Process bell peppers and onions in two batches if doubling muhammara.
- For the best results, use pure pomegranate molasses without added sugar. Pomegranate molasses is available at Middle Eastern and Iranian grocery stores and is increasingly stocked in American supermarkets. If you can't source pomegranate molasses, try making your own.
- Red pepper paste, also often labeled as jarred mild pepper spread, can be found in Middle Eastern, Turkish, and Greek grocery stores, and is also often available in many American grocery stores.
- Ground Aleppo pepper can be found in Middle Eastern grocery stores. If unavailable, substitute 1 teaspoon Aleppo pepper with 3/4 teaspoon sweet paprika and 1/8 teaspoon cayenne.
↑ Back to top
Multigrain Bread Extraordinaire
Adapted from file:///C:/Users/Starfleet%20Command/Documents/Zapya/Misc/Multigrain%20Bread%20Extrodinaire.htm
Tags: Breads
Is starred.
Servings: Makes one 2-pound loaf
or 6 to 12 rolls
Ingredients
- 3 tablespoons (1 ounce) coarse cornmeal (also packaged as "polenta"), millet, quinoa, or amaranth
- 3 tablespoons (.75 ounce) rolled oats or wheat, buckwheat, or triticale flakes
- 2 tablespoons (.25 ounce) wheat bran
- 1/4 cup (2 ounces) water, at room temperature
- 3 cups (13.5 ounces) unbleached high-gluten or bread flour
- 3 tablespoons (1.5 ounces) brown sugar
- 11/2 teaspoons (.38 ounce) salt
- 1 tablespoon (.33 ounce) instant yeast
- 3 tablespoons (1 ounce) cooked brown rice
- 11/2 tablespoons (1 ounce) honey
- 1/2 cup (4 ounces) buttermilk or milk
- 3/4 cup (6 ounces) water, at room temperature
- About tablespoon poppy seeds for topping (optional)
SOAKER:
DOUGH:
Steps
- On the day before making the bread, make the soaker. Combine the cornmeal, oats, and bran with the water in a small bowl. The water will just cover the grain, hydrating it slightly. Cover the bowl with plastic wrap and leave it at room temperature overnight to initiate enzyme action.
- The next day, to make the dough, stir together the flour, brown sugar, salt, and yeast in a 4-quart bowl (or in the bowl of an electric mixer). Add the soaker, rice, honey, buttermilk,and water. Stir (or mix on low speed with the paddle attachment) until the ingredients form a ball. Add a few drops of water if any of the flour remains separate.
- Sprinkle flour on the counter, transfer the dough to the counter, and begin to knead (or mix on medium speed with the dough hook). Knead for about 12 minutes (or mix for 8 to 10 minutes on medium-low speed), sprinkling in flour if needed to make a dough that is soft and pliable, tacky but not sticky. The individual ingredients will homogenize into the greater dough, disappearing to an extent, and the dough will smooth out and become slightly shiny. (If you are using an electric mixer, hand knead the dough for a minute or two at the end.) The dough should pass the windowpane test (page 58) and register 77° to 81°F. Lightly oil a bowl and transfer the dough to the bowl, rolling it around to coat it with oil. Cover the bowl with plastic wrap.
- Ferment at room temperature for 60 minutes, or until the dough doubles in size.
- Remove the dough from the bowl and press it by hand into a rectangle about 3/4 inch thick, 6 inches wide, and 8 to 10 inches long. Form it into a loaf, as shown on page 81, or into another desired shape. Place the loaf into a lightly oiled 9 by 5-inch loaf pan, or onto a sheet pan lined with baking parchment if you are making rolls or freestanding loaves. Mist the top of the dough with water and sprinkle on the poppy seeds. Mist again, this time with spray oil, and loosely cover the dough with plastic wrap or a towel.
- Proof for approximately 60 minutes, or until the dough nearly doubles in size. If you are using a loaf pan, the dough should crest fully above the lip of the pan, doming about 1 inch above the pan at the center.
- Preheat the oven to 350°F with the oven rack on the middle shelf.
- Bake for about 20 minutes. Small rolls probably will be finished at this point. For everything else, rotate the pan 180 degrees and continue baking for another 15 minutes for freestanding loaves and 20 to 40 minutes for loaf-pan bread. The bread should register at least 185° to 190°F in the center, be golden brown, and make a hollow sound when thumped on the bottom.
Notes
- Tips
- For the Buttermilk, I use 2 tbl. Buttermilk Powder in with the dry dough ingredients and a total of 1 1/4 cups water.For the Rice, I cook one tbl. in salted water like pasta - 20 to 30 Minutes.
↑ Back to top
Musaengchae (Spicy Radish Salad)
Servings: 4 PRINT RECIPE
Ingredients
- 1 pound mu (Korean radish)
- 1 teaspoon salt
- 1 or 2 scallions finely chopped
- 2 tablespoons gochugaru (Korean red chili pepper flakes) adjust to taste
- 2 teaspoons minced garlic
- 1/2 teaspoon grated ginger
- 1 tablespoon fish sauce (myulchi aekjeot) or saeujeot (salted shrimp)
- 1 teaspoon sugar adjust to taste - see note
- 1 teaspoon sesame seeds optional
Steps
- Clean the radish by scrubbing with a brush and/or scratching off the stubborn impurities with a small knife. Peel the skin only if necessary. Cut into matchsticks (about 1/8 to 1/4-inch thick).
- Sprinkle the salt over the radish and toss well to coat evenly. Let sit for about 20 minutes until the radish has softened and released some liquid. Drain excess liquid. Do not rinse.
- Add all the remaining ingredients, except the scallion and sesame seeds. Mix well by hand. Taste and add more salt or fish sauce, if necessary.
- Throw in the scallion and sesame seeds and toss everything well.
Notes
- As a sugar substitute, you can use corn syrup, oligodang, or maesil cheong (Korean plum extract).
↑ Back to top
Mushroom and Scallion Lo Mein
Tags: Chinese
Noodles
Servings: Tested size: 4 servings
Ingredients
- 8 ounces dried lo mein noodles (may substitute linguine)
- 2 tablespoons peanut oil or vegetable oil
- 1 1/2-ounce piece peeled ginger root, cut crosswise into thin coins, each coin then cut into thin strips
- 10 ounces scallions, trimmed, cut in half horizontally, then cut lengthwise into thin strips, a few reserved for garnish, if desired
- 1 pound assorted mushrooms, such as oyster, shiitake, king trumpet, cremini and/or white button, stemmed as needed and thinly sliced
- 1 tablespoon toasted sesame oil, or more to taste
- 2 tablespoons low-sodium soy sauce, or more to taste
Steps
- Bring a medium pot of water to a boil, and cook the noodles according to the package directions.
- In a large, nonstick braising pan or skillet over medium-high heat, heat the peanut or vegetable oil until it shimmers. Add the ginger and cook, stirring frequently, for 2 minutes. Add the scallions and cook, stirring, until they start to wilt, 2 to 3 minutes.
- Add the mushrooms; cook, stirring occasionally, until they are cooked through, 8 to 10 minutes. If the mushrooms release a lot of liquid, cook until that liquid has reduced to a syrupy consistency.
- Stir in the sesame oil and the soy sauce. Transfer the mixture to a large serving bowl. Add the drained noodles and toss to combine. Taste, and add sesame oil and/or soy sauce as needed. Garnish with reserved scallions, if using. Serve warm.
↑ Back to top
Mushroom-Doenjang Soup

Ingredients
- 1 (2 x 2 inch) piece kombu
- 4 ½ cups water
- ½ teaspoon fine sea salt
- 1 cup hon shimeji mushrooms, caps only
- ⅓ cup doenjang or red miso
- ½ block (about 8 ounces) medium-firm tofu, drained, cut into ½-inch cubes
- 4 (⅛-inch thick) slices peeled lotus root, halved
- 1 tablespoon dried wakame seaweed, rehydrated in water
- 2 tablespoons thinly sliced scallion greens
- Freshly ground white pepper
Steps
- Place the kombu in a medium saucepan with the water and salt. Bring to a simmer over medium heat, then remove and discard the kombu.
- Add the hon shimeji mushrooms to the pot and simmer for 5 minutes.
- Put the doenjang in a small bowl and ladle in about ½ cup of the hot broth. Stir to dissolve the doenjang, then return the liquid to the soup.
- Add the tofu, lotus root and wakame to the soup. Reduce the heat to low and cook until all the ingredients have warmed. Do not boil.
- Divide the soup among four bowls. Garnish with scallions and a pinch of freshly ground white pepper. Serve immediately.
↑ Back to top
Mushroom-Jalapeño Matzo Ball Soup
Adapted from https://patijinich.com/post_1/
Servings: 6 to 8
Ingredients
- 1 cup matzo ball mix
- 2 tablespoons parsley finely chopped
- 1/4 teaspoon grated nutmeg
- 3/4 teaspoon kosher or coarse sea salt or to taste
- 4 large eggs
- 8 tablespoons vegetable oil divided
- 2 tablespoons toasted sesame oil
- 1 tablespoon sparkling water optional, to make the matzo balls fluffy
- 1/2 cup white onion finely chopped
- 1 garlic clove finely chopped
- 2 jalapeño chiles finely chopped, seeded optional, more or less to taste
- 1/2 pound white mushrooms wiped clean with cloth, sliced
- 3/4 teaspoon kosher or sea salt or to taste
- 8-10 cups chicken broth
Steps
- In a large mixing bowl, combine the matzo ball mix, parsley, nutmeg, and 1 teaspoon of salt. In another small bowl, lightly beat the eggs with 6 tablespoons the of vegetable oil and the sesame oil. Fold in the beaten eggs to the matzo ball mixture with a spatula. Add the sparkling water if you want the matzo balls fluffy, and mix well until well combine. Cover the mix and refrigerate for at least half an hour.
- Bring about 12 cups of salted water to a rolling boil in a large soup pot. Bring heat down to medium and keep at a steady simmer. With wet hands, make about 1 inch balls out of the matzo ball mix and gently drop them into the water. Cover and simmer for about 25 to 30 minutes.
- Meanwhile, heat the remaining 2 tablespoons of vegetable oil over medium heat in a large cooking pot. Add the onion, garlic and chiles and sauté for 4 to 5 minutes until they have softened. Incorporate the sliced mushrooms. sprinkle the salt, stir and cover with a lid. Steam the mushrooms for about 6 to 8 minutes.
- Take off the lid and pour the chicken broth over the mushroom base. Once it is simmering, incorporate the already cooked matzo balls, without their cooking liquid, and serve.
↑ Back to top
My Favorite Chocolate Cream Cheese Frosting

Ingredients
- 8 ounces cream cheese, room temperature
- 1/4 cup unsalted butter, room temperature
- 3 cups sifted powdered sugar (You can decrease this amount if you don't care about it being as stiff for piping)
- 1/2 cup cocoa powder
Steps
- Mix cream cheese and butter until smooth and creamy.
- Mix in powdered sugar, one cup at a time.
- Mix in cocoa powder.
Notes
- FAVORITE
↑ Back to top
Naengmyeon (Cold Noodles in Chilled Beef Broth)
Adapted from https://cooking.nytimes.com/recipes/1024870-naengmyeon-cold-noodles-in-chilled-beef-broth

Tags: Korean
Noodles
Servings: 8
Ingredients
- 3 ½ pounds bone-in beef short ribs, 1 to 2 inches thick
- ½ unpeeled Korean radish or 1 daikon, cut into large chunks (1 pound)
- 2 large unpeeled yellow onions, halved
- 1 unpeeled Korean pear or 2 Bosc pears, halved
- 1 daepa (Korean leek) or 4 large scallions, halved
- 1 (2-inch) piece ginger, scrubbed and halved lengthwise
- 1 head garlic, halved crosswise
- 1 teaspoon black peppercorns
- 3 tablespoons granulated sugar, plus more to taste
- 2 ½ tablespoons flaky or coarse sea salt, plus more to taste
- 6 tablespoons yangjo vinegar (Korean malt vinegar; see Tip) or distilled white vinegar, plus more to taste
- 4 tablespoons maesil cheong (green plum syrup; optional, see Tip), plus more to taste
- 2 quarts cold water or dongchimi (radish water kimchi) broth
- 4 Persian cucumbers, thinly sliced lengthwise
- 2 tablespoons yangjo or distilled white vinegar
- 2 teaspoons granulated sugar
- 2 teaspoons flaky or coarse sea salt
- ¼ Korean radish or ½ daikon, peeled and thinly sliced
- 1 (22-ounce) package dry naengmyeon
- ½ Korean pear or 1 Bosc pear, peeled, halved, cored and thinly sliced
- 4 large hard-boiled eggs, peeled and halved lengthwise
- Toasted sesame seeds, for garnish
FOR THE BROTH:
FOR SERVING:
Steps
- Make the broth: Soak the short ribs in a bowl of cold water for 10 minutes. Drain the short ribs then add to a large Dutch oven or stockpot and cover with 4 quarts cold water. Bring to a boil over high, skimming and discarding foam. Reduce the heat to medium-low, cover and simmer until the broth is rich and meaty, about 2 hours. Turn off the heat and let cool slightly, about 30 minutes, then carefully remove the meat and save to eat another time. Chill the broth in the refrigerator overnight, or at least 8 hours.
- After refrigeration, remove the raft of hardened fat in one or two satisfying pieces. Discard or reserve for another use (such as frying eggs or croutons). Add the radish, onions, pear, daepa, ginger, garlic and peppercorns; bring to a boil over high. Reduce the heat to low, cover and simmer until the broth is darker in color and more fragrant, about 3 hours.
- Use a sieve to strain out all of the solids and discard or eat them (especially the tender radishes). You should have 2 to 2¼ quarts of broth. Stir in the sugar and salt until dissolved. Let the broth cool completely, then stir in the vinegar, maesil cheong and 2 quarts water. Taste and add more sugar, salt, vinegar and maesil cheong if needed; it should be assertively seasoned, as this will be served cold and the flavors will be more muted. Transfer to individual quart containers, leaving about an inch of room on top, and freeze until slushied, 1 to 2 hours. (Use a fork to break up any larger ice pieces before serving.)
- To serve: In a bowl, toss the cucumber with 1 tablespoon vinegar, 1 teaspoon sugar and 1 teaspoon salt. In another bowl, toss the radish with the remaining 1 tablespoon vinegar and 1 teaspoon each sugar and salt. Let stand for 10 minutes to lightly pickle.
- Meanwhile, bring a large pot of water to a boil and cook the noodles according to package directions. Drain the noodles then rinse well with cold running water until no longer sticky to the touch.
- Divide the noodles among large bowls. Top each bowl with the slushied broth, pear, pickled radish and cucumber, an egg half, and sesame seeds.
Notes
- Yangjo vinegar, a type of Korean malt vinegar (sometimes labeled white vinegar), lends a pure, unadulterated acidity that helps the natural flavors of food shine, and can be found in any Korean grocery store or online. White distilled vinegar works in a pinch, but yangjo vinegar is a dream to cook with.
- You can find maesil cheong, or green plum syrup (also labeled an extract), online or in Korean supermarkets. Add a splash to a mug of hot water and drink it as tea, or mix it into salad dressings, marinades and stews as an aromatic sweetener with a touch of fruity tartness. It’s worth seeking out, but if you can’t find it, use a splash of apple juice or an extra pinch of sugar instead.
↑ Back to top
Nam Prik Ong (Thai Pork-And-Tomato Chile Dip)
Tags: Pork
Thai
Servings: 6 to 8
Ingredients
- 10 to 15 dried spur chiles ( 15 g) (see notes )
- 2 plum tomatoes (about 100 g)
- 1 disc ( 15 g) tua nao (optional, see notes)
- 1 stalk lemongrass, bottom 4 to 5 inches only, outer leaves discarded, tender core thinly sliced into rounds (about 10 g sliced lemongrass)
- 10 small garlic cloves ( 30 g)
- 5 small shallots ( 80 g)
- 2 teaspoons ( 20 g) Thai shrimp paste
- 1/2 cup ( 120 ml) water
- 2 tablespoons ( 30 ml) fish sauce
- 1 tablespoon ( 15 g) Thai fermented soybean paste
- 2 teaspoons ( 10 ml) Thai thin soy sauce or light soy sauce
- Pinch sugar
- 1/4 cup ( 60 ml) vegetable oil
- 1 pound ( 450 g) ground pork
- 8 ounces (1 1/2 cups; 225 g) cherry tomatoes
For the Paste:
For the
Seasoning Sauce:
For the Pork:
Steps
- For the Paste: Place spur chiles in a dry wok or carbon steel or cast iron skillet, and toast over medium-low heat, turning occasionally, until chiles are fragrant and turn a deeper shade of dark red, 4 to 5 minutes. Remove from heat and transfer chiles to a plate to cool slightly; wipe out wok or skillet and return to stovetop. Once cool enough to handle, remove stems from chiles and transfer to a granite mortar and pestle; set plate and mortar and pestle aside.
- Meanwhile, place plum tomatoes in now-empty wok or skillet, and cook over medium-high heat, turning occasionally, until charred all over, about 5 minutes. Transfer tomatoes to now-empty plate and set aside to cool.
- If using tua nao, use tongs to grab disc and hold about 2 inches above low flame on a gas burner. Flip disc every 5 seconds until tua nao is toasted to a hazelnut brown color, with little leopard spots all over on both sides, 2 to 3 minutes. Alternatively, you can toast tua nao under an electric or gas broiler, turning very frequently, or by using a culinary torch. Transfer tua nao to plate with tomatoes to cool; set aside.
- Pound chiles in mortar and pestle to a coarse powder, 3 to 5 minutes. Add lemongrass and pound fine, 3 to 5 minutes. Add garlic and shallots and pound to a coarse paste with a few large pieces remaining, 3 to 5 minutes. Add shrimp paste and tua nao (if using) and pound until well-incorporated. Add charred plum tomatoes and gently pound until broken down and incorporated into paste, about 2 minutes. Transfer paste to a small bowl and set aside.
- For the Seasoning Sauce: In a small bowl, stir together water, fish sauce, soybean paste, soy sauce, and sugar until well-combined and sugar is dissolved. Set aside.
- For the Pork: In a wok or 3-quart saucier, heat oil over medium-high heat until shimmering. Add the chile-tomato paste and cook, stirring frequently, until paste is aromatic and turns dark red, about 3 minutes. Add the pork, stir to combine, and cook, using a wok spatula or wooden spoon to break meat up and scrape up any bits that stick to the bottom of the pan, until cooked through, about 4 minutes.
- Add cherry tomatoes, stir to combine, and continue to cook until tomatoes begin to burst, 3 to 5 minutes. You can coax the tomatoes into bursting by pressing down on them with a wok spatula or wooden spoon, and you can decide whether to lightly crush all of them or leave some whole for juicy pops of tomato flavor in the finished dip. Stir in seasoning sauce and bring to a boil over high heat. Cook, stirring frequently, until liquid is reduced to a saucy consistency and oil begins to separate from emulsion, about 8 minutes. Remove from heat and allow to cool to room temperature, at which point nam prik ong can be served or refrigerated in an airtight container for up to 1 week, or frozen for up to 1 month.
- For Serving: Transfer nam prik ong to a serving bowl and serve with assorted raw and steamed vegetables, hard-boiled eggs (if using), pork rinds (if using), and rice.
Notes
- Dried spur chilies are a type of Thai chile known as prik cheefa haeng; they have a fruity, mild flavor, and are prized for the color they impart to curry pastes. They can be hard to come by in the US, but are sometimes available online. Alternatively, you can substitute puya or guajillo chiles, which are available at Central American markets.
- Tua nao are dried fermented soybean cakes that provide an important savory quality to nam prik ong and many dishes found in Northern Thailand. To make tua nao, soybeans are cooked and left out to ferment before being ground into a paste, often through a meat grinder. The paste is portioned and pressed into circles using a piece of equipment similar to a tortilla press. The circles are then sun-dried and packaged for sale. To use tua nao discs, cooks blister them over charcoal grills or the flame of a gas burner before processing them into pastes, like the one in this recipe. Tua nao is often used as a vegetarian or vegan substitute for shrimp paste. It can be a difficult ingredient to source in the US—even in Bangkok it isn’t always readily available—and nam prik ong can be made without it. It can be purchased online here.
↑ Back to top
Nathalie Dupree's Food Processor Biscuits

Ingredients
- 2 1/2 cups self-rising flour (I keep mine in the freezer so it is nice and cold), divided
- 1/4 cup (half a stick) of butter (or any combination of butter, shortening or lard) cut into 1/4″ dice
- 1/4 cup (half a stick) of butter (or any combination of butter, shortening or lard) cut into 1/2″ dice
- 1 cup of buttermilk divided
Steps
- Preheat the oven to 450 degrees. I bake in a convection oven on the convection bake selection.
- Select your pan; for softer biscuits place in a greased 8-9″ cake pan or skillet. For crispy exterior, place on a greased baking sheet about 2″ apart.
- In the bowl of a food processor, pulse 2 1/4 cups of flour with the knife blade 4-5 times. Set aside the remaining 1/4 cup of flour.
- Scatter the chilled butter pieces around the bowl of the processor.
- Pulse 2-3 times quickly, no piece should be larger than a pea
- Add 3/4 cup of buttermilk, reserving the remaining 1/4 cup
- Pulse briefly to incorporate the liquid, resulting in a shaggy dough, then remove the lid and feel the dough, it needs to be wet but not sticky. If needed add more flour or buttermilk to achieve this result, but do not over process.
- Pour the dough out onto a chilled floured surface and allow to rest for a minute
- Gently flour the dough and roll into a ball with floured hands, then, roll over again into a disc. GENTLY
- Using a rolling pin flatten the disc to about 1/2 to 3/4 inches thick
- Using a floured cutter or glass, cut into biscuits
- You can roll out the scraps for a final biscuit, but I usually toss because this one will be tougher
- Place in your baking pan
- Bake for 6 minutes on the middle shelf, then turn the pan so that it is evenly browning. If the bottom looks like it is browning too fast, you can add a baking sheet under it
- Bake for another 4-6 minutes, until the tops of the biscuits are a light golden color
- Remove from the oven and brush a little softened butter on them.
Notes
- FAVORITE
↑ Back to top
Nathalie Dupree's Shrimp and Grits

Tags: Grains
Seafood Southern
This variation of grits is my all-time favorite,
and variations of it appear in several of my cookbooks. That does not
take away from its decadence, which makes it a special-occasion dish.
These can be served on their own, as a base for shrimp and grits, as a
colorful dip, or accompanying ham, eggs or other delicacies. A chafing
dish helps for a party.
Servings: 4 - 6
Ingredients
- 2 cups milk
- 2 cups water, shrimp stock or other liquid
- 1 cup grits
- 1 garlic clove, chopped (optional)
- 1 to 2 cups heavy cream
- 1⁄4 to 1⁄2 cup butter
- 1 to 2 cups freshly grated Parmesan cheese
- 1 cup baby spinach, or larger spinach leaves cut into a chiffonade (optional)
- 1/2 to 1 pound peeled and lightly cooked shrimp, cut into in 1-inch pieces
- Salt
- Freshly ground black pepper
Steps
- Bring the milk and water or stock to a simmer in a heavy-bottomed nonstick saucepan over medium heat. Add the grits and garlic, if using, and bring just to a boil. Cook until soft and creamy, adding heavy cream as needed to make a loose but not a runny mixture. Add as much butter and cheese as desired, stirring to make sure the cheese doesn’t stick. Add enough cream to make the grits “dip” consistency. Fold in spinach, if using, and shrimp.
- They will reheat and cook as needed. Serve with crisp tortilla scoops or chips.
Notes
- Grits cook in different amounts of time. Quick grits will cook in 5 minutes; some stone-ground grits take up to an hour. Always follow package directions.
↑ Back to top
New England Fish Chowder
Adapted from http://www.foodnetwork.com/recipes/tylers-ultimate/new-england-fish-chowder-recipe/index.html

Ingredients
- 4 ounces meaty salt pork, rind removed and cut into 1/3-inch dice
- 2 tablespoons butter
- 2 medium onions, cut into 3/4-inch dice
- 6 to 8 sprigs fresh summer savory or thyme, leaves removed and chopped (1 tablespoon)
- 2 dried bay leaves
- 2 pounds all-purpose potatoes such as Yukon gold, peeled and sliced 1/3-inch thick
- 5 cups Strong Fish Stock, recipe follows
- Kosher or sea salt and freshly ground pepper
- 3 pounds skinless haddock or cod fillets, preferably over 1-inch thick, pin bones removed
- 1 1/2 cups heavy cream
- 2 tablespoons finely chopped Italian parsley leaves
- 2 tablespoons finely chopped fresh chives
Steps
- Heat a 4 to 6 quart heavy pot over low heat and add the diced salt pork. Once it has rendered a few tablespoons of fat, increase the heat to medium and cook until the pork is a crisp golden brown. Use a slotted spoon to transfer the cracklings to a small ovenproof dish; reserve.
- Add the butter, onions, savory or thyme, and bay leaves to the fat in the pot and cook over medium heat, stirring occasionally with a wooden spoon, until the onions have softened but not browned, about 8 minutes.
- Add the potatoes and stock. If the stock doesn't cover the potatoes, add a little water. Turn up the heat and bring to a boil. Cover the pot and boil the potatoes vigorously until they are soft on the outside but still firm in the center, about 10 minutes. If the stock hasn't thickened slightly, smash a few of the potato slices against the side of the pot and cook for 1 to 2 minutes longer.
- Reduce the heat to low and season assertively with salt and pepper (you want to almost over season at this point in order to avoid having to stir once the fish is added). Add the fish fillets and cook over a low heat until the fish is almost done, 5 minutes. Remove the pot from the heat and allow the chowder to sit for 10 minutes (the fish will finish cooking during this time).
- Gently stir in the cream and taste for salt and pepper. If you are not serving the chowder within the hour, let it cool a bit, then refrigerate (only cover the chowder after it has chilled completely). Otherwise, let it sit for up to an hour at room temperature, allowing the flavors to meld.
- When ready to serve, reheat the chowder over a low heat; don't let it boil. Warm the cracklings in a low oven (220 degrees F) for a few minutes.
- Use a slotted spoon to mound the chunks of fish, the onions, and potatoes in the center of large soup plates or shallow bowls, ladle the creamy broth around and scatter the cracklings over top. Finish each serving with a sprinkling of chopped parsley and minced chives.
Notes
- FAVORITE
↑ Back to top
New Orleans–Style Red Beans and Rice
Tags: Beans and Other
Legumes Cajun and
Creole Rice
Servings: 6 to 8
Ingredients
- 1 pound (450g) red kidney beans
- Kosher salt
- 1 tablespoon (15ml) vegetable oil or lard
- 1 pound (about 450g) cooked andouille sausage, cut into 1/2-inch disks
- 1 large onion, finely chopped (about 12 ounces; 340 g)
- 1 green bell pepper, stemmed, seeded, and finely chopped (about 8 ounces; 225 g)
- 4 ribs celery, finely chopped (about 8 ounces; 225 g)
- 4 medium cloves garlic, minced
- 1/2 teaspoon to 1 tablespoon (3 to 15g) ground cayenne pepper (depending on how hot you like it)
- 1 teaspoon (about 4 g) ground sage
- Freshly ground black pepper
- 1 smoked ham hock (optional)
- 8 ounces (225g) pickled pork shoulder or rind (optional; see note)
- 4 sprigs fresh thyme
- 3 bay leaves
- Hot sauce, such as Crystal or Frank's, to taste
- Cider vinegar, to taste (optional; see note)
- Cooked white rice, for serving
Steps
- Place beans in a large bowl and cover with 6 cups (1.5L) cold water. Add 2 tablespoons (30g) kosher salt and stir until dissolved. Set aside at room temperature for 8 to 16 hours. Drain and rinse.
- In a large Dutch oven, heat oil or lard over medium-high heat until shimmering. Add andouille and cook, stirring, until lightly browned, about 5 minutes. Add onion, bell pepper, and celery. Season with salt and cook, stirring, until vegetables have softened and are just starting to brown around the edges, about 8 minutes. Add garlic and cook, stirring, until fragrant, about 45 seconds. Add cayenne pepper, sage, and a generous 10 to 12 grinds of fresh black pepper. Cook, stirring, until fragrant, about 30 seconds. Add beans, along with enough water to cover by about 2 inches (roughly 6 to 8 cups), ham hock (if using), pickled pork (if using), thyme, and bay leaves. Bring to a boil and reduce to a bare simmer. Cover and cook until beans are completely tender, 1 1/2 to 2 1/2 hours. (Older beans can take longer.)
- Remove lid and continue to cook, stirring occasionally, until liquid has thickened and turned creamy, about 20 minutes. If the pot starts to look dry before the stew turns creamy, add a cup of water and continue simmering. Repeat as necessary until desired level of creaminess is achieved. Discard bay leaves and thyme stems. Season to taste with hot sauce, a few teaspoons of cider vinegar (if using), and more salt and pepper. For best texture, let cool and refrigerate overnight. Reheat the next day, adding a little water to loosen to desired consistency. Serve red beans over steamed white rice.
- Special Equipment
Notes
- Pickled pork can be difficult to find, and the beans can easily be made without it. If you're omitting the pickled pork, a small splash of cider vinegar can help brighten up the flavor of the beans, but is not completely necessary. Add it to suit your own taste.
↑ Back to top
New Year's Pretzel)

Servings: 1 large pretzel
Ingredients
- 2 1/4 teaspoons (7 grams) active dry yeast
- 1 cup (240 milliliters) lukewarm milk 105-115˚F, 40-46˚C
- 4 cups (500 grams) all purpose flour
- 1/3 cup (67 grams) granulated sugar
- 1/2 teaspoon salt
- Zest from 1 lemon
- 6 tablespoons (85 grams) unsalted butter softened at room temperature
- 1 large egg
- 1 large egg yolk
- 1 tablespoon (15 milliliters) milk
- pearl sugar Hagelzucker, optional
Topping:
Steps
- In a small bowl, sprinkle the yeast over the lukewarm milk and stir to combine. Let sit at room temperature until frothy, about 10 minutes.
- In the bowl of a stand mixer fitted with a dough hook or a large bowl, combine the flour, sugar, salt, and lemon zest.
- Mix in the activated yeast with milk, butter, and egg until a soft dough comes together. If too crumbly, add a little more milk. If too wet to handle, add a little more flour.
- Knead on a lightly floured surface until the dough becomes smooth and elastic. Place in lightly greased bowl, cover, and let rise at room temperature until doubled, 1-2 hours.
- In a small bowl, whisk together the egg yolk and milk to form the egg wash.
- Lightly flour a large work surface.
- If you want to make the braid on top of the pretzel, break off 1/4 piece of the dough and cover with a cloth.
- Roll the larger piece into a long rope, with a thicker diameter in the center and tapered ends.
- Place a piece of parchment the size of your baking sheet under the middle of the rope. Twist the ends together and place over the middle of the rope to form pretzel shape.
- To make the braid, cut the set aside dough into 3 equal pieces. Roll each piece into a long, thin rope. Pinch together the edges at one side and tightly braid. Seal the edges on the other side.
- Brush the lower, thicker part of the pretzel with the egg wash, top with the braid, and gently press down to seal.
- Gently transfer the parchment with the pretzel to a baking sheet. Adjust the shaping as needed.
- Cover the entire pretzel with a cloth and let rise until puffy, about 30 minutes.
- Place rack in center of oven and preheat to 350˚F (180˚C).
- Brush the entire surface of the pretzel with the egg wash. If desired, sprinkle with pearl sugar.
- Bake in preheated oven until golden brown, about 25-30 minutes. Allow to cool on baking sheet for 15 minutes before serving.
- Serve warm with butter and/or jam.
↑ Back to top
New York Bagels
Adapted from http://serenalissy.com/new-york-bagels/

Ingredients
- 1 cup plus 2 tablespoons ice water (9 ounces)
- 2 tablespoons malt syrup
- 2 2/3 cups (14 2/3 ounces) bread flour
- 4 teaspoons vital wheat gluten
- 2 teaspoons instant or rapid rise yeast
- 2 teaspoons salt
- 1/4 cup (1 1/4 ounces) cornmeal
- 1/4 cup (1 3/4 ounces) sugar
- 1 tablespoon baking soda
- 2 tablespoons poppy seeds
- 2 tablespoons sesame seeds
- 1 tablespoon onion flakes
- 2 teaspoons garlic flakes
- 2 teaspoons caraway seeds
- 1/2 teaspoon coarse salt
Cooks
Illustrated New York Bagels
Everything
topping:
Steps
- Stir ice water and malt syrup together until malt syrup has fully dissolved. (We used 8 ounces here instead of 9 because of weather in TX. I'd recommend starting with 8 ounces and if dough appears dry in the food processor add the other ounce) In a food processor, process flour, wheat gluten and yeast until combined. With processor running, slowly add ice water mixture and continue to process until dough is just combined and no dry flour remains. Let dough stand for 10 minutes once complete.
- Add salt to dough and process until dough forms shaggy mass that clears the sides of work bowl, about 60-90 seconds. Transfer dough to unfloured counter and knead until smooth, about 1 minute. Divide dough into 8 equal pieces and cover loosely with plastic wrap.
- Working with one piece of dough at a time and keeping remaining pieces covered, form dough pieces into smooth round balls. Let dough balls rest on counter, covered, for 15 minutes.
- Sprinkle rimmed baking sheet with cornmeal. Working with one dough ball at a time, coat dough balls lightly with flour, and then, using your hands and rolling pin, pat and roll dough balls into 5 inch rounds. Starting with edge of dough farthest from you, roll into tight cylinder. Starting at center of cylinder and working towards ends, gently and evenly roll and stretch dough into 8-9 inch long ropes. Rolling end of dough under your hands in opposite directions, twist rope to form tight spiral. Without unrolling spiral, wrap rope around your fingers, overlapping ends of dough by about 2 inches under your palm to create ring shape. Pinch ends of dough gently together. With overlap under your palm, press and roll seam using circular motion on counter to fully seal. Transfer rings to prepared sheet and cover loosely with plastic leaving at least one inch between bagels. Let bagels stand at room temperature for one hour. Cover sheet tightly with plastic and refrigerate for 16-24 hours.
- One hour before baking, place baking stone on oven rack, and heat oven to 450 degrees.
- Bring 4 quarts water, sugar and baking soda to boil in large Dutch oven. Set wire rack in rimmed baking sheet and spray rack with vegetable oil spray.
- Transfer 4 bagels to boiling water and cook for 20 seconds. Using wire skimmer, flip bagels over and cook 20 seconds longer. Using wire skimmer, transfer bagels to prepared wire rack, with cornmeal side facing down. At this time, dip your bagels into the toppings of your choice. Repeat with remaining four bagels.
- Place sheet with bagels on preheated baking stone and pour 1/2 cup boiling water into bottom of sheet. Bake until tops of bagels are beginning to brown, 10-12 minutes. Using metal spatula, flip bagels and continue to bake until golden brown, 10-12 more minutes. Remove sheet from oven and let bagels cool on wire rack for at least 15 minutes. Serve warm or at room temperature.
Notes
- FAVORITE
↑ Back to top
New York Bagels

Tags: Bagels
Baking Breads
Steps
- Stir ice water and malt syrup together in 2-cup liquid measuring cup until malt syrup has fully dissolved. Process flour, wheat gluten, and yeast in food processor until combined, about 2 seconds. With processor running, slowly add ice water mixture; process until dough is just combined and no dry flour remains, about 20 seconds. Let dough stand for 10 minutes.
- Add salt to dough and process, stopping processor and redistributing dough as needed, until dough forms shaggy mass that clears sides of workbowl (dough may not form one single mass), 45 to 90 seconds. Transfer dough to unfloured counter and knead until smooth, about 1 minute. Divide dough into 8 equal pieces (3 1/2 ounces each) and cover loosely with plastic wrap.
- Working with 1 piece of dough at a time and keeping remaining pieces covered, form dough pieces into smooth, taut rounds. (To round, set piece of dough on unfloured counter. Loosely cup your hand around dough and, without applying pressure to dough, move your hand in small circular motions. Tackiness of dough against counter and circular motion should work dough into smooth, even ball, but if dough sticks to your hands, lightly dust your fingers with flour.) Let dough balls rest on counter, covered, for 15 minutes.
- Sprinkle rimmed baking sheet with cornmeal. Working with 1 dough ball at a time and keeping remaining pieces covered, coat dough balls lightly with flour and then, using your hands and rolling pin, pat and roll dough balls into 5-inch rounds. Starting with edge of dough farthest from you, roll into tight cylinder. Starting at center of cylinder and working toward ends, gently and evenly roll and stretch dough into 8- to 9-inch-long rope. Do not taper ends. Rolling ends of dough under your hands in opposite directions, twist rope to form tight spiral. Without unrolling spiral, wrap rope around your fingers, overlapping ends of dough by about 2 inches under your palm, to create ring shape. Pinch ends of dough gently together. With overlap under your palm, press and roll seam using circular motion on counter to fully seal. Transfer rings to prepared sheet and cover loosely with plastic, leaving at least 1 inch between bagels. Let bagels stand at room temperature for 1 hour. Cover sheet tightly with plastic and refrigerate for 16 to 24 hours.
- One hour before baking, adjust oven rack to upper-middle position, place baking stone on rack, and heat oven to 450 degrees.
- Bring 4 quarts water, sugar, and baking soda to boil in large Dutch oven. Set wire rack in rimmed baking sheet and spray rack with vegetable oil spray.
- Transfer 4 bagels to boiling water and cook for 20 seconds. Using wire skimmer or slotted spoon, flip bagels over and cook 20 seconds longer. Using wire skimmer or slotted spoon, transfer bagels to prepared wire rack, with cornmeal side facing down. Repeat with remaining 4 bagels.
- Place sheet with bagels on preheated baking stone and pour 1/2 cup boiling water into bottom of sheet. Bake until tops of bagels are beginning to brown, 10 to 12 minutes. Using metal spatula, flip bagels and continue to bake until golden brown, 10 to 12 minutes longer. Remove sheet from oven and let bagels cool on wire rack for at least 15 minutes. Serve warm or at room temperature.
Notes
- Techniques
- Shaping Bagels Like a Pro
- Thoroughly working the dough during shaping helps a New York bagel develop its characteristic chew.
- Pat and roll dough ball (lightly coated with flour) with rolling pin into 5-inch round.
- Roll into tight cylinder, starting with far side of dough.
- Roll and stretch dough into 8- to 9-inch-long rope, starting at center of cylinder (don’t taper ends).
- Twist rope to form tight spiral by rolling ends of dough under hands in opposite directions.
- Wrap rope around fingers, overlapping ends by 2 inches, to create ring. Pinch ends together.
- Press and roll seam (positioned under your palm) using circular motion on counter to fully seal.
- Secrets to a Glossy Crust, Great Flavor, and Big Chew
- Here’s how we created the hallmarks of a New York bagel without the ingredients and equipment (or tap water) used by the local pros.
- HIGH-PROTEIN DOUGH:
- Lots of gluten is key to achieving that jaw-working chew, so we used relatively high-protein bread flour supplemented with vital wheat gluten, a powdered form of the protein that is sold in most supermarkets.
- COLD FERMENTATION:
- Proofing the dough overnight in the fridge allows it to develop an especially complex mix of flavor compounds.
- ROUGH HANDLING:
- We roll, stretch, and twist the dough to shape it into rings—actions that help tighten the gluten network and thus yield a bagel with substantial chew.
- A BETTER BOIL:
- Adding baking soda and sugar to the water in the boiling step helps encourage consistent browning.
- STEAM TREATMENT:
- Baking the bagels on a rack set in a rimmed baking sheet (set on a baking stone) and adding a small amount of boiling water creates steam that leads to a crisp, delicate crust.
- Our New York–style bagels, made here in Brookline.
- How to add Toppings
- Place 1/2 cup poppy seeds, sesame seeds, caraway seeds, dehydrated onion flakes, dehydrated garlic flakes, or coarse/pretzel salt in small bowl. Press tops of just-boiled bagels (side without cornmeal) gently into topping and return to wire rack, topping side up.
- For Everything Topping
- , combine 2 tablespoons poppy seeds, 2 tablespoons sesame seeds, 1 tablespoon onion flakes, 2 teaspoons garlic flakes, 2 teaspoons caraway seeds, and 1/2 teaspoon coarse or pretzel salt.
↑ Back to top
New York Bagels
Adapted from http://serenalissy.com/new-york-bagels/

Ingredients
- 1 cup plus 2 tablespoons ice water (9 ounces)
- 2 tablespoons malt syrup
- 2 2/3 cups (14 2/3 ounces) bread flour
- 4 teaspoons vital wheat gluten
- 2 teaspoons instant or rapid rise yeast
- 2 teaspoons salt
- 1/4 cup (1 1/4 ounces) cornmeal
- 1/4 cup (1 3/4 ounces) sugar
- 1 tablespoon baking soda
- 2 tablespoons poppy seeds
- 2 tablespoons sesame seeds
- 1 tablespoon onion flakes
- 2 teaspoons garlic flakes
- 2 teaspoons caraway seeds
- 1/2 teaspoon coarse salt
Cooks
Illustrated New York Bagels:
Everything
topping:
Steps
- Stir ice water and malt syrup together until malt syrup has fully dissolved. (We used 8 ounces here instead of 9 because of weather in TX. I'd recommend starting with 8 ounces and if dough appears dry in the food processor add the other ounce) In a food processor, process flour, wheat gluten and yeast until combined. With processor running, slowly add ice water mixture and continue to process until dough is just combined and no dry flour remains. Let dough stand for 10 minutes once complete.
- Add salt to dough and process until dough forms shaggy mass that clears the sides of work bowl, about 60-90 seconds. Transfer dough to unfloured counter and knead until smooth, about 1 minute. Divide dough into 8 equal pieces and cover loosely with plastic wrap.
- Working with one piece of dough at a time and keeping remaining pieces covered, form dough pieces into smooth round balls. Let dough balls rest on counter, covered, for 15 minutes.
- Sprinkle rimmed baking sheet with cornmeal. Working with one dough ball at a time, coat dough balls lightly with flour, and then, using your hands and rolling pin, pat and roll dough balls into 5 inch rounds. Starting with edge of dough farthest from you, roll into tight cylinder. Starting at center of cylinder and working towards ends, gently and evenly roll and stretch dough into 8-9 inch long ropes. Rolling end of dough under your hands in opposite directions, twist rope to form tight spiral. Without unrolling spiral, wrap rope around your fingers, overlapping ends of dough by about 2 inches under your palm to create ring shape. Pinch ends of dough gently together. With overlap under your palm, press and roll seam using circular motion on counter to fully seal. Transfer rings to prepared sheet and cover loosely with plastic leaving at least one inch between bagels. Let bagels stand at room temperature for one hour. Cover sheet tightly with plastic and refrigerate for 16-24 hours.
- One hour before baking, place baking stone on oven rack, and heat oven to 450 degrees.
- Bring 4 quarts water, sugar and baking soda to boil in large Dutch oven. Set wire rack in rimmed baking sheet and spray rack with vegetable oil spray.
- Transfer 4 bagels to boiling water and cook for 20 seconds. Using wire skimmer, flip bagels over and cook 20 seconds longer. Using wire skimmer, transfer bagels to prepared wire rack, with cornmeal side facing down. At this time, dip your bagels into the toppings of your choice. Repeat with remaining four bagels.
- Place sheet with bagels on preheated baking stone and pour 1/2 cup boiling water into bottom of sheet. Bake until tops of bagels are beginning to brown, 10-12 minutes. Using metal spatula, flip bagels and continue to bake until golden brown, 10-12 more minutes. Remove sheet from oven and let bagels cool on wire rack for at least 15 minutes. Serve warm or at room temperature.
Recipe Source: SerenaLissy.com
All images and content are
copyright protected. Do not use our images without prior permission.
↑ Back to top
New York Deli-Style Rye Bread
Tags: Breads
Servings: 1 large loaf
Ingredients
- 2 cups/310 grams bread flour
- 1 cup/155 grams light rye flour
- 2 teaspoons/6 grams caraway seeds (optional)
- 2 teaspoons/10 grams kosher salt
- 1½ teaspoon/5 grams active dry yeast
- 2 teaspoons honey
- 2 teaspoons flavorless vegetable oil, such as grapeseed or canola
- 1 teaspoon cornstarch
For the Bread:
For the Glaze:
Steps
- In the bowl of a standing mixer, whisk together the flours, caraway seeds (if using), salt and yeast. Put 1¼ cups lukewarm water into a small bowl, then stir in the honey and oil.
- Using a dough hook attachment at low speed, gradually pour in the liquid mixture. Mix just until a cohesive dough starts to form and no streaks of dry flour remain, about 2 minutes. Scrape down sides of the bowl halfway through. Cover bowl tightly with plastic wrap and let dough rest for 20 minutes.
- Turn mixer to medium-low and knead until smooth and elastic, easily clearing the sides of the bowl, about 8 minutes. The dough should be moist but not sticky; if needed, add more flour 1 tablespoon at a time.
- Lightly oil a medium-size mixing bowl. Transfer the dough to a lightly floured surface and knead 30 seconds, shaping dough into a smooth round ball. Place seam side down in the oiled bowl. Cover with plastic wrap and let rise until doubled in size, 1½ to 2 hours.
- Stack 2 rimmed baking sheets and line the top sheet with aluminum foil. Punch the dough down to deflate. Turn out onto a lightly floured surface. Press and stretch into a rough 6-inch square.
- Lift and fold top 2 corners of dough into the center of the square and press gently to seal. Lift and fold down the upper third of the dough toward the center and press gently to seal. Lift and fold down the top half of the dough to form a loaf, and pinch the seam closed. Turn the loaf seam side down, gently slide hands underneath, and transfer to the prepared pan. You should have an oval loaf about 8 inches by 4 inches; use hands to shape as needed. Cover with oiled plastic wrap and let rise until loaf increases in size by about half, 30 minutes to 1 hour.
- Meanwhile, place a rack in the lower third of oven and heat to 450 degrees. When the dough has risen, make 3 deep slashes across the top, using a sharp paring knife or razor blade. Place in oven, reduce heat to 375 degrees and bake until deep golden brown, 35 to 40 minutes, rotating pan once during baking.
- Meanwhile, dissolve cornstarch in 1 cup cold water. Simmer in saucepan or microwave until clear and syrupy. Transfer hot, baked bread immediately to a wire rack and brush top and sides with cornstarch mixture until glazed and shiny. Let cool completely before slicing.
↑ Back to top
Nigella's Chicken with 40 Cloves of Garlic
Adapted from https://www.foodnetwork.com/recipes/nigella-lawson/chicken-with-40-cloves-of-garlic-recipe-2012801
Tags: Chicken
Poultry
Servings: 4 to 6
Ingredients
- 2 tablespoons regular olive oil
- 8 chicken thighs (with skin on and bone in), preferably organic
- 1 bunch or 6 scallions
- 8 to 10 sprigs fresh thyme
- 40 cloves garlic (approximately 3 to 4 heads), unpeeled
- 2 tablespoons dry white vermouth or white wine
- 1 1/2 teaspoons kosher salt or 3/4 teaspoons table salt
- Good grinding pepper
Steps
- When I was young, this old French classic was still - though in a quiet way - very much in vogue. I dare say it was because the novelty of using so many garlic cloves had not worn off; it seemed somehow dangerously excessive. Even so, I don't think anyone would think it quite unremarkable now to put 40 cloves of garlic in a casserole. Certainly, if you peeled and chopped - let alone minced - the garlic, it would be inedible, but garlic cloves cooked encased in their skins grow sweet and caramelly as they cook, like savory bonbons in their sticky wrappers, rather than breathing out acrid heat. This is a cozy supper, not a caustic one.
- This dish entered my canon under someone else's auspices. A few years ago, for the fortieth birthday of a then-colleague and friend of mine, Nick Thorogood, his partner asked everyone to contribute something written expressly for purpose to be compiled in a fat tribute of a book. Since most of Nick's and my conversation dwells, with almost fetid passion, on food, it seemed only proper to write a recipe for him. And given that it was his fortieth birthday, this seemed the right recipe.
- It is not quite the classic version (not that there is only one: food is as variable as the people who cook it) but it sticks to the basic principles. Maybe because the white meat on chicken tends towards the utterly tasteless these days, I prefer to use not a whole chicken, but thigh portions only. Naturally, this wouldn't make sense if you were raising your own chickens, then slaughtering them for the pot, as was the custom when this recipe came into being (and very good it would have been, too, for adding oomph to an old bird) but if you're following the contemporary shopping model, it works very well. For some reason, I veer towards recipes that can easily be cooked in one of my wide and shallow cast-iron Dutch ovens and this fits the bill perfectly.
- By all means, add some steamed or boiled potatoes alongside if you wish, but I'd prefer, by far, a baguette or two to be torn up and dunked into the flavorsome juices; though don't rule out the option of sourdough toast, which is the perfect vehicle for spreading the sweet-cooked garlic onto. Otherwise, some green beans or baby peas or a plain green salad is all you need for a sure-fire salivation-inducing supper.
- Preheat the oven to 350 degrees F.
- Heat the oil on the stovetop in a wide, shallow ovenproof and flameproof Dutch oven (that will ultimately fit all the chicken in one layer, and that has a lid), and sear the chicken over a high heat, skin-side down. This may take 2 batches, so transfer the browned pieces to a bowl as you go.
- Once the chicken pieces are seared, transfer them all to the bowl. Finely slice the scallions, put them into the Dutch oven and quickly stir-fry them with the leaves torn from a few sprigs of thyme.
- Put 20 of the unpeeled cloves of garlic (papery excess removed) into the pan, top with the chicken pieces skin-side up, then cover with the remaining 20 cloves of garlic. Add the vermouth (or white wine) to any oily, chickeny juices left in the bowl. Swish it around and pour this into the pan too. Sprinkle with the salt, grind over the pepper, and add a few more sprigs of thyme. Put on the lid and cook in the oven for 1 1/2 hours.
- Make Ahead Note: Chicken can be browned and casserole assembled 1 day ahead. Cover tightly and store in the refrigerator. Season with salt and pepper and warm the pan gently on the stovetop for 5 minutes before baking as directed in recipe.
- Making Leftovers Right: If I do have any chicken left over - and I don't think I've ever had more than 1 thigh portion - I take out the bone then and there and put the chicken in the refrigerator. Later (within a day or two), I make a garlicky soup, by removing the chicken, adding some chicken broth or water to the cold, jelled juices, placing it over a high heat and, when that's hot, shredding the chicken into it and heating it through thoroughly, till everything is piping hot. You can obviously add rice or pasta. Otherwise, mash any leftover garlic into the concentrated liquid (which will be solid when cold), chop up some leftover chicken, and put it all into a saucepan with some cream. Reheat gently until everything is piping hot, and use as a pasta sauce or serve with rice.
Notes
- My Private Notes
- Add a Note
↑ Back to top
Niku Udon (Japanese Beef Noodle Soup)
Tags: Beef
Japanese Noodles
Servings: 4
Ingredients
- 20 grams/about 2 (4-inch) squares kombu
- 20 grams/about 2 cups loosely packed katsuobushi (dried bonito flakes)
- 1 pound thinly shaved beef (see Tips)
- 1 small yellow onion, thinly sliced
- 1 bunch scallions, white parts cut into 2-inch segments and halved lengthwise, light green parts thinly sliced at a sharp angle
- 1 tablespoon granulated sugar
- ¼ cup sake
- 2 tablespoons soy sauce
- 2 tablespoons mirin
- 2 tablespoons soy sauce, plus more as needed
- 3 tablespoons mirin, plus more as needed
- 1 pound fresh or frozen udon noodles
- Shichimi or nanami togarashi, or use your favorite chile powder (optional)
FOR THE DASHI
(SEE TIPS):
FOR THE BEEF:
FOR SERVING:
Steps
- Make the dashi: Combine 2 quarts cold water and the kombu in a medium saucepan, and place over medium heat. As soon as the water boils, remove from heat and add the katsuobushi, pushing it gently into the water to submerge (don’t stir vigorously). Steep for 5 to 10 minutes. Strain and discard the kombu and katsuobushi (or reserve to make another batch of weaker dashi) and return the dashi to the saucepan. Keep warm, but don’t let it boil.
- Cook the beef: Combine the shaved beef, onion, scallion whites, sugar, sake, soy sauce, mirin and 1 cup of the finished dashi in a large skillet or sauté pan. Bring to a simmer over high heat, stirring. Continue cooking over high heat, stirring frequently, until the beef and onions are tender and the mixture is still moist but not soupy, 10 to 15 minutes.
- As beef cooks, bring a pot of unsalted water to a boil — udon noodles are typically made with plenty of salt in the dough — and cook the udon noodles according to package directions.
- To serve, add the soy sauce and mirin to the reserved dashi and stir. Taste and adjust seasoning to taste with more soy sauce or mirin. (The broth should have a balanced savory-sweet flavor.)
- Divide the cooked noodles across 4 large serving bowls. Ladle the broth on top of the noodles. Divide the beef and onion mixture evenly across the noodles, including any liquid in the pan. Top each bowl with sliced scallion greens. (You may have extra.) Serve immediately with shichimi togarashi to taste.
Notes
- You can use instant dashi powder, such as Hondashi, in place of homemade dashi. Katsuobushi, kombu and shichimi togarashi can be found at any Japanese supermarket or many well-stocked Western supermarkets, or ordered online. You can find thinly shaved beef intended for shabu-shabu, sukiyaki or other hot pots at most Asian supermarkets. Alternatively, if you have a source for high-quality shaved beef for cheesesteaks, you can use that. If you can’t find shaved beef, you can use regular ground beef (any fat percentage will do) to achieve different but delicious results.
- If you prefer, you can turn this recipe into gyudon (Japanese beef and rice bowls): Omit the noodles and broth (making only enough dashi to cook the beef) and serve the cooked beef mixture on top of bowls of steamed white rice. Garnish with beni shoga (pickled red ginger) and a poached or fried egg.
↑ Back to top
No Bake Energy Bites
Adapted from http://www.gimmesomeoven.com/no-bake-energy-bites/

Ingredients
- 1 cup (dry) oatmeal (I used old-fashioned oats)
- 2/3 cup toasted coconut flakes
- 1/2 cup peanut butter
- 1/2 cup ground flaxseed or wheat germ
- 1/2 cup chocolate chips or cacao nibs (optional)
- 1/3 cup honey or maple syrup
- 1 Tbsp. chia seeds (optional)
- 1 tsp. vanilla extract
Steps
- Stir all ingredients together in a medium bowl until thoroughly mixed. Cover and let chill in the refrigerator for half an hour.
- Once chilled, roll into balls of whatever size you would like. (Mine were about 1" in diameter.) Store in an airtight container and keep refrigerated for up to 1 week.
- Makes about 20-25 balls.
- Substitution ideas can abound for just about any of these ingredients! Feel free to substitute in your favorite nut butter (almond butter, sunflower seed butter, etc.) for the peanut butter. And you could also add in some wheat germ in place of some or all of the flaxseed. I would caution, though, against substituting agave nectar for the honey, as the honey’s thickness helps hold things together.
- Some other fun substitutions for the chocolate chips (or an addition to them) could include:Method
- Stir all ingredients together in a medium bowl until thoroughly mixed. Cover and let chill in the refrigerator for half an hour.
- Once chilled, roll into balls of whatever size you would like. (Mine were about 1" in diameter.) Store in an airtight container and keep refrigerated for up to 1 week.
- Makes about 20-25 balls.
- Substitution ideas can abound for just about any of these ingredients! Feel free to substitute in your favorite nut butter (almond butter, sunflower seed butter, etc.) for the peanut butter. And you could also add in some wheat germ in place of some or all of the flaxseed. I would caution, though, against substituting agave nectar for the honey, as the honey’s thickness helps hold things together.
- chopped dried fruit (apricots, dates, raisins, etc.)
- dried berries (cranberries, cherries, etc.)
- chopped almonds, pecans, walnuts, or sunflower seeds
- other chips (butterscotch, dark chocolate, milk chocolate, white chocolate, M&Ms, etc.)
- other grains (different kinds of oatmeal, rice cereal, etc.)
Ali’s Tip:
Ali’s Tip:
Some other fun substitutions for the chocolate chips (or an addition
to
them) could include:Some other fun substitutions for the chocolate
chips (or an addition to them) could include:
Notes
- FAVORITE
↑ Back to top
No-Bake Crème Brûlée
Adapted from https://www.mycookbook-online.net/recipes/2501998/
Ingredients
- 2 tablespoons cornstarch
- 1/4 teaspoon salt
- 2 1/2 cups (600 ml) cream
- 8 large egg yolks
- 1 cup (240 ml) whole milk
- 6 tablespoons (75 g) sugar
- 1 vanilla bean, or 2 teaspoons pure vanilla extract
- Fine turbinado sugar, for brûléeing
Steps
- Make a cornstarch and egg yolk slurry: Put the cornstarch and salt in a medium bowl, and whisk out any lumps. Slowly whisk in the cream, making sure there are no lumps. Whisk in the egg yolks. It is important that this mixture be as smooth as you can make it.
- Warm and flavor the milk: Whisk the milk with the sugar over medium heat in a 3-quart (2.8-L) saucepan. If you’re using the vanilla bean, scrape it and add the seeds to the pan. Whisk the mixture so the seeds are incorporated into the liquid. (It should look speckled, like milk after an Oreo has been dunked in it repeatedly!) When the vanilla bean has been scraped out, drop the entire pod into the pan as well. Warm until bubbles form around the edge of the milk and the entire surface begins to quiver. Remove the vanilla bean and discard it. Turn off the heat.
- Temper the slurry: Pour all of the milk mixture into the slurry. Whisk vigorously to combine. The mixture should come together smoothly, with no lumps. Pour the mixture back into the pan. Thicken the pudding: Turn the heat back on to medium and bring to a simmer, whisking constantly and vigorously. Work all the angles of the pot, and scrape the bottom. It will take 2 to 5 minutes to bring the custard to a boil, with large bubbles that slowly pop up to the surface. Boil, whisking constantly, for 2 minutes. Turn off the heat. (If you didn’t use a vanilla bean, stir in the vanilla extract now.)
- Strain and chill the pudding: Pass the custard through a fine-mesh strainer. Pour it into eight 1/2-cup (120-ml) ovenproof ramekins and refrigerate. Do not cover them; in this case, you want a thin, dry skin to form on top. Chill the puddings for at least 4 hours, or overnight.
- Brûlée the pudding! Lightly sprinkle the surface of each pudding with an even layer of turbinado sugar. Shake the ramekins from side to side to even out the layer. Use a kitchen torch to caramelize the sugar. Let sit 5 minutes before serving so the sugar layer can cool and harden.
- Alternate method: Make sure your ramekins are broiler-safe. Move a rack up to the highest position and heat your broiler. Broil the ramekins for 3 to 7 minutes, until the sugar is evenly melted and browned. Keep a close watch and turn the ramekins once or twice to help them brown evenly.
Notes
- FAVORITE
↑ Back to top
No-Waste Tacos De Carnitas with Salsa Verde
Adapted from http://www.seriouseats.com/recipes/2010/07/no-waste-tacos-de-carnitas-with-salsa-verde-recipe.html
Servings: YIELD serves 4 to 6
Ingredients
- 2 medium onions
- 1/2 cup chopped cilantro
- 3 pounds boneless pork butt (shoulder), rind removed, cut into 2-inch cubes
- Kosher salt
- 1 medium orange
- 6 cloves garlic, split in half
- 2 bay leaves
- 1 cinnamon stick, broken into three or four pieces
- 1/4 cup vegetable oil
- 6 medium tomatillos (about 1 1/2 pounds), peeled and split in half
- 2 jalapeño peppers, split in half lengthwise, stem removed
- 3 limes, cut into wedges
- 1 cup crumbled queso fresco or feta
- 24 corn tortillas
Steps
- Adjust oven rack to middle position and preheat oven to 275 degrees. Cut one onion into fine dice and combine with cilantro. Refrigerate until needed. Split remaining onion into quarters. Set aside. Season pork chunks with 1 tablespoon salt and place in a 9 by 13 glass casserole dish. The pork should fill the dish with no spaces. Split orange into quarters and squeeze juice over pork. Nestle squeezed orange pieces into casserole. Add 2 onion quarters, 4 cloves garlic, bay leaves, and cinnamon stick to casserole. Nestle everything into an even layer. Pour vegetable oil over surface. Cover dish tightly with aluminum foil and place in oven. Cook until pork is fork tender, about 3 1/2 hours.
- Set large fine-meshed strainer 1 quart liquid measure or bowl. Using tongs, remove orange peel, onion, garlic, cinnamon stick, and bay leaves from pork. Transfer pork and liquid to strainer. Let drain for 10 minutes. Transfer pork back to casserole. You should end up with about 1/2 cup liquid and 1/2 cup fat. Using a flat spoon or de-fatter, skim fat from surface and add back to pork. Shred pork into large chunks with fingers or two forks. Season to taste with salt. Refrigerate until ready to serve. Transfer remaining liquid to medium saucepot.
- Add tomatillos, remaining 2 onion quarters, remaining 2 garlic cloves, and jalapeños to saucepot with strained pork liquid. Add water until it is about 1-inch below the top of the vegetables. Bring to a boil over high heat, reduce to a simmer, and cook until all vegetables are completely tender, about 10 minutes. Blend salsa with hand blender or in a stand-up blender until smooth. Season to taste with salt. Allow to cool and refrigerate until ready to use.
- To serve: Place casserole dish with pork 4-inches under a high broiler and broil until brown and crisp on surface, about 6 minutes. Remove pork, stir with a spoon to expose new bits to heat, and broil again for 6 more minutes until crisp. Tent with foil to keep warm.
- Meanwhile, heat tortillas. Preheat an 8-inch non-stick skillet over medium-high heat until hot. Working one tortilla at a time, dip tortilla in bowl filled with water. Transfer to hot skillet and cook until water evaporates from first side and tortilla is browned in spots, about 30 seconds. Flip and cook until dry, about 15 seconds longer. Transfer tortilla to a tortilla warmer, or wrap in a clean dish towel. Repeat with remaining tortillas.
- To eat, stack two tortillas on top of each other. Add two to three tablespoons carnitas mixture to center. Top with salsa verde, chopped onions and cilantro, and queso fresco. Serve with lime wedges.
Notes
- FAVORITE
↑ Back to top
Noodles & Cabbage
Ingredients
- 2 oz pancetta or bacon diced small
- 6 tablespoons butter, divided
- 2 cups onion, diced
- 1 1/2 pounds green cabbage, cored and cut into bite-sized pieces
- 1 1/2 teaspoons kosher salt
- 1/2 teaspoon freshly ground black pepper
- 6 ounces dry No Yolks® egg noodles, any size noodle
Steps
- In a medium to large skillet, over medium high heat, cook pancetta in 2 tablespoons of butter until crisp. Add onions and sauté for 2 minutes. Add 2 more tablespoons butter, cabbage, salt and pepper, cover and once mixture is hot, reduce to medium and cook for ten minutes.
- While cabbage mixture is cooking, cook No Yolks® noodles according to package direction and drain.
- Once cabbage is tender, remove cover and add drained noodles.
- Add remaining butter and cook to bring to serving temperature.0
- Season with additional salt and pepper as desired. (Lots of black pepper is traditional
Notes
- FAVORITE
↑ Back to top
Northeastern Potato, Eggplant and Peppers
Tags: Chinese
Vegetables Vegetarian
Servings: 4
Ingredients
- 3 medium-size potatoes, like Yukon Gold, peeled
- 1 large eggplant, peeled
- 2 green bell peppers, stemmed and seeded
- ½ cup chicken stock or water
- 2 teaspoons cornstarch
- 2 teaspoons soy sauce
- 2 teaspoons black or balsamic vinegar
- Vegetable oil for frying
- Salt to taste
- 1 tablespoon coarsely chopped garlic
Steps
- Cut potatoes and eggplant into wedges about 3 inches long. Cut peppers into pieces about 1 inch by 3 inches. In a bowl, whisk together stock, cornstarch, soy sauce and vinegar.
- In a wok, heat 3 cups oil to about 350 degrees, until a bit of potato bubbles fiercely when dropped in. Working in batches to avoid crowding pan, deep-fry potatoes, then eggplant, until golden all over and brown around edges, about 5 minutes a batch. Drain on paper towels and sprinkle with salt.
- Discard frying oil from wok and reheat wok over high heat until a drop of water sizzles on contact. Swirl in 1½ tablespoons oil and add peppers, stir-frying briskly until edges just start to brown. Add garlic, stir-fry 30 seconds, then return fried potatoes and eggplant to wok, stir-frying to combine.
- Add half the liquid mixture. Let simmer, stirring gently, until sauce is hot and thickened. Taste vegetables for doneness; they should be tender but not mushy. Cook, adding liquid a little at a time and allowing it to cook down, until vegetables are done. Serve immediately.
↑ Back to top
Northern-Style Cornbread
Tags: Baking
Quickbread
Ingredients
- 1 cup yellow cornmeal
- 1 cup all purpose flour
- 1/2 cup sugar
- 2 teaspoons baking powder
- 1 teaspoon Kosher salt
- 1/2 teaspoon baking soda
- 3/4 cup sour cream
- 1/2 cup buttermilk
- 2 large eggs
- 3 tablespoons melted butter, cooled slightly, plus 1 additional tablespoon for pan
- 2 tablespoons canola oil
Steps
- Place a 10" cast iron skillet on middle rack in oven and preheat to 425°F. In a medium bowl, whisk together cornmeal, flour, sugar, baking powder, salt, and baking soda. In a separate medium bowl, whisk together sour cream, buttermilk, eggs, 3 tablespoons melted butter, and canola oil. Pour wet ingredients into bowl with dry ingredients and whisk until completely combined.
- Using pot holders, carefully remove hot pan from oven. Place 1 tablespoon butter in skillet and swirl to completely melt and coat inside of pan. Pour in cornbread batter and place in oven. Bake until skewer inserted into middle of cornbread comes out clean, about 20 minutes. Let bread cool in pan for 5 minutes, then carefully turn out to wire rack and let cool an additional 10 minutes. Serve immediately. Reheat any leftover cornbread before serving again.
Notes
- FAVORITE
↑ Back to top
Northern-Style Cornbread

Servings: Serves 6-8
Ingredients
- 1 cup yellow cornmeal
- 1 cup all purpose flour
- 1/2 cup sugar
- 2 teaspoons baking powder
- 1 teaspoon Kosher salt
- 1/2 teaspoon baking soda
- 3/4 cup sour cream
- 1/2 cup buttermilk
- 2 large eggs
- 3 tablespoons melted butter, cooled slightly, plus 1 additional tablespoon for pan
- 2 tablespoons canola oil
Steps
- Place a 10" cast iron skillet on middle rack in oven and preheat to 425°F. In a medium bowl, whisk together cornmeal, flour, sugar, baking powder, salt, and baking soda. In a separate medium bowl, whisk together sour cream, buttermilk, eggs, 3 tablespoons melted butter, and canola oil. Pour wet ingredients into bowl with dry ingredients and whisk until completely combined.
- Using pot holders, carefully remove hot pan from oven. Place 1 tablespoon butter in skillet and swirl to completely melt and coat inside of pan. Pour in cornbread batter and place in oven. Bake until skewer inserted into middle of cornbread comes out clean, about 20 minutes. Let bread cool in pan for 5 minutes, then carefully turn out to wire rack and let cool an additional 10 minutes. Serve immediately. Reheat any leftover cornbread before serving again.
↑ Back to top
Norwegian Sour Cream Cookies
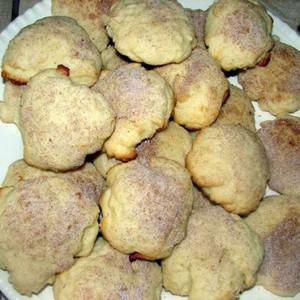
Tags: Baking
Norway
Servings: 24
Ingredients
- 1/3 cup butter, softened
- 2/3 cup sugar
- 1 egg, beaten
- 1/3 cup sour cream (not commercial sour cream, but cream or heavy cream that has gone sour or bad)
- 1 teaspoon vanilla
- 1 2/3 cups sifted flour
- 1 teaspoon baking powder
- 1/8 teaspoon baking soda
- 1/4 teaspoon salt
- Cinnamon Sugar: Combine a few tablespoons of sugar and about 1-2 teaspoons ground cinnamon
Steps
- Mix together your wet ingredients (butter, sugar, egg, sour cream and vanilla) until smooth. Add the flour, baking powder, baking soda and salt.
- Drop rounded spoonfuls onto an ungreased cookie sheet.
- Dip the bottom of a small glass into your bowl of cookie dough or smear a little dough on the glass. Dip the glass into cinnamon sugar.
- With the glass coated in sugar, lightly tap down each ball of dough on the sheet leaving a dusting of cinnamon sugar on the cookie. Continue with remaining dough. I sometimes use a spoon and sprinkle just a little more cinnamon sugar on each one as well.
- Bake for 10 minutes in a 400 degree fahrenheit oven.
↑ Back to top
Not Really Taco Bell's Taco Meat

Tags: Beef
Mexican
Servings: 6-8
Ingredients
- 2 tbsp vegetable canola, or other neutral-flavored oil
- 2 lbs lean ground beef preferably 90 percent lean or more
- 2 beef bouillon cubes (gluten-free if necessary), crumbled
- 2 tbsp dehydrated onion flakes
- 1 1/2 tbsp standard chili powder
- 2 tsp unsweetened cocoa powder do not use a powdered cocoa mix
- 2 tsp garlic powder
- 2 tsp mild smoked paprika
- 2 tsp granulated white sugar
- 1 tsp onion powder
- 1/2 tsp ground dried cayenne
- 1/4 cup raw steel-cut oats (certified gluten-free if necessary — do not use standard rolled or quick-cooking oats)
- 3/4 cup Water
Steps
- Press Sauté and set for Medium, Normal or Custom 300°F.
- As the pot heats, warm the oil in the insert set in a 5- or 6-quart Instant Pot. Crumble in the ground beef and cook, stirring often, until lightly browned, about 5 minutes.
- Stir in the crumbled bouillon cubes, onion flakes, chili powder, cocoa powder, garlic powder, smoked paprika, sugar, onion powder, and cayenne until fragrant, about 30 seconds. Add the steel-cut oats and stir well. Pour in the water and scrape up any browned bits on the pot’s bottom. Turn off the heat and lock the lid on the pot.
- Set the Instant Pot for Pressure Cook/Manual and set to LOW pressure for 6 minutes.
- When the pot has finished cooking, turn it off and let the pressure return to normal naturally, about 15 minutes. Unlatch the lid and open the cooker. Stir well and set aside for a couple of minutes so the meat continues to absorb the sauce.
Notes
- Other Pots
- For a 3-quart Instant Pot, you must
- halve all of the ingredient amounts.
- For an 8-quart Instant Pot, you must increase all of the ingredient amounts by 50 percent.
- For a 10-quart Instant Pot, you must double all of the ingredient amounts.
- Beyond
- Serve the taco meat in taco shells with diced tomatoes, shredded iceberg lettuce, and/or shredded Monterey Jack cheese.
- To make a copycat version of Taco Bell’s quesadilla sauce for tacos, whisk these ingredients in a medium bowl until uniform: 2/3 cup regular or low-fat mayonnaise (gluten- free, if necessary), 2/3 cup regular or low-fat sour cream (gluten-free, if necessary), 1/4 cup minced jarred (hot or “tamed”) pickled jalapeño rings, 1/4 cup brine from the jar of pickled jalapeños, 1 tablespoon mild paprika, 1 tablespoon ground cumin, 1 1/2 teaspoons onion powder, 1/2 teaspoon garlic powder, and
- 1/2 teaspoon standard chili powder. Store any leftovers in a covered bowl in the refrigerator for up to 3 days.
↑ Back to top
Nuoc Cham
Adapted from http://www.vietworldkitchen.com/blog/2008/11/basic-vietnamese-dipping-sauce-nuoc-cham.html
Tags: Condiments
Dips and Spreads
Vietnam
I made this. Is starred. Rated 5/5
Servings: YIELD 3/4 cup
Ingredients
- 3 tablespoons lime juice (1 fat, thin skin lime)
- 2 tablespoons sugar
- 1/2 cup water
- 2 1/2 tablespoons fish sauce
- 1 small garlic clove, finely minced
- 1 or 2 Thai chilis, thinly sliced or 1 teaspoon homemade chili garlic sauce or store bought (tuong ot toi)
Optional
additions:
Steps
- Make limeade. Combine the lime juice, sugar and water, stirring to dissolve the sugar. Taste and as yourself this question: Does this limeade taste good? Adjust the flavors to balance out the sweet and sour.
- Finish with fish sauce. Add the fish sauce and any of the optional ingredients. Taste again and adjust the flavors to your liking, balancing out the sour, sweet, salty and spicy. Aim for a bold, forward finish -- perhaps a little stronger than what you'd normally like. This sauce is likely to be used to add final flavor to foods wrapped in lettuce or herbs, which are not salted and therefore need a little lift to heighten the overall eating experience. My mother looks for color to gauge her dipping sauce. When it's a light honey or amber, she knows she's close.
Notes
- Advance Preparation - This sauce may be prepared early in the day and left to sit at room temperature.
- Variation - Use half lime juice and half Japanese rice vinegar for a less assertive sauce. Some delicately flavored dishes require this.
↑ Back to top
O'Brian's Potato Casserole

Tags: Potato
Sides
Servings: Original recipe yields
8 servings
Ingredients
- 1 (2 pound) package frozen hash brown potatoes, thawed
- ½ cup melted butter
- 1 (10.75 ounce) can condensed cream of chicken soup
- 12 ounces shredded American cheese
- 1 (8 ounce) container sour cream
- 1 teaspoon salt
- ½ onion, chopped
- 2 cups crushed cornflakes cereal
- ½ cup melted butter
Steps
- Preheat oven to 350 degrees F (175 degrees C). Lightly grease one 9x13 inch baking dish.
- Place potatoes in bottom of prepared dish.
- Combine the 1/2 cup butter, condensed soup, cheese, sour cream, salt and onion; mix well and pour over potatoes. Top with crushed corn flakes and drizzle with 1/2 cup melted butter.
- Bake uncovered at 350 degrees F (175 degrees C) for 45 minutes.
↑ Back to top
Oatmeal Cookies

Tags: Cookies
I made this.
Ingredients
- 1 cup cup all-purpose flour
- 1/4 teaspoon baking powder
- 1/4 teaspoon baking soda
- 1/4 teaspoon ground cinnamon
- 1/2 teaspoon salt
- 1 stick unsalted butter, room temperature
- 2/3 cup packed light-brown sugar
- 1/3 cup granulated sugar
- 1 large egg
- 1 teaspoon pure vanilla extract
- 1 1/2 cup old-fashioned rolled oats
- 1/2 cup golden raisins
- nuts (optional)
Steps
- Preheat oven to 350 degrees. Sift flour, baking powder, baking soda, cinnamon, and 1/2 teaspoon salt into a bowl. Beat butter and sugars until pale and fluffy. Mix in egg and vanilla, then flour mixture. Mix in oats, then raisins.
- Using a 1 1/4-inch ice cream scoop (or 1 tablespoon), drop dough onto parchment-lined baking sheets, spacing each scoop about 2 inches apart. Bake until edges are golden, about 14 minutes. Let cookies cool on a wire rack.
Notes
- FAVORITE
↑ Back to top
Oatmeal Craisins® Chocolate Chunk Cookies
Adapted from http://www.oceanspray.com/Recipes/Corporate/Desserts---Snacks/Oatmeal-Craisins%C2%AE-Chocolate-Chunk-Cookies.aspx
Servings: Makes approximately 2
1/2 dozen cookie
Ingredients
- 2/3 cup butter or margarine, softened
- 2/3 cup brown sugar
- 2 large eggs
- 1 1/2 cups old-fashioned oats
- 1 1/2 cups flour
- 1 teaspoon baking soda
- 1/2 teaspoon salt
- 1 5-ounce package Ocean Spray® Craisins® Original Dried Cranberries
- 2/3 cup white or semi-sweet chocolate chunks or chips
Steps
- Preheat oven to 375ºF.
- Using an electric mixer, beat butter or margarine and sugar together in a medium mixing bowl until light and fluffy. Add eggs, mixing well. Combine oats, flour, baking soda and salt in a separate mixing bowl. Add to butter mixture in several additions, mixing well after each addition. Stir in dried cranberries and chocolate chunks.
- Drop by rounded teaspoonfuls onto ungreased cookie sheets. Bake for 10-12 minutes or until golden brown. Cool on wire rack.
- Makes approximately 2 1/2 dozen cookie
Notes
- FAVORITE
↑ Back to top
Oatmeal Dinner Rolls

Ingredients
- 2 cups water
- 1 cup quick-cooking oats
- 3 tablespoons butter
- 1 package (1/4 ounce) active dry yeast
- 1/3 cup warm water (110° to 115°)
- 1/3 cup packed brown sugar
- 1 tablespoon sugar
- 1 to 1/2 teaspoons salt
- 4 to 1/4 cups all-purpose flour
Steps
- In a large saucepan, bring water to a boil; add oats and butter. Cook and stir for 1 minute. Remove from the heat; cool to lukewarm.
- In a large bowl, dissolve yeast in warm water. Add the oat mixture, sugars, salt and 4 cups of flour; beat until smooth. Add enough remaining flour to form a soft dough.
- Turn onto a floured surface; knead until smooth and elastic, about 6-8 minutes. Place in a greased bowl, turning once to grease top. Cover and let rise in a warm place until doubled, about 1 hour.
- Punch dough down; allow to rest for 10 minutes. Shape into 18 balls. Place in two greased 9-in. round baking pans. Cover and let rise until doubled, about 45 minutes.
- Bake at 350° for 20-25 minutes or until golden brown. Remove from pan to wire racks. Yield: 1-1/2 dozen.
Notes
- FAVORITE
↑ Back to top
Oi Muchim (Korean Marinated Cucumber Banchan)

Servings: 2 to 3
Ingredients
- 4 Persian cucumbers (about 10 1/2 ounces; 300 g), sliced crosswise into 1/2-inch-thick rounds
- 1 tablespoon ( 8 g) coarse ground gochugaru (Korean chili flakes)
- 1 1/2 teaspoons ( 6 g) kosher salt
- 1 teaspoon ( 5 g) sugar
- 2 tablespoons ( 30 ml) unseasoned rice wine vinegar
- 1 teaspoon ( 5 ml) fish sauce
- 1 medium garlic clove ( 5 g), finely minced or grated
- 3 tablespoons ( 45 ml) toasted sesame oil
- 1 tablespoon ( 10 g) toasted sesame seeds
Steps
- In a medium bowl, combine cucumbers, gochugaru, salt, and sugar. Using clean hands, massage cucumbers, squeezing and tossing them with seasoning, until cucumber is well-coated on all sides and begins to release liquid and color of gochugaru brightens to vibrant orange-red, about 1 minute.
- Transfer cucumbers to a colander, then set colander inside bowl used to season cucumbers. Cut a round of parchment paper large enough to cover surface of cucumbers, and place over cucumbers. Then place a weight on top of parchment to press down on cucumbers (canned goods, a cast iron skillet, a mixing bowl filled with water, or a Chef's Press all make for good weights). Set aside to drain for at least 30 minutes and up to 1 hour.
- Meanwhile, in a separate medium bowl, whisk together rice wine vinegar, fish sauce, and garlic. Whisking constantly, slowly drizzle in sesame oil until emulsified.
- Once cucumbers have drained, remove weight and discard parchment paper. Using clean hands, squeeze cucumbers to get rid of excess moisture, then transfer to bowl with dressing; discard accumulated cucumber liquid. Toss cucumbers with dressing until well-coated all over, about 30 seconds. Add sesame seeds and toss to combine. Divide between small individual serving bowls and serve, or transfer to airtight container and refrigerate for up to 2 days.
- Special Equipment
- Colander, parchment paper, Chef's Press (optional)
- Make-Ahead and Storage
- The marinated cucumbers can be refrigerated in an airtight container for up to 2 days. Bring to room temperature before serving.
↑ Back to top
Old-Fashioned Latkes
Adapted from https://www.seriouseats.com/recipes/2011/12/old-fashioned-latkes-chanukah-hanukah-potato-pancakes.html
Servings: 16 latkes
Ingredients
- 4 1/2 pounds (2kg) russet potatoes (about 7 medium-large)
- 5 cups diced onion
- 4 eggs
- 1 1/4 cups matzo meal (more or less as needed)
- 2 tablespoons (24g) kosher salt, to taste
- Canola or peanut oil, for frying
- Applesauce and sour cream, for serving
Steps
- Shred potatoes with the grating disk of a food processor. After every 2 or 3 potatoes, wrap shreds in cheesecloth that has been folded over twice. Tie corners around the handle of a wooden spoon and twist bundle until water flows out. Collect water in a bowl and squeeze all potatoes until dry. Transfer potatoes to a large mixing bowl along with diced onion.
Let
drained potato water sit, undisturbed, until a pool of brown water
forms on top of a slurry of pale potato starch. Carefully drain off
water, then mix starch into potato and onion mixture with your hands.
Mix in eggs, one at a time, alternating with 1/4-cup additions of
matzo
meal, until latke mix can be formed into patties that just stick
together in your hands. Add salt incrementally.
Heat 1/2 inch oil in a cast iron skillet over medium-high heat until a
shred of potato immediately bubbles when added to pan. Form a small
amount of latke mix into a disk and fry on both sides until golden
brown to test for seasoning. Taste and add more salt as needed.
Form latke mix into patties about 4 inches wide and 1 inch thick in
the
center. Slide into pan, cooking no more than 4 at a time. Fry until a
golden-brown crust forms on bottom, then flip with a slotted spatula
and fork until same color is achieved on other side. Flip as needed to
get a firm, darker-than-golden crust on both sides.
Transfer to a sheet pan lined with paper towels to cool for 2 minutes,
then serve with applesauce and sour cream at the table.
↑ Back to top
Old-Fashioned Pecan Pie
Ingredients
- 1 cup maple syrup
- 1 cup packed light brown sugar
- 1/2 cup heavy cream
- 1 tablespoon molasses
- 4 tablespoons unsalted butter cut into 1/2-inch pieces
- 1/2 teaspoon salt
- 6 large egg yolks lightly beaten
- 1 1/2 cups pecans toasted and chopped
- 1 (9-inch) unbaked pie shell (see note), chilled in pie plate for 30 minutes
Steps
- MAKE FILLING: Adjust oven rack to lowest position and heat oven to 450 degrees. Heat syrup, sugar, cream, and molasses in saucepan over medium heat, stirring occasionally, until sugar dissolves, about 3 minutes. Remove from heat and let cool 5 minutes. Whisk butter and salt into syrup mixture until combined. Whisk in egg yolks until incorporated.
- BAKE PIE: Scatter pecans in pie shell. Carefully pour filling over. Place pie in hot oven and immediately reduce oven temperature to 325 degrees. Bake until filling is set and center jiggles slightly when pie is gently shaken, 45 to 60 minutes. Cool pie on rack for 1 hour, then refrigerate until set, about 3 hours or up to 1 day. Bring to room temperature before serving.
Notes
- FAVORITE
↑ Back to top
Old-Fashioned, No-Knead English Muffins

Tags: Breads
Ingredients
- 10 ounces bread flour (2 cups; 285g)
- 5 ounces whole wheat flour (1 cup; 140g) (see note)
- 2 3/4 teaspoons (11g) Diamond Crystal kosher salt; for table salt, use the same weight or half as much by volume
- 1 1/4 teaspoons (4g) instant dry yeast (not rapid-rise)
- 12 ounces cold milk (1 1/2 cups; 340g), any percentage will do (see note)
- 3 1/2 ounces honey (1/4 cup; 100g)
- 1 large egg white, cold
- 5 ounces fine cornmeal (1 cup; 145g), for dusting
- Roughly 1 ounce bacon fat, unsalted butter, or oil (2 tablespoons; 30g), for griddling
Steps
- Make the Dough and Let Rise: In a large bowl, mix bread flour, whole wheat flour, kosher salt, and yeast together until well combined. Add milk, honey, and egg white, stirring with a flexible spatula until smooth, about 5 minutes. Cover with plastic and set aside until spongy, light, and more than doubled, 4 to 5 hours at 70°F (21°C). (The timing is flexible depending on your schedule.)
- For the Second Rise: Thickly cover a rimmed aluminum baking sheet with an even layer of cornmeal. With a large spoon, dollop out twelve 2 2/3–ounce (75g) portions of dough; it's perfectly fine to do this by eye. If you'd like, pinch the irregular blobs here and there to tidy their shape. Sprinkle with additional cornmeal, cover with plastic, and refrigerate at least 12 and up to 42 hours.
- To Griddle and Serve: Preheat an electric griddle to 325°F (160°C) or warm a 12-inch cast iron skillet or griddle over medium-low heat. When it's sizzling-hot, add half the butter and melt; griddle muffins until their bottoms are golden brown, about 8 minutes. Flip with a square-end spatula and griddle as before. Transfer to a wire rack until cool enough to handle, then split the muffins by working your thumbs around the edges to pull them open a little at a time. Toast before serving and store leftovers in an airtight container up to 1 week at room temperature (or 1 month in the fridge).
- Rimmed baking sheet; electric or cast iron griddle, or 12-inch cast iron skillet; square-end spatula; wire rack
Special Equipment:
Notes
- This recipe was developed and tested with King Arthur's bread flour and classic whole wheat. While English muffins can be adapted to any brand, differences in starch content and milling practices may necessitate an adjustment in hydration. Stone-ground whole wheat may require as little as 10 ounces milk (1 1/4 cups; 285g), while white whole wheat may accommodate a splash more.
- Make-Ahead and Storage
- Store leftover English muffins in an airtight container up to 1 week at room temperature, or 1 month in the fridge.
↑ Back to top
The One-Bowl Passover Cake You Have to Make This Year
Adapted from https://www.myjewishlearning.com/the-nosher/the-one-bowl-passover-cake-you-have-to-make-this-year/

Tags: Cakes and Pastries
Jewish Passover
Ingredients
- 3 lg eggs, at room temperature
- ½ cup granulated sugar
- 2 Tbsp oil
- Zest of 1 lemon (about 2 tsp)
- 2 Tbsp lemon juice
- 1 tsp vanilla extract
- ¼ tsp almond extract (optional)
- 2¼ cups super-fine almond flour
- 1 Tbsp potato starch, plus more for dusting the berries
- 1 tsp baking powder
- ½ tsp baking soda
- ¼ tsp salt
- 1¼ cup blueberries, fresh or frozen
- 1 Tbsps turbinado or coarse sugar (optional)
Steps
- Preheat the oven to 350°F. Generously grease and line a 9” round or square baking dish with parchment paper.
- In a standmixer fitted with the whisk attachment, or in a large bowl using a whisk or handheld mixer, beat together the eggs and sugar until doubled in size and pale yellow, about 5-6 minutes.
- To the egg mixture, add the oil, lemon zest, lemon juice, vanilla, and almond extract if using. Whisk together until just combined, being careful not to deflate the egg mixture too much.
- To the center of the bowl, add the almond flour, potato starch, baking powder, baking soda, and salt. Gently fold the mixture until the dry ingredients are fully incorporated into the wet ingredients. Toss the blueberries in a spoonful of starch, and add 1 cup of the berries to the batter. Gently fold and combine.
- Transfer the batter to the lined and greased baking dish. Top the cake with the remaining ¼ cup of berries. Sprinkle the top of the cake with turbinado sugar.
- Bake for 30-35 minutes, or until it looks evenly golden brown and set on top, and a cake tester comes out clean. Allow the cake to fully cool before serving. This cake is best served the same day it is prepared, but can be made one day in advance if needed. Top with powdered sugar, or whipped cream before serving if desired.
↑ Back to top
Oven-Fried Artichokes
Adapted from https://www.latimes.com/recipe/oven-fried-artichokes
Tags: Snacks
Vegetables
Ingredients
- 2 jars (12 ounces each) oil-marinated artichoke quarters
- Everyday olive oil, if needed (see note above)
- Flaky sea salt
- Lemon wedges, for serving
Steps
- Heat the oven to 425 degrees. Line a baking sheet with foil.
Place a colander or sieve over a bowl and add the artichoke quarters,
letting their oil drain into the bowl. Transfer the artichokes to the
prepared baking sheet. Drizzle with 2 tablespoons of the oil from the
bowl.
Bake the artichokes, flipping each with tongs halfway through cooking,
until golden brown and crisp all over, 20 to 25 minutes.
Transfer the artichokes to a platter while hot and sprinkle with flaky
sea salt. Serve immediately with lemon wedges.
↑ Back to top
Oven-Fried Chicken
Tags: Chicken
I made this. Is starred.
Ingredients
- 1 to 1/4 cups kosher salt or 1/2 cup plus 2 T table salt
- 1/4 cup sugar
- 2 T paprika
- 3 medium heads garlic, cloves separated
- 3 bay leaves, crumbled
- 7 cups low-fat buttermilk
- 4 whole chickens, legs separated into drumsticks and thighs and skin removed
- 1/4 cup vegetable oil
- 1 box (about 5 oz) plain melba toast , crushed or Japanese Panko breadcrumbs
- 2 large eggs
- 1 T Dijon mustard
- 1 tsp dried thyme
- 3/4 tsp salt
- 1/2 tsp ground black pepper
- 1/2 tsp dried oregano
- 1/4 tsp. garlic powder
- 1/4 tsp cayenne (optional)
Chicken:
Coating:
Steps
- To make melba toast crumbs, place the toasts in a heavy-duty plastic bag, seal, and pound
- with a meat mallet, or other heavy blunt object. Leave some crumbs in the mixture the size of
- pebbles, but most should resemble course sand.
- For the chicken: In large zipper-lock plastic bag, combine, salt, sugar, paprika, garlic cloves and bay leaves. With rubber mallet or flat meat mallet, smash garlic into salt and spice mixture thoroughly. Pour mixture into plastic container or nonreactive stockpot. Add buttermilk and stir until salt is completely dissolved. Immerse chicken and refrigerate until fully seasoned, 2 to 3 hours. Remove chicken from buttermilk brine and shake off excess; place in single layer on a large wire rack set over baking sheet. Refrigerate uncovered for 2 hours. (After 2 hours, chicken can be covered with plastic wrap and refrigerated up to 6 hours longer).
- Adjust oven rack to upper-middle position and heat oven to 400 degrees F. Line sheet pan with foil and set large flat wire rack over sheet pan.
- For the coating: Drizzle oil over Melba toast crumbs in shallow dish or pie plate, toss well to coat. Mix eggs, mustard, thyme, salt, pepper, oregano, garlic powder, and optional cayenne with a fork in a second shallow dish or pie plate.
- Working one piece at a time, coat chicken on both sides with egg mixture. Set chicken in melba crumbs, sprinkle crumbs over chicken, and press to coat. Turn chicken over and repeat on other side. Gently shake off excess and place on rack. Bake until chicken is deep nutty brown and juices run clear, about 35 -40 minutes.
Notes
- FAVORITE
↑ Back to top
Overnight Apple Butter
Servings: YIELD 4 cups (serving
size: 1/4 cup)
Ingredients
- 1 cup packed brown sugar
- 1/2 cup honey
- 1/4 cup apple cider
- 1 tablespoon ground cinnamon
- 1/4 teaspoon ground cloves
- 1/8 teaspoon ground mace
- 10 medium apples, peeled and cut into large chunks (about 2 1/2 pounds)
Steps
- Combine all ingredients in a 5-quart electric slow cooker. Cover and cook on low 10 hours or until apples are very tender.
- Place a large fine-mesh sieve over a bowl; spoon one-third of apple mixture into sieve. Press mixture through sieve using the back of a spoon or ladle. Discard pulp. Repeat procedure with remaining apple mixture. Return apple mixture to slow cooker. Cook, uncovered, on high 1 1/2 hours or until mixture is thick, stirring occasionally. Spoon into a bowl; cover and chill up to a week.
- Stovetop variation: Combine all ingredients in a Dutch oven. Cover and cook over medium-low heat 1 hour or until apples are very tender, stirring occasionally. Strain through a sieve as recipe instructs in Step 2. Return mixture to pan. Cook, uncovered, over medium-low heat 15 minutes or until thick, stirring frequently.
Notes
- FAVORITE
↑ Back to top
Overnight Waffles
Tags: Breakfast
Ingredients
- 2 cups all ‐purpose flour
- 1 tablespoon sugar
- ½ teaspoon salt
- 2 cups milk
- 8 tablespoons butter, melted and cooled
- ½ teaspoon vanilla extract (optional)
- Neutral oil, like grapeseed or corn, for brushing the iron
- 2 eggs
▢ ½ teaspoon
instant yeast:
Steps
- The night before you want to serve the waffles, combine the dry ingredients in a large bowl. Stir in the milk, then the butter and the vanilla if you're using it. The mixture will be creamy and loose. Cover with plastic wrap and set aside overnight at room temperature. (Of course you can do this in the morning if you want waffles for supper.)
- To start baking, brush the waffle iron lightly with oil and heat it. Separate the eggs and stir the yolks into the batter. Beat the whites until they hold soft peaks. Fold them gently into the batter.
- Spread enough batter onto the waffle iron to barely cover it; bake until the waffle is done, usually 3 to 5 minutes, depending on your iron. Serve immediately or keep warm for a few minutes on an ovenproof plate in a 200°F oven.
↑ Back to top
Overnight Waffles

Tags: Breakfast
Is starred. Rated
5/5
Ingredients
- 1/2 teaspoon instant yeast
- 2 cups all-purpose flour
- 1 tablespoon sugar
- 1/2 teaspoon salt
- 2 cups milk
- 8 tablespoons butter, melted and cooled
- 1/2 teaspoon vanilla extract
- 2 eggs
Steps
- Before going to bed, combined the dry ingredients, then stir in the milk, butter and vanilla. Cover with plastic wrap or a tight-fitting lid and let stand overnight at room temperature.
- Grease and preheat your waffle iron. Separate the eggs and stir the yolks into the batter. Beat the whites until they hold soft peaks. Fold them into the batter.
- Ladle the batter into the waffle and waffle until light golden brown, 3 to 5 minutes depending on your waffle iron.
Notes
- FAVORITE
↑ Back to top
Pad Krapow Gai (Thai Basil Chicken)
Servings: 2 to 4
Ingredients
- ¼ cup vegetable oil
- 1 pound ground chicken (preferably dark meat)
- 2 teaspoons minced garlic (from 2 cloves)
- 2 teaspoons granulated sugar
- 1 teaspoon minced fresh bird’s-eye chile or other fresh chile (from 1 chile)
- 8 ounces green beans, trimmed and cut into ½-inch pieces (about 1½ cups)
- 3 tablespoons oyster sauce
- 2 tablespoons fish sauce
- 1 tablespoon Thai seasoning sauce (such as Golden Mountain; see Tip)
- 1 cup loosely packed basil leaves (preferably Thai basil or holy basil)
- Ground white pepper, to taste
- Steamed jasmine rice, for serving
- 4 crispy fried eggs (optional)
Steps
- Heat a wok or large nonstick skillet over medium-high, then swirl in the oil. Once the oil is shimmering, add the ground chicken and cook, actively breaking the chicken up into small pieces, until it is mostly cooked, about 6 minutes.
- Stir in the garlic, sugar and chile until evenly distributed and fragrant, about 2 minutes, then add the green beans, oyster sauce, fish sauce and Thai seasoning, and cook, stirring constantly, until the chicken is fully cooked, the green beans are crisp-tender and the krapow is glossy, about 2 minutes.
- Remove from heat, add the basil and a dash of white pepper and toss to combine. If the sauce seems to cling too tightly to the mixture, add 1 to 2 tablespoons of water to make it loose and glossy.
- Serve over rice, and top with a crispy fried egg, if desired. Serve with additional Thai seasoning to sprinkle on top, according to taste.
Notes
- Golden Mountain is made with fermented soybeans, like soy sauce, and imparts sweetness along with its jolt of salinity. It can be purchased in Asian supermarkets or online and lasts indefinitely. A dash of it adds complexity to stir-fries, curries, fried rice and cooked proteins and vegetables.
↑ Back to top
Pad See Ew (Thai Noodles with Beef and Broccoli)
Adapted from https://www.allrecipes.com/recipe/214536/pad-see-ew-thai-noodles-with-beef-and-broccoli/
Tags: Beef
Noodles Thai
Vegetables
Servings: Original recipe yields
8 servings
Ingredients
- 1 (8 ounce) package wide rice noodles
- 1 cup bite size broccoli pieces
- 1 tablespoon vegetable oil
- 1 teaspoon crushed garlic
- ½ pound rib-eye steak, sliced thin
- ½ cup water
- 1 tablespoon cornstarch
- 3 tablespoons oyster sauce
- 3 tablespoons soy sauce
- 1 tablespoon fish sauce
- 1 tablespoon white sugar
- 1 pinch salt and ground black pepper to taste
- 1 egg
Steps
- Place the dry rice noodles in a bowl, cover with hot water, and let soak until white and soft but not mushy, about 10 minutes. Drain and set aside.
- Bring a small pot of water to a boil; cook the broccoli in the boiling water until cooked and still firm, 5 to 7 minutes. Drain and set aside.
- Heat the oil in a skillet over medium heat; cook the garlic in the hot oil until fragrant, 3 to 5 minutes. Stir in the sliced steak; cover the skillet and cook until the meat is just turning from pink to grey, 5 to 7 minutes. Whisk the water and cornstarch together in a bowl; pour into the skillet along with the oyster sauce, soy sauce, fish sauce, and sugar. Add the rice noodles and broccoli and stir to mix evenly. Season with salt and pepper. Allow the mixture to simmer while you prepare the egg.
- Prepare a small skillet with cooking spray and heat over medium-low heat. Cook the egg in the prepared skillet until cooked through and the yolk is solid. Add the cooked egg to the other skillet and stir to incorporate. Serve hot.
↑ Back to top
Paella with Chickpeas, Green Beans, and Shishito Peppers
Adapted from https://www.bluezones.com/recipe/paella-with-chickpeas-green-beans-and-shishito-peppers/
Tags: Beans and Other
Legumes Rice
Spanish
Servings: 8 to 10
Ingredients
- 6 cups no-salt-added vegetable broth
- ¼ teaspoon crumbled saffron threads*
- 2 tomatoes, halved
- ½ cup extra-virgin olive oil
- 24 small shishito peppers, stemmed but left whole
- 1 large yellow onion, chopped
- 6 garlic cloves, chopped
- 2 red bell peppers, chopped
- 2 teaspoons Spanish smoked paprika (pimenton)
- 1 teaspoon ground cumin
- 1 teaspoon kosher salt, plus more to taste
- 1 pound fresh green beans, cut into 1-inch pieces
- ¼ cup finely chopped flat-leaf parsley leaves
- 3 cups imported Spanish rice, preferably Calasparra (may substitute Arborio)
- 3 cups cooked or canned no-salt-added chickpeas (from one 29-ounce can or two 15-ounce cans), drained and rinsed
- 2 cups spinach, chopped
- 1 cup Chickpea Aioli or store-bought vegan or traditional mayonnaise, mixed with 1 finely chopped garlic clove
Steps
- Preheat the oven to 400 º F.
- In a saucepan, combine the broth and saffron over medium-high heat, bring to a boil, then reduce the heat to low and cover while you assemble the paella.
- Set a box grater over a bowl and run the cut side of the tomatoes across the coarse side of the grater, continuing until you are left with just the skin.
- Heat a 17-to 18-inch paella pan over two or three burners or heat two 10-to 11-inch cast-iron skillets over medium-high heat. Pour in the olive oil and when it shimmers, add the shishitos, searing each side for a minute or two, then use tongs to transfer them to a plate.
- Stir in the onion, garlic, and bell peppers and cook, stirring frequently, until the vegetables are soft, 6 to 8 minutes. Stir in the paprika, cumin, and salt and cook until fragrant, about 30 seconds. Stir in the green beans and cook, stirring frequently, until they lose a little of their crunch.
- Stir in the tomato pulp and parsley and cook for about 30 seconds, then stir in the rice, coating it well with the pan mixture. Stir in the broth, chickpeas, and spinach, taste, and add more salt if needed. Cook, stirring and rotating the pan occasionally, until the mixture is no longer soupy, but the rice is still covered by liquid, about 5 minutes.
- Nestle the shishitos on the rice and transfer the pan to the oven. Bake, uncovered, until the rice is al dente, 12 to 15 minutes. Remove, cover with aluminum foil, and let it sit for 10 minutes, until the rice is fully cooked.
- Serve hot, with the aioli on the side.
Notes
- Note: Saffron may not be available, or may not be in your budget, so a common substitute is an Okinawan favorite, turmeric.
↑ Back to top
Pain De Mie

Tags: Breads
Servings: YIELD 1 loaf.
Ingredients
- 2/3 cup (5 3/8 ounces) milk
- 1 cup (8 ounces) water
- 6 tablespoons (3 ounces) butter
- 2 1/4 teaspoons salt
- 3 tablespoons (1 1/4 ounces) sugar
- 1/4 cup (1 1/8 ounces) Baker's Special Dry Milk or nonfat dry milk
- 3 tablespoons (1 1/4 ounces) potato flour
- 4 3/4 cups (20 ounces) King Arthur Unbleached All-Purpose Flour
- 2 teaspoons instant yeast
Steps
- Manual Method: In a large bowl, combine the milk, water, butter, salt and sugar. Add the dried milk, flours and yeast, stirring till the dough starts to leave the sides of the bowl. Transfer the dough to a lightly greased surface, oil your hands, and knead it for 5 to 8 minutes, or until it's smooth and supple. Because of the relatively high fat content of this dough, it's a real pleasure to work with. Transfer the dough to a lightly greased bowl or dough-rising bucket, cover the bowl or bucket, and allow the dough to rise till puffy though not necessarily doubled in bulk, about 1 1/2 hours, depending on the warmth of your kitchen.
- Mixer Method: Combine the ingredients as above, using a flat beater paddle or beaters, then switch to the dough hook(s) and knead for 5 to 8 minutes. Transfer the dough to a lightly greased bowl or dough-rising bucket, cover the bowl or bucket, and allow the dough to rise till doubled in bulk, 1 to 2 hours.
- Bread Machine Method: Place all of the ingredients into the pan of your machine, program the machine for Manual or Dough, and press Start. When the cycle is finished, remove the dough and proceed as follows.
- Lightly grease a 13 x 4-inch pain de mie pan. Transfer the risen dough to a lightly greased work surface, shape it into a 13-inch log, and fit it into the pan. Cover the pan with lightly greased plastic wrap, and allow the dough to rise until it's just below the lip of the pan, 45 minutes to 1 hour, depending on the warmth of your kitchen (it may rise even more slowly in a cool kitchen; don't worry, this long rise will give it great flavor).
- Remove the plastic, and carefully place the cover on the pan, let it rest an additional 10 minutes while you preheat your oven to 350°F. Bake the bread for 25 minutes. Remove the pan from the oven, carefully remove the lid, and return the bread to the oven to bake for an additional 20 minutes, or until it tests done; an instant-read thermometer inserted into the center will register 190°F. Remove the bread from the oven, and turn it out of the pan onto a rack to cool completely.
Notes
- FAVORITE
↑ Back to top
Pain De Mie
Servings: 1 loaf
Ingredients
- Choose your measure: Volume Ounces Grams
- 2/3 cup milk
- 1 cup lukewarm water
- 3/8 cup (6 tablespoons) butter
- 2 1/4 teaspoons salt
- 3 tablespoons sugar
- 1/4 cup Baker's Special Dry Milk or 1/2 cup nonfat dry milk
- 3 tablespoons potato flour
- 4 3/4 cups King Arthur Unbleached All-Purpose Flour
- 2 teaspoons instant yeast
Steps
- Combine all of the ingredients, and mix and knead — using your hands, a mixer, or a bread machine set on the dough cycle — to form a smooth, soft dough.
- Transfer the dough to a lightly greased bowl or dough-rising bucket, cover the bowl or bucket, and allow the dough to rise until puffy though not necessarily doubled in bulk, about 1 1/2 hours, depending on the warmth of your kitchen.
- Lightly grease a 13" pain de mie pan. Gently deflate the dough, transfer it to a lightly greased work surface, shape it into a 13" log, and fit it into the pan. Cover the pan with lightly greased plastic wrap, and allow the dough to rise until it's just below the lip of the pan, 45 minutes to 1 hour, depending on the warmth of your kitchen (it may rise even more slowly in a cool kitchen; don't worry, this long rise will give it great flavor).
- Towards the end of the rising time, preheat the oven to 350°F.
- Remove the plastic, and place the cover on the pan. Bake the bread for 25 minutes. Remove the pan from the oven, carefully remove the lid, and return the bread to the oven to bake for an additional 20 minutes, or until it tests done; a digital thermometer inserted into the center will register 190°F.
- Remove the bread from the oven, and turn it out of the pan onto a rack to cool completely.
- Store, wrapped, at room temperature for 4 days, or freeze for up to 3 months.
Notes
- Ingredient weight chart
- How to measure flour
- High-altitude baking
- Tips & techniques
- Tools & pans
- Baker's yeast
↑ Back to top
Pakistani Potato Samosas

Tags: Shopping
Servings: YIELD About 20 small
samosas
Ingredients
- 2 cups all-purpose flour
- ½ teaspoon salt
- 1 teaspoon ajwain or cumin seeds
- ¼ cup vegetable oil
- ½ cup cold water
- 1 ½ pounds russet potatoes, peeled, in 1-inch cubes
- 3 medium carrots, chopped, optional
- 3 tablespoons vegetable oil, plus about 3 cups more for frying
- 1 chopped onion, about 1 cup
- Salt and pepper
- 1 teaspoon cumin seeds
- 1 teaspoon black mustard seeds
- 1 teaspoon grated garlic
- 1 teaspoon grated ginger
- 2 Serrano chiles, finely chopped
- 1 teaspoon turmeric
- ½ teaspoon garam masala
- 3 tablespoons lemon juice
- 1 cup chopped cilantro, tender stems and leaves
FOR THE DOUGH:
FOR THE
FILLING:
Steps
- Make the dough: Put flour, salt and ajwain seeds in a medium bowl. Drizzle in oil and work into flour with fingers until mixture looks mealy. Add water gradually, stirring until a soft dough has formed. If dough seems too dry, add a tablespoon of water; if it seems wet, add a tablespoon of flour. Knead for 1 minute and form into a ball. Wrap and set aside for 30 minutes.
- Make the filling: Simmer the potatoes and carrots in well-salted water until tender, about 10 to 15 minutes. Drain and set aside to cool. Put 2 tablespoons oil in a deep, heavy skillet over medium-high heat. Add onions, season with salt and pepper and cook, stirring, until softened and beginning to brown, 8 to 10 minutes.
- Put 1 tablespoon oil in a very small skillet over medium heat. When hot, add cumin and mustard seeds. When seeds are fragrant and beginning to pop, stir in garlic, ginger, chiles, turmeric and garam masala. Let sizzle for a minute, then add skillet contents to onions.
- Add reserved potatoes and carrots and stir well to coat. Check seasoning and adjust salt. Remove mixture to a bowl and let cool to room temperature. When cool, add lemon juice and chopped cilantro. Mix well, smashing the potatoes a bit in the process.
- Make the samosas. Portion the dough into 20 pieces, each weighing 1 1/2 ounces. Form each piece into a ball and place on a large plate. Cover with a damp napkin.
- Roll each dough ball into a thin disk about 6 inches in diameter, as if rolling out pie dough. Cut each disk exactly in half, leaving 2 pieces with a straight side and a round side.
- Form each half-disk into a cone by folding it over and pinching the straight sides together. Put 3 tablespoons filling in the opening on the round side, then pinch closed to make a stuffed triangle. Form the rest of dough balls into samosas.
- Heat about 2 inches of oil in the bottom of wok over medium-high heat. Adjust heat to maintain the oil at 350 degrees. Slip samosas 4 at a time into the hot oil and let fry on one side until golden, a minute or so, then flip and cook other side. Lift from oil and drain on paper towels. Serve samosas hot or at room temperature, accompanied by your favorite chutney.
↑ Back to top
Paleo Sriracha

Ingredients
- 1 1/2 pounds fresh red jalapeño peppers, stemmed, seeded, and roughly chopped
- 8 garlic cloves, peeled and smashed
- 1/3 cup apple cider vinegar
- 3 tablespoons tomato paste
- 3 tablespoons honey
- 2 tablespoons Paleo-friendly fish sauce (Red Boat!)
- 1 1/2 teaspoons kosher salt
Steps
- Puree
- Bring to Boil then simmer for 5 to 10
Notes
- FAVORITE
↑ Back to top
Pan De Cristal

Tags: Breads
Servings: 4 medium (5” x 7”)
breads
Ingredients
- 2 cups plus 3 tablespoons (500g) water*
- 4 cups plus 2 1/2 tablespoons (500g) King Arthur Unbleached Bread Flour
- 3/4 teaspoon (2.5g) instant yeast
- 2 teaspoons (10g) salt
- 1 tablespoon (15g) olive oil, for the pan
* See “tips,”
below.
Steps
- To make the dough: For best results, weigh your flour; this recipe was developed by metric weight. However, if you prefer to work with volume measurements, please be sure to measure your flour the King Arthur way: gently spoon the flour into a cup, then sweep off any excess.
- In a medium bowl, mix the water, flour, yeast, and salt until thoroughly combined and homogenous. Note: The dough starts off very slack and wet. That’s OK; it will transform itself through time and folds.
- Oil a two-quart rectangular baking dish (10" x 7") with the olive oil. If you don’t have a 2-quart dish, an 8" or 9" square pan will work. Don’t worry about any pan you use being oven-safe; you won’t be baking the bread in it.
- Pour the dough into the dish. Check the dough’s temperature by inserting a digital thermometer into the center. If it's less than 72°F, move the dish to a warmer spot, e.g., your oven with the light turned on.
- Cover the dish and allow the dough to rest for 20 minutes.
- Start with a bowl fold: Use your wet hands to grab a section of dough from one side, lift it up, then press it down into the middle. Repeat this eight to 12 times.
- Cover the dish and allow the dough to rest for 20 minutes.
- Then do a coil fold: With wet hands, reach under the dough and stretch the middle upward until the dough releases from the dish. Roll it forward off your hands, allowing it to fold over (or “coil”) on itself. This is called a coil fold. Rotate the dish 90° (a quarter turn) and repeat. Continue performing this folding action until the dough feels like it won’t stretch and elongate easily, usually four to five times initially. Note: You’ll be doing this three more times, each time building strength and developing the dough. See "tips," below, for more details,
- Cover the dish and allow the dough to rest for 20 minutes.
- Repeat the coil fold. Cover the dish and allow the dough to rest for 20 minutes.
- At this point, the dough should be easier to handle and feel tighter. Repeat the coil fold using only two or three folds this time. Cover the dish and allow the dough to rest for 20 minutes.
- Repeat the coil fold one last time, using only one or two folds if the dough is relatively strong. Cover the dish and allow the dough to rest for about 80 minutes.
- To divide the dough: As gently as possible, turn the dough out onto a heavily floured surface, maintaining the rectangle or square shape — be careful not to deflate the delicate dough. Sprinkle a generous amount of flour on top of the dough, leaving no exposed sticky spots. Then, working as gently as possible, use a bench knife or other sharp knife to divide it into four pieces. Gently place two pieces on a piece of parchment, leaving space between them. Repeat with the remaining two pieces of dough, placing them on another piece of parchment.
- Allow the loaves to rest at room temperature for 2 hours, uncovered. While the loaves are resting, preheat the oven to 475°F with a baking stone or steel on a lower rack. (If you don't have a stone or steel, see "tips," below.) Allow the oven to preheat for 1 hour to ensure it’s thoroughly heated. The loaves are ready for the oven when there are a few large bubbles on the surface of each loaf and they feel light and airy.
- To bake the bread: Carefully slide the two loaves (still resting on the parchment) into the oven onto the preheated stone or steel. If space is tight and the full sheet of parchment won’t fit on the stone or steel, cut the parchment between the two loaves and arrange them as best you can. Allow the other two loaves to continue to rest.
- Bake the loaves for 15 minutes, then transfer them, from the stone or steel, directly onto a rack in the upper third of the oven for an additional 13 to 15 minutes. (Leave the stone in place.) Moving them to the rack allows the baking stone or steel to become hot again in preparation for the next two loaves. After a total of 27 to 30 minutes of baking, remove the loaves from the oven and allow them to cool on a rack.
- Repeat the process with the two remaining loaves. Cool the bread fully before slicing.
- Storage information: Wrap the bread loosely and store it at room temperature for up to several days; freeze for longer storage.
Notes
- In warmer months (or when your indoor temperature is 70°F to 75°F), the water used should be 80°F to 85°F. In cooler months (when your indoor temperature is around 65°F), use 100°F to 105°F water. The DDT (desired dough temperature) at the end of mixing is 74°F to 76°F.
- Depending on the strength of your dough, you may not need to perform all four coil folds. If after the third coil fold, the dough feels relatively strong, tight, and is easy to handle, immediately allow the dough to rest for 80 minutes and skip the final coil fold. This will ensure an open crumb structure.
- If you don't have a baking stone/steel: For best results, the dough should receive an immediate blast of heat as soon as it goes into the oven. A baking stone or steel is ideal for transferring heat, but if you don't have one, you can use a cast iron pan or another oven-safe skillet. Allow the pan(s) to preheat with the oven (step 14). A preheated baking sheet may also work, but results may vary and some baking sheets may warp in the oven when heated alone.
- This bread stales (and its crust softens) quickly due to its high ratio of crust to crumb. Re-crisp the loaf before serving by heating it in a preheated 400°F oven, uncovered, for about 8 to 10 minutes.
- Sample timeline:
- 12:00 p.m. Mix the dough
- 12:20 p.m. Bowl fold
- 12:40 p.m. Coil fold #1
↑ Back to top
Pan De Horno (Real Spanish Bread)
Ingredients
- 1 1/2 tablespoons of bread yeast
- 3 cups warm water
- 7 cups flour, unbleached
- 2 teaspoons salt
- 1/4 cup extra virgin olive oil
Steps
- Mix the yeast in the warm water let sit in a warm place for 10 minutes.
- Mix the salt with the flour and run through a fine mesh, allowing it to fall into a large bowl.
- Using your fingers, mix in the oil or butter.
- Slowly pour in the raised yeast while working the dough with your hands so as to produce a firm dough.
- Place the dough on a flat surface with some flour sprinkled on it.
- Knead the dough until it becomes firm and elastic.
- Grease the bowl and place the dough in it. Cover the bowl with a moist sheet and set in a warm place until the dough has doubled in volume.
- Once again, remove the dough and knead it again over a floured tabletop, to remove air pockets and until the dough feels smooth. Return the dough to a covered bowl and let it rest, 15 minutes should be sufficient.
- Cut the dough as desired to form bars, loafs or balls and place on greased pans.
- Cut slits in top of bread as desired.
- Let bread raise on pans 30 more minutes or until the tops of the bars begin to flatten.
- Place in a very hot oven (450 degrees F) for 30 o 50 minutes, or until the tops of the bars become toasted and they sound hollow when knocked on the bottom. Remove the bread from the pans and let cool.
- This recipe comes from a panadero.
- It may not come out exactly right the first time, but with practices the results are incredible.
Notes
- FAVORITE
↑ Back to top
Pan-Roasted Chicken and Vegetables
Tags: Pan Meals
Poultry
Servings: 6
Ingredients
- 2 pounds red potatoes (about 6 medium), cut into 3/4-inch pieces
- 1 large onion, coarsely chopped
- 2 tablespoons olive oil
- 3 garlic cloves, minced
- 1-1/4 teaspoons salt, divided
- 1 tablespoon minced fresh rosemary or 1 teaspoon dried rosemary, crushed, divided
- 3/4 teaspoon pepper, divided
- 1/2 teaspoon paprika
- 6 bone-in chicken thighs (about 2-1/4 pounds), skin removed
- 6 cups fresh baby spinach (about 6 ounces)
- Lemon wedges, optional
Steps
- Preheat oven to 425°. In a large bowl, combine potatoes, onion, oil, garlic, 3/4 teaspoon salt, 2 teaspoons fresh rosemary or 1/2 teaspoon dried rosemary and 1/2 teaspoon pepper; toss to coat. Transfer to a 15x10x1-in. baking pan coated with cooking spray.
- In a small bowl, mix paprika and the remaining salt, rosemary and pepper. Sprinkle chicken with paprika mixture; arrange over vegetables. Roast until a thermometer inserted in chicken reads 170°-175° and vegetables are just tender, 35-40 minutes.
- Remove chicken to a serving platter; keep warm. Top vegetables with spinach. Roast until vegetables are tender and spinach is wilted, 8-10 minutes longer. Stir vegetables to combine; serve with chicken. If desired, serve with additional fresh rosemary and lemon wedges.
Notes
- PAN-ROASTED CHICKEN AND VEGETABLE TIPS
- What other vegetables pair well with chicken?
↑ Back to top
Pane Francese
Tags: Breads
Italian
The Italian cousin to the baguette, pane
francese (which means “French bread”) is a long loaf with a moist and
open crumb. Pane francese has a crisp yet forgiving exterior, and it’s
slightly flatter in shape than a baguette. It’s nice for sandwiches or
for dipping into olive oil. We started this bread with a sponge, which
developed structure, depth of flavor, and a hint of tang in the loaf.
After preparing this mixture (made with water, yeast, and 20 percent of
the bread’s total weight of flour), we let it sit on the counter for 6
to 24 hours before mixing it into the dough. During this period the
yeast consumed sugars in the flour. This fermentation process, visible
by the rise and collapse of the mixture, created acid as a byproduct,
which helps develop the strong gluten network that suppors the loaf’s
open crumb. Also, extending the overall fermentation time for the dough
is what provides great flavor. (For more information on sponges, click
here.) A repeated series of gentle folds
Ingredients
- ⅔ cup (3⅔ ounces) bread flour
- ½ cup (4 ounces) water, room temperature
- ⅛ teaspoon instant or rapid-rise yeast
- 2⅔ cups (14⅔ ounces) bread flour
- 1½ teaspoons instant or rapid-rise yeast
- 1¼ cups (10 ounces) water, room temperature
- 1 tablespoon extra-virgin olive oil
- 2¼ teaspoon salt
SPONGE:
DOUGH:
Steps
- 1). For the sponge Stir all ingredients in 4-cup liquid measuring cup with wooden spoon until well combined. Cover tightly with plastic wrap and let sit at room temperature until sponge has risen and begins to collapse, about 6 hours (sponge can sit at room temperature for up to 24 hours).
- 2). For the dough Whisk flour and yeast together in bowl of stand mixer. Stir water into sponge with wooden spoon until well combined. Using dough hook on low speed, slowly add sponge mixture to flour mixture and mix until cohesive dough starts to form and no dry flour remains, about 2 minutes, scraping down bowl as needed. Cover bowl tightly with plastic and let dough rest for 20 minutes.
- 3). Add oil and salt to dough and knead on medium-low speed until dough is smooth and elastic and clears sides of bowl, about 5 minutes. Transfer dough to lightly greased large bowl or container, cover tightly with plastic, and let rise for 30 minutes.
- 4). Using greased bowl scraper (or your fingertips), fold dough over itself by gently lifting and folding edge of dough toward middle. Turn bowl 45 degrees and fold dough again; repeat turning bowl and folding dough 6 more times (total of 8 folds). Cover tightly with plastic and let rise for 30 minutes. Repeat folding, then cover bowl tightly with plastic and let dough rise until nearly doubled in size, 1 to 1½ hours.
- 5). Mist underside of couche with water, drape over inverted rimmed baking sheet, and dust evenly with flour. Transfer dough to lightly floured counter. Press and stretch dough into 12 by 6-inch rectangle, deflating any gas pockets larger than 1 inch, and divide in half crosswise. Cover loosely with greased plastic.
- 6). Gently press and stretch 1 piece of dough (keep remaining piece covered) into 7-inch square. Fold top corners of dough diagonally into center of square and press gently to seal. Stretch and fold upper third of dough toward center and press seam gently to seal.
- 7). Stretch and fold dough in half toward you to form rough loaf with tapered ends and pinch seam closed. Roll loaf seam side down. Starting at center of dough and working toward ends, gently and evenly roll and stretch dough until it measures 15 inches long by 2½ inches wide. Moving your hands in opposite directions, use back and forth motion to roll ends of loaf under your palms to form sharp points.
- 8). Gently slide your hands underneath each end of loaf and transfer seam side up to prepared couche. On either side of loaf, pinch couche into pleat, then cover loosely with large plastic garbage bag. Repeat steps 6 through 7 with remaining piece of dough and place on opposite side of 1 pleat. Fold edges of couche over loaves to cover completely, then carefully place sheet inside garbage bag. Tie, or fold under, open end of bag to fully enclose. Let rise until loaves increase in size by about half and dough springs back minimally when poked gently with your knuckle, 30 minutes to 1 hour (remove loaf from bag to test).
- 9). One hour before baking, adjust oven racks to lower-middle and lowest positions. Place baking stone on upper rack, place 2 disposable aluminum pie plates filled with 1 quart lava rocks each on lower rack, and heat oven to 450 degrees. Line pizza peel with 16 by 12-inch piece of parchment paper, with long edge perpendicular to handle. Bring 1 cup water to boil.
- 10). Remove sheet with loaves from bag. Unfold couche, pulling from ends to remove pleats. Dust top of loaves with flour. (If any seams have reopened, pinch closed before dusting with flour.) Gently pushing with side of flipping board, roll 1 loaf over, away from other loaf, so it is seam side down. Using your hand, hold long edge of flipping board between loaf and couche at 45-degree angle, then lift couche with your other hand and flip loaf seam side up onto board. Invert loaf seam side down onto prepared pizza peel, about 2 inches from long edge of parchment, then use flipping board to straighten loaf and reshape as needed. Repeat with second loaf, leaving at least 3 inches between loaves.
- 11). Carefully pour ½ cup boiling water into 1 disposable pie plate of preheated rocks and close oven door for 1 minute to create steam. Meanwhile, holding lame concave side up at 30-degree angle to loaf, make one ½-inch-deep slash with swift, fluid motion lengthwise along top of loaf, starting and stopping about ½ inch from ends. Repeat with second loaf.
- 12). Working quickly, slide parchment with loaves onto baking stone and pour remaining ½ cup boiling water into second disposable pie plate of preheated rocks. Bake until crust is golden brown and loaves register 205 to 210 degrees, 20 to 25 minutes, rotating loaves halfway through baking. Transfer loaves to wire rack, discard parchment, and let cool completely, about 3 hours, before serving.
Notes
- problem: The loaf is bland.
- solution: Let the sponge sit for at least 6 hours.
- Made with just flour, water, yeast, and salt (and a little olive oil), our pane francese gets most of its flavor from a prefermented sponge. Don’t undercut the 6- to 24-hour fermentation time; it is essential for developing the slight tang we expect from this loaf. The sponge is ready for use when it rises and then begins to collapse.
- problem: You don’t have a flipping board.
- solution: Make one from cardboard.
- You don’t want to deflate the delicate proofed loaf, so you can’t pick it up with your hands. A flipping board has a thin edge that you can wedge under the loaf to roll it onto the pizza peel without collapsing the air bubbles. But if you don’t have a flipping board, you can fashion one from cardboard: Simply tape two 16 by 4-inch pieces of heavy cardboard together with packaging tape.
- problem: The loaf sticks to the couche.
- solution: Mist and flour the couche well.
- Although a linen couche is better than a cotton towel for releasing loaves, it can still stick to very wet doughs. Mist the couche with water and dust it well with flour—2 tablespoons does the trick.
↑ Back to top
Panzanella with Mozzarella and Herbs
Servings: YIELD 6 servings TOTAL
TIME 45 minutes
Ingredients
- 4 ounces ciabatta or baguette, preferably stale, cut into 1-inch cubes (about 3 cups)
- 6 tablespoons extra-virgin olive oil, more to taste
- 3/4 teaspoon kosher sea salt, more to taste
- 2 pounds very ripe tomatoes, preferably a mix of varieties and colors
- 6 ounces fresh mozzarella, torn or cut into bite-size pieces
- 1/2 cup thinly sliced red onion, about half a small onion
- 2 garlic cloves, grated to a paste
- 2 tablespoons red wine vinegar, more to taste
- 1 tablespoon chopped fresh oregano or thyme (or a combination)
- Large pinch red pepper flakes (optional)
- 1/2 teaspoon Dijon mustard
- Black pepper, to taste
- 1/2 cup thinly sliced Persian or Kirby cucumber, about 1 small cucumber
- 1/2 cup torn basil leaves
- 1/4 cup flat-leaf parsley leaves, roughly chopped
- 1 tablespoon capers, drained
Steps
- Heat oven to 425 degrees. Spread the bread cubes on a rimmed baking sheet and toss with 2 tablespoons oil and a pinch of salt. Bake until they are dried out and pale golden brown at the edges, about 7 to 15 minutes. Let cool on a wire rack.
- Cut tomatoes into bite-size pieces and transfer to a large bowl. Add mozzarella, onions, garlic paste, 1 tablespoon vinegar, oregano or thyme, 1/4 teaspoon salt and the red pepper flakes if using. Toss to coat and set aside.
- In a medium bowl, combine remaining 1 tablespoon vinegar, the mustard, 1/4 teaspoon salt and some black pepper to taste. While whisking constantly, slowly drizzle in the remaining 4 tablespoons olive oil until the mixture is thickened. Stir in cucumbers, basil and parsley.
- Add bread cubes, cucumber mixture and capers to the tomatoes and toss well. Let sit for at least 30 minutes and up to 4 hours before serving. Toss with a little more olive oil, vinegar and salt if needed just before serving.
Notes
- FAVORITE
↑ Back to top
Papaya Granita

Ingredients
- Papaya – 2 cups, peeled, chopped
- Sugar – 1/2 cup
- Lemon Juice – 2 tsp
- Ginger – 2 tsp, peeled, grated
Steps
- Combine the papaya and ginger in a blender.
- Blend well until smooth.
- Heat a pan over medium flame.
- Add sugar and enough water.
- Stir well until the sugar is fully dissolved.
- When it starts to boil, switch off the flame and remove the pan.
- Cool and add the ground papaya.
- Add lemon juice and stir well.
- Pour this into a freezer safe container.
- Keep it in the freezer for 8 to 12 hours.
- Keep stirring every 3 to 4 hours to break it apart and refreeze until set.
- Serve.
Notes
- FAVORITE
↑ Back to top
Parker House Rolls
Servings: 11) Yield: 16 rolls.
Ingredients
- 3 cups King Arthur Unbleached All-Purpose Flour
- 2 1/2 teaspoons instant yeast
- 3 tablespoons sugar
- 1 1/4 teaspoons salt
- 1/4 cup potato flour or 3/4 cup instant mashed potato flakes
- 3 tablespoons butter
- 1 cup milk
- 1 large egg
- 3 1/2 to 4 tablespoons butter, melted; for brushing on rolls
Steps
- In a large mixing bowl, or in the bowl of an electric mixer, combine all of the ingredients (except the 3 tablespoons melted butter at the end), mixing to form a shaggy dough. Note: to speed the rising process, whisk together the milk and egg, and heat gently just enough to remove the refrigerator chill; then add to the remaining ingredients.
- Knead the dough, by hand (10 minutes) or by machine (7 to 8 minutes) until it's smooth.
- Place the dough in a lightly greased bowl or 8-cup measure (so you can track its rising progress). Allow it to rise for 90 minutes; it'll become quite puffy, though it probably won't double in bulk. Note that the dough takes quite awhile to get going; after 1 hour, it may seem like it's barely expanded at all. But during the last half hour, it rises more quickly.
- Transfer the dough to a lightly greased work surface. Divide it in half. Working with one half at a time, roll or pat the dough into an 8" x 12" rectangle.
- Brush the dough all over with a light coating of the melted butter. You'll have melted butter left over; save it to brush on top of the baked rolls.
- Cut the dough in half lengthwise, to make two 4" x 12" rectangles. Working with one rectangle at a time, fold it lengthwise to about 1/2" of the other edge, so the bottom edge sticks out about 1/2" beyond the top edge. You'll now have a rectangle that's about 2 1/4" x 12". Repeat with the other piece of dough.
- Cut each of the rectangles crosswise into four 3" pieces, making a total of 8 rolls, each about 2 1/4" x 3". Place the rolls, smooth side up, in a lightly greased 9" x 13" pan. Repeat with the remaining piece of dough, making 16 rolls in all. You'll arrange 4 rows of 4 in the pan, with the longer side of the rolls going down the longer side of the pan. Gently flatten the rolls to pretty much cover the bottom of the pan.
- Cover the pan, and let the rolls rise for about 45 minutes to 1 hour, until they're puffy but definitely not doubled. Towards the end of the rising time, preheat the oven to 350°F.
- Bake the rolls for 20 to 25 minutes, until they're golden brown and feel set.
- Remove them from the oven, and brush with the remaining melted butter. Pull them apart to serve.
- Yield: 16 rolls.
Notes
- FAVORITE
↑ Back to top
Parmesan-Roasted Broccoli
Adapted from http://www.foodnetwork.com/recipes/ina-garten/parmesan-roasted-broccoli-recipe/index.html
Ingredients
- 4 to 5 pounds broccoli
- 4 garlic cloves, peeled and thinly sliced
- Good olive oil
- 1 1/2 teaspoons kosher salt
- 1/2 teaspoon freshly ground black pepper
- 2 teaspoons grated lemon zest
- 2 tablespoons freshly squeezed lemon juice
- 3 tablespoons pine nuts, toasted
- 1/3 cup freshly grated Parmesan cheese
- 2 tablespoons julienned fresh basil leaves (about 12 leaves)
Steps
- Preheat the oven to 425 degrees F.
- Cut the broccoli florets from the thick stalks, leaving an inch or two of stalk attached to the florets, discarding the rest of the stalks. Cut the larger pieces through the base of the head with a small knife, pulling the florets apart. You should have about 8 cups of florets. Place the broccoli florets on a sheet pan large enough to hold them in a single layer. Toss the garlic on the broccoli and drizzle with 5 tablespoons olive oil. Sprinkle with the salt and pepper. Roast for 20 to 25 minutes, until crisp-tender and the tips of some of the florets are browned.
- Remove the broccoli from the oven and immediately toss with 1 1/2 tablespoons olive oil, the lemon zest, lemon juice, pine nuts, Parmesan, and basil. Serve hot.
- Note: Recipe was halved for TV
Notes
- not 4 to 5 pounds but about 1-3
↑ Back to top
Parmesan-Roasted Cauliflower

Servings: YIELD Makes 4 servings
Ingredients
- 1 head cauliflower
- 1 sliced medium onion
- 4 thyme sprigs
- 4 unpeeled garlic cloves
- 3 tablespoons olive oil
- Kosher salt
- Freshly ground black pepper
- 1/2 cup grated Parmesan
Steps
- Preheat oven to 425°F. Cut 1 head cauliflower into florets; toss on a large rimmed baking sheet with 1 sliced medium onion, 4 thyme sprigs, 4 unpeeled garlic cloves, and 3 tablespoons olive oil; season with kosher salt and freshly ground black pepper. Roast, tossing occasionally, until almost tender, 35-40 minutes. Sprinkle with 1/2 cup grated Parmesan, toss to combine, and roast until cauliflower is tender, 10-12 minutes longer.
Notes
- FAVORITE
↑ Back to top
Party Shrimp
Adapted from http://www.tasteofhome.com/recipes/party-shrimp
Servings: 30
Ingredients
- 1 tablespoon olive oil
- 1 to 1/2 teaspoons brown sugar
- 1 to 1/2 teaspoons lemon juice
- 1 garlic clove, thinly sliced
- 1/2 teaspoon paprika
- 1/2 teaspoon Italian seasoning
- 1/2 teaspoon dried basil
- 1/4 teaspoon pepper
- 1 pound uncooked large shrimp, peeled and deveined
Steps
- In a large resealable plastic bag, combine the first eight ingredients. Add shrimp; seal bag and turn to coat. Refrigerate 2 hours.
- Drain shrimp, discarding marinade. Place shrimp on an ungreased baking sheet. Broil 4 in. from heat 3-4 minutes on each side or until shrimp turn pink. Yield: about 2-1/2 dozen.
- Nutritional Facts
- 1 shrimp: 14 calories, 0 fat (0 saturated fat), 18mg cholesterol, 18mg sodium, 0 carbohydrate (0 sugars, 0 fiber), 2g protein.
- Sponsored Content
Notes
- FAVORITE
↑ Back to top
Passover Bagels
Tags: Holidays
Jewish Rolls and Buns
Ingredients
- 1/2 cup cold water
- pinch of salt
- 1/2 cup vegetable oil
- 1 tbl sugar
- 1 cup matzoh meal
- 3 large eggs
Steps
- Put water salt oil and sugar and bring to a boil. Beat in matzoh all at once and stir until it forms a ball. Let cool. Beat in eggs one at a time until thoroughly combined.
- 1 heaping tbl per roll bagel.
- 350 for 30 min
Notes
- FAVORITE
↑ Back to top
Passover Crack
Adapted from https://toriavey.com/chocolate-toffee-matzo-crunch/

Servings: 12
Ingredients
- 4-6 unsalted matzos (use gluten free matzo crackers to make this recipe gluten free)
- 1 cup unsalted butter or margarine (butter recommended)
- 1 cup brown sugar
- 1 1/4 cups chopped semi-sweet or dark chocolate chips (use dairy free chocolate for pareve/vegan)
- 2 tablespoons chopped pistachios (or your favorite Passover-friendly nut - optional)
- Sea salt
Steps
- Preheat the oven to 375°F. Line a sheet tray with a layer of foil, then cover the foil with a sheet of parchment. Evenly cover the sheet tray with matzos. Break or cut the matzos into smaller pieces if necessary.
- In a heavy bottomed saucepan, combine the butter, brown sugar, and a generous pinch of sea salt. Cook over medium heat, whisking constantly, until the mixture comes to a boil (about 2 to 4 minutes). Boil for 3 additional minutes and continue stirring constantly.
- Remove from the heat and pour the toffee mixture over the matzos.
- Use a spatula to spread evenly across the entire surface of the matzo. Make sure you spread it out fairly quickly or it will start to get sticky and become harder to smooth over.
- Place the baking sheet in the oven and immediately reduce the heat to 350 degrees F. Bake for 15 minutes. Check frequently to be sure that the mixture is not burning. If it appears to browning too quickly, remove the tray from the oven and reduce the heat to 325 degrees F, then replace the tray when the temperature drops a bit.
- Once 15 minutes have passed, remove the matzos from the oven and evenly sprinkle the chopped chocolate chips over the top.
- Let stand for 5 minutes, then spread the chocolate over the matzo.
- Sprinkle the chopped pistachios and a light sprinkle of sea salt over the top of the melted chocolate.
- While the matzos are still warm, break them into smaller squares or pieces.
- Place in the freezer until the topping has set. Serve straight from the freezer, chilled, or at room temperature (I prefer it chilled!).
Notes
- You will also need: Sheet tray, parchment paper, foil, heavy bottom sauce pan, spatula
↑ Back to top
Passover Potato Kugel
Ingredients
- 5 lbs russet potatoes (about 10 medium-sized potatoes)
- 2 large onions
- 6 eggs
- 2 tsp salt
- 1/2 tsp black pepper
- 6 tbsp potato starch (if not serving for Passover you may substitute corn starch)
- 1/4 cup schmaltz or extra virgin olive oil, divided (schmaltz gives amazing flavor; use olive oil to keep it vegetarian)
Steps
- Place a 9x13 baking dish or pan in the oven and preheat oven to 400 degrees, letting the dish heat up inside. Peel the potatoes, then use a food processor or hand grater to grate them into large shreds.
- Place the potato shreds in a large mixing bowl and cover with cold water. Let the shreds sit for a few minutes.
- Meanwhile, peel and shred the two large onions in the food processor or with a hand grater. Reserve.
- In a medium mixing bowl, whisk together the eggs, salt and pepper until fluffy.
- Drain the potato shreds in a colander, pushing down firmly on top of the shreds with your hands to push out the excess liquid.
- Place grated potatoes in a large bowl. Add the seasoned eggs, grated onions and potato starch to the bowl. Use your hands to mix all ingredients together until well combined.
- Take the preheated baking dish out of the oven. Quickly pour in 3 tbsp schmaltz or olive oil, then use a pastry brush to carefully spread the fat around the bottom and sides of the hot dish. Careful, don't burn yourself! The hot dish, while a bit difficult to navigate, will help to form a beautiful brown and crisp crust for the kugel
- Carefully and quickly spread the potato mixture into an even layer in the baking dish (it should sizzle!), then drizzle remaining 1 tbsp of melted schmaltz or olive oil across the top.
- Bake uncovered at 400 degrees for 60-70 minutes until the top is nicely browned all across the top. If it seems to be browning too fast (before the center is cooked), cover the kugel to keep it from over-browning. You really want it to have a nice golden crust-- at the end of cooking, if it's not quite brown enough, you can put it 6 inches below the broiler for a minute or two to evenly brown it all across the top. This kugel tastes best served hot directly from the oven. Let it sit for 5-10 minutes before slicing and serving.
- See the full post:http://toriavey.com/toris-kitchen/2016/04/passover-potato-kugel/#4jzIkHzXWeYbeV3K.99
Notes
- FAVORITE
↑ Back to top
Pasta Da Pizza (Naples-Style Pizza Dough)

Ingredients
- 2 tbsp. sugar
- 1 tbsp. olive oil, plus more
- 1/2 tsp. active dry yeast
- 5 1/2 cups "00" flour, preferably Caputo Pizzeria Flour
- 2 tbsp. kosher salt
Steps
- Combine sugar, oil, yeast, and 2 cups cold water in bowl of a stand mixer fitted with a dough hook; let sit until foamy, 8-10 minutes. Mix flour and salt in a bowl. With motor running, slowly add flour mixture; mix until a smooth dough forms, 8-10 minutes. Transfer dough to a greased baking sheet; cover with plastic wrap. Let sit at room temperature 1 hour.
- Divide dough into 4 balls; transfer to a greased 9" x 13" dish; brush tops with oil. Cover with plastic wrap; refrigerate 48 hours.
Notes
- FAVORITE
↑ Back to top
Pastry Cream
Ingredients
- Choose your measure: Volume Ounces Grams
- 3 cups whole milk
- 1/2 cup sugar
- 1/4 teaspoon salt
- 2 teaspoons vanilla extract; or 1/2 vanilla bean, slit lengthwise
- 1/4 cup cornstarch
- 1 tablespoon King Arthur Unbleached All-Purpose Flour
- 4 large egg yolks
- 4 tablespoons (1/4 cup) butter
- 1 cup heavy cream, whipped to soft peaks; optional, for a softer filling
Steps
- In a medium-sized saucepan, stir together 2 1/2 cups of the milk, the sugar, salt, and the vanilla bean. (If you're using vanilla extract or Vanilla Crush, add it at the end.) Bring to a simmer over medium heat, stirring to dissolve the sugar.
- Meanwhile, whisk the cornstarch, flour, and egg yolks with the remaining 1/2 cup milk.
- Whisk some of the hot milk mixture with the egg yolks to temper them. This keeps the yolks from turning to scrambled eggs when you add them to the simmering milk.
- Pour the egg/milk mixture back into the remaining simmering milk. Doing this through a strainer will help prevent lumps later. Bring to a boil, stirring constantly with a whisk, until the mixture thickens.
- Remove from the heat and strain through a fine sieve. Stir in the butter and vanilla extract (if you're using it). If you're going to flavor the pastry cream with chocolate or some other flavor, this is the time to do it (see variations below).
- Rub a piece of butter over the surface of the cream, top with a piece of plastic wrap (make sure it touches the top of the pastry cream so it doesn't develop a skin), then refrigerate until cool.
- Use chilled pastry cream as is for a sliceable cream pie, or a stiff filling for éclairs. Fold in the optional whipped cream, just before using, for a softer filling.
- Pastry cream will keep, covered in the refrigerator, for up to 5 days. After that it may start to weep.
Notes
- Butterscotch Pastry Cream: Add 1/4 teaspoon butter-rum flavor and/or 1 cup (6 ounces) butterscotch chips to the pastry cream after straining, stirring until the chips have melted.
↑ Back to top
Patient Fried Potatoes
Tags: 4bites
Potato
Ingredients
- 2-3 pounds potatoes
- 2 teaspoons salt
- 1 tablespoon dried or granulated garlic
- 1 tablespoon onion powder
- 1 tablespoon turmeric
- 2 teaspoons ground black pepper
- 1 teaspoon white pepper
- ½ cup plus 2 tablespoons vegetable oil
Steps
- Wash potatoes, then cut them into dice roughly an inch square. Leave the peels on for more texture and nutrients. The little corners, too, they’ll get the crunchiest.
- Put them in a big bowl.
- Put the biggest non-stick skillet or skillets you have on the stove. Turn the heat to high and cover the bottoms of the pans with oil, a quarter-inch deep.
- Drizzle with 2 tablespoons vegetable oil. Season with spices, Mix thoroughly for several minutes, until potatoes are coated in a seasoned uniform.
- Put potatoes in pan, in a single layer or a little deeper. (Piling potatoes deeper can work, too, but requires more active stirring throughout the process.)
- With a spatula, turn the potatoes regularly, every minute or two at first. This is the high-heat phase of the process, starting the dehydration that must occur before potatoes can brown.
- After about 10 minutes, when the potatoes are well heated and fragrant, turn the heat to medium-low, and stir again.
- This is where patience is required. Stir every 5 minutes or so, using the time and your spatula to turn unbrowned potato surfaces to the metal. Potatoes only brown when touching the pan.
- It takes about 30 minutes more to get the golden brown and delicious results everyone appreciates. Keep cooking until they’re as crunchy as you like.
- Eaten straight-up, they’re satisfying. Run off batches and put them in coconut curry or tomato sauce for a vegan dish. They reheat admirably, if there are any leftovers.
Notes
- courtesy of Andrew Galarneau
- fourbites.substack.com/p/recipe-patient-fried-potatoes
↑ Back to top
Peanut Butter Chooclate Chip Granola Bars
Servings: 12 bars
Ingredients
- 1/2 cup peanut butter
- 1/4 cup honey
- 1 teaspoon vanilla extract
- 1 cup quick cooking oats
- 1/2 cup chopped nuts (I use pecans)
- 1/2 cup semi-sweet chocolate chips
Steps
- Stir together peanut butter, honey and vanilla in a mixing bowl until smooth. Add oats, nuts and chocolate chips and stir until oats are completely coated.
- Gently press mixture into a greased 8x8 square baking pan. Bake in a preheated 325 degree oven for 15 minutes, just until edges start to brown. Remove from oven and let cool completely before cutting into bars.
- Store in an airthight container.
Notes
- Line baking pan with parchment paper for ease in removing from pan.
- INSTRUCTIONS
↑ Back to top
Peanut Butter Cup Banana Bread
Adapted from http://www.betterrecipes.com/blogs/daily-dish/2013/01/29/best-banana-bread-ever-peanut-butter-cup-banana-bread/

Ingredients
- 3 cups All Purpose Flour, divided
- 2 tsp Baking Soda
- 1/2 tsp Salt
- 1 tsp Cinnamon
- 4 Very Ripe Bananas, slightly mashed
- 1/2 cup Peanut Butter
- 1 cup Sour Cream
- 2 Eggs
- 1/4 cup Coconut Oil or Canola Oil
- 1 cup Packed Light Brown Sugar
- 1 tsp Vanilla
- 1 1/2 cups Bite-sized Peanut Butter Cups, or chopped peanut butter cups
- 1 (3- To 3.5-oz) Bar Premium Dark Chocolate, chopped
Steps
- Preheat oven to 350 degrees; spray two 9x5” loaf pans with cooking spray.
- In a large bowl, whisk together 2 3/4 cups of the flour, baking soda, salt, and cinnamon; set aside.
- Fit a stand mixer with the paddle attachment. Beat the bananas, peanut butter, sour cream, eggs, oil, brown sugar and vanilla until well blended, about 2 minutes. Spoon the flour mixture into the banana mixture and beat on low speed until just blended. Toss the peanut butter cups in the remaining 1/4 cup flour (to help prevent sinking) and stir into the batter along with the chopped dark chocolate.
- Divide the batter evenly between the two loaf pans. Bake for 50 to 55 minutes, or until a toothpick inserted in the center comes out clean. Cool for 10 minutes before removing from pans. Cool completely on a wire rack before slicing.
Notes
- FAVORITE
↑ Back to top
Peanut Butter Cup Brownie Bottom Cheesecake
Ingredients
- [Brownie Crust}
- 1 cup semi-sweet chocolate chips
- 1 cup peanut butter chip
- 6 tablespoons unsalted butter, melted
- 1 1/4 cups sugar
- 1 tablespoon vanilla extract
- 2 eggs
- 1 cup all-purpose flour
- 2 tablespoons all-purpose flour
- 1/3 cup unsweetened cocoa
- 1/2 teaspoon baking powder
- 1/2 teaspoon salt
- 2 lbs cream cheese, softened
- 5 eggs, at room temperature
- 1 1/2 cups firmly packed brown sugar
- 1 cup smooth peanut butter (not natural-style)
- 1/2 cup whipping cream
- 1 tablespoon vanilla extract
- 6 peanut butter cups, cut into quarters
- 6 peanut butter cups, cut carefully in half
- 1/2 cup whipping cream
- 1 cup semi-sweet chocolate chips
- 1 cup peanut butter cup
Cheesecake
Filling
Decoration
Steps
- Heat oven to 350°F Grease 9-inch springform pan with butter.
- Stir together butter, sugar and vanilla in large bowl with spoon or wire whisk. Add eggs; stir until well blended. Stir in flour, cocoa, baking powder and salt; blend well. Spread in prepared pan.
- Bake 25 to 30 minutes or until brownie begins to pull away from side of pan. Meanwhile make cheesecake layer (see below).
- Immediately after removing brownie from oven, sprinkle milk chocolate chips, peanut butter chips and peanut butter cups over brownie surface. Spoon cheesecake mixture over chips. Turn down oven 325°.
- Cheesecake Filling:.(makes extra).
- Beat cream cheese in bowl of electric mixer until smooth.
- Add eggs, one at a time, beating well after each addition.
- Add sugar, peanut butter and cream; mix until smooth.
- Stir in vanilla.
- Pour filling into prepared crust.
- IF SOME BATTER IS LEFT OVER, EITHER STORE OR PUT IN SMALLER SPRINGFORM PAN.
- Double-wrap springform pan with aluminum foil to prevent water seeping inches.
- Place springform pan into a larger baking pan.
- Pour hot water into the larger pan so that the water comes 1 inch up the sides of the springform pan.
- Bake at 325 degrees 1-1/2 hours, or until firm and lightly browned.
Remove from the oven and
allow to cool on a wire rack for one hour.
Run a knife along the edge of
the cake to loosen it from the pan somewhat.
Refrigerate for at least 4
hours before decorating.
Decoration- (makes a lot
extra-try using it on individual slices after cutting).
Remove cake from pan and put
on a pretty plate.
Bring whipping cream to boil
in a small saucepan.
Remove from heat and add
semi-sweet and peanut butter chips. Stir, stir, stir until melted and
smooth.
Drizzle over cake and then
add peanut butter cup halves around the edge of the cake.
Notes
- FAVORITE
↑ Back to top
Peanut Sauce

Servings: Makes about 1 cup
Ingredients
- cup
- coconut milk
- cup
- peanut butter
- green onion, including tender green portion, minced
- piece lemongrass stalk, 3 inches long, minced
- garlic cloves, minced
- Juice of 1/2 lime
- Tbs
- soy sauce
- tsp
- curry powder
- tsp
- ground coriander
- tsp
- ground cumin
- tsp
- chili paste, or to taste
1/2
1/2
1
1
2
1
1
1
1/2
1
Steps
- In a saucepan, combine the coconut milk, peanut butter, green onion, lemongrass, garlic, lime juice, soy sauce, curry powder, coriander and cumin. Place over medium heat and cook, stirring constantly, until well blended.
- Transfer the mixture to a blender or food processor and puree until smooth, thinning with water if necessary. Pour into a bowl and stir in the chili paste.
- Use the sauce immediately, or cover and let stand at room temperature for up to 6 hours or refrigerate overnight. Thin with water if necessary before using. Makes about 1 cup.
Nutrition Facts
Notes
- FAVORITE
↑ Back to top
Peanut Sauce for Satay

Ingredients
- 3/4 cup coconut milk
- 1 tablespoon red curry paste
- 2 tablespoons fish sauce
- 2 to 3 tablespoons peanut butter
- 3 tablespoons sugar
- 1 tablespoon tamarind paste
Steps
- Add the coconut milk to a cold sauce pan and start to heat it up at medium heat. As it is heating, stir in the curry paste and break the paste into small pieces. Mix well. When you see red oil simmering to the top, add the peanut butter and the rest of ingredients. Stir and taste. You should be able to taste the fish sauce, sugar and tamarind flavors. If it becomes too thick, add a few teaspoons of water to thin the paste.
Notes
- Serve with satay and cucumber salad. Place the sauce on a flat plate for easy dip, saucer dish is the best.
↑ Back to top
Pecan Pie Thumbprints

Ingredients
- 1 cup butter, softened
- 1/2 cup sugar
- 2 eggs, separated
- 1/2 cup dark corn syrup
- 2 to 1/2 cups all-purpose flour
- 1/4 cup plus 2 tablespoons confectioners' sugar
- 3 tablespoons butter
- 2 tablespoons dark corn syrup
- 1/4 cup plus 2 tablespoons finely chopped pecans
FILLING:
Steps
- In a large bowl, cream butter and sugar until light and fluffy. Beat in egg yolks and corn syrup. Gradually beat in flour. Refrigerate, covered, 30 minutes or until firm enough to roll.
- For filling, in a small saucepan, combine confectioners' sugar, butter and corn syrup. Bring to a boil over medium heat, stirring occasionally. Remove from heat; stir in pecans. Remove from pan; refrigerate 30 minutes or until cold.
- Preheat oven to 375°. Shape dough into 1-in. balls; place 2 in. apart on parchment paper-lined baking sheets. In a small bowl, whisk egg whites; brush over tops.
- Bake 5 minutes. Remove from oven. Gently press an indentation in center of each cookie with the end of a wooden spoon handle. Fill each with a scant 1/2 teaspoon pecan mixture. Bake 4-5 minutes longer or until edges are light brown.
- Cool on pans 5 minutes. Remove to wire racks to cool. Yield: 4-1/2 dozen.
Notes
- FAVORITE
↑ Back to top
Peggy's Sweet Polish Sausage Appetizer

Tags: Appetizers and Dim
Sum Polish
Sausage
Ingredients
- 2 lbs Wardynski Polish Sausage
- 1/2 jar of applesauce (Natural/No sugar added is best)
- 1 cup brown sugar
- 1/4 cup chopped onions
Steps
- Slice sausage into quarter inch pieces.
- Place in an oblong baking dish with the applesauce, onions, and brown sugar and mix well.
- Bake at 325 degrees for 1 1/2 hours.
Notes
- Peggy’s Shortcuts & Tips
- Many people like this dish especially gooey. To get that effect, I cook it the day before as directed. But I drain off the liquid with a baster. Then I let it cool and refrigerate it overnight. The next day, I warm it up and serve it in a Crockpot.
↑ Back to top
Peking Meat Sauce Noodles (Zha Jiang Mian)
Adapted from https://www.vietworldkitchen.com/blog/2017/10/peking-meat-sauce-noodles-zha-jiang-mian-recipe.html
Servings: 4
Ingredients
- 8 ounces | 225g dried spaghetti regular or gluten-free
- 6 ounces | 180g baby spinach leaves and/or radish greens
- 1 large handful bean sprouts
- 5 or 6 red radishes thinly sliced then cut into matchsticks (1 cup total)
- 2 Persian cucumbers or ½ English or Armenian cucumber seeded and cut into matchsticks
- 6 ounces | 180g ground pork or chicken thigh
- Scant 1 teaspoon dry sherry or Shaoxing rice wine
- 3 tablespoons light white miso
- 3 tablespoons red aka miso
- 1 ½ teaspoons hoisin optional
- 1 tablespoon regular or gluten-free soy sauce
- Scant ¼ teaspoon MSG ½ teaspoon mushroom seasoning powder, or 1 teaspoon nutritional yeast powder (optional)
- 2 teaspoons canola or other neutral oil
- ⅓ cup | 80ml lightly packed finely chopped green onion white and green parts
- Generous ½ cup water
- 2 cloves garlic minced (2 teaspoons)
- Chile oil chile garlic sauce, sambal oelek, sriracha
Steps
- Cook the spaghetti in a large pot of boiling water until chewy-tender. Drain, rinse, and set aside to drain well.
- Put the spinach and bean sprouts in two separate bowls. Add very hot water (I use a kettle to heat the water) to just cover. Let sit for 1 to 3 minutes (longer for the sprouts), until softened. Drain separately and set aside with the radishes and cucumber.
- Mix the ground meat with the sherry. Combine the two kinds of miso, hoisin, soy sauce, and MSG (or other seasoning powder). Keep near the stove.
- Set a deep skillet or shallow saucepan over medium heat. Add the oil. When shimmering, add the seasoned pork. Stir vigorously with a fork to break up the meat into small pieces. When well broken up, add the green onion, stirring constantly. Cook for 45 to 60 seconds longer before adding the miso mixture.
- Once the miso and meat are well combined, add the water. Adjust the heat to low. Let gently cook for 2 minutes (expect no bubbling action) to combine and slightly darken. Turn off the heat, then stir in the garlic. Cool a few minutes, taste and if needed, add a tiny splash of water to thin out. Set aside. Use warm or slightly above room temperature.
- To serve, you may set out the noodles, meat sauce, bean sprouts, cucumber, spinach, and radish for people to compose their own bowls. Or, divide the components up among four (4) individual pasta or noodle bowls and let people mix things up themselves. Alternatively, make one giant bowl and toss at the table and serve. Offer chile oil or sauce for people to add heat. Spoon and fork are my utensils of choice.
↑ Back to top
Perfect (Almost) No-Stir Risotto Risotto
Servings: 4 to 6
Ingredients
- 1 1/2 cups (about 13 1/2 ounces) risotto-style rice (see notes)
- 1 quart ( 950 ml) low-sodium homemade or store-bought chicken stock
- 1 cup ( 240 ml) white wine (optional; can be replaced with additional broth)
- 2 tablespoons ( 30 g) butter, plus more for finishing, if desired
- 2 tablespoons ( 30 ml) extra-virgin olive oil
- 2 medium cloves garlic, grated on a Microplane (about 2 teaspoons)
- 2 small shallots, finely minced (about 2 tablespoons)
- 3/4 cup ( 180 ml) heavy cream, whipped to stiff peaks
- 3 ounces ( 85 g) finely grated Parmesan cheese
- Kosher salt and freshly ground black pepper
- Chopped herbs or other garnishes, as desired
Steps
- Combine rice, chicken stock, and wine in a large bowl. Agitate rice with fingers or a whisk to release starch. Strain through a fine-mesh strainer set in a 2-quart liquid cup measure or another large bowl. Allow to drain 5 minutes, stirring rice occasionally.
- Heat butter and oil in a heavy 12-inch skillet over medium-high heat until foaming subsides. Add rice and cook, stirring and tossing frequently, until all liquid has evaporated, fat is bubbling, and rice has begun to take on a golden blond color and nutty aroma, about 5 minutes. Add garlic and shallots and continue to cook, stirring frequently, until aromatic, about 1 minute. Give reserved broth a good stir and pour all but 1 cup over rice. Increase heat to high and heat until simmering. Stir rice once, cover, and reduce heat to lowest possible setting.
- Cook rice for 10 minutes, undisturbed. Stir once, shake pan gently to redistribute rice, cover, and continue cooking until liquid is mostly absorbed and rice is tender with just a faint bite, about 10 minutes longer.
- Remove lid and add final cup of stock. Increase heat to high and cook, stirring and shaking rice constantly, until risotto is thick and creamy. Off heat, fold in heavy cream and cheese. Season to taste with salt and pepper and stir in herbs as desired. Serve immediately on hot plates.
Notes
- I prefer using carnaroli rice for its slightly longer grains and firmer texture. Feel free to use any risotto-style rice, like arborio or vialone nano.
↑ Back to top
Perfect Guacamole

Servings: 8
Ingredients
- 1/2 of 1 medium white onion (about 4 ounces; 113 g), roughly chopped
- 1 serrano chile, stemmed and roughly chopped (remove seeds before chopping for a less hot result)
- 1/2 cup picked cilantro leaves and tender stems, finely chopped, divided
- Kosher salt
- 4 ripe Hass avocados (about 7 ounces; 200 g each)
- 2 to 3 tablespoons ( 30-45 ml) fresh lime juice (from about 2 limes)
Steps
- Place onion, chile, half of cilantro leaves, and a large pinch of salt in a molcajete or mortar and pestle. Pound into a fine paste. Alternatively, combine onion, chile, half of cilantro, salt, and half of lime juice in a food processor or blender and process, scraping down sides as necessary, until smooth paste is formed.
- Split each avocado in half, discard pits, and spoon out flesh into the molcajete or mortar and pestle (if large enough), or combine with the onion-chile purée in a medium mixing bowl. Roughly mash with the pestle or a stiff whisk.
- Stir in remaining cilantro leaves, then season with lime juice and salt to taste. Serve immediately with warm tortilla chips or as desired.
Serious Eats / Amanda
Suarez
Serious Eats / Amanda
Suarez
↑ Back to top
Perfect Homemade Pita Bread
Servings: Makes 6 pitas
Ingredients
- 1 cup (8 ounces) water, 105–110°F
- 1 tablespoon extra-virgin olive oil, plus more for oiling the bowl
- 1 tablespoon granulated sugar
- 2 1/4 teaspoons instant yeast
- 1 teaspoon kosher salt
- 1/2 cup (2 1/2 ounces) whole wheat flour
- 2 cups (10 ounces) all-purpose flour, plus extra for dusting
Steps
- Mix water, oil, sugar, yeast, salt, and whole wheat flour with a wooden spoon until combined and smooth. Stir in all-purpose flour until the mixture comes together into a shaggy mass.
- Using clean hands, knead the dough in the bowl for 10 minutes until it becomes smooth and very elastic, adding only very small amounts of extra flour if dough is extremely sticky (see note). Alternatively, knead dough at low speed in a stand mixer fitted with the dough hook attachment until dough is very elastic and smooth, about 8 minutes.
- Turn the dough out onto a lightly floured work surface and form into a smooth ball. Lightly oil a clean mixing bowl and place the dough inside, then rub oiled hands over the top of the dough. Cover bowl with a damp cloth and let rise in a warm place for 1 hour.
- Meanwhile, place a baking stone on the top oven rack and preheat oven to 500°F. Line a plate with a large, clean kitchen towel and set aside.
- Punch down the dough, transfer to a lightly floured work surface, and cut into 6 even pieces. Form each dough piece into an even ball. Cover with a damp towel and let rest for 10 minutes.
- Roll each piece of dough into a 7-inch circle, no more than 1/4 inch thick, taking care not to tear dough and keeping the thickness even all around. Place dough disks on a lightly floured surface, cover with a damp towel, and let proof until slightly puffy, about 20 minutes.
- Working with as many pitas as will fit on the stone at once, pick up each pita and place onto the stone top side down. Immediately close the oven door and bake until pitas have puffed and are slightly golden around the edges, about 3 minutes. Be careful not to over-bake. Place baked pitas onto towel-lined plate and wrap with the overhanging towel. Repeat with any remaining pitas.
- Heat a cast iron skillet on high heat until smoking. Working with one pita at a time, briefly heat each side until charred in a few spots, about 30 seconds. Return pita to towel and cover. Repeat with remaining pitas and serve immediately.
↑ Back to top
Perfect Pasta -
Adapted from https://mail.google.com/mail/u/0/#inbox/WhctKLbfKsVWpCzSBLzqlbQPRNgHCtJNlfKHWwPHfrXNBctKlZdgvkhBTrpwXdpShnFBhmV
Servings: 6
Ingredients
- 2 zucchini, washed and cut into halves and quarters
- 1/4 cup extra virgin olive oil, divided
- 1/4 cup Parmigiano-Reggiano cheese
- 1/8 teaspoon freshly ground black pepper
- 1 pound linguine
- 2 cloves garlic, peeled and sliced thinly
- 1 1/2 pounds mussels, scrubbed well, and debearded if necessary
- 1 pound shrimp
- 1/2 cup seafood stock, divided
- 1/4 teaspoon unrefined sea salt, if desired, for flavor
- 2 tablespoons finely chopped, fresh flat-leaf Italian parsley
- 1 lemon, cut into 6 wedges
Steps
- Place zucchini on a baking sheet. Preheat broiler on high. Brush 1 tablespoon of olive oil over both sides of zucchini and top with cheese and black pepper. Broil for 2-3 minutes per side, watching carefully until golden. Remove from oven and let cool.
- Cook the pasta according to package directions, until very al dente (about 3 minutes less than if you were serving immediately). Drain, reserving a cup of cooking liquid.
- When zucchini are cool, place most of them in a blender, leaving a few pieces for garnish, and puree until smooth.
- While the linguine is cooking, heat the olive oil in a large sauté pan over medium heat. Add the garlic, and cook until it begins to release its aroma.
- Add the mussels, shrimp and seafood stock. Cover and cook over medium heat until all the mussels are open, approximately 2-3 minutes. Discard any broken or unopened mussels.
- Add the linguine and zucchini cream to the seafood mixture, and toss well with ¼ cup of reserved pasta water. If "sauce" seems too thick, add additional pasta water, ¼ cup at a time, until you are happy with the consistency of the sauce. Continue to cook for 1-2 minutes to allow the flavors to combine and the linguine to achieve desired tenderness.
- Toss with tongs to combine. Place pasta on a platter or individual plates and arrange mussel shells around the pasta. Top with remaining zucchini pieces and parsley, and serve immediately with lemon wedges.
↑ Back to top
Perfect Popovers Recipe (+ Tips and Video)
Adapted from https://bellyfull.net/classic-popovers/

Tags: Baking
Pastry
I made this.
Servings: 6 popovers
Ingredients
- 4 large eggs , room temperature before cracking
- 1 1/2 cups whole milk , lukewarm (about 125 degrees F)
- 3/4 teaspoon salt
- 1 1/2 cups all-purpose flour , spooned and leveled
- 3 tablespoons melted butter , cooled slightly
Steps
- Using a blender, blend eggs, milk, and salt; add flour, blending until smooth; then add the melted butter at the end, blending until frothy. Let batter rest for 15 minutes while you preheat the oven.
- Preheat the oven to 450 degrees F and place rack in the bottom third position (to make room for tall popovers and to ensure the tops don’t burn!) and another rack in the top position.
- Place a 6-slot popover pan on a baking sheet; put on the lower rack of oven for 2 minutes while oven is preheating.
- Spray the hot pan all over (including inside the wells and the outside rim) with nonstick cooking spray.
- Pour the rested batter evenly into the muffin slots, almost to the top.
- Bake the popovers for 20 minutes without opening the oven door. Reduce the heat to 350°F (again without opening the door), and bake for an additional 10 minutes, until they're tall, have "popped" over the tops of the pan, and are a deep, golden brown.
- (Without opening the oven door, check them with the oven light during the last few minutes to make sure they’re not over-browning. If so, quickly open the door and put a cookie sheet on that upper rack to shield the popovers' tops from direct heat.)
- Remove them from the oven, and pierce the top or bottom of each with the tip of a pairing knife, to release steam and help prevent sogginess.
- Slip them out of the pan, split open and serve with butter!
Notes
- For helpful tips to achieve optimal results, recipe variations, and storage, please refer to the full article.
↑ Back to top
Perfect Risotto

Servings: 4 to 6
Ingredients
- 1 1/2 cups (about 13 1/2 ounces) risotto-style rice (see note)
- 1 quart (950ml) low-sodium homemade or store-bought chicken stock
- 1 cup (240ml) white wine (optional; can be replaced with additional broth)
- 2 tablespoons (30g) butter, plus more for finishing, if desired
- 2 tablespoons (30ml) extra-virgin olive oil
- 2 medium cloves garlic, grated on a Microplane (about 2 teaspoons)
- 2 small shallots, finely minced (about 2 tablespoons)
- 3/4 cup (180ml) heavy cream, whipped to stiff peaks
- 3 ounces (85g) finely grated Parmesan cheese
- Kosher salt and freshly ground black pepper
- Chopped herbs or other garnishes, as desired
Steps
- Combine rice, chicken stock, and wine in a large bowl. Agitate rice with fingers or a whisk to release starch. Strain through a fine-mesh strainer set in a 2-quart liquid cup measure or another large bowl. Allow to drain 5 minutes, stirring rice occasionally.
- Heat butter and oil in a heavy 12-inch skillet over medium-high heat until foaming subsides. Add rice and cook, stirring and tossing frequently, until all liquid has evaporated, fat is bubbling, and rice has begun to take on a golden blond color and nutty aroma, about 5 minutes. Add garlic and shallots and continue to cook, stirring frequently, until aromatic, about 1 minute. Give reserved broth a good stir and pour all but 1 cup over rice. Increase heat to high and heat until simmering. Stir rice once, cover, and reduce heat to lowest possible setting.
- Cook rice for 10 minutes, undisturbed. Stir once, shake pan gently to redistribute rice, cover, and continue cooking until liquid is mostly absorbed and rice is tender with just a faint bite, about 10 minutes longer.
- Remove lid and add final cup of stock. Increase heat to high and cook, stirring and shaking rice constantly, until risotto is thick and creamy. Off heat, fold in heavy cream and cheese. Season to taste with salt and pepper and stir in herbs as desired. Serve immediately on hot plates.
Notes
- I prefer using carnaroli rice for its slightly longer grains and firmer texture. Feel free to use any risotto-style rice, like arborio or vialone nano.
↑ Back to top
Perfect Sesame Chicken
Adapted from http://allrecipes.com/recipe/perfect-sesame-chicken/
Ingredients
- 2 tablespoons all-purpose flour
- 2 tablespoons cornstarch
- 1/4 teaspoon baking soda
- 1/4 teaspoon baking powder
- 2 tablespoons low-sodium soy sauce
- 1 tablespoon dry sherry
- 2 tablespoons water
- 1 teaspoon vegetable oil
- 1 dash sesame oil
- 1 pound skinless, boneless chicken breast meat - cubed
- 1 cup chicken broth
- 1 cup white sugar
- 2 tablespoons distilled white vinegar
- 2 tablespoons dark soy sauce
- 2 tablespoons sesame oil
- 1 teaspoon chile paste
- 1 clove garlic, minced
- 1/4 cup cornstarch
- 1/2 cup water
- 1 quart olive oil for frying
- 2 tablespoons toasted sesame seeds
Steps
- Sift flour, 2 tablespoons cornstarch, baking soda, and baking powder into a bowl. Pour in low-sodium soy sauce, sherry, 2 tablespoons water, vegetable oil, and a dash of sesame oil; stir until smooth. Stir in chicken until coated with the batter, then cover, and refrigerate for 20 minutes.
- Meanwhile, bring chicken broth, sugar, vinegar, dark soy sauce, sesame oil, chile paste, and garlic to a boil in a saucepan over high heat. Dissolve 1/4 cup cornstarch into 1/2 cup of water, and stir into boiling sauce. Simmer until the sauce thickens and turns clear, about 2 minutes. Reduce heat to low, and keep sauce warm.
- Heat olive oil in a deep fryer or large saucepan to a temperature of 375 degrees F (190 degrees C).
- Drop in the battered chicken pieces, a few at a time, and fry until they turn golden brown and float to the top of the oil, 3 to 4 minutes. Drain on a paper towel lined plate. To serve, place fried chicken pieces onto a serving platter, and pour the hot sauce overtop. Sprinkle with toasted sesame seeds to garnish.
Notes
- FAVORITE
↑ Back to top
Persian Lamb in Pomegranate Quince Sauce
Servings: 8
Ingredients
- 4 Lamb shanks, visible fat trimmed off
- 2 tablespoons butter
- 1/2 small onion, sliced thinly
- 2 cups best-quality pomegranate juice
- 1/2 cup water
- 2 tablespoons sugar
- 2 cinnamon sticks
- 1 teaspoon ground allspice
- 1 teaspoon whole clove
- Salt and pepper to taste
- 2 tablespoons quince jam
- 1/2 a lemon's juice
Steps
- In a large heavy pan, brown the shanks on all sides, turning them after 5-8 minutes on each side. You’ll be able to brown the short sides if you help prop one shank with the other. If you have the room, you can brown them all in the same pan. Set aside.
- Pour off all the lamb fat from the pan. Place the butter and cut onions into the pan and cook the onions for 5-8 minutes until golden. Put the shanks back in the pan and add the cinnamon sticks, cloves, salt, pomegranate juice, 2 tablespoons of sugar and water. (If you’re using 2 pans, you’ll have to duplicate all the ingredients for the other pan with the shanks.) Cover and cook on low for 1 1/2 hours. Check the pan once in a while to check on the liquid; it should be halfway up the side of the lamb, and add pomegranate juice and water at a 2:1 ratio if the lamb still needs time to cook. Cook for an additional 10-15 minutes if necessary, but don’t overcook. Once cooked, the meat will be tender and falling off the bone. Remove the shanks and set aside.
- To the sauce, add 2 tablespoons of quince jam and simmer the until reduced in half. If the sauce becomes too sweet, adjust with fresh lemon juice to bring back some of the tang. You can strain the sauce from the onions or leave them in. Pour some of the sauce over the shanks before serving just to give them some shine and set the rest of the pomegranate sauce at the table.
Notes
- FAVORITE
↑ Back to top
Persian Pomegranate Mocktail

Ingredients
- 2 cups pomegranate juice
- 2 cups ice cubes, or more if needed
- 2 tbsp fresh lime juice
- 1 tbsp orange blossom water
- Sweetener to taste - I use stevia- you can use sugar and agave also work well)
↑ Back to top
Phat Bai Horapha (Thai-Style Beef with Basil & Chiles)
Tags: Beef
Thai
I made this. Is starred. Rated 5/5
Servings: 2 to 3
Ingredients
- 1 pound (450g) flank steak, skirt steak, hanger steak, or flap meat, cut into 1/4-inch-thick strips
- 1 tablespoon (15ml) soy sauce, divided
- 5 teaspoons (25ml) Asian fish sauce, divided
- 1 teaspoon ( 4 g) white sugar
- 4 to 6 fresh red or green Thai bird chiles, divided
- 6 medium cloves garlic, divided
- 1 1/2 tablespoons ( 20 g) palm sugar (see notes)
- 1 small shallot, thinly sliced
- 4 makrut lime leaves, very thinly sliced into hairs (central vein discarded), plus more for garnish (see notes)
- 2 tablespoons (30ml) vegetable or canola oil, divided
- 2 cups packed Thai purple basil (about 2 ounces; 55g) (see notes)
- Dried Thai chile flakes or red pepper flakes to taste (optional)
- 1/4 cup fried shallots (see notes)
- Kosher salt
- Cooked rice, for serving
Steps
- Combine beef, 1 teaspoon soy sauce, 2 teaspoons fish sauce, and white sugar in a bowl. Toss to combine and set in refrigerator to marinate for at least 15 minutes and up to overnight.
- Roughly chop half of Thai chiles and garlic and place inside a stone mortar with palm sugar. Grind with pestle until a mostly smooth paste has formed. Add remaining fish sauce and soy sauce and mash in mortar to form a sauce. Set aside. Finely slice remaining garlic and chiles and combine with shallot and lime leaves in a small bowl.
- When ready to cook, heat 1 tablespoon oil in a wok over high heat until smoking. Add half of beef and cook, without moving, until well seared, about 1 minute. Continue cooking, while stirring and tossing, until beef is lightly cooked but still pink in spots, about 1 minute. Transfer to a large bowl. Repeat with 1 more tablespoon oil and remaining beef, transferring beef to the same bowl. Wipe out wok.
- Reheat wok over high heat and add all of the beef, along with sliced garlic-chile-lime leaf mixture. Continue to cook, tossing and stirring constantly, until stir-fry is aromatic and shallots have completely softened, about 1 minute.
- Add sauce mixture to wok and cook, tossing and stirring constantly, until completely reduced. (The beef should look moist, but there should be no liquid in the bottom of the wok.) Immediately add basil and toss to combine. Season to taste with salt and optional Thai chile or red pepper flakes. Transfer to a serving platter. Top with more makrut lime threads and fried shallots. Serve immediately with rice.
Notes
- Palm sugar is available in most Asian grocery stores. Light brown sugar or panela can be used in place of palm sugar.
- Makrut lime leaf is sold fresh or frozen in Southeast Asian specialty shops, often under the name "kaffir" lime leaf. (Note that "kaffir" is a derogatory term.) It can be omitted if you can't find it.
- Holy basil (ka-phrao, often marketed as "krapow" in the States) or sweet Italian basil can be used in place of purple basil.
- You can make the crispy fried shallots yourself, or buy them: Check the dried-goods areas of most well-stocked Asian supermarkets.
- Garlic, chiles, and palm sugar can be ground in a mini food processor, chopper, or blender, but a mortar and pestle will deliver the best flavor.
↑ Back to top
Phat Phrik Khing with Tofu and Long Beans (Thai Dry-Curry
Stir-Fry)
Servings: 4
Ingredients
- 6 dried guajillo, California, or pasilla chilies, stemmed and seeded (45g)
- 6 medium cloves garlic, roughly chopped (30g)
- 2 medium shallots, peeled and roughly chopped (60g)
- 2 to 6 red Thai bird chilies (to taste), roughly chopped
- 1 large bunch cilantro stems (about 1 ounce; 30g), roughly chopped
- 3 fresh or dried makrut lime leaves (see note), hard central stem removed and discarded, leaves roughly chopped
- 1 stalk fresh lemongrass, bottom 3 to 5 inches only (40g), tough outer leaves removed and discarded, tender core thinly sliced
- 1 (1-inch) knob galangal, peeled (see note)
- 1/2 teaspoon (2g) freshly ground white or black pepper
- Kosher salt
- 3 tablespoons (45ml) vegetable oil or coconut oil
- 1 (12-ounce; 340g) block firm tofu, cut into 1- by 1- by 1/2-inch squares, pressed firmly between paper towels
- 1 pound (450g) green beans or long beans, trimmed and cut into 1 1/2-inch lengths
- 1 tablespoon (14g) sugar
- 1 tablespoon (15ml) soy sauce
- Steamed jasmine rice, for serving
Steps
- Place chilies in a heatproof container and cover with boiling water. Cover and set aside for 10 minutes. Meanwhile, place garlic, shallots, Thai chilies, cilantro, lime leaves, lemongrass, galangal, ground pepper, and 1 teaspoon salt in a mortar and pestle. Pound into a rough paste. Drain chilies, add to mortar, and continue pounding until a rough paste has formed. Alternatively, chop all ingredients in a food processor (see note).
- Heat 1 tablespoon (15ml) oil in a wok over medium-high heat until shimmering. Add tofu, spread into a single layer, and cook, occasionally shaking pan gently, until crisp on first side, about 3 minutes. Flip tofu and continue cooking until second side is crisp. Transfer to a bowl and set aside. Add another tablespoon (15ml) oil to the wok and increase heat to high. When oil is smoking, add beans and cook, stirring and tossing occasionally, until blistered and tender, about 3 minutes. Transfer to bowl with tofu.
Add
remaining tablespoon (15ml) oil to wok and return to high heat until
lightly smoking. Add curry paste all at once and cook, stirring
continuously, until aromatic and sizzling, about 1 minute. Return tofu
and beans to pan, along with sugar and soy sauce. Stir and toss to
combine and coat tofu and beans in curry paste. Season to taste with
more salt if desired. Serve immediately with steamed jasmine rice.
Notes
- Makrut lime leaves are also known as kaffir lime leaves and can be found in Southeast Asian markets. Galangal can be found fresh or frozen in Southeast Asian markets. A mortar and pestle will produce much better flavor than a food processor.
↑ Back to top
Philly Cheesesteak

Tags: Philadelphia
Sandwiches
Servings: 2
Ingredients
- 1 pound (454g) boneless rib eye steak or skirt steak or store-bought pre-sliced rib eye (see notes)1 tablespoon (15ml) vegetable or other neutral oil
- 1/2 medium yellow onion (4 ounces; 114g), cut into 1/4-inch dice
- 8 thin slices provolone cheese (about 6 ounces; 160g), 4 slices torn into 1-inch pieces and 4 slices left whole
- 2 tablespoons grated Parmigiano-Reggiano cheese (optional)
- 1 teaspoon Diamond Crystal kosher salt; for table salt use half as much by volume
- 1/8 teaspoon freshly ground black pepper
- Two 7- to 8-inch-long Italian hoagie/sub rolls, split lengthwise, but left attached on 1 side to create a hinge
Steps
- If using a whole steak, trim and cut steak crosswise with grain into roughly 3-inch wide sections, then set on large plate and freeze until firm but not frozen solid, about 1 hour. If using pre-sliced steak, skip to chopping instructions in Step 2.
- Heat an empty 12-inch cast-iron skillet over medium-high heat for 5 minutes. Add oil to skillet and heat until just smoking. Add meat and onion in an even layer and cook, without stirring, until well browned on one side, 4 to 6 minutes. Continue to cook, stirring frequently to move and pull apart the meat slices until meat and onions are browned and meat is no longer pink, 2 to 4 minutes.
- Stir in torn provolone cheese, Parmesan cheese (if using), salt, and pepper. Cook, stirring constantly, until cheese is melted and well combined, 1 to 2 minutes. Turn off heat. Divide mixture into 2 individual portions the length of the rolls. Shingle 2 slices of Provolone cheese over each portion. Cover and let cheese melt, about 1 minute.
- Center rolls, cut sides down, over each portion of meat. Working with one at a time, use a large spatula to scoop under each portion of meat and flip meat into roll to create a filled sandwich. Serve immediately.
- Make-Ahead and Storage
- Absolutely not.
- Special Equipment
- 12-inch cast-iron skillet with lid or large cast-iron flat griddle pan or plancha
Notes
- While I prefer rib eye steak in this recipe, skirt steak will work just as well. You may also use store-bought pre-sliced well marbled steak found at some supermarkets like Wegmans and many Asian market chains like H-Mart. If using pre-sliced steak, still run a knife through mound of meat about 5 times at the end of Step 2.
- If you have a cast-iron flat griddle pan or plancha, this is the time to use it. Position and center (over two burners if needed) for even heating of the pan.
- While written for an indoor stovetop, this recipe works great in a cast-iron skillet cooked outside on a grill, which is a great way to avoid grease splatter in your kitchen. Preheat the grill as usual, then preheat the empty cast-iron skillet on a preheated grill on high heat, with lid closed, for 5 minutes. Proceed with the recipe.
- Provolone cheese can range from mild to very sharp. Go with your personal preference, but the cheese should be sliced thin and melt easily. You may also substitute with equal weight Cheese Whiz or American cheese in this recipe.
- This recipe can easily be cut in half to make 1 serving. Alternatively, it may also be doubled and cooked through in 2 separate batches to serve 4.
↑ Back to top
Philly Fluff Cake

Tags: Baking
Cakes and Pastries
Servings: 12
Ingredients
- 1 Tbsp. plus ½ cup vegetable shortening, room temperature
- 1 Tbsp. plus 2 cups (250 g) bleached all-purpose flour
- 2¼ cups (450 g) granulated sugar
- 2 tsp. baking powder
- 2 tsp. Diamond Crystal or 1¼ tsp. Morton kosher salt
- 8 oz. cream cheese, room temperature
- ½ cup (1 stick) unsalted butter, room temperature
- 6 large eggs, room temperature
- 2 tsp. vanilla extract or vanilla bean paste
- ¼ cup (28 g) powdered sugar
- A 9 or 10"-diameter tube pan
Special
equipment:
Steps
- Place a rack in middle of oven and preheat to 350°. Grease pan with 1 Tbsp. vegetable shortening, room temperature, then coat with 1 Tbsp. bleached all-purpose flour, tapping out any excess. Whisk together 2¼ cups (450 g) granulated sugar, 2 tsp. baking powder, and 2 tsp. Diamond Crystal or 1¼ tsp. Morton kosher salt, and remaining 2 cups (250 g) bleached all-purpose flour in a large bowl.
Beat 8 oz. cream cheese, room temperature, ½ cup (1 stick) unsalted
butter, room temperature, and remaining ½ cup vegetable shortening,
room temperature, in the bowl of a stand mixer fitted with the paddle
attachment on medium speed until light and fluffy, 2–3 minutes. Add
dry
ingredients and mix on low speed, scraping sides of bowl as needed,
until flour is coated in fat, 30–60 seconds. Increase speed to medium
and beat until mixture resembles a smooth paste, 2–3 minutes.
With mixer on medium-low speed, add 6 large eggs, room temperature,
one
at a time, waiting after each addition until incorporated before
adding
the next, and beat, scraping down bowl as needed, until smooth, 1–2
minutes total. Add 2 tsp. vanilla extract or vanilla bean paste and
beat until incorporated and batter is smooth, about 1 minute.Scrape
batter into prepared pan and spread into an even layer with an offset
spatula or spoon.
Bake cake until golden brown and a tester inserted into the center
comes out clean, 55–65 minutes. Transfer to a wire rack and let cake
cool in pan 15 minutes. Invert cake onto rack and let cool completely.
To
serve, place cake right side up on a platter and, using a fine-mesh
sieve, dust ¼ cup (28 g) powdered sugar over cake to create a thick
layer.
Do
Ahead: Cake can be baked 5 days ahead. Store tightly wrapped at room
temperature. Dust with powdered sugar just before serving.
↑ Back to top
Pho Spice Blend
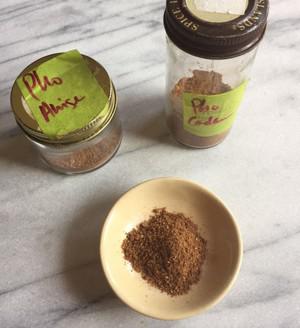
Servings: 1 ½ tablespoons
Ingredients
- 2 star anise (16 robust points total), or 1 star anise (8 robust points total) and 1 medium Chinese black cardamom
- 2 whole cloves
- 1⁄2 teaspoon fennel seeds
- 1 teaspoon coriander seeds
- 10 black peppercorns
- 1⁄4 teaspoon ground cinnamon
Steps
- Break up the star anise as needed, dropping the points into a small saucepan, skillet, or wok. If using the black cardamom, use a meat mallet to crush and break the skin, then remove the seeds and add to the star anise; discard the skin since it won’t grind up easily.
- Add the cloves, fennel seeds, coriander seeds, and peppercorns. Toast over medium heat, stirring, for about 3 minutes, until fragrant and slightly darkened. Cool off heat and then grind to a fine texture in a clean spice grinder (a dedicated electric coffee grinder works great); if you like, hold on tight and shake the grinder to get all of the ingredients into contact with the blades. Add the cinnamon and pulse a few times to combine.
- Transfer to a jar and keep in the cupboard for up to 1 month. Grind a tablespoon of raw rice to clean out the grinder.
↑ Back to top
Phở Saigon (Southern Vietnamese Noodle Soup)
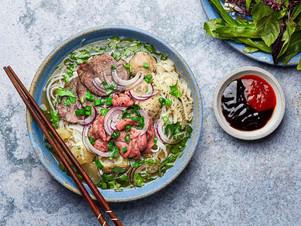
Tags: Soups
Vietnam
Servings: 8 to 10
Ingredients
- One medium yellow/white onion (8 ounces; 227g), peeled and halved
- 2 ounces (60g) peel-on fresh ginger, lightly smashed under the side of a knife
- 10 cloves
- 5 star anise pods
- 2 black cardamom pods, slightly crushed to reveal seeds
- 2 cinnamon sticks
- 1 teaspoon coriander seeds
- 1 teaspoon fennel seeds
- 4 pounds (1.8kg) beef leg bones with marrow, cut crosswise or lengthwise
- 2 pounds (900g) beef neck bones
- 1 1/2 pounds (680g) boneless beef shank
- 8 ounces (228g) beef tendon
- 8 ounces (228g) book tripe
- 3 tablespoons (27g) Diamond Crystal kosher salt; for table or fine sea salt, use half as much by volume or the same weight
- 3 ounces (84g) yellow rock sugar, or more to taste
- 6 tablespoons (90ml) fish sauce, or more to taste
- Thai basil, for serving
- Sawtooth herb ( culantro), for serving
- Mung bean sprouts, raw or blanched (see notes), for serving
- 1 jalapeño or bird’s eye chile, thinly sliced
- 2 limes, cut into wedges
- 1/2 cup (26g) thinly sliced red onion
- 1/2 cup (22g) sliced scallion, green parts only
- 1/2 cup (16g) roughly chopped cilantro leaves and tender stems
- 2 pounds (908g) semi-fresh pho noodles
- 11 ounces (312g) Vietnamese beef meatballs (see notes), halved
- 1 pound (455g) beef round, very thinly sliced (at least 1/8-inch thick; see notes)
- Freshly ground black pepper, for serving
- Hoisin sauce, for serving
- Sriracha, for serving
For the Broth:
For Assembling
and Serving:
Steps
- For the Soup: Using a broiler with the oven rack in the highest position, in a dry cast iron skillet over high heat, or over an open medium gas flame, char onion and ginger, using tongs to rotate for even charring, until softened and lightly blackened, about 10-12 minutes. Allow to cool, then peel the ginger and discard any heavily blackened parts and set aside.
- In a medium cast iron or stainless steel skillet, toast cloves, star anise, cardamom, cinnamon, coriander seeds, and fennel seeds over medium-low heat until fragrant, about 3 minutes. Let cool, then wrap cloves, star anise, coriander seeds, and fennel seeds in muslin and tie off with kitchen twine.
- Wash all bones, shanks, tendons, and tripe thoroughly in water. Transfer beef leg and neck bones to a stockpot and add just enough water to cover. Bring to a boil over high hea, then let boil vigorously for 5 minutes to release foamy impurities.
- Pour off water, then rinse bones to remove any remaining impurities. Wash stockpot thoroughly.
- Return bones to stockpot along with shank and tendons to stockpot. Add cinnamon sticks, cardamom pods, spice pouch, charred onion and ginger, salt, rock sugar, and 4 1/2 quarts (4.3L) water. Bring to a boil over high heat and skim off scum. Reduce heat to low and let simmer gently, uncovered, frequently skimming any scum and fat that floats to surface, for 3 hours.
- Add tripe and simmer for 30 minutes. Add fish sauce and continue to simmer for 30 minutes longer.
- Remove shank, tendon, and tripe and shock them in a bowl filled with ice water to retain their texture. Drain and set aside.
- Remove broth from heat, then remove neck bones and bones with marrow and reserve for another use (I recommend eating it later as a snack). Let broth stand for 10 minutes to settle any sediment, then carefully strain broth through a mesh strainer lined with cheesecloth or muslin, being careful not to pour sediment through; you should have about 12 cups (2.8L) broth.
- Return broth to a large clean pot, then taste and season with additional fish sauce and rock sugar to your liking. Set aside until ready to serve.
- To Assemble and Serve: Slice shank, tendon, and tripe crosswise against the grain into thin slices. Set aside.
- Arrange Thai basil, sawtooth herbs, bean sprouts, jalapeño slices, and lime wedges on a large plate.
- Place sliced onion, scallion, and cilantro in separate bowls.
- Cook noodles according to package instructions. Strain and rinse noodles with cold water.
- For each serving, place about 4 ounces (115g) noodles in each bowl. Top with a few pieces of sliced shank, tendon, tripe, meatballs, and raw beef round. Garnish with sliced onion, scallion, and cilantro. Ladle about 1 1/2 cups hot broth into bowls and sprinkle with freshly ground pepper. Serve immediately with garnishes.
- Special Equipment
- Fine mesh sieve, muslin cloth, kitchen twine
Notes
- If you plan on doubling the recipe, simmer for 8 hours.
- To blanch the mung bean sprouts, bring a pot of water to a boil over medium-high heat. Add the bean sprouts and blanch them for 45 seconds.
- Vietnamese meatballs can be found in the refrigerated section at the Asian grocery stores. Freeze leftover meatballs and defrost them in the fridge before cooking.
- It is very difficult to slice beef so thinly at home; your best bet is to ask the butcher to do it for you, or to shop at an Asian grocer where you can find pre-sliced beef. If you do want to try slicing it yourself, freeze the beef until partially frozen (not rock-hard, but quite firm), then slice as thinly as possible with a very sharp slicing knife.
- Make-Ahead and Storage
- Refrigerate unused broth and cooked meat separately in lidded containers for up to three days. To freeze unused stock, divide in portions in zipper-lock bags. Lay flat on a baking sheet to freeze. They can be frozen for up to 3 months. When ready to use, thaw them in the fridge overnight. Reheat the broth and re-season to taste.
↑ Back to top
Piccalilli Pepper Relish
Adapted from http://hungry-again.com/piccalilli-pepper-relish/
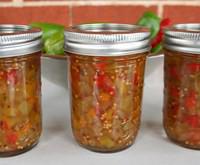
Ingredients
- 5 cups diced peppers – mixed sweet and hot (about 1 1/2 lbs)
- 1 1/2 lbs. green tomatoes, about 3 medium
- 1 small onion, chopped
- 3 cups apple cider vinegar
- 1 3/4 cups sugar
- 1 teaspoon whole allspice berries
- 1 teaspoon black peppercorns
- 1 cinnamon stick
- 3 bay leaves
- 2 tablespoons cup yellow mustard seeds
- 2 tablespoons kosher salt
Brine
ingredients:
Steps
- In a colander, combine the diced tomatoes, onion and peppers with two tablespoons of kosher salt and place over a sink to drain for a few hours. This will draw out the excess moisture from the vegetables.
- When the chopped ingredients have drained for a couple of hours, you are ready to make your relish. In a large pot, add the brine ingredients–apple cider vinegar, sugar, allspice berries, peppercorns, bay leaf, cinnamon stick, mustard seeds. Heat the brine over a medium heat until it comes to a boil. Add all the chopped and drained vegetables into the brine and bring back up to a boil. Turn down the heat and simmer for 30-45 minutes. The vegetables should be cooked down and the mix will look like a relish. Remove from the heat.As soon as you take the relish off the heat, return to your stockpot of hot water and jars. Remove the jars, rings and lids from the water bath and place on a clean kitchen towel to dry. DON'T THROW OUT THE HOT WATER! You will be using this for your heat-processing. Turn the heat back on the water to bring the temperature back up.
- Ladle the relish into the canning jars. Make sure that you distribute the spices evenly throughout the jars. Leave at least 1/2 inch room at the top of the jar. Tap the jars gently on a cutting board or on your towel to force air bubbles up to the top. Then, making sure that you've wiped up any drips from the lid, place the clean, new lids on the jars and put the rings on to hold the lids in place. The rings should not be too tight. Just tight enough to loosely close the jar.
- Use jar tongs (if you have them) to place the closed jars back into hot water bath. The jars should be completely submerged under the hot water and have about an inch of water above each lid.
- Bring the water back up to a boil and heat process the relish for 15 minutes. Remove from the water bath with the jar tongs and let the jars cool to room temperature. You will hear the jar lids pop as they cool and seal themselves. They are now safe to store at room temperature in your kitchen pantry.
Notes
- FAVORITE
↑ Back to top
Pickapeppa Sauce Clone

Tags: Condiments
Ingredients
- 1/2 can diced tomatoes in juice, juice included
- 1/2 smaller medium onion, diced
- 4 T organic sugar
- 1 cup white balsamic vin
- 1 med garlic clove, pressed
- 1/2 c raisins
- 1/2 small mango, cubed
- 1 med guajillo chile
- 1/3 t dried thyme
- 1/8 t ground clove
- salt and white and black pepper
1 small aji
amarillo chile:
Steps
- Combine all in a pot. Bring to a full simmer then reduce the heat to low, cover, and cook till the chilies and raisins are completely reconstituted. Remove from the heat. Remove the chilies then remove their stems and seeds as best you can; return them to the pot.
- Purée the mixture very well. Strain through a fine sieve, forcing somewhat through. Discard the solids. Adjust consistency with water and/or vinegar - or don't bother. Adjust salt and pepper.
Notes
- FAVORITE
↑ Back to top
Pickapeppa Sauce Clone ?

Ingredients
- 1/2 can diced tomatoes in juice, juice included
- 1/2 smaller medium onion, diced
- 4 T organic sugar
- 1 cup white balsamic vin
- 1 med garlic clove, pressed
- 1/2 c raisins
- 1/2 small mango, cubed
- 1 small aji amarillo chile
- 1 med guajillo chile
- 1/3 t dried thyme
- 1/8 t ground clove
- salt and white and black pepper
Steps
- Combine all in a pot. Bring to a full simmer then reduce the heat to low, cover, and cook till the chilies and raisins are completely reconstituted. Remove from the heat. Remove the chilies then remove their stems and seeds as best you can; return them to the pot.
- Purée the mixture very well. Strain through a fine sieve, forcing somewhat through. Discard the solids. Adjust consistency with water and/or vinegar - or don't bother. Adjust salt and pepper.
- I served it on the side of grilled flat iron.
- Were I in Shawnee I'd try the tamarind addition. I'd add it at the end, just before removing the pot to purée. I'd go with 2 t tamarind concentrate.
- If you don't have organic sugar go with around 80% white, 20% light brown.
- If you don't have cane vinegar use white balsamic or white wine, not distilled white.
- Make sure the mango is ripe - it should feel like a just-ripe avocado, giving a bit when pressed - not overripe and too soft.
- If ajis are not at hand use a tiny chile de arbol or half a small cascabel instead.
- I'll play with this again at some point but give it a shot as is and see what you think.
↑ Back to top
Pickled Daikon

Ingredients
- 1 cup water
- 4 garlic cloves, crushed and peeled
- 1 cup distilled white vinegar
- 1 cup sugar
- 1 pound daikon, peeled, quartered lengthwise, and cut into 1-inch pieces
- 1/4 teaspoon turmeric (optional)
Steps
- In small saucepan, bring water to simmer. Add garlic and cook for 5 minutes. Off heat, add vinegar and sugar and stir until sugar has dissolved, 15 to 30 seconds. Set aside.
- Pack daikon into 1-quart glass jar with tight-fitting lid. Pour vinegar mixture over daikon to cover. Let cool to room temperature, then cover and refrigerate for 2 days before eating. Pickled daikon can be refrigerated for up to 1 month.
Notes
- FAVORITE
↑ Back to top
Pickled Jalapeno Peppers

Ingredients
- 8 jalapeños
- 1/2 cup soy sauce
- 3 garlic cloves, sliced paper thin
- 3/4 cup seasoned rice vinegar (unseasoned will work in a pinch)
- 3 tablespoons granulated sugar
- 2 tablespoons fresh lime juice (from 1 lime)
- 1 tablespoon fresh lemon juice (from about 1/2 lemon)
- 1/4 cup lemon-lime soda, such as Sprite
Steps
- Slice the jalapeños crosswise into thin rings about an 1/8-inch thick using a sharp knife or a handheld slicer. If you prefer a less-than-incredibly-spicy pickle, scrape out and discard the seeds. Place the jalapeños rings in a jar.
- In a small saucepan over medium heat, bring the soy sauce, garlic, rice vinegar, and sugar to a gentle boil and let it bubble for a few minutes. Remove from the heat. Add the citrus juices and soda and let cool until no longer piping hot, about 5 minutes.
- Pour the warm soy mixture over the jalapeños. Tightly seal the jar with the lid. Immediately refrigerate the pickled jalapeño peppers for at least 1 day and up to 2 weeks before strewing or scattering them onto anything and everything.
Notes
- FAVORITE
↑ Back to top
Pickled Onions

Ingredients
- 3 large onions, sliced thinly
- 2 cups white vinegar
- 1/2 cup water
- 3 tablespoons sugar
- Few pinches kosher salt
- Dried bay leaves
- Few Dried Peppers
- Black Peppercorns
Steps
- In a medium pot combine the ingredients from the vinegar to the peppercorns and the bring the mixture to a simmer. Add the onions and bring back to a simmer and cook for 2 – 3 minutes. Remove from heat, transfer the onions to mason jars and pour the hot brine over them to cover. Leave to cool, cover the jars and refrigerate for several hours or a day. The pickled onions will keep for a few weeks.
Notes
- This recipe will be enough to fill three mason jars with brine left over.
↑ Back to top
PICKLED RED ONIONS
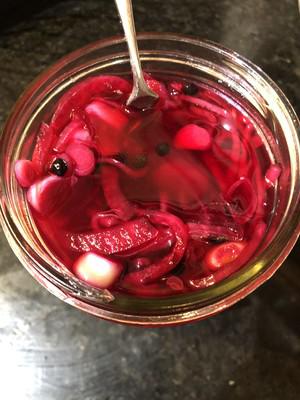
Tags: Mexican
Pickles
Servings: 2 cups
Ingredients
- 1 cup white vinegar
- 2 teaspoons white sugar
- Kosher salt
- 2 medium red onions, halved and thinly sliced
- 1 jalapeño chili, stemmed, halved lengthwise and seeded
Steps
- In a medium bowl, combine the vinegar, sugar and 2 teaspoons salt, then stir until the salt and sugar dissolve. Stir in the onions and jalapeño. Cover and refrigerate for at least 1 hour or up to 24 hours.
↑ Back to top
Pickled Red Onions

Tags: Condiments
Mexican
Ingredients
- 1
- CUP WHITE VINEGAR
- 2
- TEASPOONS WHITE SUGAR
- KOSHER SALT
- 2
- MEDIUM RED ONIONS, HALVED AND THINLY SLICED
- 1
- JALAPEÑO CHILI, STEMMED, HALVED LENGTHWISE AND SEEDED
Steps
- 01 To make, in a medium bowl, stir together 1 cup white vinegar, 2 teaspoons white sugar, and 2 teaspoons kosher salt. Stir in 2 medium red onions (halved and thinly sliced) and 1 jalapeño chili (stemmed, halved lengthwise and seeded). Cover and refrigerate at least 1 hour or up to 24 hours. SEE IT
↑ Back to top
Pickled Rhubarb Stalks
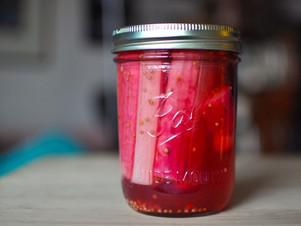
Servings: 2 pints
Ingredients
- 1 cup apple cider vinegar
- 1 cup water
- 1 cup granulated sugar
- 1/2 teaspoon fine grain salt
- 2 teaspoons mustard seeds
- 1/2 teaspoon black peppercorns
- 1/2 teaspoon whole cloves
- 2 star anise
1 pound
rhubarb stalks (4 to 6 large stalks):
Steps
- Prepare two wide mouth pint jars and lids.
- Wash rhubarb stalks well and trim to fit into the jars. If the stalks are broad, slice them into lengthwise sections. In a small saucepan, combine the apple cider vinegar, water, sugar and salt and bring to a boil.
- Divide the mustard seeds, peppercorns, cloves and star anise between the two prepared jars. Pack the rhubarb pieces into the jars above the spices.
Once the pickling liquid has boiled and the sugar and salt are
dissolved, pour it into the jars over the rhubarb, leaving 1/2 inch
headspace. Tap the jars gently to dislodge any air bubbles. If the
headspace level has dropped significantly, add more pickling liquid.
Wipe jar rims, apply lids and rings and process jars in a boiling
water
bath canner for 10 minutes. When time is up, remove jars from canner
and set them to cool on a folded kitchen towel. When jars are cool
enough to handle, remove rings and test seals. If jars are at all
sticky, wash them to remove that residue. Sealed jars can be stored in
the pantry for up to 1 year. Unsealed jars can be stored in the
refrigerator and eaten within 2 weeks.
Let this pickle cure for at
least 48 hours before eating.
↑ Back to top
Piggy Cookies
Adapted from http://www.npr.org/2013/05/02/179090872/this-little-piggy-cookie-is-a-sweet-mexican-find

Ingredients
- 1 3/4 cups (10 ounces) firmly packed grated piloncillo or dark brown sugar
- 3/4 cup water
- 1 Ceylon cinnamon stick
- 1/2 pound (2 sticks) unsalted butter, cut into small pieces, at room temperature, plus more for the cookie sheets
- 2 tablespoons honey
- 4 1/4 cups all-purpose flour, plus more for dusting
- 1 teaspoon baking powder
- 1 teaspoon baking soda
- 1/2 teaspoon kosher or coarse sea salt
- 2 large eggs, lightly beaten, at room temperature, plus
- 1 large egg, lightly beaten, for glaze
- Confectioners' sugar for dusting (optional)
Steps
- In a medium saucepan, combine the piloncillo, water, and cinnamon and bring to a simmer over medium heat. Lower the heat to medium-low and simmer for about 15 minutes, or until the piloncillo has dissolved and the liquid thickens to a light syrup. Turn off the heat and remove the cinnamon stick.
- Add the butter and honey and stir until they melt.
- In a large bowl, whisk together the flour, baking powder, baking soda, and salt. Make a well in the center and pour in the piloncillo mixture. Mix with a rubber spatula until well combined. Add 2 of the eggs and stir until thoroughly mixed. The dough will be very sticky and gooey.
- Place two long pieces of plastic wrap, one running horizontally and one vertically, in a medium bowl, letting the ends overhang the edges of the bowl. With a rubber spatula, scrape the dough onto the plastic wrap, then bring the edges of the wrap over the dough and secure tightly (leave the dough in the bowl). Refrigerate for at least 2 hours, or up to 2 days.
- Preheat the oven to 375°F, with racks in the upper and lower thirds. Butter two cookie sheets.
- Sprinkle flour on a work surface and a rolling pin. Cut the dough in half. Working with one piece at a time, roll out the dough about 1/4-inch thick. Using a 3-inch piggy cookie cutter, press straight down on the dough to cut out cookies, moving the cutter slightly on the work surface to make it easier to lift up the cookies. Gather the scraps into a ball and roll out again. Transfer the cookies to the prepared cookie sheets, spacing them about 1-inch apart. If the dough becomes too sticky, roll it into a ball, wrap it again in plastic wrap, and place it in the freezer for 5 to 10 minutes before rolling again.
- Gently brush the cookie tops with the remaining egg. Bake in batches for 7 to 9 minutes, or until the cookies are puffed and golden on top. Remove from the oven and transfer to a cooling rack to cool completely. Sift confectioners' sugar on top of the cooled cookies, if desired.
Notes
- If you cover them as soon as they cool, they will remain soft and fluffy for a while, but as the days go by, they will harden and have the snap of a traditional cookie. If you want them to harden faster, don't cover them.
↑ Back to top
Pinched Noodles
Ingredients
- 1 cup flour
- 1/2 tsp salt
- 1 large egg
- 1 tbsp oil
Steps
- Mix the flour and salt.
- Stir in the egg to make stiff dough.
- Sprinkle in a few drops of cold water if needed.
- Knead until smooth.
- Cover and let dough rest for 30 minutes.
- Roll into strands.
- Pinch or chop into small pieces.
- Roll the dough between the hands.
- Set them on a board to dry, not touching.
- To cook them; drop into simmering soup.
- Cook noodles for 15 minutes or until tender.
↑ Back to top
Pineapple Cream Cheese Upside Down Cake
Ingredients
- 1/4 cup melted butter
- 1/2 cup brown sugar
- 1 20 oz can pineapple slices
- 8 maraschino cherries
- 1 yellow cake (mix)
- 2 8 oz packages cream cheese
- 1 package lemon jello
- 2 eggs
Steps
- melt butter in 9 inch springform pan, stir in brown sugar arrange 8 pineapple slices and cherries in bottom of pan/
- Mix cake according to directions pour half the batter into pan. Beat cream cheese jello and eggs together
- spread over cake batter. Pour remaining batter in pan
- Bake at 350 65-75 minutes until toothpick comes out clean
- Cool on rack 5 minutes then turn out on serving plate
Notes
- FAVORITE
↑ Back to top
Pistachio Cream Cheese Cookies

Ingredients
- 1/2 cup butter, softened
- 3 ounces cream cheese, softened
- 1 to 1/2 cups confectioners' sugar
- 1 large egg, room temperature
- 3 teaspoons grated lemon zest
- 1 to 1/2 teaspoons vanilla extract
- 1 to 2 drops green food coloring
- 2 to 1/2 cups all-purpose flour
- 1/2 teaspoon baking powder
- 1/2 teaspoon salt
- 1/2 cup finely chopped pistachio
- 60 shelled pistachios
Steps
- In a large bowl, beat butter, cream cheese and confectioners' sugar until blended. Beat in egg, lemon zest, vanilla and food coloring. In another bowl, whisk flour, baking powder and salt; gradually beat into creamed mixture.
- Divide dough in half; shape each into a 7-1/2-in.-long roll. Roll in chopped pistachios. Wrap and refrigerate 2 hours or until firm.
- Preheat oven to 375°. Unwrap and cut crosswise into 1/4-in. slices. Place 1 in. apart on ungreased baking sheets. Press a whole pistachio into the center of each cookie.
- Bake 7-9 minutes or until edges are lightly browned. Remove from pans to wire racks to cool.
Notes
- FAVORITE
↑ Back to top
Pistachio Mixed Herb Pesto
Servings: 1 CUP
Ingredients
- 1 clove garlic, peeled
- 2 cups packed flat-leaf parsley
- 2 tablespoons fresh lemon thyme leaves
- 2 tablespoons fresh tarragon leaves
- 1 tablespoon fresh sage leaves
- 1 tablespoon fresh oregano leaves
- 1/2 cup grated Parmesan
- 3/4 cup roasted pistachios
- Pinch kosher salt, to taste
- Pinch fresh ground black pepper, to taste
- 1 cup olive oil
- Blender
Software
Specialized
Hardware
Steps
- In a blender with the motor running, add the garlic and pulse until finely chopped. Add all of the herbs, cheese, pistachios, salt, and pepper to the blender, and blend until finely chopped. With the blender running, add the olive oil in a steady stream until the mixture becomes creamy and emulsified.
- Serve over pasta or use as topping for bruschetta.
↑ Back to top
Pita Bread
Adapted from https://www.177milkstreet.com/recipes/pita-bread
Tags: Breads
Flatbreads Middle-East
I made this. Is starred.
Ingredients
- 4 TABLESPOONS GRAPESEED OR OTHER NEUTRAL OIL, DIVIDED
- 171 GRAMS (1¼ CUPS) BREAD FLOUR, PLUS EXTRA FOR DUSTING
- 175 GRAMS (1¼ CUPS) WHOLE-WHEAT FLOUR
- 2¼ TEASPOONS INSTANT YEAST
- 2 TEASPOONS WHITE SUGAR
- ¾ CUP WARM WATER (100°F TO 110°F), PLUS MORE IF NEEDED
- ¼ CUP PLAIN WHOLE-MILK YOGURT
- 1¼ TEASPOONS TABLE SALT
Steps
- Coat a medium bowl with 1 teaspoon of the oil; set aside. In the bowl of a stand mixer fitted with the dough hook, add both flours, the yeast and sugar. Mix on low until combined, about 5 seconds. Add the water, yogurt and 2 tablespoons of the oil. Mix on low until a smooth ball forms, about 3 minutes. Feel the dough; it should be slightly sticky. If not, add water 1½ teaspoons at a time (no more than 2 tablespoons total), mixing after each addition, until slightly sticky. Let rest in the mixer bowl for 5 minutes. SEE DEMO
- Add the salt and knead on low until smooth and pliable, 10 minutes. Transfer to the prepared bowl, forming it into a ball and turning to coat with oil. Cover with plastic wrap and let rise in a warm, draft-free area until well risen but not quite doubled in volume, 1 to 1½ hours. SEE DEMO
- Dust a rimmed baking sheet evenly with bread flour. Transfer the dough to the counter. Using a dough scraper or bench knife, divide the dough into 10 pieces (about 2 ounces each). Form each into a tight ball and place on the prepared baking sheet. Brush each ball with ½ teaspoon of the remaining oil, then cover with a damp kitchen towel. Let rise in a warm, draft-free area until well risen but not quite doubled, 30 to 60 minutes. Meanwhile, heat the oven to 500°F with a baking steel or stone on the upper-middle rack. SEE DEMO
- Lightly dust two rimmed baking sheets with bread flour and lightly dust the counter. Place a dough ball on the counter; use a lightly floured rolling pin to roll the ball into a round ⅛ inch thick and 5½ inches in diameter. Set on one of the prepared baking sheets. Repeat with the remaining dough balls, placing them in a single layer on the baking sheets. Cover with a damp kitchen towel and let rest for 10 minutes. SEE DEMO
- Lightly dust a peel with bread flour, then place 2 dough rounds on the peel without flipping them. Working quickly, open the oven and slide the rounds onto the baking steel. Immediately close the door. Bake until the breads have puffed and are light golden brown, about 3 minutes. Using the peel, remove the breads from the oven. Transfer to a wire rack and cover with a dry kitchen towel. Repeat with the remaining dough rounds. Serve warm or room temperature. SEE DEMO
Notes
- Tip: Don’t forget to heat the baking steel or stone for a full hour before baking. And do cover the pita breads with a towel when they come out of the oven to keep them soft.
- 346
↑ Back to top
Pita Bread
Adapted from http://fatmornings.com/recipes/Pita+bread

Tags: Flatbreads
Ingredients
- 1 1/2 teaspoons active dry yeast
- 1 1/4 cups lukewarm water
- 1/4 teaspoon sugar
- 3 cups unbleached bread flour (plus more for flouring work surfaces)
- 3/4 teaspoon salt
- 2 tablespoons extra-virgin olive oil
Steps
- In a large bowl, dissolve the sugar and yeast in 1/4 cup of the lukewarm water. When the water begins to froth a bit (proof your yeast is still active), stir in the remaining water. Add 1 1/2 cups of flour, 1/2 cup at a time, stirring vigorously. Let this sponge rest for about 10 minutes, or until it bubbles a bit.
- Stir in the salt and a tablespoon of oil and mix well. Add the remaining flour gradually, a little at a time (you may need less), until your dough holds together in a ball. Knead well by hand in the bowl for about 10 minutes, or until your dough is smooth, shiny, and elastic and no longer sticks to your fingers. Dust the dough occasionally with flour while kneading if the dough is too sticky.
- Put the remaining tablespoon of oil in the bottom of the bowl and roll the ball of dough around to grease it all over. (This will prevent the surface from becoming dry and crusty.) Cover the bowl with plastic wrap and leave in a warm place free of drafts for about 2 hours or until doubled in size.
- Preheat the oven at the maximum temperature of 500∞ for at least 20 minutes with a baking stone or large baking sheet in the center.
- Punch the dough down and knead again for a few minutes, then divide the dough into 8 lumps. Flatten each dough lump on a lightly floured surface into rounds between 1/8 and 1/4 inch thick using a floured rolling pin. (Rounds will be about 7-inches in diameter.) Dust the rounds with flour and lay them on a floured cloth, leaving 1 inch of space between the rounds. Cover with another lightly floured cloth, and leave the pitas to rest and rise again for about 20 minutes.
- Place 2 rounds at a time on the hot baking stone and bake for 3 to 5 minutes, or until the pitas puff up like balloons and are slightly brown on top. Wrap the breads together in a cloth while still hot, or put them in a plastic bag to keep them
Notes
- An inverted sheet pan can be used in place of the stone.
↑ Back to top
Pita Bread

Tags: Flatbreads
Servings: Even the broiler is too
finicky to yield consistent results, sometimes burning the surface
Ingredients
- 3 1/2 cups all-purpose flour (you may also use a combination of the two, plus wheat flour) or 3 1/2 cups bread flour (you may also use a combination of the two, plus wheat flour)
- 2 teaspoons salt
- 1 1/2 teaspoons instant yeast
- 1 tablespoon olive oil, plus a bit for greasing the bowl
- 1 cup water, plus more as needed
Steps
- Place flour in a food processor with steel blade. Add salt and yeast, process for 5 seconds.
- While processor is running, add olive oil and water through the feed tube.
- Process about 30 seconds and remove cover.
- Dough should be barely sticky and in a ball, add water 1 tablespoon at a time if too dry, and process for 5-10 seconds. If dough is too wet, add a tablespoon of flour and process for a couple of seconds.
- Place dough on lightly floured surface and and knead by hand for about 1 minute by hand.
- Lightly oil a large bowl and put the dough in it. Cover and let it rise until doubled, about 2 hours.
- Punch dough and divide it into 6-12 pieces. Keep lightly floured and covered.
- Preheat oven to 500°F, use baking stones, or place a baking sheet on each rack.
- Flatten each ball on a lightly floured surface and roll into a 6-8 inch circle. Lightly flour each circle as finished, cover, but do not stack.
- Rule 2: Roll Thin Pitas
- Roll out the pitas to no more than a quarter inch in thickness. This is one of the most important rules, since the dough needs to be thin enough that the heat can quickly penetrate to the center, creating that blast of steam and expanding the pocket before the dough becomes too rigid. If the dough is too thick, it'll get overly firm before the heat of the oven can swell the center.
- A very hot oven is a must in order to get that quick burst of steam inside. If the oven temperature is too low, steam won't puff the pitas, and you'll end up with duds. Turn the oven as high as it will go, and preheat the oven with a baking stone, which retains heat, thus aiding in the creation of steam. This needs to happen quickly-in a mere two to three minutes
- Rule 4: Don't Tear the Pita Before Baking
- After rolling out the pitas, try not to tear the dough before baking. Doing so can create a weak point that may fail as the pita puffs, preventing it from fully expanding.
- Over the course of years of making pitas, I began to notice a tendency for the pita to end up with a much thinner top than bottom after it comes out of the oven. Eventually, I realized that this has to do with pockets of air rising to the surface of the dough during the final proofing step. The solution: Flip the dough right before baking and set it top side down on the baking stone. (This trick also guarantees an even distribution of air holes in ciabatta bread.
- You know those pitas that crack when you try to open them up, making them impossible to stuff properly? It's because they've dried out too much. To prevent that, wrap them in a clean kitchen towel as soon as they come out of the oven. The cloth traps just enough moisture while also allowing the pitas to breathe; use plastic, and they'll sweat and get soggy.
- Try as I might, I never could get my oven to produce the beautiful charred look of a pita that's baked in a scorching hot wood-fired oven. Even the broiler is too finicky to yield consistent results, sometimes burning the surface. The solution? Char the pita in a cast iron skillet on the stovetop after baking. Not only do the pitas look a lot better that way, but the charring adds a layer of smoky flavor.
Notes
- FAVORITE
↑ Back to top
Pita Bread

Ingredients
- 4 tablespoons grapeseed or other neutral oil, divided
- 175 grams (1 1/4 cups) bread flour, plus extra for dusting
- 175 grams (1 1/4 cups) whole-wheat flour
- 2 1/4 teaspoons instant yeast
- 2 teaspoons white sugar
- 3/4 cup warm water (100°F to 110°F), plus more if needed
- 1/4 cup plain whole-milk yogurt
- 2 1/2 teaspoons kosher salt
- 3 tablespoons grapeseed or other neutral oil
- 175 grams (1 1/4 cups) bread flour
- 175 grams (1 1/4 cups) whole-wheat flour
- 2 1/4 teaspoons instant yeast
- 2 teaspoons white sugar
- 3/4 cup warm water (100°F to 110°F), plus more if needed
- 1/4 cup plain whole-milk yogurt
- 2 1/2 teaspoons kosher salt
- 1 tablespoon grapeseed or other neutral oil
Steps
- Coat a medium bowl with 1 teaspoon of the oil; set aside. In the bowl of a stand mixer fitted with the dough hook, add both flours, the yeast and sugar. Mix on low until combined, about 5 seconds. Add the water, yogurt and 2 tablespoons of the oil. Mix on low until a smooth ball forms, about 3 minutes. Feel the dough; it should be slightly sticky. If not, add water 1½ teaspoons at a time (no more than 2 tablespoons total), mixing after each addition, until slightly sticky. Let rest in the mixer bowl for 5 minutes. SEE DEMO
- Add the salt and knead on low until smooth and pliable, 10 minutes. Transfer to the prepared bowl, forming it into a ball and turning to coat with oil. Cover with plastic wrap and let rise in a warm, draft-free area until well risen but not quite doubled in volume, 1 to 1½ hours. SEE DEMO
- Dust a rimmed baking sheet evenly with bread flour. Transfer the dough to the counter. Using a dough scraper or bench knife, divide the dough into 10 pieces (about 2 ounces each). Form each into a tight ball and place on the prepared baking sheet. Brush each ball with ½ teaspoon of the remaining oil, then cover with a damp kitchen towel. Let rise in a warm, draft-free area until well risen but not quite doubled, 30 to 60 minutes. Meanwhile, heat the oven to 500°F with a baking steel or stone on the upper-middle rack. SEE DEMO
- Lightly dust two rimmed baking sheets with bread flour and lightly dust the counter. Place a dough ball on the counter; use a lightly floured rolling pin to roll the ball into a round ⅛ inch thick and 5½ inches in diameter. Set on one of the prepared baking sheets. Repeat with the remaining dough balls, placing them in a single layer on the baking sheets. Cover with a damp kitchen towel and let rest for 10 minutes. SEE DEMO
- Lightly dust a peel with bread flour, then place 2 dough rounds on the peel without flipping them. Working quickly, open the oven and slide the rounds onto the baking steel. Immediately close the door. Bake until the breads have puffed and are light golden brown, about 3 minutes. Using the peel, remove the breads from the oven. Transfer to a wire rack and cover with a dry kitchen towel. Repeat with the remaining dough rounds. Serve warm or room temperature. SEE DEMO
- Tip: Don’t forget to heat the baking steel or stone for a full hour before baking. And do cover the pita breads with a towel when they come out of the oven to keep them soft.
- STEP-BY-STEP DEMO
- IN THE STORE
- LAMSON DOUGH SCRAPER
- Dough scrapers are an absolute kitchen essential that we use for everything. You'll think of countless uses, from shaping pie crusts to cutting pasta dough.
- Lightly dust two rimmed baking sheets with bread flour and lightly dust the counter. Place a dough ball on the counter; use a lightly floured rolling pin to roll the ball into a round ⅛ inch thick and 5½ inches in diameter. Set on one of the prepared baking sheets. Repeat with the remaining dough balls, placing them in a single layer on the baking sheets. Cover with a damp kitchen towel and let rest for 10 minutes. SEE DEMO
- Lightly dust a peel with bread flour, then place 2 dough rounds on the peel without flipping them. Working quickly, open the oven and slide the rounds onto the baking steel. Immediately close the door. Bake until the breads have puffed and are light golden brown, about 3 minutes. Using the peel, remove the breads from the oven. Transfer to a wire rack and cover with a dry kitchen towel. Repeat with the remaining dough rounds. Serve warm or room temperature. SEE DEMO
- Tip: Don’t forget to heat the baking steel or stone for a full hour before baking. And do cover the pita breads with a towel when they come out of the oven to keep them soft.
- STEP-BY-STEP DEMO
- IN THE STORE
- LAMSON DOUGH SCRAPER
- Dough scrapers are an absolute kitchen essential that we use for everything. Yo
↑ Back to top
Pizza
Tags: Breads
Servings: 2 ten inch pizzas
Ingredients
- 3/4 cup lukewarm water
- 1 teaspoon active dry yeast
- 2 cups all-purpose flour, plus more for kneading
- 3/4 teaspoon salt
- 2 teaspoons olive oil, divided
- 1/2 cup pizza sauce, such as classic red sauce or a white sauce
- 1 to 2 cups shredded cheese: one or a combination of mozzarella, provolone, Parmesan, fontina, romano, or asiago cheese
- Topping options: sautéed onions or mushrooms, sliced red peppers, pepperoni, cooked sausage, cooked bacon, etc.
For the
toppings:
Steps
- Instructions
- Arrange a rack in the bottom third of the oven, place a rimmed baking sheet on the rack, and heat the oven to 450°F. Meanwhile, make the dough.
- Pour the water into a medium bowl. Sprinkle the yeast over the water, and let stand until the yeast is dissolved and foamy, 3 to 5 minutes.
- Add the flour and salt. Mix with a stiff spatula or wooden spoon until floury, shaggy dough forms. Turn the dough out onto a work surface and knead until it forms a smooth, slightly tacky ball that springs back when you poke it, 5 to 8 minutes. If the dough sticks to your hands like bubblegum, add a tablespoon of flour at a time until it’s easier to work with; avoid adding too much flour if possible.
- Cover the dough with the upside-down bowl or a clean kitchen towel and let sit while you prepare the pizza toppings, about 10 minutes.
- Divide the dough into 2 equal pieces. Working with one piece of dough at a time, stretch or roll it into a thin, 10- to 12-inch round. Form from the middle of the dough outwards, using the heel of your hand to gently press and stretch the dough until it's about a 1/4-inch thick or less. For an extra-thin crust, roll it with a rolling pin. If the dough starts to shrink back, let it rest for 5 minutes and then try rolling again.
- Carefully remove the preheated baking sheet from the oven and place it upside down on a wire rack. Transfer the dough directly onto the upside-down baking sheet. Brush the dough with 1 teaspoon of the oil. Spread 1/4 cup sauce into a thin layer onto dough, leaving a 1/2-inch border. Sprinkle on the cheese and other toppings.
- Bake until the crust is golden-brown and the cheese is melted and browned in spots, 8 to 12 minutes. Remove the pizza from the oven and cool for about 5 minutes before slicing and serving. Repeat with the remaining dough and toppings.
↑ Back to top
Pizza Dough
Adapted from https://www.177milkstreet.com/recipes/pizza-dough
Tags: Pizza
Ingredients
- 548 GRAMS (4 CUPS) BREAD FLOUR, PLUS MORE FOR DUSTING
- 1 TABLESPOON WHITE SUGAR
- ¾ TEASPOON INSTANT YEAST
- 1½ CUPS COOL (65°F) WATER
- 1 TEASPOON TABLE SALT
Steps
- In the bowl of a stand mixer fitted with the dough hook, combine the flour, sugar and yeast. Mix on low to combine, about 15 seconds. With the mixer running, slowly add the water, then mix on low until a slightly bumpy dough forms and the dough clears the sides of the bowl, about 5 minutes. Cover the bowl with plastic wrap and let rest for 20 minutes.
- Uncover the bowl, sprinkle the salt over the dough and mix on low until smooth and elastic, 5 to 7 minutes. If the dough climbs up the hook, stop the mixer, push it down and continue kneading.
- Scrape the dough onto a well-floured counter and divide it into 4 pieces. With floured hands, form each into a taut ball and dust with flour. Mist 4 quart-size plastic bags with cooking spray, then add 1 ball to each. Seal and refrigerate for 24 to 72 hours.
- About 1 hour before making pizza, lightly oil 4 small bowls. Remove the dough from the bags and set each in a bowl. Cover with plastic wrap, then set each bowl into a larger bowl of 100°F water for 30 minutes, or until the dough reaches 75°F, changing the water as needed.
Notes
- Tip: Don’t shorten the fermentation and room-temperature warming times. The dough requires at least 24 hours in the refrigerator to ferment, then needs to come up to 75°F before shaping.
↑ Back to top
Pizza Rustica
Tags: Flatbreads
Ingredients
- 2 cups warm water
- 1 (1/4 ounce) packet active dry yeast
- 1 tablespoon sugar
- 1 tablespoon salt
- 5 to 6 cups all-purpose flour
- 2 tablespoons olive oil
- 1 teaspoon olive oil
- 1/2 lb fresh hot Italian sausage (in casing)
- 1/2 lb capocollo ham, thinly sliced (a cured Italian cold cut with spices)
- 1/3 lb genoa salami, thinly sliced
- 1/3 lb pepperoni, thinly sliced
- 1 lb fresh basket cheese
- 1/2 lb mozzarella cheese, thinly sliced
- 1 dozen egg (8 will be beaten, 4 will be hard boiled)
- 1/3 cup minced fresh flat leaf parsley
- 15 to 20 cranks fresh ground black pepper
- 1 egg beaten with 1 teaspoon water for egg wash
For the Dough:
For the
Filling:
Steps
- In a large bowl, dissolve in 2 cups of warm water, yeast, sugar and salt. Using a spoon, gently blend. Add 5 cups of all-purpose flour and 2 tablespoons of olive oil to start. Blend with a spoon just until the dough starts to form, then using your hands, transfer dough to a floured surface.
- Knead well, adding flour if it's too sticky, until the dough becomes springy and smooth. It should take a good 5 to10 minutes of vigorous kneading. It will be soft and silky when done.
- Place the dough ball in a large, clean bowl coated with olive oil and rub some olive oil on top of the dough. Cover with a clean, dry dishtowel and let rise in a warm, draft-free area until doubled in size (at least 2 hours).
- Meanwhile, fill a large heavy-bottom saucepan halfway with water. Bring to a light, rolling boil, and place 4 room-temperature eggs in the water. Maintaining a light, rolling boil, cook them for 18 to 20 minutes. Using a slotted spoon, remove the eggs, place in a colander, and run under cool water. Tap the eggs against the counter top to crack the shells. Remove the shells, and rinse the boiled eggs under cool water. Slice thinly and set aside.
- Meanwhile, heat 1 teaspoon olive oil in a large skillet over medium heat. Remove the sausage from its casing and add to the pan. Cook for 5 to 6 minutes, or until browned and crispy. Transfer to a small bowl and set aside.
- Place oven rack in center of oven and preheat to 350 degrees. Brush the inside surface of a 10-inch-by-3-inch spring form pan with olive oil.
- Once the dough is risen, punch it down to release air bubbles. Transfer dough to a lightly floured surface, divide in half, and roll one half into a 12-inch round. Transfer the dough to the spring form pan. Using your hands, fit the dough snugly in the pan, gently stretching it to hang 1 inch over the edge.
- In a medium bowl, whisk together the 8 eggs, parsley and black pepper.
- Fill the inside of the dough with alternating layers of sliced meats, cheeses and sliced hard-boiled eggs. After 5 to6 layers, pour half of the egg mixture over the filling, allowing it to seep down. Continue layering the meats and cheeses, then pour the remainder of the egg mixture evenly over the top. You should have enough for 10 to12 layers.
- On a lightly floured surface, roll out the second half of the dough to a 12-inch round. Place the dough over the filling, and using a sharp knife, trim excess dough until it just meets the rim of the pan. Using your fingertips, pinch the edges of the dough together, and gently roll the bottom layer over the top layer, creating a seal. Then pinch the dough between your thumb and index finger creating a slightly fluted edge all around. Brush the top of pie with the egg wash.
- Bake pie for 60 to 75 minutes, or until the crust is golden brown. Remove from the oven and let cool 20 to 25 minutes. Release the spring and transfer the pie to a serving plate. Cut into wedges and enjoy at room temperature.
- Leftover pizza chena can be stored in an air-tight container in the refrigerator for 5 to 7 days. Individual slices also can be wrapped tightly in aluminum foil and placed in a heavy-duty freezer bag or plastic container and frozen for up to 2 months.
- ** Fresh basket cheese is a semi-soft cheese that is used primarily for binding ingredients together. It can be found at Italian markets and cheese shops. If you can't find it, then substitute one (15-ounce) container of ricotta cheese (drained) and whisk it with 2 large eggs.
Notes
- FAVORITE
↑ Back to top
Pomegranate Champagne Cocktail

Tags: Beverages
Ingredients
- 2 tbsp pure 100% pomegranate juice, chilled
- 1 tbsp Cointreau
- 1/2 tsp pomegranate seeds
- 1/2 tsp sweetened lime juice
- Champagne or sparkling wine, chilled
- Substitute 1 tbsp fresh squeezed orange juice for the Cointreau and non-alcoholic sparkling cider for the champagne/sparkling wine. This makes a really yummy non-alcoholic version!
↑ Back to top
Pomegranate Oatmeal Cookies

Tags: Cookies
Servings: ~24 COOKIES
Ingredients
- 1 cup cake flour, sifted
- ¾ cup bread flour
- ½ teaspoon baking soda
- ½ teaspoon sea salt
- 1 ½ cups old-fashioned oats
- 10 tablespoons unsalted butter, softened
- ½ cup plus 2 tablespoons granulated sugar
- ½ cup plus 2 tablespoons light brown sugar
- 1 egg, room temperature
- 2 teaspoons pure vanilla extract
- 1 cup chocolate chips
- ½ cup pomegranate seeds (drained and dried on a paper towel)
Steps
- In a medium bowl, whisk together the flours, baking soda, salt, and oats.
- In the bowl of an electric mixer fitted with the paddle attachment, beat the butter and sugars until light and fluffy, about 2 minutes. Add the egg and vanilla extract and mix until combined.
- Add the dry ingredients and mix until just combined. Fold in the chocolate chips and pomegranate seeds using a stiff rubber spatula.
- Cover the dough with plastic wrap and chill for at least 30 minutes to an hour.
- Preheat oven to 350 degrees F. Line two baking sheets with parchment paper or silicone mats.
- Using a medium cookie scoop, scoop out cookie dough and arrange 2 inches apart.
- Bake cookies for 12-14 minutes or until lightly golden around the edges.
- Remove from oven and let cool on baking sheet for two minutes before transferring to a wire rack. Cool completely.
↑ Back to top
Pomegranate-Glazed Chicken with Buttery Pine Nuts
Tags: Chicken
Middle-East
Poultry
Servings: 4
Ingredients
- 4 garlic cloves, finely grated
- ¼ cup plain whole-milk yogurt (not Greek)
- ⅓ cup plus 2 tablespoons pomegranate molasses
- 4 tablespoons honey, divided
- 2 tablespoons Diamond Crystal or 3½ teaspoons Morton kosher salt, plus more
- 1 3½–4-pound chicken, backbone removed, halved
- Extra-virgin olive oil (for drizzling)
- 2 tablespoons unsalted butter
- ¼ cup pine nuts or blanched slivered almonds
- 1½ cups pomegranate juice, room temperature
- 1 lime, halved
Steps
- Combine garlic, yogurt, ⅓ cup pomegranate molasses, 2 Tbsp. honey, and 2 Tbsp. Diamond Crystal or 3½ tsp. Morton kosher salt in a large resealable plastic bag. Place chicken in bag and seal, pressing out any air; turn to coat. Chill, turning occasionally, at least 12 hours and up to 2 days.
Let chicken sit at room
temperature 1 hour before cooking.
Place a rack in top position of oven; preheat to 450°. Stir remaining
2
Tbsp. pomegranate molasses and remaining 2 Tbsp. honey in a small
bowl.
Drizzle enough oil to barely coat the bottom of a large heavy skillet,
preferably cast iron, that can hold both chicken halves (or you can
roast chicken on a foil-lined rimmed baking sheet). Remove chicken
from
marinade, letting excess drip back into bag, and place in skillet,
skin
side up. Pat chicken dry with paper towels; season lightly with salt.
Brush or spoon pomegranate molasses mixture evenly over skin.
Roast chicken until skin is lacquered and deep mahogany over most of
surface and juices run clear when thigh meat is pierced with a knife,
25–30 minutes. Transfer to a cutting board and let rest 15 minutes.
Meanwhile, melt butter in a small skillet over medium-low heat. Cook
pine nuts, tossing often, until golden and mixture smells nutty (don’t
let the butter burn), about 3 minutes. Scrape buttery pine nuts into a
small bowl and season with salt.
Pour pomegranate juice into a large bowl or shallow platter and
squeeze
in lime. Season with a large pinch of salt and stir to dissolve. Add
chicken to bowl (or divide between 2 shallow bowls) and spoon buttery
pine nuts over to serve.
↑ Back to top
Poppy Seed Cake
Servings: 12
Ingredients
- 1 cup poppy seeds
- 1 cup milk or soy milk
- 1 cup (8 ounces) unsalted butter or pareve margarine, plus more for greasing pan
- 2 cups all-purpose flour, plus additional for dusting pan
- 2 cups sugar
- 3 large eggs, separated
- 2 teaspoons vanilla extract
- ½ teaspoon salt
- 2½ teaspoons baking powder
- Confectioners’ sugar, for dusting
Steps
- In a small saucepan, combine the poppy seeds and milk. Bring to a boil, remove from heat, and allow to rest until cool, about 20 minutes.
- Preheat oven to 350 degrees and prepare a large loaf or tube pan by greasing it with margarine and lightly flouring the inside of the pan.
- In bowl of an electric mixer with a paddle attachment, cream together butter or margarine and sugar. Add egg yolks, vanilla, and poppy seed-milk mixture, and beat until smooth. Gradually add 2 cups flour, salt and baking powder. Mix well; remove bowl from mixer and set aside.
- Place a clean bowl in mixer, with a whisk attachment, and whisk egg whites until stiff but not dry. Gently fold into batter. Scrape into pan, and bake until a knife inserted into the cake comes out clean, about 1 hour. Transfer cake to a rack. Unmold after 15 minutes. When cool, dust cake with confectioners’ sugar.
↑ Back to top
Poppy Seed Dressing
Tags: Condiments
Dressings
Is starred.
Ingredients
- 1/4 cup Sugar
- 1/4 cup rice wine vinegar
- 1 teaspoon grated onion
- 1/2 teaspoon dry mustard
- 1/4 teaspoon salt
- 1 1/2 tbl poppy seed
- 1/2 cup corn oil
Steps
- Combine the sugar and vinegar in a saucepan and stir over low heat
- until the sugar is dissolved. Remove from heat and add onion, mustard
- and salt. Beat in the oil until well blended and stir in the poppy
- seed.
Notes
- FAVORITE
↑ Back to top
Poppy Seed Filling
Tags: Baking
Condiments
Ingredients
- 1 c. poppy seed
- 1/2 c. water or milk
- 1/4 c. honey
- 2 tbsp. sugar
- 1/8 tsp. salt
- 1 tsp. fresh lemon juice
- 1 lg. egg, slightly beaten
Steps
- Combine first 5 ingredients in a saucepan. Cook over moderate heat until thick, stirring constantly, about 10 minutes. Add lemon juice. Add a little of the hot mixture to the beaten egg and then stir into the remaining poppy seed mixture. Cool thoroughly before using.
- Makes sufficient filling for 2 1/2 dozen Hamanfaschen.
Notes
- FAVORITE
↑ Back to top
Porchetta Pork Roast
Tags: Italian
Pork
Ingredients
- 1 (7- to 8-pound) bone-in, skin-on pork shoulder roast, or a 6- to 7-pound boneless roast, fat trimmed to 1/4-inch thickness
- 1/4 cup chopped fennel fronds
- 1/4 cup chopped fresh rosemary
- 2 teaspoons chopped fresh sage leaves
- 5 garlic cloves, grated or mashed to a paste
- Finely grated zest of 1 lemon
- 1 1/2 tablespoons kosher salt
- 1 teaspoon fennel seed
- 3/4 teaspoon red pepper flakes
- 1/2 teaspoon black pepper
- 1/4 cup extra-virgin olive oil
Steps
- Score skin and fat all over pork, taking care not to cut down to the meat.
- In a food processor or mortar and pestle, combine fennel fronds, rosemary, sage, garlic, lemon zest, salt, fennel seed, red pepper flakes and black pepper. Pour in oil. Pulse or mash until it forms a paste. Rub all over pork. If using a boneless roast, tie with kitchen string at 2-inch intervals. Transfer to a large bowl and cover with plastic wrap. Refrigerate at least 6 hours and preferably overnight.
- Remove pork from refrigerator 1 to 2 hours before you want to cook it. Heat oven to 450 degrees. Transfer pork to a rimmed baking sheet and roast 35 minutes. Reduce temperature to 325 degrees and cook an additional 2 hours 45 minutes to 4 hours, until a thermometer inserted into the thickest part of the meat reads 180 degrees, which will give you sliceable, tender meat. (Bone-in roasts will take longer than boneless ones.)
- Transfer pork to a cutting board and let rest 15 to 30 minutes before serving. Make sure everyone gets some of the cracklings
Notes
- FAVORITE
↑ Back to top
Pork Adobo
Adapted from https://doobydobap.com/recipe/pork-adobo
Tags: Chicken
Filipino
Ingredients
- ½ cup soy sauce
- ½ cup vinegar
- 1 tbsp brown sugar
- 20 cloves of garlic
- 1 slice of ginger
- 1 tbsp whole black peppercorns
- 5 bay leaves
- ½ cup water (omit water if using pressure cooker)
- Jasmine rice to serve with
- 1 tbsp neutral oil
800 g thick
pork belly:
Steps
- Cut the pork belly into sizeable chunks. I like to have it 4cm width and 3cm thickness but cut to your liking. (Cutting it smaller will reduce the cooking time)
- Prepare a large dutch oven or skillet. On high heat, drizzle in neutral oil and sear the pork belly until light golden brown on each side.
- Take the pork belly out and lower the heat to a medium-low.
- Add the garlic, ginger, and black peppercorns. Stir to bloom the spices and aromatics, or until the garlic has turned to a pale golden color.
- Add the soy sauce, vinegar, and brown sugar to simmer.
- Add the bay leaves and the pork belly into the mixture. Heat on high if the mixture has stopped simmer and turn the heat back to low on a rolling simmer.
- Prepare parchment paper and cut a hole in the middle. Place the parchment paper on top of the liquid. This method is called cartouche and it is extremely effective at controlling the amount of liquid evaporated and ensuring that the pork belly is submerged and tender at all times. You can also leave the lid slightly ajar!
- Simmer on low heat for 1 hour. Alternatively, stick it in a preheated oven at 325F/ 165C for 1 hour and 30 minutes. You can also use a pressure cooker without the water for 15 minutes on high pressure and 5 minutes rest before releasing the steam.
- Serve on top of jasmine rice and enjoy!
↑ Back to top
Pork and Chive Dumplings (Shui Jiao)
Tags: Appetizers and Dim
Sum Chinese
Servings: 30 dumplings
Ingredients
- 4 tbsp. plus 1 tsp. Asian sesame oil
- 4 tbsp. soy sauce
- 2 tbsp. black vinegar
- Flour, for dusting 1 lb. ground lean pork
- 3 1/2 oz. garlic chives or scallions,
- finely chopped (1 1/2 cups)
- 2 tsp. mushroom powder
- 1 tsp. cornstarch
- 1 tsp. salt
- 1/2 tsp. grated ginger
- 1/2 tsp. white or black pepper
- 30 4 1/2" round wonton wrappers
Steps
- In a small bowl, whisk together 1 tsp. sesame oil, soy sauce, and vinegar; set aside. Line a rimmed baking sheet with parchment paper and sprinkle with flour; set aside. Put remaining sesame oil, along with the pork, garlic chives, mushroom powder, cornstarch, salt, ginger, and pepper, into a medium bowl and stir vigorously with a rubber spatula to combine.
- Working with one wrapper at a time, put a tablespoon of pork filling onto a wrapper, fold wrapper in half, and seal it with water, or follow instructions on facing page for forming dumplings into the traditional pleated crescent shape. Transfer each dumpling to reserved baking sheet; cover with a tea towel.
- Meanwhile, bring a 5-qt. pot of water to a boil. Working in three batches, boil dumplings until filling is cooked through, about 8 minutes. Using a slotted spoon, transfer dumplings to a platter and serve with reserved dipping sauce.
Notes
- FAVORITE
↑ Back to top
Pork Bao

Tags: Appetizers and Dim
Sum Chinese
Servings: YIELD MAKES 16 BUNS
Ingredients
- 1 tsp. active dry yeast
- 3 1/2 cups cake flour
- 1 tbsp. sugar
- 1 tsp. baking powder
- 2 tbsp. diced lard
- 1 tbsp. vegetable oil
- 3 scallions (white parts only), chopped
- 1 1/2 cups diced roast pork
- 1 tbsp. sugar
- 3 tbsp. Chinese soy sauce
- 3 tbsp. oyster sauce
- 1 tsp. cornstarch
- 16 pieces parchment paper, 2'' square
FOR THE DOUGH:
FOR THE
FILLING:
Steps
- 16 pieces parchment paper, 2'' square
- For the dough: Dissolve yeast in 1 1/4 cups lukewarm water in a large bowl and set aside for about 5 minutes. Combine flour, sugar, and baking powder in the bowl of a standing mixer. Mix in dissolved yeast on low speed, then add lard one piece at a time, increase speed to medium, and continue mixing until dough forms into a ball, about 5 minutes. Remove bowl from mixer, cover with plastic wrap, and allow dough to rise until doubled, about 2 hours. Punch dough down, then knead until smooth and elastic, about 5 minutes. Shape into 16 equal-size balls.
- For the filling: Heat oil in a nonstick skillet over medium-high heat. Add scallions and sauté for 1 minute. Add roast pork, sugar, and soy and oyster sauces and continue cooking until scallions have softened and pork is heated through, about 3 minutes. Dissolve cornstarch in 2 tbsp. water in a small cup, then add to pork mixture and cook until sauce thickens, about 1 minute more. Remove from heat and allow to cool slightly.
- Place a dough ball in the palm of one hand and, with the thumb of your other hand, make a well in the center. Fill well with about 1 1/2 tbsp. pork filling, then seal in by pinching dough closed towards the center. Place a piece of parchment paper over pinched area. Turn bun over and use scissors or a sharp paring knife to make a 1/2'' crisscross incision in the center of the bun. Repeat process, filling remaining buns. Keep filled buns covered with a damp towel. Place 8 buns, paper side down, in a bamboo steamer; close tightly with lid. Meanwhile, bring 2 cups water to a boil in a wok over high heat. Fit bamboo steamer into wok and steam until puffed, about 12 minutes. Repeat with remaining buns.
- MAKES 16 BUNS
Notes
- FAVORITE
↑ Back to top
Pork Belly Big Squid Ramen
Tags: Japanese
Noodles Pork
Servings: 6
Ingredients
- 1/3 cup plus 4 teaspoons (95 g) canola oil
- 1 pound pork belly
- 1 pound chicken necks
- 1 pound pig's feet
- 1 cup usukuchi soy sauce
- 2 yellow onions, 1 thinly slice and 1 julienned
- 3 ounces fresh ginger, peeled and sliced
- 2 ounces kombu
- 11 1/2 cups water
- 6 giant squid or cuttlefish
- 1 shallot, minced
- 2 cloves garlic, smashed and minced
- 5 1/4 ounces spinach
- 4 teaspoons squid ink, (includes the saved ink)
- 1/3 cup rice vinegar
- 8 quail eggs
- 3 1/2 tablespoons canola oil, plus more for deep-frying
- fine sea salt
- micro chives
Steps
- In the pressure cooker, heat the 1/3 cup (75 g) of the canola oil over high heat until it begins to shimmer but does not smoke. Add the pork belly, skin side down, and cook until the skin is golden brown, 5–8 minutes.
- Flip the pork belly over and add the chicken necks, pig’s feet, 2/3 cup (213 g) of the usukuchi soy sauce, sliced onion, 2 ounces (56 g) of the ginger, the kombu, and 81/2 cups (1913 g) of the water. Following the manufacturer’s instructions, lock the lid in place, bring up to high pressure, and cook for 1 hour.
- Let the pressure dissipate naturally, then uncover. Carefully transfer the pork belly to a shallow baking dish to cool. Strain the cooking liquid through a fine-mesh sieve placed over a lidded container and let cool. Discard the remaining solids. Store the broth in the refrigerator until serving time.
- Lay 1 squid on a cutting board. Remove the tentacles and set aside. Remove the innards from the body tube and discard. Set the ink sac aside. Rinse the tube thoroughly. Carefully pop out the long piece of cartilage on the inside of the tube. Peel the skin off the tube. Rinse the tube again until it is white and clean.
- Repeat with the remaining 5 squid. Lay 1 tube out on the cutting board and slice it open from top to bottom. Turn it on its side with the point to the left, and then roll it up into a log. Wrap it tightly in plastic wrap, twisting the ends of the wrap to compact the squid and create a uniform shape. Repeat with 3 more tubes. Place the wrapped tubes in the freezer for at least 4 hours.
- Chop the remaining 2 squid tubes into tiny pieces and place in the Styrofoam cooler. Pour the liquid nitrogen over the squid pieces and stir gently to freeze completely. Put the frozen squid pieces in the blender and process to a fine powder.
- Line a food dehydrator tray or a sheet pan with a silicone mat, and pour the powder onto the mat in an even layer about 1/4 inch (6 mm) thick. Dehydrate the squid powder in the dehydrator set at 155°F (68°C) or the oven preheated to 175°F (80°C) until it forms a completely dry sheet, about 4 hours.
- Once the squid sheet is completely dry, break it into 8 roughly equal pieces. The dried squid may be stored in an airtight container at room temperature for up to 1 week.
- Alternatively, wrap the remaining 2 squid tubes tightly in plastic wrap and freeze them solid as you did the other 4 tubes. Using a wide rasp grater, finely grate the 2 frozen tubes over the silicone-lined tray, forming an even layer 1/4 inch 6 mm) thick, and then dehydrate, break, and store as directed above.
- Remove the 4 squid rolls from the freezer, and remove and discard the plastic wrap. Using a sharp mandoline, thinly slice the squid rolls to yield pinwheels. Transfer the slices to a baking dish and refrigerate until thawed.
- In a large sauté pan, heat the remaining 4 teaspoons (20 g) canola oil over medium-high heat. Add the shallot and garlic and sauté until translucent but not browned, 2–3 minutes. Add the spinach and sauté just until it wilts and is tender, 2–3 minutes. Transfer to a heatproof colander set over a bowl.
- When cool enough to handle, squeeze out as much of the water as possible from the spinach. Transfer the spinach to a large piece of plastic wrap, roll up into a tight cylinder about 2 inches (5 cm) long, and twist the ends of the wrap to compact the spinach and create a uniform shape. Refrigerate until ready to serve.
- In a saucepan, combine the remaining 31/3 cups (750 g) water, the reserved squid tentacles, the remaining 1 ounce (28 g) ginger, the julienned onion, the squid ink, and the remaining 1/3 cup (107 g) usukuchi soy sauce, place over medium-high heat, and bring to a slow simmer. Cook for 20 minutes.
- Remove from the heat, drain the liquid through a fine-mesh sieve placed over a clean saucepan, and place over medium-high heat. Bring to a simmer and cook until reduced to 11/3 cups (300 g), 30–45 minutes.
- Meanwhile, prepare an ice bath. Remove the reduced liquid from the heat, stir in the vinegar, and transfer to a metal bowl. Set over the ice bath and let cool completely, stirring occasionally and replenishing the ice as needed, about 15 minutes.
- Preheat the circulating water bath to 167°F (75°C).
- Cook 8 quail eggs (this allows for breakage) in their shells in the circulating water bath for 5 minutes. Meanwhile, prepare an ice bath. When the eggs are ready, carefully transfer them to the ice bath and let cool completely, replenishing the ice as needed, about 15 minutes. Remove the eggs from the ice bath.
- Using a small egg cutter or small sharp scissors, cut off the top of 1 egg and pour the contents of the shell into your palm, brushing off any loose cooked egg whites. Slip the egg into the cooled tentacle broth. Repeat with the remaining eggs. Let them marinate for at least 4 hours before serving.
- To serve, pour the canola oil into the deep fryer to the fill line or into a tall-sided saucepan to a depth of 21/2 inches (6 cm) and heat to 375°F (190°C). Put the broth from cooking the pork belly in a large saucepan and bring to a simmer over medium-high heat; keep at a low simmer.
- In a large sauté pan, heat the 31/2 tablespoons (50 g) canola oil over high heat until it begins to shimmer. Add the pork belly, turn down the heat to medium, and cook, turning once, until warmed through, 2–3 minutes on each side.
- Transfer the pork belly to a cutting board and cut crosswise into pieces about 1/8 inch (3 mm) thick. Cut the wrapped spinach roll into 4 equal rounds, each about 1/2 inch (12 mm) thick, and remove the plastic wrap. Put the spinach slices into a small baking dish. Pour 1/4 cup (56 g) of the hot pork broth over them to bring them up to room temperature.
- Put 1 spinach round into each serving bowl. Arrange 3 pork belly slices on the bottom of the bowl. Using a slotted spoon, remove the quail eggs from the tentacle broth one at a time and place next to the spinach. Divide the thawed squid pinwheels into 6 equal portions.
- Using a small wire skimmer, plunge each portion in the hot broth for 5 seconds and immediately transfer to a bowl, arranging the “noodles” over the pork.
- Add the dehydrated squid pieces to the hot oil and fry until crisp and puffed, about 5 seconds. Using a skimmer, transfer the squid pieces to a paper towel–lined plate to drain briefly, season lightly with salt, and place 2 fried squid pieces in each bowl.
- Pour 7 tablespoons (100 g) of the simmering pork broth into each bowl, garnish each bowl with micro chives and serve right away.
Notes
- FAVORITE
↑ Back to top
Pork Belly Onigiri
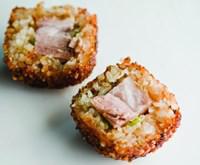
Tags: Japanese
Pork
Ingredients
- 1 ounce pork belly, cut in two
- kosher salt, to taste
- 2 ounces sugar
- 1/2 ounce Korean chile flake
- 2 ounces fish sauce
- 1/2 ounce water
- 2 ounces white vinegar
- 1 ounce negi (scallion) whites
- 1 ounce garlic
- 8 ounces chile sauce base
- 9 ounces cucumber
- 3 1/2 ounces carrots
- vegetable oil, enough to cover 2 inches of frying pan
- 6 1/4 ounces sushi rice
- 1/2 ounce negi, chopped
- 1 pinch bonito flake
- 1/4 ounce furikake (Japanese seasoning mix commonly found at Asian markets)
- a few sprigs cilantro
- 2 ounces tamari
Chile sauce
base:
Banh mi
pickles:
Onigiri rice:
Garnish:
Steps
- Combine the salt, sugar, and chile flakes and mix well. Combine fish sauce, water, and vinegar, and mix well. Pour the vinegar mixture into the sugar mixture, and mix well. Slice the negi whites into thin rounds, cutting across the stalk. Peel and slice the garlic thinly, across the grain. Add the garlic and negi to mixture, and mix well. Refrigerate for later use.
- Heat the chile base until it is warmed through but below the boiling point. Slice the cucumber and carrots on a mandolin about 1/8 inch thick. Pour the warmed chile base over the sliced cucumbers and carrots, and let sit overnight. Refrigerate to reserve.
- Preheat pan with oil to 325 degrees. Mix the sushi rice with negi, bonito flake, furikake, white soy and sesame oil. Mix well to incorporate flavors, being careful not to overwork the rice. Ball the sushi rice with a 1/2-ounce portion of pork belly in the center of the ball. Fry until the rice becomes golden and crispy and the centers are heated through.
- Slice the onigiri balls in half and place on a small square plate. Place the pickles in between the halves and top with cilantro. Place a small ramekin of tamari on the plate for dipping.
Notes
- FAVORITE
↑ Back to top
Pork Chop Spice Rub
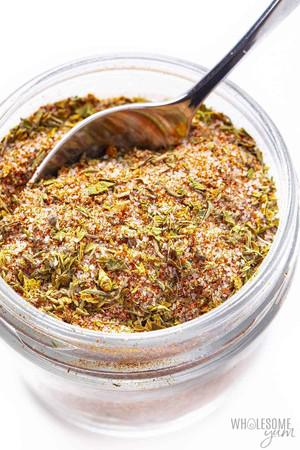
Tags: Rubs and Blends
Spices
Servings: YIELD Makes 6 to 8
servings
Ingredients
- Pork Chop Willy's Grilling Rub
- 3 tablespoons sweet paprika, preferably Spanish
- 1 tablespoon freshly ground black pepper
- 1 tablespoon coarse salt, either kosher or sea salt
- 3/4 teaspoon sugar
- 3/4 teaspoon chili powder
- 3/4 teaspoon granulated garlic or garlic powder
- 3/4 teaspoon onion powder
- 1/4 to 1/2 teaspoon ground cayenne
↑ Back to top
Pork Potstickers

Tags: Appetizers and Dim
Sum Chinese
Dumplings
Servings: YIELD MAKES 30
DUMPLINGS
Ingredients
- 1 pound ground pork
- 1 scallion, white and green parts, thinly sliced
- 1/2 cup jicama or water chestnut, finely chopped
- 4 cups Napa cabbage, finely chopped
- 6 cloves garlic, minced
- 2 tbs cilantro, minced
- 1 egg white
- 3 tbs oyster sauce
- 2 tbs soy sauce
- 1 tbs toasted sesame oil
- 1 tbs vegetable oil
- 2 tbs cornstarch
- 2 tbs salt
- Fresh-ground black pepper
- 30 4 1/2" round wonton wrappers
- 1/4 cup vegetable oil, for frying
- 1/2 cup water
- Soy sauce, for serving
- Chili sauce, for serving
FOR THE
FILLING:
FOR THE
DUMPLINGS:
Steps
- Combine all filling ingredients in a large nonreactive mixing bowl and mix by hand, aggressively slamming the mixture against the side of the bowl until thoroughly combined and very sticky.
- Working one wrapper at a time, put a tablespoon of filling in the center of a wrapper. Brush water on one side of the circle. Holding the dumpling between the thumb and forefinger of your left hand (or right hand, if left-handed), use your dominant hand to pleat and seal the edges of the sealed dumpling. Stand sealed dumplings on an even surface, gently pressing to flatten their bottoms, and cover gently with a damp cloth or paper towel.
- When all the dumplings are filled and sealed, heat the vegetable oil in a flat-bottomed, lidded skillet until hot but not smoking. Arrange half the dumplings flat-side down in the hot oil and cook, uncovered, for 3 minutes. Add the water, cover tightly with the lid, and reduce heat to medium. Cook 8-10 minutes, until all the liquid has evaporated and the dumplings are crisp on the bottom. Shake pan to loosen dumplings; turn out onto a plate and cover with foil. Repeat with remaining dumplings. Serve warm with soy and chili sauce for dipping.
Notes
- FAVORITE
↑ Back to top
Pork-And-Crab Soup Dumplings
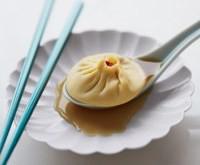
Tags: Appetizers and Dim
Sum Chinese
Dumplings
Ingredients
- One 3-pound chicken, quartered
- 1 pound boneless pork shoulder, sliced 1 inch thick
- Eight 1/4-inch-thick slices of fresh ginger
- 2 scallions, halved crosswise
- 1 large carrot, thinly sliced
- 2 quarts low-sodium chicken broth
- 1 quart water
- 3 envelopes unflavored gelatin
- 4 1/2 cups all-purpose flour, plus more for dusting
- 1 1/2 cups bread flour
- Boiling water
- Large pinch of saffron threads, crumbled
- 1 tablespoon fine sea salt
- 4 dried shiitake mushrooms
- Boiling water
- 3/4 pound ground pork shoulder
- 1/4 cup Asian crab paste (optional; see Note)
- 1/2 cup finely chopped chives
- 2 tablespoons potato starch
- 2 tablespoons toasted sesame oil
- 1 1/2 tablespoons dark soy sauce
- 1 1/2 tablespoons mushroom soy sauce, such as Healthy Boy (see Note)
- 1 tablespoon sugar
- 1 teaspoon finely chopped peeled fresh ginger
- 3/4 teaspoon salt
- 1/2 teaspoon freshly ground white pepper
- 3 cups Jellied Stock (recipe above)
- Goji berries, for garnish (optional)
- 1/4 cup Chinese black vinegar
- 1 tablespoon fresh ginger, julienned
jellied
chicken stock
dough
filling
vinegar
dipping sauce
Steps
- MAKE THE CHICKEN STOCK In a large, deep pot, combine the chicken, pork, ginger, scallions, carrot, broth and water and bring to a boil. Reduce the heat and simmer until the chicken is cooked through, about 30 minutes. Remove the chicken and, when it is cool enough to handle, pull the meat from the bones. Return the bones to the pot and simmer over moderately low heat until the broth is very flavorful and reduced to 6 cups, about 1 1/2 hours longer. Strain the stock and skim the fat from the surface. Reserve the chicken meat and pork for another use.
- In a small bowl, combine the gelatin with 1/3 cup of cold water and let stand for 5 minutes. Whisk the softened gelatin into 3 cups of the hot stock until melted. (Reserve the remaining stock for another use.) Pour the gelatinized stock into a 2-quart glass or ceramic baking dish and refrigerate until firm, at least 3 hours or overnight.
- MEANWHILE, MAKE THE DOUGH In a medium bowl, stir 1/2 cup of the the all-purpose flour with 1/2 cup of the bread flour and 1/2 cup of boiling water until thoroughly combined. Turn the hot-water dough out onto a work surface and knead until fairly smooth, about 5 minutes.
- In a glass measuring cup, combine 2 cups of room-temperature water with the saffron and let stand for 5 minutes. In the bowl of a standing electric mixer fitted with the dough hook, blend the remaining 4 cups of all-purpose flour and 1 cup of bread flour with the salt. Add the saffron water and beat at medium speed until a smooth dough forms, about 5 minutes. Add the hot-water dough and beat at medium speed until incorporated, about 5 minutes. Turn the dough out onto a work surface and knead it into a smooth ball. Wrap the dough in plastic and let stand at room temperature for 30 minutes or refrigerate overnight.
- MAKE THE FILLING In a small bowl, cover the dried mushrooms with boiling water and soak until softened, about 20 minutes. Drain, squeezing out any excess liquid; discard the stems. Finely chop the caps and transfer them to the bowl of a standing electric mixer fitted with the paddle. Add the ground pork, crab paste, chives, potato starch, sesame oil, dark and mushroom soy sauces, sugar, ginger, salt and white pepper. Beat at medium speed until thoroughly combined, about 5 minutes.
- In a food processor, pulse the jellied chicken stock until finely chopped; beat into the pork mixture at medium speed until the mixture is light and fluffy, about 5 minutes.
- FORM AND STEAM THE DUMPLINGS Cut the dough into 4 pieces. Working with one piece at a time and keeping the rest covered, roll the dough into a 1-inch-thick rope. Pinch or cut the rope into 3/4-inch pieces and roll them into balls. Then, using a small dowel, glass bottle or Chinese-style rolling pin, roll each piece of dough into a thin 3 1/2-inch round, dusting with flour as necessary. (For an alternative method, see Note.) Lightly dust the rounds with flour, transfer to a floured baking sheet and cover with a damp towel to keep them from drying out. Repeat with the remaining dough. You should have 4 dozen rounds.
- Line 2 baking sheets with wax paper and dust lightly with flour. Working with 1 dough round at a time and keeping the rest covered, spoon a well-rounded tablespoon of the filling onto the center of the round. Using your fingers, pinch and pleat the dough around the filling, leaving a tiny steam vent at the top; transfer to the baking sheet and top with a goji berry, if using. Repeat with the remaining dough and filling.
- Fill a pot with 2 inches of water and bring to a boil. Arrange the dumplings in a bamboo steamer basket in batches, leaving at least 1 inch between them. Cover and steam over the boiling water until the dough is shiny and the filling is soupy, about 5 minutes. Serve right away while you steam the remaining dumplings.
Notes
- FAVORITE
↑ Back to top
Potato Kugel: Delicious Pesach
Adapted from https://toriavey.com/passover-potato-kugel/
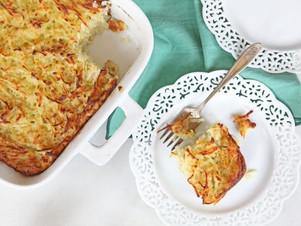
I made this. Is starred.
Servings: 15
Ingredients
- 2.5 pounds russet potatoes (about 10 medium-sized potatoes)
- 2 whole large onions
- 3 eggs
- 2 teaspoons salt
- 1/2 teaspoon black pepper
- 3 tablespoons potato starch (if not serving for Passover you may substitute corn starch)
- 1/4 cup schmaltz or extra virgin olive oil, divided (schmaltz gives amazing flavor; use olive oil to keep it vegetarian)
Steps
- Place a 9x13 baking dish or pan in the oven and preheat oven to 400 degrees, letting the dish heat up inside. Peel the potatoes, then use a food processor or hand grater to grate them into large shreds.
- Place the potato shreds in a large mixing bowl and cover with cold water. Let the shreds sit for a few minutes.
- Meanwhile, peel and shred the two large onions in the food processor or with a hand grater. Reserve.
- In a medium mixing bowl, whisk together the eggs, salt and pepper until fluffy.
- Drain the potato shreds in a colander, pushing down firmly on top of the shreds with your hands to push out the excess liquid.
- Place grated potatoes in a large bowl. Add the seasoned eggs, grated onions and potato starch to the bowl. Use your hands to mix all ingredients together until well combined.
- Take the preheated baking dish out of the oven. Quickly pour in 3 tbsp schmaltz or olive oil, then use a pastry brush to carefully spread the fat around the bottom and sides of the hot dish. Careful, don't burn yourself! The hot dish, while a bit difficult to navigate, will help to form a beautiful brown and crisp crust for the kugel.
- Carefully and quickly spread the potato mixture into an even layer in the baking dish (it should sizzle!), then drizzle remaining 1 tbsp of melted schmaltz or olive oil across the top.
- Bake uncovered at 400 degrees for 60-70 minutes until the top is nicely browned all across the top. If it seems to be browning too fast (before the center is cooked), cover the kugel to keep it from over-browning. You really want it to have a nice golden crust-- at the end of cooking, if it's not quite brown enough, you can put it 6 inches below the broiler for a minute or two to evenly brown it all across the top. This kugel tastes best served hot directly from the oven. Let it sit for 5-10 minutes before slicing and serving.
Notes
- You will also need: 9x13 ceramic, metal or cast iron baking dish or pan (I don't recommend using glass), food processor with grating attachment or hand grater, mixing bowls, silicone pastry brush (heat-safe)
↑ Back to top
Potato Latkes
Tags: Holidays
Jewish Potato
Ingredients
- 2 pounds russet (baking) or Yukon Gold potatoes
- 1 medium onion
- 1/2 cup chopped scallions including the green part
- 1 large egg beaten
- Salt and pepper to taste
- Vegetable oil for frying
Steps
- Peel the potatoes and put in cold water.
- Using a grater or a food processor coarsely grate the potatoes and onions.
- Place together in a fine-mesh strainer or tea towel and squeeze all the water over a bowl. The potato starch will settle to the bottom; reserve that after you have carefully poured off the water. Mix the potato and onion with the potato starch.
- Add the scallions, egg, and salt and pepper. Heat a griddle or non-stick pan and coat with a thin film of vegetable oil.
- Take about 2 tablespoons of the potato mixture in the palm of your hand and flatten as best you can. Place the potato mixture on the griddle, flatten with a spatula, and fry for a few minutes until golden.
- Flip the pancake over and brown the other side. Remove to paper towels to drain.
- Serve immediately.
Notes
- You can also freeze the potato pancakes and crisp them in a 350- degree oven at a later time.
↑ Back to top
Potato, Scallion & Chorizo Crispy Tacos

Tags: Mexican
Servings: 5 to 6
Ingredients
- 1 lb red bliss potatoes peeled and cut into 1-inch pieces
- 8 oz fresh uncooked Mexican chorizo sausage casings removed, coarsely chopped
- 8 scallions white and light green parts thinly sliced (1/2 cup)
- 1 tsp kosher or sea salt or more to taste
- 10-12 Corn tortillas
- safflower oil for frying
- Salsa verde or any salsa of your choice
Steps
- Bring a medium pot of water to a boil over medium-high heat. Add the potato pieces, once the water returns to a boil, cook for 10 to 12 minutes or until the potatoes are tender. Drain.
- Place the chorizo in a large skillet over medium-high heat. As it cooks, use a wooden spoon or spatula to crumble it into smaller pieces. Once it browns and crisps, 5 to 6 minutes, add the scallions and stir to combine; cook for about 1 minute or until the scallions begin to soften.
- Add the cooked potatoes and salt, mashing them into the chorizo mixture with a potato masher or a wooden spoon, for about 1 minute until well combined. Remove from the heat. Taste, add salt as needed.
- Heat a dry, medium skillet over medium heat. Warm the tortillas in the skillet one at a time for 15 to 30 seconds on each side, to soften them for rolling and so they will not crack as you assemble tacos.
- Place a few tablespoons of the filling on the center of each heated tortilla, and roll, as tightly as you can, into a taco. Insert a wooden toothpick through taco pairs, through the seams to help them retain their roll shape as they cook. When they have all been rolled, finish the tacos by either frying or toasting them.
- Pour enough oil into a large skillet to a depth of about 1 inch, place over medium heat. Once the oil is hot, 4 to 6 minutes, fry the tacos in batches, placing them in the skillet, without crowding them. They oil should be bubbling as they cook. Cook for about 2 to 3 minutes on the first side, until the bottom and sides have crisped and turned golden. Use tongs to turn over the tacos, cook for another 2 to 3 minutes. Transfer them to a plate lined with paper towels. Continue until all the tacos have been fried.
- Heat a large, dry skillet or comal over medium heat. Working in batches, place the tacos in the skillet. Let them toast and heat for about 3 to 4 minutes or until the tacos are browned and crisped, then flip to the other side and toast until evenly browned and crisp.
- Remove all toothpicks; serve warm.
To fry the tacos:
To toast the tacos:
↑ Back to top
Pozole Verde

Tags: Mexican
Stew
Ingredients
- 1 pound lean pork shoulder, in 1 piece
- 1/2 chicken, cut into pieces
- 1 onion, quartered, plus 1 onion, finely chopped
- 2 cloves garlic, peeled and smashed
- 5 stems cilantro, plus more for garnishing
- 4 ounces hulled untoasted pumpkin seeds
- 1/2 pound fresh tomatillos
- 2 1/2 teaspoons salt
- 1 fresh hot chile, such as Serrano or jalapeno, stem removed and coarsely chopped
- 1 small onion, chopped
- 2 tablespoons lard or vegetable oil
- Salt
- 2 (29-ounce) cans hominy, drained
- Sour cream
- Diced red onion
- Dried oregano and/or finely chopped cilantro leaves
- Ripe avocados, cubed
- Fried pork rinds, crumbled
- Fried corn tortilla strips
- Lime wedges
Garnishes:
Steps
- In a large soup pot put 3 quarts of water, the pork shoulder, chicken, quartered onion, smashed garlic, and cilantro stems and bring to a boil. Skim any foam that rises to the surface, partially cover the pot, reduce heat to a simmer and cook for 2 1/2 to 3 hours, or until the pork is very tender and the stock is flavorful.
- While the meat is cooking, heat a small skillet over medium low heat. Add the pumpkin seeds and cook, stirring constantly, until all of the seeds have popped and turned golden, 3 to 4 minutes. Transfer to a bowl and set aside to cool.
- Place the tomatillos in a small saucepan and add enough water to cover by 1-inch. Add 1 teaspoon of the salt and cook over medium heat until the tomatillos are tender, about 10 minutes. Strain tomatillos and discard the cooking liquid. Place the tomatillos in the jar of a blender along with the pumpkin seeds, green chile, and chopped onion.. Add 1/3 cup of the pork cooking liquid and blend until very smooth. Strain through a medium-mesh sieve and discard the solids.
- In a skillet over medium high heat, add the oil. When hot, add the puree and cook, stirring constantly, for about 7 minutes, or until the color has darkened and the mixture has thickened considerably. Remove from the heat.
- When the pork is very tender, strain the stock. Set the meat and chicken aside. Discard other solids. Return the stock to the soup pot, add the tomatillo-pumpkin seed mixture and the hominy and return to a gentle simmer. Cook for about 1 hour, stirring frequently, until slightly thickened and flavorful. When the meat and chicken are cool enough to handle, discard any bones and shred into bite size pieces. Add the meat to the soup pot and season with the remaining 1 1/2 teaspoons salt. Serve the pozole in shallow bowls, and allow guests to garnish their soup with condiments of their own choosing.
Notes
- FAVORITE
↑ Back to top
Preserved Lemons
Tags: Condiments
North Africa
Seasonings
Servings: 16 to 20
Ingredients
- 8 to 10 whole lemons
- 1/2 cup kosher salt (90g Diamond Crystal or 124g Morton's)
- 1/4 cup ( 50 g) granulated sugar
Steps
- Trim 1/4 inch off the top and bottom of each lemon. Split each lemon lengthwise into quarters, keeping quarters connected at base. Transfer to a large bowl. Toss with salt and sugar. Cover with plastic and refrigerate overnight.
- The next day, the lemons will have released a lot of liquid. Transfer entire contents of bowl to a sterilized canning jar, pressing lemons down firmly until they are completely submerged in liquid. Seal jars and store in refrigerator for at least 2 weeks and up to 6 months.
↑ Back to top
Pressure Cooker French Onion Soup
Tags: Soups
Servings: 6
Ingredients
- 6 tablespoons unsalted butter, plus more for toasts (3 ounces; about 90 g)
- 3 pounds yellow or mixed onions, sliced 1/8 inch thick (1.4kg; about 4 to 5 large onions) (see note)
- 1/2 teaspoon (2g) baking soda
- Kosher salt and freshly ground black pepper
- 1/2 cup ( 120 ml) dry sherry, such as Amontillado
- 2 quarts (about 2 L) homemade or store-bought low-sodium chicken stock
- 2 sprigs thyme
- 1 bay leaf
- 1 teaspoon ( 5 ml) Asian fish sauce (optional)
- 1 teaspoon (5ml) cider vinegar
- 8 bowl-size slices rustic bread, toasted until crisp
- 1 medium clove garlic
- 1 pound (450g) Gruyère cheese, grated
- Freshly minced chives, for garnish
Steps
- Melt butter in an electric or stovetop pressure cooker over medium heat. Add onions and baking soda and stir to combine. Season with salt and pepper. Cook, stirring, until onions slightly soften and start to release liquid, about 3 minutes. Seal pressure cooker and heat to high pressure (12.5 to 15 psi). Cook at high pressure for 20 minutes. Release pressure by allowing steam to vent, then remove lid.
- Continue cooking with lid off, stirring constantly, until liquid inside has completely reduced and the onions are deep brown and sticky, about 5 minutes.
- Add sherry and bring to a simmer, scraping up any browned bits. Cook until alcohol smell is mostly gone, about 3 minutes. Add stock, thyme, and bay leaf, raise heat to medium-high, and bring to a simmer. Lower heat and simmer for 10 minutes.
- Add fish sauce, if using, and cider vinegar and season with salt and pepper (if necessary). Discard thyme sprigs and bay leaf.
- To Serve: Preheat broiler and move oven rack to top position. Butter toasts and rub with garlic clove until fragrant. Spoon a small amount of broth into the bottoms of 4 ovenproof serving bowls, then top with half the toasts. Sprinkle some grated Gruyère on top of toasts, then spoon more soup and onions on top, nearly filling the bowls. Set the remaining 4 toasts in each bowl, pushing to nearly submerge them. Top with remaining grated cheese and set bowls on a rimmed baking sheet. Broil until cheese is melted and browned in spots. Garnish with chives and serve.
↑ Back to top
Pretzel Rods from 'Classic Snacks Made from Scratch'
Adapted from http://www.seriouseats.com/recipes/2013/02/pretzel-rods-from-classic-snacks-made-from-sc.html

Tags: Snacks
Ingredients
- 1 1/2 cups (6 3/8 ounces) unbleached all-purpose flour
- 1 1/2 cups (6 3/8 ounces) bread flour
- 1 teaspoon instant yeast (not active dry or rapid-rise)
- 2 teaspoons packed light brown sugar
- 1/2 teaspoon kosher salt
- 1 cup warm water
- Cooking spray or vegetable oil
- 8 cups (2 quarts) water
- 1/2 cup baked soda (see note above)
- 1/4 cup (1 7/8 ounces) packed light brown sugar
- 1 large egg whisked with 1 tablespoon water, for egg wash
- 2 tablespoons pretzel salt or coarse sea salt
Pretzels
Poaching
Liquid
Topping
Steps
- Stir the flours, yeast, brown sugar, and salt together in a large bowl, then stir in the warm water until a shaggy dough forms. (The water should feel as warm as a hot bath or Jacuzzi-not lukewarm but not boiling, either.)
- Transfer the dough to a lightly floured surface and knead for 5 minutes. The dough should feel smooth and satiny.
- Spritz a large, clean bowl with cooking spray or grease lightly with vegetable oil. Place the dough ball in the bowl and cover with a spritzed or greased piece of plastic wrap. Let rise for 1 hour, until doubled in size.
- Line 2 baking sheets with parchment paper.
- Transfer the dough to a clean, unfloured surface and divide into 24 pieces. Roll each piece into a rope about 9 inches long and 1/2 inch wide. Line up the ropes on the baking sheets and cover loosely with spritzed or greased plastic wrap. Let rise for another 30 minutes.
- Poach and bake
- Preheat the oven to 375˚F and prepare the poaching liquid. Bring the 8 cups water to a simmer in a large, wide saucepan or Dutch oven over medium heat. Add the baked soda and brown sugar and stir until dissolved. The water will foam slightly.
- Gently drop the dough ropes into the simmering water, a few at a time, and poach for 15 seconds. Remove the ropes gently using tongs, a slotted spoon, or a metal skimmer and return them to the baking sheets. Brush with the egg wash and sprinkle with the pretzel salt or sea salt.
- Bake for 30 to 35 minutes, until fully hardened, dark brown, and glossy, checking every few minutes after a half hour; switch the sheets between top and bottom racks halfway through. Transfer the baked pretzels to a wire rack and let cool completely. Store the pretzels at room temperature in an airtight container for up to a week.
Make the pretzels
Notes
- To make the boiling mixture more alkaline without resorting to lye, Barber calls for a concentrated "baked soda." This, however, is easy to make. Simply pour out a box of baking soda onto an aluminum foil-lined baking sheet, and send it into a 250-degree oven for about an hour. Voila! Baked soda
- What worked: Between the baked soda and the brown sugar, the malty flavor of these pretzels was totally on-point.
- What didn't: In a 375 degree oven, my pretzels turned golden brown long before they became completely crisp. Next time, I'll lower the oven temperature to 350 or even 325 and bake them an extra 20 minutes or so to ensure they turn into crunchy logs before burning.
↑ Back to top
Pudding Chomeur
Maple Dessert
Servings: 8
Ingredients
- Syrup
- 1c dark Maple Syrup
- 1c Heavy Cream
- 1/2 tsp salt
- Cake
- 1-1/4 C flour
- 3 tbsp sugar
- 1-1/2 tsp baking powder
- 1/2 tsp salt
- 2/3 c milk2 eggs
- 1/2 tsp vanilla
- 6tbsp. melted butter
Steps
- Combine maple syrup, cream and salt in saucepan let boil 5 min pour mixture in measuring cup set aside
- for cake use muffin method combine dry ingredients. Mix together wet ingredients and mix together
- Pour in ungreased 8 in glass baking pan. Spread evenly Pour syrup mixture over top using the back of a spoon to control the flow
- Bake at 375 about 6 inches from the top of the oven for 35 minutes let cool 10 minutes
add melted butter.
↑ Back to top
Puerto Rican Pork Shoulder
Tags: Pork
Ingredients
- 1 pork shoulder ham (6 to 7 pounds bone-in and with skin on, see Note)
- 3 cloves garlic, cut into ¼-inch slivers
- 1 bunch fresh oregano, broken into sprigs
- 2 tablespoons Coarse salt (kosher or sea)
- 2 tablespoons dried oregano
- 2 tablespoons granulated garlic
- 1 tablespoon Freshly ground black pepper
- 2 teaspoons dried sage
- 2 tablespoons extra-virgin olive oil
- ½ cup vegetable oil
- ¼ cup annatto seeds (optional)
- Sparkling Barbecue Sauce
- Butcher’s string or bamboo skewers; about 5 cups oak chips or chunks (optional), soaked for 1 hour in water to cover, then drained
YOU’LL ALSO
NEED:
Steps
- None, but allow yourself 3 hours or so for grilling.
- Carefully remove the skin from the pork shoulder ham and set it aside. Using the tip of a paring knife, make a series of cuts in the pork, each about ½ inch deep, ½ inch wide, and spaced 2 inches apart. Place a sliver of garlic and a sprig of fresh oregano in each slit.
- Combine the salt, dried oregano, granulated garlic, pepper, and sage in a bowl and stir with your fingers to mix. Sprinkle the rub all over the pork shoulder. (You may not need all of the rub; it keeps well in an airtight jar and is good to have on hand for an impromptu grill session.) Drizzle the olive oil over the seasoned pork and rub it into the meat.
- Put the pork skin back on the roast and tie it in place with butcher’s string or pin it in place with bamboo skewers.
- Make the annatto oil, if using, by heating the vegetable oil in a small saucepan over medium heat. Add the annatto seeds and cook until fragrant and brown and the oil turns bright orange, 2 to 4 minutes. Immediately strain the oil into a heat-proof bowl. Discard the annatto seeds.
- To grill: Ideally you’ll grill the pork shoulder over charcoal. If you want a smoke flavor, charcoal will give you the most pronounced result.
- Grill the pork shoulder until dark golden brown on the outside and completely cooked through. If you spit roast the pork shoulder with the rotisserie covered, it will take 2 to 2½ hours; grilling with the rotisserie uncovered will take a little longer. If you are grilling using the indirect method it will take about 4 hours. Use an instant-read meat thermometer to test for doneness, inserting it into the thickest part of the meat but not touching any bones or the spit. When the pork is done the internal temperature will be 190° to 195°F. Start basting the pork with the annatto oil, if using, or with plain vegetable oil after the pork has grilled for 30 minutes, if spit roasting, or after 1 hour of indirect grilling. Continue basting every 30 minutes. If you are using a charcoal grill, add 1½ cups of wood chips or chunks after the first and second hours. Add fresh coals to each side of the grill every hour.
- Transfer the pork shoulder to a cutting board. Remove the skin and cut it into 1-inch squares. It will crisp into cracklings as it cools. Thinly slice the pork and serve it with the cracklings and the Sparkling Barbecue Sauce, if desired.
If
you are using a rotisserie, set up the grill for spit roasting,
following the manufacturer’s instructions, and preheat the grill to
medium-high. Thread the pork shoulder onto the rotisserie spit, using
the forked prongs to hold it in place. When ready to cook, if you are
spit roasting on a charcoal grill and want a smoke flavor, toss 1½
cups
of wood chips or chunks on the coals. If you are using a gas grill,
add
the wood chips or chunks to the smoker box or place them in a smoker
pouch under the grate (see here). Attach the spit to the grill and
turn
on the motor.
If
you are grilling using the indirect method, set up the grill for
indirect grilling, place a drip pan in the center, and preheat the
grill to medium. When ready to cook, if a smoke flavor is desired and
you are using a gas grill, add the wood chips or chunks to the smoker
box or place them in a smoker pouch under the grate (see here). If you
are using a charcoal grill, toss 2 cups of the wood chips or chunks on
the coals. Place the pork shoulder, skin side up, in the center of the
grate over the drip pan and away from the heat and cover the grill.
Notes
- To maximize the ratio of crisp skin to meat, buy the shank end of the pork shoulder, sometimes called a shoulder ham or picnic ham. A pork chop version of this dish appears here.
↑ Back to top
Puff Pastry Dough from Scratch
Tags: Pastry
Ingredients
- 1¼ cups cake flour
- 3¾ cups bread flour
- 1½ teaspoons salt
- ¼ cup white sugar
- 1¼ cups cold butter, cut into tablespoon-sized pieces
- 1¼ cups cold water
- 1½ lemon juice
Steps
- In a large bowl, stir together the cake flour, bread flour, salt and white sugar. Stir in the chunks of butter so that each one is completely coated in flour. Combine the cold water and lemon juice. Make a well and add the liquid (the tablespoon of lemon juice or vinegar helps tenderize the dough and keep it from oxidizing or turning gray). Stir into the bowl while lightly tossing the ingredients to moisten them evenly, keeping the butter pieces large. Gather the dough into a ball.
- On a lightly floured surface, roll out the dough into a rectangle about 1/2 inch thick. Keep the edges as square as possible. The dough will look terrible, but don't worry, it will shape up. Fold the dough into thirds like a business letter, wrap in plastic wrap and refrigerate for at least 30 minutes. This will allow the flour to fully absorb the liquid and will let it relax after the first roll-out.
- Place the dough on the floured work surface and turn at a 90 degree angle from the last time you rolled it out. Roll again into a rectangle again and fold into thirds so that the short edges are in the fold. Basically, you've done a quarter turn of the dough. If the dough is still cold and manageable, rotate and roll again, then fold into thirds, or refrigerate and continue in 30 minutes. Finish by rolling the dough out to the size of a baking sheet. Place on a lightly floured baking sheet and wrap in plastic. refrigerate for at least 30 minutes before using.
- To use, roll out dough to 1/4 inch thickness and cut into shapes with a sharp knife. Wrap and chill again after cutting the dough into shapes (to keep the edges sharp) or before baking (this prevents shrinkage). Use as directed in recipes calling for puff pastry, or alternatively, enclose desired fillings and bake in a preheated 400 degrees F (200 degrees C) oven until puffed and golden brown.
↑ Back to top
Pullman Loaf
Tags: Breads
Servings: 1 loaf
Ingredients
- 1 1/2 cups lukewarm water
- 1 cup ( 5 1/2 ounces) semolina flour
- 2 tablespoons honey
- 2 1/4 teaspoons instant yeast
- 2 cups ( 9 ounces) bread flour
- 1/2 cup white wheat flour
- 1 1/2 teaspoons salt
- 3 tablespoons butter
Steps
- In the bowl of your stand mixer, combine the water, semolina flour, honey, yeast, and bread flour. Stir to combine. Cover and set aside for 20 minutes.
- Add the white wheat flour, salt, and butter and knead with the dough hook attachment of your stand mixer until the dough is smooth and elastic. Flour your work surface lightly, and knead by hand briefly, then form the dough into a ball. Drizzle with olive oil and return it to the bowl. Cover with plastic wrap and set aside for 30 minutes.
- Preheat the oven to 350 degrees. turn out the dough and knead it briefly to knock out the large bubbles. Form it into a log about 13 inches long - to fit inside the pan. Place the log in the pan, seam-side down. Put the lid on the pan and set aside until the dough has risen to within about an inch of the top of the pan - about 40 minute (but you might want to check at 30 minutes, just in case)
- Bake at 350 degrees until the loaf is golden brown, about 40 minutes. Remove the loaf from the pan and allow it to cool completely on a rack before slicing.
↑ Back to top
Pumpernickel Color

Tags: Food Coloring
Ingredients
- 3 T sugar
- 1 T water
- Pinch cream of tartar
- 1/4 cup boiling water
Steps
- "In a heavy saucepan over low heat, melt the sugar in the tablespoon of water. Increast the heat to medium-high, cover the pan, bring to a boil, and boil for 2 minutes. Add the cream of tartar and continue to boil, uncovered, until the sugar is almost black in color. Remove the pan from the heat. The sugar will continue cook and darken. Allow it to begin to cool. Using extreme care, add the boiling water (the sugar will boil up and may splatter). Stir to disolve, then let cool to room temperature.
- Whenever you use pumpernickel color, wet the measuring spoon or cup with cold wter for easier cleanup. Soaking the saucepan and the utensils in hot water will dissolve the caramelized sugar remaining on them."
Notes
- FAVORITE
↑ Back to top
Pumpkin Crème Brûlée

Servings: 6
Ingredients
- 1 1/2 cups ( 355 ml) heavy cream
- 1/2 cup ( 120 ml) whole milk
- 200 g pumpkin purée ( 7 ounces; 3/4 cup) from 1 (15-ounce) can
- 134 g granulated sugar ( 4 3/4 ounces; 2/3 cup), plus more for topping
- 1/4 teaspoon Diamond Crystal kosher salt; for table salt, use half as much by volume
- 1/4 teaspoon ground cinnamon
- 1/4 teaspoon ground nutmeg
- 1/8 teaspoon ground ginger
- Freshly ground black pepper
- 8 large egg yolks ( 4 ounces; 113 g)
- Granulated sugar, for topping
Steps
- Adjust oven rack to middle position and preheat oven to 325°F (160°C). Bring a kettle or large pot of water to a boil; set aside.
- In a medium saucepan, whisk heavy cream, milk, and pumpkin purée to combine. Cook, stirring occasionally to prevent the bottom from scalding, until mixture begins to steam, about 5 minutes.
- In a large bowl, whisk sugar, salt, cinnamon, nutmeg, ginger, and a pinch of black pepper to combine. Add yolks, and whisk until smooth. (Avoid combining yolks with sugar mixture until you are ready to add the dairy; if left to stand for too long, the sugar will absorb moisture from the yolks, leaving behind hard, clumpy bits.)
- Slowly pour hot cream mixture into yolk mixture, and whisk until thoroughly combined.
- Set six 6-ounce ramekins in a large roasting pan. Divide custard base evenly among ramekins, filling them 1/4-inch from top of rim. Pour reserved hot water (around 180 to 200°F/88 to 93°C) into roasting pan until it comes 2/3 of the way up the ramekins; be careful not to splash water into the ramekins as you pour.
- Carefully transfer roasting pan to oven and bake until custards are just set with a slight wobble and an instant-read thermometer inserted in the center registers 173 to 175°F (78 to 80°C), 25 to 30 minutes.
- Remove roasting pan from oven and, using kitchen towels, oven mitts, or silicone-coated tongs, carefully transfer ramekins to a wire rack. Allow custards to cool slightly—warm but no longer hot—about 30 minutes. Refrigerate until set, uncovered, at least 4 hours and up to 3 days.
- Right before serving, top surface of each custard with an even layer of sugar (about 2 teaspoons per ramekin). Working in a circular motion, use a kitchen torch to pass a flame over the top of each custard, until sugar has caramelized and melted into a glossy, crackling sheet and turned golden brown. (How closely and how long you should torch your custards will depend on the strength of your blowtorch; watch the sugar carefully as you pass the torch over the surface of the custard to avoid scorching your custard.) For broiler method, see notes.
- Serve immediately.
- Medium saucepan, mixing bowl, whisk, flexible spatula, 4 (6-ounce) ramekins, roasting pan, instant-read thermometer
Special Equipment
Notes
- To bake the custard in an 8-by-8-inch baking dish: Set an 8-by-8-inch baking dish in a large roasting pan. Pour custard into baking dish, filling until it reaches 1/4-inch from top of rim. Pour reserved hot water (around 180 to 200°F/88 to 93°F) into roasting pan until it comes 2/3 of the way up the ramekins; be careful not to splash water into the ramekins as you pour. Carefully transfer roasting pan to oven and bake until custard is just set with a slight wobble and an instant-read thermometer inserted in the center registers 173 to 175°F (78 to 80°C), about 30 minutes. Proceed with step 7 of recipe.
- To caramelize the sugar using the broiler, turn the broiler on high and position a rack 3 to 4 inches below the heating element. Allow the broiler to preheat for 5 to 10 minutes, then place the roasting pan of custards in the oven. Broil until the sugar has melted and caramelized, 5 to 7 minutes. Keep a watchful eye on custards, as broiler strength can vary.
↑ Back to top
Pumpkin-Pecan Tassies
Adapted from http://www.recipe.com/pumpkin-pecan-tassies/

Tags: Pies and Tarts
Servings: 24 tassies
Ingredients
- 1 15 ounce package rolled refrigerated unbaked piecrust (2 crusts)
- 3/4 cup canned pumpkin
- 1/4 cup granulated sugar
- 1 teaspoon pumpkin pie spice
- 1/8 teaspoon salt
- 1 egg, lightly beaten
- 1/4 cup half-and-half, light cream, or milk
- 1/3 cup chopped pecans
- 1 tablespoon packed brown sugar
- 1 tablespoon butter, melted
- Maple syrup (optional)
Steps
- Let piecrusts stand according to package directions. Preheat oven to 350 degrees F. Unroll piecrusts. Use a 2-1/2-inch round cookie cutter to cut 12 rounds from each pie crust. Gently ease pastry rounds into the bottoms and up sides of 24 ungreased 1-3/4-inch muffin cups; set aside.
- For filling, in a large bowl , stir together pumpkin, granulated sugar, pumpkin pie spice, and salt. Add egg; stir until combined. Gradually add half-and-half. Stir just until combined.
- For pecan topping, stir together pecans, brown sugar, and melted butter.
- Spoon about 2 teaspoons filling into each pastry-lined cup. Top each with a scant 1 teaspoon pecan topping. Bake in the preheated oven about 35 minutes or until filling is set and crust is golden brown. Remove tassies from muffin cups and cool completely on a wire rack. If desired, drizzle tassies with maple syrup just before serving. Makes 24 tassies.
Notes
- FAVORITE
↑ Back to top
Pâté de Sardine
I swap out liver for briny sardines in this fast
and easy, but still fancy, appetizer.
I adore canned sardines. In fact, I'd say I am a connoisseur of the form, with favorite brands from the United States, France, Portugal, and Spain. I enjoy them right out of the can most of the time, but this pâté is my absolute favorite way to consume them.
If you happen to drop by my place for hors d'ouvres, odds are, I'll serve this stuff with thin baguette toasts for dipping. If it's fancy, we'll spread instead.
Tightly wrapped, the pâté will keep for about 5 days. It doesn't freeze well, though, so...don't do that.
AB
Servings: 4
Ingredients
- 2 cans oil-packed sardines (about 4 ounces each)
- 4 tablespoons unsalted butter, at room temperature
- 1 large shallot, chopped
- 2 tablespoons fresh lemon juice
- 3 tablespoons finely chopped fresh herbs, such as chives, parsley, or dill
Steps
- Dump the sardines and their oil in the bowl of a food processor, along with the butter, shallot, and lemon juice, and process until smooth. Add 2 tablespoons of the herbs and pulse 2 or 3 times.
- Pack the pâté into a small ramekin (or back into the sardine cans). Smooth with a spatula, then top with the remaining 1 tablespoon hers. Wrap tightly in plastic wrap and refrigerate for at least 1 hour to firm the texture.
Notes
- This recipe first appeared in EveryDayCook
↑ Back to top
Pão de Queijo - David Grabowski
Tags: Baking
Breads Cheese
Servings: 24
Ingredients
- Preheat oven to 400 degrees
- •1 egg at room temperature
- •1/3 cup olive oil
- •2/3 cup whole milk
- •1 1/2 cups tapioca flour
- •1 teaspoon dry mustard powder
- •1 teaspoon coarsest cracked black pepper
- •1 cup grated Gruyere cheese
- •1/4 cup finely grated Parmigiana Reggiano
Steps
- Blend first 6 ingredients. Scrape down sides of blender. Blend again.
Add cheese and pulse until
incorporated.
Spray mini muffin tins (2- 12 muffin tins or 1- 24) with Pam spray or
brush with olive oil. Carefully pour batter into tins, about 4/5th
full. Finely grate about 1/4 cup more Gruyere. Carefully sprinkle over
batter.
Place prepped tins into oven. Bake for 20 minutes or until puffed up
and golden brown. Do NOT open oven door. Use oven light and look
through window to check.
Let cool ten minutes. Play
with recipe. Add any spices you like.
These were baked in a Whirlpool gas oven. I often sprinkle the
portioned batter with Tony Cachere’s Creole Seasoning. This time I
chose to use Maldon sea salt flakes instead. Sometimes I use up cheese
scraps and grate cheddar or Asiago, but I like Gruyere the best.
↑ Back to top
Quentin's Grandma's Cream Cheese Rugelach

Tags: Jewish
Pastry
Ingredients
- 2 1/4 cups all-purpose flour, plus more for the work surface
- 1/4 cup plus 1 tablespoon granulated sugar
- 1/2 teaspoon fine sea salt
- 8 ounces (2 sticks) unsalted butter, cut into chunks and chilled
- 8 ounces cream cheese, cut into chunks
- 2 tablespoons sour cream or Greek yogurt
- 2 large egg yolks
- One 15-ounce box golden raisins
- Enough water , to cover the raisins
- 1/4 cup granulated sugar
- Pinch of salt
- 1 teaspoon ground cinnamon
- 1 teaspoon pure vanilla extract
- 1/2 cup walnuts or filberts (hazelnuts)
- 2 to 3 tablespoons rum
- One 15-ounce box apricots
- Enough water (or orange juice), to cover the apricots
- 1/4 cup granulated sugar
- Pinch of salt
- 1 teaspoon ground cinnamon
- 1 teaspoon pure vanilla extract
- 1/2 cup walnuts (or filberts)
- One 12-ounce jar of orange marmalade
- 2 to 3 tablespoons orange brandy
For the dough
For the raisin
filling
For the
apricot filling
Steps
- To make the cream cheese rugelach recipe, pulse the flour, 1 tablespoon of sugar, and salt in a food processor until combined. Add the butter and pulse until the mixture resembles coarse sand with some pea-size pieces of butter. Add the cream cheese and sour cream and pulse just until the batter comes together into a rough dough.
- Turn the dough out of the bowl onto a floured work surface and divide into 4 portions. Pat each portion into a disk, wrap in plastic wrap, and refrigerate for about 45 minutes.
- For the raisin filling: Put the raisins in a medium saucepan and cover with the water. Add the sugar, salt, cinnamon, and vanilla. Simmer over low heat until almost all the water is absorbed and the raisins are plumped, anywhere from 30 to 60 minutes, depending on the heat and and size of pan. Transfer the raisin sauce to a blender or food processor and pulse. Add the walnuts and process again to form a paste. Stir in the rum to taste and set aside to cool.
- For the apricot filling: Put the apricots in a medium saucepan and cover with the water. Add the sugar, salt, cinnamon, and vanilla. Simmer over low heat until almost all the water is absorbed and the apricots are soft and plumped, 30 to 60 minutes, depending on the heat and size of the pan. Transfer the apricot sauce to a blender or food processor and pulse. Add the walnuts and marmalade, and process again to form a paste. Stir in the brandy to taste and set aside to cool.
- Preheat the oven to 375°F (190°C). Line 2 half-sheet pans with parchment paper.
- Roll 1 portion of the dough into a rectangle that’s between 1/8 and 1/4 inch thick. Spread with 1/4 of the filling. Starting with the long side, roll up the dough to make a tight cylinder. Flatten it a bit and wrap in plastic wrap. Place the cylinder in the freezer or refrigerator and repeat the process with the remaining portions of dough.
- Take just one of the cylinders out of the fridge or freezer and slice it into 1 1/2-inch-wide cookies. Place each cookie, seam side down, on the prepared sheet. Whisk the egg yolks and brush very lightly over the tops and then sprinkle sparingly or generously, as you see fit, with sugar. Refrigerate for at least 10 minutes. Repeat with the other portion of dough.
- Bake for about 25 minutes, or until golden and crispy. Cool the rugelach for a few minutes on the baking sheets before transferring to a wire rack to cool completely.
Meanwhile, make one of
the fillings:
Notes
- FAVORITE
↑ Back to top
Quick Barbecue Beans
Servings: 4 to 6
Ingredients
- 4 ounces sliced bacon, cut into 1/2-inch strips
- 1 cup finely diced yellow onion (about 1 medium onion)
- 2 tablespoons finely diced green bell pepper
- 1 tablespoon finely diced seeded jalapeño (about 1 small pepper)
- 1 teaspoon finely minced garlic
- 1 cup ketchup
- 3/4 cup dark brown sugar
- 1/2 cup apple juice
- 1/4 cup honey
- 2 tablespoons molasses
- 1 tablespoon apple cider vinegar
- 1 tablespoon barbecue rub
- 1 tablespoon yellow mustard
- 1 tablespoon hot sauce
- 1 ( 19-ounce) can pork and beans
- 1 ( 15.5-ounce) can butter beans, drained and rinsed
- 1 ( 15.5-ounce) can great northern beans, drained and rinsed
- Kosher salt, to taste
Steps
- Preheat oven to 300°F. Place a 12-inch skillet or dutch oven over medium-high heat. Add bacon and cook until fat has rendered and bacon has crisped, 7-10 minutes. Transfer bacon to a paper towel-lined plate, leaving as much fat in the pan as possible.
- Add onion to pan and cook, stirring occasionally, until onion softens and begins to brown around the edges, about 7 minutes. Stir in green pepper, jalapeño, and garlic and cook until fragrant, about 1 minute. Stir in ketchup, brown sugar, apple juice, honey, molasses, vinegar, barbecue rub, mustard, hot sauce, and reserved bacon; bring to a simmer. Gently fold in pork and beans, butter beans, and great northern beans.
- Transfer beans to oven and cook, uncovered, until beans are heated through and sauce has thickened, about 50 minutes. Remove from oven and let cool for 15 minutes. Season with salt. Serve immediately; alternatively, store in an airtight container in the refrigerator for up to 1 week, or freeze. Reheat before serving.
↑ Back to top
Quick Chicken Piccata
Tags: Chicken
Ingredients
- 4 skinless, boneless chicken breast halves
- cayenne pepper, or to taste
- salt and ground black pepper to taste
- all-purpose flour for dredging
- 2 tablespoons olive oil
- 1 tablespoon capers, drained
- 1/2 cup white wine
- 1/4 cup fresh lemon juice
- 1/4 cup water
- 3 tablespoons cold unsalted butter, cut in 1/4-inch slices
- 2 tablespoons fresh Italian parsley, chopped
Steps
- Place chicken breasts between 2 layers of plastic wrap and pound to about 1/2-inch thick.
- Season both sides of chicken breasts with cayenne, salt, and black pepper; dredge lightly in flour and shake off any excess.
- Heat olive oil in a skillet over medium-high heat. Place chicken in the pan, reduce heat to medium, and cook until browned and cooked through, about 5 minutes per side; remove to a plate.
- Cook capers in reserved oil, smashing them lightly to release brine, until warmed though, about 30 seconds.
- Pour white wine into skillet. Scrape any browned bits from the bottom of the pan with a wooden spoon. Cook until reduced by half, about 2 minutes.
- Stir lemon juice, water, and butter into the reduced wine mixture; cook and stir continuously to form a thick sauce, about 2 minutes. Reduce heat to low and stir parsley through the sauce.
- Return chicken breasts to the pan cook until heated through, 1 to 2 minutes. Serve with sauce spooned over the top.
Notes
- FAVORITE
↑ Back to top
Quick Curtido (Mexican Cabbage Slaw)
Adapted from http://www.seriouseats.com/recipes/2014/05/quick-curtido-mexican-cabbage-slaw-recipe.html
Tags: Mexican
Slaw
Ingredients
- 1/2 small (2-pound) green cabbage, cored and very thinly sliced (about 4 cups)
- 1/2 medium white onion, peeled and very thinly sliced (about 1/2 cup)
- 2 carrots, peeled and shredded (about 1/2 cup)
- 1 small jalapeño, ribs and seeds removed, minced (optional)
- 3 tablespoons apple cider vinegar
- 2 teaspoons sugar
- 1 teaspoon kosher salt
Steps
- In a large bowl, toss together cabbage, onion, carrot, and jalapeño, if using. In a small saucepan, combine vinegar, salt, and sugar a cook over medium heat, stirring, until salt and sugar are just dissolved. Pour brine over vegetables and toss to combine. Cover and refrigerate for one hour before serving.
Notes
- FAVORITE
↑ Back to top
Quick Immersion Blender Hollandaise

Servings: makes about 1 1/2 cups
Ingredients
- 1 egg yolk (about 35 grams)
- 1 teaspoon water (about 5 grams)
- 1 teaspoon lemon juice from 1 lemon (about 5 grams)
- Kosher salt
- 1 stick butter (8 tablespoons, about 112 grams)
- Pinch cayenne pepper or hot sauce (if desired)
Steps
- Combine egg yolk, water, lemon juice, and a pinch of salt in the bottom of a cup that barely fits the head of an immersion blender. Melt butter in a small saucepan over high heat, swirling constantly, until foaming subsides. Transfer butter to a 1 cup liquid measuring cup.
- Place head of immersion blender into the bottom of the cup and turn it on. With the blender constantly running, slowly pour hot butter into cup. It should emulsify with the egg yolk and lemon juice. Continue pouring until all butter is added. Sauce should be thick and creamy. Season to taste with salt and a pinch of cayenne pepper or hot sauce (if desired). Serve immediately, or transfer to a small lidded pot and keep in a warm place for up to 1 hour before serving. Hollandaise cannot be cooled and reheated. Check here for a full video walkthrough of the process.
↑ Back to top
Quick Injera
Tags: Ethiopia
Flatbreads
Is starred.
Servings: 12 flatbread
Ingredients
- 1 cup Teff flour*
- ½ cup All purpose flour
- 1 teaspoon Instant yeast
- ½ teaspoon Sea salt
- ¼ teaspoon Baking soda
- 2 cups Warm water
- 1 tablespoon Apple Cider Vinegar
Steps
- In a large mixing bowl, combine teff flour, all purpose flour, instant yeast, salt and baking soda. Mix well. Stir in apple cider vinegar and warm water. Whisk vigorously into a smooth batter without lumps. Cover and set aside for 1 hour in a warm spot.
- Preheat a 9" non-stick or cast-iron skillet on high heat for 5 minutes. Lightly spray the skillet with cooking spray. Pour ¼ cup of the batter on the outside of the hot pan and work in a spiral toward the center. Tilt the pan to fill in any holes. Immediately cover the pan with a loose-fitting lid and let the injera cook for 2~3 minutes.
- Injera is done when the top is no longer shiny or wet and feels firm to touch. Transfer the cooked injera to a plate and cover immediately with a kitchen towel or a plastic wrap. Repeat with the remaining batter.
Stack the injera on top of
each other. Keep them covered to keep them moist and soft.
Notes
- Buckwheat flour is an acceptable alternative to teff flour in this recipe.
- You can use either white vinegar or lemon juice instead of apple cider vinegar.
- If you want a slightly more sour taste to the injera, then increase the amount of apple cider vinegar by 1~2 teaspoons.
- Make sure that you use a good quality non-stick pan to make the Injera. If not, they tend to stick to the pan.
- Leftover injera can be stored well wrapped in the fridge for up to 4 days. Freeze them for up to 2 months. Reheat briefly in the microwave before serving.
↑ Back to top
Quick-Pickled Cucumbers with Rice Vinegar
Tags: Condiments
Japanese Pickles
Servings: 16
Ingredients
- 1 cup rice wine vinegar
- 1 cup water
- 3/4 cup sugar
- 1 tablespoon kosher salt
- 4 cups thinly sliced Japanese or English cucumbers (about 3 Japanese or 1 English)
Steps
- Combine vinegar, water, sugar, and salt in a medium saucepan and bring to a boil over high heat. Remove from heat. Add cucumber slices and stir. Cover with a clean kitchen towel or a double layer of heavy duty paper towels, pressing down until towel is saturated with liquid and in direct contact with the cucumbers. Let rest 10 minutes, then transfer cucumbers to a sealable container. Top up with liquid and discard the rest. Store in the refrigerator for up to 1 month.
↑ Back to top
Quick-Pickled Shrimp

Tags: Pickles
Seafood
Servings: YIELD 4 servings TOTAL
TIME 40 minutes
Ingredients
- 1 pound shell-on medium shrimp
- Kosher salt
- 1/2 medium fennel bulb, thinly sliced
- 1/2 medium onion, thinly sliced
- 2 garlic cloves, thinly sliced
- 1/2 Fresno chile or red jalapeño, thinly sliced, seeded
- 1/2 cup fresh lemon juice
- 1/4 cup apple cider vinegar
- 1/4 cup extra-virgin olive oil
- 2 tablespoons fennel fronds
- Freshly ground black pepper
- 1/2 loaf ciabatta or country-style bread, sliced 1/2-inch thick, toasted
- Mayonnaise (for serving; optional)
Steps
- Cook shrimp in a large pot of boiling salted water until just opaque in the center, about 2 minutes. Drain; rinse under cold running water to cool. Peel and devein, leaving tails intact, if desired.
- Combine shrimp, fennel bulb, onion, garlic, chile, lemon juice, vinegar, oil, and fennel fronds in a medium bowl. Season with salt and pepper and toss to combine. Let sit, tossing occasionally, at least 20 minutes.
- Serve shrimp with toast and mayonnaise, if using.
- DO AHEAD: Pickled shrimp can be made 2 days ahead. Cover and chill.
Notes
- FAVORITE
↑ Back to top
Radish Salad (Musaeng-Chae) Recipe by Maangchi
Adapted from https://www.maangchi.com/recipe/musaeng-chae
Ingredients
- Korean radish (or daikon)
- kosher salt
- vinegar
- Korean hot pepper flakes (gochugaru)
- sugar
- garlic
- green onion
- toasted sesame seeds
Steps
- Peel a radish and cut it into thin matchsticks.
- Put 3-3½ cups of radish matchsticks into a large bowl.
- Add 1 tbs kosher salt and mix it by hand. Set aside for 5 minutes.
- Squeeze out any excess water from the radish strips.
- Add 2 cloves of minced garlic, 1 stalk of chopped green onion, 1 tbs vinegar, 2 ts hot pepper flakes, and 2 ts sugar.
- Mix together by hand until well combined.
- Add 1 ts roasted sesame seeds and mix it up a bit more.
- Transfer it to a serving plate and serve it with rice.
↑ Back to top
Radish, Cucumber and White Bean Farro Salad
Servings: 4 servings (about 8
cups)
Ingredients
- Salt and freshly cracked black pepper
- 1 cup farro
- 2 tablespoons sherry or red wine vinegar
- 1 tablespoon Dijon mustard
- 4 to 6 jarred pepperoncini, thinly sliced (about 3 tablespoons), plus 1 tablespoon pickling liquid
- ¼ cup olive oil, plus more for drizzling
- 2 scallions, light green and white parts thinly sliced
- 4 to 6 medium radishes, trimmed and thinly sliced
- 1 large cucumber, halved lengthwise and thinly sliced
- 1 (15-ounce) can white beans, rinsed
- ¼ cup flat-leaf parsley leaves and tender stems, gently chopped or torn
Steps
- Bring a large pot of salted water to a boil. Add the farro and adjust the heat to maintain a gentle boil. Cook until tender, about 30 minutes.
- Meanwhile, in a large serving bowl, whisk together the vinegar, mustard, pepperoncini pickling liquid, oil and a few grinds of pepper until smooth. Add the pepperoncini slices, scallions, radishes, cucumber, beans and most of the parsley. Season the dressing with salt, and toss to coat. Set aside, stirring occasionally, until the farro is ready.
- Drain the farro, and drizzle with olive oil, tossing in the colander to cool slightly. Transfer to the serving bowl and mix to combine. Taste and season with more salt or oil, if needed, and garnish with the remaining parsley.
↑ Back to top
Raised Pork Pie
Adapted from https://www.bbcgoodfood.com/recipe/raised-pork-pie

Tags: British
Pies and Tarts
Pork
Ingredients
- 800 g pork shoulder, minced or finely chopped
- 400 g pork belly, half minced and half chopped
- 250 g smoked bacon, cubed
- 1/2 tsp ground mace
- 2 large pinches ground nutmeg
- 1 tbsp fresh chopped sage
- Sage
- 1 tsp fresh chopped thyme
- 1/2 tsp salt
- 1 tsp ground white pepper
- 575 g plain flour
- 200 g lard
- 220 ml water
- 1 egg
- Eggs
- , beaten
- 6 gelatine leaves
- 300 ml chicken stock
For the
filling
For the pastry
To finish
Steps
- Heat the oven to 180C/160C fan/gas 4. In a large bowl mix together all the ingredients for the filling.
- To make the pastry, put the flour in a large bowl, then put the lard and water into a small pan and heat gently until the lard melts. Bring just to the boil and then stir into the flour using a wooden spoon. When the mixture is cool enough to handle, (it should still feel very warm) knead well until smooth.
- Cut off 1/4 of the dough, wrap in cling film and reserve for the lid. Roll out the remaining dough to a circle and then place in the base of a non-stick 20cm springform cake tin. Working quickly while the dough is warm and pliable, press the dough evenly over the base and up the sides of the tin. Make sure there are no holes. Fill with the meat mixture and pack down well. Roll out the dough for the lid. Place on top of the pie. Pinch all around the edge to seal the pie. Make a hole for steam in the centre, using the handle of a wooden spoon.
- Cook in the oven for 30 mins then reduce the heat to 160C/140C fan/gas 3 and cook for 90 minutes. Brush the top with beaten egg and return to the oven for a further 20 mins. Leave until cold.
- Soak the gelatine in cold water for about 5 mins, then remove and squeeze out the excess water. Heat the stock until almost boiling. Remove from the heat and stir in the gelatine. Leave to cool to room temperature.
- Use a small funnel to pour the stock into the pie through the hole in the top. Pour in a little at a time allowing a few seconds before each addition. Place in the fridge to set overnight
Notes
- FAVORITE
↑ Back to top
Ras Al-Hanut
Tags: North Africa
Rubs and Blends
Ingredients
- 2 teaspoons ground cinnamon
- 1 teaspoon turmeric
- 1/2 teaspoon freshly ground black pepper
- 1/4 teaspoon freshly ground nutmeg
- 1/4 teaspoon freshly ground cardamom seed
- 1/4 teaspoon freshly ground clove
Steps
- Mix all the ingredients and store in a spice jar. It will keep
- indefinitely but lose its pungency over time
Notes
- FAVORITE
↑ Back to top
Raspberry Thyme Tarts
Tags: Pies and Tarts
Ingredients
- 1/4 cup each almonds, hazelnuts and walnuts
- 1/4 cup whole wheat flour
- 1/2 cup all purpose flour
- 1/4 cup sugar
- Zest one lemon
- Pinch salt
- 5 tablespoons cold butter in small pieces
- 1 cup Mascarpone cheese, at room temperature
- 3 tablespoons honey
- 1 teaspoon raspberry extract
- 1 tablespoon fresh thyme leaves, minced plus a few small sprigs for garnish
- 2 cups fresh raspberries
- Confectioners sugar to sprinkle
FOR THE CRUST:
FOR THE
FILLING:
Steps
- Preheat oven to 375°F.
- Brush four 3 inch tartlet shells with melted butter and set on a baking sheet. Set aside.
- Place nuts on baking sheet and toast them for about 12 minutes or until they are fragrant. Cool. Transfer nuts to food processor and pulse a couple of times. Add the flours, sugar, zest, salt and butter and process until the dough begins to hold together. Gather up dough and divide and press into bottom and sides of tartlet pans.
- Coat squares of foil with olive oil and press onto the top of each tartlet.
- Bake them for about 15 minutes or until they just begin to brown. Cool then remove from tart shell and set aside.
- Combine the cheese, honey, extract and thyme leaves until blended. Spread a thin layer into each tart shell then fill in with the berries. Refrigerate for 30 minutes. When ready to serve, dust the tops with confectioners' sugar and add a thyme sprig for garnish.
FOR THE CRUST:
FOR THE FILLING:
Notes
- FAVORITE
↑ Back to top
Re-Creating Husk's Kentuckyakai Chicken Wings

Tags: Chicken
Ingredients
- 2 Cups Soy Sauce (soybeans, wheat, salt, water, yeast)
- 1/2 cup Kentucky Sorghum
- 1/2 cup local honey
- 1/2 cup Apple Cider Vinegar
- 8 cloves Fresh Garlic very finely grated
- a 2″ piece of Fresh Ginger very finely grated
- 1 cup of Kentucky Bourbon divided in 1/2 cup portions
Steps
- Add all ingredients except the final 1/2 cup of bourbon and simmer on medium low heat for 30 minutes. Add the second 1/2 cup of bourbon and simmer for five minutes. Allow to cool completely. This the basic sauce, which is quite thin and can be used if you want to make more of a glaze, you can add a cornstarch slurry of 1 tablespoon of cornstarch mixed with 3 tablespoons of water. Add to the sauce and simmer further till thickened.
Notes
- FAVORITE
↑ Back to top
Real Strawberry Cupcakes

Tags: Cakes and Pastries
Ingredients
- 8 large fresh strawberries, or as needed
- 2 eggs
- 1 cup white sugar
- 1/3 cup vegetable oil
- 1/2 teaspoon vanilla extract
- 1/2 teaspoon lemon zest
- 1 1/2 cups all-purpose flour
- 2 teaspoons baking powder
- 1/4 teaspoon salt
- 3 tablespoons instant vanilla pudding mix (optional)
- 1 drop red food coloring, or as needed (optional)
- 3/4 cup cream cheese, softened
- 2 tablespoons butter, softened
- 1/2 cup confectioners' sugar
- 1/2 teaspoon vanilla extract
- 3 large fresh strawberries, sliced
Steps
- Preheat oven to 325 degrees F (165 degrees C). Spray cupcake cups with cooking spray, or line with cupcake liners.
- Place 8 strawberries into a blender, and blend until smooth. Pour the puree through a strainer to remove seeds. Puree should equal about 3/4 cup. Set the puree aside.
- In a large bowl, beat together the eggs, white sugar, vegetable oil, 1/2 teaspoon vanilla extract, lemon zest, and strawberry puree until well combined. Stir in the flour, baking powder, salt, vanilla pudding mix (for a moister cupcake), and red food coloring to reach a desired shade of pink. Spoon the batter into the prepared cupcake cups, filling each about 2/3 full.
- Bake in the preheated oven until the cupcakes have risen and a toothpick inserted into the center of a cupcake comes out clean, about 23 minutes. Allow the cupcakes to cool at least 10 minutes before frosting.
- To make frosting, beat cream cheese and butter together in a mixing bowl with an electric mixer until smooth, and mix in confectioners' sugar and 1/2 teaspoon vanilla extract to make a lump-free icing. Frost each cupcake with about 2 tablespoons of icing, and top each cupcake with a strawberry slice.
Notes
- FAVORITE
↑ Back to top

Red Boat Pork Belly in Caramel Sauce (Thit Kho)
Adapted from https://www.vietworldkitchen.com/blog/2019/03/red-boat-pork-belly-in-caramel-sauce-thit-kho-recipe.html
Tags: Pork
Vietnam
Servings: 4
Ingredients
- 1 pound lean pork belly, with or without skin, or fatty pork shoulder
- 1 ½ teaspoons Red Boat Salt
- ¾ teaspoon recently or freshly ground black pepper
- 2 teaspoons neutral oil, such as canola
- 1 small shallot, minced (1 ½ tablespoons)
- 1 large garlic clove, minced (1 ½ teaspoons)
- 2 tablespoons white granulated sugar or shaved light palm sugar (about 1 ounce)
- 1 tablespoon Red Boat fish sauce
- 2 tablespoons water
- 1 or 2 Thai chilis, split lengthwise
- 1 Persian cucumber, thickly sliced on the diagonal
Steps
- If using pork belly, cut across the meat grain into 1 to 1 ¼-inch wide rectangular chunks. Then cut the chunks into ¼-inch-thick pieces. (When using pork shoulder, do your best to cut it into similar size pieces, each about ¼-inch thick. Try to get a little fat with the lean.) Season the pork with the salt and pepper and set aside.
- In a 3-quart saucepan, warm the oil over medium heat. Add the shallot and garlic, and cook, stirring frequently for about 2 minutes, until some pieces start browning. Turn off the heat.
- Slide the pan to a cold burner, let the cooking calm down, then transfer the shallot and garlic to a small bowl of plate. Keep nearby.
- Replace the pan over medium heat, add the sugar then let the sugar melt, stirring frequently with a silicone spatula. Once sugar has melted and caramelized to a light orange, about 1 minute, add back the shallot and garlic. Cook for about 2 minutes longer, to further brown the aromatics and push the caramelization to a rich dark brown. Lower the heat if the pan seems to get out of control, or if there’s smoke.
- Dump in the pork and mix well. Stir frequently to cook the pork until it no longer looks raw, about 2 minutes. Sugar will stick to your spatula so knock it off with a spoon or other utensil.
- Add the fish sauce, water, and Thai chilis. Stir and let come to a vigorous simmer. Cover and lower the heat to gently simmer. Let cook for 10 to 15 minutes, stirring occasionally and lowering the heat as needed. The pork is done when it is firm tender, a lovely brown-red color, and there’s a rich sauce in the pan. Turn off the heat, cover, and let rest 5 minutes for flavors to meld.
- If there’s too much fat (a possibility with the pork belly), use a slotted spoon to transfer the pork to a bowl. Tilt the pan and use a metal ladle to remove as much fat as you like; save the fat for other uses. Replace the pork in the pan and stir to coat in sauce.
- Taste the pork and sauce. If needed, add a sprinkling of Red Boat Salt, fish sauce, pepper, or sugar to create a savory, spicy sweet finish. If the flavor is too salty or you just want more sauce, stir in water by the tablespoon and if needed, reheat to combine. Transfer to a shallow bowl and serve with the cucumbers on a separate dish as an accompaniment.
Notes
- If you have homemade caramel sauce ( see my recipe and how-to video), use 2 tablespoons and add it at the end of step 3, after you've cooked the shallot and garlic.
↑ Back to top
Red Cabbage Slaw
Tags: Pickles
Sides Vegetables
Servings: 6 to 8
Ingredients
- 1/2 cup apple cider vinegar
- 2 tablespoons sugar
- 1/4 cup extra-virgin olive oil
- 2 teaspoons celery seed
- Salt and freshly ground black pepper
- 1/2 head red cabbage, cut into roughly 1 1/2-inch chunks
- 2 small carrots, grated
- 1 small red onion, chopped
- 1 cup golden raisins
Steps
- Watch how to make this recipe.
- In a large bowl, whisk together vinegar and sugar until dissolved. Slowly whisk in oil, celery seed, salt and pepper to taste. Toss in cabbage, carrots, red onion and raisins to coat well. Cover and let sit at least 1 hour.
Notes
- My Private Notes
- Add a Note
- WATCH
↑ Back to top
Red Lentil Soup with North African Spices

Tags: Beans and Other
Legumes North
Africa Soups
Ingredients
- 4 tablespoons unsalted butter
- 1 large onion, chopped fine
- Salt and pepper
- 3/4 teaspoon ground coriander
- 1/2 teaspoon ground cumin
- 1/4 teaspoon ground ginger
- 1/8 teaspoon ground cinnamon
- Pinch cayenne
- 1 tablespoon tomato paste
- 1 garlic clove, minced
- 4 cups chicken broth
- 2 cups water
- 10 1/2 ounces (1 1/2 cups) red lentils, picked over and rinsed
- 2 tablespoons lemon juice, plus extra for seasoning
- 1 1/2 teaspoons dried mint, crumbled
- 1 teaspoon paprika
- 1/4 cup chopped fresh cilantro
Steps
- Melt 2 tablespoons butter in large saucepan over medium heat. Add onion and 1 teaspoon salt and cook, stirring occasionally, until softened but not browned, about 5 minutes. Add coriander, cumin, ginger, cinnamon, cayenne, and 1/4 teaspoon pepper and cook until fragrant, about 2 minutes. Stir in tomato paste and garlic and cook for 1 minute. Stir in broth, water, and lentils and bring to simmer. Simmer vigorously, stirring occasionally, until lentils are soft and about half are broken down, about 15 minutes.
- Whisk soup vigorously until it is coarsely pureed, about 30 seconds. Stir in lemon juice and season with salt and extra lemon juice to taste. Cover and keep warm. (Soup can be refrigerated for up to 3 days. Thin soup with water, if desired, when reheating.)
- Melt remaining 2 tablespoons butter in small skillet. Remove from heat and stir in mint and paprika. Ladle soup into individual bowls, drizzle each portion with 1 teaspoon spiced butter, sprinkle with cilantro, and serve.
Notes
- FAVORITE
↑ Back to top
Red Lentil Soup with North African Spices
Servings: Serves 4 to 6
Ingredients
- 4 tablespoons unsalted butter
- 1 large onion, chopped fine
- Salt and pepper
- ¾ teaspoon ground coriander
- ½ teaspoon ground cumin
- ¼ teaspoon ground ginger
- ⅛ teaspoon ground cinnamon
- Pinch cayenne
- 1 tablespoon tomato paste
- 1 garlic clove, minced
- 4 cups chicken broth
- 2 cups water
- 10 ½ ounces (1 ½ cups) red lentils, picked over and rinsed
- 2 tablespoons lemon juice, plus extra for seasoning
- 1 ½ teaspoons dried mint, crumbled
- 1 teaspoon paprika
- ¼ cup chopped fresh cilantro
Steps
- Melt 2 tablespoons butter in large saucepan over medium heat. Add onion and 1 teaspoon salt and cook, stirring occasionally, until softened but not browned, about 5 minutes. Add coriander, cumin, ginger, cinnamon, cayenne, and 1/4 teaspoon pepper and cook until fragrant, about 2 minutes. Stir in tomato paste and garlic and cook for 1 minute. Stir in broth, water, and lentils and bring to simmer. Simmer vigorously, stirring occasionally, until lentils are soft and about half are broken down, about 15 minutes.
- Whisk soup vigorously until it is coarsely pureed, about 30 seconds. Stir in lemon juice and season with salt and extra lemon juice to taste. Cover and keep warm. (Soup can be refrigerated for up to 3 days. Thin soup with water, if desired, when reheating.)
- Melt remaining 2 tablespoons butter in small skillet. Remove from heat and stir in mint and paprika. Ladle soup into individual bowls, drizzle each portion with 1 teaspoon spiced butter, sprinkle with cilantro, and serve.
↑ Back to top
Red October Dressing

My version of Russian
Servings: 26
Ingredients
- 1 Cup Mayonnaise
- 1/4 Cup Ketchup
- 3 tbl Weber's Hot Piccalilli
- 1 tsp Worcestershire
- 1 tsp Lemon Juice
- 1 tsp Heat
Steps
- Combine and Serve
↑ Back to top
Red Pozole with Traditional Garnishes

Tags: Mexican
Stew
Servings: 12
Ingredients
- 1 pound dried hominy or 3 29-ounce cans hominy, drained and rinsed
- 1 head garlic papery outer layers removed, but not entirely peeled (if using dried hominy)
- 2 whole chickens (about 3 pounds each) rinsed and cut into serving pieces, or a combination of 3 pounds chicken and 3 pounds pork shoulder or butt
- 1 white onion peeled
- 5 fresh cilantro sprigs
- 1 tablespoon kosher or coarse sea salt plus more to taste
- 2 ancho chiles (about 1 ounce) rinsed, stemmed and seeded
- 3 guajillo chiles (about 1 ounce) rinsed, stemmed and seeded
- 3 tablespoons coarsely chopped white onion
- 3 cloves garlic
- Pinch of ground cumin
- 2 whole cloves
- 1 teaspoon kosher or coarse sea salt or more to taste
- 3 tablespoons vegetable oil
- 5-6 limes halved
- 10 radishes rinsed, halved and thinly sliced
- 1 head of romaine lettuce rinsed, drained and thinly sliced
- 1/2 cup chopped white onion
- Dried ground chile such as piquín, ancho, chipotle or a Mexican mix
- dried oregano
- Crispy tostadas or tortilla chips store-bought or homemade
- refried beans store-bought or homemade (optional)
For the
pozole:
For the chile
puree:
For the
garnishes:
Steps
- If using dried hominy, place it in a large soup pot. Add water to the pot to cover the hominy by at least 3-inches. Add the head of garlic. Don’t add salt now or the hominy will toughen. Bring to a boil and simmer over medium-low heat, partially covered, for 4 to 5 hours, until hominy is tender and has begun to “bloom” or open up. Occasionally skim the foam from the top as the hominy cooks and make sure it doesn’t dry as it cooks, adding more hot water if need be. If using canned or pre-cooked hominy, start with step below.
- Meanwhile, place the chicken (and pork, if using), in a large soup pot. Add water to cover the top layer of chicken by at least 2 inches. Add the onion, cilantro and the tablespoon of salt and bring to a boil. Simmer, partially covered, until chicken is cooked through and tender, about 35 minutes. Drain, reserving the cooking broth. When the chicken is cool enough to handle, remove the skin and bones and shred the meat into bite-sized pieces.
- In the soup pot, combine the cooked hominy and its broth (discard the garlic head), or the canned hominy and 2 cups water, with the shredded chicken and its broth. Taste for salt, add more if need be, and simmer all together for 10 minutes more.
- Place the chiles in a 3-quart saucepan and cover with water. Bring to a boil over medium-high heat and simmer for 10 minutes, or until the chiles have softened and rehydrated. Place the chiles, along with 1/2 cup of their cooking liquid, the onion, garlic, cumin, cloves and salt in a blender or food processor and puree until smooth. If using a food processor, be sure to wrap a towel around the joint between the lid and the base to catch any escaping liquid. Pass the sauce through a fine-mesh strainer into a bowl, pressing gently on the solids with the back of a wooden spoon to extract as much liquid as possible.
- Heat 3 tablespoons vegetable oil in the 3-quart saucepan over medium heat until hot, but not smoking. Add the chile puree, bring to a boil and simmer for 6 to 8 minutes, stirring occasionally and allowing it to thicken.
- Add the red chile sauce to simmering pozole, let it cook for an additional 25 minutes, adjust the seasoning, and serve in soup bowls. Arrange the garnishes in smaller bowls on the table and let your guests customize their pozole. Or, if making ahead, let the pozole cool then cover and refrigerate, and reheat when you are ready to serve.
To make the pozole:
To make the chile puree:
↑ Back to top
Reuben Benedict

Tags: Beef
Breakfast Cured
Eggs
Ingredients
- 1/2 lb corned beef
- 1.5 cups sauerkraut
- 3 poached eggs
- spicy hollandaise sauce (recipe below)
- caraway seeds (for garnish)
- Place corned beef in a skillet and cook on low until warmed up. Meanwhile, poach your eggs.
- Divide corned beef into three portions and place on three separate plates. Top each with 1/2 cup of sauerkraut. Next, place a poached egg on each pile of sauerkraut. Pour hollandaise over each stack. Garnish with caraway seeds as desired. Serves three.
- 1/4 cup + 1T organic, unsalted butter
- 2 beaten egg yolks
- 2 tsp water
- 2 tsp freshly squeezed lemon juice
- 1/2 tsp hot sauce (I used Sriracha)
- 1 T Dijon mustard
- Place ingredients in the top part of a double boiler (don’t let the boiling water below touch the top pan), slowly adding the butter. Stir continuously until the butter melts and the sauce thickens.
Hollandaise
sauce:
↑ Back to top
Rhubarb Cake with Butter Sauce

Servings: Kcal: 420 kcal |
Servings: 8 servings
Ingredients
- 1 1/2 cups all-purpose flour
- 1 teaspoon baking powder
- 1/2 teaspoon salt
- 1 cup granulated sugar
- 1/2 cup unsalted butter, softened
- 1 egg
- 1 teaspoon vanilla extract
- 1/2 cup milk
- 2 cups chopped rhubarb
- 1/2 cup unsalted butter
- 1 cup granulated sugar
- 1/2 cup heavy cream
- 1 teaspoon vanilla extract
For the cake:
For the butter
sauce:
Steps
- Preheat the oven to 350°F (175°C) and grease a 9-inch square baking pan.
In a medium bowl, whisk
together the flour, baking powder, and salt.
In a large bowl, cream together 1 cup sugar and 1/2 cup butter until
light and fluffy. Beat in the egg and vanilla extract.
Gradually add the flour mixture to the creamed mixture alternately
with
the milk, starting and ending with the flour mixture. Fold in the
chopped rhubarb.
Pour the batter into the
prepared pan and spread evenly.
Bake for 45-50 minutes, or
until a toothpick inserted into the center comes out clean.
For the butter sauce, combine 1/2 cup butter, 1 cup sugar, and the
heavy cream in a saucepan over medium heat. Cook, stirring, until the
sugar is dissolved and the sauce is smooth. Remove from heat and stir
in 1 teaspoon vanilla extract.
Serve the warm cake drizzled
with the butter sauce.
↑ Back to top
Ribs with Hot-Pepper-Jelly Glaze
Tags: Barbecue
Chillis Pork
Ingredients
- 2 tablespoons coriander seeds
- 1 teaspoon dried orange peel
- 1/4 cup dark brown sugar
- 2 tablespoons chile powder
- 1 tablespoon garlic powder
- 1 tablespoon onion powder
- Kosher salt
- Freshly ground pepper
- 4 English-cut beef short ribs, about 6 inches long (3 pounds)
- 2 racks baby back ribs (6 pounds), membranes removed
- 2 racks spareribs (4 pounds), membranes removed
- 1 1/2 cups hot red pepper jelly
- 1/4 cup white miso
- 1/4 cup fresh lemon juice
- 2 tablespoons Sriracha (or to taste)
- Sesame seeds and chopped scallions, for garnish
Steps
- In a spice grinder, grind the coriander and orange peel. Add the sugar, chile powder, garlic powder, onion powder and 1 tablespoon each of salt and pepper; pulse to combine. Rub the spice mix over the ribs and place in a large roasting pan. Cover and refrigerate overnight.
- Preheat the oven to 325°. Put the short ribs in a small baking dish and cover with foil. Roast for 30 minutes.
- Put the baby back ribs and spareribs on 2 rimmed baking sheets and cover with foil. Roast all of the ribs until tender, about 2 hours longer. Carefully pour the pan drippings into a medium bowl and skim off the fat. Reserve 1 1/2 cups of the drippings and discard the rest.
- Meanwhile, in a saucepan, combine the pepper jelly with the miso, lemon juice, Sriracha and the reserved pan juices. Simmer the glaze for 5 minutes, whisking.
- Light a grill. Arrange all of the ribs on the grill and cook over moderately high heat, turning and brushing with half of the glaze, until nicely caramelized, about 15 minutes. Transfer the ribs to a work surface. Cut the baby back and spareribs in between the bones and slice the short ribs. Garnish with sesame seeds and scallions and serve the ribs with the remaining glaze on the side.
Notes
- FAVORITE
↑ Back to top
Ricciarelli: Chewy Italian Almond Cookies

Tags: Cookies
Italian
Ingredients
- 2 egg whites
- 1 dash lemon juice
- 2 1/4 cups almond flour
- 1 3/4 cups powdered sugar
- 1 pinch salt
- 1/4 tsp baking powder
- 1 tsp orange zest about half a large orange
- 1 tbsp almond extract
- 1 tsp vanilla extract
- 1/2 cup powdered sugar for coating cookies
Steps
- Whip egg whites and lemon juice together with a stand mixer or hand mixer until stiff peaks form.
- Using a fine mesh sieve, sift in almond flour, 1 3/4 cups powdered sugar, salt, and baking powder and fold into egg whites. I don’t do it all at once but maybe in 2-3 batches. Try to keep some air in the egg whites, but at this point it will form a pretty sticky dough rather than a fluffy meringue.
- Add orange zest, vanilla extract, and almond extract and fold in until combined.
- Line a baking sheet with parchment paper. Using clean hands, roll dough into balls about 1″ in diameter, then roll in powdered sugar until well coated. Shape into an oval, then arrange on baking sheet with some space between them for spreading, and flatten slightly.
- Leave at room temperature for about an hour or until the tops have dried out and formed almost a little shell. (This may take longer in humid areas.) Pre-crack the shell by squeezing the cookies slightly from opposite corners. (Not doing this won’t affect the taste, but pre-cracking them makes them much prettier if you want that beautiful white-gold contrast!)
- While cookies are drying, preheat oven to 300 degrees. When the cookies are ready, bake for about 20 minutes. Cool and store in an airtight container. These are even better the next day and are great with coffee or tea!
↑ Back to top
Rice Pudding Recipe Made with Leftover Rice

Tags: Desserts
Puddings
Servings: about 4
Ingredients
- 2 cups milk
- 1 cup leftover cooked rice
- 2 eggs
- 1/4 cup sugar
- 1/2 teaspoon vanilla extract
- 1/3 teaspoon cinnamon or to taste
- 1/3 cup raisins
Steps
- Gather the ingredients.
- Preheat the oven to 350 F.
- In a medium saucepan, heat the milk and rice, stirring together frequently so the milk doesn't burn. Bring the mixture to a slow simmer.
- In a separate large bowl, combine the eggs, sugar, and vanilla.
- Add the egg mixture to the hot milk and rice and allow to cook for just a few minutes, stirring occasionally.
- Add the cinnamon and raisins, stirring just to combine.
- Finally, pour the rice pudding mixture into a casserole or baking dish and bake in the preheated oven for 20 minutes.
- Allow the rice pudding to cool slightly before serving.
- Enjoy!
Notes
- Though rice pudding is usually prepared with leftover cooked white rice, you can use any rice you'd like or happen to have leftover (brown or basmati rice, for example). However, note that wild rice is not actually rice, and shouldn't be used to prepare rice pudding as it won't cook up in the same way.
- While heating the milk and rice, be sure to stir frequently; otherwise, the milk can begin to stick to the bottom of the pan and potentially burn.
- Recipe Variations
- If you'd like, you can always sprinkle the top with a little bit extra cinnamon, brown sugar, nutmeg, or even a touch of cocoa powder or pumpkin pie spice blend.
- Add a touch of rose water syrup for Middle Eastern flair, some fresh cardamom pods for an Indian-style "kheer," or a touch of fresh lemon zest for a Greek twist.
↑ Back to top
Rice Vermicelli with Chicken and Nuoc Cham
Tags: Noodles
Vietnam
Servings: 4
Ingredients
- 1 1/2 pounds skin-on, bone-in chicken breasts (about 2)
- Kosher salt
- 1 large shallot, thinly sliced crosswise, separated into rings
- 1/2 cup vegetable oil
- 8 ounces rice vermicelli noodles
- 1 Fresno chile or red jalapeño, with seeds, finely chopped
- 1 small garlic clove, finely grated
- 1/3 cup fresh lime juice
- 1/4 cup fish sauce (such as nam pla or nuoc nam)
- 2 tablespoons light brown sugar
- 4 baby white turnips, trimmed, thinly sliced into rounds
- 4 radishes, trimmed, thinly sliced into rounds
- 1 1/2 cups fresh Thai or sweet basil leaves, divided
Steps
- Prepare grill for medium heat. Season chicken with salt and grill, turning often and moving away from direct heat if needed, until cooked through and an instant-read thermometer inserted into the center registers 165°, 20–25 minutes. Transfer chicken to a plate. Let cool slightly, then shred meat, discarding skin and bones. Set aside.
- Cook shallot in oil in a small sauce- pan over medium heat, stirring occasionally, until shallot is golden brown and crisp, 8–10 minutes (reserve shallot oil and use to make vinaigrettes). Using a slotted spoon, transfer shallot rings to a paper towel–lined plate and season with salt. Set aside.
- Meanwhile, place noodles in a large bowl and add boiling water to cover. Let noodles soak until tender but not mushy, 5–10 minutes; drain. Rinse under cold water and drain well.
- Mix chile, garlic, lime juice, fish sauce, and brown sugar in a large bowl to combine. Add noodles, turnips, radishes, half of basil, and reserved shredded chicken, and toss to combine. Top with reserved fried shallot rings and remaining basil.
- DO AHEAD: Shallot rings can be fried 3 days in advance. Store airtight at room temperature. Dressing can be made 2 days ahead.
Notes
- FAVORITE
↑ Back to top
Rich and Creamy Tonkotsu Ramen Broth
Adapted from https://www.seriouseats.com/recipes/2012/02/print/rich-and-creamy-tonkotsu-ramen-broth-from-scratch-recipe.html

Tags: Japanese
Soups
Ingredients
- 3 pounds pig trotters, split lengthwise or cut crosswise into 1-inch disks (as your butcher to do this for you)
- 2 pounds chicken backs and carcasses, skin and excess fat removed
- 2 tablespoons vegetable oil
- 1 large onion, skin on, roughly chopped
- 12 garlic cloves
- One 3-inch knob ginger, roughly chopped
- 2 whole leeks, washed and roughly chopped
- 2 dozen scallions, white parts only (reserve greens and light green parts for garnishing finished soup)
- 6 ounces whole mushrooms or mushroom scraps
- 1 pound slab pork fat back
Steps
- Place pork and chicken bones in a large stockpot and cover with cold water. Place on a burner over high heat and bring to a boil. Remove from heat as soon as boil is reached.
- While pot is heating, heat vegetable oil in a medium cast iron or non-stick skillet over high heat until lightly smoking. Add onions, garlic, and ginger. Cook, tossing occasionally until deeply charred on most sides, about 15 minutes total. Set aside.
- Once pot has come to a boil, dump water down the drain. Carefully wash all bones under cold running water, removing any bits of dark marrow or coagulated blood. Bones should be uniform grey/white after you've scrubbed them. Use a chopstick to help remove small bits of dark marrow from inside the trotters or near the chicken's spines.
- Return bones to pot along with charred vegetables, leeks, scallion whites, mushrooms, and pork fatback. Top up with cold water. Bring to a rolling boil over high heat, skimming off any scum that appears (this should stop appearing within the first 20 minutes or so). Use a clean sponge or moist paper towels to wipe and black or gray scum off from around the rim of the pot. Reduce heat to a bare simmer and place a heavy lid on top.
- Once the lid is on, check the pot after 15 minutes. It should be at a slow rolling boil. If not, increase or decrease heat slightly to adjust boiling speed. Boil broth until pork fatback is completely tender, about 4 hours. Carefully remove pork fat with a slotted spatula. Transfer fatback to a sealed container and refrigerate until step 7. Return lid to pot and continue cooking until broth is opaque with the texture of light cream, about 6 to 8 hours longer, topping up as necessary to keep bones submerged at all times. If you must leave the pot unattended for an extended period of time, top up the pot and reduce the heat to the lowest setting while you are gone. Return to a boil when you come back and continue cooking, topping up with more water as necessary.
- Once broth is ready, cook over high heat until reduced to around 3 quarts. Strain through a fine mesh strainer into a clean pot. Discard solids. For an even cleaner soup, strain again through a chinois or a fine mesh strainer lined with several layers of cheese cloth. Skim liquid fat from top with a ladle and discard.
- Finely chop cooked pork fatback and whisk into finished broth. To serve, season broth with condiments of your choice (salt, soy sauce, miso, sesame paste, grated fresh garlic, chili oil or a mixture of all, for instance) and serve with cooked ramen noodles and toppings as desired.
Notes
- Blanching the pork bones and rinsing them thoroughly of coagulated blood and other impurities ensures the final tonkotsu broth is a pale, rather than a deep, dark brown.
- Charring the aromatic vegetables adds complexity to the broth.
- Keeping the broth at a low, rolling boil ensures that the released fat and particulate matter emulsifies in the broth, which makes the broth opaque and creamy.
↑ Back to top
Rich and Creamy Tonkotsu Ramen Broth
Adapted from https://www.seriouseats.com/recipes/2012/02/print/rich-and-creamy-tonkotsu-ramen-broth-from-scratch-recipe.html

Ingredients
- 3 pounds pig trotters, split lengthwise or cut crosswise into 1-inch disks (as your butcher to do this for you)
- 2 pounds chicken backs and carcasses, skin and excess fat removed
- 2 tablespoons vegetable oil
- 1 large onion, skin on, roughly chopped
- 12 garlic cloves
- One 3-inch knob ginger, roughly chopped
- 2 whole leeks, washed and roughly chopped
- 2 dozen scallions, white parts only (reserve greens and light green parts for garnishing finished soup)
- 6 ounces whole mushrooms or mushroom scraps
- 1 pound slab pork fat back
Steps
- Place pork and chicken bones in a large stockpot and cover with cold water. Place on a burner over high heat and bring to a boil. Remove from heat as soon as boil is reached.
- While pot is heating, heat vegetable oil in a medium cast iron or non-stick skillet over high heat until lightly smoking. Add onions, garlic, and ginger. Cook, tossing occasionally until deeply charred on most sides, about 15 minutes total. Set aside.
- Once pot has come to a boil, dump water down the drain. Carefully wash all bones under cold running water, removing any bits of dark marrow or coagulated blood. Bones should be uniform grey/white after you've scrubbed them. Use a chopstick to help remove small bits of dark marrow from inside the trotters or near the chicken's spines.
- Return bones to pot along with charred vegetables, leeks, scallion whites, mushrooms, and pork fatback. Top up with cold water. Bring to a rolling boil over high heat, skimming off any scum that appears (this should stop appearing within the first 20 minutes or so). Use a clean sponge or moist paper towels to wipe and black or gray scum off from around the rim of the pot. Reduce heat to a bare simmer and place a heavy lid on top.
- Once the lid is on, check the pot after 15 minutes. It should be at a slow rolling boil. If not, increase or decrease heat slightly to adjust boiling speed. Boil broth until pork fatback is completely tender, about 4 hours. Carefully remove pork fat with a slotted spatula. Transfer fatback to a sealed container and refrigerate until step 7. Return lid to pot and continue cooking until broth is opaque with the texture of light cream, about 6 to 8 hours longer, topping up as necessary to keep bones submerged at all times. If you must leave the pot unattended for an extended period of time, top up the pot and reduce the heat to the lowest setting while you are gone. Return to a boil when you come back and continue cooking, topping up with more water as necessary.
- Once broth is ready, cook over high heat until reduced to around 3 quarts. Strain through a fine mesh strainer into a clean pot. Discard solids. For an even cleaner soup, strain again through a chinois or a fine mesh strainer lined with several layers of cheese cloth. Skim liquid fat from top with a ladle and discard.
- Finely chop cooked pork fatback and whisk into finished broth. To serve, season broth with condiments of your choice (salt, soy sauce, miso, sesame paste, grated fresh garlic, chili oil or a mixture of all, for instance) and serve with cooked ramen noodles and toppings as desired.
↑ Back to top
Ricotta Dumplings with Red Pepper Sauce

Ingredients
- 1 small red pepper, seeded and cut into 1-inch chunks ( 6 ounces)
- 1 tomato, cut into 1-inch chunks ( 6 ounces)
- 1 cup water
- ½ teaspoon kosher salt
- ¼ teaspoon freshly ground black pepper
- 1 tablespoon cornstarch, dissolved in 1 tablespoon water
- 1 ½ tablespoons unsalted butter
- 1 tablespoon extra-virgin olive oil
- 8 ounces ricotta cheese
- ½ teaspoon kosher salt
- ¼ teaspoon freshly ground black pepper
- 1 jumbo egg
- ¼ cup freshly grated Parmesan cheese, plus more for serving
- ½ cup all-purpose flour
- 2 tablespoons minced chives
Red Pepper
Sauce:
Dumplings:
Steps
- In a saucepan, combine the red pepper and tomato chunks with the 1 cup water. Bring to a boil over high heat, then reduce the heat to low. Cover and boil gently for 8 minutes; strain the puree through a food mill.
- Return the puree to the saucepan and stir in the salt, pepper, and dissolved cornstarch. Bring to a boil, then add the butter and oil and emulsify with a hand blender for 10 seconds. Keep the sauce warm while you make the dumplings.
- Bring 3 quarts of water to a simmer in a pot. Meanwhile, in a food processor, combine the ricotta, salt, pepper, egg, Parmesan, and flour and process for 10 seconds. Transfer the dumpling batter to a bowl and mix in the chives.
- Cook the dumplings in two batches
- Arrange the dumplings on a platter or individual plates. Spoon on the warm red pepper sauce and sprinkle with grated Parmesan.
Make the red pepper
sauce:
Make the dumplings:
Working as quickly as possible, drop the batter, about 1 tablespoon at
a time, into the hot water. Let the dumplings cook at a low simmer
(180°F to 190°F) for 10 minutes; the dumplings will rise to the
surface
of the water as they cook. Remove the dumplings with a slotted spoon,
drain well, and arrange on a platter. Keep warm while you cook the
remaining dumplings.
↑ Back to top
Risotto Cakes
Adapted from https://lidiasitaly.com/recipes/risotto-cakes/
Servings: 2 to 3
Ingredients
- 2 CUPS LEFTOVER RISOTTO (I ESPECIALLY LIKE THE ZUCCHINI, PEAS, AND PANCETTA RISOTTO)
- 1 SMALL ZUCCHINI, GRATED ON THE COARSE HOLES OF A BOX GRATER (BUT SEE HEADNOTE)
- 1/3 CUP FRESHLY GRATED GRANA PADANO OR PECORINO
- 1 LARGE EGG, BEATEN
- 2 TABLESPOONS CHOPPED FRESH ITALIAN PARSLEY
- 1/4 CUP CHOPPED FRESH CHIVES
- ABOUT 3/4 CUP FINE DRY BREAD CRUMBS
- VEGETABLE OIL, FOR FRYING
- KOSHER SALT
- 1 TABLESPOON RED WINE VINEGAR
- 1 TEASPOON DIJON MUSTARD
- 2 TABLESPOONS EXTRA-VIRGIN OLIVE OIL
- FRESHLY GROUND BLACK PEPPER
- 6 CUPS MIXED SALAD GREENS
Steps
- In a large bowl, combine the leftover risotto with the zucchini, grated cheese, egg, parsley, and 2 tablespoons chives. Form into six 1-inch-thick patties, and let them chill for 30 minutes.
- Spread the bread crumbs on a plate, and press the patties into the crumbs to coat. Heat about 1/2 inch of vegetable oil in a large nonstick skillet over medium heat. Fry the patties until they’re heated through and crispy on the outside, about 2 minutes per side. Drain on a paper-towel-lined plate, and season with salt.
- Whisk together the vinegar and mustard in a large bowl. Whisk in the olive oil to make a smooth dressing. Season with salt and pepper. Add the salad greens and remaining chives, and toss well.
- Serve the salad with the warm risotto cakes.
↑ Back to top
Roasted Broccoli with Garlic and Chili Pepper
Adapted from http://www.motherjones.com/tom-philpott/2012/11/toms-kitchen-roasted-broccoli-garlic-and-chile-pepper
Tags: Chillis
Vegetarian
Ingredients
- 2 big heads of broccoli
- Extra-virgin olive oil
- Sea salt
- Freshly ground black pepper
- 3 cloves of garlic
- 1 fresh red-hot chili pepper; or a good pinch of crushed chili flakes
- A lemon for squeezing; or red wine vinegar
Steps
- Preheat oven to 375. Cut the broccoli florets into more-or-less bite-sized pieces, and add to a bowl large enough to comfortably accommodate them. You'll have plenty of stem left over-and the stem has good flavor. So thinly slice a bit of the stem, starting from the floret side (see picture), and add it to the bowl with the florets. About an inch's worth of sliced stem from each broccoli head will do.
- Add a couple of glugs of olive oil to the bowl, and then a good pinch of sea salt and several grinds of black pepper. Using your hands, toss the broccoli pieces well, making sure they're evenly coated with the olive oil and seasonings.
- Add the seasoned broccoli to a roasting pan or oven-proof skillet large enough to accommodate them in a single layer. Place it in the preheated oven and roast for 10-15 minutes.
- Meanwhile, finely mince the garlic and (if using) the fresh chili pepper. When the florets have just begun to brown, remove the pan from the oven and add add the minced garlic and chili pepper (or dried chili flakes). Toss well with a spatula, and return pan to the oven for another couple of minutes. The broccoli pieces are done when the florets are browned in spots but still slightly crunchy. Finish with a few dashes of vinegar or freshly squeezed lemon juice, and taste for salt. This dish can be made ahead several hours and is just fine served room temperature.
Notes
- FAVORITE
↑ Back to top
Roasted Butternut Squash Ravioli with a Sage Brown Butter
Sauce

Tags: Pasta
Vegetables
Ingredients
- 9 tablespoons butter
- 3 tablespoons minced shallots
- 1 cup roasted butternut squash puree
- Salt
- Freshly ground white pepper
- 3 tablespoons heavy cream
- 3 tablespoons grated Parmigiano-Reggiano cheese, plus 2 ounces
- Pinch nutmeg
- 1 recipe pasta dough, rolled out into wide ribbons, about 1/4-inch thick
- 12 fresh sage leaves
- 1 tablespoon finely chopped fresh parsley leaves
Steps
- In a large saute pan, over medium heat, melt 1 tablespoon of the butter. Add the shallots and saute for 1 minute. Add the squash puree and cook until the mixture is slightly dry, about 2 to 3 minutes. Season with salt and pepper. Stir in the cream and continue to cook for 2 minutes. Remove from the heat and stir in 3 tablespoons cheese and nutmeg, to taste. Season with salt and pepper. Cool completely.
- Cut the pasta ribbons into 3-inch squares. Place 2 teaspoons of the filling in the center of each pasta square. Bring 1 corner of the square to the other, forming a triangle and seal the pasta completely. Add the pasta to pot of boiling salted water. Cook until al dente, about 2 to 3 minutes or until the pasta floats and is pale in color.
- Remove the pasta from the water and drain well. Season the pasta with salt and pepper.
- In a large saute pan, melt the remaining 8 tablespoons of butter. Add the sage to the butter and continue to cook until the butter starts to brown. Remove from the heat.
- Place some of the pasta in the center of each serving plate. Spoon the butter sauce over the pasta. Sprinkle the 2 ounces of cheese over each plate and garnish with parsley.
Notes
- FAVORITE
↑ Back to top
Roasted Chicken Thighs with Delicata Squash
Tags: Chicken
Servings: 4
Ingredients
- 1/2 lemon, ends trimmed, halved lengthwise, seeds removed, and thinly sliced crosswise into wedges
- 4 bone-in, skin-on chicken thighs (about 1 and 1/2 pounds)
- 1 tablespoon plus 1 teaspoon extra-virgin olive oil
- 1 tablespoon chopped sage
- 1 and 1/2 teaspoons coriander seed
- 1 and 1/2 teaspoons kosher salt
- 1 teaspoon black pepper
- 1/4 cup maple syrup
- 3 tablespoons unsalted butter, cut into cubes
- Large pinch chile powder
- 1 delicata or acorn squash (1 and 1/4 pounds), seeded and sliced into 1/4-inch-thick rings
- 1/4 cup thinly sliced scallions, white and light-green parts
Steps
- Bring a small pot of salted water to a boil; drop in lemon slices and cook for two minutes. Drain well.
- In a large bowl, toss chicken with lemon slices, 1 tablespoon oil, sage, coriander, 1 teaspoon salt and pepper. Let stand 30 minutes.
- Heat oven to 425 degrees.
- In a small saucepan over medium heat, combine syrup, butter, remaining 1/2 teaspoon salt and chile powder. Simmer for 3 minutes. Toss mixture with squash.
- Spread squash in a 9-by-13-inch pan or on a large rimmed baking sheet. Nestle chicken and lemon on top of squash. Roast for 15 minutes. In a small bowl, toss scallions and remaining 1 teaspoon oil. Scatter over chicken and squash; keep roasting until chicken is no longer pink, about 20 minutes more.
Notes
- FAVORITE
↑ Back to top
Roasted Garlic Confit
Adapted from https://daenskitchen.com/garlic-confit/
Tags: Condiments
Servings: 20
Ingredients
- 6 heads garlic
- 3 cups Rich Glen olive oil
- 6 sprigs of thyme
Steps
- Preheat the oven to 120 degrees Celsius.
- Peel the garlic by breaking the cloves away and placing them into a heatproof bowl. Submerge in boiling hot water for 5 minutes and drain. The skin will become loose and easy to peel away.
- Place the garlic cloves and thyme into an ovenproof dish and fully submerge in olive oil. It's important the garlic is fully submerged in the olive oil so it does not burn. Bake for 2 hours or until the garlic has browned in colour.
- Allow to cool and store in an airtight container or jar for up to several weeks in the fridge.
↑ Back to top
Roasted Melting Potatoes
Tags: Potato
Sides
Servings: 4
Ingredients
- ⅓ cup butter, melted
- 1 tablespoon chopped fresh thyme
- 1 teaspoon salt
- ½ teaspoon ground black pepper
- 3 pounds Yukon Gold potatoes, cut into 1-inch slices
- 1 ¼ cups vegetable broth
- 2 cloves garlic, minced
- Local Offers
- Buffalo, NY 14221 Change
- Unsalted Butter - 1lb - Good & Gather™
- Ideal for cooking, baking or using as a spread
- Buy all 7 ingredients from this recipe for $14.14
FEATURED
PRODUCTS
Steps
- Preheat the oven to 500 degrees F (260 degrees C) and place oven rack in upper-middle position. Grease a high-rimmed metallic baking sheet with butter.
- Combine melted butter, thyme, salt, and pepper in a bowl. Add potatoes and toss until fully coated. Place potato slices in a single layer on the prepared baking sheet.
- Roast in the preheated oven until slightly golden, about 15 minutes.
- Flip potatoes over and roast for another 15 minutes.
- Flip potatoes and add vegetable broth and garlic; roast until tender, about 15 minutes.
↑ Back to top
Roasted Mushroom Pizza with Fontina and Scallions
Adapted from https://www.177milkstreet.com/recipes/roasted-mushroom-pizza-with-fontina-and-scallions
Tags: Mushrooms
Pizza
Ingredients
- 1 POUND PORTOBELLO MUSHROOM CAPS
- ⅓ CUP EXTRA-VIRGIN OLIVE OIL
- TABLE SALT AND GROUND BLACK PEPPER
- 1 TABLESPOON FINELY CHOPPED FRESH THYME
- 3 GARLIC CLOVES, MINCED
- 1 PORTION PIZZA DOUGH (WARMED TO 75°F)
- BREAD FLOUR, FOR DUSTING COUNTERTOP
- 1 TABLESPOON SEMOLINA FLOUR, FOR DUSTING PIZZA PEEL
- 1 CUP FONTINA-PARMESAN CREAM
- 2 SCALLIONS, THINLY SLICED ON BIAS
- ¼ TEASPOON RED PEPPER FLAKES
Steps
- At least 1 hour before baking, heat the oven to 550°F with a baking steel or stone on the upper-middle rack and a second rack in the lower-middle.
- Using a spoon, scrape off and discard the gills on the undersides of the mushroom caps. Halve any caps that are 5 inches or larger in diameter, then cut the caps into ¼-inch slices. In a large bowl, toss the mushrooms, olive oil and ¼ teaspoon salt.
- Spread the mushrooms in an even layer on a rimmed baking sheet. Roast on the lower oven rack, stirring once, until they have released their moisture, the moisture evaporates and the mushrooms begin to brown, about 15 minutes. Stir in the thyme and garlic, then roast until the mushrooms have browned and the garlic is no longer raw, another 3 to 4 minutes. Let cool completely on a wire rack. Leave the oven on.
- Turn the dough out onto a counter dusted generously with bread flour. Flour your hands and, using your fingers, press the dough, starting at the center and working out to the edges, into a 12-inch round, turning the dough over once. The round should be thin in the center, with slightly thicker edges. Lightly dust a baking peel, inverted baking sheet or rimless cookie sheet with the semolina. Transfer the dough to the peel and, if needed, reshape into a 12-inch round.
- Using the back of a spoon, spread the fontina-Parmesan cream evenly on the dough, leaving ½-inch border at the edge. Scatter the mushrooms over it and season with pepper. Slide the pizza onto the baking steel or stone and bake until the crust is well browned, 7 to 9 minutes.
- Using the peel, transfer the pizza to a wire rack. Let cool for a couple of minutes, then sprinkle with scallions and red pepper flakes.
Notes
- Tip: Don’t undercook the mushrooms. Roasting them until well browned removes moisture that would otherwise make the pizza crust soggy.
↑ Back to top
Roasted Sesame Asparagus
Tags: Jewish
Vegetables
Ingredients
- 1 bunch asparagus
- Extra virgin olive oil
- Salt
- Black pepper
- 1 tsp cornstarch
- 2 tbsp sesame oil
- 2 tbsp rice vinegar
- 1 1/2 tbsp agave nectar
- 1 1/2 tbsp soy sauce
- 1/4 tsp cayenne
- 1/2 tbsp sesame seeds
Steps
- Preheat oven to 450 degrees F. Wash asparagus and pat dry. Trim off the tough, thick end part of each stalk. Line the baking sheet with aluminum foil for easier cleanup, if desired. Spread asparagus out on ungreased baking sheet. Drizzle extra virgin olive oil evenly over the top of the asparagus; I use about 1 tbsp of oil for each pound of asparagus. Use your fingers to gently rub each stalk evenly with the olive oil. Sprinkle the asparagus lightly with salt and pepper. Place in the oven.
- Roast the asparagus for 12-15 minutes. You will know they’re done when the asparagus turns bright green, the stems are tender, and the tips of the asparagus begin to get crisp. Small or very thin stalks may take less than 12 minutes to roast.
- While asparagus is roasting, make sauce. In a small saucepan, whisk together cornstarch, sesame oil, rice vinegar, agave nectar, soy sauce and cayenne till smooth. Turn on the stove to medium and heat up the sauce, whisking constantly, till it boils around the edges and thickens.
- Drizzle the roasted asparagus with warm sesame sauce and sprinkle with sesame seeds. Serve warm.
Notes
- FAVORITE
↑ Back to top
Roasted Sesame Asparagus
Tags: Vegetables
Servings: 4 servings Prep Time
Ingredients
- 1 bunch asparagus
- Extra virgin olive oil
- Salt
- Black pepper
- 1 tsp cornstarch
- 2 tbsp sesame oil
- 2 tbsp rice vinegar (for gluten free use a certified GF vinegar)
- 1 1/2 tbsp agave nectar or honey
- 1 1/2 tbsp soy sauce (for gluten free use a certified GF tamari sauce)
- 1/4 tsp cayenne
- 1/2 tbsp sesame seeds
Steps
- Preheat oven to 450 degrees F. Wash asparagus and pat dry. Trim off the tough, thick end part of each stalk. Line the baking sheet with aluminum foil for easier cleanup, if desired. Spread asparagus out on ungreased baking sheet. Drizzle extra virgin olive oil evenly over the top of the asparagus; I use about 1 tbsp of oil for each pound of asparagus. Use your fingers to gently rub each stalk evenly with the olive oil. Sprinkle the asparagus lightly with salt and pepper. Place in the oven.
- Roast the asparagus for 12-15 minutes. You will know they’re done when the asparagus turns bright green, the stems are tender, and the tips of the asparagus begin to get crisp. Small or very thin stalks may take less than 12 minutes to roast.
- While asparagus is roasting, make sauce. In a small saucepan, whisk together cornstarch, sesame oil, rice vinegar, agave nectar, soy sauce and cayenne till smooth. Turn on the stove to medium and heat up the sauce, whisking constantly, till it boils around the edges and thickens.
- Drizzle the roasted asparagus with warm sesame sauce and sprinkle with sesame seeds. Serve warm. GF modification: To make this dish gluten free, make sure your soy sauce and rice vinegar are certified gluten free. Many soy sauces have gluten in them so choose carefully! You can also use tamari as a sub for the soy sauce, there are some gluten free certified varieties.
↑ Back to top
Roasted Spiced Chickpeas
Adapted from https://www.facebook.com/

Tags: Middle-East
Snacks
Ingredients
- 1 can (14 oz) chickpeas (garbanzo beans), drained
- 2 teaspoons olive oil
- 1 teaspoon cinnamon or your spice(s) of choice
- 1 1/2 teaspoons brown sugar
- 1/4 teaspoon salt
Steps
- Place chickpeas on a baking sheet lined with parchment paper or a Silpat.
- Bake at 450 F for 30 minutes. (You didn't miss anything here. You don't oil or season them until after they are done).
- Transfer chickpeas to a bowl and mix thoroughly with the rest of the ingredients.
- Enjoy hot, or bring to room temperature and store in an air-tight container.
Notes
- FAVORITE
↑ Back to top
Roasted Spiced Lamb Ribs with Whole Grain Mustard Sauce
Servings: 4
Ingredients
- 1 ( 4- to 5- pound) side of lamb ribs or lamb breast
- Kosher salt and freshly ground black pepper
- 1 1/2 teaspoons smoked paprika
- 1 1/4 teaspoons ground cumin
- 1 teaspoon ground coriander seeds
- 1/2 teaspoon ground fennel seeds
- 1/2 teaspoon sugar
- 1/4 teaspoon red chile flakes
- 1 1/2 cups homemade or store-bought low-sodium chicken stock
- 1 tablespoon whole grain mustard
- 1 tablespoon unsalted butter
Steps
- Preheat oven to 300°F. Season ribs all over with salt and pepper. In a small bowl, thoroughly combine smoked paprika, cumin, coriander, fennel, sugar, and chili flakes. Rub ribs all over with spice mixture and place on a wire rack set in a rimmed baking sheet or roasting pan.
- Bake ribs for 1 hour, then increase heat to 375°F and cook until browned outside, tender within, and an instant-read thermometer registers 175°F, about 1 hour longer. Let rest for 10 minutes.
- Meanwhile, pour off fat from pan. Set pan on burner and heat over medium heat. Add 1/2 cup stock and stir, scraping up any browned bits; pour into a medium saucepan and add remaining 1 cup stock. Cook over medium heat until reduced by half, about 8 minutes. Stir in mustard and season with salt and pepper. Off the heat, whisk in butter.
- Divide ribs by cutting between the bones and serve with the sauce.
↑ Back to top
Roasted Sweet Potato Salad W/ Honey Maple Viniagrette
Tags: Potato
Salad
Ingredients
- 2 lbs sweet potatoes peeled & diced 3/4 in about 7 cups
- 2 tbsp oil
- Dressing
- 3 tbsp. oil
- 3 tbsp. cider vinegar'
- 2 tbsp. honey
- 2 tbsp. Maple Syrup
- 1 clove garlic minced
- 1/2 tsp Dijon mustard
- 1/8 tsp salt
- 1/8 tsp pepper
- 6 oz baby spinach
- 1 med apple chopped
- 1/2 c dried cranberries
- 1/2 c chopped pecans toasted
- 1/2 c crumbled bleu cheese
Steps
- toaa potatoes with oil roast insingle layer 400 degrees about 45 minutes transfer to bowl cool slightly'
- add rest of ingredients dress sprinkle w blue cheese
Notes
- FAVORITE
↑ Back to top
Roasted Vegetable Udon

Tags: Japanese
Noodles Vegetarian
Servings: YIELD 4 servings ACTIVE
TIME 40 minutes
Ingredients
- 2 red bell peppers
- 2 yellow bell peppers
- 1 large onion
- 1 bunch scallion bottoms, cut into 1 inch pieces
- 4 ounces toban dian (chili bean sauce; we use LEE KUM KEE brand)
- 4 ounces soy sauce
- 8 ounces water
- 8 ounces sugar
- 16 ounces udon noodles (we use futonaga)
- 12 ounces shrimp (16- to 20-count), peeled; deveined; cut in half lengthwise
- 1 ounce ginger, peeled; julienne
- 3 large cloves garlic, sliced thin
- 4 cups spinach leaves
- 2 ounces freshly toasted sesame seeds; black and white
- garlic chips
- cilantro, to garnish
- 3 large cloves garlic, sliced thin
- 1 cup vegetable oil
- salt
For the
Vegetables
For the Sauce
For the Udon
For the Garlic
Chips
Steps
- Char peppers over open flames. Peel, seed, rinse, and julienne.
- Char onion over open flame until very black, roast at 350 degrees until tender (about 25 minutes), julienne.
- Grill or roast 1 inch pieces of scallion bottoms.
- In small pot, heat oil gently. Add sliced garlic and mix around to separate slices.
- Raise heat to low medium and gently fry garlic, stirring often, until very light golden, about 14 minutes.
- Do not let garlic color past golden, it will be bitter.
- Strain from oil immediately, drain on paper towels and season with a pinch of salt. Save garlic oil for another use.
- Combine all ingredients together.
- Cook udon like pasta in salted water for 8 minutes or until tender yet firm, drained and tossed warm in sesame oil.
- In a wok or large pot sauté garlic and ginger in olive oil until fragrant. Add shrimp and a tiny pinch of salt. Cook until just pink.
- Add peppers, onions and scallions, season with a tiny bit of salt (the sauce is highly seasoned).
- Add pasta, make hot then add 6 oz of sauce. Wilt spinach in at very end.
- Toss. Plate in a large bowl, garnish with sesame seeds, garlic chips and cilantro. Enjoy!
Notes
- FAVORITE
↑ Back to top
Rochester Hot Dog Sauce
Adapted from http://about:reader/?url=https%3A%2F%2Fwww.chowhound.com%2Frecipes%2Fnick-tahous-meat-sauce-28498

Tags: Condiments
Rochester
Ingredients
- 1 medium onion, chopped
- 1 teaspoon oil
- 1 pound ground beef
- 1 cup water
- 1/4 cup tomato paste
- 1 tablespoon brown sugar
- 1 teaspoon black pepper
- 1 teaspoon cayenne pepper
- 1 teaspoon chili powder
- 1/2 teaspoon ground cumin
- 1/2 teaspoon allspice
- 1/4 teaspoon cinnamon
- 1/4 teaspoon ground cloves
- salt to taste
- 1 clove garlic, diced or pressed through a garlic press
Steps
- In a large skillet, fry onion and garlic in oil until soft. Add meat and spices, stirring constantly with fork to keep the beef broken up. Once the meat browns, add water, tomato paste and brown sugar. Simmer 10 minutes. Go through it with an immersion blender to give it a finer texture similar to triple ground beef. Simmer 1 hour, adding water if necessary to keep it moist but not soupy.
- Original recipes call for triple ground beef which is too difficult to obtain and not worth the effort.
Notes
- FAVORITE
↑ Back to top
Rochester Hot Sauce
Tags: Condiments
Rochester
Ingredients
- 1 teaspoon oil
- 1 medium onion, chopped
- 1 clove garlic, minced
- 1 pound ground beef
- 1 cup beef broth
- 1 (6 oz.) can tomato paste
- 1 tablespoon brown sugar
- 1 teaspoon ground black pepper
- 1 teaspoon cayenne pepper
- 1 teaspoon chili powder
- 1/2 teaspoon ground cumin
- 1/4 teaspoon allspice
- 1/8 teaspoon cinnamon
- 1/8 teaspoon ground cloves
- salt to taste
Steps
- ln a large skillet, over medium heat fry onion and garlic in oil until soft. Add meat and spices, periodically stir and break up any clumps of beef with a fork. Cook until the meat is no longer pink.
- Once the meat is cooked though, add beef broth, tomato paste and brown sugar. Simmer 10 minutes. Use a hand immersion blender to further give the meat a finer texture, a couple of quick whirls here and there are all you need.
- Simmer 1 hour, adding more beef broth if necessary to keep it moist, but avoid adding too much and letting the sauce get soupy.
Notes
- FAVORITE
↑ Back to top
Rock Sugar Ginger Chicken
Tags: Chicken
Chinese
Servings: Makes four to six
servings
Ingredients
- 2 pounds chicken parts
- 1/2 cup chicken broth, preferably homemade
- 1/2 cup water
- 2 tablespoons black or dark soy sauce
- 2 ounces rock sugar, about 1/4 cup
- 2 teaspoons vegetable oil
- 1 1/2 cups sliced ginger, about 6 ounces
- 1/2 teaspoon salt
Steps
- Using a meat cleaver, chop chicken through the bone into 2-inch pieces, or ask a butcher to do it. Whole chicken parts may be used, but will take longer to cook.
- In a small saucepan, combine broth, water, soy sauce and rock sugar. Bring to a simmer over medium heat and cook until sugar is dissolved, about 5 minutes. Set aside.
- Heat a 14-inch skillet on high until hot but not smoking. Add oil and ginger and stir-fry until ginger is lightly browned, about 1 minute. Push ginger to sides of skillet. Reduce heat to medium and carefully add chicken, skin side down. Cook, undisturbed, 3 to 4 minutes, adjusting heat between medium and medium-high to brown chicken.
- Using a metal spatula or tongs, turn chicken over and pan-fry 3 to 4 minutes, or until chicken is browned on the other side, but not cooked through. Spoon off any excess fat, redistribute ginger, and sprinkle chicken with salt.
- Quickly drizzle chicken broth mixture down sides of skillet and immediately cover. Cook, covered, on medium heat 4 minutes. Turn chicken, reduce heat to low, and cook 3 to 4 minutes, or until chicken is cooked through. If using whole bone-in parts, simmer 10 minutes. Serve immediately with rice. Makes four to six servings.
Notes
- Black soy sauce is aged longer than thin soy sauce. It is darker, thicker and slightly sweeter. Rock sugar, also known as rock candy, is crystallized sugar sold in chunks that range in color from amber to clear. It is used in sweet soups and braised dishes. Tap with a mallet to break into smaller pieces. Store in an air-tight jar in a cool, dry, dark cupboard. Two tablespoons of granulated sugar may be substituted in this dish.
↑ Back to top
Rock Sugar Ginger Chicken
Ingredients
- 2 pounds mixed chicken parts, on the bone
- 1/2 cup homemade chicken broth
- 1/2 cup water
- 2 tablespoons black soy sauce
- 2 ounces rock sugar, about 1/4 cup
- 2 teaspoons vegetable oil
- 1 1/2 cups sliced ginger, about 6 ounces
- 1/2 teaspoon salt
Steps
- With a meat clever, chop the chicken through the bone, into 2-inch pieces, or disjoint into several pieces. In a small saucepan, combine the chicken broth, 1/2 cup water, soy sauce, and rock sugar. Bring to a simmer over medium heat and cook until the sugar is completely dissolved, about 5 minutes. Set aside. Heat a 14-inch skillet over high heat until hot but not smoking. Add oil and ginger, and stir-fry until ginger is lightly browned, about 1 minute. Bring ginger to the sides of the skillet. Reduce heat to medium, and carefully add the chicken, skin side down, spreading it in the skillet. Cook, undisturbed, 3 to 4 minutes, adjusting heat between medium-high to let the chicken brown. Then, using a metal spatula , turn the chicken over and pan-fry 3 to 4 minutes, or until chicken is browned on the other side, but not cooked through. Pour off any excess fat, redistribute the ginger, and sprinkle the chicken with salt. Quickly drizzle chicken broth mixture down the sides of skillet, and immediately cover. Cook, covered, on medium heat 4 minutes. Turn the chicken, reduce heat to low, and cook 3 to 4 minutes, or until chicken is cooked through. Serve immediately.;
- Recipe courtesy of Grace Young, "The Wisdom of the Chinese Kitchen"
Notes
- My Private Notes
- Add a Note
↑ Back to top
Rosemary Balsamic Tzimmes: Elegant Rosh Hashanah
Servings: 6
Ingredients
- 1 pound yams, peeled and sliced into 1 1/2 inch pieces (1 large or 2 medium yams - orange sweet potatoes)
- 1 pound carrots, peeled and sliced into 1 1/2 inch pieces (about 5 medium carrots - I like using multicolored heirloom carrots)
- 1 pound parsnips, peeled and sliced into 1 1/2 inch pieces (about 2 large parsnips)
- 2 tablespoons extra virgin olive oil
- 1 1/2 tablespoons molasses (or substitute maple syrup)
- 1 teaspoon kosher salt
- 4 sprigs fresh rosemary, plus more for garnish if desired
- 1/2 cup balsamic vinegar
- 1/2 cup chopped walnuts
Steps
- Preheat oven to 400 degrees F. Combine the chopped root vegetables in a mixing bowl. In a smaller bowl, whisk together the olive oil and molasses. Pour over the root vegetables, sprinkle on the kosher salt, and stir to coat all of the vegetables evenly with the molasses, oil and salt.
- Spread vegetables out evenly on a parchment lined baking sheet. Place the rosemary sprigs across the top of the vegetables, evenly spread out. Place vegetables in the oven. Roast for 25 minutes undisturbed.
- In a small saucepan, bring the balsamic vinegar to a boil, then reduce heat to medium and simmer for 5-8 minutes until the liquid has reduced by half and the balsamic thickens enough to coat the back of a spoon. Remove from heat and pour into a cool heat-safe container.
- The syrup will continue to thicken as it cools.
- After 25 minutes of roasting, remove the tray from the oven. Sprinkle the chopped walnuts onto the tray with the vegetables, then stir the vegetables, moving the vegetables on the outside of the sheet to the center, and vice versa. While doing so the walnuts will be slightly coated with the molasses mixture. Return to the oven and continue to roast for 10-25 minutes longer, until the largest pieces of vegetables are tender.
- Remove the vegetables from the oven and discard the roasted rosemary sprigs. Drizzle the roasted vegetables with the balsamic reduction.
- Serve warm or at room temperature.
Notes
- Serving Size: 3/4 cup. Makes roughly 4 1/2 cups total, 6 servings.
- Passover Note: It is difficult to find molasses with a Passover hechsher. If making for the holiday and keeping kosher, use maple syrup instead.
↑ Back to top
Rugelach
Adapted from http://toriavey.com/toris-kitchen/2011/02/rugelach/

Tags: Jewish
Pastry
Ingredients
- 2 sticks (1 cup) unsalted butter
- 8 oz. cream cheese
- 1/4 cup sour cream
- 2 cups all purpose flour
- 1/4 tsp salt
- 2 tbsp granulated sugar
- 1 1/2 cups chopped walnuts or pecans
- 1 1/4 cups semi-sweet chocolate chips
- 1/2 cup berry preserves (raspberry, strawberry, or blackberry)
- 1/4 cup brown sugar
- 1 egg
- 1 tsp water
- 1/4 cup granulated sugar
- 1 1/2 tsp cinnamon
Dough
Ingredients:
Filling
Ingredients:
Egg Wash
Ingredients:
Steps
- Chop cold butter and cream cheese into smaller pieces. Put pieces into your food processor along with sour cream, flour, salt, and sugar. Pulse together ingredients until a crumbly dough forms and begins to fall away from the sides of the processor. Don't overprocess; the dough should look crumbly, like cottage cheese.
- Save
- If you don't have a food processor: let the butter and cream cheese come to room temperature. Using a stand mixer or hand mixer, cream the butter and cream cheese together with the sour cream. In a separate bowl, sift together the flour, salt, and sugar. Slowly add the dry mixture to the wet mixture, mixing constantly, until dough holds together and begins to pull away from the sides of the bowl. Don't overmix. Pour dough onto a lightly floured rolling surface...
- Save
- and form into a rough ball shape.
- Save
- Divide the ball into four equal pieces and form those pieces into rough balls.
- Save
- Cover each ball with plastic and place in the refrigerator. Refrigerate dough balls for at least 1 1/2 hours, for up to 48 hours.
- In a skillet, toast the chopped nuts over medium heat until fragrant.
- Save
- Pour the toasted nuts into a food processor along with the chocolate chips, berry preserves, and brown sugar. Pulse together until a thick, coarse paste forms. Reserve.
- Save
- Combine the cinnamon and sugar in a small bowl; reserve. Beat your egg wash with water; reserve.
- Save
- Lift the dough gently from the rolling surface (it may stick a bit) and re-flour your surface beneath the dough.
- Save
- Replace the dough onto the newly refloured surface. Use a round 9" cake pan as a guide to make a nice, smooth imprint of a circle in the dough.
- Save
- Cut the dough into a large circle, following the shape of the cake pan. If you don't have a cake pan, just guesstimate the size of the circle and cut it as smoothly as you can.
- Save
- Form the trimmed excess dough into a small ball. Wrap it in plastic and reserve in the refrigerator, adding to the ball with each batch that is made.
- Take 1/4 of the filling (about 4 tbsp) and place it in the center of the circle. Spread it very thin across the surface of the dough; a thick layer of filling will make your cookies expand and burst. You can use your fingers to make the spreading easier; I like to use my palm to flatten and even out the filling. Leave about an inch around the edges of the circle.
- Save
- Cut the circle into 8 equal triangles by first cutting the circle in half...
- Save
- then quarters...
- Save
- then halve the quarters to make eighths.
- Save
- If you prefer to make smaller bite-sized cookies, divide each quarter into three to make 12 equal triangles.
- Save
- Roll each triangle, starting from the wide flat end and rolling towards the narrow point.
- Save
- Save
- Save
- Save
- Press the end point into the cookie to secure it. Place the rolled cookies onto a parchment lined cookie sheet, end point down. Leave an inch between the cookies, as they will expand slightly during baking.
- Save
- When you are ready to bake, brush the top of each cookie with egg wash...
- Save
- then sprinkle lightly with cinnamon sugar.
- Save
- Place cookies in the oven and let them back for about 25 minutes, or until golden brown.
Preheat oven to 375 degrees F. Lightly flour your rolling surface and
rolling pin. Take one portion of the dough out the refrigerator (keep
the rest of the dough cold until ready to use). Roll out the dough to
about 1/8 inch thickness. You may need to use the rolling pin to pound
out the dough a bit at the beginning; the dough will be very firm and
cold, but will become more pliable as it starts to warm. Just keep
rolling with firm, even pressure, and eventually it will look like
this:
↑ Back to top
Rugelach
Adapted from https://www.jocooks.com/recipes/rugelach-recipe/

I made this.
Ingredients
- 1¾ cup all-purpose flour
- ½ teaspoon salt
- ¾ cup butter (unsalted, cold)
- ½ cup sour cream
- 1 teaspoon vanilla extract
- ⅓ cup cherry jam
- ¾ cup pecans (ground)
- 3 tablespoons powdered sugar
- Before You Begin! If you make this, please leave a review and rating letting us know how you liked this recipe! This helps our business thrive & continue providing free recipes.
Steps
- Add the flour and butter to a large bowl. Using two knives or a pastry cutter, cut the butter into the flour until it forms pea-sized pieces. Gently stir in the sour cream and vanilla, just until the dough holds together. Turn the bowl out onto a flour surface and give the dough a quick knead. Divide it in 3 pieces, wrap each piece with plastic, and refrigerate for 20 minutes.
- Preheat your oven to 375°F. Line two baking sheets with parchment paper or a silpat.
- Sprinkle some flour generously over your work surface. Take one disc of the dough and unwrap it. Sprinkle some flour over your rolling pin and roll out the dough so that it’s about 10 inches in diameter.
- Spread about 2 tablespoons of jam over the rolled dough. You don’t wan to add too much jam because it’s going to seep out of the cookies while baking. Next sprinkle about a quarter of the ground pecans evenly over the jam. Using a pizza cutter or sharp knife, cut the dough into 12 wedges, like a pizza. Starting at the long, curved edge, roll each wedge, crescent style, and place the rolls point side down (so they don’t unravel) on the prepared baking sheet. Repeat with remaining dough.
- Place the baking sheet in the oven and bake for 20 to 25 minutes or until lightly golden. Let the cookies cool on the baking sheet for 2 minutes before transferring them to a cooling rack to fully cool. Once completely cooled, either sprinkle them generously with powdered sugar or roll them through it.
Notes
- I doubled the recipe and made it in the food processor. Refrigerated overnite and rolled it under the plastic wrap
↑ Back to top
Rugelach ***
Adapted from https://www.jocooks.com/recipes/rugelach-recipe/

Tags: Cookies
Jewish Pastry
I made this. Rated 5/5
Ingredients
- 1¾ cup all-purpose flour
- ½ teaspoon salt
- ¾ cup butter (unsalted, cold)
- ½ cup sour cream
- 1 teaspoon vanilla extract
- ⅓ cup cherry jam
- ¾ cup pecans (ground)
- 3 tablespoons powdered sugar
- Before You Begin! If you make this, please leave a review and rating letting us know how you liked this recipe! This helps our business thrive & continue providing free recipes.
Steps
- Add the flour and butter to a large bowl. Using two knives or a pastry cutter, cut the butter into the flour until it forms pea-sized pieces. Gently stir in the sour cream and vanilla, just until the dough holds together. Turn the bowl out onto a flour surface and give the dough a quick knead. Divide it in 3 pieces, wrap each piece with plastic, and refrigerate for 20 minutes.
- Add the flour, salt and butter to the bowl of your food processor. Pulse a few times to combine or until it forms pea-sized pieces. Add the sour cream and vanilla to the bowl and pulse until the dough forms big chunks. Turn the bowl out onto a flour surface and give the dough a quick knead. Divide it in 3 pieces, wrap each piece with plastic, and refrigerate for 20 minutes.
- Preheat your oven to 375°F. Line two baking sheets with parchment paper or a silpat.
- Sprinkle some flour generously over your work surface. Take one disc of the dough and unwrap it. Sprinkle some flour over your rolling pin and roll out the dough so that it’s about 10 inches in diameter.
- Spread about 2 tablespoons of jam over the rolled dough. You don’t wan to add too much jam because it’s going to seep out of the cookies while baking. Next sprinkle about a quarter of the ground pecans evenly over the jam. Using a pizza cutter or sharp knife, cut the dough into 12 wedges, like a pizza. Starting at the long, curved edge, roll each wedge, crescent style, and place the rolls point side down (so they don’t unravel) on the prepared baking sheet. Repeat with remaining dough.
- Place the baking sheet in the oven and bake for 20 to 25 minutes or until lightly golden. Let the cookies cool on the baking sheet for 2 minutes before transferring them to a cooling rack to fully cool. Once completely cooled, either sprinkle them generously with powdered sugar or roll them through it.
↑ Back to top
Russ Parsons' Dry-Brined Turkey (A.K.A. the Judy Bird)

Tags: Chicken
Is starred.
Servings: 11-15
Ingredients
- One 12- to 16-pound turkey (frozen is fine)
- Kosher salt
- Herbs and/or spices to flavor the salt (optional -- see suggestions in step 1)
- Melted butter for basting (optional)
Steps
- Wash the turkey inside and out, pat it dry, and weigh it. Measure 1 tablespoon of salt—we used Diamond Crystal kosher— into a bowl for every 5 pounds the turkey weighs (for a 15-pound turkey, you'd have 3 tablespoons). You can flavor the salt with herbs and spices if you like—try a pinch of smoked paprika and orange zest, bay leaf and thyme, or rosemary and lemon zest. Grind together with the salt in a spice grinder, small food processor, or mortar and pestle.
- Sprinkle the inside of the turkey lightly with salt. Place the turkey on its back and salt the skin of the breasts, concentrating the salt in the center, where the meat is thickest. You'll probably use a little more than a tablespoon.
- Turn the turkey on one side and sprinkle the entire side with salt, concentrating on the thigh. You should use a little less than a tablespoon. Flip the turkey over and do the same with the opposite side.
- Place the turkey in a 2 1/2-gallon sealable plastic bag, press out the air and seal tightly. (If you can't find a resealable bag this big, you can use a turkey oven bag, but be prepared for it to leak, or wrap the bird in a few layers of plastic wrap.) Place the turkey breast-side up in the refrigerator. Chill for 3 days, turning it onto its breast for the last day. Rub the salt around once a day if you remember. Liquid might collect in the bag as you go—this is normal!
- For the crispiest skin, the night before, remove the turkey from the bag. There should be no salt visible on the surface and the skin should be moist but not wet. Place the turkey breast-side up on a plate and refrigerate uncovered for at least 8 hours.
- On the day it is to be cooked, remove the turkey from the refrigerator and leave it at room temperature at least 1 hour (do not rinse—it's not needed, and rinsing will make the skin less crispy). Heat the oven to 425° F.
- Pat it dry one last time and baste with melted butter, if using. Place the turkey breast-side down on a roasting rack in a roasting pan; put it in the oven. After 30 minutes, remove the pan from the oven and carefully turn the turkey over so the breast is facing up (it's easiest to do this by hand, using kitchen towels or oven mitts).
- Reduce the oven temperature to 325° F, return the turkey to the oven and roast until a thermometer inserted in the deepest part of the thigh, but not touching the bone, reads 165° F, about 2 3/4 hours total roasting. Note that because a dry-brined turkey cooks more quickly than one that hasn't been brined, it's best to check the temperature early with this recipe—it may be done faster than you think!
- Remove the turkey from the oven, transfer it to a warm platter or carving board; tent loosely with foil. Let stand at least 30 minutes to let the juices redistribute through the meat. Carve and serve.
↑ Back to top
Russ Parsons' Dry-Brined Turkey (A.K.A. the Judy Bird)
Is starred.
Servings: 11-15
Ingredients
- One 12- to 16-pound turkey (frozen is fine)
- Kosher salt
- Herbs and/or spices to flavor the salt (optional -- see suggestions in step 1)
- Melted butter for basting (optional)
Steps
- Wash the turkey inside and out, pat it dry, and weigh it. Measure 1 tablespoon of salt—we used Diamond Crystal kosher— into a bowl for every 5 pounds the turkey weighs (for a 15-pound turkey, you'd have 3 tablespoons). You can flavor the salt with herbs and spices if you like—try a pinch of smoked paprika and orange zest, bay leaf and thyme, or rosemary and lemon zest. Grind together with the salt in a spice grinder, small food processor, or mortar and pestle.
- Sprinkle the inside of the turkey lightly with salt. Place the turkey on its back and salt the skin of the breasts, concentrating the salt in the center, where the meat is thickest. You'll probably use a little more than a tablespoon.
- Turn the turkey on one side and sprinkle the entire side with salt, concentrating on the thigh. You should use a little less than a tablespoon. Flip the turkey over and do the same with the opposite side.
- Place the turkey in a 2 1/2-gallon sealable plastic bag, press out the air and seal tightly. (If you can't find a resealable bag this big, you can use a turkey oven bag, but be prepared for it to leak, or wrap the bird in a few layers of plastic wrap.) Place the turkey breast-side up in the refrigerator. Chill for 3 days, turning it onto its breast for the last day. Rub the salt around once a day if you remember. Liquid might collect in the bag as you go—this is normal!
- For the crispiest skin, the night before, remove the turkey from the bag. There should be no salt visible on the surface and the skin should be moist but not wet. Place the turkey breast-side up on a plate and refrigerate uncovered for at least 8 hours.
- On the day it is to be cooked, remove the turkey from the refrigerator and leave it at room temperature at least 1 hour (do not rinse—it's not needed, and rinsing will make the skin less crispy). Heat the oven to 425° F.
- Pat it dry one last time and baste with melted butter, if using. Place the turkey breast-side down on a roasting rack in a roasting pan; put it in the oven. After 30 minutes, remove the pan from the oven and carefully turn the turkey over so the breast is facing up (it's easiest to do this by hand, using kitchen towels or oven mitts).
- Reduce the oven temperature to 325° F, return the turkey to the oven and roast until a thermometer inserted in the deepest part of the thigh, but not touching the bone, reads 165° F, about 2 3/4 hours total roasting. Note that because a dry-brined turkey cooks more quickly than one that hasn't been brined, it's best to check the temperature early with this recipe—it may be done faster than you think!
- Remove the turkey from the oven, transfer it to a warm platter or carving board; tent loosely with foil. Let stand at least 30 minutes to let the juices redistribute through the meat. Carve and serve.
↑ Back to top
Russian Borscht
Adapted from http://sarahcooksthebooks.blogspot.com/2014/06/the-frugal-gourmet-on-our-immigrant_11.html
Tags: Chicken
Soups
Ingredients
- 3 Tbsp. olive oil
- 3 cloves garlic, peeled and chopped
- 1 lb. lamb meat, chopped into 1/2-inch pieces
- 1 medium onion, peeled and chopped
- 1 1/4 lbs. green cabbage, cored and chopped
- 1 1/2 lbs. tomatoes, diced
- 2 lbs. red beets, peeled and diced
- 3 1/2 quarts beef broth or stock
- 1/4 cup red wine vinegar
- 2 bay leaves
- Juice of 1/2 lemon
- 1 tsp. salt
- 1/2 tsp. black pepper
- Sour cream for garnish (optional)
Steps
- Heat a 12-quart stockpot over medium-high heat. Add the oil, garlic, and lamb. Brown the lamb, then add the onion.
- Saute until the onion is tender, and then add cabbage, tomatoes, beets, beef broth, vinegar, bay leaves, lemon juice, salt, and pepper.
- Bring to a boil (this will take a while), then turn down to a simmer. Cook covered for 1 hr., 45 minutes to 2 hours.
- Add salt and pepper to taste, and dish into individual bowls. Add sour cream on top if you'd like.
- Trust me.
Notes
- FAVORITE
↑ Back to top
Russian Borscht
Adapted from http://sarahcooksthebooks.blogspot.com/2014/06/the-frugal-gourmet-on-our-immigrant_11.html
Ingredients
- 3 Tbsp. olive oil
- 3 cloves garlic, peeled and chopped
- 1 lb. lamb meat, chopped into 1/2-inch pieces
- 1 medium onion, peeled and chopped
- 1 1/4 lbs. green cabbage, cored and chopped
- 1 1/2 lbs. tomatoes, diced
- 2 lbs. red beets, peeled and diced
- 3 1/2 quarts beef broth or stock
- 1/4 cup red wine vinegar
- 2 bay leaves
- Juice of 1/2 lemon
- 1 tsp. salt
- 1/2 tsp. black pepper
- Sour cream for garnish (optional)
Steps
- Heat a 12-quart stockpot over medium-high heat. Add the oil, garlic, and lamb. Brown the lamb, then add the onion.
- Saute until the onion is tender, and then add cabbage, tomatoes, beets, beef broth, vinegar, bay leaves, lemon juice, salt, and pepper.
- Bring to a boil (this will take a while), then turn down to a simmer. Cook covered for 1 hr., 45 minutes to 2 hours.
- Add salt and pepper to taste, and dish into individual bowls. Add sour cream on top if you'd like.
- Trust me.
↑ Back to top
Rustic Italian Ciabatta

Tags: Breads
Italian
Servings: 2 loaves
Ingredients
- Biga
- 3/4 cup (170g) water, cool
- 1 3/4 cups 2 tablespoons (226g) King Arthur Unbleached Bread Flour
- 1/8 teaspoon instant yeast or active dry yeast
- Dough
- all of the starter (from above)
- 3/4 cup (170g) water, lukewarm
- 1 3/4 cups 2 tablespoons (226g) King Arthur Unbleached Bread Flour
- 1 teaspoon instant yeast or active dry yeast
- 1 1/2 teaspoons (9g) salt
Steps
- To make the biga: Weigh your flour; or measure it by gently spooning it into a cup, then sweeping off any excess. Stir the water, flour, and yeast together, cover, and let rest at room temperature for 12 to 16 hours.
- To make the dough: Add the water to the biga, mixing to incorporate the two. Combine the flour, yeast, and salt in a separate bowl, and add to the biga-water mixture. Mix on low speed of a stand mixer fitted with a dough hook until the dough becomes cohesive, about 2 minutes. Increase the mixer to medium speed and knead to form an elastic, sticky dough, about 3 to 4 minutes. Resist the urge to add more flour unless the dough is truly "soupy."
- Cover the dough in the bowl, let it rise for 1 hour, then perform a bowl fold. To do a bowl fold, use your wet hand to grab a section of dough from one side, lift it up, then press it down firmly into the middle. Repeat this eight to 12 times.
- Let the dough rise for another hour, then turn it out onto a liberally floured work surface, and sprinkle lots of flour on top.
- Gently stretch the dough to an 8" x 10" rectangle and cut it into two pieces, each 4" x 10".
- Transfer the loaves onto a piece of parchment or linen coated with flour, leaving about 6" between them. Cover with a lightly greased piece of plastic wrap or a freestanding plastic cover, and let rise until the loaves have expanded, and look puffy, about 1 to 2 hours depending on the temperature of your kitchen. The loaves are ready for the oven when an indent made with your fingertip stays visible for a few seconds and fills is very slowly; if it springs back, the loaves need more time.
- About 30 minutes before the loaves are ready to bake, preheat the oven to 500°F. If you have a baking stone, place it in the middle of the oven when you start preheating, so it gets nice and hot.
- Spritz the dough with water; or add steam to your oven (see "tips," below). If you're baking on a stone, transfer the bread to the stone, parchment and all. If you're using a pan, transfer the loaves on their parchment to a baking sheet, and place them on a middle rack of the oven. Lower the oven temperature to 425°F.
- Bake the ciabatta until it's golden brown, approximately 22 to 25 minutes. Turn the oven off, place ciabatta on the oven's middle rack (remove the stone if you’ve used one), crack the door open about 2", and allow ciabatta to cool completely in the turned-off oven.
- Fresh ciabatta is best enjoyed within a couple of days. For longer storage, wrap well and freeze.
Notes
- For extra-crusty crust and the best rise, add steam to your oven as follows: While the oven is preheating, place an empty cast iron frying pan on the oven rack below the stone. If possible, adjust stone and pan so that the pan isn't directly under the stone, making it easier for steam to reach the baking bread. Once you’ve placed the bread in the oven, pour about 1 cup of boiling water into the cast iron frying pan. Steam will billow from the pan upwards to envelop the baking bread; be sure to wear good oven mitts to shield your hands and arms. Quickly close the oven door to trap the steam.
- Join King Arthur baker Martin Philip and his family as they bake Rustic Italian Ciabatta together, start to finish. Watch Martin Bakes at Home — Ciabatta now.
- The maximum temperature rating for most parchment paper is below 500°F, and at temperatures between 450°F and 500°F parchment’s exposed edges begin to char. To be safe, keep a close eye on anything being cooked at temperatures above 450°F (especially anything on an upper rack). Burned edges can also be minimized by trimming away excess parchment before baking.
↑ Back to top
Rustic Rosemary Sourdough Bread
Ingredients
- 5 cups all-purpose unbleached flour
- 1 1/2 cups lukewarm water
- 2 T Olive oil
- 1 cup ripe sourdough starter
- 1 teaspoon instant yeast (use 2 teaspoons if your sourdough isn't very vigorous)
- 3-4 tablespoons chopped fresh rosemary
- 2 1/2 teaspoons sea salt
- Extra rosemary and coarse salt (like fleur de sel) for sprinkling on the exterior
Steps
- Place all of the ingredients in a stand mixer and knead on the "2" bread setting for 6-8 minutes until a smooth dough forms. (Alternatively knead by hand for about double the length of time.) Form the dough into a ball, lightly spray the bowl with oil, return the dough to the bowl and cover loosely with plastic wrap. Set in a warm place and let it rise for about 90 minutes or until doubled in size.
- Punch the dough down with your fist. Form the dough into a round and place it in a 10" banneton (recommended) or comparable loaf pan. Let the dough rise again for about one hour until nearly doubled in size. In the meantime, preheat the oven to 425 degrees F.
- If using a banneton, invert the bread onto a baking stone or sheet. Spray the dough with water and use a long serrated knife to cut two 1/2 inch diagonal slashes into the dough. Sprinkle with some extra rosemary and some coarse salt like fleur de sel.
Bake the bread for 25 to 30 minutes, until it's a dark golden brown.
NOTE: You can also place the bread on a baking stone
that's been preheated. The baking stone absorbs the oven's heat
and transfers it to the bread for an evenly crispy crust.
Transfer the bread to a wire rack and let it cool. Best enjoyed
while still warm. Also excellent toasted or made into grilled
cheese sandwiches.
Notes
- NOTE: For the BEST flavor and texture results, wrap the dough tightly in plastic wrap before the first rise and let it sit in the fridge for at least 24 hours, punch it down occasionally, and then let it rise as normal at room temperature when you're ready to bake it (note, it will take longer since the dough is cold).
- Serving: 1 slice | Calories: 84 kcal | Carbohydrates: 17 g | Protein: 2 g | Sodium: 194 mg | Potassium: 27 mg
↑ Back to top
Rustic Rub
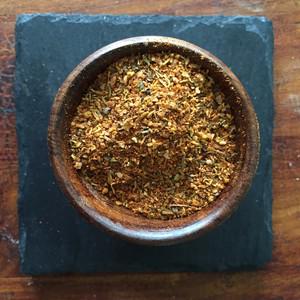
Tags: Chicken
Ingredients
- 4 tablespoons paprika
- 1 1/2 tablespoons cayenne
- 2 1/2 tablespoons black pepper
- 3 tablespoons garlic powder
- 1 1/2 tablespoons onion powder
- 3 tablespoons salt
- 1 1/4 tablespoons dried oregano
- 1 1/4 tablespoons dried thyme
Steps
- Stir together all ingredients in a bowl until combined well.
Notes
- FAVORITE
↑ Back to top
Rye Bread, Light

Tags: Breads
Rated 5/5
Ingredients
- 1 1/2 cups water
- 2 1/4 teaspoons (1 envelope) active dry yeast
- 1 1/2 tablespoons unsulfured molasses
- 1 1/4 cups whole-wheat or bread flour
- 1/4 cup nonfat dry milk or dried 1/2buttermilk
- 2 tablespoons vegetable oil
- 2 teaspoons salt
- 1 1/2 cups rye flour
- 3/4 to 1 cup bread flour or all-purpose flour
- Cornmeal for the pan
- Egg white glaze (see below)
The Sponge:
The Bread:
Steps
- Mix together everything for the sponge in a bowl, then cover and let rise for 2 hours. It should be foamy.
- Stir down the sponge, then add the oil, salt, and rye flour. Beat in the bread flour until the dough is shaggy and pu1/4lls away from the side, then turn it out onto a lightly floured counter and knead in the remainder. You can expect it to be a little stickier to handle than all-wheat flour doughs.
- Transfer to an oiled bowl, cover, and set in a warm place until doubled in bulk, about 1 hour. Push the dough down, then shape into an oval loaf about 10 inches long. Scatter cornmeal over a baking pan or peel if you’re using a baking stone. Place the bread on it, cover, then let rise until doubled in bulk, about 40 minutes. Preheat the oven to 375 degrees F during the last 15 minutes. Make three diagonal slashes across the top and brush with the glaze. Bake for 45 to 50 minutes or until browned.
- Seeded Rye Knead 1 tablespoon caraway or fennel seeds into the dough. Shape into a 5 x 9 inch loaf or free-form oblong loaf, brush with an egg glaze, sprinkle with additional seeds, and make several diagonal slashes in the top.
- Egg White Glaze
- 1 egg white
- 1 tablespoon water or milk
- Pinch salt
- Whisk the ingredients until well blended. Use this on seed breads or country breads.
Notes
- FAVORITE
↑ Back to top
Salisbury Steak
Tags: Beef
Ingredients
- 1 1/2 pounds lean ground beef
- 1/2 cup seasoned breadcrumbs
- 1 tablespoon ketchup
- 2 teaspoons dry mustard
- 4 dashes Worcestershire sauce
- 1 cube beef bouillon, crumbled (or powdered beef base)
- Salt and pepper
- 1 tablespoon butter
- 1 tablespoon olive oil
- 1 whole onion, halved and thinly sliced (or diced if you prefer)
- 2 cups beef broth, more if needed for thinning
- 1 tablespoon ketchup
- 1 teaspoon seasoning sauce, such as Kitchen Bouquet, optional
- 4 dashes Worcestershire
- 1 teaspoon cornstarch, optional
- Salt and pepper
Steps
- For the meat mixture: Combine the ground beef, breadcrumbs, ketchup, dry mustard, Worcestershire sauce, bouillon and some salt and pepper. Knead until all combined. Form into 4 to 6 oval patties, and then make lines across the patties to give them a "steak" appearance.
- Fry the patties in a skillet with the butter and oil over medium-high heat on both sides until no longer pink in the middle. Remove from the skillet and pour off any excess grease.
- For the gravy: Reduce the heat to medium and add in the sliced onions. Stir and cook until golden brown and somewhat soft, for several minutes. Add the beef stock, ketchup, seasoning sauce, if using, and the Worcestershire. Then combine the cornstarch with a little beef broth and add to the sauce if using. Stir and cook to reduce.
- Add a sprinkle of salt and pepper and more broth if needed for thinning. Then return the patties to the gravy. Spoon the gravy over the top and let them simmer and heat back up for a couple of minutes.
- 2012 Ree Drummond, All Rights Reserved
Notes
- FAVORITE
↑ Back to top
Salsa De Chipotle Y Cacahuate

Ingredients
- 1 pound tomatoes (see note)
- 2 garlic cloves unpeeled
- 1/4 large white onion cut into large chunks
- 6 to 7 dried chipotle chiles preferably moritas, stemmed
- 3/4 cup raw unsalted peanuts (see note)
- 1/2 teaspoon dried oregano
- 1 tablespoon unseasoned rice vinegar or white vinegar
- 1/2 cup water
- 1 teaspoon kosher salt or to taste
Steps
- Preheat the broiler, with the rack 2 to 3 inches from the heat source. Put the tomatoes, garlic cloves, and onion on a baking sheet lined with foil and broil, turning the vegetables halfway through, until they are charred and the tomatoes are mushy, 5 to 7 minutes for the garlic, and 10 to 12 minutes for the other vegetables. Remove the garlic when charred and softened and when it is cool enough to handle, peel it. Alternatively, you can toast the vegetables on a hot comal or skillet over medium heat, turning them every 4 to 5 minutes, until charred and soft. Transfer the tomatoes, onion, and garlic to a blender, along with any juices on the baking sheet.
- Set a comal or small skillet over medium-low heat. Add the chipotles and peanuts and toast, stirring the peanuts and turning the chiles from time to time, just until the chiles soften, puff, and begin to lightly toast but not burn, 4 to 5 minutes. The peanuts should be slightly toasted, but that will barely show. Transfer to the blender.
- Toast the oregano on the hot pan for 10 to 15 seconds, until fragrant and just beginning to darken, and add to the blender.
- Add the vinegar, water, and salt to the blender and puree until smooth. Taste and adjust the salt.
- The salsa will keep, tightly covered, for up to 5 days in the refrigerator. Stir well before using.
Notes
- You can substitute 1 (15-ounce) can fire-roasted tomatoes for the roasted fresh tomatoes. Add them to the blender along with the roasted onion and garlic.
- If you can only find salted and roasted peanuts, toast them with the chipotles as directed in the recipe, but reduce the salt in the recipe to 1⁄2 teaspoon, then season to taste with more salt if necessary.
↑ Back to top
Salsa Macha
Servings: 1 1/4 cups
Ingredients
- 1 cup ( 240 ml) neutral oil, such as canola or vegetable oil
- 15 medium garlic cloves ( 75 g), peeled and smashed
- 5 dried morita chiles or chipotle chiles, stems removed (see notes)
- 5 dried puya chiles or guajillo chiles, stems removed, and halved lengthwise
- 4 dried árbol chiles, stem removed
- 1 dried habanero chile, stem removed (optional)
- 3 tablespoons dry roasted, unsalted peanuts
- 2 tablespoons slivered almonds
- 1 tablespoon hulled pumpkin seeds
- 1 tablespoon toasted sesame seeds
Steps
- In a small saucepan, combine oil and smashed garlic. Cook over medium-low heat (the oil temperature should not exceed 275℉(135℃), until garlic is golden and fragrant, 8 to 12 minutes.
- When garlic just turns golden, carefully add the chiles (they may sizzle slightly when adding), and cook until softened, about 45 seconds. Set a fine-mesh strainer over a medium heat-proof bowl, and pour the oil mixture through the strainer into the bowl. Transfer the strained solids to a blender. Blend the solids on medium speed, scraping down the sides of the blender jar as needed, until evenly chopped, about 1 minute.
- Return the strained oil to the now-empty saucepan and heat over medium-high until oil registers 325°F. Add peanuts, almonds, pumpkin seeds, and sesame seeds and fry, stirring constantly, until peanuts and almonds turn light brown, about 2 minutes. Strain the mixture through a fine-mesh strainer set over the now-empty medium heat-proof bowl. Reserve the strained nuts and oil separately and let cool to room temperature, about 30 minutes.
- Once the oil is cooled, add the fried nut mixture and reserved oil to the blender. Pulse until solids are broken down into small pieces (about the size of the sesame seeds), about 10 pulses. Season with salt to taste. Serve or transfer to an airtight container and refrigerate. Stir to recombine before using.
- Special Equipment
- Small saucepan, blender, fine-mesh strainer
Notes
- Morita chiles can be substituted with chipotle as they're both smoked chiles made from jalapeños. Puya chiles can be substituted with guajillo chiles since they share a fruity flavor. Chiles de arbol can be substituted with dried Japones or Thai chiles which pack a similar punch of heat.
- Since salt doesn’t dissolve in oil it will settle at the bottom. Make sure to stir well before each use.
↑ Back to top
Salsa Naranja

Tags: Salsas
Ingredients
- 1 cup sweet chili sauce
- 1/2 cup orange juice
- 1/4 cup lime or Meyer lemon juice
- 1 small onion, diced
- 2 green onions
- 5 cloves garlic
- 1 thumb ginger, grated (galangal if you can find it)
- 1/2 cup (loosely packed) basil preferably Thai
- 1/2 cup (loosely packed) cilantro
- 2 serrano chilies (more if you like it really spicy) rough chop
- 2 cayenne or birds eye chilies
- 2 tablespoon toasted black sesame seeds
- 1 tablespoon smoked salt
- 1 tablespoon pepper
Steps
- Puree everything in a food processor.
Notes
- FAVORITE
↑ Back to top
Salt Bread Shio Pan Sogeum-Ppang Buttery Crispy

Servings: 8 salt bread rolls
Ingredients
- 14g/0.5ozs flour
- 60ml/2flozs water
- 155ml/5.2flozs milk
- 8g/0.3oz fine salt
- 310g/11oz bread flour
- 40g/1.4oz sugar
- 2 teaspoons/7g instant dried yeast
- 30g/1oz butter, softened, cubed
- 200g/7ozs cold butter (cut into 8x25g pieces)
- Flaked salt to sprinkle
Steps
- ROUX- Make the tangzhong roux. Whisk the 14g/0.5oz flour and water in a small saucepan and heat gently on low until it reaches 65C/149F. Gradually whisk in the milk in a steady stream and then whisk in the salt.
- LOW SPEED - Place the bread flour, sugar and yeast in a large mixer bowl and whisk together. Pour in the roux and mix with a spatula until it become shaggy textured. Knead this dough on low speed for 1 minute until the dough starts to come together.
- MEDIUM SPEED - Drop the butter in, one piece at a time while the mixer is going. Increase speed to medium (4 out of 10) to work that gluten and knead for 14-17 minutes. Make sure to reposition the dough so that all of the dough is evenly kneaded.
- BULK RISE - The dough will be ready when you can easily stretch it apart with your fingers and it doesn't break (the window pane effect). Shape into a ball and place back in a large greased bowl (I use the mixer bowl). Allow to rise in a warm place (I like to place it in another bowl of hot water, changing the water twice).
- BUTTER - Take the block of cold butter and cut into 8 even pieces. Place in the fridge until needed.
- SHAPE - Divide the dough into 8 pieces of 75g/2.6ozs each (the total dough will weigh around 600g/1.3lbs). Shape into balls, cover with cling film and allow to rise for 20 minutes. Then shape them into a carrot shape by rolling it into a log but concentrate on rolling one end thinner. Cover with cling film and allow to rise for 20 minutes.
- ROLLING - Take a small rolling pin and roll out the fatter end away from you. Then holding the narrow end, pull it towards you while rolling it out. You want it to be around 10cms/4inch wide at the widest point and around 40cm/15inches long. Optional: take a pizza cutter and cut straight edges, just trimming off as little as possible.
- RISE - Line a large tray with parchment. Take a piece of butter and place on the wider end and roll up the dough towards you. Place on the parchment and repeat with the other dough pieces and butter. Allow to rise again for 1 hour in a warm spot. Tip: you can place this in the cold oven but place a pan of hot water in the oven which will make the oven warmer. The buns are ready when they are puffy.
- BAKE - Preheat oven to 190C/374F fan forced or 210C/410F and place a tray with 1 inch of water in it on the base of the oven. Spray each bun 20 times with water spray and sprinkle with flaked salt. Bake for 19 minutes turning around in the oven after 15 minutes. Allow to cool for 10 minutes and then devour!
Step-By-Step
Instructions:
Notes
- Personal Note
- When I said everyone that tries these rolls loves them I mean everyone and I also mean love. I gave some to Laura and she loved them and I also few to our neighbours Vic and Nicki. I wasn't sure if they had ever tried salt bread but the feedback came back strong. Vic explained that he and Nicki had been annoyed with each other that day trading a few verbal pot shots at each other.
- "But imagine us doing that, while gobbling down the salt bread and trying to contain our 'Oh my god this is delicious!' faces LOL," explained Vic via text to Mr NQN. "Lorraine's mastering the art of Dinner-Roll-Diplomacy or Dinner-Roll-Detente. It was amazing! The perfect dinner rolls just how I like it!" he said before adding, "I loved it so much I want to learn how to make it myself. It's so perfectly buttery oily and gooey. Just the right amount of salt. I can't imagine how they could be any better 10/10."
- So tell me Dear Reader, have you ever tried Korean salt bread before? Would you bake this at home or hunt it down at a bakery first?
↑ Back to top
Salt-Rubbed Brussels Sprouts Make a Salad That's Both
Tender and Crisp
Adapted from https://www.seriouseats.com/2017/01/how-to-make-salt-wilted-brussels-sprouts-salad-hazelnut-goat-cheese.html
Steps
- Making a hearty salad is like recruiting the A-Team: You want to assemble a diverse collection of ingredients, each bringing its own special qualities to the mix. Just as Face was the suave manipulator, Murdock the crazy pilot, B. A. the muscle, and Hannibal the master of disguises, so nuts add crunch, greens crisp-tenderness, cheese a creamy richness, and the vinaigrette moisture and flavor. But this approach overlooks another technique: manipulating a single ingredient in different ways to get more than one quality out of it.
- This Brussels sprout salad does all of the above. There are the nuts—here, they're toasted skin-on hazelnuts, the skins taking on a light campfire aroma as they blister in a dry skillet. Then there's the cheese, in this case tangy, creamy fresh goat cheese that's crumbled in at the end. And, of course, there's the vinaigrette, which I spike with tangerine zest to give it some personality. What I think is most interesting about this salad, though, is how the Brussels sprouts themselves are handled.
- Shaving Brussels sprouts is a common technique for salads, the sturdy little brassicas forming a dense pile once shredded. Sometimes, though, that leads to a salad with a bit too much crunch—raw Brussels sprouts aren't exactly the tenderest of greens.
- This got me thinking about creative ways to deal with that issue. Roasting is one option, but that can take the dish a little too far out of salad territory. Plus, it's something we've all seen before.
- As it happened, though, I'd just been working on a sauerkraut how-to. The method starts by tossing and kneading shredded cabbage with salt, which wilts it through the powers of osmosis (the salt draws out moisture from the cabbage's cells, collapsing them) and the mechanical crushing of the cells through the kneading itself.
- When you're making kraut, the next step is to let it ferment for several weeks, but that salted, wilted cabbage is actually delicious all on its own. So I started thinking about the sprouts: Why not salt and knead them, reenacting that first phase of kraut-making, but then toss the wilted sprouts directly into a fresh salad, no fermentation required?
- I liked the idea, but I also knew that if I used them alone as the base, especially once they were mixed with a vinaigrette and creamy fresh goat cheese, the salt-wilted sprouts would come across as too soft and damp. My solution was simple: I'd salt-wilt only half the shredded sprouts, leaving the other half pristine and raw, then toss them back together right before serving. It'd be the perfect mix of two incarnations of a single ingredient: one soft and tender, the other stout and crisp. Combined, they are definitely greater than the sum of their parts.
- The salt-wilting itself is easy. Sprinkle salt on the shredded sprouts, toss well, then knead and squeeze for a few minutes until you can feel them begin to yield and grow wet as their juices are drawn out. I decided to also squeeze onto them the juice from the tangerine I was zesting for the vinaigrette, to infuse them with a little more flavor. After they've rested in the fridge for around 15 minutes or so, they're ready to go, though you can hold them for several hours at this point. When you're ready to finish the salad, just squeeze the sprouts dry of all the liquid that has accumulated in the bowl, combine them with everything else, add the vinaigrette, and toss to coat.
- After the first bite, there's only one thing a person can say: I love it when a plan comes together.
↑ Back to top
Salted Caramel Brownies
Tags: Baking
Brownies
Ingredients
- 4 ounces unsweetened chocolate; coarsely chopped
- 3/4 cup unsalted butter, cut into cubes
- 1 cup sugar
- 3 large eggs
- 1 teaspoon pure vanilla extract
- 1/2 teaspoon salt
- 1 cup all-purpose flour
- 9 Ghirardelli Dark Chocolate and Sea Salt Caramel Squares
- 1/2 cup Planters Salted Caramel Peanuts, chopped
Steps
- Preheat oven to 350 degrees. Line an 8×8 inch baking pan with foil and spray with nonstick cooking spray.
- Microwave chocolate and butter in a large bowl microwave-safe bowl at medium (50% power) for 2-3 minutes or until butter is melted.
- Stir until chocolate is melted. Whisk in sugar, eggs, vanilla and salt. Gradually add in flour; stir until just combined.
- Spread 1/2 the batter into prepared pan. Add an even layer of Ghirardelli Dark Chocolate and Sea Salt Caramel Squares, sprinkle the peanuts over the batter and chocolate, and cover with remaining 1/2 of brownie batter.
- Bake for 30-35 minutes; do not over bake.
Notes
- FAVORITE
↑ Back to top
Salted Honey Parker House Rolls
Servings: 12
Ingredients
- ¼ cup water, warmed to between 110° to 115°F
- 2 ¼ teaspoons active dry yeast
- 1 cup whole milk, at room temperature
- 4 tablespoons Vermont Creamery Sea Salt Cultured Butter - 82% Butterfat
- 1 tablespoon honey
- 1 ½ teaspoons kosher salt
- 1 large egg, at room temperature
- 3 ½ cups all-purpose flour
- 1 large egg, at room temperature
- 1 teaspoon water
- 4 tablespoons Vermont Creamery Sea Salt Cultured Butter - 82% Butterfat
- ¼ cup honey
- flaky sea salt, for garnish
FOR THE DOUGH:
FOR THE
FINISH:
Steps
- To make the dough. In a small liquid measuring cup, whisk together the water and yeast. Set aside for 5 minutes, or until bubbly and foamy, while you prep the other ingredients.
- In the bowl of a stand mixer, whisk together the milk, Vermont Creamery Salted Cultured Butter, honey, and salt. Add the yeast mixture and the egg all at once and mix with a rubber spatula until just combined. Add the flour and mix until a shaggy dough forms, about 1 minute.
- Knead the dough. Affix the bowl to the stand mixer with a dough hook. Knead on medium-low for 5 minutes, or until the dough is smooth and elastic.
- Proof the dough. Tip the dough out onto a lightly floured counter and use the spatula to scrape down the bottom and sides of the bowl for any stuck dough. Use your hands to knead the dough lightly and bring it together, about 1 minute. Lightly spray the stand mixer bowl with cooking spray and place the dough back in the bowl. Cover with plastic wrap and let rise in a warm, draft-free spot for 90 minutes or until doubled in volume.
- Shape the dough. Once the dough has doubled, lightly spray an 8-inch square pan with cooking spray. Punch down the dough and tip it onto a floured counter. Use a bench scraper to divide the dough into 12 equal pieces, about 2.5 ounces each. Shape each piece into rough ball and place in the prepared baking pan, arranging the balls into three rows of four. Loosely cover with plastic wrap and let rise for 1 hour.
- Prep the oven. About 30 minutes into the second rise, position a rack in the center of the oven and preheat the oven to 375ºF.
- Make the egg wash. In a small bowl, whisk together the remaining egg and water. Use a pastry brush to brush the top and sides of each roll with the egg wash.
- Bake the rolls. Bake for 30 to 35 minutes, or until the tops of each roll are golden brown. An instant thermometer inserted into the center of roll should read 200ºF.
- Make the salted honey topping. In a small saucepan over medium heat, melt the remaining butter. Whisk in the honey to combine. Use a pastry brush to brush the tops of each roll with the salted honey topping immediately after pulling out the rolls from the oven. Garnish with flaky salt.
- Serve and store. Serve immediately. The rolls can be stored in an airtight container or zip-top bag at room temperature for up to 2 days.
↑ Back to top
Salted Maple Pie
I made this.
Servings: 1 pie
Ingredients
- 1 1/4 cups ( 160 g) all-purpose flour
- 1 tablespoon sugar
- 1/4 teaspoon table or kosher salt
- 8 tablespoons ( 114 g) cold, cubed butter, salted or unsalted
- 1/4 C. + 1 T. ( 71 g) ice water
- 3⁄4 cup ( 150 g) packed light brown sugar
- 10 tablespoons ( 142 g) unsalted butter, melted and cooled
- 1 cup ( 325 g) maple syrup
- 1⁄4 cup ( 32 g) fine yellow cornmeal
- 1/2 teaspoon kosher salt ( 1.5 g)
- 1– 1⁄4 teaspoons pure vanilla extract
- 3 large eggs
- 1 large egg yolk
- 3⁄4 cup ( 188 g) heavy cream
- Flaky sea salt
- 1 cup heavy cream
- confectioner’s sugar
FOR THE PIE
DOUGH:
FOR THE PIE:
FOR FINISHING:
Steps
- In the bowl of a food processor, pulse the flour, sugar, and salt together. Cut the butter into small pieces, then add to the food processor. Pulse at 1-second intervals until butter is the size of peas—should be about 10 quick pulses. Add the ice water and pulse again about 10 times until the mixture is crumbly but holds together when pinched. Lay a clean tea towel on a work surface. Dump the crumbly dough mixture into the center of the towel. Grab the four corners of the towel together and twist to create a beggar’s purse, pressing the dough into a round. Use your hands to pack and flatten the round. If time permits, chill the dough for 30-60 minutes before proceeding, or better for 12 to 24 hours.
- On a lightly floured work surface, roll out the dough into a 13- to 14-inch round. Use as much flour as needed to prevent the dough from sticking, and every few rolls, flip the dough over. Transfer it to a 9-inch pie plate or pan. Trim dough that hangs over by a lot — leave at least an inch over hanging; you may not need to trim everywhere. Tuck the overhanging dough behind itself; then use your fingers to crimp the edge into a fluted pattern — video guidance here. Save the scraps in an airtight container in the fridge for another use.
- If time permits, chill the dough in the fridge until firm, about 30 minutes.
- Heat your oven to 425ºF. If you have a Baking Steel or pizza stone, place it on a rack in the lower third of your oven. Lay a sheet of parchment across the pie plate and pour pie weights or dried beans or rice into the center until they reach the top of the pie crust. Use your hands to press the weights down and fit them into the edges of the fluted crust.
- Transfer the filled pie crust to a parchment-lined sheet pan and transfer to the oven for 15-20 minutes or until the edges are just beginning to color — do rely on the visual cues here. It sometimes takes my crusts a little longer to take on that light color at the edges.
- Remove the pan from the oven and carefully remove the pie weights or dried beans (which you can use again and again — let them cool completely; then transfer to a storage bag). Return the pan to the oven for another 2 to 3 minutes — it should take on only the slightest bit of more color all around.
- Preheat your oven to 350°F.
- Make the filling: In a large bowl, whisk together the brown sugar and melted butter. Add the maple syrup, cornmeal, salt, and vanilla. Add the eggs and yolk and whisk again until very well combined or emulsified — this is important: several commenters have had issues with the mixture separating in the oven. Finally, add the cream and whisk one last time until emulsified.
- Place the pie plate on a parchment-lined baking sheet. Pour the filling into the pie shell.
- Transfer the baking sheet with the pie on it to the oven and bake for 45 minutes to 1 hour, until the edges are puffed and the center jiggles only slightly when shaken. It will look slightly underbaked when you remove it but it will continue to set as it cools.
- Remove the baking sheet from the oven and transfer the pie to a wire rack. Sprinkle generously with flaky sea salt. Let cool for 4 to 6 hours. Once fully cooled and at room temperature, slice, and serve.
- To make the whipped cream, beat the heavy cream with a wire whip or in an electric mixer until soft peaks begin to form. Sprinkle in a small handful of sugar (or don’t — I actually like this whipped cream without any sugar because the pie is on the sweet side) and a big pinch of flaky sea salt and beat until peaks begin to get firmer. Taste. Add more sugar (if using) and salt to taste. Beat until peaks begin to hold their shape or until they reach a texture you like — I like billowy, not-quite-stiff peaks. Store in fridge until ready to serve.
- Store leftover pie, well wrapped in plastic wrap, or tucked into a jumbo ziplock bag, or under a pie dome, at room temperature for up to 3 days.
MAKE THE PIE DOUGH:
PARBAKE THE DOUGH:
FILL AND BAKE THE PIE:
↑ Back to top
Salted-Butter Apple Galette with Maple Whipped Cream
Tags: Pies and Tarts
Servings: 8
Ingredients
- 1/4 cup (1/2 stick) salted butter
- 1/2 vanilla bean, split lengthwise
- Basic Tart Dough (click for recipe)
- All-purpose flour (for dusting)
- 1 pound baking apples (such as Pink Lady; about 2 large), scrubbed, sliced â ” thick
- 3 tablespoons dark muscovado or dark brown sugar
- 1 large egg
- 1 tablespoon granulated sugar
- 2 cups heavy cream
- 2 tablespoons pure maple syrup
Steps
- Place a rack in middle of oven and preheat to 375°. Place butter in a small saucepan and scrape in vanilla seeds; add pod. Cook over medium heat, stirring often, until butter foams, then browns (be careful not to burn), 5â8 minutes. Remove pan from heat and remove pod.
- Roll out dough on a lightly floured surface into a rough 14x10” rectangle about â ” thick (alternatively, roll out into a 12” round). Transfer to a parchment-lined baking sheet. Arrange apples on top, overlapping and leaving a 11/2” border. Brush apples with brown butter and sprinkle with muscovado sugar. Lift edges of dough over apples, tucking and overlapping as needed to keep rectangular shape.
- Beat egg with 1 tsp. water in a small bowl and brush crust with egg wash. Sprinkle with granulated sugar and bake, rotating once, until apples are soft and juicy and crust is golden brown, 40â50 minutes. Let cool slightly on baking sheet before slicing.
- Beat cream in a medium bowl to medium-soft peaks. Fold in maple syrup and serve alongside galette.
- DO AHEAD: Galette can be baked 2 days ahead. Store tightly wrapped at room temperature. Reheat slightly before serving.
Notes
- FAVORITE
↑ Back to top
Saltine Toffee Cookies
Adapted from http://allrecipes.com/recipe/saltine-toffee-cookies/

Tags: Cookies
Servings: YIELD 1 cookie sheetful
Ingredients
- 4 ounces saltine crackers
- 1 cup butter
- 1 cup dark brown sugar
- 2 cups semisweet chocolate chips
- 3/4 cup chopped pecans
Steps
- Preheat oven to 400 degrees F (205 degrees C).
- Line cookie sheet with saltine crackers in single layer.
- In a saucepan combine the sugar and the butter. Bring to a boil and boil for 3 minutes. Immediately pour over saltines and spread t cover crackers completely.
- Bake at 400 degrees F (205 degrees C) for 5 to 6 minutes. Remove from oven and sprinkle chocolate chips over the top. Let sit for 5 minutes. Spread melted chocolate and top with chopped nuts. Cool completely and break into pieces.
Notes
- FAVORITE
↑ Back to top
Salty Oil-Cured Chilies
Tags: Chillis
Pickles
Ingredients
- 1 pound assorted chilies, stemmed
- 1/2 cup kosher salt
- 1 to 1 1/2 cups oil, such as flavorful olive oil or grapeseed
Steps
- Slice all the chilies crosswise into uniform rounds about 1/8 inch thick.
- Put them in a bowl and toss them with the salt. Don’t pussyfoot around-really season the chilies well. Transfer the salted chilies to a colander or a fine-mesh sieve set over a bowl and let them drain for about an hour or so. The salt will have dissolved at this point, and you should have quite a bit of chili water gathered in the bowl (see Note for ways to use it). Rinse the chilies well under cold running water. Transfer the rinsed slices to a paper-towel-lined tray, pat dry, then transfer them to a heatproof bowl (or sterilized jars if you’re rolling like that).
- Heat the oil in a saucepan over medium-high heat (as a guideline, you want the oil to be about 325°F, so use a deep-frying thermometer if you have one), and carefully pour it over the chilies. You will hear a happy sizzle. Let the chilies come to room temperature.
Notes
- FAVORITE
↑ Back to top
Sambal Oelek
Tags: Chillis
Condiments Southeast Asia
Servings: YIELD Makes about 1 cup
sambal oelek.
Ingredients
- 1 pound serrano chilies
- 1 teaspoon salt
- 2 tablespoons vinegar
Steps
- To slice the chilies: cut the top off and slice in half lengthwise. Remove the center veins and all the seeds. If you like it with more heat, leave some seeds in. Slice the chilies in about 1/2 inch pieces. Grind them in a food processor or grind them in a mortar and pestle until they become a thick paste - you may need to add up to 1-2 tablespoons of water to get it going. Pour the paste into a yet unheated wok or sauce pan set on medium to high heat. As the sambal heats up, add the salt and vinegar. Stir well. Leave on medium for about 10 minutes, stirring regularly.
- Makes about 1 cup sambal oelek.
Notes
- FAVORITE
↑ Back to top
San Francisco-Style Vietnamese American Garlic Noodles
Adapted from https://cooking.nytimes.com/recipes/1023012-san-francisco-style-vietnamese-american-garlic-noodles
Tags: Noodles
Vietnam
Servings: 4
Ingredients
- 4 tablespoons unsalted butter
- 20 medium garlic cloves, minced or smashed in a mortar and pestle
- 4 teaspoons oyster sauce
- 2 teaspoons light soy sauce or shoyu
- 2 teaspoons fish sauce
- 1 pound dry spaghetti
- 1 ounce grated Parmesan or Pecorino Romano (heaping ¼ cup)
- A small handful of thinly sliced scallions (optional)
Steps
- Melt the butter in a wok or saucepan over medium heat. Add the garlic and cook, stirring, until fragrant but not browned, about 2 minutes. Add the oyster sauce, soy sauce and fish sauce, and stir to combine. Remove from the heat.
- Meanwhile, bring 1½ inches of water to a boil in a 12-inch skillet or sauté pan over high heat. (Alternatively, heat up just enough water to cover the spaghetti in a large Dutch oven or saucepan.) Add the pasta, stir a few times to make sure it’s not clumping, and cook, stirring occasionally, until just shy of al dente (about 2 minutes short of the recommended cook time on the package).
- Using tongs, transfer the cooked pasta to the garlic sauce, along with whatever water clings to it. (Reserve the pasta water in the skillet.) Increase the heat to high, add the cheese to the wok, and stir with a wooden spatula or spoon and toss vigorously until the sauce is creamy and emulsified, about 30 seconds. If the sauce looks too watery, let it keep reducing. If it looks greasy, splash some more cooking water into it and let it re-emulsify. Stir in the scallions (if using), and serve immediately.
↑ Back to top
Sandwich Rye Bread
Servings: 1 loaf, 16 servings
Ingredients
- 2 1/2 teaspoons instant yeast or active dry yeast
- 152 to 198g lukewarm water*
- 50g vegetable oil
- 170g dill pickle juice
- 1 1/2 teaspoons salt
- 1 tablespoon sugar
- 1 1/4 teaspoons caraway seeds
- 1 1/4 teaspoons dill seeds
- 1 tablespoon yellow mustard seeds OR 1 tablespoon prepared Dijon mustard
- 46g instant mashed potato flakes or potato flour
- 298g King Arthur Unbleached Bread Flour
- 138g pumpernickel
* Use the lesser amount in summer (or in a humid environment), the
greater amount in winter (or in a dry climate), and somewhere in
between the rest of the year, or if your house is climate controlled.
Steps
- Combine all of the dough ingredients, and mix until clumps form; the dough may seem dry at this point. Let it rest for 20 minutes, for the flour to start to absorb the liquid.
- Knead the dough—by mixer or bread machine set on the dough cycle—to make a stiff, but fairly smooth dough. It'll take about 7 minutes in a stand mixer at second speed, using the dough hook. The dough should clean the sides of the bowl; if it doesn't sprinkle in a bit more all-purpose flour. We don't recommend kneading this dough by hand, as it's hard to develop the gluten sufficiently. If you DO knead by hand, realize that the dough will take longer to rise, and won't rise as high.
- Place the dough in a lightly greased bowl, cover the bowl, and let the dough rise till it's puffy, about 1 to 2 hours. It may or may not have doubled in bulk, but it definitely will have expanded.
- Gently deflate the dough, and shape it into a log. Place the log in a lightly greased 8 1/2" x 4 1/2" loaf pan (for a stiffer dough), or 9" x 5" loaf pan (for a slacker dough). Press it to the edges of the pan, and flatten the top.
- Tent the pan with greased plastic wrap, and allow the loaf to rise till it's crowned about 1" to 1 1/2" over the edge of the pan, about 1 to 1 1/2 hours. Towards the end of the rising time, preheat the oven to 350°F.
- Bake the bread for 20 minutes. Tent it lightly with foil, and bake for an additional 20 minutes. When done the bread will be golden brown, and its internal temperature will register 190°F on an instant-read thermometer.
- Remove the bread from the oven, wait 5 minutes, remove it from the pan, and allow it to cool completely on a rack before slicing. Store for up to a week at cool room temperature.
Notes
- Homemade rye bread can be quite a challenge; if you're a beginning bread baker, please become familiar with the bread-baking process by trying a simpler loaf (like our White Sandwich Bread) before tackling this one.
- Substitute white or medium rye flour for the pumpernickel, if desired.
- This bread has a sensitive liquid-flour ratio. The finished dough should be smooth and easy to handle; it shouldn't be sticky. If it's sticky, understand that the rising times may be shorter; a slacker (stickier) dough usually rises faster than one that's stiffer.
- We've baked this successfully in both an 8 1/2" x 4 1/2" loaf pan, and a 9" x 5" loaf pan. If your dough is at all sticky, we recommend using the larger size pan.
- For a wonderfully close-grained, square-corner sandwich loaf, press the dough into a 9" x 4" pain de mie pan. Bake the loaf as directed, removing the cover and tenting loosely with foil for the final 15 minutes of baking.
- This is a great place to use your "discard" sourdough starter. Substitute up to 8 ounces starter for an equal weight of bread flour/water; e.g., substitute 6 ounces starter for 3 ounces water and 3 ounces bread flour. The starter will give the bread subtle tang.
↑ Back to top
Saucisson of Pork Tenderloin
Tags: Charcuterie
Pork
Steps
- Remove any silver skin from 2 pork tenderloins, each about 1 pound, and cut 2 to 3 inches off the tails, reserving them for another use. Put 1 cup of kosher salt in a plastic storage bag (or use 1/2 cup of Morton Tender Quick Curing Salt,) which has a curing agent that keeps the meat beautifully pink. If this is unavailable, however, substitute a cup of regular kosher salt. Add 2 tablespoons of light brown sugar to the salt in the bag, and mix well. Slide the tenderloins into the bag, close tightly, and shake to coat the meat with the salt mixture. Refrigerate overnight.
- After 12 hours or so, remove the tenderloins from the bag, and wipe them dry with paper towels. Rub the meat with about 1 tablespoon of cognac, and sprinkle on about 1 tablespoon cracked black pepper and 1 tablespoon herbes de Provence, dividing it between the two tenderloins.
- Wrap each piece of meat in a cloth to protect it from insects, tie it with kitchen twine, and hang in an area where there is good air circulation, like a cellar with a window that can be opened, or a porch. This is best done in cooler weather, but if that is not the case, place the tenderloins in your refrigerator on a rack where the air can circulate around them.
- The tenderloins will dry out in five to six weeks. I like them when they are still a little soft, not too dry. Slice very thinly, and enjoy with bread and butter and a cool glass of wine.
Notes
- FAVORITE
↑ Back to top
Savory Lentils
Servings: 4 serving(s)
Ingredients
- 1 medium onion, chopped
- 1 clove garlic (large), minced
- 4 tablespoons butter
- 1 1/2 cups veggie stock
- 1 cup uncooked lentils
- 1 teaspoon salt
- 1/4 teaspoon black pepper
- 1/2 teaspoon dried summer savory
- 1 pint canned tomatoes
- 1 stalk celery with leaves, chopped
- 1 medium carrot, cleaned and diced
Steps
- If you don't have summer savory, substitute with herbes de Provence or thyme.
- Saute onion and garlic in butter until tender.
- Bring veggie stock to a boil in a medium saucepan. Add lentils, salt, pepper, savory, celery, carrot, tomatoes, and sauteed onion and garlic. Simmer over low to medium heat for 45 minutes or until lentils are tender and thick.
↑ Back to top
Scallion Pancake Challah
Adapted from https://www.yahoo.com/food/my-name-is-yehs-scallion-pancake-challah-recipe-103584899926.html

Tags: Breads
Chinese Jewish
I made this. Is starred. Rated 5/5
Ingredients
- Basic Challah Dough (Based on Food 52’s Recipe)
- 1 tablespoon instant yeast
- 3/4 cups warm water
- 2 tablespoons + 1 teaspoon sugar
- 3 cups flour, plus more for dusting
- 1 teaspoon salt
- 2 tablespoons honey
- 1/3 cups vegetable or canola oil
- 2 eggs
- Filling and Topping
- 1 tablespoon toasted sesame oil
- 2 to 3 stalks scallions or green onions, minced
- salt, pepper, and red chili flakes to taste
- Egg wash: 1 egg beaten with 1 tablespoon of water
- A few pinches of toasted sesame seeds and black sesame seeds
Steps
- In a small bowl, proof yeast in 1/2 cup warm water mixed with 1 teaspoon of sugar.While yeast is proofing, mix flour, salt, and remaining 2 tablespoons of sugar in a large bowl.
- In a medium bowl, mix remaining 1 cup of water, honey, oil, and eggs.
- Once yeast has finished proofing, add it to the flour, followed by the wet ingredients. Mix with a large wooden spoon until dough becomes too thick to stir. Empty dough onto well-floured surface and knead by hand. Knead dough until smooth and no longer sticky, adding flour as needed.
- Transfer to an oiled bowl and cover with a damp towel. Let rise for about two hours, or until doubled in size.
- Preheat oven to 375. Divide dough into three equal parts and then roll each part into a 1-foot log. Gently flatten each log so that it is about 3 inches wide. Brush each with toasted sesame oil and then sprinkle with salt, pepper, chili flakes, and scallions. Roll them up length wise like a jellyroll, and then braid.
- Place the loaf on a parchment lined baking sheet and then brush with egg wash and sprinkle with sesame seeds and black pepper. Bake for 20-25 minutes until the top is golden brown and the challah is cooked through
Notes
- FAVORITE
↑ Back to top
Scalloped Potatoes
Adapted from https://www.bettycrocker.com/recipes/scalloped-potatoes/328145a6-db72-4258-b545-0589655fe23d

Servings: 6
Ingredients
- 4 tablespoons butter
- 1 small onion, finely chopped (1/3 cup)
- 3 tablespoons all-purpose flour
- 1 teaspoon salt
- 1/4 teaspoon pepper
- 2 1/2 cups milk
- 6 medium peeled or unpeeled potatoes, thinly sliced (6 cups)
Steps
- Heat oven to 350°F. Grease 2-quart casserole with shortening or cooking spray.
- In 2-quart saucepan, melt 3 tablespoons of the butter over medium heat. Cook onion in butter about 2 minutes, stirring occasionally, until tender. Stir in flour, salt and pepper. Cook, stirring constantly, until smooth and bubbly; remove from heat. Stir in milk. Heat to boiling, stirring constantly. Boil and stir 1 minute.
- Spread potatoes in casserole. Pour sauce over potatoes. Cut remaining 1 tablespoon butter into small pieces; sprinkle over potatoes.
- Cover; bake 30 minutes. Uncover; bake 1 hour to 1 hour 10 minutes longer or until potatoes are tender. Let stand 5 to 10 minutes before serving (sauce thickens as it stands).
↑ Back to top
Scarlett's Sesame Noodles
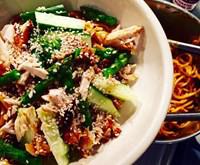
Tags: Chinese
Noodles
Ingredients
- 3 cloves garlic, minced
- 2 teaspoons chile flakes (or 3 or 4 depending on disposition)
- vegetable oil as needed, 2 tablespoons or so
- 1 tablespoon lime juice
- 1 tablespoon brown sugar
- 1/4 cup soy sauce
- 1 tablespoon fish sauce
- 3 ounces peanut butter (a heaping 1/4 cup by volume)
- 1/2 pound pasta, cooked and chilled
- 8 ounces cooked chicken, chopped or shredded
- sesame oil to taste
- 1/2 pound asparagus, cooked and shocked
- 1/2 cucumber seeded and cut in strips
- 3 scallions thinly sliced
- 2 tablespoons sesame seeds
Steps
- In a sauté pan over medium high heat, cook the garlic and chile flakes in the oil until the garlic is tender. Add the lime, sugar, soy, fish sauce, and peanut butter. Stir till it’s all combined and the peanut butter has melted and it’s uniform.
- Combine the pasta and chicken in a bowl and pour the peanut sauce over it, tossing till the pasta is coated. Season to taste with sesame oil and keep combining.
- Serve topped with asparagus, cuke, scallion, and sesame seeds.
Notes
- FAVORITE
↑ Back to top
Scotch Broth
Adapted from https://www.seriouseats.com/scotch-broth-recipe

Servings: 4
Ingredients
- 1 pound lamb shanks (about 2 medium shanks)
- Kosher salt and freshly ground black pepper
- 2 tablespoons vegetable oil
- 2 bay leaves
- 3 medium cloves garlic
- 1 medium onion, finely chopped (about 1 cup)
- 8 cups homemade or store-bought low-sodium chicken broth
- 2 medium carrots, finely diced (about 1 1/2 cups)
- 1 medium parsnip, finely diced (about 3/4 cup)
- 1 medium russet potato, finely diced (about 1 1/4 cups)
- 1/3 cup pearl barley
- 2 tablespoons finely chopped fresh parsley leaves
Steps
- Season lamb shank with salt and pepper. Heat oil in a Dutch oven over high heat until lightly smoking. Add lamb shanks and cook, turning occasionally, until well browned on all sides, about 10 minutes total. Remove shanks and set aside. Add onions and cook, stirring constantly, until lightly softened, about 2 minutes. Add garlic and bay leaves and cook, stirring constantly, until fragrant, about 30 seconds. Add broth and return shanks to pot. Bring to a boil, reduce to a bare simmer, cover, and cook until lamb shanks are tender and meat is pulling away from the bone, about 2 hours. For best results, let broth cool completely overnight in refrigerator, scrape off fat, and return to heat the next day. Otherwise, skim fat with a ladle or large spoon and continue to step 2.
- Remove the shanks from the stock, and once cool enough to handle gently remove the meat from the bones and tear into bite-sized pieces. Reserve. Bring stock back to a simmer and add carrot, parsnip, potato, and pearl barley. Cook until barley is tender, about 25 minutes then return shredded meat to the pot. Season to taste with salt and pepper, stir in parlsey, and serve.
↑ Back to top
Scotcheroos
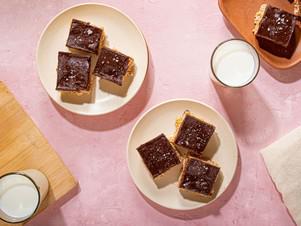
the Chewy, Peanut-Buttery Bar That Rules Midwestern
Potlucks
Servings: 24
Ingredients
- Cooking spray for greasing pan
- 1 1/4 cup light corn syrup ( 11 1/2 ounces; 324 g), such as Karo
- 7 1/2 ounces brown sugar ( 215 g; about 3/4 cup loosely packed)
- 9 ounces ( 255 g; 1 cup) creamy peanut butter (commercial or natural varieties will both work well)
- 2 teaspoons ( 10 ml) vanilla extract
- 1 teaspoon ( 4 g) Diamond Crystal kosher salt; for table salt, use about half as much by volume or the same weight
- 6 cups ( 180 g) rice crisp cereal such as Rice Krispies
- 8 ounces ( 225 g) butterscotch chips
- 8 ounces ( 225 g) bittersweet chocolate, 60% cacao, roughly chopped
- Flaky sea salt, such as Maldon, to finish, optional
Steps
- Lightly grease a 9-by-13-inch baking pan with cooking spray; set aside. In a minimum 3-quart saucepan or Dutch oven, heat corn syrup and sugar over medium heat, whisking occasionally, until mixture is just bubbling around the edges, about 2 minutes.
- Slowly whisk in peanut butter, vanilla, and kosher salt until peanut butter is completely incorporated and mixture is smooth, about 30 more seconds.
- Off heat, fold in rice cereal with a rubber spatula. Transfer mixture to the greased pan and pat gently into place (do not overpack).
- In a heatproof bowl, melt chocolate and butterscotch chips in microwave in 15-30 second intervals, stirring thoroughly between each interval, until glossy and smooth. Pour over cereal and use rubber spatula to spread topping across the bars in a thin, even layer. Sprinkle flaky salt over topping, if desired.
- Let scotcheroos rest at room temperature for at least 2 hours or until topping is firm and set. Cut into roughly 2-inch squares and serve.
- Special Equipment
- 3-qt saucepan or Dutch oven, 9-by-13-inch baking pan, rubber spatula
Notes
- To further enhance the bars' molasses notes, you can substitute up to 1/4 cup of the light corn syrup for dark corn syrup or cane syrup. The flavor profile will be less traditional, but absolutely delicious.
- Make-Ahead and Storage
- Stored in an airtight container, uncut scotcheroos can be kept for up to 7 days at room temperature. To keep bars soft, tightly wrap any cut bars individually in plastic wrap.
↑ Back to top
SCOTTISH BROTH

When I was very young I would always request
Campbell's Scotch
Broth when I was sick. My mother always had some in the house. How-
ever, now that I know what the real thing tastes like, I cannot go back to
the can. This soup is easy to prepare and wonderful on a cold winter
night. If someone will play the bagpipes for you while you cook, so much
the better.
Broth when I was sick. My mother always had some in the house. How-
ever, now that I know what the real thing tastes like, I cannot go back to
the can. This soup is easy to prepare and wonderful on a cold winter
night. If someone will play the bagpipes for you while you cook, so much
the better.
Servings: 6-8
Ingredients
- 1 pound lamb breast, cut 1 cup peeled and diced
- into ½-inch-wide strips turnips
- (Use a cleaver. Do not 2 medium yellow onions,
- remove bones.) peeled and diced
- 1 pound lamb steak, diced
- (Save the bone for the
- pot.) chopped
- ½ cup pearl barley
- 2 medium leeks (white
- parts only), rinsed and
- 2 stalks celery, chopped
- 2 bay leaves 1 cup finely chopped green
- 1 teaspoon dried thyme, cabbage
- whole Salt and freshly ground
- 2 tablespoons chopped black pepper to taste
- parsley ½ cup frozen peas
- 4 tablespoons butter
- 3 carrots, diced
- GARNISH
- 2 tablespoons chopped
- parsley
Steps
- Place the lamb and bones in a 6-quart pot and add 2 quarts of water.
Bring to a boil, reduce the
heat, cover, and simmer for 20 minutes. Skim
off any scum that appears.
In the meantime, boil the
barley in 2 cups of water for 10 minutes,
then drain and set aside.
Add the bay leaves, thyme,
and parsley to the pot.
In a large frying pan melt
the butter and sauté all of the vegetables,
except the peas, until the
onion is tender. Add the vegetables to the pot
and simmer for 45 minutes,
covered. Add the drained barley to the pot
and cook, covered, for
another 15 minutes. Add salt and pepper to taste,
along with the peas. Bring to
a boil and serve. Garnish with parsley
↑ Back to top
Seafood Essence
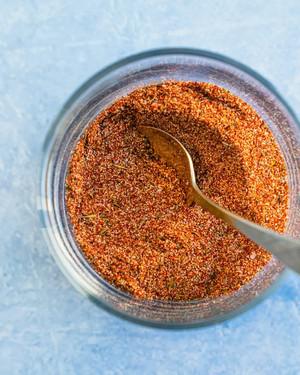
Tags: Rubs and Blends
Spices
Ingredients
- 1 tablespoon celery seed
- 1 tablespoon whole black peppercorns
- 6 bay leaves
- 4 whole cloves
- 1/2 teaspoon ancho chile powder
- 1/2 teaspoon smoked paprika
- 1/2 teaspoon whole cardamom pods
- 1/2 teaspoon mustard seeds
- 1/4 teaspoon mace
Steps
- Process in spice grinder or food processor until they finely-ground.
Notes
- FAVORITE
↑ Back to top
Seaweed Salad
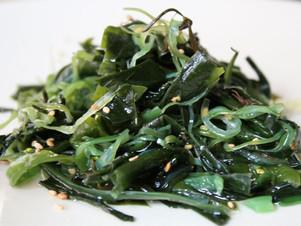
Ingredients
- handful of dried seaweed, enough for 2 cups when rehydrated
- 1 tablespoon rice vinegar
- 2 teaspoons sesame oil
- 1/4 teaspoon salt
- 1/4 teaspoon sugar
- 2 teaspoons toasted sesame seeds
Steps
- To rehydrate seaweed: Place seaweed in large bowl filled with water. Let soak for 10 to 15 minutes, or until seaweed is supple. Working by handfuls, squeeze seaweed of residual water.
- Place seaweed on cutting board and chop into rough ½ inch slices. Dress seaweed in oil, vinegar, salt, and sugar. Adjust seasonings to taste, depending on how tangy you like your seaweed. Sprinkle with sesame seeds and serve cold or at room temperature. Leftover seaweed may be kept in refrigerator for up to four days.
↑ Back to top
Semolina Braid
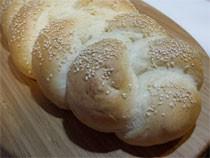
Tags: Breads
Ingredients
- 1 1/4 cups lukewarm water
- 2 1/2 teaspoons yeast
- 2 teaspoons honey crystals (or sugar)
- 1 cup (5 3/4 ounces) semolina flour
- 2 cups (9 ounces) bread flour
- 1 teaspoon salt
- 1 1/2 tablespoons olive oil
- Eggwash (optional)
- Sesame seeds (optional)
Steps
- In the bowl of your stand mixer, combine the water, yeast, honey crystals or sugar, and semolina flour; let it hang out for 15 minutes to let it get bubbly and foamy.
- Add the bread flour and salt and knead with the dough hook until the dough comes together and starts to become stretchy. Add the olive oil and continue kneading until the dough is smooth, satiny and very stretchy.
- Form the dough into a ball put it back into the bowl (or a clean bowl, if you prefer) and drizzle it with olive oil, Cover the bowl with plastic wrap and set it aside to rise until the dough has doubled, about an hour.
- Sprinkle a baking sheet with cornmeal (for this one, I place the dough on the diagonal on the sheet) and preheat the oven to 325 degrees.
- On a lightly floured surface knead the dough briefly, then divide into three roughly equal pieces.
- Form each piece into a rope about 15 inches long, then braid those pieces, tucking the ends underneath and pinching to secure them. Try not to stretch too much as you braid, or it won't fit on a baking sheet and won't have room to grow when it rises and bakes.
- Place the braid on your prepared baking sheet and adjust it - you can stretch it longer or squish it a bit to make it shorter if you've stretched too much.
- Cover the dough with plastic wrap and let rise until doubled in size, about 40 minutes.
- Bake at 325 degrees for 45 minutes, or until the bread is a nice golden brown.
- Let the bread cool completely on a rack before cutting.
↑ Back to top
Semolina Pizza Dough

Tags: Breads
Pizza
Ingredients
- 1/4 cup warm water [110°F (43°C)]
- 1 teaspoon granulated sugar
- 1 package (2 1/4 teaspoons) active dry yeast
- 1 cup room-temperature water, plus more as needed
- 1 tablespoon mild olive or vegetable oil, plus more for the bowl
- 2 cups plus 2 tablespoons fine semolina flour
- 1 cup plus 7 tablespoons all-purpose flour, plus more for the work surface
- 1 tablespoon salt
Steps
- In a measuring cup or small bowl, stir together the warm water and the sugar. Sprinkle with the yeast and let stand until it starts to foam, about 5 minutes.
- Add the room-temperature water and the olive oil to the foaming yeast concoction. Let it rest for a moment.
- In a food processor, combine the semolina and all-purpose flours and the salt. With the motor running, add the yeast mixture in a steady stream and then pulse until the dough comes together in a rough mass, about 12 seconds. (If the dough doesn’t form a ball, sprinkle it with 1 to 2 teaspoons of cold water and pulse again until a rough mass forms.) Let the dough rest in the processor bowl for 5 to 10 minutes.
- Process the dough again for 25 to 30 seconds, steadying the top of the food processor with one hand. The dough should be tacky to the touch but not sticky.
- Transfer the dough to a lightly floured work surface and form it into a smooth ball. Place the dough in a large oiled bowl, turn the dough to coat with oil, and cover the bowl with plastic wrap. Let the dough rise in a warm place until doubled in size and spongy, about 1 1/2 hours.
- Turn the dough out onto a lightly floured work surface, gently punch it down, and shape it into a smooth cylinder. Divide the dough into 2 equal portions. Shape each portion into a smooth ball, dusting with flour only if the dough becomes sticky.
↑ Back to top
Senegalese Black-Eyed Pea and Sweet Potato Soup (Ndambe)
Adapted from https://www.food.com/recipe/senegalese-black-eyed-pea-and-sweet-potato-soup-ndambe-538623
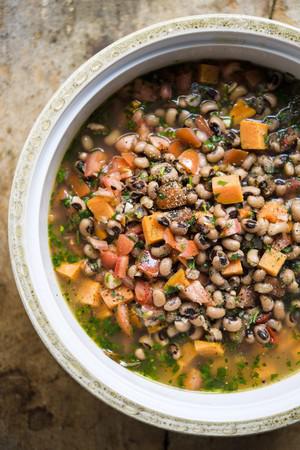
Tags: Potato
Stew Vegetables
West African
Sweet potatoes and black-eyed peas are staples
of West African cooking and in this recipe for Senegalese ndambe
(pronounced NAM-bay), they simmer together for a hearty vegetable stew.
Chilies add heat and unrefined coconut oil brings sweetness in a dish
that comes together quickly thanks to the convenience of canned
black-eyed peas. Chopped tomatoes and a squeeze of lemon juice go in
off heat for a light, fresh finish.
Is starred.
Servings: 4
Ingredients
- 2 tablespoons coconut oil
- 1 large yellow onion , finely chopped
- kosher salt & fresh ground pepper, to taste
- 8 medium garlic cloves , minced
- 2 fresno chilies , stemmed and sliced into thin rings (can substitute jalapenos)
- 3 (14 ounce) cans black-eyed peas , drained and rinsed
- 2 bay leaves
- 1 lb sweet potato , in 1/2-inch cubes
- 1 lb plum tomato , cored and chopped
- 1 cup flat leaf parsley , chopped
- 2 tablespoons lemon juice , plus lemon wedges, to serve
Steps
- In a large Dutch oven over medium, heat the coconut oil until shimmering. Add the onion, 2 teaspoons salt and ½ teaspoon pepper, then cook, stirring, until light golden brown and softened, 7 to 10 minutes.
- Stir in the garlic and chilies, then cook until fragrant, about 30 seconds.
- Add the black-eyed peas, bay leaves and 5 cups water. Bring to a simmer over medium-high, then reduce to medium and cook, uncovered, stirring occasionally, until the flavors meld, about 15 minutes.
- Stir in the sweet potatoes and 2 teaspoons salt. Cover, reduce to medium-low and cook until the potatoes are tender, 10 to 15 minutes.
- Off heat, add tomatoes, parsley and lemon juice, salt and pepper to taste, and serve.
Notes
- Tip: Don't use neutral-flavored oil in place of the coconut oil. Coconut oil—particularly unrefined—infuses the stew with a sweet aroma while adding richness.
↑ Back to top
Sephardic Charoset Truffles
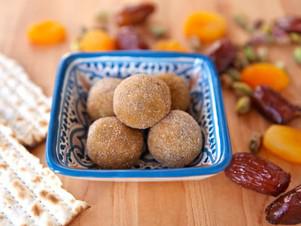
Tags: Candy
Jewish Passover
Servings: Adjust Total Servings
25 servings
Ingredients
- 1 1/2 cups pitted dates
- 1 1/2 cups dried apricots
- 1/2 cup golden raisins
- 3/4 cup shelled pistachios
- 2 tbsp honey
- 1/4 cup sugar
- 1 tsp cinnamon
- Notes
- You will also need: Food processor
Steps
- Place dates, apricots, raisins, pistachios and honey and place in a food processor.
- Pulse for about 2 minutes until the mixture is smooth but still has texture. You may need to break up the sticky mixture a few times if it collects in a ball in the processor.
- In a bowl, mix together the sugar and the cinnamon. Form date mixture into balls that are about ¾ inch in diameter. The balls will be sticky and soft. It will be easier to shape them if you wet your hands slightly.
- Dry your hands. Dip the balls in the cinnamon sugar and coat thoroughly, and re-roll between your palms to smooth out any rough edges. Serve at room temperature.
↑ Back to top
Sesame Noodles with Chili Oil and Scallions
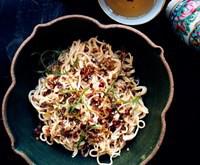
Tags: Chinese
Noodles
Servings: 4
Ingredients
- 4 scallions, whites and greens separated, thinly sliced
- 1/2 cup vegetable oil
- 1 tablespoon crushed red pepper flakes
- 1/2 cup vegetable oil
- 2 teaspoons sesame seeds
- 2 teaspoons Sichuan pepper, coarsely chopped
- 12 ounces thin ramen noodles or spaghettini
- Kosher salt
- 1/4 cup tahini (sesame seed paste)
- 1/4 cup unseasoned rice vinegar
- 4 baby white turnips, trimmed, thinly sliced into rounds
- 3 tablespoons reduced-sodium soy sauce
- 2 teaspoons toasted sesame oil
- 1 teaspoon sugar
Steps
- Cook scallion whites, vegetable oil, red pepper flakes, sesame seeds, and pepper in a small saucepan over low heat, stirring occasionally, until oil is sizzling and scallions are golden brown, 12–15 minutes; let chili oil cool in saucepan.
- Meanwhile, cook noodles in a large pot of salted boiling water until al dente; drain. Rinse under cold water and drain well.
- Whisk tahini, vinegar, soy sauce, sesame oil, sugar, and 2–3 tablespoons chili oil (depending on desired heat) in a large bowl; season with salt. Add noodles and toss to coat. Top with scallion greens and drizzle with more chili oil.
Notes
- FAVORITE
↑ Back to top
Sesame-Brown Butter Udon Noodles
Tags: Japanese
Noodles
Servings: 4
Ingredients
- Salt
- 14 to 16 ounces udon, preferably thick fresh, frozen or shelf-stable noodles
- 1 pound baby spinach or coarsely chopped or torn mature spinach
- 6 tablespoons unsalted butter
- 1 teaspoon coarsely ground black pepper, plus more for serving
- 1 tablespoon low-sodium soy sauce, plus more as needed
- Pinch of granulated sugar
- 2 tablespoons toasted sesame seeds, plus more for serving
Steps
- Bring a large pot of salted water to a boil. Add the noodles and cook according to package directions until just tender. Reserve 1 cup cooking water, then add the spinach and press to submerge. (It will continue cooking later.) Drain the noodles and spinach, shaking to get rid of any excess water.
- Set the pot over medium heat. Add 5 tablespoons butter and cook, stirring occasionally, until the foam subsides, the milk solids turn golden-brown and it smells nutty and toasty, 3 to 4 minutes. Add the black pepper and stir until fragrant. Add ¼ cup pasta water, plus the noodles and spinach, soy sauce and sugar, and toss until the sauce is thickened and silky. Add pasta water, 1 tablespoon at a time, until the sauce clings to the noodles.
- Remove from heat, add the sesame seeds and stir in the remaining 1 tablespoon butter until melted. Season to taste with more soy sauce and black pepper (if mild) and sugar (if too salty). Serve with more sesame seeds on top.
↑ Back to top
Sesame-Orange Shrimp and Chicken Stir-Fry

Tags: Chicken
Chinese Seafood
Ingredients
- 1 cup water
- 1/3 cup low-sodium soy sauce
- 1/4 cup cornstarch
- 1/4 cup orange juice
- 1 tablespoon sugar
- 1/2 teaspoon ground ginger
- 1/2 teaspoon dark sesame oil
- 1/4 teaspoon kosher salt
- 1/4 teaspoon ground red pepper
- 1/4 teaspoon freshly ground black pepper
- 1 (14-ounce) can fat-free, less-sodium chicken broth
- 2 tablespoons olive oil, divided
- 12 ounces skinless, boneless chicken breast, cut into 1-inch pieces
- 2 cups coarsely chopped broccoli florets
- 1 cup chopped carrot
- 1 cup mushrooms, halved
- 1 cup snow peas, trimmed
- 1/2 cup chopped onion
- 2 garlic cloves, chopped
- 1 1/2 pounds medium shrimp, cooked and peeled
- 3 cups hot cooked long-grain rice
Stir-fry:
Steps
- To prepare sauce, combine the first 11 ingredients in a large bowl, stirring with a whisk. Set aside.
- To prepare stir-fry, heat 1 tablespoon olive oil in a large nonstick skillet over medium-high heat. Add chicken to pan, and stir-fry for 4 minutes or until done. Remove chicken from pan, and keep warm. Add the remaining 1 tablespoon olive oil to pan. Add chopped broccoli and the next 5 ingredients (through garlic) to the pan; stir-fry for 4 minutes or until the vegetables are crisp-tender. Return chicken to pan, and stir in shrimp. Add sauce, and bring to a boil. Reduce heat, and simmer for 5 minutes or until the sauce thickens. Serve over rice.
Notes
- FAVORITE
↑ Back to top
Shakshouka
Adapted from http://www.pbs.org/food/fresh-tastes/shakshouka/

Tags: Eggs
Middle-East North
Africa
Servings: 3-4
Ingredients
- 2 tablespoons olive oil
- 1 teaspoon cumin seeds
- 2 cloves garlic, finely minced
- 1 small red chili pepper, finely minced (optional, to taste)
- 1 medium onion, minced
- 1 red bell pepper, minced
- 1 yellow bell pepper, minced
- 1 kilogram ripe tomatoes, peeled and roughly chopped (35 ounces)
- 1 bay leaf
- 1 teaspoon salt
- parsley, minced for garnish
Steps
- Heat a medium saucepan over a medium flame until hot. Add the oil and cumin seeds. Toast until fragrant (about 30 seconds).
- Add the garlic, chili pepper, onion, and bell peppers, and then fry until they’re tender and starting to caramelize (about 10-15 minutes).
- Add the tomatoes, bay leaf, and salt, and then simmer uncovered until the mixture is thick and chunky (about 15-20 minutes).
- Taste the sauce and adjust the seasonings to your tastes. At this point, you can divide the mixture and save some for later. You should have enough tomato sauce to poach about 6 eggs, so if you only want to make 2 eggs, set 2/3 of the mixture aside.
- Break the eggs into the pot, and then turn down the heat to medium low, covering the pan with a lid. Cook the eggs until they reach your desired level of doneness.
- Serve the Shakshouka with your favorite bread.
Notes
- FAVORITE
↑ Back to top
Shakshuka
Adapted from https://toriavey.com/toris-kitchen/shakshuka/

Tags: Breakfast
Eggs North Africa
Servings: 6 Prep Time
Ingredients
- 1 tbsp extra virgin olive oil
- 1/2 medium onion, peeled and diced
- 1 clove garlic minced
- 1 medium green or red bell pepper, chopped
- 4 cups ripe diced tomatoes, or 2 cans diced tomatoes (14 oz. each)
- 2 tbsp tomato paste
- 1 tsp chili powder, mild
- 1 tsp cumin
- 1 tsp paprika
- 1 pinch cayenne pepper (or more to taste-- spicy!)
- 1 pinch sugar (optional, to taste)
- Salt and pepper to taste
- 6 eggs
- 1/2 tbsp fresh chopped parsley (optional, for garnish)
Steps
- Heat a deep, large skillet or sauté pan on medium. Slowly warm olive oil in the pan. Add chopped onion, sauté for a few minutes until the onion begins to soften. Add garlic and continue to sauté until mixture is fragrant.
- Add the bell pepper, sauté for 5-7 minutes over medium until softened.
- Add tomatoes and tomato paste to pan, stir until blended. Add spices and sugar, stir well, and allow mixture to simmer over medium heat for 5-7 minutes until it starts to reduce. At this point, you can taste the mixture and spice it according to your preference. Add salt and pepper to taste, more sugar for a sweeter sauce, or more cayenne pepper for a spicier shakshuka (be careful with the cayenne... it is extremely spicy!).
- Crack the eggs, one at a time, directly over the tomato mixture, making sure to space them evenly over the sauce. I usually place 4-5 eggs around the outer edge and 1 in the center. The eggs will cook "over easy" on top of the tomato sauce. Cook to desired doneness.
- Many people prefer their shakshuka eggs slightly runny. If this is your preference, let the sauce reduce for a few minutes before cracking the eggs on top-- then, cover the pan and cook the eggs to taste.
- Garnish with the chopped parsley, if desired. Shakshuka can be eaten for breakfast, lunch, or dinner. For breakfast, serve with warm crusty bread or pita that can be dipped into the sauce (if you’re gluten-intolerant, skip the bread). For dinner, serve with a green side salad for a light, easy meal.
↑ Back to top
Shakshuka (North African–Style Poached Eggs in Spicy
Tomato Sauce)

Servings: 4 to 6
Ingredients
- 3 tablespoons (45ml) extra-virgin olive oil, plus more for drizzling
- 1 medium onion, thinly sliced
- 1 large red pepper (bell pepper for milder heat, or a hotter variety, such as red horned pepper, depending on your heat preference), stems, seeds, and ribs removed, thinly sliced
- 1 fresh small hot chile (such as jalapeño, serrano, or Fresno), stems, seeds, and ribs removed, thinly sliced
- 2 to 3 cloves garlic, thinly sliced
- 1 1/2 tablespoons (15g) sweet Hungarian or smoked Spanish paprika
- 2 teaspoons (8g) whole or ground cumin seeds
- 1 (28-ounce; 800 g) can whole peeled tomatoes, crushed by squeezing between your fingers or with a pastry blender (see note)
- Kosher salt and freshly ground black pepper
- Large handful minced cilantro, parsley, or a mix
- 6 eggs
- Sliced oil-cured black olives, feta cheese, and/or artichoke hearts, for serving (all optional)
- Crusty bread, for serving
Steps
- Heat olive oil in a large, deep skillet or straight-sided sauté pan over high heat until shimmering. Add onion, red pepper, and chile and spread into an even layer. Cook, without moving, until vegetables on the bottom are deeply browned and beginning to char in spots, about 6 minutes. Stir and repeat. Continue to cook until vegetables are fully softened and spottily charred, about another 4 minutes. Add garlic and cook, stirring, until softened and fragrant, about 30 seconds. Add paprika and cumin and cook, stirring, until fragrant, about 30 seconds. Immediately add tomatoes and stir to combine (see notes). Reduce heat to a bare simmer and simmer for 10 minutes, then season to taste with salt and pepper and stir in half of cilantro or parsley.
- Using a large spoon, make a well near the perimeter of the pan and break an egg directly into it. Spoon a little sauce over edges of egg white to partially submerge and contain it, leaving yolk exposed. Repeat with remaining 5 eggs, working around pan as you go. Season eggs with a little salt, cover, reduce heat to lowest setting, and cook until egg whites are barely set and yolks are still runny, 5 to 8 minutes.
- Sprinkle with remaining cilantro or parsley, along with any of the optional toppings. Serve immediately with crusty bread.
- Special Equipment
- Deep 10-inch skillet with matching lid, or 3-quart straight-sided lidded sauté pan
Notes
- To crush the tomatoes, transfer to a large bowl and squeeze through your fingers to create a chunky purée. Alternatively, leave whole, add to the pan, and use a pastry blender to cut the tomatoes directly in the pan.
↑ Back to top
Shanghai Soup Dumplings

Tags: Appetizers and Dim
Sum Chinese
Dumplings
Ingredients
- 3 " piece ginger, peeled
- 2 scallions, trimmed
- 4 oz. pork skin, rinsed and finely diced
- 8 large napa cabbage leaves, trimmed
- 4 tbsp. chinkiang (Chinese black vinegar)
- 5 oz. pork belly, cubed
- 1 tsp. sugar
- 1 tsp. fermented soybean paste
- 1 tsp. dark soy sauce
- 1 tsp. Asian sesame oil
- 1 tsp. salt
- 1/8 tsp. freshly ground white pepper
- 1/2 cup flour
Steps
- Click here to find out more!
- Jan 2, 2008
- Click here to find out more!
- Rate & Review
- Shanghai Soup Dumplings
- Pork
- Vegetables
- Steam
- Soups & Stews
- Chinese
- Hard
- Email Print Save Recipe
- Shanghai Soup Dumplings Credit: Steve Giralt
- (Xiao Long Bao)
- MAKES 16
- There's an art to eating these dumplings. Resist the temptation to pop one whole into your mouth; you'll almost certainly burn your lip. Instead, set a dumpling on a deep-bowled soup spoon, nibble a small hole near the top of the wrapper, and carefully slurp out the hot soup. Then finish off the dumpling, dunking it into the dipping sauce, if you like. Look for pork skin at Asian meat markets or at butcher counters.
- 3" piece ginger, peeled
- 2 scallions, trimmed
- 4 oz. pork skin, rinsed and finely diced
- 8 large napa cabbage leaves, trimmed
- 4 tbsp. chinkiang (Chinese black vinegar)
- 5 oz. pork belly, cubed
- 1 tsp. sugar
- 1 tsp. fermented soybean paste
- 1 tsp. dark soy sauce
- 1 tsp. Asian sesame oil
- 1 tsp. salt
- 1/8 tsp. freshly ground white pepper
- 1/2 cup flour
- Thinly slice one-third of the ginger crosswise and put into a small pot. Cut 1 of the scallions in half crosswise and add to pot. Add pork skin and 1 1/2 cups cold water. Bring to a simmer over medium-low heat and continue to simmer until most of the gelatin from the pork skin has leached out and broth has reduced to 1/2 cup, about 1 hour. Strain broth through a sieve into a shallow bowl, discarding solids, and refrigerate until firmly jelled, 1–1 1/2 hours.
- Blanch cabbage leaves in a wide medium pot of boiling water over high heat until pliable, about 15 seconds, then dip leaves into a bowl of ice water to prevent them from cooking further. Drain leaves and pat dry with paper towels. Line bottoms of 2 medium (about 9" in diameter) bamboo steamer baskets with 3 of the cabbage leaves each and set aside.
- Slice half of the remaining ginger lengthwise into very thin matchsticks and divide between 2 small dipping bowls. Add 2 tbsp. of the vinegar to each bowl and set sauce aside.
- Chop the remaining scallion and put into a medium bowl. Thinly slice the remaining ginger crosswise and add to bowl with scallions. Add pork belly and mix well. Pass pork mixture through a meat grinder fitted with the fine-hole disk into a medium bowl. Add sugar, bean paste, soy sauce, sesame oil, and salt and pepper and mix well. Finely dice pork jelly from step 1 and, using chopsticks or a fork, gently but thoroughly stir into ground pork mixture. Cover and set filling aside in the refrigerator to let rest.
- Put flour into a medium bowl, add 5 tbsp. warm water (115°–120°), and stir with chopsticks or a fork until a dough begins to form. Press dough together into a rough ball, transfer to a lightly floured surface, and knead until smooth, 8–10 minutes. Shape dough into a ball, cover with plastic wrap, and set aside to let rest for 30 minutes. Roll dough into a 6"-long rope on a lightly floured surface with your hands, cut into 16 equal pieces, roll into balls, and cover with plastic wrap to keep from drying out.
- To form the dumplings (See Photo Gallery for step-by-step guide to making dumplings), lightly dust 1 of the dough balls with flour, then flatten it with your fingertips into a disk. Set disk on a lightly floured surface. Roll out edge of disk closest to you (avoiding center 1" of disk) with a small dowel with one hand while holding opposite edge of disk with the other hand, rotating disk as you roll out edge, until disk is about 3" in diameter; the outer edge of dough will be thin all around, and the center portion will be slightly thicker. Put 1 tbsp. of the filling on the thick center of dough. Pleat dough at 1/4" intervals to encase filling. Hold dumpling in one hand, put tip of index finger of your other hand in center of pleated dough, then gently twist pleats shut, removing index finger as you twist, to completely encase filling. Repeat rolling, filling, pleating, and twisting with remaining dough to make 16 filled dumplings in all. Put 8 dumplings into each steamer basket, adding them as they are formed; cover dumplings with remaining cabbage leaves to keep them from drying out as you work.
- Remove and discard cabbage leaves from tops of dumplings (not the leaves lining the baskets), stack baskets, and put lid on top basket. Steam dumplings over a wok of boiling water over high heat until pork is cooked through and jelly has melted into soup, 8–10 minutes.
- Take steamer baskets to the table and serve dumplings immediately, with dipping sauce on the side.
Related Topics:
Notes
- FAVORITE
↑ Back to top
Shaved Zucchini and Herb Salad with Parmesan
Tags: Cheese
Salad Vegetables
Ingredients
- 1 TEASPOON GRATED LEMON ZEST, PLUS 3 TABLESPOONS JUICE (1 LEMON)
- 3 TABLESPOONS EXTRA-VIRGIN OLIVE OIL
- ¼ TEASPOON HONEY
- ½ TEASPOON KOSHER SALT
- ¼ TEASPOON GROUND BLACK PEPPER
- 1 POUND ZUCCHINI (2 MEDIUM ZUCCHINI)
- 1 OUNCE PARMESAN CHEESE, FINELY GRATED (ABOUT 1 CUP), PLUS SHAVED TO SERVE
- ½ CUP LIGHTLY PACKED MINT LEAVES, TORN
- ½ CUP LIGHTLY PACKED BASIL LEAVES, TORN
- ¼ CUP HAZELNUTS, TOASTED, SKINNED AND COARSELY CHOPPED
Steps
- In a large bowl, whisk together the lemon zest and juice, oil, honey, salt and pepper. Set aside. Holding each zucchini by the stem, use a Y-style peeler to shave the zucchini from top to bottom into ribbons; rotate the zucchini as you go, and stop shaving when you reach the seedy core. Discard the cores.
- Whisk the dressing to recombine, then add the shaved zucchini, grated cheese, mint and basil and toss. Gently toss until evenly coated. Transfer to a serving plate and sprinkle with shaved Parmesan and hazelnuts.
SEE DEMO:
Notes
- Tip: Don’t dress the salad until you are ready to serve. The zucchini and herbs are delicate and quickly wilt.
↑ Back to top
Sheet Pan Tomato Sauce
Ingredients
- 2 pounds plum tomatoes ( 8 to 10 medium tomatoes), cored and halved
- 1 small yellow onion, sliced 1/4-in. thick (about 1 1/4 cups)
- 2 medium carrots, peeled and sliced 1/4-in. thick (about 2/3 cup)
- 8 garlic cloves
- 1 teaspoon fine sea salt, plus more to taste
- 1/4 teaspoon black pepper, plus more to taste
- 7 tablespoons extra-virgin olive oil, divided
- 3 anchovy fillets (optional), finely chopped (about 1 teaspoon)
- 4 teaspoons chopped fresh basil
- 1/4 teaspoon granulated sugar
Steps
- Preheat oven to 425°F. Toss together tomatoes, onion, carrots, garlic, salt, pepper, and 3 tablespoons oil on a large rimmed baking sheet; spread in an even layer.
- Roast in preheated oven until tomatoes are broken down, garlic is very soft, and carrots are fork-tender, about 35 minutes.
- Process tomato mixture, anchovies (if using), basil, sugar, and remaining 4 tablespoons oil in a blender until smooth, about 30 seconds, stopping to scrape down sides of container. Season to taste with additional salt and pepper (see Note). Use immediately.
Notes
- Note: If you plan to use this sauce with pasta cooking water, wait until your desired consistency is reached with the added pasta cooking water before adjusting seasoning to taste.
↑ Back to top
Sheet-Pan Döner Kebab
Servings: 4 to 6
Ingredients
- 2 medium onions, cut into large dice
- ¼ cup olive oil
- 2 pounds ground lamb or 85- to 90-percent ground beef
- Heaping ½ cup plain full-fat Greek yogurt, plus ½ cup for the sauce
- 1½ tablespoons smoked paprika
- 1½ tablespoons dried oregano
- 1½ tablespoons ground cumin
- 1½ tablespoons garlic powder
- 1 tablespoon crushed red pepper (preferably Aleppo pepper), or less to taste
- 1 tablespoon kosher salt (such as Diamond Crystal)
- 1 tablespoon black pepper
- Lemon wedges, for squeezing
- Pita bread, sliced tomato, lettuce and thinly sliced onions, for serving
Steps
- Heat the oven to 400 degrees.
- In a food processor, blend onions with olive oil until a paste forms. Transfer to a large bowl.
- To the bowl, add lamb, yogurt, spices, salt and pepper. Using clean hands, mix everything until the mixture is evenly brown with no visible pockets of spices or onions.
- Place a 12-by-16-inch sheet of parchment paper on a clean counter or cutting board. Top the sheet with a heaping handful of the mixture and lay another sheet of parchment on top. Using a rolling pin, roll the mixture between the two sheets so it’s about ¼-inch thick.
- Working from the longest side, begin rolling parchment onto itself like a cinnamon roll. If some of the mixture spills out the ends, it’s OK — just tuck it back in as best as you can. Place the roll onto a rimmed sheet pan.
- Repeat the previous two steps with the remaining lamb mixture, laying the rolled parchments next to one another on the sheet pan. (You should have about four rolls.)
- Bake until the parchment rolls have released their fat onto the sheet pan, about 20 minutes, and remove from oven. Pour any drippings into a small bowl. Return pan to oven and bake for 15 minutes more, until the parchment begins turning a dark brown. Let cool on the pan.
- Once the rolls are cool enough to handle, carefully unroll them: Hold one side of the parchment and lift slightly so the cooked lamb mixture falls out naturally onto the sheet pan. Repeat with all the rolls. They should naturally break into pieces, but if they don’t, you can use kitchen shears to create strips, about 3 inches long for easier pita building. Squeeze a little lemon juice over the cooked meat.
- To serve, add the remaining ½ cup yogurt to the reserved drippings and stir. Taste and adjust with more salt and pepper if desired.
- Serve cooked lamb immediately with pita, tomato, lettuce, onions and yogurt sauce. Leftovers can be wrapped and kept refrigerated for a few days.
↑ Back to top
Shokupan (Japanese Milk Bread)
Servings: 1 9- by 4-inch loaf
Ingredients
- 70 g sweet rice flour (about 2 1/2 ounces; 6 tablespoons plus 1 teaspoon), see notes
- 38 g (3 tablespoons) granulated sugar
- 209 g (3/4 cup plus 2 tablespoons) whole milk, brought to a boil
- 42 g (3 tablespoons) cold unsalted butter, cut into 1/2-inch cubes
- 45 g (3 tablespoons) cold whole milk
- 1 large egg yolk
- 280 g bread flour or high-protein flour (about 9 3/4 ounces; 2 cups plus 2 tablespoons)
- 6 g (2 teaspoons) Diamond Crystal kosher salt
- 3/4 teaspoon instant yeast (see notes)
- 14 g (1 tablespoon) unsalted butter
For the Scald:
For the Dough:
Steps
- For the Scald: In a medium bowl, whisk glutinous rice flour and sugar to combine. Add boiling milk and rapidly whisk until mixture thickens to pudding-like consistency and registers between 155 to 170˚F (68 to 77˚C). (See notes.)
- Scatter butter over the scalded rice flour mixture, cover bowl with plastic wrap, and let sit until butter has melted and mixture has cooled to at least 80˚F (27˚C), about 1 hour.
- For the Dough: Add milk and egg yolk to the scald mixture. Whisk until well-combined and at or below 75˚F (24˚C); if not at temperature, cover and let sit until it reaches 75ºF.
- In the bowl of a stand mixer fitted with the dough hook attachment, combine flour, salt, and yeast, and mix on low speed until well combined, about 15 seconds. Turn off mixer, then add scalded rice flour mixture all at once and mix on low speed until dough is uniform, about 2 minutes, using a flexible spatula to scrape down sides of bowl and dough hook as needed.
- Increase speed to medium and mix until dough just starts to come away from sides of bowl, about 8 minutes. (The dough will remain sticky and webby. Do not overmix here; the dough should not be bouncy.)
- Using nonstick baking spray, grease a large bowl; the bowl should be big enough for dough to double in size. Transfer dough to the greased bowl, and cover bowl tightly with plastic wrap. Let sit at warm room temperature (75-80˚F; 24-27˚C) until the dough is puffy and expanded by about 1 1/2 times its original volume, 60 to 90 minutes.
- Using lightly moistened hands, deflate the dough until it is restored to its original volume. Cover tightly and refrigerate until dough is at least 55˚F (13˚C), at least 2 hours and up to 24 hours.
- To Bake a Yama ("Mountain") Style Loaf (see notes below for how to adapt this recipe to produce a perfectly square kaku-style loaf): Using nonstick baking spray, grease a 9- by 4- by 4-inch loaf pan. Lightly flour top of dough and transfer to a lightly-floured work surface. Using a knife or dough scraper, divide dough into 3 equal pieces, about 225g each. Gently shape each into a round. Cover loosely with plastic wrap and let sit for 30 minutes.
- Working with one ball of dough at a time (seam-side up), lightly flour exterior of dough and, using a rolling pin, flatten and roll each ball into a 5- by 8-inch oval. Fold the long ends into the center to form a 4-inch wide strip. Roll strip into 9- by 4-inch rectangle, flouring dough on both sides as needed to prevent sticking. Starting at the short end, roll dough into a 4-inch-wide log, stretching it gently as you go and keeping the spiraled edges even. Pinch the seam closed, set aside. Repeat with remaining dough balls and place each shaped cylinder of dough into greased loaf pan, side-by-side, seam-side down, and evenly spaced apart. (The spiraled ends should be facing the long side of pan.)
- Loosely cover with plastic wrap and let sit at warm room temperature (75 to 80˚F; 24 to 27˚C) until top of loaf is 1/2 inch below lip of pan, 1 to 2 hours.
- Halfway through proofing time, adjust oven rack to middle position and preheat oven to 300ºF (150ºC).
- When loaf is ready to bake, transfer loaf to oven. Bake until loaf is well-browned and has an internal temperature of at least 195ºF (88ºC), 50 to 60 minutes.
- Transfer the pan to a cooling rack and brush the exposed surface of loaf with butter. (See notes.) Let cool for 5 minutes, then remove loaf from pan and cool on wire rack, to room temperature, at least 1 hour.
- Special Equipment
- Whisk, instant-read thermometer, stand mixer, rolling pin, nonstick baking spray, 9- by 4- by 4-inch rectangular bread pan, bread knife, pastry brush, wire rack
Notes
- This recipe was developed using weight and not volume and will work best if you have a scale.
- Unlike active dry yeast, instant yeast does not have to be bloomed in warm liquid.
- Glutinous or sweet rice flour is available in supermarkets, Asian markets, or online. It can also be made by grinding sweet or Thai white sticky rice to a fine powder in a tabletop mill, high-powered blender, or spice mill. Do not use white rice flour.
- If in step 1 the scald mixture is below 160˚F (70˚C), transfer to microwave-safe bowl, cover, and microwave in 30-second intervals, whisking after each, until it thickens and reaches 160˚F. If you do not have a microwave and need to continue cooking the scald after doing the pour-over, transfer the mixture to a small nonstick skillet and heat it over medium-low heat, whisking constantly, until it thickens and reaches 160˚F (71ºC). Take care not to overcook it. Immediately transfer the paste to a bowl and proceed with step 2.
- The overnight cold proof is optional, but adds flavor and convenience. Either way, chilling the dough before shaping makes the otherwise sticky dough easier to handle and is essential.
- This recipe is written to work with a perfectly rectangular 9- by 4- by 4-inch loaf pan. If you have a smaller flared bread pan instead of a pullman, or are baking in a covered 9- by 4- by 4-inch pullman pan, reduce the dough ball size to 200g and use the remaining dough to make a single bun as a baker’s treat. Proof bun on a small, lightly-greased pan that will fit next to loaf pan on your oven rack. To bake bun, transfer to oven and bake until golden brown, 17 to 20 minutes.
- If baking loaf in a flared bread pan, proof until top of loaf is 1/2 inch above lip of pan. When loaf is ready to bake, cover with the pan lid, and transfer loaf to oven and bake. Carefully remove lid after 30 minutes and continue to bake until loaf is well-browned and has an internal temperature of at least 195ºF (88ºC), another 20 to 30 minutes.
- The melted butter is only used when baking the loaf without a lid (or on a bun), and gets brushed on the exposed top of the loaf after baking.
- Make-Ahead and Storage
- The dough can be refrigerated for up to 24 hours before shaping. To freeze the loaf, wrap it tightly in foil then place in a zip-top bag. The bread can be frozen for up to 3 months.
↑ Back to top
Shokupan (Japanese Milk Bread)

Tags: Breads
Japanese
Servings: 1 9- by 4-inch loaf
Ingredients
- 70 g sweet rice flour (about 2 1/2 ounces; 6 tablespoons plus 1 teaspoon), see notes
- 38 g (3 tablespoons) granulated sugar
- 209 g (3/4 cup plus 2 tablespoons) whole milk, brought to a boil
- 42 g (3 tablespoons) cold unsalted butter, cut into 1/2-inch cubes
- 45 g (3 tablespoons) cold whole milk
- 1 large egg yolk
- 280 g bread flour or high-protein flour (about 9 3/4 ounces; 2 cups plus 2 tablespoons)
- 6 g (2 teaspoons) Diamond Crystal kosher salt
- 3/4 teaspoon instant yeast (see notes)
- 14 g (1 tablespoon) unsalted butter
For the Scald:
For the Dough:
Steps
- For the Scald: In a medium bowl, whisk glutinous rice flour and sugar to combine. Add boiling milk and rapidly whisk until mixture thickens to pudding-like consistency and registers between 155 to 170˚F (68 to 77˚C). (See notes.)
- Scatter butter over the scalded rice flour mixture, cover bowl with plastic wrap, and let sit until butter has melted and mixture has cooled to at least 80˚F (27˚C), about 1 hour.
- For the Dough: Add milk and egg yolk to the scald mixture. Whisk until well-combined and at or below 75˚F (24˚C); if not at temperature, cover and let sit until it reaches 75ºF.
- In the bowl of a stand mixer fitted with the dough hook attachment, combine flour, salt, and yeast, and mix on low speed until well combined, about 15 seconds. Turn off mixer, then add scalded rice flour mixture all at once and mix on low speed until dough is uniform, about 2 minutes, using a flexible spatula to scrape down sides of bowl and dough hook as needed.
- Increase speed to medium and mix until dough just starts to come away from sides of bowl, about 8 minutes. (The dough will remain sticky and webby. Do not overmix here; the dough should not be bouncy.)
- Using nonstick baking spray, grease a large bowl; the bowl should be big enough for dough to double in size. Transfer dough to the greased bowl, and cover bowl tightly with plastic wrap. Let sit at warm room temperature (75-80˚F; 24-27˚C) until the dough is puffy and expanded by about 1 1/2 times its original volume, 60 to 90 minutes.
- Using lightly moistened hands, deflate the dough until it is restored to its original volume. Cover tightly and refrigerate until dough is at least 55˚F (13˚C), at least 2 hours and up to 24 hours.
- To Bake a Yama ("Mountain") Style Loaf (see notes below for how to adapt this recipe to produce a perfectly square kaku-style loaf): Using nonstick baking spray, grease a 9- by 4- by 4-inch loaf pan. Lightly flour top of dough and transfer to a lightly-floured work surface. Using a knife or dough scraper, divide dough into 3 equal pieces, about 225g each. Gently shape each into a round. Cover loosely with plastic wrap and let sit for 30 minutes.
- Working with one ball of dough at a time (seam-side up), lightly flour exterior of dough and, using a rolling pin, flatten and roll each ball into a 5- by 8-inch oval. Fold the long ends into the center to form a 4-inch wide strip. Roll strip into 9- by 4-inch rectangle, flouring dough on both sides as needed to prevent sticking. Starting at the short end, roll dough into a 4-inch-wide log, stretching it gently as you go and keeping the spiraled edges even. Pinch the seam closed, set aside. Repeat with remaining dough balls and place each shaped cylinder of dough into greased loaf pan, side-by-side, seam-side down, and evenly spaced apart. (The spiraled ends should be facing the long side of pan.)
- Loosely cover with plastic wrap and let sit at warm room temperature (75 to 80˚F; 24 to 27˚C) until top of loaf is 1/2 inch below lip of pan, 1 to 2 hours.
- Halfway through proofing time, adjust oven rack to middle position and preheat oven to 300ºF (150ºC).
- When loaf is ready to bake, transfer loaf to oven. Bake until loaf is well-browned and has an internal temperature of at least 195ºF (88ºC), 50 to 60 minutes.
- Transfer the pan to a cooling rack and brush the exposed surface of loaf with butter. (See notes.) Let cool for 5 minutes, then remove loaf from pan and cool on wire rack, to room temperature, at least 1 hour.
- Special Equipment
- Whisk, instant-read thermometer, stand mixer, rolling pin, nonstick baking spray, 9- by 4- by 4-inch rectangular bread pan, bread knife, pastry brush, wire rack
Notes
- This recipe was developed using weight and not volume and will work best if you have a scale.
- Unlike active dry yeast, instant yeast does not have to be bloomed in warm liquid.
- Glutinous or sweet rice flour is available in supermarkets, Asian markets, or online. It can also be made by grinding sweet or Thai white sticky rice to a fine powder in a tabletop mill, high-powered blender, or spice mill. Do not use white rice flour.
- If in step 1 the scald mixture is below 160˚F (70˚C), transfer to microwave-safe bowl, cover, and microwave in 30-second intervals, whisking after each, until it thickens and reaches 160˚F. If you do not have a microwave and need to continue cooking the scald after doing the pour-over, transfer the mixture to a small nonstick skillet and heat it over medium-low heat, whisking constantly, until it thickens and reaches 160˚F (71ºC). Take care not to overcook it. Immediately transfer the paste to a bowl and proceed with step 2.
- The overnight cold proof is optional, but adds flavor and convenience. Either way, chilling the dough before shaping makes the otherwise sticky dough easier to handle and is essential.
- This recipe is written to work with a perfectly rectangular 9- by 4- by 4-inch loaf pan. If you have a smaller flared bread pan instead of a pullman, or are baking in a covered 9- by 4- by 4-inch pullman pan, reduce the dough ball size to 200g and use the remaining dough to make a single bun as a baker’s treat. Proof bun on a small, lightly-greased pan that will fit next to loaf pan on your oven rack. To bake bun, transfer to oven and bake until golden brown, 17 to 20 minutes.
- If baking loaf in a flared bread pan, proof until top of loaf is 1/2 inch above lip of pan. When loaf is ready to bake, cover with the pan lid, and transfer loaf to oven and bake. Carefully remove lid after 30 minutes and continue to bake until loaf is well-browned and has an internal temperature of at least 195ºF (88ºC), another 20 to 30 minutes.
- The melted butter is only used when baking the loaf without a lid (or on a bun), and gets brushed on the exposed top of the loaf after baking.
- Make-Ahead and Storage
- The dough can be refrigerated for up to 24 hours before shaping. To freeze the loaf, wrap it tightly in foil then place in a zip-top bag. The bread can be frozen for up to 3 months.
↑ Back to top
Shortcut Banh Mi with Pickled Carrots and Daikon
Adapted from https://cooking.nytimes.com/recipes/1014140-shortcut-banh-mi-with-pickled-carrots-and-daikon

Tags: Sandwiches
Vietnam
Servings: 6
Ingredients
- ¾ cup shredded carrots
- ¾ cup thinly sliced Persian, Kirby or European cucumbers
- ½ cup shredded daikon radish
- 2 tablespoons unseasoned rice wine vinegar
- 2 tablespoons sugar
- ¼ teaspoon kosher salt
- ½ cup mayonnaise
- 4 tablespoons finely chopped scallions
- 2 to 3 tablespoons sriracha or other chili sauce, to taste
- 1 tablespoon peanut or vegetable oil
- 4 garlic cloves, finely chopped
- 1 pound ground pork
- 2 tablespoons Asian fish sauce
- ½ teaspoon black pepper
- ½ teaspoon kosher salt
- 1 teaspoon sugar
- ½ cup chopped fresh basil
- Finely grated zest of 1 lime
- Juice of 1/2 lime
- 6 small hero rolls or 2 baguettes cut into thirds, split
- Fresh jalapeño, thinly sliced and seeded, for serving
- Mint sprigs, for serving
- Cilantro sprigs, for serving
FOR THE
PICKLED VEGETABLES:
FOR THE PORK:
FOR THE
SANDWICH:
Steps
- To make the pickled vegetables: In a bowl, toss together the carrots, cucumbers, daikon, vinegar, sugar and salt and let stand at room temperature for at least 30 minutes.
- Meanwhile, make the pork. In a small bowl, whisk together the mayonnaise, 1 tablespoon scallions and 1 to 2 tablespoons chili sauce, to taste. Cover tightly and set aside.
- Heat oil in a large skillet over medium-high heat. Add the remaining 3 tablespoons scallions and the garlic. Cook, stirring, for 1 minute. Add pork and cook, breaking up with a fork, until no longer pink, 7 to 10 minutes. Stir in 1 tablespoon chili sauce and the fish sauce, pepper, salt and sugar. Remove from heat and stir in the basil, lime zest and lime juice. Let cool 5 minutes, then add mayonnaise mixture.
- Fill bread with pork mixture. Press the jalapeño, mint and cilantro sprigs into the pork. Spoon some pickled vegetables onto the sandwiches and serve any extra alongside.
FOR THE PICKLED
VEGETABLES:
↑ Back to top
Shoyu Ramen
Adapted from http://www.bonappetit.com/recipe/shoyu-ramen
Tags: Japanese
Noodles
Ingredients
- 2 pieces dried kombu
- 1/2 cup reduced-sodium soy sauce
- 2 Tbsp. dry sake
- 1 Tbsp. mirin
- 1 1/2 lb. boneless pork shoulder
- Kosher salt and freshly ground black pepper
- 2 Tbsp. vegetable oil
- 2 lb. chicken necks, backs, and/or wings
- 1 lb. pork spareribs
- 2 bunches scallions, chopped
- 2 carrots, peeled, cut into pieces
- 1 head of garlic, halved horizontally
- 1 1” piece ginger, peeled, sliced
- 1/4 cup bonito flakes
- 3 large eggs
- 6 5-oz. packages fresh thin and wavy ramen noodles (or six 3-oz. packages dried)
- 1/2 cup menma (fermented bamboo shoots)
- 6 scallions, thinly sliced
- 3 toasted nori sheets, torn in half
- Chili oil, toasted sesame oil, and shichimi togarashi (for serving)
pork and
stock:
ramen and
garnishes:
Steps
- You can find all the Asian ingredients listed here at Asian markets, in the Asian foods section of some supermarkets, and online. Look in the refrigerated section of Asian markets for fresh noodles. Ask your butcher for chicken necks and backs.
- Two days ahead: For the dashi, combine kombu and 4 quarts cold water in a large bowl. Cover and let sit at room temperature at least 8 hours and up to 12 hours. For the tare, combine soy sauce, sake, and mirin in a small bowl; cover and chill.
- One day ahead: Season pork shoulder with salt and pepper. Roll up and tie with kitchen twine at 2” intervals. (This helps keep the meat intact while cooking and makes for round, compact slices.)
- Heat oil in a large heavy pot (at least 8 quarts) over medium-high heat Cook pork shoulder, turning, until brown all over, 10â12 minutes. Add chicken, spareribs, scallions, carrots, garlic, ginger, and bonito flakes. Remove kombu from dashi; discard. Add as much kombu dashi as will fit in pot once liquid is boiling (reserve remaining dashi). Bring to a boil, reduce heat, and simmer, skimming the surface occasionally and adding remaining dashi as liquid reduces, until pork shoulder is tender and stock has reduced to about 2 quarts, 21/2â3 hours.
- Remove pork shoulder from stock and let cool. Wrap tightly in plastic and chill until ready to use. (Chilling pork will make meat easier to slice.) Strain stock through a fine-mesh sieve into another large pot or a large bowl or container; discard solids (including ribs and chicken). Cover and chill.
- Bring a medium pot of water to a boil. Carefully add eggs one at a time and boil gently for 7 minutes. (Egg yolks should be shiny yellow and almost jammy; egg white should be just set.) Drain eggs and transfer to a bowl of ice water to stop cooking; let cool. Peel; set aside.
- Remove string and thinly slice pork; cover and set aside.
- When ready to serve, bring stock to a simmer; it should be very hot. At the same time, cook noodles in a large pot of boiling water according to package directions until al dente; drain (no need to salt the water, as ramen noodles contain more salt than pasta).
- Just before serving, divide noodles among 6 deep bowls. Top with sliced pork, placing it off to one side. Add tare to hot stock and ladle over pork to warm through (stock should come up just to the level of the noodles).
- Place a small pile of menma next to pork. Halve eggs and place next to menma. Place a small pile of sliced scallions next to egg. Tuck half a sheet of nori between side of bowl and noodles so itâs just poking out.
- Serve ramen with chili oil, sesame oil, and shichimi togarashi.
- DO AHEAD: Eggs can be cooked 1 day ahead. Keep unpeeled eggs covered in cool water. Cover and chill.
Kombu dashi and tare:
pork and stock:
ramen and garnishes:
Notes
- FAVORITE
↑ Back to top
Shrimp and Pea Shoot Dumplings (Har Gow)

Tags: Chinese
Dumplings
Servings: YIELD MAKES ABOUT 40
DUMPLINGS
Ingredients
- 1 pound shrimp, peeled, deveined, and diced
- 1 cup bamboo shoots, diced
- 1 cup water chestnuts, diced
- 1 cup pea shoots, coarsely chopped
- 1 clove garlic, finely minced
- 2 tbs. salt
- 1 tsp. sugar
- 1 tsp. white pepper
- 2 tsp. vegetable oil
- 1 tsp. toasted sesame oil
- 1/4 cup green peas
- 1 1/3 cups wheat starch
- 2/3 cup tapioca flour
- 1/4 tsp. salt
- Vegetable oil
- 1/2 cup soy sauce
- 1/4 cup rice vinegar
- 1 scallion, green parts only, sliced very thin
FOR THE
FILLING:
FOR THE DOUGH:
Steps
- Make the filling: In a large nonreactive bowl, combine filling ingredients except peas. Work the mixture aggressively with hands until thoroughly combined. Cover and refrigerate.
- Make the dough: Mix together wheat starch, tapioca flour, and salt in a medium bowl. Gradually stir in 1 cup plus 3 tbsp. boiling water a little at a time, then add 2 tbsp. oil. Mix until dough forms a ball. Knead dough on a lightly oiled surface until silky, about 1 minute. Quarter dough, roll into 10" ropes, cut each rope into 10 pieces, roll pieces into balls, then flatten balls with palm of your hand. Flatten skins further using the flat side of an oiled Chinese cleaver until very thin. Keep dough and skins covered with plastic to prevent them from drying out.
- Spoon about 2 tsp. filling in center of each skin, folding dough over and pleating edges together until halfway closed; place two peas on the edge of the dumpling skin and fold dough around them to form "eyes."
- Fit a bamboo steamer basket over boiling water; steam dumplings over high heat for about 5 minutes, or until translucent. Serve accompanied with combined soy sauce, rice vinegar, and scallion.
Notes
- FAVORITE
↑ Back to top
Shrimp and Sugar Snap Peas

Tags: Seafood
Ingredients
- 1 (16 ounce) package uncooked linguini pasta
- 2 tablespoons olive oil
- 1 teaspoon chili oil
- 1 1/2 pounds medium shrimp, peeled and deveined
- 1 pound sugar snap pea pods
- 2 large cloves garlic, minced
- 1 1/2 cups dry white wine
- 1/4 cup reserved pasta water
- 1 tablespoon unsalted butter
- 1 tablespoon fresh lemon juice
- 1/3 cup chopped fresh basil
Steps
- Bring a large pot of lightly salted water to a boil. Add linguini pasta, and cook for 8 to 10 minutes or until al dente. Drain, reserving 1/4 cup liquid.
- Heat the olive oil and chili oil in a wok over medium-high heat. Mix in the shrimp, pea pods, and garlic. Cook and stir 2 minutes, until shrimp are almost opaque. Remove from heat, and set aside.
- Pour the wine into the wok, and bring to a boil. Cook until reduced by 1/3. Return shrimp, peas, and garlic to the wok, and stir in the reserved pasta water. Continue to cook and stir until shrimp are opaque. Remove wok from heat, and mix in the butter, lemon juice, and basil. Toss with the cooked pasta to serve.
Notes
- FAVORITE
↑ Back to top
Shrimp Ceviche "Cocktail"

Tags: Appetizers and Dim
Sum Central
America Dips and
Spreads Mexican
Seafood South America
Is starred. Rated
5/5
Ingredients
- 1 quart salted water
- 1/2 cup plus 2 tablespoons freshly squeezed lime juice
- 1 generous pound unpeeled small green shrimp (about 41 to 50 count to a pound)
- 1/2 medium white onion, chopped into 1/4-inch pieces
- 1/3 cup chopped fresh cilantro, plus several sprigs for garnish
- 1/2 cup ketchup
- 1 to 2 tablespoons vinegary Mexican bottled hot sauce (such as Tamazula, Valentina or Bufalo)
- About 2 tablespoons olive oil, preferably extra-virgin (optional, but smoothes out sharpness)
- 1 cup peeled, diced cucumber or jicama (or 1/2 cup each)
- 1 small ripe avocado, peeled, pitted and cubed
- Salt
- Several lime slices, for garnish
- Tostadas or tortilla chips or saltine crackers, for serving
Steps
- Cooking and marinating the shrimp: Bring 1 quart salted water to a boil and add 2 tablespoons of the lime juice. Add shrimp, cover and return to a boil. Immediately remove from heat, set pot lid askew and pour off all liquid. Replace lid and set aside, letting shrimp steam in closed pot for 10 minutes. Spread out shrimp in large glass or stainless steel bowl to cool completely. Peel shrimp (and devein, if desired). Toss shrimp with remaining 1/2 cup lime juice, cover and refrigerate for about 1 hour.
- The flavorings: In a small strainer, rinse chopped onion under cold water, then shake off excess liquid. Add to shrimp bowl along with chopped cilantro, ketchup, hot sauce, optional olive oil, cucumber and/or jicama and avocado. Mix gently, taste and season with salt, usually about 1/2 teaspoon. Cover and refrigerate up to a few hours, or serve immediately.
- Serving the ceviche: Spoon the ceviche into sundae glasses, martini glasses or small bowls. Garnish with sprigs of cilantro and slices of lime. Serve with tostadas, tortilla chips or saltines.
Notes
- FAVORITE
↑ Back to top
Shrimp Scampi with Garlic, Red Pepper Flakes, and Herbs
Servings: 4
Ingredients
- 1 pound ( 450 g) large shrimp, peeled and split down the back, veins removed
- Kosher salt
- 1/4 teaspoon baking soda
- 4 tablespoons ( 60 ml) extra-virgin olive oil, divided, plus more as needed
- 4 teaspoons ( 25 g) minced garlic ( 4 to 5 medium cloves)
- Pinch red pepper flakes
- 1/2 cup ( 120 ml) dry vermouth
- 3 tablespoons ( 45 g) unsalted butter, cut into tablespoon-size pieces
- 1 tablespoon ( 15 ml) fresh juice and 1 teaspoon ( 4 g) grated zest from 1 lemon
- 2 teaspoons ( 6 g) minced parsley, tarragon, and chives
Steps
- In a large bowl, toss together shrimp with 3/4 teaspoon (3g) kosher salt and baking soda until evenly coated. Let stand for at least 10 minutes and up to 1 hour.
- In a large skillet, heat 3 tablespoons (45ml) olive oil over high heat until shimmering. Add half of shrimp in an even layer and cook, stirring and turning shrimp occasionally, until pink, barely cooked through, and just starting to turn lightly golden in spots, about 2 minutes. Using a slotted spoon, flexible slotted offset spatula, or tongs, transfer shrimp to a plate. Repeat with remaining shrimp, adding more oil if necessary.
- Add remaining 1 tablespoon (15ml) olive oil to skillet along with garlic and red pepper flakes and cook, stirring, until garlic is just starting to turn golden, about 1 minute; lower heat if necessary to prevent scorching.
- Add vermouth and boil over high heat, stirring and scraping up any browned bits, until raw alcohol smell is mostly gone and vermouth has reduced by about half, about 3 minutes.
- Add butter and cook, stirring and swirling pan rapidly as butter melts to create a silky, emulsified sauce. Remove from heat, add lemon juice, and season with salt. Return to medium heat and bring to a simmer, stirring constantly. (If sauce breaks, whisk in a teaspoon or two of water until sauce emulsifies again.)
- Return shrimp to skillet, add herbs and lemon zest, and toss until shrimp are coated in sauce and warmed through. Serve immediately.
- Special Equipment
- Large skillet
Notes
- This dish can be served with pasta. To do so, cook linguine or other long noodles until al dente, then toss in the pan with shrimp and sauce, adding a little pasta-cooking water to bind it all together.
↑ Back to top
Shrimp Tacos

Servings: 4
Ingredients
- 1 pound peeled and deveined shrimp, tails removed
- ½ teaspoon ground cumin
- ¼ teaspoon cayenne pepper
- ½ teaspoon onion powder
- ½ teaspoon garlic powder
- ¼ teaspoon black pepper
- 3 tablespoons neutral oil, such as grapeseed or canola
- Kosher salt (such as Diamond Crystal)
- 1½ cups thinly sliced red cabbage (¼ small cabbage)
- 2 limes
- 12 corn tortillas
- Guacamole
- Sour cream or crema
- Pico de gallo
- Cilantro leaves
Steps
- Watch
- In a medium bowl, toss the shrimp with the cumin, cayenne, onion powder, garlic, black pepper and 1 tablespoon oil. Season the shrimp lightly with salt. If you have time, you can refrigerate the shrimp to marinate for at least 30 minutes and up to 12 hours.
- Squeeze 1 tablespoon juice from 1 lime. Slice the remaining lime into wedges for serving. In a small bowl, quick pickle the cabbage by combining the shredded cabbage with the lime juice and a pinch of salt. Toss together and set aside.
- Heat a large (12-inch) skillet over medium. Warm a tortilla in the dry skillet, flipping once, until soft and pliable, about 30 seconds. Place in a dish towel to keep warm. Repeat until all the tortillas are warmed, stacking and wrapping them in the dish towel until ready to use.
- Heat a tablespoon of oil in the skillet over medium-high. Add half of the shrimp and cook without stirring until the contact side is browned around the edges, about 3 minutes. Flip to cook the other side for 1 to 2 minutes, until the shrimp is fully cooked. Move to a plate and cook the remaining shrimp, heating up the remaining tablespoon of oil before adding the shrimp to get a nice sear.
- To assemble, spread some guacamole down the middle of each tortilla. Divide the shrimp among the warm tortillas and top with crema, pico de gallo, quick pickled cabbage and cilantro leaves. Serve immediately with lime slices for squeezing.
Make the recipe with us:
↑ Back to top
Shrimp Veggie Salad
Tags: Salad
Seafood Vegetables
Ingredients
- 1 pound peeled and deveined cooked medium shrimp
- 3 medium tomatoes, seeded and cut into 1/2-inch pieces
- 2 medium cucumbers, quartered and sliced
- 1 small red onion, chopped
- 1/2 cup chopped fresh cilantro
- 4 green onions, chopped
- 2 jalapeno peppers, seeded and minced
- 2 tablespoons lemon juice
- 1/2 teaspoon salt
- 2 medium ripe avocados, peeled and cubed
Steps
- Combine the first nine ingredients in a large bowl. Gently stir in avocado. Serve immediately. Yield: 12 servings (1 cup each).
Notes
- FAVORITE
↑ Back to top
Shrimp Étouffée
Servings: 4
Ingredients
- 4 tablespoons unsalted butter
- 1 yellow onion, finely chopped
- 2 celery stalks, thinly sliced
- ½ green bell pepper, finely chopped
- 4 garlic cloves, minced
- 3 tablespoons all-purpose flour
- 2 tablespoons tomato paste
- ¾ cup chicken or vegetable stock
- 1 tablespoon hot sauce, or to taste
- 1 dried bay leaf
- 2 teaspoons store-bought or homemade Creole seasoning (see Tip)
- Kosher salt and black pepper
- 1 pound shrimp, peeled and deveined
- 1 scallion, green parts chopped
- White rice, for serving
Steps
- In a large skillet, melt the butter over medium-high heat. Add the onion, celery and bell pepper, and cook until softened, about 7 minutes. Add the garlic and cook until fragrant, 1 more minute.
- Sprinkle the flour over the ingredients and stir constantly until lightly toasted, about 5 minutes. Add the tomato paste, and stir and cook for 1 more minute.
- Pour in the stock and ¾ cup water. Cook until the liquid is reduced by half, about 3 minutes. Add the hot sauce, bay leaf, Creole seasoning, 1 teaspoon salt and ½ teaspoon pepper. Bring to a boil, and cook until the mixture starts to thicken, about 2 minutes.
- Stir in the shrimp and reduce the heat to medium. Simmer until the shrimp is cooked through and opaque, about 5 minutes, turning each piece halfway through. Remove from the heat. Taste and adjust seasoning. Sprinkle the scallions on top. Serve warm over rice.
Notes
- To make your own Creole seasoning, combine 1 tablespoon smoked paprika, 1 tablespoon chile powder, 1 teaspoon onion powder, 1 teaspoon garlic powder, ½ teaspoon cayenne pepper (or less, if desired), ½ teaspoon fine sea salt and ½ teaspoon black pepper in a small bowl and stir together. Store in an airtight container in a cool, dry place.
↑ Back to top
Sichuan Cold Sesame (Or Peanut) Noodles
Servings: 4
Ingredients
- 8 ounces | 225 g dried Chinese noodles, or 12 ounces 360g fresh Chinese noodles
- 2 ribs celery thinly sliced on diagonal (include the leaves if you like their bite)
- 1 large carrot julienned to resemble a fat bean sprout
- 8 ounces | 225g bean sprouts
- 3 tablespoons Chinese sesame paste or unsalted peanut butter or 2 ½ tablespoons tahini and 1 ½ teaspoons toasted sesame oil
- 2 tablespoons chile oil preferably with chile flakes, Sichuan chile bean sauce (dou ban jiang), or sambal olek (Rooster brand)
- 2 tablespoons Chinkiang vinegar or 1 ½ tablespoons balsamic and 1 ½ teaspoons cider vinegar
- 2 ½ tablespoons regular soy sauce
- 1 ½ teaspoons dark soy sauce
- 1 tablespoon sugar
- Salt to taste
- 1 heaping teaspoon Sichuan peppercorns toasted until fragrant in a skillet then pounded to a coarse texture
- 1 to 2 tablespoons toasted sesame oil
- 12 ounces | 360g hand-shredded cooked chicken breast or thin strips of pressed tofu
- 2 small green onions green part only, cut into thin rounds
Sauce:
To finish:
Steps
- Bring a 4-quart (4 l) pot of water to boil. Cook the noodles until they are still a bit chewy – al dente. Add the celery, carrot, and bean sprout. Stir and when the vegetables have slightly softened (there may be little bubbles at the edge of the pot), drain. Flush with water and drain well. Cool to room temperature or transfer to a container and refrigerate for up to 3 days. Return to room temperature before using.
- Meanwhile, stir together all the sauce ingredients – from the sesame paste to the sugar, until smooth.Taste and tweak the flavors for a tangy, spicy, salty and slightly sweet finish. It should be a little punchy because the other ingredients will dilute it a tad. Add the Sichuan peppercorn when you are satisfied. The sauce thickens so add 1 tablespoon water if it’s gloppy. Let rest 10 minutes before using or refrigerate for up to 3 days.
- To serve, toss the noodles and vegetables with a little sesame oil to separate things. Divided among individual serving bowls or put into a communal bowl. Plop sauce on top, add the chicken and sprinkle on the green onion. Stir together and enjoy.
Notes
- For information on chile bean paste (doubanjiang), check out this mega buying guide.
- Details on Sichuan peppercorns are here.
↑ Back to top
Sichuan Cucumber Pickles

Tags: Chinese
Pickles Vegetables
Ingredients
- 1 English cucumbers, halved lengthwise and cut on the diagonal into 1/8-inch-thick slices
- 2 T. plus 1 t. kosher salt
- 1 -inch piece fresh ginger, grated
- 1 or 2 fresh Thai chiles, stemmed, seeded, and julienned
- 4 cups rice vinegar
- 1 1/4 cups sugar
- 1 1/2 t. sambal chile paste a.k.a sambal oelek
- 1/2 cup toasted sesame oil
- 1 T. Sichuan peppercorns
- 1/4 cup whole dried chiles, such as arbol
Steps
- In a bowl, toss together the cucumber slices and 1 t. of salt. Transfer the cucumbers to a colander and let drain in the sink for two hours.
- Rinse the cucumbers briefly under cold water and drain well. Transfer to a bowl. Add the ginger, fresh Thai chiles and toss all together.
- In a separate bowl, stir together vinegar, sugar, sambal, and the remaining 2 T. salt until the sugar and salt have dissolved. Set aside.
- In a small fry pan, heat the sesame oil over medium heat, add the Sichuan peppercorns and toast for 10 seconds. Add the dried chiles and toast 10 seconds longer, until the chiles are darken slightly.
- Pour the contents of the frying pan over the cucumbers, then add the vinegar solution and toss well. Let cool to room temperature, then cover and refrigerate. The pickles are ready to eat in 2 hours. They will keep, refrigerated, for up to 1 week.
Notes
- FAVORITE
↑ Back to top
Sichuan Dry-Fried Beef
Tags: Beef
Chinese
Servings: 4 to 6
Ingredients
- 1 flank steak (about 2 pounds)
- 1 cup peanut oil
- 1 tablespoon soy sauce, divided
- 1 tablespoon Chinkiang vinegar, divided
- 1 tablespoon Shaoxing wine (or dry sherry, if unavailable)
- 2 tablespoons fermented chili bean paste
- 2 teaspoons sugar
- 2 medium carrots, cut into fine julienne
- 2 stalks Chinese celery (or regular celery), cut on a sharp bias into 1/4-inch slices
- 1 medium clove garlic, minced (about 2 teaspoons)
- 12 hot Chinese dry chile peppers, seeded
- 2 teaspoons toasted and ground Sichuan peppercorns
Steps
- Cut steak with the grain into 2- to 3-inch-wide strips. Cut crosswise into 1/4-inch strips. Combine steak and oil in wok and cook over medium-high heat, stirring occasionally. Beef will initially give off lots of moisture and eventually begin sizzling and frying. Beef is done when deep brown, crisp at edges, but still pliant, about 10 minutes. Remove from oil with a slotted spoon, drain on paper towel-lined plate, and transfer to medium bowl. Add 1 teaspoon soy sauce and 1 teaspoon Chinkiang vinegar and toss to combine.
- Combine remaining soy sauce, vinegar, wine, chili bean paste, and sugar in small bowl and whisk until sugar is dissolved.
- Pour out all but 1 tablespoon oil from wok and discard. Heat wok over high heat until smoking. Add carrots and celery and cook, stirring and tossing constantly until lightly charred, about 30 seconds. Add garlic and chiles and cook, stirring constantly until fragrant, about 15 seconds. Add beef and sauce and toss until well-coated, and sauce is slightly cooked down, about 30 seconds. Add half of Sichuan peppercorn and toss to combine. Transfer to platter and sprinkle with remaining Sichuan peppercorn. Serve immediately.
↑ Back to top
Sichuan Noodles with Spicy Pork Sauce (Dan Dan Mian)
Posted December 18, 2013
Adapted from http://www.saveur.com/article/recipes/dan-dan-mian-sichuan-noodles-with-spicy-pork-sauce
Tags: Chinese
Noodles Pork
Ingredients
- 2 tbsp. peanut oil
- 3 tbsp. finely chopped ya cai (Tianjin preserved vegetable), rinsed and drained
- 4 oz. ground pork
- 3 tbsp. hong you (Sichuan red chile oil)
- 2 tbsp. light soy sauce
- 1 tbsp. dark soy sauce
- 2 tsp. Chinkiang black vinegar
- 1 tsp. shaoxing (Chinese rice wine)
- 1/2 tsp. ground Sichuan peppercorns
- 2 scallions, finely chopped
- Kosher salt, to taste
- 12 oz. fresh Chinese wheat noodles, or 8 oz. dried
Steps
- Heat peanut oil in a 14″ wok over high heat. Add preserved vegetable; cook, stirring constantly, until fragrant, about 30 seconds. Add pork; cook, stirring and breaking up meat into small pieces, until browned, 2–3 minutes. Remove from heat; stir in chile oil, soy sauces, vinegar, rice wine, ground peppercorns, and scallions; set sauce aside.
- Bring a large pot of salted water to a boil; cook noodles until tender, 7–9 minutes. Drain noodles and divide between 4 large serving bowls; divide sauce over noodles.
Notes
- FAVORITE
↑ Back to top
Sichuan Style Stir-Fried Chinese Long Beans
Tags: Chinese
Vegetables
Servings: 3 to 4
Ingredients
- 1/2 pound Chinese long beans, trimmed and cut into 3 inch segments
- 1 tablespoon peanut oil
- 4 to 6 dried chilies, preferably Sichuanese, roughly chopped
- 1 teaspoon whole Sichuan peppercorns , lightly crushed
- 1/4 teaspoon salt
- 1/2 teaspoon sugar
- 1 tablespoon roasted sesame oil
- Splash soy sauce
Steps
- Add a tablespoon of peanut oil to a wok or a large sauté pan over medium heat and swirl until hot. Add chilies and peppers and stir-fry briefly until fragrant.
- Add the long beans and stir-fry vigorously for 3 to 4 minutes. (You don't want the spices to burn. If they start to then turn down the heat a bit). Season with salt and sugar and stir-fry a few seconds more to mix it all together.
- Remove from heat. Stir in the sesame oil and soy sauce. Serve immediately.
Add the oil, stir-fry
the chilies and peppers:
Add the long beans,
salt, and sugar:
Stir in the sesame oil
and soy sauce:
↑ Back to top
Sichuan-Style Smashed Cucumber Salad
Servings: 3 to 4
Ingredients
- 1 whole English cucumber, washed, peeled in any especially thick areas (see notes)
- Kosher salt
- 2 medium cloves garlic, minced (about 2 teaspoons)
- 1 teaspoon black vinegar or rice vinegar
- 1/2 teaspoon sesame oil (optional)
Steps
- Place the washed cucumber on a firm, flat, clean surface. Whack it firmly but gently with the flat side of a heavy cleaver or the bottom of an 8-inch skillet. Repeat all down its length until it is completely smashed. Chop the cucumber crosswise into 1-inch pieces and transfer to a colander set in a bowl. Toss with salt and refrigerate for 10 minutes. Discard the extracted liquid and transfer the cucumbers to the bowl.
- Add garlic, vinegar, and sesame oil (if using) to the bowl and toss to combine. This cucumber salad is best served absolutely fresh; It will get wet and slimy as it rests in the fridge.
Notes
- If your cucumber has very thick skin in some areas, use a peeler to remove it before smashing. Most likely you will not need to remove any skin at all.
↑ Back to top
Silky Roasted Eggplant with Tomato and Feta
Adapted from https://www.americastestkitchen.com/test-recipes/silky-roasted-eggplant-with-tomato-and-feta-res
Servings: 4–6 servings
Ingredients
- ½ cup extra-virgin olive oil, divided
- 2½ pounds eggplant, peeled and sliced ½-inch thick on bias
- 2 teaspoons kosher salt
- ¾ teaspoon pepper
- 1 onion, chopped fine
- 1 tablespoon tomato paste
- 2 garlic cloves, minced
- 1 teaspoon dried oregano
- ½ teaspoon red pepper flakes
- ½ cup dry white wine
- 1 (28-ounce) can crushed tomatoes
- ½ teaspoon sugar
- 8 ounces feta cheese, crumbled (2 cups)
- 2 tablespoons ouzo, grappa, brandy, or vodka (optional)
- Crusty bread
Steps
- You can prep and cook the eggplant and tomato sauce up to 3 days ahead, if you want, so all you have to do come dinner time is layer and bake.
We
developed this recipe with Diamond Crystal kosher salt. If using
Morton
kosher salt, which is denser, use only 1½ teaspoons in step 1.
Before flambéing, make sure to roll up long shirt sleeves, tie back
long hair, turn off the exhaust fan (otherwise the fan may pull the
flames up), and turn off any lit burners (this is critical if you have
a gas stove).
If
flambéing, do not use a nonstick skillet; the heat produced by
flambéing (igniting) the contents of the skillet can damage nonstick
coatings
This recipe is under development and is intended for America’s Test
Kitchen, Cook’s Illustrated and Cook’s Country recipe testers only.
↑ Back to top
Simple Crusty White Bread
Servings: Makes 2 large (850g)
loaves
Ingredients
- 1000 grams all-purpose flour, plus more for dusting
- 700 grams room-temperature water, divided if using active dry yeast
- 22 grams salt
- 4 grams instant yeast, 5 grams active dry yeast, or 10 grams fresh yeast (see note)
- Vegetable, canola, or other neutral oil, for greasing
Steps
- If using instant or fresh yeast, combine flour and all of the water in a stand mixer fitted with the dough hook. If using active dry yeast, combine flour with 650 grams water and combine yeast with 50 grams warm water; let yeast stand until foamy. Mix flour and water at low speed until they are fully incorporated and form a uniform dough. Alternatively, combine flour and water in a mixing bowl and mix using a dough spatula until dough forms. Cover the bowl with a kitchen towel or plastic wrap and let the dough rest for at least 15 minutes and up to 1 hour.
- Add salt, along with either the instant yeast, fresh yeast, or the active-dry yeast solution, and mix at low speed or by hand until salt and yeast are fully incorporated and dough is smooth.
- Turn stand mixer up to medium-high speed and mix until the dough feels elastic and bounces partway back when indented with your thumb, about 3-5 minutes. If mixing by hand, skip this step.
- Working with oiled hands, gently transfer dough, being careful not to tear its surface, to a lightly oiled mixing bowl and cover with plastic wrap. Let dough stand at room temperature for 30 minutes. Uncover dough and fold it in half, being careful not to compress it too much. Re-cover with plastic wrap and let stand until dough has increased in volume by half, about 1 hour 30 minutes longer.
- Transfer dough in one piece to a lightly floured work surface. Using a bench knife, divide dough in half and shape each portion into a ball. Dust the tops of the dough balls with flour, cover with a towel, and let rest for 15 minutes.
- Shape the dough into rounds once again, folding the dough under itself to create a smooth surface with a seam on the bottom. Let dough rest on the work surface, seam-side down, for 5 minutes. Transfer each dough ball, seam-side up, to a bowl or basket lined with a lightly floured linen cloth or plain, not-fuzzy kitchen towel. Refrigerate dough balls or store in a cool place until dough has nearly doubled in size, about 1 hour to 1 hour 30 minutes.
- Meanwhile, set a Dutch oven on the oven's bottom rack and preheat oven to 500°F (260°C)(if your oven has a convection setting, do not use it).
- Remove 1 loaf from the refrigerator and gently turn it out, seam-side down, into the preheated Dutch oven. With a razor or paring knife, score the full surface of the dough with 2 parallel lines roughly 3 inches apart. With a spray bottle filled with water, lightly spritz the surface of the dough. Cover and bake for 15 minutes. Lower oven temperature to 450°F (232°C)and bake for 15 minutes longer. Uncover and bake until crust is dark brown, about 15 to 20 minutes.
- Transfer loaf to a wire rack. Allow to cool for at least 1 hour before slicing. Return Dutch oven to oven, and reheat at 500°F (260°C) for 10 minutes. Then repeat with the remaining ball of dough.
Notes
- Note: This recipe requires a scale to measure the ingredients—it's a far more accurate way to bake and will deliver much more consistent results. This recipe works with multiple types of yeast: choose whichever is available to you.
↑ Back to top
Simple Garlic Shrimp
Tags: Seafood
Ingredients
- 1 1/2 tablespoons olive oil
- 1 pound shrimp, peeled and deveined
- salt to taste
- 6 cloves garlic, finely minced
- 1/4 teaspoon red pepper flakes
- 3 tablespoons lemon juice
- 1 tablespoon caper brine
- 1 1/2 teaspoons cold butter
- 1/3 cup chopped Italian flat leaf parsley, divided
- 1 1/2 tablespoons cold butter
- water, as needed
Steps
- Heat olive oil in a heavy skillet over high heat until it just begins to smoke. Place shrimp in an even layer on the bottom of the pan and cook for 1 minute without stirring.
- Season shrimp with salt; cook and stir until shrimp begin to turn pink, about 1 minute.
- Stir in garlic and red pepper flakes; cook and stir 1 minute. Stir in lemon juice, caper brine, 1 1/2 teaspoon cold butter, and half the parsley.
- Cook until butter has melted, about 1 minute, then turn heat to low and stir in 1 1/2 tablespoon cold butter. Cook and stir until all butter has melted to form a thick sauce and shrimp are pink and opaque, about 2 to 3 minutes.
- Remove shrimp with a slotted spoon and transfer to a bowl; continue to cook butter sauce, adding water 1 teaspoon at a time if too thick, about 2 minutes. Season with salt to taste.
- Serve shrimp topped with the pan sauce. Garnish with remaining flat-leaf parsley.
Notes
- FAVORITE
↑ Back to top
Simple Guacamole
Adapted from http://www.rickbayless.com/recipe/view?recipeID=130

Tags: Condiments
Dips and Spreads
Mexican
Ingredients
- 2 to 3 garlic cloves, peeled
- Hot fresh green chiles to taste (I’d choose 2 serranos), stems removed
- 3 ripe avocados, preferably the black-skinned Hass
- A couple of tablespoons chopped fresh Mexican herbs (such as cilantro, pipisa or papalo)
- 1 small white onion (fresh knob onion-green tops still on-is best), finely chopped
- Salt
- 2 tablespoons fresh lime juice
- A little crumbled Mexican fresh cheese (queso fresco) for garnish
- A sliced radish or two for garnish
Steps
- Finely chop the garlic and green chiles, and scoop them into a bowl.
- One at a time, run a knife down through each avocado, starting at the top, until you reach the pit; continue cutting around the pit until you reach the point you started.
- Twist the two halves of the avocado apart. Remove the pit and discard. Scoop the flesh into the bowl with the chiles. Mash coarsely with the back of a spoon or an old-fashioned potato masher.
- Add the herbs and onion, stir to combine, then taste. Season with salt (usually about a teaspoon) and lime juice. Scoop into a serving dish and garnish with cheese and radishes.
Notes
- FAVORITE
↑ Back to top
Simplified Haggis
Adapted from https://www.carolinescooking.com/haggis/
Tags: Holidays
Puddings Sausage Scotland
Servings: 4
Ingredients
- ½ tablespoon butter approx, or a little more as needed
- 1 onion
- ½ teaspoon ground black pepper or more, if you prefer a stronger pepper flavor
- ¾ teaspoon ground coriander
- ¾ teaspoon nutmeg
- 1 teaspoon allspice
- ½ teaspoon dried thyme or fresh, slightly chopped if fresh
- ¼ teaspoon cinnamon
- 1 lb ground lamb lamb mince
- ½ lb chicken livers
- 1 cup stock eg beef, chicken
- 4 oz pinhead oatmeal (steel cut oats)
Steps
- Preheat the oven to 350F/175C.
- Warm the butter in a pan. Finely dice the onion and cook over a medium heat in the butter until softened, about 5 minutes.
- Meanwhile take any fatty of tough pieces off the chicken livers and roughly chop.
- Add the various spices and thyme to the onion and cook a minute then add the lamb and chicken livers.
- Brown the meat then once it is all cooked, add the stock and cover. Allow to simmer for around 20mins.
- Then add the oatmeal, mix well and transfer to an oven dish (unless you started with a dish that can transfer).
- Cover the dish and put in the oven for 30mins.
- Remove the lid and cook another 10 mins.
- Serve with mashed potatoes and mashed rutabaga/swede.
Notes
- I allow around 4oz/110g rutabaga/swede and potato per person, skin them, boil them then add some butter and pepper to the rutabaga/swede and some butter and milk to the potatoes and mash each of them.
- The oatmeal used in this is called pinhead oatmeal in the UK, which is broadly the same as Irish oatmeal/steel cut in the US. The Scottish pinhead is no longer available on Amazon so I have linked to Irish oatmeal in the ingredients above which is what I have used here most recently and also works well.
↑ Back to top
SINGAPORE CHILI CRAB
Tags: Chillis
Seafood Southeast Asia
This version of Singapore chili crab was inspired
by a class I attended in Singapore, given by Violet Oon,
Singapore’s most famous cooking teacher. You won’t, of course, be able to use the crabs they use in
Singapore—but our large West Coast Dungeness crabs are most like theirs. The dish could also be
made with Maryland blue crabs, or even with frozen king crab legs from Alaska.
Singapore’s most famous cooking teacher. You won’t, of course, be able to use the crabs they use in
Singapore—but our large West Coast Dungeness crabs are most like theirs. The dish could also be
made with Maryland blue crabs, or even with frozen king crab legs from Alaska.
I made this. Is starred.
Servings: 6
Ingredients
- 2 large live Dungeness crabs, each about1 1/4 to1 1/2 pounds
- 10 to 12 fresh, medium-hot red chilies, stemmed, seeded, and chopped
- 2 tablespoons minced garlic
- 2 tablespoons minced shallots
- 1tablespoons finely grated gingerroot
- 3 tablespoons vegetable oil, plus additional
- 1 1/2 cups water
- 1tablespoon Asian fish sauce, such as nam pla
- 3/4 cup Heinz chili sauce
- 2 tablespoons fresh lime juice
- 1 tablespoon cornstarch combined with 2 tablespoons water
- 2 large eggs, lightly beaten
- 3 tablespoons sliced scallion for garnish
Steps
- 1. In a large pot of boiling salted water, add the crabs
and cook them for about 1
minute, or until they’re no
longer moving. Drain them,
and set them aside until
they are cool enough to
handle.
2. To clean the crabs, pull
off the top shells; pull and
twist off the aprons; remove
the gills. Separate the large
claws, but leave the legs
intact. With a sharp knife, cut
the crabs into quarters.
3. In a mortar with a pestle,
or a small food processor,
pound or process the chilies,
garlic, shallots, and ginger
with a little oil if
necessary to make a paste.
4. Heat a wok over moderately
high heat. Add 3 table¬
spoons of oil, and heat until
hot. Add the chili and garlic
paste, and stir-fry for 1
minute. Add the crabs, and stir-fry for 2 to 3 minutes.
Add the water, fish sauce,
chilisauce, and lime juice. Bring to a boil, and simmer,
covered, for 7 minutes.
Transfer the crabs to a bowl.
5. Bring the sauce in the wok
to a boil. Stir the corn¬
starch mixture, and add it to
the wok. Simmer until it is
thickened. Reduce the heat to
low, and gradually add
the eggs in a stream,
whisking. Return the crabs to the
wok, and coat them with
sauce.
6. Transfer the crabs with
their sauce to a serving platter,
and garnish with scallion.
↑ Back to top
Singaporean Chili Crab
Adapted from http://www.seriouseats.com/recipes/2013/02/singaporean-singapore-chili-crab-recipe.html

Tags: Chillis
Seafood Southeast Asia
Ingredients
- 1 tablespoon cornstarch
- 7 tablespoons peanut oil
- 2 to 3 shallots, minced (about 1/2 cup)
- 1 1/2 -inch knob ginger, grated (about 2 tablespoons)
- 6 medium garlic cloves, minced (about 2 tablespoons)
- 4 Thai chiles, minced
- 2 whole Mud or Dungeness crabs (about 1 pound each), prepared (see note above)
- 2 cups homemade or store-bought low sodium chicken broth
- 1/4 cup tomato paste
- 1/2 cup hot-sweet chili sauce (see note)
- 1 large egg, beaten
- 1/2 cup thinly sliced green onions
- 1 cup chinese parsley leaves
- Rice or steamed chinese buns to serve on side
Steps
- In small bowl, stir cornstarch with 2 tablespoons water; set aside. In large wok with lid (or Dutch oven), heat oil over medium heat until shimmering. Stir in shallots, ginger, garlic, and chilies. Cook until fragrant, stirring, about 1 minute.
- Add crab pieces and broth. Increase heat to medium high and bring to a boil. Cover loosely and gently boil (decrease heat if necessary), until crab has turned red and is nearly cooked through, about 6 minutes.
- Remove cover and stir in tomato paste and chili sauce. Simmer 1 minute and season to taste with salt, sugar, or chili sauce. Stir in cornstarch and bring to boil to thicken.
- Remove from heat and stir in egg. Stir in green onions. Ladle into serving dish, sprinkle with Chinese parsley, and serve.
Notes
- Crabs need to be rinsed well, cleaned, and cut into pieces. Check out this video by Sydney Fish Market on how to do it, or get your fishmonger to do it for you. I keep the creamy part inside the top shell for the extra crab flavor it lends to the dish. If using a wok with a lid, make sure it's supported well on the stove.
- I used ABC brand hot chili sauce. I found that I didn't need to adjust my seasoning, but you may want to adjust so it has a balance of sweet, salty, and heat from the chiles.
- Take care when eating the sauce—it may have bits of shell!
↑ Back to top
Singaporean Sriracha Chile Sauce
Servings: 1 ⅓ cups (330 ml)
Ingredients
- 12 ounces (350 g) Fresno chile or other moderately-hot red chiles
- 20 red Thai chiles
- 10 cloves garlic
- .8 oz (25 g) granulated sugar
- 1 tablespoon fine sea salt
- ¼ cup water, plus more as needed
- 1 ounce (30 g) yellow rock sugar
- 6 tablespoons (90 ml) unseasoned rice vinegar
Steps
- Wash and dry both kinds of chiles well, then dry thoroughly. Discard the stem but keep little green part that looks like a star. Coarsely chop, then put into a food processor. Add garlic. Process to a rough chopped texture. Add the sugar and salt, then pulse to combine.
- Transfer to a clean, glass jar. Cover with a piece of wax paper or loosely cover with plastic wrap. Set aside at room temperature for 4 to 5 days. Each day, stir with a clean spoon. The mixture should bubble slightly as it ferments. (After I kept mine for 3 weeks, the sweet heat mellowed nicely. The stuff didn’t spoil so you could keep for longer than 5 days.)
- Pour the fermented chile mixture into a saucepan. Add the water, rock sugar, and vinegar. Bring to simmer, and maintain that gentle cooking for 5 to 6 minutes. Off heat, taste and adjust the flavor with sugar, salt and vinegar – to get a hot, salty, and slightly sour flavor. Let cool completely.
- Puree in a blender until smoothie-like. Strain through a mesh strainer, pressing on the solids. You should have about 1 ⅓ cups. Stir in a little water and restrain, if needed. Store in a jar or bottle in the refrigerator.
↑ Back to top
Sisig (Filipino Sizzling Pork)
Servings: 4 to 6
Ingredients
- 1 (2-pound) skin-on pork belly
- 1 small lemongrass stalk, trimmed
- 1 bay leaf
- 1/4 cup cane vinegar or distilled white vinegar
- 1 1/4 cups thinly sliced white onion (about 1 small onion)
- 1/4 cup minced garlic (about 12 cloves)
- 1 (2-inch) piece fresh ginger, peeled and cut into 1/8-inch-thick matchsticks (about 1/4 cup)
- 1 to 2 tablespoons thinly sliced chiles (such as serrano or Thai chiles), plus more for serving
- 1 (9-ounce) can liver spread or liverwurst, crumbled
- 1 tablespoon Maggi seasoning
- 1/4 cup fresh lime juice (about 2 limes), divided, plus wedges for serving
- 1/2 cup mayonnaise
- 2 tablespoons banana ketchup or ketchup
- 2 tablespoons sriracha
- 4 teaspoons canola oil, divided
- 1/2 teaspoon garlic salt, divided
- Black pepper, to taste
- Cooked white rice, for serving (optional)
Sisig:
Spicy
Mayonnaise:
Additional
Ingredients:
Steps
- Place pork, skin side down, in a large Dutch oven. Add lemongrass, bay leaf, vinegar, and enough water to just cover the pork. Bring to a boil over high. Reduce heat to medium, and simmer, covered, until skin can easily be pierced with a fork, about 1 hour and 20 minutes. Remove from heat; transfer pork, skin side up, to a wire rack set inside a large rimmed baking sheet. Chill in refrigerator, uncovered, until cooled, about 1 hour.
- Preheat oven to broil with rack positioned about 6 inches from heat. Remove pork from refrigerator, and broil, rotating baking sheet every 5 minutes, until skin is crispy and browned, 15 to 20 minutes. Let pork cool completely on baking sheet, about 20 minutes. Finely chop pork into small (about 1/4 inch) pieces.
- Combine pork, onion, garlic, ginger, and chiles in a large nonreactive bowl. Stir in crumbled liver spread. Stir in Maggi seasoning and 2 tablespoons lime juice; cover and chill in refrigerator for at least 30 minutes or up to 1 day.
- Stir together mayonnaise, ketchup, and sriracha in a medium bowl. Set aside.
- Heat 2 teaspoons oil in a large cast-iron skillet over high. Add half of the pork mixture (about 3 1/2 cups), and spread in an even layer. Season with 1/4 teaspoon garlic salt and black pepper to taste. Cook, undisturbed, until fragrant, about 1 minute. Continue cooking, vigorously chopping and tossing sisig using a metal spatula, until pork is very finely chopped and starts to brown and aromatics are fragrant, 4 to 5 minutes. Drizzle with 3 tablespoons spicy mayonnaise and 1 tablespoon lime juice. Remove from heat, and stir until well combined.
- Transfer sisig to a serving platter or individual plates. Wipe skillet clean, and repeat process with remaining pork mixture, garlic salt, black pepper, spicy mayonnaise, and lime juice. Serve hot with lime wedges, additional sliced chiles, rice (if desired), and remaining spicy mayonnaise on the side.
Make the sisig:
Make the spicy
mayonnaise:
↑ Back to top
Skirt Steak with Bloody Mary Tomato Salad

Tags: Beef
Salad Sides
Ingredients
- 1/4 cup drained bottled horseradish
- 2 tablespoons fresh lemon juice
- 2 teaspoons Worcestershire sauce
- 1/2 teaspoon celery seeds
- Coarsely ground black pepper
- 1/4 cup plus 2 tablespoons canola oil
- Kosher salt
- 2 pounds heirloom tomatoes, chopped
- 2 small celery ribs, thinly sliced, plus 1/4 cup leaves
- 1/3 cup sour cream
- 1 pound skirt steak, in 2 pieces
Steps
- In a bowl, stir 2 tablespoons of the horseradish with the lemon juice, Worcestershire, celery seeds and 1/2 teaspoon of black pepper. Whisk in 1/4 cup of the canola oil in a steady stream; season with salt. Add the tomatoes and celery ribs and leaves, season with salt and pepper and toss.
- In a small bowl, stir the sour cream with the remaining 2 tablespoons of horseradish.
- Light a grill or preheat a grill pan. Rub the remaining 2 tablespoons of canola oil all over the steak and season with salt and black pepper. Grill the steak over moderately high heat, turning once, until nicely charred, 3 to 4 minutes per side for medium-rare. Transfer the steak to a work surface and let rest for 5 minutes. Slice the steak across the grain and serve with the tomato salad and horseradish cream.
Notes
- FAVORITE
↑ Back to top
Sloppy Joes
Tags: Meat
Sandwiches
Ingredients
- 4 teaspoons olive oil
- 1 medium onion, chopped
- 2 garlic cloves, finely chopped
- 1 medium red pepper, chopped
- 1 small green pepper, chopped
- 1 stalk celery, chopped
- 2 pounds ground beef chuck
- 1 can (28 ounces) whole tomatoes in puree, chopped
- 2 tablespoons light (mild) molasses
- 1 tablespoon cider vinegar
- 1 teaspoon salt
- 1/4 teaspoon ground black pepper
- 6 hamburger buns, split
Steps
- In a nonstick 12-inch skillet, heat oil over medium heat. Add onion and garlic and cook until onion is tender, about 5 minutes.
- Add red and green peppers and celery and cook until tender, about 5 minutes. Stir in ground beef and cook, breaking up meat with side of spoon, until meat is no longer pink, about 5 minutes. Stir in tomatoes with their puree, molasses, vinegar, slat, and black pepper and heat to boiling. Reduce heat and simmer until sauce has slightly thickened, about 10 minutes.
- Place split buns on plates and top with Sloppy Joe mixture.
Notes
- FAVORITE
↑ Back to top
Smoke Roasted Potato Salad
Tags: Potato
Salad Smoking
Ingredients
- 1 lb. Waxy Potatoes
- 2 Tb. Sour Cream
- ⅓ Cup Mayonnaise
- 1 tsp. Chipotle in Adobo
- 2 Tb. Chives, chopped
- 1 squirt Lime Juice
- 1/2 cup onion
- Salt and Pepper
↑ Back to top
Smoked Bratwurst

Tags: Charcuterie
Pork Sausage Smoking
ALTHOUGH SIMILAR SPICES ARE USED IN BOTH THE
FRESH AND SMOKED versions of bratwurst, the smoked variety has a rich
and smoky flavor. Make smoked bratwurst with all pork or a combination
of pork and beef. Experiment a bit with different proportions of meat
until you find the taste and texture you like. We like about 4 parts
pork to 1 part beef, but taste for yourself. This sausage is also
excellent unsmoked. If making this variation, leave the curing salts
out.
Servings: Makes about 3 pounds
Ingredients
- 2½ pounds pork butt, or 2 pounds pork butt and ½ pound beef chuck
- ½ pound pork back fat
- 1 tablespoon kosher salt
- 1 tablespoon coarsely ground black pepper
- 1 tablespoon coarsely ground mustard seed
- 2 teaspoons minced garlic
- 2 teaspoons sugar
- 1 teaspoon ground mace
- 1 teaspoon dried sage
- ½ teaspoon freshly grated nutmeg
- ½ cup water
- ¾ teaspoon curing salts (optional)
- Medium hog casings
Steps
- Mix the meat, fat, salt, black pepper, mustard seeds, garlic, sugar, mace, sage, and nutmeg in a large bowl. Grind the mixture through a ¼-inch plate. Add the water. Add the curing salts, if you intend to cold smoke the sausages. Knead and squeeze the mixture to blend all the ingredients thoroughly.
- Stuff into medium hog casings, and tie in 5- to 6-inch links.
- If you choose to cold smoke the brats and have mixed in the curing salts, air-dry the sausages in front of a fan overnight. Cold smoke for 12 to 24 hours according to the directions on this page. Bratwurst can also be hot smoked very successfully. Hot smoke to an internal temperature of 155° to 160° (see this page).
Notes
- The smoked sausages will keep for 5 days refrigerated, or for 2 months frozen. Unsmoked sausages will keep for 3 days refrigerated.
↑ Back to top
Smoky Potato Salad

Tags: Potato
Salad
Servings: 8
Ingredients
- 6 slices bacon
- 3 tablespoons red wine vinegar
- 2 tablespoons mayonnaise
- 2 teaspoons minced canned chipotle chiles in adobo sauce
- Salt and pepper
- 3 tablespoons olive oil, plus extra for brushing
- 3 pounds small red potatoes, unpeeled, halved
- 1 large onion, sliced into 1/2-inch-thick rounds
- 4 scallions, sliced thin
Steps
- Cook bacon in 12-inch skillet over medium heat until crisp, 7 to 9 minutes; transfer to paper towel–lined plate. Set aside 2 tablespoons bacon fat. When cool enough to handle, crumble bacon and set aside. Whisk vinegar, mayonnaise, chipotle, 1/2 teaspoon salt, and 1/2 teaspoon pepper together in large bowl. Slowly whisk in 3 tablespoons oil until combined; set aside dressing.
- 2A FOR A CHARCOAL GRILL: Open bottom vent completely. Light large chimney starter three-quarters filled with charcoal briquettes (4 1/2 quarts). When top coals are partially covered with ash, pour evenly over grill. Set cooking grate in place, cover, and open lid vent completely. Heat grill until hot, about 5 minutes.
- Clean and oil cooking grate. Toss potatoes with reserved bacon fat and 1/2 teaspoon salt. Push toothpick horizontally through each onion round to keep rings intact while grilling. Brush onion rounds lightly with extra oil and season with salt and pepper. Place potatoes, cut side down, and onion rounds on grill and cook, covered, until charred on first side, 10 to 14 minutes.
- Flip potatoes and onion rounds and continue to cook, covered, until well browned all over and potatoes are easily pierced with tip of paring knife, 10 to 16 minutes longer. Transfer potatoes and onion rounds to rimmed baking sheet and let cool slightly.
- When cool enough to handle, halve potatoes; remove toothpicks and coarsely chop onion rounds. Add potatoes, onion, scallions, and bacon to dressing and toss to combine. Season with salt and pepper to taste. Serve warm or at room temperature.
Notes
- Use small red potatoes 1 1/2 to 2 inches in diameter. If you don’t have 2 tablespoons of fat in the skillet after frying the bacon, add olive oil to make up the difference.
↑ Back to top
Smoky Roasted Cauliflower Soup with Herbed Chickpea
Dumplings
Adapted from http://www.anediblemosaic.com/?p=15197

Tags: Soups
Vegetables Vegetarian
Ingredients
- 1 3/4 lbs (800 g) cauliflower florets, cut into bite-sized pieces (about 6 cups)
- 6 tablespoons olive oil, divided
- 1/2 teaspoon salt, divided
- 2 medium-large onions, diced
- 2 medium carrots, chopped
- 5 large cloves garlic, minced
- 2 bay leaves
- 1 teaspoon smoked paprika
- 1 teaspoon sweet paprika
- 1/2 teaspoon turmeric
- 1/4 teaspoon hot paprika (more or less to taste)
- 1/4 teaspoon black pepper
- 6 cups (1.4 liters) low-sodium vegetable stock
- 4 3/4 oz (135 g) tomato paste
- 1 teaspoon vegan Worcestershire sauce
- 1 teaspoon soy or tamari sauce
- 1 1/2 cups (180 g) besan (chickpea flour, also known as gram flour)
- 3/4 teaspoon salt
- 1/2 teaspoon baking powder
- 3 scallions, green and white parts, thinly sliced
- 3 tablespoons minced fresh parsley leaves
- 1/2 cup (120 ml) water (or slightly more or less as needed)
- Minced fresh parsley leaves, for garnish
Soup:
Dumplings:
Other:
Steps
- Preheat the oven to 400F. Toss the cauliflower with 3 tablespoons olive oil and 1/4 teaspoon salt. Spread the cauliflower in an even layer on a large baking sheet and roast until tender and browned in spots, about 20 to 25 minutes, tossing once halfway through.
- Meanwhile, heat the remaining 3 tablespoons olive oil in a 5-quart pot over medium heat; add the onion and carrot and cook until slightly softened, about 10 minutes, stirring occasionally. Add the garlic and cook 2 minutes more, stirring constantly.
- Add the remaining 1/4 teaspoon salt, the bay leaves, spices (smoked paprika through black pepper), vegetable stock, tomato paste, Worcestershire sauce, and soy sauce. Turn the heat up to high and bring to a simmer, then turn the heat down a bit to keep it at a simmer and cook for 10 minutes. Add the roasted cauliflower to the soup during the last 2 minutes of simmer time. Taste the soup and add additional salt and pepper as desired.
- While the soup simmers, make the dumpling batter. Whisk together the besan, salt, baking powder, scallion, and parsley in a medium bowl. Use a wooden spoon to stir in the water a little at a time until it comes together into a thick dough (about the consistency of cookie dough).
- Use a 1 tablespoon measure to drop the batter into the simmering soup. Lightly spoon a little broth over the dumplings, then cover the pot and cook until a toothpick inserted into a dumpling comes out clean, about 10 to 15 minutes.
- Ladle the soup into bowls, sprinkle the minced fresh parsley on top if desired, and serve.
Notes
- FAVORITE
↑ Back to top
Soba Noodles with Miso-Roasted Tomatoes
Tags: Japanese
Noodles Vegetables Vegetarian
Ingredients
- 1/3 cup canola oil
- 3 tablespoons unseasoned rice vinegar
- 2 tablespoons light yellow miso
- 1 tablespoon minced peeled fresh ginger
- 1 tablespoon toasted sesame oil
- 1 tablespoon honey
- 2 teaspoons finely grated lime zest
- 2 tablespoons fresh lime juice
- Kosher salt
- 2 pints cherry tomatoes
- 8 ounces soba noodles
- 4 scallions, thinly sliced
- 1 tablespoon toasted sesame seeds
Steps
- Preheat the oven to 425°. In a bowl, whisk the canola oil, vinegar, miso, ginger, sesame oil, honey, lime zest and lime juice until smooth. Season with salt.
- On a rimmed baking sheet, toss the tomatoes with 3 tablespoons of the miso dressing and season with salt. Roast for 20 minutes, stirring, until the tomatoes are charred in spots. Scrape into a large bowl.
- Cook the soba in boiling water just until al dente, 4 minutes. Drain and cool under cold running water. Add the soba, scallions and half of the remaining dressing to the tomatoes and toss well. Season with salt; transfer to a platter and garnish with the sesame seeds. Serve with the remaining dressing.
Notes
- FAVORITE
↑ Back to top
Socca

Tags: Beans and Other
Legumes Flatbreads
Italian Vegan Vegetarian
Is starred. Rated
5/5
Ingredients
- 1 cup chickpea flour
- 1 teaspoon salt
- 1 tsp, at least ground black pepper
- 1 cup lukewarm water
- 3 to 5 tbsp olive oil
- 1/2 large onion thinly sliced, optional
- 1 tablespoon fresh rosemary leaves optional
↑ Back to top
Soda Bread
Tags: Breads
Irish
I made this.
Ingredients
- 2 cups flour
- 1 tsp baking soda
- 1/2 tsp baking powder
- 1/2 tsp salt
- 1½ tbsp sugar
- 6 tbsp. shortening (I use butter)
- 2/3 cup currants
- 2 tsp. caraway
- 1 cup buttermilk
- mix all dry ingredients mix in shortening until looks like small peas. mix in currants and caraway, add milk mix in with fork
- Traditionally it should be baked in a round shape on a sheet pan. They used a loaf pan
- 375° 45 minutes.
↑ Back to top
Soda Bread Buns

Tags: Breads
Irish Rolls
and Buns
Servings: YIELD 8 servings TOTAL
TIME 45 minutes
Ingredients
- 3 tablespoons unsalted butter, chilled and cubed, more for greasing pan
- 155 grams all-purpose flour (1 1/4 cups), more as needed
- 95 grams whole wheat pastry flour ( 3/4 cup)
- 55 grams sugar ( 1/4 cup)
- 7 grams baking powder (1 1/2 teaspoons)
- 5 grams salt (1 teaspoon)
- 5 grams baking soda ( 3/4 teaspoon)
- 2/3 cup buttermilk, more for brushing
- 1 large egg
- 90 grams dried currants (about 2/3 cup)
- 8 grams caraway seeds (about
- 1 1/2 teaspoons)
Steps
- Heat oven to 375 degrees. Lightly grease a large rimmed baking sheet.
- In a large bowl, whisk together flours, sugar, baking powder, salt and baking soda. Using a pastry cutter or your fingers, work in butter until mixture forms coarse crumbs. In a small bowl, whisk together buttermilk and egg. Stir wet mixture into dry one until they just form a moist dough. Stir in currants and caraway seeds.
- Turn dough out onto a lightly floured surface. Shape into a 7-inch round about 1-inch thick. Cut into 8 wedges. Using lightly floured hands, roll each wedge into a ball and transfer to the prepared baking sheet. Using kitchen shears, snip a small “x” into the top of each bun. (You can also use a knife.) Brush tops with a little buttermilk, and dust lightly with flour.
- Transfer baking sheet to oven. Bake until buns are golden brown and firm, 20 to 25 minutes. Cool 10 minutes before serving.
Notes
- FAVORITE
↑ Back to top
Sofrito

Tags: Condiments
Mexican
Servings: YIELD Makes about 4
cups.
Ingredients
- 2 medium Spanish onions, cut into large chunks
- 3 to 4 Italian frying peppers or cubanelle peppers
- 16 to 20 cloves garlic, peeled
- 1 large bunch cilantro, washed
- 7 to 10 ajices dulces (see note below), optional
- 4 leaves of culantro (see note below), or another handful cilantro
- 3 to 4 ripe plum tomatoes, cored and cut into chunks
- 1 large red bell pepper, cored, seeded and cut into large chunks
Steps
- Chop the onion and cubanelle or Italian peppers in the work bowl of a food processor until coarsely chopped. With the motor running, add the remaining ingredients one at a time and process until smooth. The sofrito will keep in the refrigerator for up to 3 days. It also freezes beautifully. Freeze sofrito in 1/2 cup batches in sealable plastic bags. They come in extremely handy in a pinch. You can even add sofrito straight from the freezer to the pan in any recipe that calls for it in this book.
Notes
- Pantry Notes: Ajices Dulces, also known as cachucha or ajicitos are tiny sweet peppers with a hint of heat. They range in color from light to medium green and yellow to red and orange. They add freshness and an herby note to the sofrito and anything you cook. Do not mistake them for Scotch bonnet or Habanero chilies (which they look like)--those two pack a wallop when it comes to heat. If you can find ajicitos in your market, add them to sofrito. If not, up the cilantro and add a pinch of cayenne pepper. Culantro is not cilantro. It has long leaves with tapered tips and serrated edges. When it comes to flavor, culantro is like cilantro times ten. It is a nice, not essential addition to sofrito. (See Sources for both the above.)
↑ Back to top
Soft Lemonade Cookies

Tags: Cookies
Ingredients
- 1 cup butter, softened
- 1 cup sugar
- 2 eggs
- 3 cups all-purpose flour
- 1 teaspoon baking soda
- 1/3 cup thawed lemonade concentrate
- 1/2 cup thawed lemonade concentrate
- Additional sugar
TOPPINGS:
Steps
- In a large bowl, cream butter and sugar until light and fluffy. Add eggs, one at a time, beating well after each addition. Combine flour and baking soda; add to the creamed mixture alternately with 1/3 cup lemonade concentrate, beating well after each addition.
- Drop by rounded teaspoonfuls onto ungreased baking sheets. Bake at 400° for 8 minutes. Remove to wire racks. Brush with 1/2 cup lemonade concentrate; sprinkle with sugar. Cool. Yield: 6 dozen.
Notes
- FAVORITE
↑ Back to top
Soft Pretzels

Tags: Bagels
Baking Snacks
Ingredients
- 4 cups all-purpose flour
- One package active dry yeast
- 2 tsp kosher salt
- 1 Tbs molasses
- 3/4 cup milk
- 3/4 cup water
- Oil for greasing the bowl
- alkali solution
- 1 cup melted butter
Steps
- In the bowl of a food processor pulse 4 cups of flour yeast in the 2 tablespoon salt just to mix them together
- At the molasses and milk. While pulsating, gradually add the water until softball forms. This will take about a minute. Add more liquid if needed.
- Once the softball has formed, continue to mix the dough for 3 more minutes. Turn onto a floured board and knead by hand until the dough feel smooth about 2 minutes. Forming a ball and set in the lightly greased bowl cover and leave in a warm place until doubled inside. This will take about an hour at room temperature.
- Lightly flour a work surface. Keeping the dough covered break off a walnut sized piece-1/18 of the dough-and roll into a rope about 18 inches long. Form an upside down you with the opening pointed towards you. Across the 2 ends leaving about 2 1/2 inches of dough beyond the point of intersection. Still grasping the 2 ends of the dough rope cross again so the dough intertwines at the intersection point. There will be a teardrop shape above the to intertwine ends. Now hold the top of the teardrop and folded down toward yourself the final shape will be pretzel like: a circle overall, that his inside it to open loops at the top and one open loop at the bottom. Set each pretzel onto a lightly greased cookie sheet. Repeat 7 times.
- When the pretzels are shape cover lightly with a towel and let rise again until doubled about 40 minutes. Preheat the oven to 375°. Brush each pretzel lightly on top with baking soda mixture. Bake until golden crusty on the outside but still soft inside, about 12 to 15 minutes.
- As soon as the pretzels are done brush them liberally with melted butter. Sprinkle with kosher salt to taste. Best when served warm.
Notes
- FAVORITE
↑ Back to top
Somen Noodles with Poached Egg, Bok Choy and Mushrooms
Adapted from https://cooking.nytimes.com/recipes/1020047-somen-noodles-with-poached-egg-bok-choy-and-mushrooms
Servings: 2
Ingredients
- 2 tablespoons vegetable oil
- 3 scallions, trimmed, whites and greens separated and thinly sliced
- 8 ounces fresh shiitake mushrooms, stems discarded and caps thinly sliced (about 3 cups)
- Kosher salt
- 1 medium bok choy (about 4 ounces), cut into bite-size pieces
- 3 tablespoons soy sauce
- 2 teaspoons toasted sesame oil, plus more for serving
- 2 bundles (about 7 ounces total) somen noodles, or any thin wheat or rice noodles
- 2 large eggs
Steps
- Bring a large saucepan of water to a simmer.
- Heat vegetable oil in a pot over medium. Add scallion whites and sliced mushrooms, season with salt and cook until browned, stirring occasionally, 5 to 6 minutes.
- Add 3 cups water to the pot and bring to a simmer over medium-high. Add bok choy and cook until crisp-tender, about 1 minute. Stir in soy sauce and 2 teaspoons sesame oil and season to taste with salt. Turn off heat and cover to keep warm.
- Meanwhile, cook somen according to package instructions in the simmering water in the saucepan. Using a slotted spoon or spider, divide the noodles among bowls, leaving the simmering water in the saucepan. Crack each egg into its own small bowl, discarding the shells. Swirl the simmering water in the saucepan, creating a vortex by stirring with a wooden spoon. Add the eggs, one right after another, and cook over medium-low until the whites are set, about 3 minutes. Transfer eggs to noodle bowls using a slotted spoon.
- Ladle the reserved shiitake broth into the bowls. Top with sliced scallion greens, drizzle with sesame oil and serve.
↑ Back to top
Sour Cream Apple Pie

Tags: Fruit
Pies and Tarts
Ingredients
- 2 eggs
- 1 cup (8 ounces) sour cream
- 1 cup sugar
- 6 tablespoons all-purpose flour, divided
- 1 teaspoon vanilla extract
- 1/4 teaspoon salt
- 3 cups chopped peeled tart apples
- 1 unbaked pie shell (9 inches)
- 1/4 cup packed brown sugar
- 3 tablespoons cold butter
Steps
- In a large bowl, beat eggs. Add sour cream. Stir in sugar, 2 tablespoons flour, vanilla and salt; mix well. Gently stir in apples. Pour into pie shell. Bake at 375° for 15 minutes.
- Meanwhile, combine brown sugar and remaining flour; cut in butter until mixture is crumbly. Sprinkle over top of pie. Bake 20 to 25 minutes longer or until filling is set. Cool completely on a wire rack. Serve or cover and refrigerate. Yield: 8 servings.
Notes
- FAVORITE
↑ Back to top
Sour Cream Pie Crust

Tags: Pies and Tarts
Ingredients
- 2 cups (260 g) all purpose flour
- 1 teaspoon of salt (skip if using salted butter)
- 2 teaspoons of sugar (for sweet recipes, otherwise skip)
- 2 sticks unsalted butter (1 cup, 8 ounces, 225 g) cubed
- 1/2 cup (115 ml) sour cream (full fat, NOT light sour cream)
Steps
- Cut butter into cubes and let sit for a couple minutes: Cut the butter into cubes and put in a warm spot to take the chill off (don't soften the butter, just let it sit out for couple minutes when you take it out of the fridge).
- Whisk together flour, salt, sugar: In a large bowl, vigorously whisk together the flour, salt (omit if using salted butter), and sugar (if using).
- Work the butter into the flour with your hands: Sprinkled the cubes of butter over the flour. Use your clean hands to squish the flour and butter together with your thumbs, fingers, and knuckles. Work the butter into the dough until you have what resembles a coarse meal with some flattened chunks of butter.
- Add sour cream: Add the sour cream to the flour butter mixture. Use a fork to incorporate into the mixture.
- Form dough into disks, refrigerate: Use your hands to gather the pastry dough together into a large ball. Use a knife to cut the ball in half. Form into two disks. As you work the dough into disks, it should end up smooth, having the consistency of Play-Doh. Don't worry about over-working this dough. Form the disks so that there are no cracks.
- Remove dough from fridge, let sit for a few minutes, then roll out: After the dough has been sitting in the fridge for an hour, remove it and let it sit for 5-10 minutes at room temperature to become more malleable before rolling out.
Sprinkle all over with a little flour. Wrap tightly with plastic wrap.
Once you wrap the dough disk in plastic wrap, you can massage the
dough
and the edges with your warm hands to close any cracks. Chill in the
refrigerator for an hour or up to a day ahead.
If
you want to freeze for future use, wrap again, this time with aluminum
foil and freeze (leave in refrigerator overnight to thaw before
using).
If it still feels too stiff
to roll out, hold your hands around the edges to soften.
To roll out, sprinkle a clean, flat surface with flour. As you roll
the
dough, check to make sure the bottom is not sticking. If it is, lift
it
up and sprinkle a little flour underneath.
Roll out to 12 to 14 inches
wide, to an even thickness.
You can use this pastry dough for unstructured rustic pies or
galettes,
or single or double crusted traditional pies. It can also be used for
a
savory pot pie.
Whether you use the dough for a galette or a double crust pie, it will
be prettier with a light egg wash. Just whisk one egg in a small bowl,
add a teaspoon of water, and brush lightly over the exposed crust with
a pastry brush, right before baking.
Blind-baking this pie crust
This pie crust recipe is difficult to pre-bake. There is more fat in
it
than a regular crust, which can cause the sides to slump if you bake
it
without a filling. That said, I have successfully pre-baked this crust
by freezing it for at least 30 minutes first, lining it with heavy
foil, filling it all of the way with white granulated sugar, then
baking it at 350°F for 50 minutes. (See our instructions for blind
baking a pie crust.)
Notes
- For a 9-inch double crust pie
↑ Back to top
Sour Pickles
Tags: Pickles
Servings: 1 to 2 quarts
Ingredients
- 2 pounds freshly picked firm, unwaxed, bumpy pickling cucumbers, often called Kirby
- 2 cloves spring garlic, sliced thin (optional)
- 1 dill flower, or 5 sprigs fresh dill or 1 teaspoon dill seed (optional)
- 1/2 teaspoon coriander seed (optional)
- 1/2 jalapeño, seeded and slivered (optional)
- 2 tablespoons salt
Steps
- Soak cucumbers for 30 minutes in a bowl filled with ice water to loosen any dirt. Slice the blossom end off each cucumber, which is opposite the stem end. If you aren’t sure which end is which, slice a little off each. Cut cucumbers into spears or chunks, if desired.
- Pack cucumbers into one or two clean quart jars. Tuck in garlic, dill, coriander and jalapeño, if using.
- Add salt to two cups boiling water. Stir until dissolved. Add two cups of ice (made with filtered water if yours is chlorinated). Stir well until the ice has melted and the brine is cool. Pour brine into jars, covering cucumbers.
- Loosely cap jars and place in a bowl or pan because the jars may leak during fermentation.
- Leave pickles on the counter to ferment. The brine will bubble lazily and become cloudy. Taste after 3 days, leaving on the counter another day or two if you want your pickles more sour, or refrigerating if they’re ready. They keep a month in the refrigerator.
Notes
- FAVORITE
↑ Back to top
Sourdough Cheese Crackers

Servings: 50 CRACKERS
Ingredients
- 3/4 cup plus 2 tablespoons all-purpose, unbleached flour
- 1/2 cup filtered water, room temperature
- 2/3 cup plus 1 tablespoon all-purpose, unbleached flour
- 7 tablespoons filtered water, room temperature
- 1/2 cup plus 1 tablespoon unbleached, all-purpose flour, plus more for dusting
- 2 tablespoons cheddar cheese powder
- 1/4 teaspoon kosher salt, plus more for sprinkling
- 4 tablespoons unsalted butter, softened and divided
- 1/2 cup discarded Sourdough Starter (unfed), from above
- Kitchen scale with tare function
- Quart-sized, wide-mouthed glass jars with lids
- Pasta machine
- Pizza wheel
TO BEGIN
FOR DAILY
FEEDING
SOURDOUGH
CHEESE CRACKERS
Specialized
Hardware
Steps
- To begin: Mix together 125 grams flour and 125 grams water with a clean hand in a medium glass bowl. Cover the bowl with a tea towel and let sit undisturbed at room temperature until the mixture is full of bubbles and has nearly doubled in size, usually 2 to 3 days. During this time, yeasts and bacteria from the air and from the flour and probably from you will set up housekeeping in the bowl.
- For daily feeding: Peel back any crust that may have formed and transfer 20 percent of the culture (50 grams) to a clean, wide-mouthed jar. Stir in 100 grams flour and 100 grams water, loosely screw on the lid and stash at room temperature for 24 hours. (The culture will have a stinky-sour smell at this point.) Discard the rest of the original mixture.
- Repeat step 2 every 24 hours for 5 days. By then the culture should smell yeasty-sweet-sour, which means you're ready to put the starter to work. The cheese crackers are to be made with the discarded percentage of starter.
- Whisk the flour, cheese powder, and salt together in a small bowl.
- Place 3 tablespoons of the butter and the starter in the work bowl of a stand mixer fitted with the paddle attachment, and work on low speed until creamy and homogeneous, about 1 minute. Stop the mixer and sift the flour mixture over the creamed starter, return the mixer to low, and work until a soft dough forms, about 1 minute more.
- Turn the dough out onto a lightly floured surface and divide into 4 equal pieces. Press each piece into a 1/4-inch-thick rectangle and wrap in individual pieces of plastic wrap. Refrigerate between 8 and 24 hours (see Cook's Note).
- Place two racks nearest the center of the oven and heat to 350ºF. Line two half-sheet pans with parchment paper.
- Retrieve one piece of dough from the refrigerator and dust both the dough and your pasta maker with flour. (Continue to dust the pasta roller and the dough as needed to prevent sticking.) Starting on the widest setting, typically labeled "1," feed the dough through the roller. Then fold the dough into thirds, as you would a letter, turn 90 degrees and run it through again. Fold the dough into thirds again, turn, and pass it through the roller.
- Adjust your pasta maker to the next setting and roll the dough through 3 times without folding. Repeat this step 3 times more on both the 3rd and 4th settings. Transfer the dough to one of the prepared half-sheet pans and repeat the process with the remaining dough, arranging two sheets of dough per pan.
- Melt the remaining 1 tablespoon of butter and brush onto the dough. Sprinkle with a generous pinch of kosher salt. Dock the dough thoroughly with a fork and cut into 1-inch squares with a pizza wheel.
- Bake for 10 minutes, then turn the pans 180 degrees, and rotate from top to bottom. Continue baking until the crackers just begin to brown around the edges, 8 to 10 minutes more.
- Remove from the oven and immediately transfer the crackers on the parchment to a wire rack to cool completely before serving, about 20 minutes.
- Lid tightly and store at room temperature.
FOR DAILY FEEDING
SOURDOUGH CHEESE
CRACKERS
↑ Back to top
Sourdough Hot Dog Buns

Servings: 10 buns
Ingredients
- Choose your measure: Volume Ounces Grams
- 113g ripe (fed) sourdough starter
- 227g lukewarm water
- 298g King Arthur Unbleached All-Purpose Flour
- 1 1/2 teaspoons salt
- 25g sugar
- 57g unsalted butter, softened
- 35g Baker's Special Dry Milk or nonfat dry milk
- 46g potato flour
- 3/4 teaspoon instant yeast
Steps
- Weigh out your flour; you’ll find its weight by toggling to “ounces” at the top of the ingredient section above. Or measure it by gently spooning it into a cup, then sweeping off any excess.
- Combine all the ingredients, and mix and knead — by hand, mixer, or bread machine set to the dough cycle — adding more flour or water if necessary to make a soft, smooth dough.
- Place the dough into a lightly greased bowl, cover, and allow it to rise at warm room temperature until it's nearly doubled in bulk, 60 to 90 minutes.
- While the dough is rising, lightly grease a hot dog bun pan.
- Transfer the dough to a lightly greased work surface, gently deflate it, and stretch it until it's about 15" long and 6" wide. Place the dough into the pan, stretching it to the edges.
- Let the dough rise for 45 to 60 minutes, until it comes to within 1/2" of the top of the pan. Towards the end of the rising time, preheat the oven to 350°F.
- Grease a baking sheet, and place it on top of the risen buns.
- Put the covered buns into the oven, weighing the baking sheet down with something heavy and oven-safe; a cast iron skillet works well.
- Bake the buns for 18 minutes, remove the weighted baking sheet, and bake for 2 to 5 minutes longer, if necessary to brown the buns.
- Remove the pan from the oven, and cool the buns in the pan for 5 minutes. Turn them out onto a rack, rounded side up, to cool completely.
- Slice each bun down the middle vertically, without cutting through the bottom; then cut between the buns to separate them.
- Store buns wrapped in plastic for several days; freeze for longer storage.
Notes
- Need help making sourdough starter? Purchase and feed our sourdough starter; or create your own starter.
- To make regular (not New England-style) hot dog buns without a pan, divide the dough into 10 equal pieces (if you have a scale, each piece will weigh about 2 3/4 ounces), and form each piece into a cylinder 6" in length. Transfer buns to a parchment-lined baking sheet. Flatten the buns slightly (dough rises more in the center, so this will give them gently rounded tops), then allow to rise for 60 to 90 minutes, until puffy. Bake in a preheated 350°F oven for 15 to 20 minutes, until lightly golden brown and a digital thermometer inserted into the center of one bun reads at least 190°F. Note that buns baked without a hot dog bun pan will have a more uneven texture, with smaller and larger gas bubbles on the inside. The buns may have a speckled appearance due to those gas bubbles under the surface.
↑ Back to top
Sous Vide Barbecue Pork Ribs
Tags: Pork
Sous Vide
Servings: 4
Ingredients
- 1/3 cup paprika
- 1/3 cup dark brown sugar
- 1/4 cup kosher salt
- 1 teaspoon Prague Powder #1 (optional; see note)
- 2 tablespoons whole yellow mustard seed
- 1 teaspoon freshly ground black pepper
- 2 tablespoons granulated garlic powder
- 1 tablespoon dried oregano
- 1 tablespoon whole coriander seed
- 1 teaspoon red pepper flakes
- 1 medium yellow onion, grated on the large holes of a box grater
- 1 1/2 cups (360ml) ketchup
- 2 tablespoons (30ml) spicy brown mustard
- 1/3 cup (80ml) dark molasses
- 1/4 cup (60ml) Worcestershire sauce
- 1/4 cup (60ml) apple cider vinegar
- 3/4 teaspoon (3ml) Wright’s or Colgin liquid hickory smoke
- 2 whole racks St. Louis–cut pork ribs
- About 3/4 teaspoon (3ml) Wright’s or Colgin liquid hickory smoke
For the Spice
Rub:
For the Sauce
(if making sauced ribs):
For the Ribs:
Steps
- For the Spice Rub: Working in batches, combine the paprika, brown sugar, salt, Prague Powder (if using), mustard seed, black pepper, garlic powder, oregano, coriander seed, and red pepper flakes in a spice grinder and reduce to a fine powder.
- For the Sauce (if using): Combine 3 tablespoons spice rub, grated onion, ketchup, mustard, molasses, Worcestershire sauce, vinegar, and liquid smoke in a medium saucepan and whisk to combine. Bring to a bare simmer and cook until reduced and thickened, about 20 minutes. Set aside.
- Prepare the Ribs: Remove the papery membrane on the back of the ribs, using a paper towel or kitchen towel to grip it and pulling it away in one piece. Divide each rack of ribs into three to four portions, with three to four ribs per portion, by cutting through the meat in between the ribs. Rub ribs generously on all sides with the remaining spice rub mixture. (Set aside 3 tablespoons spice rub if making dry-style ribs.)
- Place individual portions of rubbed ribs in vacuum bags. (Fold over the top of each bag while you add the ribs so that no rub or pork juices get on the edges of the bags, which can weaken the seal.) Add 4 drops (about 1/8 teaspoon) liquid smoke to each bag. Seal the bags, transfer to refrigerator, and let rest for 4 to 12 hours.
- When Ready to Cook: Set your precision cooker to 145°F (63°C) for extra-meaty ribs or 165°F (74°C) for more traditionally textured ribs.
- Add ribs to the water bath and cover it with a lid, aluminum foil, or table tennis balls. Cook for 36 hours at 145°F or 12 hours at 165°F. Transfer cooked ribs to a large bowl of water filled with ice to chill thoroughly. Ribs can be stored in the refrigerator at this stage for up to 5 days before finishing.
- To Finish Dry-Style in the Oven: Remove ribs from vacuum bags and carefully pat dry with paper towels. Rub with remaining 3 tablespoons spice rub. Adjust oven racks to upper and lower-middle positions and preheat oven to 300°F (150°C). Line 2 rimmed baking sheets with aluminum foil and place a wire rack in each. Divide ribs evenly on racks, facing meat-side up. Transfer ribs to oven and cook until a crusty bark has formed, about 40 minutes. Serve.
- To Finish Dry-Style on the Grill: Remove ribs from vacuum bags and carefully pat dry with paper towels. Rub with remaining 3 tablespoons spice rub. Light one-half chimney full of charcoal (about 2 1/2 quarts of coals). When all the charcoal is lit and covered with gray ash, pour out and arrange the coals on one side of the charcoal grate. Set cooking grate in place, cover grill, and allow to preheat for 5 minutes. Alternatively, set half the burners on a gas grill to the medium heat setting, cover, and preheat for 10 minutes. Scrape the grill grates clean with a grill scraper, then oil the grates by holding an oil-dipped kitchen towel or paper towels in a set of tongs and rubbing them over the grates 5 to 6 times. Place the ribs, meat-side up, over the cooler side of the grill. Cover and cook until ribs are heated through and dry to the touch, about 15 minutes. Transfer ribs to hotter side of grill and continue grilling, turning occasionally, until a crusty bark has formed, about 10 minutes. Serve.
- To Finish Sauced Ribs in the Oven: Remove ribs from vacuum bags and carefully pat dry with paper towels. Adjust oven racks to upper and lower-middle positions and preheat oven to 300°F (150°C). Line 2 rimmed baking sheets with aluminum foil and place a wire rack in each. Divide ribs evenly on racks, meat-side up. Transfer ribs to oven and cook until surface is sizzling and ribs are heated through, about 20 minutes. Brush ribs with sauce and return to oven for 10 minutes. Remove from oven, brush with another layer of sauce, and return to oven until sauce is dried and sticky, about 10 minutes longer. Remove ribs from oven, paint with one last layer of sauce, and serve, passing extra sauce at the table.
- To Finish Sauced Ribs on the Grill: Remove ribs from vacuum bags and carefully pat dry with paper towels. Light one-half chimney full of charcoal (about 2 1/2 quarts of coals). When all the charcoal is lit and covered with gray ash, pour out and arrange the coals on one side of the charcoal grate. Set cooking grate in place, cover grill, and allow to preheat for 5 minutes. Alternatively, set half the burners on a gas grill to the medium heat setting, cover, and preheat for 10 minutes. Scrape the grill grates clean with a grill scraper, then oil the grates by holding an oil-dipped kitchen towel or paper towels in a set of tongs and rubbing them over the grates 5 to 6 times. Place the ribs, meat-side up, over the cooler side of the grill. Cover and cook until ribs are heated through and dry to the touch, about 15 minutes. Brush ribs with a layer of sauce and transfer ribs to hotter side of grill. Cover and cook until sauce is mostly dry, about 7 minutes. Brush with a second layer of sauce, cover, and cook until second layer is sticky, about 5 minutes longer. Remove ribs from grill, paint with one last layer of sauce, and serve, passing extra sauce at the table.
- Special equipment
Notes
- Prague Powder #1, a curing salt, can be added to give the ribs a red "smoke" ring. You can order it online.
↑ Back to top
Sous Vide Barbecue Pulled Pork Shoulder
Adapted from https://www.seriouseats.com/recipes/2016/07/sous-vide-barbecue-pulled-pork-shoulder-recipe.html
Tags: Barbecue
Pork Sous Vide
Servings: 8 to 12
Ingredients
- 1/4 cup (50g) paprika
- 1/4 cup (50g) dark brown sugar
- 3 tablespoons (35g) kosher salt
- 1/2 teaspoon (2g) Prague Powder #1 (optional; see note)
- 1 tablespoon (12g) whole yellow mustard seed
- 1 teaspoon (4g) freshly ground black pepper
- 2 tablespoons (20g) granulated garlic powder
- 1 tablespoon (8g) dried oregano
- 1 tablespoon (12g) whole coriander seed
- 1 teaspoon (4g) red pepper flakes
- 1 whole boneless or bone-in pork butt (shoulder), 5 to 7 pounds total (2.25 to 3.25kg)
- 1/2 teaspoon (3ml) liquid smoke, such as Wright's Liquid Smoke (optional; see note)
- Kosher salt
For the Spice
Rub:
For the Pork:
Steps
- For the Spice Rub: Working in batches, combine paprika, brown sugar, salt, Prague Powder (if using), mustard seed, black pepper, garlic powder, oregano, coriander seed, and red pepper flakes in a spice grinder and reduce to a fine powder.
- To Cook: Set your precision cooker to 165°F (74°C) for more traditionally textured pulled pork, or 145°F (63°C) for sliceable but tender pork. When the bath is at temperature, add sealed bag with pork and cover with foil or plastic wrap. Allow to cook for 18 to 24 hours. After this stage, pork can be refrigerated for up to 1 week before continuing.
- To Finish in the Oven: Adjust oven rack to lower-middle position and preheat oven to 300°F. Remove pork from sous vide bag and carefully blot dry with paper towels. (The liquid from the bag can be added to your favorite barbecue sauce and simmered down to provide extra flavor.) Rub reserved spice mixture into the surface of the pork. Place pork on a wire rack set in a rimmed baking sheet and place in oven. Roast until a deep, dark bark has formed, about 1 1/2 hours. Continue with step 7.
- To Finish on the Grill: Light 1/2 chimney full of charcoal. When all the charcoal is lit and covered with gray ash, pour out and arrange coals on one side of the charcoal grate. Set cooking grate in place, cover grill, and allow to preheat for 5 minutes. Alternatively, set half the burners on a gas grill to medium-high heat, cover, and preheat for 10 minutes. Clean and oil the grilling grate.
Divide mixture in half. Rub half of mixture evenly all over pork
shoulder, pressing it in until it adheres. Place pork shoulder in a
sous vide–safe vacuum-sealer bag. Add liquid smoke (if using) and seal
bag.
Remove pork from bag and carefully blot dry with paper towels. (The
liquid from the bag can be added to your favorite barbecue sauce and
simmered down to provide extra flavor.) Rub reserved spice mixture
into
the surface of the pork. Place pork on the cooler side of grill. Add 4
to 5 hardwood chunks to the hotter side of grill. Cover and allow pork
to smoke, adjusting vents to maintain a temperature between 275 and
300°F and adding 2 to 3 wood chunks twice during cooking. Smoke until
a
deep, dark bark has formed, about 1 1/2 hours. Continue with step 7.
Transfer pork to a large bowl or cutting board. Using a couple of
forks, shred meat into bite-size pieces (or, if you cooked it at
145°F,
use a knife to slice the pork). Season pulled pork to taste with salt
and serve immediately, passing your favorite barbecue sauce at the
table.
Notes
- Prague Powder #1 can be added to give the shoulder a red "smoke" ring. You can order it here. Liquid smoke will help give the pork a smokier flavor if you're using the oven method, but is not completely necessary.
↑ Back to top
Sous Vide Barbecue Pulled Pork Shoulder

Tags: Barbecue
Pork
Servings: 8 to 12
Ingredients
- 1/4 cup ( 50 g) paprika
- 1/4 cup ( 50 g) dark brown sugar
- 3 tablespoons ( 35 g) kosher salt
- 1/2 teaspoon (2g) Prague Powder #1 (optional; see note)
- 1 tablespoon ( 12 g) whole yellow mustard seed
- 1 teaspoon ( 4 g) freshly ground black pepper
- 2 tablespoons ( 20 g) granulated garlic powder
- 1 tablespoon ( 8 g) dried oregano
- 1 tablespoon ( 12 g) whole coriander seed
- 1 teaspoon ( 4 g) red pepper flakes
- 1 whole boneless or bone-in pork butt ( shoulder), 5 to 7 pounds total (2.25 to 3.25kg)
- 1/2 teaspoon (3ml) liquid smoke, such as Wright's Liquid Smoke (optional; see note)
- Kosher salt
For the Spice
Rub:
For the Pork:
Steps
- For the Spice Rub: Working in batches, combine paprika, brown sugar, salt, Prague Powder (if using to develop a smoke ring), mustard seed, black pepper, garlic powder, oregano, coriander seed, and red pepper flakes in a spice grinder and reduce to a fine powder.
- Divide mixture in half. Rub half of mixture evenly all over pork shoulder, pressing it in until it adheres. Place pork shoulder in a sous vide–safe vacuum-sealer bag. Add liquid smoke (if using) and seal bag.
- To Finish in the Oven: Adjust oven rack to lower-middle position and preheat oven to 300°F. Remove pork from sous vide bag and carefully blot dry with paper towels. (The liquid from the bag can be added to your favorite barbecue sauce and simmered down to provide extra flavor.) Rub reserved spice mixture into the surface of the pork. Place pork on a wire rack set in a rimmed baking sheet and place in oven. Roast until a deep, dark bark has formed, about 1 1/2 hours. Continue with step 7.
- To Finish on the Grill: Light 1/2 chimney full of charcoal. When all the charcoal is lit and covered with gray ash, pour out and arrange coals on one side of the charcoal grate. Set cooking grate in place, cover grill, and allow to preheat for 5 minutes. Alternatively, set half the burners on a gas grill to medium-high heat, cover, and preheat for 10 minutes. Clean and oil the grilling grate.
- Remove pork from bag and carefully blot dry with paper towels. (The liquid from the bag can be added to your favorite barbecue sauce and simmered down to provide extra flavor.) Rub reserved spice mixture into the surface of the pork. Place pork on the cooler side of grill. Add 4 to 5 hardwood chunks to the hotter side of grill. Cover and allow pork to smoke, adjusting vents to maintain a temperature between 275 and 300°F and adding 2 to 3 wood chunks twice during cooking. Smoke until a deep, dark bark has formed, about 1 1/2 hours. Continue with step 7.
- Transfer pork to a large bowl or cutting board. Using a couple of forks, shred meat into bite-size pieces (or, if you cooked it at 145°F, use a knife to slice the pork). Season pulled pork to taste with salt and serve immediately, passing your favorite barbecue sauce at the table.
Notes
- Prague Powder #1 can be added to give the shoulder a pink "smoke" ring. Liquid smoke will help give the pork a smokier flavor if you're using the oven method, but is not necessary.
↑ Back to top
Sous Vide Barbecue Pulled Pork Shoulder
Adapted from https://www.seriouseats.com/recipes/2016/07/sous-vide-barbecue-pulled-pork-shoulder-recipe.html

Tags: Barbecue
Pork Smoking Sous
Vide
Servings: 8 to 12
Ingredients
- 1/4 cup (50g) paprika
- 1/4 cup (50g) dark brown sugar
- 3 tablespoons (35g) kosher salt
- 1/2 teaspoon (2g) Prague Powder #1 (optional; see note)
- 1 tablespoon (12g) whole yellow mustard seed
- 1 teaspoon (4g) freshly ground black pepper
- 2 tablespoons (20g) granulated garlic powder
- 1 tablespoon (8g) dried oregano
- 1 tablespoon (12g) whole coriander seed
- 1 teaspoon (4g) red pepper flakes
- 1 whole boneless or bone-in pork butt (shoulder), 5 to 7 pounds total (2.25 to 3.25kg)
- 1/2 teaspoon (3ml) liquid smoke, such as Wright's Liquid Smoke (optional; see note)
- Kosher salt
For the Spice
Rub:
For the Pork:
Steps
- For the Spice Rub: Working in batches, combine paprika, brown sugar, salt, Prague Powder (if using), mustard seed, black pepper, garlic powder, oregano, coriander seed, and red pepper flakes in a spice grinder and reduce to a fine powder.
- To Cook: Set your precision cooker to 165°F (74°C) for more traditionally textured pulled pork, or 145°F (63°C) for sliceable but tender pork. When the bath is at temperature, add sealed bag with pork and cover with foil or plastic wrap. Allow to cook for 18 to 24 hours. After this stage, pork can be refrigerated for up to 1 week before continuing.
- To Finish in the Oven: Adjust oven rack to lower-middle position and preheat oven to 300°F. Remove pork from sous vide bag and carefully blot dry with paper towels. (The liquid from the bag can be added to your favorite barbecue sauce and simmered down to provide extra flavor.) Rub reserved spice mixture into the surface of the pork. Place pork on a wire rack set in a rimmed baking sheet and place in oven. Roast until a deep, dark bark has formed, about 1 1/2 hours. Continue with step 7.
- To Finish on the Grill: Light 1/2 chimney full of charcoal. When all the charcoal is lit and covered with gray ash, pour out and arrange coals on one side of the charcoal grate. Set cooking grate in place, cover grill, and allow to preheat for 5 minutes. Alternatively, set half the burners on a gas grill to medium-high heat, cover, and preheat for 10 minutes. Clean and oil the grilling grate.
- Transfer pork to a large bowl or cutting board. Using a couple of forks, shred meat into bite-size pieces (or, if you cooked it at 145°F, use a knife to slice the pork). Season pulled pork to taste with salt and serve immediately, passing your favorite barbecue sauce at the table.
Divide mixture in half. Rub half of mixture evenly all over pork
shoulder, pressing it in until it adheres. Place pork shoulder in a
sous vide–safe vacuum-sealer bag. Add liquid smoke (if using) and seal
bag.
Remove pork from bag and carefully blot dry with paper towels. (The
liquid from the bag can be added to your favorite barbecue sauce and
simmered down to provide extra flavor.) Rub reserved spice mixture
into
the surface of the pork. Place pork on the cooler side of grill. Add 4
to 5 hardwood chunks to the hotter side of grill. Cover and allow pork
to smoke, adjusting vents to maintain a temperature between 275 and
300°F and adding 2 to 3 wood chunks twice during cooking. Smoke until
a
deep, dark bark has formed, about 1 1/2 hours. Continue with step 7.
Notes
- Prague Powder #1 can be added to give the shoulder a red "smoke" ring. You can order it here. Liquid smoke will help give the pork a smokier flavor if you're using the oven method, but is not completely necessary.
↑ Back to top
Sous Vide Glazed Carrots
Servings: 4 to 6
Ingredients
- 1 pound (454g) baby whole small carrots, peeled or well-scrubbed, or 1 pound (454g) medium to large carrots, peeled and cut into 1-inch chunks
- 2 tablespoons (30g) unsalted butter
- 1 tablespoon (12g) sugar
- Kosher salt
- Freshly ground black pepper
- 1 tablespoon (15ml) chopped parsley (optional)
Steps
- Use a sous vide immersion circulator to preheat a water bath to 183°F (84°C). Place carrots, butter, sugar, and 1/2 teaspoon kosher salt in a vacuum bag and seal according to manufacturer's instructions. Cook carrots in the water bath until fully tender, about 1 hour. At this point, carrots can be stored in refrigerator for up to 1 week.
- Empty entire contents of bag into a 12-inch, heavy-bottomed skillet and cook over high heat, stirring constantly, until liquid has reduced to a shiny glaze, about 2 minutes. If glaze breaks and turns greasy, add water a teaspoon at a time, shaking pan to re-form glaze. Season to taste with salt and pepper, stir in parsley, and serve.
↑ Back to top
Sous Vide Rosemary-Mustard Seed Crusted Roast Beef and
Yogurt Herb Sauce
Tags: Beef
Ingredients
- 1 5-pound (2.3 kilograms) boneless beef chuck-eye roast, pulled into 2 pieces at natural seam and trimmed of large pieces of fat
- Kosher salt and pepper
- 2 tablespoons (28 grams)
- vegetable oil
- 1 egg white (30 grams)
- 3 tablespoons (25 grams) ground black, green, and pink
- peppercorns
- ¼ cup (42 grams) mustard seeds
- ⅓ cup (25 grams) chopped rosemary
- 2 tablespoons (20 grams) flake sea salt
- 2 cups (490 grams)
- plain whole-milk yogurt
- ¼ cup (16 grams) minced fresh parsley
- ¼ cup (16 grams) minced fresh chives
- 2 teaspoons (4 grams) grated lemon zest plus ¼ cup (60 grams) juice
- 2 garlic cloves (10 grams), minced
- Salt and pepper
Beef:
Sauce:
↑ Back to top
Sous Vide Smoked Brisket
Servings: 8 to 10
Ingredients
- 2 ounces coarsely ground black peppercorns (about 1/3 cup; 55 g); see notes
- 2 1/4 ounces kosher salt (about 1/4 cup; 65 g)
- 1/4 ounce (10g) pink salt, such as Prague Powder Curing Salt (optional; see note)
- 1 flat-cut or point-cut brisket, about 5 pounds (2.25kg); see note
- 1/4 teaspoon liquid smoke, such as Wright's Liquid Smoke (optional; see note)
- Dill pickles, sliced yellow onion, and white bread, for serving
Steps
- Combine pepper, salt, and pink salt (if using) in a small bowl. Rub two-thirds of mixture evenly over surface of brisket. Reserve remaining one-third of mixture. Slice brisket in half crosswise in order to fit into large vacuum bags.
- Place each brisket half in a vacuum bag. (Fold over the top of each bag while you add brisket so that no rub or juices get on the edges of bags, which can weaken the seal.) Add 4 drops (about 1/8 teaspoon) liquid smoke, if using, to each bag. Seal bags using a vacuum sealer and let rest for 2 to 3 hours in the refrigerator.
- Set your precision cooker to 135°F (57°C) for brisket with a tender, steak-like texture, or 155°F (68°C) for more traditionally textured brisket that falls apart when you pull at it. Add brisket to water bath and cover it with a lid, aluminum foil, or ping pong balls. Cook for 24 to 36 hours at 155°F or 36 to 72 hours at 135°F. Allow cooked brisket to cool at least to room temperature before proceeding (an ice bath can speed up this process). Brisket can be stored in the refrigerator at this stage for up to 1 week before finishing.
- To Finish on the Grill: Light 1/2 chimney full of charcoal. When all charcoal is lit and covered with gray ash, pour out and arrange coals on one side of charcoal grate. Set cooking grate in place, cover grill, and allow to preheat for 5 minutes. Alternatively, set half the burners on a gas grill to medium-high heat, cover, and preheat for 10 minutes. Clean and oil grilling grate .
- Remove brisket from bags and carefully blot dry with paper towels. (Liquid from bags can be added to your favorite barbecue sauce and simmered down to provide extra flavor.) Rub reserved salt and pepper mixture into surface of brisket. Place brisket on cooler side of grill, fat cap up. Add 4 to 5 hardwood chunks to hotter side of grill. (If using a gas grill, wrap wood chunks loosely in aluminum foil before placing over hotter side of grill.) Cover and allow brisket to smoke, adjusting vents to maintain a temperature between 275 and 300°F (135 and 149°C) and adding 2 to 3 wood chunks twice during cooking. Smoke until a deep, dark bark has formed, about 3 hours. Continue with step 7.
- To Finish in the Oven: Adjust oven rack to lower-middle position and preheat oven to 300°F (150°C). (If your oven has a convection setting, turn it on and adjust heat to 275°F/135°C instead.) Remove brisket from sous vide bags and carefully blot dry with paper towels. (Liquid from bags can be added to your favorite barbecue sauce and simmered down to provide extra flavor.) Rub reserved salt-and-pepper mixture into surface of brisket. Place brisket on a wire rack set in a rimmed baking sheet, fat cap up, and place in oven. Roast until a deep, dark bark has formed, about 2 hours. Continue with step 7.
- Transfer brisket to a cutting board and tent with foil. Allow to rest until the temperature drops to between 145 and 165°F (63 and 74°C), about 30 minutes. Slice against the grain into thin strips and serve with white bread, dill pickles, and sliced onion.
Notes
- You can grind pepper in a pepper mill, a food processor, or a blade grinder, but the easiest way to get a consistent coarse grind in bulk is to use a burr grinder.
- If you'd like a pink smoke ring for a more traditional look, use pink curing salt, available from spice stores or Amazon.
- Liquid smoke can be used to add smoke flavor to the beef if you're not planning on smoking it outdoors.
- I strongly recommend using a brisket with the fat cap intact and plenty of intramuscular marbling. A fully trimmed flat-cut brisket will come out relatively dry compared with an untrimmed cut.
↑ Back to top
Sous-Vide Glazed Carrots

Tags: Sous Vide
Vegan Vegetables Vegetarian
Ingredients
- 1 pound baby whole baby carrots, peeled, or 1 pound medium to large carrots, peeled and cut into 1-inch chunks with the faux-tourné cut
- 2 tablespoons unsalted butter
- 1 tablespoon granulated sugar
- Kosher salt
- Freshly ground black pepper
- 1 tablespoon chopped parsley (optional)
Steps
- Preheat water oven to 183°F. Place carrots, butter, sugar, and 1/2 teaspoon kosher salt in a vacuum bag and seal according to manufacturer's instructions. Cook carrots in the water bath until fully tender, about 1 hour. At this point, carrots can be stored in refrigerator for up to 1 week.
- Empty entire contents of bag into a 12-inch, heavy-bottomed skillet and cook over high heat, stirring constantly, until liquid has reduced to a shiny glaze, about 2 minutes. Season to taste with salt and pepper, stir in parsley, and serve.
Notes
- FAVORITE
↑ Back to top
Southern Biscuits

Tags: Baking
Biscuits Southern
Ingredients
- 2 cups flour
- 4 teaspoons baking powder
- 1/4 teaspoon baking soda
- 3/4 teaspoon salt
- 2 tablespoons butter
- 2 tablespoons shortening
- 1 cup buttermilk, chilled
Steps
- Preheat oven to 450 degrees.
- In a large mixing bowl, combine flour, baking powder, baking soda and salt. Using your fingertips, rub butter and shortening into dry ingredients until mixture looks like crumbs. (The faster the better, you don't want the fats to melt.) Make a well in the center and pour in the chilled buttermilk. Stir just until the dough comes together. The dough will be very sticky.
- Turn dough onto floured surface, dust top with flour and gently fold dough over on itself 5 or 6 times. Press into a 1-inch thick round. Cut out biscuits with a 2-inch cutter, being sure to push straight down through the dough. Place biscuits on baking sheet so that they just touch. Reform scrap dough, working it as little as possible and continue cutting. (Biscuits from the second pass will not be quite as light as those from the first, but hey, that's life.)
- Bake until biscuits are tall and light gold on top, 15 to 20 minutes.
- Read more at: www.foodnetwork.com/recipes/alton-brown/southern-biscuits-recipe.html?oc=linkback
Notes
- FAVORITE
↑ Back to top
Southern Hummus

Tags: Dips and Spreads
Middle-East
Southern
Ingredients
- 2 pounds fresh or frozen butter beans, butter peas, or English peas
- 2 medium Vidalia or other onions, chopped
- 8 garlic cloves, smashed and peeled
- 1 tablespoon salt
- 1/4 cup chopped fresh cilantro
- 1/4 cup smooth peanut butter or tahini
- 2 teaspoons ground cumin seed
- 1/4 teaspoon ground hot red pepper
- 3 ounces freshly squeezed lemon juice
- 1/2 cup olive oil, divided
- Salt
- Freshly ground black pepper
- Ground coriander seed
- Quartered pita bread, other sturdy bread, or raw vegetables for dipping
Steps
- Add the beans, onion, garlic, and salt to boiling water to cover in a large pot. Reduce heat to a simmer, cover, and simmer 10 to 20 minutes, or until beans are tender; skim off any foam as needed.
- Drain the skimmed bean mixture and move to a food processor bowl or strong blender. Add the cilantro, peanut butter, cumin, red pepper, lemon juice, and 1/3 cup oil. Purée until smooth.
- Season to taste with salt and pepper. This can be made several days in advance and refrigerated.
- Drizzle remaining oil on top just before serving, and sprinkle with coriander. Serve with pita bread, raw vegetables, or crackers.
- Add 1 teaspoon chopped fresh mint or dill.
Variation:
Notes
- FAVORITE
↑ Back to top
Southern Sweet Potato Pie

Tags: Pies and Tarts
Ingredients
- 3 tablespoons all-purpose flour
- 1 to 2/3 cups sugar
- 1/4 teaspoon ground nutmeg
- Pinch salt
- 1 cup mashed sweet potatoes
- 2 eggs
- 1/4 cup light corn syrup
- 1/2 cup butter, softened
- 3/4 cup evaporated milk
- 1 unbaked pastry shell (9 inches)
Steps
- In a small bowl, combine the flour, sugar, nutmeg and salt. In a large bowl, beat the potatoes, eggs, corn syrup, butter and sugar mixture. Gradually stir in milk. Pour into pastry shell.
- Bake at 350° for 55-60 minutes. Cool on a wire rack for 1 hour. Refrigerate for at least 3 hours before serving. Refrigerate leftovers. Yield: 8 servings.
Notes
- FAVORITE
↑ Back to top
Spaghetti Carbonara
Tags: Italian
Pastry
Servings: 4
Ingredients
- Salt
- 2 large eggs and 2 large yolks, room temperature
- 1 ounce (about 1/3 packed cup) grated pecorino Romano, plus additional for serving
- 1 ounce (about 1/3 packed cup) grated Parmesan
- Coarsely ground black pepper
- 1 tablespoon olive oil
- 3 ½ ounces of slab guanciale (see recipe), pancetta or bacon, sliced into pieces about 1/4 inch thick by 1/3 inch square
- 12 ounces spaghetti (about 3/4 box)
Steps
- Place a large pot of lightly salted water (no more than 1 tablespoon salt) over high heat, and bring to a boil. Fill a large bowl with hot water for serving, and set aside.
- In a mixing bowl, whisk together the eggs, yolks and pecorino and Parmesan. Season with a pinch of salt and generous black pepper.
- Set the water to boil. Meanwhile, heat oil in a large skillet over medium heat, add the pork, and sauté until the fat just renders, on the edge of crispness but not hard. Remove from heat and set aside.
- Add pasta to the water and boil until a bit firmer than al dente. Just before pasta is ready, reheat guanciale in skillet, if needed. Reserve 1 cup of pasta water, then drain pasta and add to the skillet over low heat. Stir for a minute or so.
- Empty serving bowl of hot water. Dry it and add hot pasta mixture. Stir in cheese mixture, adding some reserved pasta water if needed for creaminess. Serve immediately, dressing it with a bit of additional grated pecorino and pepper.
↑ Back to top
Spaghetti Squash Lasagna
Tags: Italian-American
Vegetables
Ingredients
- 2 small spaghetti squash (about 11/2 pounds each)
- 2 teaspoons olive oil
- 4 garlic cloves, thinly sliced
- 1 (8-ounce) package fresh baby spinach
- 1/2 cup part-skim ricotta cheese
- 1/8 teaspoon kosher salt
- 2 ounces shredded part-skim mozzarella cheese (about 1/2 cup), divided
- 8 ounces 93% lean ground turkey
- 1 1/2 cups lower-sodium marinara sauce (such as Dell'Amore)
- 1 ounce Parmesan cheese, grated (about 1/4 cup)
Steps
- Preheat oven to 350°.
- Cut each squash in half lengthwise. Scoop out seeds; discard. Place squash halves, cut sides up, on a baking sheet. Bake at 350° for 50 minutes. Let stand 10 minutes. Scrape inside of squash with a fork to remove spaghetti-like strands. Place strands on a clean dish towel; squeeze until barely moist.
- Heat a large skillet over medium-high heat. Add oil to pan; swirl to coat. Add garlic; cook 30 seconds. Add spinach; cook 1 minute or until spinach wilts. Remove from heat. Combine spinach mixture, squash strands, ricotta cheese, salt, and half of mozzarella cheese in a medium bowl.
- Return skillet to medium-high heat. Add turkey to pan; cook 4 minutes or until browned, stirring to crumble. Add marinara sauce; cover, reduce heat to medium, and simmer 4 minutes. Remove from heat.
- Increase oven temperature to 425°.
- Spoon sauce evenly into the bottom of each squash half. Top evenly with squash mixture. Sprinkle evenly with remaining mozzarella cheese and Parmesan cheese. Bake at 425° for 20 minutes.
- Preheat broiler to high (keep squash in oven). Broil squash 1 to 2 minutes or until cheese is golden brown and bubbly. Remove from oven; let stand 10 minutes.
Notes
- Hands-on: 40 min. Total: 1 hr. 50 min.
↑ Back to top
Spaghetti with Carbonara Sauce
Tags: Italian
Pasta
Servings: 4
Ingredients
- Kosher salt (see note)
- 1 pound (450g) dried spaghetti (see note)
- 1/2 cup diced guanciale, pancetta, or bacon (about 3 ounces; 85 g) (see note)
- 3 tablespoons (45ml) extra-virgin olive oil, divided
- 2 whole large eggs plus 6 yolks
- 1/4 cup grated Pecorino Romano (about 1 ounce; 25 g), plus more for serving
- 1/4 cup grated Parmigiano-Reggiano (about 1 ounce; 25 g), plus more for serving
- 1 teaspoon freshly ground black pepper (ground medium-coarse), plus more for serving
Steps
- Bring a pot of salted water to a boil. Add pasta and cook, stirring, until al dente.
- Meanwhile, combine guanciale (or pancetta or bacon) with 2 tablespoons (30ml) olive oil in a large skillet and cook, stirring frequently, over medium heat, until fat has rendered and guanciale is crisp, about 7 minutes.
- In a large, metal heatproof mixing bowl, whisk together whole eggs and yolks, Pecorino Romano, Parmigiano-Reggiano, and black pepper.
- Using tongs and/or a strainer, transfer pasta to skillet with crisped guanciale and its fat; be sure not to drain boiling pasta water. Add remaining 1 tablespoon (15ml) olive oil to pasta and stir to combine; let cool slightly. Scrape pasta, pork, and all the fat into the egg mixture. Measure 1/2 cup (120ml) pasta-cooking water and add to pasta and egg mixture. Stir well to combine.
- Set mixing bowl over pot of boiling pasta water (make sure bottom of bowl does not touch the water) and cook, stirring quickly with tongs, until sauce thickens to a creamy, silky consistency and leaves trails as you stir. Remove from heat, season with salt if needed, and divide into bowls. Serve right away, topping with more grated cheese and freshly ground pepper as desired.
Notes
- Remember not to oversalt your pasta water; you'll add some of it to your sauce, which will already have salty ingredients. Feel free to substitute another dried pasta, such as penne, if desired. Guanciale, cured pork jowl, is generally considered the most authentic choice here; it's fattier than pancetta or bacon and often more heavily spiced, creating a pasta with pronounced spice notes and an extra-unctuous texture. Pancetta delivers the cleanest porky flavor, while American bacon, though less traditional, adds a hit of pleasant smoke. Use whichever you prefer.
↑ Back to top
Spatchcocked (Butterflied) Roast Chicken
Servings: 4 to 6
Ingredients
- 1 large chicken, about 4 to 5 pounds ( 1.8 to 2.3 kg)
- 2 teaspoons ( 10 g) chopped fresh parsley, thyme, rosemary, oregano, marjoram, savory, or a mix (optional)
- 2 tablespoons ( 30 ml) light olive oil or other neutral-flavored oil, such as canola or vegetable, divided
- Kosher salt and freshly ground black pepper (see note)
- 1 teaspoon ( 5 g) baking powder (optional; see note)
- 1 medium onion, roughly chopped (about 1 cup)
- 1 medium carrot, peeled and roughly chopped (about 1/2 cup)
- 1 medium rib celery, roughly chopped (about 1/2 cup)
- 1 bay leaf
- 1 cup ( 240 ml) dry vermouth or sherry
- 1 cup ( 240 ml) water
- 1 teaspoon ( 5 ml) soy sauce
- 3 tablespoons ( 45 g) unsalted butter
- 2 teaspoons ( 10 ml) juice from 1 lemon
Steps
- Place oven rack in upper-middle position and preheat oven to 450°F (230°C). Using sharp kitchen shears, remove backbone from chicken and cut spine into 5 to 6 one-inch-long pieces. Set backbone aside. Flatten chicken by placing skin side up on a cutting board and applying firm pressure to breastbone. Transfer to a wire rack set in a foil-lined rimmed baking sheet. Position chicken so that breasts are aligned with center of baking sheet and legs are close to edge.
- If using herbs: using your fingers and starting from the neck end and working your way down towards the legs, gently separate chicken skin from the breast and thigh meat; be careful not to tear the skin. Carefully push the herbs under the skin, distributing them as evenly as possible all over the breast and thigh muscle.
- Combine 1 tablespoon (15g) kosher salt, 1/2 teaspoon ground black pepper, and 1 teaspoon (5g) baking powder (if using) in a small bowl. Sprinkle all over chicken skin and cavity sides, then return to skin-up position. If dry brining, transfer chicken to refrigerator and let sit, uncovered, for at least 3 and up to 24 hours; otherwise proceed with cooking right away.
- Drizzle chicken skin with 1 tablespoon (15ml) oil, rubbing to distribute evenly. Roast chicken until thickest part of breast close to bone registers 150°F (66°C) on an instant-read thermometer and joint between thighs and body registers at least 175°F (80°C), about 45 minutes.
- Meanwhile, heat remaining 1 tablespoon (15ml) oil in a small saucepan over high heat until shimmering. Add chicken backbone and cook, stirring frequently, until well browned, about 3 minutes. Add onion, carrot, and celery and cook, stirring frequently, until beginning to brown, about 3 minutes. Add bay leaf and deglaze with vermouth or sherry and 1 cup (240ml) water, using a wooden spoon to scrape up any browned bits from bottom of pan. Reduce heat to maintain simmer and cook for 20 minutes. Strain out solids and return liquid to pan. Boil over medium-high heat until approximately 1/3 cup (80ml) remains, about 7 minutes. Whisk in soy sauce, butter, and lemon juice off heat. Season to taste with salt and pepper.
- Remove chicken from oven, transfer to cutting board, tent loosely with foil, and allow to rest 5 minutes before carving. Serve with hot jus.
Notes
- Adding baking powder to the salt used on the chicken skin will give you extra-crispy results.
- If using a different type of salt, be sure to use the weight measurement, not the volume measurement.
↑ Back to top
Speculaas
Tags: Cookies
Dutch
Ingredients
- 1 cup (2 sticks) plus 2 tablespoons unsalted butter, softened
- 3/4 cup granulated sugar
- 2 teaspoons vanilla extract
- 2 large eggs, beaten separately
- 3/4 cup light brown sugar, packed
- 3 cups all-purpose flour
- 1/2 cup almond meal
- 2 teaspoons baking soda
- 2 teaspoons cinnamon
- 1 teaspoon nutmeg
- 1 teaspoon cloves
- 1/2 teaspoon ginger
- 1/2 teaspoon anise
- 1/4 teaspoon salt
- 1/4 cup sliced almonds, for topping
Steps
- In the bowl of a standing mixer, cream butter and both sugars until light and fluffy. Add vanilla. Add the beaten eggs, one at a time, and mix until everything is well combined.
- You may use special molds for making speculaas, or any type of cookie cutter.
- You may use special molds for making speculaas, or any type of cookie cutter.
- Emily Hilliard for NPR
- In a large bowl, whisk together flour, almond meal, baking soda, spices and salt. Gradually add the dry ingredients into the butter mixture, beating until well combined. Form the dough into 2 equal portions, wrap in plastic wrap and refrigerate overnight.
- Preheat oven to 350 degrees.
- On a clean, floured surface, roll out a portion of dough into a large circle about 1/4-inch thick. Cut the dough with a cookie cutter or form into a well-oiled and floured speculaas cookie mold. (Continue working with the portions of dough, recombining scraps and refrigerating between batches if necessary, until all of the dough has been cut or shaped into cookies.)
- Place cookies on a cookie sheet lined with parchment paper and bake 10 to 15 minutes, or until cookies are browned and slightly crispy. While the cookies cool, melt the 2 tablespoons of butter. Brush butter on the top of each cookie and sprinkle with the sliced almonds. Enjoy with coffee or tea.
- Speculaas will keep in a covered tin for up to 5 days.
Notes
- FAVORITE
↑ Back to top
Spiced Up Turkey Burger Recipe with Lemon Herb Mayo
Adapted from https://toriavey.com/toris-kitchen/turkey-burgers/
Tags: Poultry
Sandwiches
Servings: 10
Ingredients
- 1 1/4 lbs lean ground turkey (1 package)
- 1 slice white bread, crust removed
- 1 1/2 tbsp extra virgin olive oil (plus more for brushing the burgers)
- 1/4 cup fresh flat-leaf parsley, finely minced
- 2 tbsp onion, very finely minced
- 1 large egg
- 1 1/2 tsp smoked paprika
- 3/4 tsp cumin
- 1/2 tsp garlic powder
- Heaping 1/4 tsp cayenne pepper
- 1/2 tsp salt, or more to taste
- 1/2 tsp pepper, or more to taste
- 1 1/2 tbsp applesauce
- Vegetable oil, for frying (optional, if not grilling)
- 10 slider-sized buns for serving
- 1/2 cup good quality mayonnaise (I like Spectrum)
- 2 tbsp fresh basil, minced
- 1 tbsp fresh parsley, minced
- 1 tbsp freshly squeezed lemon juice
- 1 1/2 tsp lemon zest
- Baby kale or butter lettuce, fresh tomato slices, dill pickle slices
Turkey Burger
Ingredients:
Lemon Herb
Mayo Ingredients:
Optional
Toppings:
Steps
- Cut the crust off of your piece of bread. Pour olive oil onto a small plate. Soak the crustless bread in the olive oil, turning the slice once, till all the oil is soaked up by the bread.
- Place ground turkey in a medium mixing bowl. Shred and crumble the oil-soaked bread into tiny pieces and add it to the meat along with the parsley, onion, egg, smoked paprika, cumin, garlic powder, cayenne pepper, salt, pepper and applesauce.
- Stir ingredients with a fork and/or clean hands until the spices and herbs are well blended with the meat. Gather the meat mixture in 1/4 cupfuls and make small, thick patties (they will shrink up to slider sized during cooking). The patties will initially be soft, but will firm up as they grill.
- If grilling, grease the preheated grill well before you start cooking. Cook the patties by grilling or frying (I recommend grilling). I like to brush the burgers with olive oil periodically as they grill to keep them nice and moist.
- Grill for 15 - 20 minutes or until thoroughly cooked. Cooking times may vary by grill type.
- I also like to grill the buns. If you're doing this, brush the internal sides of the buns lightly with olive oil, then grill them open-side down for 2-3 minutes till they are warm and golden crisp around the edges.
- If you prefer not to grill the burgers, you can cook them in a skillet using 1/4 cup of vegetable oil. I like using olive oil; any oil with a somewhat high smoke point will do. Heat the oil over medium heat till hot but not smoking. Fry the burgers for 10-15 minutes, flipping occasionally, until thoroughly cooked.
- Serve turkey burgers on slider-sized buns with Lemon Herb Mayonnaise and your choice of toppings.
- Mix mayonnaise together with herbs, lemon juice and lemon zest in a small bowl till well blended. Serve as a sauce for the Turkey Burgers.
To Make Lemon Herb
Mayonnaise:
↑ Back to top
Spicy Banana Ketchup
Tags: Condiments
Vietnam
Servings: YIELD 1.5 cups
Ingredients
- 2 tablespoon canola or peanut oil
- 3/4 teaspoon annatto seeds (optional)
- 1 small yellow onion, chopped
- 2 cloves garlic, mined
- 2 to 5 Thai or Serrano chiles, chopped
- 1 generous tablespoon tomato paste
- 2 large ripe bananas, mashed (net 9 oz / 270 gr)
- 1/2 cup (120 ml) apple cider vinegar
- 1/4 cup (60 ml) water
- 2 packed tablespoons dark brown sugar
- 1/2 teaspoon black pepper
- 1/8 teaspoon ground clove
- 1/8 teaspoon sea salt
- 1 teaspoon regular soy sauce
- 1 bay leaf
Steps
- Put the oil and annatto seeds in a medium saucepan. Heat over medium-low heat and let gently sizzle for 3 to 5 minutes, until the seeds are nearly black. Cool for a minute, then use a slotted spoon to remove and discard the seeds. If you’re not using the annatto seeds, go to the next step.
- Heat the oil over medium heat, add the onion and cook, stirring often, until soft and translucent, 5 to 7 minutes. Add the garlic and chile, stir and cook for 1 to 2 minutes, until aromatic. Add the tomato paste and cook, stirring often, until the mixture is orange red and the tomato is no longer visible.
- Add the mashed bananas, stir to combine well. Then add the vinegar, water, sugar, pepper, clove, salt, soy sauce, and bay leaf. Bring to a boil, lower the heat to simmer, partially covered, for 20 to 30 minutes, until thick like-ketchup! Remove from the heat, cool for 10 minutes. Remove and discard the bay leaf.
- Use a mini food processor or blender to puree the mixture. Taste and add water to thin, sugar to sweeten, or vinegar to tartness. Transfer to a jar and use, or refrigerate for up to 3 weeks.
Notes
- FAVORITE
↑ Back to top
Spicy Brussel Sprouts with Pork Belly and Habanero
Tags: Vegetables
Servings: 8
Ingredients
- 3 cups water, plus 1/2 cup for baking
- 1/4 cup kosher or coarse sea salt
- 1/4 cup granulated sugar
- 1 pound pork belly, skinless and boneless
- 1/2 cup homemade chicken broth, or store bought
- 4 tablespoons unsalted butter
- 4 cloves garlic, finely minced
- 1/3 cup soy sauce
- 4 tablespoons sherry vinegar
- 4 tablespoons agave syrup
- 1/3 cup freshly squeezed orange juice
- 1 habanero chile
- 4 tablespoons peanut oil
- 2 pounds brussel sprouts, trimmed and halved
- Kosher or coarse sea salt to taste
- Freshly ground pepper to taste
- 2 scallions, thinly sliced
For the pork
belly:
For the sauce:
For the
brussel sprouts:
Steps
- Place the pork belly in a large sealable plastic bag. Mix 3 cups of the water with the salt and sugar, and pour it into the bag. Seal tightly and let marinate 12 to 24 hours in the refrigerator.
- When ready to cook the pork belly, preheat the oven to 300 degrees Fahrenheit with the rack in the middle of the oven.
- Remove the pork belly from the brine and place in a small baking dish. Add the chicken broth and remaining 1/2 cup of water. Cover tightly with aluminum foil and roast for 2 to 2 1/2 hours until pork belly is fork tender. Remove the aluminum foil, increase heat to 450 and roast for about 20 minutes until the top has crisped and browned and the inner fat has mostly melted. Remove from oven and let cool. Once cool enough to handle, slice into 1-inch pieces.
- To a saucepan set over medium-low heat, add the butter. Once it has melted and is bubbling, add the garlic and cook until fragrant, about 1 minute. Add the soy sauce, sherry vinegar, agave syrup and orange juice, and stir to mix well. Poke a few holes in the habanero with a pairing knife and add it to the sauce whole. It will release the flavor of the pepper without making the sauce super spicy. Bring to a simmer and let cook about 8 to 10 minutes until the sauce thickens and coats the back of a spoon.
- In a large cast iron pan set over medium-high heat, heat the peanut oil. Add the brussel sprouts, season with salt and pepper to taste, and cook for about 12-15 minutes until crispy and browned on the outside and tender inside.
- Plate the brussels sprouts on a large platter and top with the pork belly, drizzle with the sauce, and garnish with freshly sliced scallions.
↑ Back to top
Spicy Cabbage Salad Recipe (Goi Bap Cai)
Tags: Salad
Vegetables Vietnam
Ingredients
- Dressing
- 1 or 2 Thai or serrano chiles, chopped
- 1 clove garlic, chopped
- 1/2 teaspoon plus 1 teaspoon sugar
- 1 pinch salt
- 2 1/2 to 3 tablespoons fish sauce
- 5 to 6 tablespoons unseasoned Japanese rice vinegar
- 1 (1 1/4 to 1 1/3 pound) head green cabbage, about 1 pound, quartered through the stem end, cored, and cut crosswise into 1/4-inch-wide ribbons
- 1 large carrot, peeled and finely shredded
- 2 tablespoons finely chopped fresh Vietnamese coriander (rau răm), cilantro, or mint leaves
- 1/3 to 1/2 cup toasted cashew halves and pieces (not whole ones) or coarsely chopped unsalted roasted peanuts
Steps
- Using a mortar and pestle, mash the chile, garlic, 1/2 teaspoon sugar, and salt together into a fragrant orange-red paste. (Use a sweeping motion at first to crush the ingredients and then pound.) This releases and combines the oils from the chile and garlic. Scrape the paste into a bowl and add the remaining teaspoon of sugar and smaller quantities of fish sauce and rice vinegar, stirring to dissolve the sugar and salt and to combine well. Taste and add more fish sauce or rice vinegar to create a spicy, tart, savory, lightly garlicky dressing.
- In a large bowl, combine the cabbage, carrot, chopped herb of your choice and cashews. Toss to combine and distribute the ingredients well. (When making this salad in advance, leave the cashews out and add them right before tossing, lest they get chewy.)
- Just before serving, pour the dressing over the salad and toss to mix well. The salad will wilt slightly. Taste and adjust the flavors to your liking, balancing the sour, sweet, salty, and spicy. Transfer to a serving plate, leaving any unabsorbed dressing behind, and serve.
Notes
- FAVORITE
↑ Back to top
Spicy Cheese Bread

Tags: Breads
Ingredients
- 3 1/4 cups (16 1/4 ounces) all-purpose flour
- 1/4 cup (1 3/4 ounces) sugar
- 1 tablespoon instant or rapid-rise yeast
- 1 1/2 teaspoons red pepper flakes
- 1 1/4 teaspoons salt
- 1/2 cup warm water (110 degrees)
- 2 large eggs plus 1 large yolk
- 4 tablespoons unsalted butter, melted
- 6 ounces Monterey Jack cheese, cut into 1/2-inch cubes (1 1/2 cups), room temperature
- 6 ounces provolone cheese, cut into 1/2-inch cubes (1 1/2 cups), room temperature
Steps
- FOR THE BREAD: Whisk flour, sugar, yeast, pepper flakes, and salt together in bowl of stand mixer. Whisk warm water, eggs and yolk, and melted butter together in liquid measuring cup. Add egg mixture to flour mixture. Fit mixer with dough hook and knead on medium speed until dough clears bottom and sides of bowl, about 8 minutes.
- Transfer dough to unfloured counter, shape into ball, and transfer to greased bowl. Cover with plastic wrap and let rise in warm place until doubled in size, 1 1/2 to 2 hours.
- Grease 9-inch round cake pan. Transfer dough to unfloured counter and press to deflate. Roll dough into 18 by 12-inch rectangle with long side parallel to counter’s edge. Distribute Monterey Jack and provolone evenly over dough, leaving 1-inch border around edges. Starting with edge closest to you, roll dough into log. Pinch seam and ends to seal, then roll log so seam side is down. Roll log back and forth on counter, applying gentle, even pressure, until log reaches 30 inches in length. If any tears occur, pinch to seal.
- Starting at one end, wind log into coil; tuck end underneath coil. Place loaf in prepared cake pan and cover loosely with clean dish towel. Let rise in warm place until doubled in size, 1 to 1 1/2 hours. Adjust oven rack to lower-middle position and heat oven to 350 degrees.
- FOR THE TOPPING: Brush top of loaf with egg, then sprinkle with pepper flakes. Place cake pan on rimmed baking sheet. Bake until loaf is golden brown, about 25 minutes. Rotate loaf, tent with aluminum foil, and continue to bake until loaf registers 190 degrees, 25 to 30 minutes longer.
- Transfer pan to wire rack and brush bread with butter. Let cool for 10 minutes. Run knife around edge of pan to loosen bread. Slide bread onto wire rack, using spatula as needed for support. Let cool for 30 minutes before slicing. Serve warm.
Notes
- Take the cheese out of the refrigerator when you start the recipe to ensure that it comes to room temperature by the time you need it. Cold cheese will retard rising. Plan ahead: The dough needs to rise for several hours before baking.
↑ Back to top
Spicy Cilantro Almond Pesto
Tags: Chillis
Condiments
Ingredients
- 1 bunch fresh cilantro (2 cups loosely packed)
- 1/2 cup toasted almonds
- juice of 1 lime
- 1 ″ section of fresh ginger, chopped
- 3 garlic cloves
- 1/4 cup loosely packed mint leaves
- 1 Tbsp sugar
- 1/2 tsp salt
- 1/2 jalapeño (seeds included for more spice)
- 1/4 to 1/2 cup olive oil
Steps
- Combine all ingredients in a food processor, and process until smooth. Add more oil and salt as needed.
Notes
- FAVORITE
↑ Back to top
Spicy Cucumber Salad Side Dish Recipe by Maangchi
Adapted from https://www.maangchi.com/recipe/oi-muchim
Servings: 4
Ingredients
- 1 English cucumber (or 2 to 3 kirby cucumbers), washed
- ¼ cup thinly sliced onion
- 1 green onion, chopped
- 2 garlic cloves, minced
- 2 tablespoons soy sauce
- 2 teaspoons Korean hot pepper flakes (gochugaru)
- 2 teaspoons sesame oil
- 2 teaspoons toasted sesame seeds
- 1 teaspoon sugar (optional)
Steps
- Cut the cucumber lengthwise in half and cut diagonally into thin slices.
- Put the cucumber into a large bowl. Add the onion, green onion, garlic, soy sauce, hot pepper flakes, toasted sesame oil, sesame seeds, and sugar.
- Mix it well with a spoon until the sugar is well dissolved.
- Serve as a side dish for rice, noodles, or BBQ.
↑ Back to top
Spicy Garlic Lime Chicken
Tags: Chicken
Ingredients
- 3/4 teaspoon salt
- 1/4 teaspoon black pepper
- 1/4 teaspoon cayenne pepper
- 1/8 teaspoon paprika
- 1/4 teaspoon garlic powder
- 1/8 teaspoon onion powder
- 1/4 teaspoon dried thyme
- 1/4 teaspoon dried parsley
- 4 boneless, skinless chicken breast halves
- 2 tablespoons butter
- 1 tablespoon olive oil
- 2 teaspoons garlic powder
- 3 tablespoons lime juice
Steps
- In a small bowl, mix together salt, black pepper, cayenne, paprika, 1/4 teaspoon garlic powder, onion powder, thyme and parsley. Sprinkle spice mixture generously on both sides of chicken breasts.
- Heat butter and olive oil in a large heavy skillet over medium heat. Saute chicken until golden brown, about 6 minutes on each side. Sprinkle with 2 teaspoons garlic powder and lime juice. Cook 5 minutes, stirring frequently to coat evenly with sauce.
Notes
- FAVORITE
↑ Back to top
Spicy Korean Coleslaw
Adapted from https://mykoreankitchen.com/spicy-korean-coleslaw/
Tags: Korean
Sides
Ingredients
- 400 to 500 g cabbage (0.9 to 1.1 pounds), cored
- 60 g carrots (2 ounces), julienned
- 1 stalk green onion , thinly sliced
- 6 perilla leaves (optional), thinly sliced
- fine sea salt
- 2 Tbsp gochugaru (Korean chili flakes)
- 2 Tbsp rice vinegar
- 1 to 1.5 Tbsp Korean fish sauce or 2 Tbsp regular soy sauce
- 1 Tbsp (raw) castor sugar
- 1 Tbsp lemon juice
- 1 Tbsp sesame oil
- 1 Tbsp toasted sesame seeds
- 1 tsp minced garlic
MAIN:
SAUCE (MIX
THESE IN A BOWL):
Steps
- Thinly slice the cabbage. Place it into a large mixing bowl. Sprinkle some salt and gently mix the cabbage to wilt it lightly.
- Add the carrots and the sauce. Mix them well. Garnish with green onion and perilla leaves.
- Serve. (It works very well with Korean BBQ.) Best to consume within 24 hours of making it.
↑ Back to top
Spicy Orange Chicken

Tags: Chicken
Chinese
Ingredients
- 1 cup orange juice
- 1/3 cup brown sugar
- 1/3 cup rice vinegar
- 2 tablespoons fish sauce
- 1 tablespoon soy sauce
- 1 tablespoon fresh ginger root, grated
- 1 teaspoon crushed red pepper flakes
- 2 pounds skinless, boneless chicken thighs, cut into chunks
- 1 bunch green onions, sliced, white parts and tops separated
- 1 fresh jalapeno pepper, sliced into rings
- 1 red bell pepper, cut into 2 inch pieces
- 1/2 cup sugar snap peas
- 4 cloves garlic, minced
- 2 tablespoons grated orange zest
- 1 bunch cilantro leaves, for garnish
Steps
- Whisk orange juice, brown sugar, rice vinegar, fish sauce, soy sauce, ginger, and crushed red pepper flakes in a large bowl.
- Mix in chicken pieces and toss to evenly coat. Cover the bowl with plastic wrap and marinate in the refrigerator for 1 hour.
- Remove chicken from refrigerator and drain thoroughly in colander, reserving marinade.
- Heat a large non-stick skillet over high heat. Cook and stir chicken for 2 minutes; spoon out any excess liquid.
- Continue to cook and stir until chicken caramelizes, 6 to 7 minutes.
- Stir in white portions of green onions, garlic, and orange zest; cook and stir 2 to 3 minutes.
- Pour in half of reserved marinade. Simmer until reduced and thickened, 3 to 4 minutes.
- Stir in jalapeno pepper, bell pepper, and sugar snap peas; cook and stir until vegetables are warmed, about 2 minutes.
- Stir in green portions of green onions; cook and stir 1 minute.
- Remove from heat. Garnish with cilantro and serve.
Notes
- FAVORITE
↑ Back to top
Spicy stir-fried squid with red chili and holy basil (Phat
phed pla muek phrik sod bai kaprao)
Tags: Seafood
Thai
This fiery stir-fry achieves richness of taste with
only a few simple ingredients.
Garlic, hot chili, and the spicy, mint-like bite of holy basil make sparks fly.
while the tender squid provides a sea-fresh flavor.
In Thailand, we use finger-sized hot red chilies called phrik chee fa for this dish.
Red jalapeños are a wonderful substitute. I don't seed the chilies because the seeds
hold much of their heat and because my mother always taught me that the seeds of
the chili are where the plant's healing powers are concentrated. "They're good for
you," she often says, "they're medicine."
Is starred. Rated
5/5
Servings: 4 - 6
Ingredients
- ½ pounds whole souid
- 2 tablespoons Golden Mountain sauce (poo kow thong) or Maggi seasoning
- 2 tablespoons vegetable oil
- 13 cloves garlic, pounded to a mash or crushed and chopped.
- 2 tablespoons golden brown sugar
- 2 cups loosely packed holy basil (bai kaprao) or fresh mint
- 3 ounces red jalapeño peppers (about 10), stemmed and cut lengthwise into slivers
Steps
- To clean the squid: Rinse the squid under cold water. Pull the head from the body.
- Pull out the long transparent quill and discard. Press out the innards by running
- To make the stir-fry: Set a wok over medium-high heat. When it is quite hot, add
Discard the head with its
tentacles, reserving only the body sac.
the body sac between your
thumb and fingers, squeezing as you go from the closed
to the cut end. Or lay the
body sac on a flat work surface and run the dull side of
a knife blade along its
length, from the closed to the cut end. Rinse out the body
sac so you're sure to remove
any traces of the gelatinous inner matter. Peel off the
'speckled outer skin and cut
the squid into thirds. Score through one side of each
piece with a series of
diagonal cuts. Set aside.
the oil. Rotate the wok a bit
so the oil coats the sides. When the oil is hot, add the
garlic and stir-fry briefly, just until golden and aromatic.Raise the
heat to high, add the squid, and stir-fry for 30 seconds. Add the
jalapeños and stir-fry for 1 minute. Add the Golden Mountain sauce and
the sugar and
stir-fry until the sugar is
dissolved and blended.
Turn off the heat. Stir in
the basil and cook for a few seconds, just until the basil
begins to wilt.
Platter and serve with
steamed jasmine rice
↑ Back to top
Spinach and Feta Pita Bake

Tags: Flatbreads
Servings: 6
Ingredients
- 1 (6 ounce) tub sun-dried tomato pesto
- 6 (6 inch) whole wheat pita breads
- 2 roma (plum) tomatoes, chopped
- 1 bunch spinach, rinsed and chopped
- 4 fresh mushrooms, sliced
- ½ cup crumbled feta cheese
- 2 tablespoons grated Parmesan cheese
- 3 tablespoons olive oil
- ground black pepper to taste
Steps
- Preheat the oven to 350 degrees F (175 degrees C).
- Spread tomato pesto onto one side of each pita bread and place them pesto-side up on a baking sheet. Top with tomatoes, spinach, mushrooms, feta cheese, and Parmesan cheese; drizzle with olive oil and season with pepper.
- Bake in the preheated oven until pita breads are crisp, about 12 minutes. Cut pitas into quarters to serve.
↑ Back to top
Spinach Pie
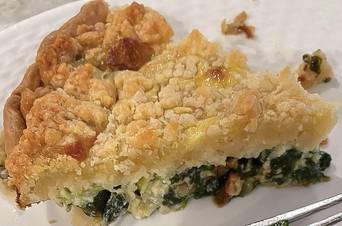
Tags: Pies and Tarts
Vegetables
Servings: 6 to 8
Ingredients
- About 3 tablespoons olive oil
- 1 medium onion, finely chopped, rinsed in cold water and patted dry
- 1 large shallot, finely chopped, rinsed in cold water and patted dry
- 3 garlic cloves, germ removed and finely chopped
- Pinch of sugar
- 4 cups (200 grams) baby spinach (or other greens; see above)
- Fine sea salt and freshly ground black pepper
- One 9-inch deep-dish piecrust made partially baked and cooled, or use store-bought pie dough (see above)
- 1/2 cup (120 ml) heavy cream
- 1/2 cup (120 ml) milk
- 2 large eggs
- 1 large egg yolk
- 1/2 cup (21 grams) finely grated Parmesan
- 2 scallions, trimmed and thinly sliced
- 1/2 cup (87 grams) finely cubed mozzarella
Steps
- Parm Crumble (see below), chilled
- Working in a large skillet, warm 2 tablespoons of the oil over medium heat. Drop in the onion, shallot and garlic and cook, stirring, until softened but not colored, 3 to 5 minutes. Stir in the pinch of sugar, add the spinach and turn up the heat. Toss the spinach around, adding a little more oil if you think you need it, until it wilts, about 2 minutes. Season with salt and pepper and spoon into a strainer set over a bowl. Press against the mixture to dry it as best as you can and let cool. (You can refrigerate the spinach mixture, covered, for up to 1 day.)
- Center a rack in the oven and preheat it to 375 degrees F. Put the crust on a baking sheet lined with parchment paper or a baking mat.
- Working in a medium bowl, whisk together the cream, milk, eggs, yolk and Parmesan. Season lightly with salt and generously with pepper, then stir in the scallions.
- Press the spinach mixture against the strainer again, and if there’s still liquid coming out, ball up the spinach and squeeze to dry it. Spread the spinach in the bottom of the crust. Pour the filling into the crust and scatter over the mozzarella cubes. Break the Parm crumble into small nuggets and cover the top of the pie with them.
- Bake the pie for about 45 minutes, or until it’s golden brown and puffed all the way to the center; a tester inserted into the center should come out clean. Transfer the pie to a rack and allow to cool for at least 45 minutes, or until it reaches room temperature.
- STORING: You can keep the pie at room temperature for up to 8 hours before serving. Leftovers will keep covered in the fridge for about 2 days.
↑ Back to top
Spinach Salad

Tags: Salad
Vegetables
Ingredients
- Spinach salad
- 1 bag spinach
- 2 cups sliced strawberries
- Candied walnuts or pecans
- Feta cheese, or Gorgonzola, or blue cheese crumbled
- Dressing
- 1/4 cup sugar
- 1/2 cup oil
- 1/4 cup white vinegar
- 2 tbs sesame seeds
- 1 1/2 tsp minced onion or onion flakes
- 1/4 tsp Worcester sauce
Steps
- Add dressing before serving
- To candy walnuts place 1cup of walnuts in a shallow pan, add 1/2 cup brown sugar, add dash of red pepper flakes. Turn heat to almost high STIR CONSTANTLY, brown sugar will suddenly melt and coat nuts remove from heat immediately and cool, crumble on salad.
Notes
- FAVORITE
↑ Back to top
Spinach Walnut Penne

Tags: Italian
Pasta
Ingredients
- 2 cups reduced-sodium vegetable broth
- 1 can (14.5 oz each) Hunt's® Diced Tomatoes with Basil, Garlic & Oregano-No Salt Added, undrained
- 2 cups dry multigrain penne pasta, uncooked
- 2 tablespoons Fleischmann's® Made with Olive Oil Spread
- 1 pkg (6 oz each) baby spinach leaves
- 1/3 cup chopped walnuts
- 1/2 cup shredded Parmesan cheese
Steps
- Combine broth, undrained tomatoes, pasta and Fleischmann's in large skillet. Bring to a boil over high heat, stirring occasionally. Cover skillet, reduce heat to medium and cook 15 minutes or just until pasta is tender, stirring occasionally.
- Stir in spinach and cook 3 to 4 minutes or until spinach is wilted, stirring occasionally. Sprinkle with walnuts and cheese just before serving.
Notes
- FAVORITE
↑ Back to top
Spiralized Thai Salad
Tags: Thai
Vegetables
Servings: 4
Ingredients
- 1 large carrot
- 1 English cucumber
- 1 red bell pepper chopped
- 1 scallion chopped (green part only)
- 1 small red cabbage
- Handful chopped cilantro
- 1/4 cup peanut butter
- 1 clove garlic minced
- 2 teaspoons rice vinegar
- 2 teaspoons soy sauce
- 2 teaspoons sesame oil
- Juice from 1.5 limes
- 1/4 teaspoon powdered ginger
- 1/4 cup water
- Thai chili paste (optional) to taste
Dressing:
Steps
- Add the dressing ingredients to a blender and combine until smooth. Set aside.
- Spiralize the carrot, cucumber, and cabbage on the settings of your choosing (I used the angel hair setting for the carrot, the straight blade for the cucumber, and the chipping blade for the cabbage). Add veggies to a salad bowl along with the red pepper, scallion and chopped cilantro.
- Pour the dressing over top and serve immediately. You may have some dressing left over. It'll keep in an air-tight container in the fridge for a few days.
↑ Back to top
Spotted Dick with Custard Sauce
Adapted from http://www.saveur.com/article/Recipes/Spotted-Dick-English-Steamed-Pudding-With-Currants-and-Custard
Tags: Desserts
Great Britain
Puddings
Ingredients
- 3 tbsp. unsalted butter, melted, plus more for greasing
- 2 1/4 cups flour
- 5 oz. beef suet, chilled and grated
- 1 cup dried currants
- 1/2 cup sugar
- 1 tbsp. baking powder
- 2/3 cup heavy cream
- 2/3 cup milk
- Zest of 1 lemon, plus 2 tbsp. fresh juice
- 4 eggs
- 3 tbsp. sugar
- 1 cup milk
- 1 1/2 tsp. vanilla extract
FOR THE
SPOTTED DICK:
FOR THE
CUSTARD SAUCE:
Steps
- Make the spotted dick: Grease a 2-liter steamed pudding mold with butter; set aside. In the bowl of a stand mixer fitted with a paddle, combine flour, suet, currants, sugar, and baking powder. Add butter, cream, milk, lemon zest, and juice; mix until a thick batter forms. Pour into prepared mold and cover with lid. Bring 10 cups water to a boil in a large stockpot fitted with a pasta strainer or steamer insert. Place pudding in pot; cover pot and steam until cooked through, 11/2–2 hours. During cooking, add boiling water to pot, as needed, to ensure that water level stays 2" up the sides of the mold; let pudding cool slightly.
- Make the custard: Whisk eggs and sugar in a bowl until fluffy. Bring milk to a boil in a 2-qt. saucepan. While whisking constantly, slowly pour milk into egg mixture. Return mixture to saucepan; heat over medium heat. Cook, stirring occasionally, until sauce is very thick, about 15 minutes. Remove from heat and stir in vanilla. To serve, uncover and invert spotted dick onto a serving plate; pour sauce over the top or cut pudding into slices and serve sauce on the side.
Notes
- FAVORITE
↑ Back to top
Spring Cleaning Cookies

Tags: Cookies
Ingredients
- 1/2 cup butter, softened
- 1/2 cup shortening
- 1 cup white sugar
- 1 cup light brown sugar
- 2 eggs
- 2 tablespoons evaporated milk
- 2 teaspoons vanilla extract
- 2 cups all-purpose flour
- 1 teaspoon baking powder
- 1 teaspoon baking soda
- 1/2 teaspoon salt
- 1 1/2 cups rolled oats
- 1 1/2 cups semisweet chocolate chips
- 1 cup flaked coconut
- 1 cup chopped pecans
Steps
- Preheat the oven to 375 degrees F (190 degrees C). Grease cookie sheets.
- In a large bowl, cream together the butter, shortening, white sugar and brown sugar until light and fluffy. Beat in the eggs one at a time, then stir in the evaporated milk and vanilla. Combine the flour, baking powder, baking soda and salt; stir into the sugar mixture. Mix in the oats, chocolate chips, coconut and pecans. Drop by rounded tablespoonfuls onto the prepared cookie sheets. Cookies should be spaced about 2 inches apart.
- Bake for 13 to 15 minutes in the preheated oven, until golden brown. Cool slightly on cookie sheets before removing to wire racks to cool completely.
Notes
- FAVORITE
↑ Back to top
Springerle I
Tags: Cookies
Goyim Holidays
Servings: 10 dozen
Ingredients
- 4 eggs
- 2 tablespoons butter
- 2 teaspoons baking powder
- 1/4 teaspoon salt
- 2 cups white sugar
- 4 cups all-purpose flour
- 1/4 cup anise seed
Steps
- Beat eggs in large mixing bowl until very light.
- Add sugar and butter. Cream together until light and fluffy.
- Sift flour, baking powder, and salt. Add dry ingredients and combine.
- Knead dough until smooth ... add more flour to get a smooth dough if necessary.
- Cover dough and allow to chill in refrigerator for at least 2 hours.
- Roll onto slightly floured board to 1/2 inch thickness. Then roll again with springerle roller to make designs. Cut at border. Sprinkle anise seed on clean tea towel and place cookies on this. Allow to stand overnight (don't cover) to dry.
- Bake 12 to 15 minutes at 325 degrees F (170 degrees C).
- Cool completely. Store in tight tin container ... the longer they are stored, the more anise flavor they take up.
Notes
- FAVORITE
↑ Back to top
Sriracha Chile Sauce Recipe (Tuong Ot Sriracha)
Adapted from https://www.vietworldkitchen.com/blog/2009/07/homemade-thai-style-sriracha-chile-sauce-recipe-tuong-ot-sriracha.html
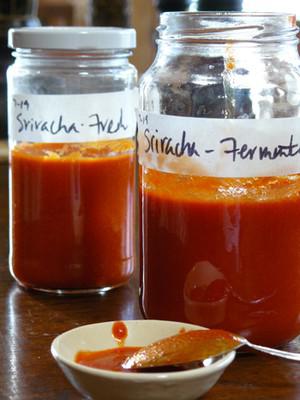
Servings: 1 ¼ cups
Ingredients
- ¾ pounds Fresno, Holland (long), Jalapeno or Cayenne chiles, snipped, halved lengthwise and coarsely chopped
- 2 cloves garlic
- 1 ¼ teaspoons kosher salt
- 2 ounces (2 tablespoons) Thai or Vietnamese palm sugar, or 1 tablespoon light brown sugar
- ¼ cup distilled white vinegar
- Water, as needed
Steps
- Combine the chiles, garlic, salt, and sugar in a food processor and chop finely to a texture like that of wet oatmeal. Transfer the mixture to a glass bowl or jar and cover with plastic wrap. Set aside at room temperature for 3 to 4 days, until small bubbles have formed under the surface of the mixture. If a little fuzzy mold forms, lift it off with a fork or knife and discard.
- Put the fermented mixture and vinegar into small saucepan. Bring to a boil, then lower the heat to simmer for 5 minutes.
- Remove from the heat and set aside to cool to room temperature. Transfer to a blender and puree for about 3 minute, until a smooth, orange-red mixture forms. Add the water to facilitate the pureeing, if needed.
- Position a fine mesh strainer over a clean bowl. Then pass the chile sauce through, pressing on the solids with a spatula or spoon to extract as much chile sauce as possible. The mixture is often slightly too thick for me so I’ll stir 1 tablespoon of water into the finished chile sauce. Let the flavor develop and bloom for a few hours before using. Taste it and make any flavor adjustment with salt, sugar or vinegar. Store in a jar and keep refrigerated for 1 month. Bring it to room temperature before using.
- This quick version of Srirach comes together in a jiffy and is extra terrific when you’re in a pinch. With the extra garlic, I prefer an extra kick from the sugar. On the first time out, start with the smaller quantity and work your way up to tinker with the flavor. Because this version is fast to prepare, you can also make half batches and play with the flavors that way too.
Fresh Sriracha Chile
Sauce
↑ Back to top
Sriracha Lime Salt

Tags: Condiments
Rubs and Blends
Spices
Ingredients
- 1 cup kosher salt
- 1 teaspoon lime juice
- 3 tablespoons Sriracha sauce
Steps
- Toss all ingredients together in a bowl using a fork until the mixture is even in colour and moisture.
- Spread out the salt on dehydrator sheets or a rimmed baking sheet (if using the oven.) Try to get the salt in as thin a layer as possible.
- Dry in a dehydrator at 125°F (if the dehydrator has a temperature selection function, otherwise, just turn it on.) for 2-5 hours (depending on your dehydrator) until the salt is bone dry.
- If you do not have a dehydrator, preheat the oven to 350°F. When the oven has reached full temperature, turn it off, open the door to the oven just long enough to put the baking sheet in the oven and close the door. Let the salt sit in the oven until dry, about 2 to three hours.
- If you use a dehydrator sheet, the salt should come up very easily. If you use a baking sheet, the salt will most likely stick to the pan a bit. Don't despair. A metal spatula will pry up all your Sriracha Lime goodness.
- Leave as is -it will be chunky- or break up briefly in a blender or mortar and pestle. Store in an airtight container indefinitely at room temperature.
Notes
- FAVORITE
↑ Back to top
Ssamjang (Korean Barbecue Dipping Sauce)
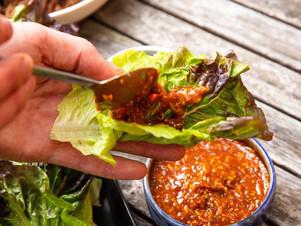
Tags: Condiments
Korean
Servings: 1/2 cup
Ingredients
- 1/4 cup (60g; 60ml) doenjang (Korean fermented soybean paste)
- 2 tablespoons (30g; 30ml) gochujang (Korean chile paste)
- 1 tablespoon (15ml) Korean rice syrup (see note)
- 1 tablespoon (15ml) toasted sesame oil
- 2 scallions ( 40 g), thinly sliced
- 2 large cloves garlic ( 10 g), minced
- 2 teaspoons (4g) toasted sesame seeds
Steps
- In a small bowl, stir together doenjang, gochujang, rice syrup, sesame oil, scallions, garlic, and sesame seeds until well-combined. Serve, or transfer to an airtight container and refrigerate until ready to use.
Notes
- Honey or corn syrup can be substituted for Korean rice syrup.
- Make-Ahead and Storage
- Ssamjang can be refrigerated for up to 3 days in an airtight container. Bring to room temperature before serving.
↑ Back to top
Ssamjang (Korean Spicy Dipping Sauce) Recipe by Maangchi
Adapted from https://www.maangchi.com/recipe/ssamjang
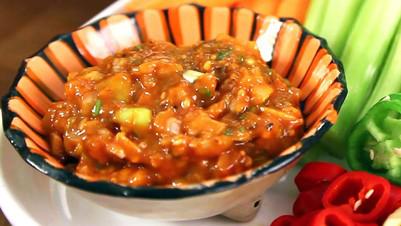
Servings: : (4 servings)
Ingredients
- ¼ cup doenjang (fermented soybean paste)
- 1 tbs gochujang (hot pepper paste)
- 1 stalk of minced green onion
- 1 clove of minced garlic
- ¼ cup chopped onion
- 2 ts honey
- 2 ts toasted toasted sesame seeds
- 2 ts toasted sesame oil
: (4 servings)
Steps
- Use a spoon to mix all the ingredients in a large bowl.
- Transfer it to a small bowl, and serve with rice and lettuce, or with meat BBQ.
↑ Back to top
Ssamjang Recipe (Korean Dipping Sauce)
Adapted from https://mykoreankitchen.com/ssamjang/
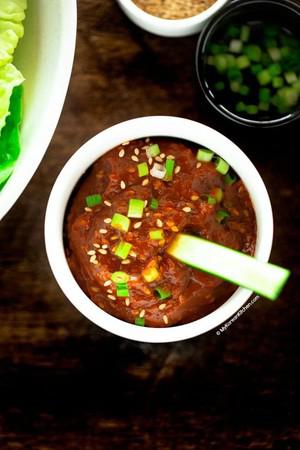
Ingredients
- 1/4 cup doenjang (Korean soybean paste)
- 2 Tbsp gochujang (Korean chili paste)
- 2 Tbsp toasted sesame oil
- 1/2 Tbsp honey
- 2 tsp toasted sesame seeds
- 1/2 tsp minced garlic
- 10 g onion , thinly sliced
- 2 Tbsp walnuts (or your choice of nuts and seeds) – this will add nuttier flavor and creamier texture.
- 10 g apple , cored and cut into small pieces
- green onion (optional)
- green chilies (optional)
- toasted sesame seeds (optional)
Main
Garnish
Steps
- Put all ingredients in a food processor and blend until the texture is smooth. It will takes about 1 min. Transfer the sauce into a serving bowl. Garnish with the green onion and sesame seeds.
Notes
- 1 Tbsp = 15 ml, 1 cup = 250ml
- * If you want to learn more about Korean ingredients, check my essential Korean grocery ingredients!
- ** When adding sesame oil and/or nuts, be sure to use the fresh ones. Old ones can be rancid and spoil the taste of ssamjang.
- *** Be sure to check out alternative ingredients options from the post above.
↑ Back to top
Ssamjang Recipe (Korean Dipping Sauce)
Adapted from https://mykoreankitchen.com/ssamjang/

Tags: Condiments
Korean
Ingredients
- 1/4 cup doenjang (Korean soybean paste)
- 2 Tbsp gochujang (Korean chili paste)
- 2 Tbsp toasted sesame oil
- 1/2 Tbsp honey
- 2 tsp toasted sesame seeds
- 1/2 tsp minced garlic
- 10 g onion , thinly sliced
- 2 Tbsp walnuts (or your choice of nuts and seeds) – this will add nuttier flavor and creamier texture.
- 10 g apple , cored and cut into small pieces
- green onion (optional)
- green chilies (optional)
- toasted sesame seeds (optional)
Main:
Garnish:
Steps
- Put all ingredients in a food processor and blend until the texture is smooth. It will takes about 1 min. Transfer the sauce into a serving bowl. Garnish with the green onion and sesame seeds.
Notes
- 1 Tbsp = 15 ml, 1 cup = 250ml
- * If you want to learn more about Korean ingredients, check my essential Korean grocery ingredients!
- ** When adding sesame oil and/or nuts, be sure to use the fresh ones. Old ones can be rancid and spoil the taste of ssamjang.
- *** Be sure to check out alternative ingredients options from the post above.
↑ Back to top
St. Louis-Style Pizza

Tags: Pizza
Ingredients
- 1 (8-ounce) can tomato sauce
- 3 tablespoons tomato paste
- 2 tablespoons chopped fresh basil
- 1 tablespoon sugar
- 2 teaspoons dried oregano
- 2 cups shredded white American cheese
- 1/2 cup shredded Monterey Jack cheese
- 3 drops liquid smoke
- 2 cups all-purpose flour
- 2 tablespoons cornstarch
- 2 teaspoons sugar
- 1 teaspoon baking powder
- 1 teaspoon salt
- 1/2 cup plus 2 tablespoons water
- 2 tablespoons olive oil
SAUCE:
CHEESE:
DOUGH:
Steps
- MAKE SAUCE Whisk together tomato sauce, tomato paste, basil, sugar, and oregano in small bowl; set aside. Toss cheeses with liquid smoke in medium bowl; set aside.
- MIX DOUGH Combine flour, cornstarch, sugar, baking powder, and salt in large bowl. Combine water and olive oil in liquid measuring cup. Stir water mixture into flour mixture until dough starts to come together. Turn dough onto lightly floured surface and knead 3 or 4 times, until cohesive.
- ROLL DOUGH Adjust oven rack to lower-middle position, place pizza stone (or inverted baking sheet) on rack, and heat oven to 475 degrees. Divide dough into 2 equal pieces. Working with 1 piece of dough at a time, press into small circle and transfer to parchment paper dusted lightly with flour. Using rolling pin, roll and stretch dough to form 12-inch circle, rotating parchment as needed. Lift parchment and pizza off work surface onto inverted baking sheet.
- ASSEMBLE PIZZA Top each piece of dough with half of sauce and half of cheese. Carefully pull parchment paper and pizza off baking sheet onto hot baking stone. Bake until underside is golden brown and cheese is completely melted, 9 to 12 minutes. Remove pizza and parchment from oven. Transfer pizza to cooling rack and let cool few minutes. Assemble and bake second pizza. Cut into 2-inch squares. Serve.
Notes
- MAKE AHEAD: The dough can be made in advance. At the end of step 2, tightly wrap the ball of dough in plastic and refrigerate for up to 2 days.
↑ Back to top
Stardust Chocolate Pancakes

Tags: Breakfast
Chocolate
Servings: YIELD 10 servings TOTAL
TIME 14 mins
Ingredients
- 1 cup milk
- 1 egg
- 2 tablespoons butter or 2 tablespoons margarine, melted
- 1 cup all-purpose flour
- 1/4 cup unsweetened cocoa powder
- 1/2 cup sugar
- 1/2 teaspoon baking soda
- 1/2 teaspoon salt
- 3 tablespoons powdered sugar
- strawberry preserves or sliced strawberries or sweetened whipped cream (optional)
Steps
- In a small bowl, combine milk, egg and butter; whisk until blended.
- In another bowl, combine flour, cocoa powder, sugar, baking soda and salt; mix well.
- Add milk mixture; whisk just until dry ingredients are moistened.
- (Batter will be slightly lumpy.) Heat griddle over medium heat until hot.
- (Drops of water will sizzle, then evaporate.) For each pancake, pour scant 1/4 cup batter into griddle.
- Cook 1-2 minutes or until batter is set around edges.
- Carefully turn over pancake; cook 1-2 minutes or until pancakes are cooked through.
- Repeat with remaining batter.
- Sprinkle pancakes with powdered sugar; serve warm with desired toppings.
- (I use a star shaped mold, placed on grill. You must spray mold with vegetable oil) Try using metal star shaped cookie cutters!
Notes
- FAVORITE
↑ Back to top
Steak & Arugula Salad with Oranges
Tags: Beef
Mexican
Servings: 8 FAJITAS;
Ingredients
- STEAK & ARUGULA SALAD WITH ORANGES
Steps
- Trim fat from steak and cut into 2 or 3 pieces.
- In a zippered plastic bag, combine soy sauce, orange juice, 1 tablespoon of lime juice, ginger, and garlic. Add steak, seal tightly, and turn to mix marinade and coat steak. Refrigerate for at least 1 hour and up to overnight.
- Preheat broiler. Remove steak from bag and discard marinade. Place steak on a broiler pan and place about 2 inches (5 cm) from heat source. Broil, turning once, for about 8 minutes total for medium-rare.
- Meanwhile, using a sharp knife, cut a thin slice off both ends of each orange, then cut away peel and bitter white pith, following fruit’s curve. Cut orange in half lengthwise, then slice crosswise into thin half-moons.
- In a large bowl, mix remaining 3 tablespoons lime juice and olive oil. Add arugula, oranges, and radishes and toss to mix well. Mound on a platter. Carve steak across grain into slices ¼ inch (6 mm) thick and arrange over salad. Sprinkle with pepper and serve right away.
- To lower the fat in the salad, reduce the steak to 12 oz (375 g). Or, slice or cube 8 oz (250 g) firm tofu, and marinate and cook it as you would the steak.
↑ Back to top
Steak Seasoning
Adapted from http://ontreal-steak-seasoning-1221.html/
Tags: Rubs and Blends
Spices
Ingredients
- 6 tablespoons Kosher salt
- 2 tablespoon cracked pepper (I use equal parts black, white, dry green and pink)
- 2 tablespoon granulated onion
- 2 tablespoon granulated garlic
- 2 teaspoons ancho chilli powder
- 1 tablespoon dried thyme
- 1 tablespoon dried rosemary
- 1 tablespoon dried fennel
- 1 tablespoon coriander seed
Steps
- Blend Ingredients. Store in cool dry place.
Notes
- FAVORITE
↑ Back to top
Stewed Chicken and Sausage
Adapted from http://www.marthasflowers.com/recipes/recipe-print?id=2820&KeepThis=true&TB_iframe=true&height=500&width=700

Tags: Chicken
Sausage
Ingredients
- 1 small chicken (about 2 1/2 pounds)
- 1 tablespoon Rustic Rub
- 1/2 cup flour
- 1/4 cup vegetable oil
- 1 pound smoked hot pork sausage, cut crosswise into 1/2-inch slices
- 2 cups chopped onions
- 1 cup chopped celery
- 1/2 cup chopped bell peppers
- 1 cup tomatoes
- 4 bay leaves
- 1 tablespoon minced garlic
- 6 cups Chicken Broth
- 1/2 teaspoon salt
- 1/4 teaspoon cayenne
- 1/4 cup chopped parsley
- 1/4 cup chopped green onions
Steps
- Cut the chicken in half, then cut each half into 4 pieces. Season with the rub. Toss the chicken pieces with 1/4 cup of the flour to coat evenly. Heat the oil in a large cast-iron or enameled cast-iron Dutch oven. When the oil is hot, add the chicken. Turn to brown on all sides. Cook until evenly browned, 5 to 6 minutes. Add the sausage, stir, and cook for 5 to 6 minutes. Add the remaining 1/4 cup flour and cook, stirring constantly, for 2 to 3 minutes.
- Add the onions, celery, and bell peppers and stir. Cook for 5 to 6 minutes, or until the vegetables are soft. Add the bay leaves, tomatoes and garlic and cook for 5 to 6 minutes, stirring occasionally to prevent sticking.
- Add the broth, salt, and cayenne and bring to a boil. Reduce the heat to medium-low and cook, uncovered, for 1 hour. Remove the bay leaves.
- Add the parsley and green onions and serve immediately.
Notes
- FAVORITE
↑ Back to top
Stir-Fried Chile-Lemon Shrimp and Rice Noodles
Adapted from https://www.thekitchn.com/recipe-stir-fried-chile-lemon-shrimp-and-rice-noodles-228379#post-recipe-9599
Tags: Seafood
Servings: 3 to 4
Ingredients
- 1 bunch Broccolini (about 6 ounces), trimmed and cut into 2-inch pieces
- 8 ounces thin, flat, dried rice noodles (see Recipe Notes)
- 2 tablespoons vegetable oil
- 8 ounces large uncooked shrimp (26/30 count), peeled and cleaned
- Salt
- 1 clove garlic, minced
- 1 tablespoon fish sauce
- 1 tablespoon freshly squeezed lemon juice
- 2 teaspoons soy sauce or tamari
- 2 teaspoons Asian chile-garlic paste, such as sambal oelek
- 1 tablespoon coarsely chopped fresh cilantro
- Shop Recipe
Steps
- Bring a large pot of salted water to a boil over high heat. Add the Broccolini and cook until crisp-tender, about 3 minutes. Remove the pot from the heat. Using a slotted spoon, transfer the Broccolini to a large plate.
- Add the noodles to the pot of hot water and let sit, stirring occasionally, until the noodles are just tender, 8 to 10 minutes. Meanwhile, cook the shrimp.
- Heat 1 tablespoon of the oil in a large nonstick frying pan or wok over medium-high heat until shimmering. Add the shrimp, season with salt, and sauté until just pink and almost cooked through, about 3 minutes. Transfer to the plate with the Broccolini. Drain the rice noodles and run under cold water until cool; drain again.
- Heat the remaining 1 tablespoon of oil in the pan over medium heat. Add the garlic and cook until fragrant, about 30 seconds. Add the noodles, Broccolini, shrimp, fish sauce, lemon juice, soy sauce or tamari, and chile paste and cook, constantly tossing with wooden chopsticks or tongs, until heated through, about 3 minutes. Sprinkle with the cilantro and serve immediately.
Notes
- Rice noodles: Look for 1/4-inch-wide noodles; they're sometimes labeled as pad Thai noodles.
- Cilantro: If you don't like cilantro, just skip it or substitute fresh parsley instead or Thai basil instead.
↑ Back to top
Stir-Fried Chinese Broccoli with Crispy Pork Belly (Khana
Mu Krop)
Adapted from http://www.seriouseats.com/recipes/2012/10/stir-fried-broccoli-pork-belly-my-thai-recipe.html
Tags: Chinese
Pork Vegetables
Servings: YIELD serves 4
Ingredients
- 1 pound roast pork belly, cut into 1/2- by 1/2- by 1-inch pieces (see note above)
- 1 teaspoon vegetable oil
- 1 pound Chinese broccoli (kai lan), trimmed and cut into 1-inch pieces
- 2 large cloves garlic, peeled and smashed
- 2 fresh bird's eye chilies, smashed (or cut into thin slices)
- 2 tablespoons oyster sauce
- 1/2 teaspoon sugar
- Fish sauce to taste (see note above)
Steps
- Heat vegetable oil in wok over high heat until lightly smoking.
- Add pork bell and stir to brown pieces on all sides, about 1 minute.
- Add Chinese broccoli, garlic, chilies, oyster sauce, and sugar; stir.
- Cook until broccoli is tender-crisp, about 1 minute.
- Remove from heat, season with fish sauce, and serve over rice.
Notes
- FAVORITE
↑ Back to top
Stir-Fried Lo Mein Noodles with Pork and Vegetables
Tags: Chinese
Noodles
Servings: 4
Ingredients
- Kosher salt
- 1 pound ( 450 g) fresh lo mein noodles
- 1 pound ( 450 g) country-style boneless pork ribs or boneless pork loin chops
- 1 teaspoon ( 3 g) baking soda
- 3 tablespoons ( 40 g) sugar
- 3 tablespoons ( 45 ml) soy sauce
- 3 tablespoons ( 45 ml) oyster sauce
- 2 tablespoons (30ml) Chinese black or balsamic vinegar
- 1 tablespoon (15ml) toasted sesame oil
- 2 tablespoons (30ml) Shaoxing rice wine or dry sherry
- 1 tablespoon (15ml) Asian fish sauce
- 1 tablespoon ( 15 g) cornstarch
- 3 tablespoons (45ml) neutral oil, such as grapeseed, peanut, or canola, divided
- 1 (3-inch) knob fresh ginger, peeled and minced (about 2 tablespoons; 12 g)
- 3 medium garlic cloves, minced
- 4 scallions, white parts cut in 1-inch pieces, light green parts very thinly sliced; divided
- 1 1/2 cups shredded cored purple cabbage (5 ounces; 150 g)
- 1 1/2 cups shredded Chinese broccoli or cored Napa cabbage (5 ounces; 150 g)
- 1 cup julienned carrots (2 1/2 ounces; 75 g)
- Toasted sesame seeds, for garnish (optional)
- Sambal oelek (chili paste), for serving (optional)
Steps
- Bring a pot of salted water to a boil and cook noodles according to package directions, stirring regularly with tongs or long chopsticks, until al dente and separated. Drain noodles and set aside.
- Trim pork of excess fat and cut into thin strips, about 1/4 inch wide by 2 inches long. In a bowl, stir together baking soda and 1/2 cup cold water. Add pork, stir until thoroughly coated, then let stand at room temperature for 15 minutes.
- Meanwhile, in a medium bowl, whisk together sugar, soy sauce, oyster sauce, vinegar, sesame oil, wine, fish sauce, and cornstarch until sugar is dissolved. Set sauce aside.
- Drain pork well, rinse with cold water, then pat dry with paper towels. Add pork back to rinsed and dried bowl. Stir in 2 tablespoons (15ml) of the sauce and mix well.
- In a wok or large cast iron skillet, heat 1 tablespoon (15ml) neutral oil over medium-high heat until shimmering. Add ginger, garlic, and white scallion pieces and stir-fry for 30 seconds. Increase heat to high and add purple cabbage, Chinese broccoli (or Napa cabbage), and carrots. Cook, stirring and tossing, until vegetables are charred in spots and just softened, 3 to 5 minutes. Transfer to a plate.
- Add 1 tablespoon (15ml) neutral oil to wok or skillet and heat over high heat until smoking. Add pork, spreading it out in a single layer, and let cook on one side until crisp and brown, 2 to 3 minutes. Continue to cook, stirring and tossing, until just cooked through, about 1 minute longer. Transfer to plate with vegetables.
- Wipe out wok or skillet, then add remaining 1 tablespoon (15ml) neutral oil and heat over high heat until smoking. Add noodles and cook, tossing and stirring, until hot.
- Add remaining sauce, vegetables, and pork to noodles and toss well over heat to combine. Transfer lo mein to a platter and sprinkle sliced green scallions all over, along with sesame seeds, if using. Serve right away, passing sambal oelek at the table if desired.
↑ Back to top
Stir-Fried Lo Mein with Beef and Broccoli

Tags: Beef
Chinese Noodles
Servings: 4
Ingredients
- 1/2 pound flank or skirt steak, sliced thin for stir-frying
- 1/4 teaspoon salt
- 1/4 teaspoon sugar
- 1/8 teaspoon ground black pepper
- 1/2 teaspoon Shaoxing wine
- 1/2 teaspoon light soy sauce
- 1 teaspoon oil
- 1/2 teaspoon cornstarch
- 1 tablespoon sesame oil
- 2 teaspoons light soy sauce
- 2 teaspoons dark soy sauce
- 1 tablespoon oyster sauce
- 1/4 teaspoon salt
- 1/4 teaspoon sugar
- 1 teaspoon Shaoxing wine
- 1 tablespoon water
- Kosher salt
- 1 pound fresh lo mein noodles
- 4 tablespoons vegetable oil
- 1/2 pound broccoli, cut into bite-sized florets
- 3 medium cloves garlic, finely minced (about 1 tablespoon)
For the Beef:
For the Sauce:
For the
Noodles:
Steps
- For the Beef: Combine beef, salt, sugar, pepper, wine, soy sauce, oil, and cornstarch in a small bowl and toss with fingers to coat. Set in refrigerator to marinate.
- For the Sauce: While the beef marinates, combine sesame oil, light and dark soy sauces, oyster sauce, salt, sugar, wine, and water in a small bowl. Stir with a fork and set aside.
- For the Noodles: Bring a large pot of salted water to a boil. Add noodles and cook, stirring with chopsticks, until al dente, about 3 minutes. Drain in a colander and run under cold water until chilled. Drain well and set aside.
- When ready to cook, heat 2 tablespoons oil in a wok over high heat until smoking. Add beef, spread it out with a spatula, and cook without moving until lightly browned, about 1 minute. Toss and cook, stirring frequently, until almost cooked through, about 2 minutes total. Transfer to a large bowl and set aside.
- Add another tablespoon oil to the wok and heat over high heat until smoking. Add the broccoli and season with a couple pinches of salt. Cook, stirring, until very lightly browned, about 30 seconds, then add 1/4 cup water. Cook, stirring, until broccoli is steamed and water has evaporated, about 2 minutes. Transfer to bowl with beef.
- Heat remaining tablespoon oil over high heat until smoking. Add the noodles. Using tongs or chopsticks, cook the noodles, stirring and mixing constantly until the noodles are coated in oil, about 1 minute. Add the sauce and continue cooking, stirring constantly, until the sauce coats the noodles, about 1 minute longer. Add the garlic, broccoli, and beef and continue cooking until combined and fragrant, about 1 minute longer. Serve immediately.
↑ Back to top
Stollen

Tags: Baking
Breads Holidays
I made this.
Ingredients
- 1 cup mixed candied fruit
- 1 cup raisins
- 3 tablespoons dark rum or orange juice
- 1 scant tablespoon or 1 (1/4-ounce) package active dry yeast
- 1/4 cup warm water (about 110 degrees F)
- 2/3 cup milk
- 1 teaspoon honey
- 1 cup unbleached all-purpose flour
- 1/3 cup honey
- 1 large egg, beaten
- 1/2 cup (1 stick) unsalted butter, softened
- 1 tablespoon finely grated lemon zest
- 1 teaspoon salt
- 1/2 cup chopped almonds, toasted
- 3 to 4 cups unbleached all-purpose flour
- Oil, for coating bowl
- 2 tablespoons unsalted butter, melted
- 2 teaspoons ground cinnamon
- 3 tablespoons granulated sugar
- 1/2 cup confectioners' sugar
For the Fruit:
For the
Sponge:
For the Dough:
For the
Filling:
For the
Topping:
Steps
- Prepare Fruit: Combine the mixed fruit, raisins, and rum. Cover and set aside. Shake or stir the mixture every so often to coat the fruit with the rum.
- Prepare Sponge: In a large bowl, sprinkle the yeast in the water to soften. Heat the milk to 110 degrees F and add it to the yeast along with the honey and 1 cup flour. Cover the sponge with plastic wrap and let rise until light and full of bubbles, about 30 minutes.
- By Hand: Add the fruit mixture, honey, egg, butter, zest, salt, mace, almonds, and 2 cups of the flour to the sponge. Beat vigorously for 2 minutes. Gradually add the remaining flour 1/4 cup at a time until the dough begins to pull away from the side of the bowl. Turn the dough out onto a floured work surface. Knead, adding flour a little at a time, until the dough is smooth and elastic.
- By Mixer: In the mixer bowl, add the fruit mixture, honey, egg, butter, zest, salt, mace, almonds, and 2 cups of the flour to the sponge. Using the paddle, beat the mixture on medium low speed for 2 minutes. Gradually add the remaining flour 1/4 cup at a time until the dough begins to pull away from the side of the bowl. Change to the dough hook. Continue to add flour 1 tablespoon at a time until the dough just begins to clean the bowl. Knead 4 to 5 minutes on medium-low.
- First rise: Put the dough in an oiled bowl and turn to coat the entire ball of dough with oil. Cover with a tightly woven towel and let rise until doubled, about 1 hour.
- Shape and Fill: Turn the dough out onto a lightly oiled work surface. For 1 large loaf, roll the dough into a 9 by 13-inch oval. For 2 loaves, divided the dough in half and roll each half into a 7 by 9-inch oval. Brush the melted butter over the top of the oval(s). Combine the cinnamon and granulated sugar and sprinkle over one lengthwise half of the oval(s). Fold the dough in half lengthwise and carefully lift the bread(s) onto a parchment-lined or well-greased baking sheet. Press lightly on the folded side to help the loaf keep its shape during rising and baking.
- Second rise: Cover with a tightly woven towel and let rise for 45 minutes.
- Preheat oven: About 10 minutes before baking, preheat oven to 375 degrees F.
- Bake and cool: Bake for 25 minutes until the internal temperature of the bread reaches 190 degrees F. Immediately remove from the baking sheet and place on a rack to cool.
- To serve: Sprinkle heavily with confectioners' sugar just before serving.
- Variation: Between 2 pieces of waxed paper or plastic wrap, roll 3 ounces almond paste or marzipan into the lengthwise shape of half the oval. Omit the butter and cinnamon-sugar filling. Place the marzipan on half of the oval and fold the dough in half. Let rise and bake as directed.
- Notes: One cup coarsely chopped mixed dried fruits may be substituted for the candied fruit. Cover the dried fruit with boiling water and let sit at room temperature for 8 to 12 hours. Drain and use as you would candied fruit. You can also make your own candied fruit and peel. This bread freezes nicely for up to 6 months. If freezing it, do not sprinkle with confectioners' sugar. To serve, first thaw the bread, then bake on a baking sheet in a preheated 375 degree F oven for 7 to 10 minutes. Just before serving, sprinkle with confectioners' sugar.
Notes
- I used orange juice and instead of cinnamon sugar I used apricot filling
↑ Back to top
Stollen

Tags: Cookies
Goyim Holidays
I made this.
Ingredients
- 1 cup mixed candied fruit
- 1 cup raisins
- 3 tablespoons dark rum or orange juice
- 1 scant tablespoon or 1 (1/4-ounce) package active dry yeast
- 1/4 cup warm water (about 110 degrees F)
- 2/3 cup milk
- 1 teaspoon honey
- 1 cup unbleached all-purpose flour
- 1/3 cup honey
- 1 large egg, beaten
- 1/2 cup (1 stick) unsalted butter, softened
- 1 tablespoon finely grated lemon zest
- 1 teaspoon salt
- 1/2 cup chopped almonds, toasted
- 3 to 4 cups unbleached all-purpose flour
- Oil, for coating bowl
- 2 tablespoons unsalted butter, melted
- 2 teaspoons ground cinnamon
- 3 tablespoons granulated sugar
- 1/2 cup confectioners' sugar
For the Fruit:
For the
Sponge:
For the Dough:
For the
Filling:
For the
Topping:
Steps
- Prepare Fruit: Combine the mixed fruit, raisins, and rum. Cover and set aside. Shake or stir the mixture every so often to coat the fruit with the rum.
- Prepare Sponge: In a large bowl, sprinkle the yeast in the water to soften. Heat the milk to 110 degrees F and add it to the yeast along with the honey and 1 cup flour. Cover the sponge with plastic wrap and let rise until light and full of bubbles, about 30 minutes.
- By Hand: Add the fruit mixture, honey, egg, butter, zest, salt, mace, almonds, and 2 cups of the flour to the sponge. Beat vigorously for 2 minutes. Gradually add the remaining flour 1/4 cup at a time until the dough begins to pull away from the side of the bowl. Turn the dough out onto a floured work surface. Knead, adding flour a little at a time, until the dough is smooth and elastic.
- By Mixer: In the mixer bowl, add the fruit mixture, honey, egg, butter, zest, salt, mace, almonds, and 2 cups of the flour to the sponge. Using the paddle, beat the mixture on medium low speed for 2 minutes. Gradually add the remaining flour 1/4 cup at a time until the dough begins to pull away from the side of the bowl. Change to the dough hook. Continue to add flour 1 tablespoon at a time until the dough just begins to clean the bowl. Knead 4 to 5 minutes on medium-low.
- First rise: Put the dough in an oiled bowl and turn to coat the entire ball of dough with oil. Cover with a tightly woven towel and let rise until doubled, about 1 hour.
- Shape and Fill: Turn the dough out onto a lightly oiled work surface. For 1 large loaf, roll the dough into a 9 by 13-inch oval. For 2 loaves, divided the dough in half and roll each half into a 7 by 9-inch oval. Brush the melted butter over the top of the oval(s). Combine the cinnamon and granulated sugar and sprinkle over one lengthwise half of the oval(s). Fold the dough in half lengthwise and carefully lift the bread(s) onto a parchment-lined or well-greased baking sheet. Press lightly on the folded side to help the loaf keep its shape during rising and baking.
- Second rise: Cover with a tightly woven towel and let rise for 45 minutes.
- Preheat oven: About 10 minutes before baking, preheat oven to 375 degrees F.
- Bake and cool: Bake for 25 minutes until the internal temperature of the bread reaches 190 degrees F. Immediately remove from the baking sheet and place on a rack to cool.
- To serve: Sprinkle heavily with confectioners' sugar just before serving.
- Variation: Between 2 pieces of waxed paper or plastic wrap, roll 3 ounces almond paste or marzipan into the lengthwise shape of half the oval. Omit the butter and cinnamon-sugar filling. Place the marzipan on half of the oval and fold the dough in half. Let rise and bake as directed.
- Notes: One cup coarsely chopped mixed dried fruits may be substituted for the candied fruit. Cover the dried fruit with boiling water and let sit at room temperature for 8 to 12 hours. Drain and use as you would candied fruit. You can also make your own candied fruit and peel. This bread freezes nicely for up to 6 months. If freezing it, do not sprinkle with confectioners' sugar. To serve, first thaw the bread, then bake on a baking sheet in a preheated 375 degree F oven for 7 to 10 minutes. Just before serving, sprinkle with confectioners' sugar.
Notes
- I used orange juice and instead of cinnamon sugar I used apricot filling
↑ Back to top
Strawberry Salsa
Adapted from https://cookieandkate.com/strawberry-salsa-recipe/
Tags: Condiments
Fruit Salsas
Ingredients
- Juice and zest from 1 medium lime
- 1 ½ teaspoons honey or maple syrup
- Pinch of fine sea salt
- 1 pint of strawberries, hulled and diced
- 1 jalapeño pepper, seeded and chopped (use a smaller jalapeño for less heat, or leave in some seeds for more heat)
- ½ small red onion, chopped
- ½ cup chopped fresh cilantro
- Freshly ground black pepper, to taste
- Chips for serving
Steps
- In a large bowl, whisk together the lime juice and zest, honey and salt. Stir in the strawberries, jalapeño, onion and cilantro. Add pepper, to taste, and mix well. Adjust the seasonings if need be (you might like a little more lime for acidity, honey for sweetness, or salt if it’s just not quite right yet).
- If your strawberries are nice and juicy, you can serve immediately, with chips. My salsa needed some time to marinate before it was juicy and awesome (about 30 minutes should do it). Store leftovers in an airtight container in the fridge for up to 3 days.
Notes
- Recipe minimally adapted, with permission, from Dishing Up the Dirt by Andrea Bemis.
↑ Back to top
Strawberry Tarts

Tags: Pies and Tarts
Servings: 4 TARTS
Ingredients
- 1 1⁄4 cups all-purpose flour
- 3 tablespoons sugar
- 1⁄2 teaspoon kosher salt
- 6 tablespoons (3/4 stick) cold unsalted butter, diced
- 2 tablespoons cold Crisco
- 1⁄4 cup ice water
- 2 cups Pastry Cream (recipe follows)
- 2 pints whole strawberries, hulled and halved
- 1⁄3 cup apricot jelly
- 3 tablespoons shelled pistachios, halved (optional)
Steps
- Combine the flour, sugar, and salt in a small bowl and place in the freezer for 30 minutes. Put the flour mixture in the bowl of a food processor fitted with a steel blade. Add the butter and Crisco and pulse about 10 times, or until the butter is in the size of peas. Add the ice water and process until the dough comes together. Dump on a well-floured board and form into a disc. Wrap in plastic and chill for at least 30 minutes.
- Meanwhile, preheat the oven to 375 degrees.
- Roll out the dough and fit into four 41⁄2-inch tart pans with removable sides. Don’t stretch the dough when placing it in the pans or it will shrink during baking. Cut off the excess by rolling the pin across the top of each pan. Line the tart shells with a piece of buttered aluminum foil, butter side down, and fill them with dried beans or rice. Bake for 10 minutes. Remove the beans and foil, prick the bottom of the shells all over with a fork, and bake for another 15 to 20 minutes until lightly browned. Set aside to cool.
- Before serving, fill the tart shells with the pastry cream. Arrange the berries decoratively on top of the cream. Melt the apricot jelly with 1 teaspoon of water and brush the top of the tarts. Sprinkle with pistachios, if using, and serve.
- Pastry Cream (Makes 2 cups)
↑ Back to top
Stromboli

Ingredients
- 1 and 1/3 cups (320ml) warm water (between 100-110°F, 38-43°C)
- 2 and 1/4 teaspoons (7g) instant or active-dry yeast ( 1 standard packet)
- 1 Tablespoon ( 13g) granulated sugar
- 2 Tablespoons (30ml) olive oil
- 1 teaspoon salt
- 3 and 1/2 cups (about 450g) all-purpose flour ( spooned & leveled), plus more for hands and work surface
- 3 Tablespoons ( 43g) unsalted butter, melted
- 2 garlic cloves, minced (or 1/2 teaspoon garlic powder)
- 2 teaspoons chopped fresh parsley (or 1 teaspoon dried)
- 1 pound thinly sliced meats such as Italian cold cuts, deli ham, or large pepperoni slices*
- 3/4– 1 pound (340–454g) cheese (about 3 cups shredded or about 16–20 slices deli cheese)*
- egg wash: 1 large egg beaten with 1 Tablespoon water
- optional: fresh or dried parsley, flaky sea salt, and/or grated Parmesan
Homemade Dough
for 2:
Fillings for
2:
Egg Wash &
Topping for 2:
Steps
- Whisk the warm water, yeast, and granulated sugar together in the bowl of your stand mixer fitted with a dough hook or paddle attachment. Cover and allow to rest for 5 minutes. *If you don’t have a stand mixer, simply use a large mixing bowl and mix the dough with a wooden spoon or silicone spatula in the next step.
- Add the olive oil, salt, and flour. Beat on low speed for 2 minutes.
- Knead the dough: Keep the dough in the mixer (and switch to the dough hook if using the paddle) and beat for an additional 5 full minutes, or knead by hand on a lightly floured surface for 5 full minutes. (If you’re new to bread-baking, my How to Knead Dough video tutorial can help here.) If the dough becomes too sticky during the kneading process, sprinkle 1 teaspoon of flour at a time on the dough or on the work surface/in the bowl to make a soft, slightly tacky dough. Do not add more flour than you need because you do not want a dry dough. After kneading, the dough should still feel a little soft. Poke it with your finger—if it slowly bounces back, your dough is ready to rise. You can also do a “windowpane test” to see if your dough has been kneaded long enough: tear off a small (roughly golfball-size) piece of dough and gently stretch it out until it’s thin enough for light to pass through it. Hold it up to a window or light. Does light pass through the stretched dough without the dough tearing first? If so, your dough has been kneaded long enough and is ready to rise. If not, keep kneading until it passes the windowpane test.
- Rise: Lightly grease a large bowl with oil or nonstick spray—just use the same bowl you used for the dough. Place the dough in the bowl, turning it to coat all sides in the oil. Cover the bowl with plastic wrap or a clean kitchen towel. Allow the dough to rise at room temperature for 60–90 minutes or until doubled in size. For a tiny reduction in rise time, see my answer to Where Should Dough Rise? in my Baking with Yeast Guide.)
- Preheat the oven to 400°F (204°). Line 2 large baking sheets with parchment paper or silicone baking mats.
- Shape the dough: When the dough is risen, punch it down to release the air and divide it in half. (If you aren’t making 2 strombolis, freeze the other half of the dough. See freezing instructions below.) On a lightly floured work surface using a lightly floured rolling pin, roll each portion of dough into a 10×16-inch rectangle. Use your hands to square off the edges, as shown in the video. If the dough keeps shrinking as you try to shape it, cover it lightly and let the dough rest for 10 minutes before trying again. (The gluten just needs to relax.)
- Add fillings: Mix the melted butter and garlic together. Using a pastry brush or the back of a spoon, spread the garlic butter evenly over each rectangle. Sprinkle each with parsley. When you start layering on meats and cheeses, leave a 1-inch border on the bottom and sides and a 3-inch border on top. (Basically you’ll have an empty 3×16-inch gap on top that only has butter/garlic on it. This is because when rolling, the fillings will be pushed forward. See photos and video if you need a visual.) Arrange a layer of sliced meats onto each dough rectangle, usually about 8–10 overlapping slices on each, depending on the size of your slices. Add a layer of cheese. Repeat with more meat and cheese until all is used—about 1/2 pound meat and 1/2 pound cheese per stromboli.
- Brush the edges with egg wash, including the 3-inch border at the top. Slowly roll each into a tight 16-inch log, folding in the two ends as you roll. Dust your hands or the dough with flour if things become too sticky.
- Carefully transfer each stromboli to a prepared baking sheet. Pinch or tuck in the ends to seal. Brush the top of each stromboli with egg wash and, if using, sprinkle on the optional toppings. Using a sharp knife, cut 3–4 slits into the tops of each, which helps steam escape. At this point, you can either bake or cover the shaped stromboli tightly and refrigerate for up to 8 hours.
- Bake for about 25 minutes or until the crust is golden brown—if you have an instant-read thermometer, the center of the stromboli should be at least 200ºF (93ºC). If meats are particularly greasy (like pepperoni), some grease will spill out the sides. Cheese may bubble out the sides or top slits, too. If baking both at the same time, rotate pans halfway through baking and extend bake time (if needed) by 2–3 minutes. Remove from the oven and let cool on the baking sheets for 5 minutes before transferring to a cutting board and slicing.
- Serve plain or with warm pizza/marinara sauce for dipping.
- Cover and store leftover stromboli (slices or whole) in the refrigerator for up to 3 days.
Notes
- Freezing Dough: This dough recipe is the same as my pizza dough recipe. It yields 2 strombolis. After the dough rises and you divide the dough in half (step 6), you can freeze half of the dough. (If you want to freeze all of this dough, I recommend you still divide it in half and freeze separately.) Shape half or halves into a ball(s). Lightly coat all sides of the dough ball(s) with nonstick spray or olive oil. Place the dough ball(s) in a zipped-top bag and seal tightly, squeezing out all the air. Freeze for up to 3 months. To thaw, place the frozen pizza dough in the refrigerator for about 8 hours or overnight. When ready to make stromboli, remove the dough from the refrigerator and allow to rest for 30 minutes on the counter. Continue with step 6, punching down the dough to release air if needed.
- Overnight Dough Instructions: To prevent these notes from getting too crowded, see pizza dough post for overnight dough instructions.
- Refrigerate Shaped Stromboli Ahead of Time: See end of step 9.
- Freezing Shaped Stromboli Before Baking: Instead of freezing the dough as a whole, you can freeze the shaped stromboli before baking. Fill and roll stromboli as directed in step 7. Do not cut slits or add egg wash (step 8). Carefully place filled/rolled stromboli on a piece of plastic wrap. Sprinkle with flour to help prevent sticking. Wrap up tightly. To preserve freshness, I recommend a layer of aluminum foil over the plastic wrap as well. Freeze for up to 3 months. Thaw, still wrapped, in the refrigerator for 24 hours. Brush with egg wash, add optional toppings, and cut steam slits. Place stromboli on a lined baking sheet and bake as directed. Since stromboli is pretty cold going into the oven, it will take a couple extra minutes to bake.
- Freezing Baked Stromboli: Allow baked stromboli to cool completely. Wrap in plastic wrap or aluminum foil (or a layer of both), and freeze for up to 3 months. Thaw, still wrapped, for just 1 hour at room temperature. Bake, lightly covered with aluminum foil, in a 350°F (177°C) oven for 30 minutes.
↑ Back to top
Stromboli with Olives, Sun-Dried Tomatoes, Ham, Salami,
and Cheese
Adapted from https://www.seriouseats.com/olive-caper-tomato-salami-ham-cheese-cold-cut-stromboli-recipe

Servings: 8 to 10
Ingredients
- 1/3 cup flavorful, mixed, pitted olives
- 1 tablespoon capers, drained
- 1/3 cup oil packed sun-dried tomatoes, drained and finely chopped
- 1 ( 16- ounce) ball pizza dough, at room temperature
- 8 to 10 slices salami (about 4 ounces)
- 8 to 10 slices provolone dolce (about 4 ounces)
- 8 slices cured ham (about 4 ounces)
- 1 ( 4- ounce) ball fresh mozzarella, cut into slices
- 8 fresh basil leaves
- 1 large egg
- 3 tablespoons sesame seeds
Steps
- Place the olives and capers together on a cutting board, and chop with a sharp knife until you have a coarsely chopped spreadable mixture. Alternatively, pulse in a food processor to chop. Assemble the rest of your ingredients together.
- On a lightly floured counter or board, roll the dough out into a 16- by 12-inch rectangle. Place the dough on a baking sheet topped with a lightly oiled piece of parchment paper. Spread the olive mixture over the center of the dough lengthwise, covering the center 4 inches, and leaving 1 1/2 inches at each end. Layer the salami, then the provolone on top of the olive mixture down the center of the dough. Spread the sun-dried tomatoes on top, then layer the ham and mozzarella on top of the tomatoes. Finish by laying down a line of the fresh basil leaves over the filling ingredients.
- To form the braid, starting 1 1/2 inches from the filling, make parallel horizontal cuts in the dough at 1 1/2 inch intervals down both sides, leaving a 1 1/2 inch border at the top and bottom. Fold the top and bottom edges over the filling, and starting at the top fold one strip over the filling from the right side, then the left, slightly overlapping each. Continue alternating strips to create a braided effect, tucking in the end strips as needed. Cover with a kitchen towel, and allow the Stromboli to rise 30 minutes.
- Preheat oven to 400°F. Beat the egg with a tablespoon of water and lightly brush the tops and sides of the Stromboli, then sprinkle the sesame seeds on top. Bake until golden brown, for 25 to 30 minutes. Remove from the oven and let rest at least 15 minutes before slicing into strips and serving.
↑ Back to top
Stuffed Breast of Lamb
By Craig Claiborne and Pierre Franey
Servings: Four to six servings
Ingredients
- 2 breasts of lamb with pockets for stuffing
- Salt to taste, if desired
- Freshly ground pepper to taste
- 1 pound fresh spinach in bulk or 1 10-ounce package in plastic
- 1 tablespoon butter
- 1 tablespoon finely chopped garlic
- 2 cups thinly sliced mushrooms, about ¼ pound
- ½ cup ricotta cheese
- ¼ cup freshly grated Parmesan cheese
- 1 egg, lightly beaten
- ⅛ teaspoon finely grated nutmeg
- 1 tablespoon peanut, corn or vegetable oil
- 1 teaspoon crumbled rosemary leaves
- ¾ cup chicken broth
Steps
- Preheat oven to 425 degrees.
- Sprinkle the breasts of lamb inside and out with salt and pepper.
- Pick over the spinach and pull off and discard any tough stems or blemished leaves. Drop the spinach into boiling water to cover and cook one minute. Drain. When cool enough to handle, press the spinach to extract as much excess liquid as possible. Chop finely.
- Heat the butter in a saucepan and add the garlic, mushrooms, salt and pepper. Cook, stirring, until the mushrooms give up their liquid and it evaporates. Add the chopped spinach and stir to blend. Let cool slightly. Spoon the mixture into a mixing bowl. Add the ricotta, Parmesan, egg and nutmeg. Blend thoroughly.
- Stuff each lamb pocket with equal amounts of the filling, packing it down to almost completely fill the pockets. Sew up the openings of each pocket with string.
- Rub the meat all over with oil. Sprinkle both sides with rosemary and place the breasts bone side up on a baking dish.
- Place in the oven and bake 20 minutes.
- Reduce the oven heat to 400 degrees. Turn the breasts bone side down. Bake 25 minutes. Pour off the fat. Pour the broth into the pan and stir to dissolve the brown particles that cling to the bottom and sides of the pan. Place in the oven and bake 15 minutes longer.
↑ Back to top
Stuffed Eggplant with Lamb and Pine Nuts from 'Jerusalem'
Adapted from https://www.seriouseats.com/stuffed-eggplant-with-lamb-and-pine-nuts-from-jerusalem-recipe
Tags: Lamb
Middle-East
Is starred.
Servings: 4
Ingredients
- 4 medium eggplants (about 2 pounds; 1.2kg), halved lengthwise
- 6 tablespoons (90 ml) olive oil
- 1 teaspoon ground cumin
- 1 tablespoon sweet paprika
- 1 tablespoon ground cinnamon
- 2 medium onions (12 ounces; 340 g in total), finely chopped
- 1 pound ( 500 g) ground lamb
- 7 tablespoons ( 50 g) pine nuts
- 2/3 ounces ( 20 g) flat-leaf parsley, chopped
- 2 teaspoons tomato paste
- 3 teaspoons superfine sugar
- 2/3 cup ( 150 ml) water
- 1 tablespoon freshly squeezed lemon juice
- 1 teaspoon tamarind paste
- 4 cinnamon sticks
- Salt and freshly ground black pepper
Steps
- Preheat the oven to 425°F/220°C. Place the eggplant halves, skin side down, in a roasting pan large enough to accommodate them snugly. Brush the flesh with 4 tablespoons of the olive oil and season with 1 teaspoon salt and plenty of black pepper. Roast for about 20 minutes, until golden brown. Remove from the oven and allow to cool slightly.
- While the eggplants are cooking, you can start making the stuffing by heating the remaining 2 tablespoons olive oil in a large frying pan. Mix together the cumin, paprika, and ground cinnamon and add half of this spice mix to the pan, along with the onions. Cook over medium-high heat for about 8 minutes, stirring often, before adding the lamb, pine nuts, parsley, tomato paste, 1 teaspoon of the sugar, 1 teaspoon salt, and some black pepper. Continue to cook and stir for another 8 minutes, until the meat is cooked.
- Place the remaining spice mix in a bowl and add the water, lemon juice, tamarind, the remaining 2 teaspoons sugar, the cinnamon sticks, and 1/2 teaspoon salt; mix well.
- Reduce the oven temperature to 375°F/195°C. Pour the spice mix into the bottom of the eggplant roasting pan. Spoon the lamb mixture on top of each eggplant. Cover the pan tightly with aluminum foil, return to the oven, and roast for 1 1/2 hours, by which point the eggplants should be completely soft and the sauce thick; twice during the cooking, remove the foil and baste the eggplants with the sauce, adding some water if the sauce dries out. Serve warm, not hot, or at room temperature.
↑ Back to top
Submarine Dressing
Tags: Dressings
Sandwiches
Ingredients
- 1/2 cup vegetable oil (I used soybean...evoo probably nice too)
- 1/4 cup red wine vinegar
- 1/4 cup apple cider vinegar
- 1/2 teaspoon oregano
- 1/2 teaspoon basil
- 1/2 red pepper flakes (I removed the seeds)
- 1/4 teaspoon dried onion flakes (rehydrated if using within 2 hours)
- 1/4 teaspoon parsley flakes
- 1/8 teaspoon dried minced garlic (rehydrated if using within 2 hours)
- 1/16 teaspoon celery salt
- salt and pepper to taste, stir well or put in jar and shake
Notes
- refrigerate overnight for flavor to develop
↑ Back to top
Subtle Steps Lead to the Best Tabbouleh Salad

Servings: Makes about 4 cups
Ingredients
- 3/4 pound ripe plum tomatoes, finely diced
- 2 cups finely chopped flat-leaf parsley leaves and tender stems (about 2 bunches), finely chopped with a sharp knife
- 2 teaspoons kosher salt, divided, plus more for seasoning
- 1/4 cup dry coarse bulgur wheat
- 1 cup finely chopped fresh mint leaves (about 1 bunch)
- 2 scallions, white and light green parts only, finely chopped
- 5 tablespoons extra-virgin olive oil
- 2 tablespoons fresh juice from 2 lemons
- 1/4 teaspoon ground coriander seed (optional; see note)
- Pinch ground cinnamon (optional; see note)
- Freshly ground black pepper
- Romaine lettuce leaves, for serving
Steps
- Season tomatoes with 1 teaspoon salt and toss to combine. Transfer to a fine mesh strainer or colander set in a bowl and allow to drain for 20 minutes. Reserve liquid.
- Season parsley with remaining 1 teaspoon salt and toss to combine. Transfer to a large mixing bowl lined with paper towels and let stand for 20 minutes. Blot parsley with towels to remove excess moisture.
- Bring 1/2 cup reserved tomato water to a boil, then pour over bulgur in a small heatproof bowl and let stand until bulgur is softened, about 1 hour (bulgur may still have a slight bite, but will continue to soften in the salad). Drain bulgur of any excess liquid and pat dry with paper towels.
- In a large mixing bowl, stir together tomatoes, parsley, mint, bulgur, scallions, olive oil, lemon juice, coriander seed, and cinnamon until well combined. Season with salt and pepper. Serve tabbouleh with romaine leaves.
Notes
- Spices add complexity and depth to the tabbouleh, but you can omit or use different spices, as desired; allspice is another popular option.
↑ Back to top
Sugar Cookie Bars

Tags: Cookies
Servings: 15-18
Ingredients
- 2 1/2 cups all purpose flour
- 1/2 tsp baking powder
- 1/2 tsp salt
- 1/2 cup unsalted butter, softened
- 1 cup sugar
- 1 large egg
- 2 TBS sour cream
- 1 tsp vanilla extract
- 5 TBS unsalted butter, softened
- 3 TBS milk
- 1 TBS vanilla
- 4 cups powdered sugar
Frosting:
Steps
- Preheat your oven to 375 degrees.
- In a medium sized bowl, combine your flour, baking powder and salt. Set aside.
- In a large mixing bowl, cream together your butter and sugar for about 3 minutes until light and fluffy.
- Add in your egg, sour cream and vanilla and mix till combined.
- Slowly add in your flour mixture while stirring until everything is combined. (The dough will be crumbly)
- Press the batter into a greased 9×13 baking dish and spread it out evenly with your hands or a rubber spatula.
- Bake for 15-17 minutes or until edges just barely start to turn golden.
- Allow to cool completely.
- Mix together all your ingredients for your frosting until creamy.
- Add in desired amount of food coloring.
- Spread frosting evenly over cooled cookie bars.
- Cut into squares and serve.
Yield: 15-18
INSTRUCTIONS:
Yield: 15-18
Notes
- FAVORITE
↑ Back to top
Sugar Cookies
Adapted from https://www.copymethat.com/r/bySC6gQ/sugar-cookies/

Tags: Cookies
Goyim Holidays
Schmoopie's
Ingredients
- 1½ cups margarine
- 2 cups sugar
- 3 eggs
- 2 Tbl. Vanilla
- pinch salt
- 5 cups flour
- 1 Tbl. Baking Powder
Steps
- Chill at least 1 hour. Bake at 400 6-8 minutes
↑ Back to top
Sugar Cookies

Schmoopie's
Ingredients
- 1½ cups margarine
- 2 cups sugar
- 3 eggs
- 2 Tbl. Vanilla
- pinch salt
- 5 cups flour
- 1 Tbl. Baking Powder
Steps
- Chill at least 1 hour. Bake at 400 6-8 minutes
↑ Back to top
Sugar Cookies 1/2 batch
Adapted from https://www.copymethat.com/r/bySC6gQ/sugar-cookies/

Tags: Cookies
Schmoopie's
Ingredients
- ¾ cups margarine
- 1 cups sugar
- 2 eggs
- 1 Tbl. Vanilla
- pinch salt
- 2.5 cups flour
- 1.5 Tsp. Baking Powder
Steps
- Chill at least 1 hour. Bake at 400 6-8 minutes
↑ Back to top
Summery Chicken Pho Salad
Servings: 4
Ingredients
- 2.5cm | 1-inch section ginger
- 2 medium-large green onions
- 15g | 1 handful cilantro sprigs
- 1 1/2 tsp coriander seeds
- 2 whole clove
- 840ml to 1L | 3 1/2 to 4 cups low-sodium chicken broth (2 cans or 1 box)
- 2 cups (480 ml) water
- 360 to 450g | 12 to 16 oz boneless chicken breast or thigh (skin optional)
- 1/2 tsp fine sea salt
- 2 to 3 tsp fish sauce
- For the dressing
- 1/2 tsp fine sea salt
- 2 Tbsp sugar or agave syrup
- 1 1/2 to 2 Tbsp Viet Chile Sauce or sriracha sauce, plus more as needed
- 2 1/2 Tbsp unseasoned rice vinegar, plus more as needed
- 1/4 cup soy sauce
- 2 tablespoons canola oil or other neutral oil
- 10g | 1 Tbsp finely chopped garlic
- 1/4 tsp Pho Spice Blend (optional, for depth)
- 2 tsp cornstarch
- For salad assembly
- Broth and cooked chicken from pho
- 300g | 10 oz dried narrow flat rice noodles, boiled until tender firm then drained well
- 1.1L | 5 cups thinly sliced Romaine lettuce, napa cabbage, or a combo
- 1/2 small carrot, shaved (optional, for color and sweetness)
- Thinly sliced green onion from broth prep
- Coarsely chopped cilantro from broth prep
- 80ml | 1/3 cup coarsely chopped or torn mint or basil (any kind) leaves
- 80ml | 1/3 cup unsalted, roasted peanuts, coarsely chopped or pounded
- 80ml | 1/3 cup fried shallots or onion
Steps
- Prep aromatics: Peel then slice the ginger into 4 or 5 coins. Smack with the flat side of a knife or meat mallet; set aside. Thinly slice the green parts of the green onion to yield 1/4 cup (60ml); set aside for garnish. Cut the leftover sections into short lengths, smack, then add to ginger.
- Coarsely chop the cilantro leafy tops to yield 1/3 cup (80ml); add to the sliced green onion. Set leftover cilantro sprigs aside.
- Make fast chicken pho: In a 3 to 4-qt (3 to 4L) pot over medium heat, toast the coriander seeds and clove until fragrant, 1 to 2 minutes. Add the smacked ginger and green onion, stir, until aromatic, 30 seconds. Slide the pot off heat, wait 15 seconds to calm cooking, then pour in the broth. Return the pot to the burner, then add the water, cilantro sprigs, chicken, and salt. Bring to a boil over high heat, then lower the heat to gently simmer, uncovered.
- After 5 to 10 minutes of simmering, the chicken should be just cooked (to check: press the chicken flesh and it should slightly yield; a thermometer inserted into the thickest part should read 145F or so). Transfer the chicken to a bowl, flush with cold water to arrest the cooking, then drain. Partly cover and let cool.
- Continue simmering the broth for 20 minutes to develop flavor. Rest a few minutes then strain through a fine-mesh strainer positioned over a smaller pot; discard the solids. You should have about 4 cups (1L); add water or boil down if you’re way off. Season the broth with 2 to 3 tsp fish sauce to create a good savory flavor.
- Make the Sauce: In a bowl or measuring cup, stir together 3/4 cup (120 ml) of pho broth with 1/2 tsp salt and the sugar, chile sauce, vinegar, and soy sauce; taste and if needed, add sugar, hot sauce, vinegar by 1/2 tsp to create a pleasantly salty, tangy flavor that finishes a bit hot.
- Put the oil and garlic in a small saucepan. Heat over medium-low heat until the garlic sizzles and is light blond, 3 to 4 minutes. Add the pho spice blend to bloom until aromatic, 15 seconds. Take off heat, let cooking calm, then pour in the sauce mixture. Replace over high heat and bring to a boil. Reuse the measuring cup to stir the cornstarch with 1 Tbsp water. Once the sauce comes to a bubbly boil, stir in the slurry. Cook until thickened, 15 seconds. Slide to a cool burner. Let rest for 10 minutes, uncovered. There should be roughly 1 1/2 cups (360ml).
- Assemble and serve: Boil the rice noodles in lightly salted water until tender firm (about 5 minutes), then drain well, flush with water to stop cooking, then leave to drain and cool.
- Gather the lettuce, green onion, herbs, peanuts, and shallot. Reheat the broth to a boil. Tear or slice the chicken into chopstick-able pieces.
- To assemble, have 4 rice bowls for broth and 4 noodle-soup or pasta bowls for the salad. Into each rice bowl, add a little green onion (save the rest for the salad).
- Divide the lettuce among the noodle-soup size bowls. Sprinkle lightly with salt. Add some noodles and chicken, then top with the green onion, cilantro, mint (or basil), peanut, and fried onion/shallot. Drizzle on a little sauce around the perimeter.
- Ladle the hot broth into the rice bowls. Serve immediately with the noodle salad bowls and remaining sauce. Invite guests to wield spoons and chopsticks to toss their salads with extra sauce and enjoy the broth as soothing interludes. If the noodles seem too heavy with sauce, mix in spoonfuls of broth. Serve extra chile sauce in case people want extra heat.
↑ Back to top
Sunday Gravy (Frankie Avalon Style)
Tags: Italian
Sauces
Servings: 8 TO 12
Ingredients
- 8 tablespoons olive oil
- 3 pounds spareribs, cut by the butcher vertically in half, and then into individual ribs
- 1 teaspoon kosher salt, plus more as needed
- 3/4 teaspoon freshly ground black pepper, plus more as needed
- 2 medium yellow onions, chopped
- 1 large carrot, cut into 1/2-inch dice
- 2 medium celery ribs, cut into 1/2-inch dice
- 6 garlic cloves, minced
- 11/2 cups hearty red wine, such as Shiraz
- Two 28-ounce cans crushed tomatoes
- 3 cups water
- 1 tablespoon plus 1 teaspoon dried oregano
- 1/2 teaspoon hot red pepper flakes
- 2 bay leaves
- 11/2 pounds sweet Italian pork sausage, pierced with a fork
- 1/2 recipe Veal Meatballs (page 62)
Steps
- Heat 2 tablespoons of the oil in a very large Dutch oven over
- Add 2 tablespoons of the remaining oil to the Dutch oven and heat it. Add the onion, carrot, and celery and reduce the heat to medium. Cover and cook, stirring occasionally, until the vegetables have softened, about 6 minutes. Stir in the garlic and cook, uncovered, until the onion is golden, about 2 minutes more. Stir in the wine and bring to a boil.
- Add the crushed tomatoes, water, oregano, red pepper flakes, and bay leaves and bring to a boil over high heat. Reduce the heat to medium-low and simmer for 30 minutes.
- Heat 2 tablespoons of the remaining oil in a large skillet over medium-high heat. Add the sausage and cook, turning occasionally, until browned, about 6 minutes. Add to the tomato sauce. Add about 1/2 cup water to the skillet and bring to a boil, scraping up any browned bits from the bottom with a wooden spoon. Stir into the tomato sauce. Simmer the sauce for 1 hour. Wash and dry the skillet,
- Increase the heat under the stockpot to high to return the salted water to a boil. Add the ziti and cook, according to the package directions, until al dente. Drain well and return the ziti to the cooking pot. Add about 4 cups of the sauce to the ziti, mix well, and transfer to a large serving bowl. Pour the remaining sauce into a serving bowl.
- Serve the ziti with the meats and the Pecorino Romano passed on the side.
medium-high heat. Season the
spareribs with the aspoon
salt and 3/4 teaspoon black
pepper. Working in batches without
crowding, add the spareribs
to the oil and cooking occa-
sionally, until browned,
about 6 minutes. Transfer a platter.
S.
Heat the remaining 2 tablespoons oil in the skillet over medium-high
heat. Working in batches without crowding, add the meatballs and cook,
turning occasionally (wait for them to form a crust on the underside
before turning), until browned on all sides, about 8 minutes. Transfer
the meatballs to a platter.
Gently stir the meatballs into the sauce, making sure that they arc
submerged and adding hot water as needed. Simmer until the meatballs
are cooked through, 30 to 40 minutes.
Meanwhile, bring a stockpot of salted water to a boil over high heat.
Reduce the heat to low to keep it at a simmer until ready to cook the
pasta. 8
.
Using a slotted spoon, transfer the spareribs, sausage, and meatballs
to a very large platter. Cut each sausage in half crosswise. Add about
1/2 cup of the sauce to the platter and cover it with aluminum foil to
keep it warm. Increase the heat to medium-high and cook the sauce,
stirring often, until it has thickened and reduced by about
one-quarter, about 15 minutes.
Season to taste with salt and
pepper as heeded.
↑ Back to top
Super Soft ‘N Chewy Hoagie Rolls

Ingredients
- 4 cups bread flour
- 1 3/8 – 1 1/2 cups warm water (110-115F degrees) *See note
- 2 Tbl sugar
- 1 Tbl active dry yeast
- 1 tsp salt
- 3 Tbl cold butter, cubed
Steps
- Add the yeast, sugar and 3/8 cup warm water in a bowl of a stand mixer.
- Using a whisk or spoon, mix and set aside for 5-10 minutes or until the yeast has bubbled quite a bit.
- In the bowl of a stand mixer fitted with the dough hook (this would be the same bowl your yeast mixture is in) add in the flour and remaining cup of water. Start off on low.
- Mix for 4 minutes.
- Add in the salt and mix for 5-6 minutes until the dough is slack (See note). At this point your mixer should be at medium speed. If your dough, after 5-6 minutes is not slack add in a a bit more water (2-4 Tbl). The additional water will fully depend on how humid your room is.
- Add in the butter and mix for 1-3 minutes or until the dough comes back together.
- Remove from bowl and transfer to a greased, covered bowl until doubled in size. ~1 hour.
- Divide into 8 pieces and shape. I would advise using as little flour as possible when shaping these. The more flour you add, the tougher the hoagies will be.
- Transfer to a sprayed, parchment lined tray and cover.
- Allow to rise again. ~30-45 minutes.
- Preheat oven to 375 and bake for 16-23 minutes or until golden brown.
- Allow to cool before cutting with a quality bread knife ( Sani-Safe S162-8SC-PCP 8″ Scalloped Bread Knife with Polypropylene Handle Pan )
↑ Back to top
Surprise Carrot Cake

Tags: Cakes and Pastries
Ingredients
- 3 cups shredded carrots
- 1 to 3/4 cups sugar
- 1 cup canola oil
- 3 eggs
- 2 cups all-purpose flour
- 2 teaspoons baking soda
- 2 teaspoons ground cinnamon
- 1 teaspoon salt
- 1/2 cup chopped pecans
- 1 package (8 ounces) cream cheese, softened
- 1/4 cup sugar
- 1 egg
- 1 package (8 ounces) cream cheese, softened
- 1/4 cup butter, softened
- 2 teaspoons vanilla extract
- 4 cups confectioners' sugar
FILLING:
FROSTING:
Steps
- In a large bowl, beat the carrots, sugar, oil and eggs until well blended. In a large bowl, combine the flour, baking soda, cinnamon and salt; gradually beat into carrot mixture until blended. Stir in the pecans. Pour 3 cups batter into a greased and floured 10-in. fluted tube pan.
- In a small bowl, beat cream cheese and sugar until smooth. Beat in egg. Spoon over batter. Top with remaining batter.
- Bake at 350° for 55-60 minutes or until a toothpick inserted near the center comes out clean. Cool for 10 minutes before removing from pan to a wire rack to cool completely.
- For frosting, in a small bowl, beat the cream cheese, butter and vanilla until fluffy. Gradually add confectioners' sugar until smooth. Frost cake. Store in the refrigerator. Yield: 12-16 servings.
Notes
- FAVORITE
↑ Back to top
Sweet & Sour Seaweed Salad (Miyeok-Muchim) Recipe by
Maangchi
Adapted from https://www.maangchi.com/recipe/miyeok-muchim
Ingredients
- 1 ounce (30 grams) dried seaweed (miyeok)
- ¼ cup soy sauce
- ¼ cup white distilled vinegar
- 2 tablespoons honey (or sugar)
- 1 ounce onion (30 grams), sliced thinly
- 2 garlic cloves, minced
- 1 tablespoon toasted sesame seeds
- 6-7 ice cubes (or 1 cup of shaved ice)
- salt (optional)
Steps
- Soak the miyeok in cold water 30 minutes to 1 hour until it fully expands.
- Bring a large pot of water to a boil. Add some salt (optional) and blanch the miyeok for 30 seconds, stirring occasionally with a wooden spoon.
- Strain and rinse in cold running water until the miyeok is nice and cold.
- Cut it into bite size pieces.
- Combine garlic, onion, soy sauce, vinegar, and honey in a bowl. Add the miyeok and mix well.
- Serve right away with rice or store it in an airtight container in the fridge, for up to 1 week. Right before serving, add some shaved ice or ice cubes if you want it extra cold.
↑ Back to top
Sweet and Moist Northern-Style Cornbread
Tags: Breads
Quickbread
Servings: 6 to 8
Ingredients
- 1 cup yellow cornmeal
- 1 cup all-purpose flour
- 1/2 cup sugar
- 2 teaspoons baking powder
- 1 teaspoon kosher salt
- 1/2 teaspoon baking soda
- 3/4 cup sour cream
- 1/2 cup buttermilk
- 2 large eggs
- 3 tablespoons melted butter, cooled slightly, plus 1 additional tablespoon for pan
- 2 tablespoons canola oil
Steps
- Place a 10-inch cast iron skillet on middle rack in oven and preheat to 425°F (220°C). In a medium bowl, whisk together cornmeal, flour, sugar, baking powder, salt, and baking soda. In a separate medium bowl, whisk together sour cream, buttermilk, eggs, 3 tablespoons melted butter, and canola oil. Pour wet ingredients into bowl with dry ingredients and whisk until completely combined.
- Using pot holders, carefully remove hot skillet from oven. Place 1 tablespoon butter in skillet and swirl to completely melt and coat inside of pan. Pour in cornbread batter and place in oven. Bake until skewer inserted into middle of cornbread comes out clean, about 20 minutes. Let bread cool in pan for 5 minutes, then carefully turn out to wire rack and let cool an additional 10 minutes. Serve immediately. Reheat any leftover cornbread before serving again.
↑ Back to top
Sweet and Sour Thai Chili Sauce
Tags: Condiments
Ingredients
- 500 ml rice vinegar (can sub ACV or a mix).
- 720 ml water
- 460 grams sugar (white refined is suggested) this amount after tasting can be reduced (UPDATE - 300-350g should be better its pretty sweet)
- 250 grams fermented chili's and garlic (use what you have and adjust amount depending on desired heat) (I used a 4 month old chili, garlic, onion with a little ginger) (UPDATE - this makes it mild but nice, increase for something hotter)
- 2-6 tablespoons of dried Korean chili flakes, depending on the desired heat level (use what you got, even dehydrated chili from your last ferment)
- 2 tbsp soy sauce
- 1 tbsp fish sauce (omit if you want vegan, just add an extra tbsp of soy sauce)
- 3-4 limes juiced (I used 4 golf ball sized local limes)
- 3-5 cloves of garlic minced (use what you have)
Steps
- Put the above in a pot and bring to a boil while stirring, you will notice the garlic floating, lower heat and simmer for 5 minutes or so and you will notice the garlic will stop floating. Lower heat and go to next step
- 60g cornstarch (yes it's a lot) and 120 ml water
Combine:
Mix well.
Stream this mixture into pot
slowly while stirring constantly. Simmer for a few minutes and it
should be thick!
Pour into bottles and let
cool. That's it! Now share 2 bottles with friends.
↑ Back to top
Sweet and Spicy Chili Sauce for Korean Fried Chicken

Tags: Condiments
Korean Sauces
Servings: 1/2 cup
Ingredients
- 1/4 cup gochujang (see notes)
- 2 tablespoons soy sauce
- 1 tablespoon rice wine vinegar
- 3 tablespoons dark brown sugar
- 3 medium cloves garlic, minced (about 1 tablespoon)
- 1 teaspoon grated fresh ginger
- 1 tablespoon toasted sesame oil
Steps
- Combine gochujang, soy sauce, vinegar, sugar, garlic, ginger, and sesame oil in a large bowl and whisk to combine. Gochujang can be inconsistent in its thickness. Add up to 2 tablespoons water until sauce is just barely thin enough to drop off a spoon with inverted. Serve with Korean Fried Chicken.
↑ Back to top
Sweet and Spicy Pork Noodles

Ingredients
- Original recipe (1X) yields 4 to 6 servings
- 3 tablespoons vegetable oil
- 1 pound ground pork
- 2 Thai chiles, minced
- 1 medium red onion, finely chopped
- 1 tablespoon minced fresh ginger
- 1 tablespoon minced garlic
- 1 tablespoon Chinese fermented black beans, rinsed and chopped
- 1/3 cup hoisin sauce
- 1/2 cup Shao-Hsing rice wine or dry sherry
- 1 cup chicken stock or low-sodium broth
- 1 large scallion, thinly sliced
- Kosher salt
- Freshly ground black pepper
- 1 pound fresh or dried Chinese egg noodles
Steps
- In a large, deep skillet, heat the oil. Add the ground pork and cook over high heat, breaking up the meat, until it is browned, about 5 minutes. With a slotted spoon, transfer the cooked pork to a plate. Add the chiles, onion, ginger, garlic, and black beans to the skillet and cook over moderately high heat, stirring, until softened, about 5 minutes. Add the hoisin sauce and cook, stirring, for 1 minute. Add the rice wine and simmer until reduced by half, about 2 minutes. Add the stock and pork and simmer until thickened, about 4 minutes. Add the scallion and season with salt and pepper.
- Meanwhile, in a large pot of boiling salted water, cook the noodles until tender, 5 to 8 minutes, depending on the thickness. Drain the noodles. Add them to the skillet and toss well to thoroughly coat them with the sauce. Transfer to a large, shallow bowl and serve.
Notes
- Make ahead
- The sauce can be refrigerated overnight.
↑ Back to top
Sweet and Spicy Shrimp with Rice Noodles

Tags: Chinese
Noodles Seafood
Ingredients
- 1 tablespoon rice vinegar
- 2 1/2 teaspoons honey
- 1 tablespoon sambal oelek (ground fresh chile paste, such as Huy Fong)
- 1 tablespoon lower-sodium soy sauce
- 12 ounces peeled and deveined medium shrimp
- 4 ounces uncooked flat rice noodles (pad thai noodles)
- 1 tablespoon peanut oil
- 2 tablespoons chopped unsalted cashews
- 1 tablespoon thinly sliced garlic
- 2 teaspoons chopped peeled fresh ginger
- 1 green Thai chile, halved
- 12 sweet mini peppers, halved
- 3/4 cup matchstick-cut carrot
- 1/4 teaspoon salt
- 3/4 cup snow peas, trimmed
- 3/4 cup fresh bean sprouts
Steps
- Combine first 4 ingredients in a medium bowl, stirring well with a whisk. Add shrimp to vinegar mixture; toss to coat. Cover and refrigerate 30 minutes.
- Cook noodles according to package directions, omitting salt and fat; drain. Rinse with cold water; drain.
- Heat a large skillet or wok over medium-high heat. Add oil to pan; swirl to coat. Add cashews, garlic, ginger, and chile to pan; stir-fry 1 minute or until garlic begins to brown. Remove cashew mixture from pan with a slotted spoon, and set aside.
- Increase heat to high. Add sweet peppers, carrot, and salt to pan; stir-fry 2 minutes. Add shrimp mixture (do not drain); stir-fry 2 minutes. Stir in noodles and peas; cook 1 minute, tossing to coat. Return cashew mixture to pan. Add bean sprouts; cook 1 minute or until thoroughly heated, tossing frequently.
Notes
- FAVORITE
↑ Back to top
Sweet Mochi with Red Bean Filling

Tags: Desserts
Jewish
Ingredients
- 1 cup/200 grams dried azuki beans
- 3/4 cup/150 grams sugar
- 1/4 teaspoon salt
- Potato starch, for dusting
- 1 cup/150 grams mochiko flour (also known as sweet rice flour or glutinous rice flour)
- 3/4 cup/150 grams sugar
- 1 1/3 cup/300 milliliters water
For the red
bean paste filling (anko):
For the mochi
dough:
Steps
- Make the filling: Rinse the beans and transfer to a large pot. Cover the beans with water and bring to a boil; drain. Cover the beans again with water and this time simmer until they are completely tender, about an hour to an hour and a half, adding more water if necessary to keep the beans submerged. Drain.
- Purée the drained beans in a food processor or blender to make a smooth paste. If the beans are too dry to catch the blades, add a few tablespoons of water. Return the bean purée to the same pot and stir in the sugar and salt. Cook over medium-low heat, stirring occasionally, until most of the water has evaporated and the purée is very thick, 10 to 15 minutes. Spread bean paste in a wide, shallow container and refrigerate until firm and cool.
- Meanwhile, make the mochi dough: Line a sheet pan with a piece of parchment paper and spread a generous heap of potato starch in a large circle; set aside. In a bowl, whisk together the mochiko flour and 1 1/3 cup/300 milliliters water until smooth. Pour mixture through a mesh strainer into a saucepan, using the whisk to help push it through if necessary. Add the sugar and mix well. Switch to a heatproof spatula and cook the mixture over medium heat, stirring constantly, until it thickens and comes together as one big, smooth, shiny mass that can hold its shape, 5 to 7 minutes.
- Using a starch-dusted knife, cut the dough into 20 even pieces. (If eating plain, or as an ice cream topping, cut into 40 to 50 smaller pieces.) One at a time, use a rolling pin to roll a piece of mochi dough into a thick, flat disk about 2 inches by 2 inches. Use potato starch liberally to keep the dough from sticking to your work surface, the rolling pin or your fingers. Roll a scant tablespoon of bean paste between your hands to form a ball and place it in the center of the rolled-out dough piece. Use your fingers to evenly stretch the mochi dough up and around the filling without squishing it, pinching the dough shut at the top to seal it, and then gently rolling the mochi between your hands to form a rounded shape. Set on the parchment-lined baking sheet with the seam on the bottom. Eat the filled mochi the day they’re made, or cover and store in the refrigerator for 1 day.
Notes
- FAVORITE
↑ Back to top
Sweet Potato Pavé
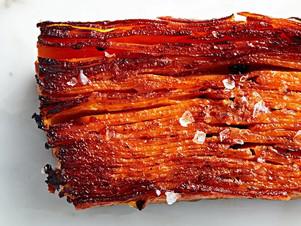
Servings: 8
Ingredients
- 1 garlic head, top cut off to expose cloves
- 1 tablespoon olive oil, plus more for greasing pan
- 1 1/2 teaspoons kosher salt
- 1 1/2 cups heavy cream
- 2 tablespoons fresh thyme leaves
- 3/4 teaspoon black pepper
- 3 3/4 pounds sweet potatoes (about 6 medium potatoes), peeled
- 1/4 cup unsalted butter, melted
- Flaky sea salt, for sprinkling
Steps
- Preheat oven to 350°F. Drizzle garlic cloves with oil and wrap garlic head in aluminum foil. Bake in preheated oven until cloves are very tender, about 45 minutes. Set aside.
- Lightly grease a 9- x 5-inch loaf pan with olive oil and line with parchment paper, allowing 2 inches of overhang on both long sides. Place kosher salt and 5 roasted garlic cloves in a large bowl; using the back of a spoon, smash into a paste. Whisk in cream, thyme, and pepper. Set aside.
- Using a mandoline, thinly slice potatoes lengthwise into 1/16-inch-thick slices. Add sweet potatoes to cream mixture; toss gently to coat. Layer potato slices in bottom of prepared pan, slightly overlapping to create a shingled layer, trimming potato slices if needed. Continue layering, pressing occasionally, until potatoes are about 1/2 inch from top of pan. Discard remaining cream and potatoes.
- Fold excess parchment over potatoes and cover pan with aluminum foil. Bake at 350°F until potatoes are tender, about 2 hours. Remove foil from pan, leaving parchment in place. Let cool 2 hours at room temperature. Place a second 9- x 5-inch loaf pan on top of cooled pavé in pan and weigh it down with unopened canned goods. Refrigerate 8 hours or overnight.
- Carefully remove top pan and weights. Pour off any accumulated liquid around pavé. Invert pavé onto a cutting board; remove and discard parchment paper. Cut pavé crosswise into 8 slices. Place slices on a rimmed baking sheet and refrigerate 20 minutes or up to 4 hours.
- Preheat oven to 500°F with rack in upper third of oven. Brush pavé slices generously with melted butter and arrange in a single layer on baking sheet. Bake until bottom edges are browned, 6 to 10 minutes. Invert pavé onto a serving platter and sprinkle with flaky sea salt. Serve hot.
↑ Back to top
Sweet Potatoes with Lime
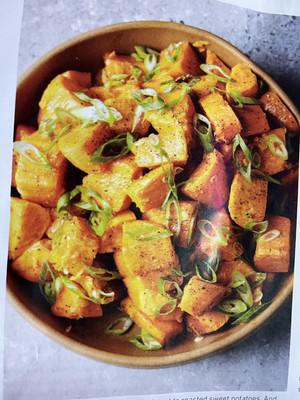

I made this.
Servings: 4-6
Ingredients
- 2 lbs sweet potatoes peeled and cut into ¾-1 inch chunks
- ¼ c coconut oil
- kosher salt
- 2 tsp grated lime zest
- 3 tbs lime juice
- 4 scallions thinly sliced on diagonal whites and greens separated
- ⅛-¼ tsp cayenne
Steps
- Heat oven 425° with a rack in the middle position
Toss the sweet potatoes with
the oil, salt and pepper
Distribute potatoes in an
even layer over a baking sheet roast without stirring until lightly
browned 18-20 minutes
While roasting mix together the lime zest, lime juice, scallion
whites,
cayenne and ¼ tsp salt. When the potatoes are done toss in the lime
mixture let stand for 15 minutes tossing twice season as necessary,
serve
↑ Back to top
Sweet Sesame Matzo Bars
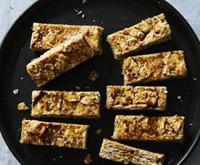
Tags: Desserts
Holidays Jewish
Servings: YIELD Makes a 9x13 pan
(32 bars)
Ingredients
- 1 1/2 cups sesame seeds
- 10 ounces plain matzo (about 8 cups once broken, loosely packed)
- 14 ounces almond paste (OR 7 ounces almond paste plus 2/3 cup creamy peanut butter**)
- 2 medium oranges
- 3/4 cup unsalted butter or coconut oil
- 1 teaspoon salt
- 3/4 cup honey
- 2 teaspoons pure vanilla extract
Steps
- Preheat oven to 350° F. Place sesame seeds in a 9 x 13-inch cake pan and bake for 20 minutes, stopping halfway through to stir and turn seeds. Remove from oven and let seeds cool in pan.
- Meanwhile, break matzo into roughly 1 1/2-inch pieces in a large bowl; set bowl aside. Grate almond paste with a standard sized grater; set aside. Zest oranges with a fine grater; set zest aside. Juice oranges over a sieve until you have 1/3 cup strained juice (one orange may be enough).
- When the sesame seed pan is cool enough to handle, pour the toasted seeds into the matzo. Line the bottom and sides of the pan with foil; grease the foil, set pan aside nearby, then grease a wooden spoon for easy mixing. Measure out the peanut butter (if using), honey, and vanilla so they are ready to quickly add to the pot.
- In a large pot over low-medium heat, melt the butter. Add the honey and salt, stirring gently. Add the grated almond paste (and peanut butter if using), and constantly stir for a few full minutes, until mixture is smooth and bubbling. Turn off heat and carefully add strained juice and the vanilla (mixture is very hot and will spatter). Mix until just even in consistency.
- Quickly add matzo, toasted sesame seeds, and zest to the pot. Mix vigorously from the bottom of the pan so that all crackers and seeds get coated with honey mixture. Transfer to lined pan and push down on it very firmly, letting matzo break as you create an even, well-packed bar. Smooth the top of bars with a heatproof spatula, applying plenty of pressure.
- Chill the pan until bars are cool and firm, then use the tin foil to remove the bars from pan. Transfer to cutting board and carefully remove foil. Using a sharp knife and plenty of pressure, cut the cold slab into quarters; cut each quarter into 8 slices to make 32 bars. For best results, transfer cut bars to paper cupcake liners; this makes for easy serving and eating. Store in a sealed container in the fridge, eating within 3 days. These bars taste best chilled or at room temperature.
- *Swapping half the almond paste for peanut butter will make for a more frugal, less sweet recipe with a familiar and delicate peanut-y essence.
Notes
- FAVORITE
↑ Back to top
Sweet-Hot Strawberry Bbq Sauce
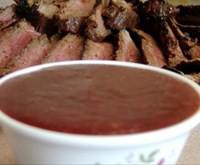
Tags: Barbecue
Sauces
Servings: YIELD 2 servings TOTAL
TIME 15 mins
Ingredients
- 2 cups fresh strawberries, hulled and sliced
- 1/3 cup strawberry preserves
- 1/3 cup ketchup
- 2 tablespoons soy sauce
- 2 tablespoons lemon juice
- 1 large garlic clove, minced
- 1 teaspoon fresh ginger, chopped
- 1/2 teaspoon cayenne or chipotle powder
- 1/2 teaspoon lemon zest
- 1 scallion, minced
- 1 tablespoon brown sugar
- 2 tablespoons fresh cilantro, chopped
Steps
- Place all ingredients in a food processor or blender and puree until smooth.
Notes
- FAVORITE
↑ Back to top
Tabbouleh Salad
Tags: Middle-East
Salad
Servings: Makes about 4 cups
Ingredients
- 3/4 pound ripe plum tomatoes, finely diced
- 2 cups finely chopped flat-leaf parsley leaves and tender stems (about 2 bunches), finely chopped with a sharp knife
- 2 teaspoons kosher salt, divided, plus more for seasoning
- 1/4 cup dry coarse bulgur wheat
- 1 cup finely chopped fresh mint leaves (about 1 bunch)
- 2 scallions, white and light green parts only, finely chopped
- 5 tablespoons extra-virgin olive oil
- 2 tablespoons fresh juice from 2 lemons
- 1/4 teaspoon ground coriander seed (optional; see note)
- Pinch ground cinnamon (optional; see note)
- Freshly ground black pepper
- Romaine lettuce leaves, for serving
Steps
- Season tomatoes with 1 teaspoon salt and toss to combine. Transfer to a fine mesh strainer or colander set in a bowl and allow to drain for 20 minutes. Reserve liquid.
- Season parsley with remaining 1 teaspoon salt and toss to combine. Transfer to a large mixing bowl lined with paper towels and let stand for 20 minutes. Blot parsley with towels to remove excess moisture.
- Bring 1/2 cup reserved tomato water to a boil, then pour over bulgur in a small heatproof bowl and let stand until bulgur is softened, about 1 hour (bulgur may still have a slight bite, but will continue to soften in the salad). Drain bulgur of any excess liquid and pat dry with paper towels.
- In a large mixing bowl, stir together tomatoes, parsley, mint, bulgur, scallions, olive oil, lemon juice, coriander seed, and cinnamon until well combined. Season with salt and pepper. Serve tabbouleh with romaine leaves.
↑ Back to top
Tabbouleh Salad
Adapted from https://www.seriouseats.com/tabbouleh-salad-recipe

Servings: 4 cups
Ingredients
- 3/4 pound ripe plum tomatoes, finely diced
- 2 teaspoons kosher salt, divided, plus more for seasoning
- 2 cups finely chopped flat-leaf parsley leaves and tender stems (about 2 bunches), finely chopped with a sharp knife
- 1/4 cup dry coarse bulgur wheat
- 1 cup finely chopped fresh mint leaves (about 1 bunch)
- 2 scallions, white and light green parts only, finely chopped
- 5 tablespoons extra-virgin olive oil
- 2 tablespoons fresh juice from 1 lemon
- 1/4 teaspoon ground coriander seeds (optional; see notes)
- Pinch ground cinnamon (optional; see notes)
- Freshly ground black pepper
- Romaine lettuce leaves, for serving
Steps
- Season tomatoes with 1 teaspoon salt and toss to combine. Transfer to a fine-mesh strainer or colander set in a bowl and allow to drain for 20 minutes. Reserve liquid.
- Season parsley with remaining 1 teaspoon salt and toss to combine. Transfer to a large mixing bowl lined with paper towels and let stand for 20 minutes. Blot parsley with towels to remove excess moisture.
- Bring 1/2 cup reserved tomato water to a boil, then pour over bulgur in a small heatproof bowl and let stand until bulgur is softened, about 1 hour (bulgur may still have a slight bite, but will continue to soften in the salad). Drain bulgur of any excess liquid and pat dry with paper towels.
- In a large mixing bowl, stir together tomatoes, parsley, mint, bulgur, scallions, olive oil, lemon juice, ground coriander seeds, and cinnamon until well combined. Season with salt and pepper. Serve tabbouleh with romaine leaves.
↑ Back to top
Tabbouleh Salad
Servings: Makes about 4 cups
Ingredients
- 3/4 pound ripe plum tomatoes, finely diced
- 2 cups finely chopped flat-leaf parsley leaves and tender stems (about 2 bunches), finely chopped with a sharp knife
- 2 teaspoons kosher salt, divided, plus more for seasoning
- 1/4 cup dry coarse bulgur wheat
- 1 cup finely chopped fresh mint leaves (about 1 bunch)
- 2 scallions, white and light green parts only, finely chopped
- 5 tablespoons extra-virgin olive oil
- 2 tablespoons fresh juice from 2 lemons
- 1/4 teaspoon ground coriander seed (optional; see note)
- Pinch ground cinnamon (optional; see note)
- Freshly ground black pepper
- Romaine lettuce leaves, for serving
Steps
- Season tomatoes with 1 teaspoon salt and toss to combine. Transfer to a fine mesh strainer or colander set in a bowl and allow to drain for 20 minutes. Reserve liquid.
- Season parsley with remaining 1 teaspoon salt and toss to combine. Transfer to a large mixing bowl lined with paper towels and let stand for 20 minutes. Blot parsley with towels to remove excess moisture.
- Bring 1/2 cup reserved tomato water to a boil, then pour over bulgur in a small heatproof bowl and let stand until bulgur is softened, about 1 hour (bulgur may still have a slight bite, but will continue to soften in the salad). Drain bulgur of any excess liquid and pat dry with paper towels.
- In a large mixing bowl, stir together tomatoes, parsley, mint, bulgur, scallions, olive oil, lemon juice, coriander seed, and cinnamon until well combined. Season with salt and pepper. Serve tabbouleh with romaine leaves.
↑ Back to top
Taco Seasoning
Tags: Rubs and Blends
Seasonings Tex-Mex
Ingredients
- 1 tablespoon flour
- 1 tablespoon chili powder
- 2 teaspoons salt
- 1/2 teaspoon garlic powder
- 1 teaspoon turmeric
- 1/2 teaspoon cumin
- 1 teaspoon cayenne powder
- 1/2 teaspoon oregano
Steps
- In a small bowl, mix all the ingredients together.
Notes
- FAVORITE
↑ Back to top
Tacos De Camarones Al Mojo De Ajo (Sautéed Shrimp Tacos)

Servings: 4
Ingredients
- 1/4 cup canola oil
- 1 white onion, sliced
- 1 1/2 pounds shrimp, peeled, deveined, and cut lengthwise
- Kosher salt
- 3 tablespoons butter
- 1 jalapeño chile, stem removed, thinly sliced
- 2 tablespoons chopped garlic (from about 4 garlic cloves)
- 1/2 bunch Italian parsley, stems discard, leaves chopped
- 16 corn tortillas
- 1 lime, quartered
Steps
- Pour the canola oil into a large skillet set over high heat. When just starting to smoke, add the onions and stir. Cook until they just start to turn soft, stirring constantly, about one minute. Add the shrimp and cook, stirring occasionally, until the shrimp are mostly pink.
- Add the butter, jalapeño, and garlic, and cook, stirring often, until the garlic is very fragrant, about one minute. Season with salt, and cook until the shrimp are completely cooked, about 30 seconds. Turn off the heat, and stir in the parsley.
- Heat a second skillet over medium heat. Add as many tortillas as will fit in one layer, and warm them a few seconds on each side until soft. Set aside and cover with a towel. Repeat until all the tortillas are warm.
- Spoon a little of the shrimp filling into each tortilla. Serve with the lime wedges.
↑ Back to top
Tacos Gobernador (Sinaloan Shrimp Tacos)

Servings: 12 tacos
Ingredients
- 2 tablespoons ( 28 g) unsalted butter
- 1 small white onion (6 ounces; 170g), diced (about 1 cup)
- 1 large poblano chile (about 3 ounces; 90g), stemmed, seeded, and thinly sliced into 1-inch long strips
- 3 medium garlic cloves ( 15 g), minced
- 12 ounces plum or Roma tomatoes, diced (about 2 cups) (see notes)
- 1/3 cup ( 80 ml) tomato purée
- 1 teaspoon Diamond Crystal kosher salt, plus more to taste; if using table salt use half as much by volume
- 1/4 cup cilantro, chopped (about 16 g)
- 1 pound ( 455 g) shrimp, peeled and deveined, and tails removed and cut into 1-inch pieces (see notes)
- Freshly ground black pepper
- Twelve 6-inch corn tortillas
- Neutral oil such as canola or vegetable
- Mayo nn aise
- 1 1/2 cups grated Manchego, asadero, or Chihuahua cheese cheese (about 135g) (see notes)
- Chopped cilantro for serving
- Lime wedges for serving
- Salsa ranc hera
- Hot sauce, such as Valentina or Salsa Huichol
For the Stewed
Shrimp:
For the Tacos:
Steps
- For the stewed shrimp: In a 12-inch stainless-steel skillet, melt butter over medium-high heat. Once melted, add onion and poblano and cook, stirring occasionally, until softened, 3 to 5 minutes. Add garlic and cook until fragrant, about 1 minute.
- Add diced tomato, tomato purée, and salt and cook, stirring occasionally, until tomatoes are cooked down until sauce is thickened and leaves a trail when a spatula is pulled across the bottom of the skillet, 8 to 10 minutes. Stir in the cilantro and season with pepper to taste.
- Stir in peeled shrimp and cook, stirring occasionally, until shrimp is pink and opaque, 3 to 5 minutes, Season with salt to taste and set aside.
- To assemble the tacos: Adjust oven rack to middle position and heat oven to 200℉. Set wire rack in rimmed baking sheet; set aside. In a lightly oiled 12-inch nonstick or cast iron skillet or griddle, warm the tortillas in batches over medium heat, flipping occasionally, until the tortillas are soft and pliable. Stack the tortillas, and wrap in a clean kitchen towel to keep warm, removing 4 at a time to assemble the tacos.
- Working with 4 tortillas at a time, place flat on a work surface and spread each with a thin layer of mayonnaise, about 1/2 teaspoon each. Top the mayonnaise with about 2 tablespoons grated cheese per tortilla, covering the entire tortilla. Spread a large spoonful (about 1/4 cup) of stewed shrimp over half of each tortilla. Using a metal spatula, fold the tortilla in half over the shrimp and press to close.
- Using a paper towel or pastry brush, brush 1 teaspoon oil over the surface of the now-empty griddle or skillet. Arrange the 4 prepared tacos in skillet and place over medium-high heat and cook until cheese is melted and tacos are crisp and spotty golden brown on the bottom side, 2 to 5 minutes. Using tongs and thin spatula, carefully flip tacos. Continue to cook until golden and crisp on the second side, 2 to 3 minutes, adjusting heat as necessary.
- Remove skillet from heat and transfer tacos to the prepared wire rack and hold warm in the oven. Repeat assembling, cooking, and holding the tacos warm in batches of 4 at a time. Once all are cooked, serve tacos immediately, garnished with fresh chopped cilantro and lime if desired and accompanied by your favorite hot sauce.
↑ Back to top
Taiwanese Beef Noodle Soup
Servings: 6 to 8
Ingredients
- 3 tablespoons vegetable, canola, or peanut oil
- 2 pounds boneless beef shank or chuck, cut into 1-inch cubes
- 6 large slices fresh ginger root
- 6 cloves garlic, smashed
- 2-3 small red chilies, such as Thai chiles, roughly chopped
- 1 large plum tomato, roughly chopped
- 2 tablespoons sugar
- 1 tablespoon Sichuan chili bean sauce ( doubanjiang)
- 1 cup Chinese rice wine
- 1 tablespoon Sichuan peppercorns
- 2 whole star anise cloves
- 1/4 cup dark soy sauce
- 1/2 cup light soy sauce
- 2 1/2 quarts water
- 2 pounds Asian wheat flour noodles (any width you like)
- Fresh spinach leaves, baby bok choy, broccolini, or other small greens, as desired
Steps
- Heat 1 tablespoon vegetable oil in a large, heavy-bottomed pot or Dutch oven over medium-high heat until shimmering. Add the beef and cook without moving until well browned on first side, about 4 minutes. Stir and cook until well browned all over, about 10 minutes total. Transfer beef to a large bowl and repeat with 1 more tablespoon oil and remaining beef.
- Add remaining tablespoon of oil to the same pan and heat until shimmering. Add the sliced ginger, garlic cloves, and chilies. Cook, stirring, until fragrant, about 30 seconds. Add the chopped tomato and stir stir for another minute. Add the sugar and stir until dissolved, about 30 seconds. Add the chili bean sauce, and stir until the mixture just begins to bubble.
- Return the beef to the pot. Stir to warm up and coat the meat with the spices. Add the rice wine and cook for 1 minute, scraping up browned bits from bottom of pot. Add the star anise, Sichuan peppercorns, dark soy sauce, light soy sauce, and the water. Bring to a boil. Then reduce heat to a simmer and cover. Cook until beef is tender, about 2 1/2 hours.
- Using tongs, carefully remove the beef cubes from the stew and set aside in a bowl. Carefully strain the soup over a colander or mesh strainer to catch the ginger, peppercorns, and other stray solids. Retain any solids or small beef pieces from the strained mixture that you may want to keep, and return to the soup. Return the beef to the soup and add greens to wilt if desired.
- Cook the noodles according to the directions on their package. Strain noodles, and divide into serving bowls. Ladle the warm soup and beef chunks into each bowl and serve immediately.
↑ Back to top
Taiwanese Flaky Scallion Pancakes
Tags: Breads
Chinese
Ingredients
- 1 LARGE EGG
- 580 GRAMS (4¼ CUPS) BREAD FLOUR, PLUS MORE FOR DUSTING
- TABLE SALT
- 2 STICKS SALTED BUTTER, 1 MELTED AND 1 SOFTENED
- ½ CUP PEANUT OR CANOLA OIL, PLUS MORE FOR COUNTER
- 1 CUP FINELY CHOPPED SCALLIONS
Steps
- In a 2-cup liquid measuring cup or small bowl, whisk together 1¼ cups water and the egg. In a stand mixer fitted with the dough hook, combine the flour and 1 teaspoon salt; mix on medium until well combined, about 1 minute. Add the melted butter to the water-egg mixture then, with the mixer running on medium, slowly add to the flour and mix until incorporated, about 1 minute. Reduce to medium-low and knead until a smooth, elastic dough forms, about 7 minutes.
- Transfer the dough to a very lightly floured counter and divide into 8 portions (about 4 ounces each). Shape each into a taut ball. On an unfloured area of the counter, roll each portion against the counter under a cupped hand until the surface of the ball is completely smooth. Pour the oil into a 13-by-9-inch baking dish. Place the balls in the dish and roll to coat with oil on all sides. Cover with plastic wrap and refrigerate overnight.
- Remove the dough from the refrigerator and let stand at room temperature for at least 1 hour or up to 2 hours. Using your hands, spread 2 to 3 tablespoons of oil in an even layer on a large area of counter (about 2 feet square). Working with 1 dough ball at a time, use your fingertips to push the dough gently out from the center until it forms an 8-inch round. Flip the round, adding more oil as needed to the counter to keep the surface slicked, and continue to push and stretch the dough until it forms a paper-thin round about 18 inches in diameter; you should be able to see through the dough. Shape the dough into an 18-inch square. If at any point the dough isn't moving easily, add more oil to the counter.
- Grease your hands with 1 tablespoon of the softened butter, then gently rub the entire surface of the dough with butter. Sprinkle with ¼ teaspoon salt. Using your fingertips, lift the far edge of the dough square and fold the top third of the dough down toward you, then fold the bottom third up, as if folding a letter; align the edges as much as possible. The dough will spring back slightly as you fold, leaving you with a long strip about 4 inches wide. Scatter 2 tablespoons of the scallions over the strip and gently press them in. Fold over 4 inches of one end of the strip, then continue folding the 4-inch area until you reach the other end. Transfer to two oiled plates and cover with plastic wrap. Shape and fill the remaining dough in the same way using the remaining scallions. Cover and refrigerate for at least 15 minutes, or up to 24 hours.
- Heat the oven to 350°F with a rack in the middle position. Heat a 10-inch cast-iron or nonstick skillet over medium until flecks of water instantly sizzle when they hit the pan, 3 to 5 minutes. Place 1 dough square on an oiled counter and gently spread it into an 8-inch oval of even thickness; it's fine the oval is not perfectly shaped. Transfer the oval to the skillet, reduce heat to low and cook, occasionally rotating the pancake in the pan, until the bottom is golden brown and crisp, 5 to 7 minutes. Flip the pancake and cook until the second side is golden brown and crisp, another 5 to 7 minutes. While the pancake cooks, shape another dough square into an 8-inch oval.
- Using a spatula, transfer the pancake to a cutting board and cover with a dry kitchen towel. Using your hands, scrunch the pancake, pushing the edges together to help the layers separate. Flatten the pancake, then rotate 90 degrees, re-cover with the towel and repeat the scrunching process. Unfold the pancake and place it on a wire rack set in a rimmed baking sheet. Repeat the entire process until all the dough squares have been used. It's fine if the pancakes overlap slightly on the rack. Transfer the pancakes to the oven and bake until heated through, about 3 minutes.
Notes
- Tip: Don't use all-purpose flour. Bread flour is essential for a dough that can be stretched paper-thin. Don't worry if the dough forms a few tears or holes as you stretch it; they won't matter in the finished pancakes. Don't skimp on the oil used on the countertop; a thin but thorough coating is required.
↑ Back to top
Takeout-Style Kung Pao Chicken (Diced Chicken with Peppers
and Peanuts)
Adapted from https://www.seriouseats.com/takeout-style-kung-pao-chicken-diced-chicken-peppers-peanuts-recipe
Tags: Chicken
Chillis Chinese
Servings: 4
Ingredients
- 1 1/2 pounds ( 680 g) boneless skinless chicken thighs, cut into 3/4-inch chunks (see note)
- 1 teaspoon ( 5 ml) dark soy sauce
- 1 teaspoon (5ml) Shaoxing wine (see note)
- 1/2 teaspoon sugar
- 1/2 teaspoon toasted sesame oil
- 1/2 teaspoon cornstarch
- 1/2 teaspoon Diamond Crystal kosher salt; for table salt use half as much by volume
- 1/4 teaspoon ground white pepper
- 2 tablespoons ( 30 ml) homemade or store-bought low-sodium chicken stock
- 1 tablespoon (15 ml) dark soy sauce
- 1 tablespoon ( 15 ml) Shaoxing wine
- 1 tablespoon ( 15 ml) distilled white vinegar
- 1 tablespoon ( 15 g) sugar
- 2 teaspoons ( 5 g) cornstarch
- 1 teaspoon toasted (5ml) sesame oil
- 3 tablespoons (45ml) vegetable, peanut, or canola oil, divided
- 1 large red bell pepper, cut into 3/4-inch dice
- 1 large green bell pepper, cut into 3/4-inch dice
- 2 stalks celery, cut into 3/4-inch dice
- 1/2 cup ( 100 g) roasted peanuts
- 2 teaspoons (5g) minced fresh garlic (about 2 medium cloves)
- 2 teaspoons ( 5 g) minced fresh ginger
- 1 scallion, white and light green parts only, finely minced
- 8 small dried red Chinese or Arbol chiles (see note)
For the
Chicken:
For the
Stir-Fry:
Steps
- For the Chicken: Combine chicken, soy sauce, wine, sugar, sesame oil, cornstarch, salt, and pepper in a medium bowl and toss to coat. Set aside for 20 minutes.
- For the Stir-Fry: Combine chicken stock, soy sauce, wine, vinegar, sugar, cornstarch, and sesame oil in a small bowl and whisk together until homogenous. Set aside.
- Heat 1 tablespoon oil in a wok over high heat until smoking. Add chicken, spread into a single layer, and cook without moving until lightly browned, about 1 minute. Continue cooking, tossing and stirring frequently, until the exterior is opaque but chicken is still slightly raw in the center, about 2 minute longer. Transfer to a clean bowl and set aside.
- Wipe out wok and heat remaining 2 tablespoons oil over high heat until smoking. Add bell peppers and celery and cook, stirring and tossing occasionally, until brightly colored and browned in spots, about 1 minute. Add peanuts and toss to combine.
- Push vegetables up side of wok to clear a space in the center. Add garlic, ginger, scallions, and dried chiles and cook, stirring, until fragrant, about 30 seconds. Return chicken to wok and toss to combine. Stir sauce and add to wok. Cook, tossing, until sauce thickens and coats ingredients and chicken is cooked through, about 1 minute longer. Serve immediately.
Notes
- If you can't find boneless skinless chicken thighs, you can debone them yourself using this guide. Shaoxing wine can be found in most Asian markets. If unavailable, dry sherry can be used in its place. If you can't find whole dried chiles, substitute with 1/4 teaspoon crushed red pepper flakes.
↑ Back to top
Takeout-Style Sesame Noodles
Tags: Chinese
Noodles
I made this. Is starred. Rated 5/5
Servings: 4
Ingredients
- 1 pound noodles, frozen or (preferably) fresh
- 2 tablespoons sesame oil, plus a splash
- 3½ tablespoons soy sauce
- 2 tablespoons Chinese rice vinegar
- 2 tablespoons Chinese sesame paste
- 1 tablespoon smooth peanut butter
- 1 tablespoon granulated sugar
- 1 tablespoon finely grated ginger
- 2 teaspoons minced garlic
- 2 teaspoons chile-garlic paste, chile crisp or chile oil, or to taste
- Half a cucumber, peeled, seeded and cut into ⅛-inch by ⅛-inch by 2-inch sticks
- ¼ cup chopped roasted peanuts
Steps
- Bring a large pot of water to a boil. Add noodles and cook until barely tender, about 5 minutes. They should retain a hint of chewiness. Drain, rinse with cold water, drain again and toss with a splash of sesame oil.
- In a medium bowl, whisk together the remaining 2 tablespoons sesame oil, the soy sauce, rice vinegar, sesame paste, peanut butter, sugar, ginger, garlic and chili-garlic paste.
- Pour the sauce over the noodles and toss. Transfer to a serving bowl, and garnish with cucumber and peanuts.
Notes
- The Chinese sesame paste called for here is made of toasted sesame seeds; it is not the same as tahini, the Middle Eastern paste made of plain, untoasted sesame. But you could use tahini in a pinch. You need only add a little toasted sesame oil to compensate for flavor, and perhaps some peanut butter to keep the sauce emulsified.
↑ Back to top
Tamale Pie
Servings: 6
Ingredients
- 1 lb ground Beef
- 1 Tablespoon Minced Bacon
- 1 Onion Sliced
- 1 Ground Green Pepper
- 1 Cup Ground Celery
- 2 Tablespoons Butter
- 2 Tablespoons Flour
- 4 Cups Water
- 1 Bouillon Cube
- 1/ Teaspoon Salt
- 1 Tablespoon Chili Powder
- 1 Cup Tomatoes
- 1 Cup Cornmeal
Steps
- Brown the minced bacon in a casserole. Add the onion, green pepper and ground celery. Cook in the oven while you are preparing the other ingredients. Heat the cooked chicken or beef in a skillet with the butter. Stir the flour into this and add 2 cups of water, the bouillon cube, salt and the Chili powder. When it has thickened add the tomatoes. When hot add this to the casserole. Stir well. For the cornmeal mixture place 2 cups of water in a saucepan and add salt. When it boils sift into this, stirring constantly, the cornmeal. Cook until it is thick. Spread over the meat in the casserole. Cook in a slow oven (300° F.) for 40 minutes.
Notes
- Adapted from the J. N. Adam Cookbook by Mabel Claire (1932) pg. 287
↑ Back to top
Tamarind Butter

Tags: Condiments
Indian
Ingredients
- 6 TABLESPOONS TAMARIND CHUTNEY
- 3 TABLESPOONS HONEY
- 1 TABLESPOON CHILI-GARLIC SAUCE
- 2 TEASPOONS CURRY POWDER, TOASTED
- KOSHER SALT AND GROUND WHITE PEPPER
- 12 TABLESPOONS (1½ STICKS) SALTED BUTTER, CUT INTO 12 PIECES, ROOM TEMPERATURE
- 2 TABLESPOONS LIME JUICE
- 2 TABLESPOONS MINCED FRESH CILANTRO
Steps
- In a small bowl, whisk together the chutney, honey, chili-garlic sauce, curry powder, and ½ teaspoon each salt and white pepper. Set aside.
- In a medium bowl, mix the butter with a rubber spatula until completely smooth. Add the chutney mixture, stirring until incorporated. Stir in the lime juice, followed by the cilantro, mixing well after each addition. Transfer to a serving bowl.
Notes
- Tip: Don't soften the butter in the microwave, as the butter inevitably winds up partially melted. It's best to let the butter soften slowly at room temperature.
↑ Back to top
Tamarind Glaze

Tags: Asian
Barbecue Sauces
Ingredients
- 1 Pkg tamarind pulp
- 2 cups 474ml Water
- 1 Apricot preserves
- 1 cup 237ml Rice vinegar
- 2 tablespoons 30ml Red pepper flakes
- 1 Grated zest from 1 lemon
- 2 Grated zest from 2 limes
- 1 Grated zest from 1 orange
Steps
- To separate the tamarind seed from the pulp, place the tamarind block in a bowl with just enough warm water to cover and let it stand for 30 minutes to soften. Once tamarind has softened, pour the tamarind and liquid through a sieve suspended over a bowl, and push the fruit through the sieve with a wooden spoon.
- In a medium saucepan, combine the strained tamarind pulp with all the remaining ingredients and bring to a boil over high heat. Reduce heat to low and simmer, stirring occasionally, for 20 minutes. Remove from heat and allow to cool. Store in refrigerator for up to 3 months.
Notes
- FAVORITE
↑ Back to top
Tamarind-Braised Beef Short Ribs
Servings: 4 to 6
Ingredients
- 5 pounds ( 2.3 kg) beef short ribs, English- or flanken-cut (see note)
- 1/4 cup ( 60 ml) tamarind paste (see notes)
- 1 1/2 tablespoons ( 22 ml) honey
- 1 serrano chile pepper, stemmed and chopped
- 4 teaspoons ( 17 g) jaggery or dark brown sugar (see note)
- Pinch of asafetida (optional)
- 1 tablespoon ( 12 g) kosher salt, plus more for seasoning; for table salt, use half as much by volume
- Freshly ground black pepper
- 2 tablespoons ( 30 ml) neutral oil such as vegetable oil
- 2 tablespoons ( 28 g) unsalted butter
- 1 tablespoon ( 14 g) extra-virgin olive oil
- 1 large yellow onion ( 10 ounces; 283 g), cut into 1/2-inch dice
- 2 large carrots (about 12 ounces; 450 g total), cut into 1/2-inch dice
- 5 medium cloves garlic, smashed
- 2 tablespoons ( 30 ml) tomato paste
- 2 bay leaves
- 3 sprigs fresh thyme
- 5 cups ( 1.2 L) homemade beef or chicken stock or store-bought low-sodium chicken broth (if using store-bought broth, pour 1 packet unflavored gelatin (2 1/2 teaspoons; 10 g) over it and let set for 5 minutes; see notes)
- Finishing Garnish
- 1/4 cup minced flat-leaf parsley leaves ( 10 g)
- 1/4 cup minced cilantro leaves ( 10 g)
- Lime wedges
For the Short
Ribs:
For the
Vegetables and Braise:
Steps
- In a food processor, pulse tamarind paste, honey, 1 tablespoon (12g) salt, jaggery, serrano, and asafetida (if using) into a finely ground paste. Rub paste evenly over the short ribs, coating all sides thoroughly. Cover and refrigerate for 1 to 3 hours.
- Adjust oven rack to lower-middle position and heat oven to 300°F (150°C). Pat ribs lightly to remove excess surface moisture, if needed. Season with black pepper. In a large Dutch oven, heat oil over medium-high heat until shimmering. Working in batches, brown ribs quickly on all sides, about 30 seconds per side; reserve any remaining marinade. Transfer to a plate.
- For the Vegetables and Braise: Add butter and olive oil to the Dutch oven and heat over medium-high heat until butter is melted. Add the onion and carrots, and cook until the vegetables soften and begin to brown, 10 to 12 minutes. Stir in garlic, tomato paste, bay leaves, and thyme, and cook until fragrant and tomato paste darkens, about 1 minute.
- Add stock and any remaining tamarind marinade to pot, whisking and scraping up browned bits from the bottom. Return ribs to Dutch oven, nestling them into the vegetables and liquid. Bring to a gentle simmer. Cover partially with lid and transfer to the oven. Cook until ribs are fork-tender, 2 1/2 to 3 1/2 hours (this can vary depending on the beef used).
- Transfer ribs carefully to a platter and tent with aluminum foil. Strain the braising liquid into a large bowl, pressing solids to extract flavor. Discard solids. Let liquid settle, skim excess fat, and return to clean Dutch oven. Simmer over medium heat until reduced to a glossy, spoon-coating jus, about 20 to 35 minutes. Season to taste with salt and pepper. Return ribs to the pot to warm and glaze in the reduction. Sprinkle with fresh parsley and cilantro and serve with lime wedges.
- Food processor, large Dutch oven, aluminum foil, strainer
Special Equipment
Notes
- Tamarind paste and concentrate is sold in stores are ready-to-use products made from processed tamarind pulp or pods, free of seeds and fibers. The labels "tamarind concentrate" and "tamarind paste" are used interchangeably, which can confuse when reading recipes and shopping. Look for Indian tamarind concentrate, which is black and sticky.
- You can use English-cut or flanken-cut short ribs for this recipe. English-cut short ribs are cut such that one rib bone runs along the length of each portion; flanken-cut ribs slice across the ribs so that each piece has cross-sections of several rib bones in it. If using English-cut short ribs, try to find ones about 4 inches long each. If using flanken-cut, make sure that each slab is about two inches thick (flanken-cut short ribs often come in thinner slabs). You can divide flanken-cut ribs between the bones so that you have more manageable pieces to work with. In all cases, look for well-marbled short ribs with a nice meaty portion on each (at least 1 1/2 inches of meat above the bones).
- Jaggery is an unrefined sugar commonly found in Indian and other South Asian markets. Brown sugar works well as a substitute here.
- A good homemade stock will set like jelly when refrigerated; this natural gelatin helps give the sauce its final consistency. If you don't have good homemade stock, add 1 packet unflavored gelatin to store-bought stock per recipe instructions.
- Make-Ahead and Storage
- The braised beef short ribs can be refrigerated in their finished sauce in an airtight container for up to 5 days. Reheat gently before serving.
↑ Back to top
Tandoor-Style Grilled Chickens or Cornish Hens
Adapted from https://www.seriouseats.com/recipes/2011/08/tandoor-style-grilled-chickens-tandoori-cornish-hens-recipe.html

Tags: Chicken
Indian Poultry
Servings: 4 to 6
Ingredients
- 4 Cornish game hens, about 1 1/2-pounds each
- 2 tablespoons toasted ground cumin
- 2 tablespoons toasted paprika
- 1 tablespoon toasted ground coriander seed
- 1 teaspoon ground turmeric
- 1/2 teaspoon cayenne pepper
- 1 tablespoon achiote or a few drops red food coloring (optional)
- 8 cloves garlic, grated on a microplane grater
- 2 tablespoons fresh ginger, grated on a microplane grater
- 2 cups yogurt
- 1/2 cup lemon juice
- 1/4 cup kosher salt
- Thinly sliced raw onion
- 1/2 cup roughly chopped cilantro leaves
- 2 lemons or limes, cut into wedges
Steps
- Using sharp kitchen shears, remove the backs from the Cornish hens.
- Peel skin off of hens, then using a sharp knife, make deep incisions at 1-inch intervals all over the flesh
- Lay hen with breasts facing up. Press down firmly on center of breasts until wishbone cracks and they lie flat. Arrange legs so that they are pointing up towards the top of the breast. Use two long metal or wooden skewers to secure legs and breasts in place. Place in a large rimmed baking dish.
- Combine cumin, paprika, coriander, turmeric, cayenne, achiote, garlic, ginger, yogurt, lemon juice, and salt in a large bowl and whisk to combine. Pour marinade all over cornish hens, using hands to coat every surface. cover loosely and refrigerate. Refrigerate and allow to marinate for at least 4 hours and up to 8, turning occasionally.
- Ignite a large chimney starter full of charcoal and allow to burn until all coals are ignited. Spread coals evenly under one side of grill and set grill grate in place. Cover and allow to preheat for 5 minutes. Brush grill grates clean.
- Wipe excess marinade off of hens then place meaty-side down directly over the coals. Cover partially and allow to cook until deeply charred on first side, 7 to 10 minutes. Flip and continue cooking until hens register 145°F in the thickest part of the breast and 165 to 170°F in the legs, about 5 minutes longer (for larger chickens, transfer to cooler side of grill, cover, and continue cooking until desired temperature is reached).
- Remove hens to a large cutting board, tent loosely with foil, and allow to rest for five minutes. Remove skewers and using a heavy knife or cleaver, chop each hen into 8 serving-sized pieces. Serve immediately with onions, cilantro, lime wedges, and fresh naan.
↑ Back to top
Tandoori Rub
Tags: Indian
Rubs and Blends Seasonings
Servings: YIELD Makes about 1 cup
Ingredients
- 6 tablespoons paprika
- 2 tablespoons ground coriander
- 2 tablespoons ground cumin
- 2 tablespoons coarse kosher salt
- 1 tablespoon freshly ground black pepper
- 1 tablespoon sugar
- 1 tablespoon ground ginger
- 1 teaspoon ground cinnamon
- 1 teaspoon crumbled saffron threads
- 1/2 teaspoon cayenne pepper
Steps
- Whisk all ingredients in medium bowl. Transfer to airtight container. DO AHEAD: Can be made 1 month ahead. Store at room temperature.
Notes
- FAVORITE
↑ Back to top
Tangerine Beef with Glass Noodles
Tags: Asian
Beef
Ingredients
- 1 pound flank steak
- 1/4 cup soy sauce
- 1/4 cup rice wine or mirin
- 2 tablespoons tangerine zest, finely grated
- 1 tablespoon sesame oil
- 2 teaspoons cornstarch
- 2 cloves garlic, minced
- 1 teaspoon crushed red pepper flakes
- 3/4 cup scallions, thinly sliced (white parts only)
- 2 tablespoons garlic, minced
- 1 tablespoon ginger root, grated
- 1/2 cup reduced-sodium chicken broth
- 1/4 cup tangerine juice
- 2 tablespoons ponzu sauce
- 2 tablespoons soy sauce
- 4 ounces bean thread noodles
- 1/4 cup peanut oil
- 1/2 bunch asparagus, bias-sliced into 3-inch pieces
- 1/2 cup cilantro, finely chopped
- 1/3 cup dried apricots, finely chopped (optional)
For the
marinade
For the beef
Steps
- If desired, partially freeze beef for easier slicing. Trim fat from meat. Thinly slice meat across the grain into 1/4-inch-thick slices. Place beef in a large resealable plastic bag set in a shallow dish.
- For marinade, combine 1/4 cup soy sauce, rice wine, 1 tablespoon of the tangerine zest, the sesame oil, cornstarch, 2 cloves garlic, and crushed red pepper. Pour marinade over beef in bag; seal bag. Marinate in the refrigerator for 2 to 8 hours. Drain meat, discarding marinade.
- In small bowl combine scallions, 2 tablespoons garlic, ginger, and remaining tangerine zest. Set aside.
- In a another small bowl combine chicken broth, tangerine juice, ponzu sauce, and 2 tablespoons soy sauce. Set aside.
- Place bean threads in a large bowl. Add enough hot tap water to cover. Let stand about 5 minutes or until soft and pliable; drain well. Using kitchen shears, cut into 4-inch lengths.
- In a large wok or extra-large skillet heat oil over high heat. Reduce heat to medium. Add scallion mixture; cook and stir over medium heat about 30 seconds.
- Add beef strips; cook and stir about 2 minutes or until no longer pink. Add asparagus; cook and stir for 1 minute.
- Stir in broth mixture; bring to simmering. Stir in reserved noodles; cook and stir until heated through.
- Divide mixture evenly among serving bowls. Garnish with cilantro and, if desired, dried apricots. Serve immediately.
Notes
- FAVORITE
↑ Back to top
Tangerine Peel Beef

Tags: Beef
Chinese
Tangerine Peel Beef
Servings: Makes 4 servings
Ingredients
- 2 pieces (each about 1 1/2 in. square) dried tangerine peel
- 2 tablespoons soy sauce
- 1 tablespoon cornstarch
- ¾ pound flank steak, thinly sliced across the grain
- 1/3 cup orange juice
- 2 tablespoons Chinese rice wine or dry sherry
- 1 tablespoon soy sauce
- ½ teaspoon chili garlic sauce
- 2 teaspoons sugar
- 2 1/2 tablespoons cooking oil
- 6 small dried red chilies
- 1 small onion, cut into 1-inch pieces
- 1 stalk celery, cut into 1/2-inch pieces
- 1¼ teaspoons cornstarch dissolved in 1 tablespoon water
- 1/2 orange, sliced
Marinade:
Sauce:
Steps
- (1) Soak tangerine peel in warm water to cover until softened, about 20 Minutes; drain-
- (1) Place a wok over high heat until hot. Add 2 tablespoons oil, swirling to coat sides. Add chilies and cook, stirring, until fragrant, about 10 seconds. Add beef and stir-fry until no longer pink, 11/2 to 2 minutes. Remove meat and chilies from pan.
Getting Ready:
Thinly slice peel.
(2) Combine marinade
ingredients in a bowl. Add beef and stir to coat. Let stand for 10
minutes.
(3)
Combine sauce ingredients in a bowl.
Cooking:
(2)
Add remaining 1/2 tablespoon oil, swirling to coat sides. Add
tangerine
peel, onion, and celery; stir-fry for 1 minute. Return meat and
chilies
to wok and add sauce; bring to a boil. Add cornstarch solution and
cook, stirring, until sauce boils and thickens. ® Place on a serving
plate and garnish with orange slices.
Notes
- © Martin Yan
↑ Back to top
Tangerine Peel Beef

Tags: Beef
Chinese Fruit
Ingredients
- 2 tablespoons soy sauce
- 1 tablespoon cornstarch
- 3/4 pound flank steak, thinly sliced
- Sauce
- 1/3 cup orange juice
- 2 tablespoons rice wine or dry sherry
- 1 tablespoon soy sauce
- l/2 teaspoon chili garlic sauce
- 2 teaspoons sugar
- l-l/2 teaspoons cornstarch
- 2 to 1/2 tablespoons cooking oil
- 6 small dried red chiles
- 1 small onion, cut into 1-inch pieces
- Orange slices for garnish
Steps
- Soak tangerine peel in warm water to cover until softened, about 15 minutes; drain. Thinly slice tangerine peel. Combine marinade ingredients in a bowl.
- Add beef and stir to coat. Let stand for 10 minutes. Combine sauce ingredients in a bowl; set aside.
- Place a wok over high heat until hot. Add 2 tablespoons oil, swirling to coat sides. Add chiles and cook, stirring, until fragrant, about 10 seconds. Add beef and stir-fry until barely pink, about 2 minutes. Remove the beef and chiles from the wok.
- Add remaining 1/2 tablespoon oil to wok, swirling to coat sides. Add tangerine peel and onion; stir-fry for 1 minute. Add sauce and cook, Stirring, until sauce boils and thickens.
- Return beef and chiles to wok and cook until heated through. Remove to a serving plate and garnish with orange slices.
Notes
- FAVORITE
↑ Back to top
Tangerine Peel Beef

Tags: Beef
Chicken Stir-Fry
This is a lighter, stir-fry version of the
Sichuan restaurant favorite, in which
the beef is usually deep-fried.
Sichuan restaurant favorite, in which
the beef is usually deep-fried.
Is starred. Rated
5/5
Servings: 4
Ingredients
- 2 pieces (each about 1½ in. square)
- dried tangerine peel
- 2 tablespoons soy sauce
- 1 tablespoon cornstarch
- ¾ pound flank steak, thinly sliced
- across the grain
- cup orange juice
- 2 tablespoons Chinese rice wine
- or dry sherry
- 1 tablespoon soy sauce
- teaspoon chili garlic sauce
- 2 teaspoons sugar
- 2½ tablespoons cooking oil
- 6 small dried red chilies
- 1 small onion, cut into 1-inch pieces
- 1 stalk celery, cut into ½-inch pieces
- 1½ teaspoons cornstarch dissolved in 1 tablespoon water
- ½ orange, sliced
Marinade:
Sauce:
Steps
- Soak tangerine peel in warm water to cover until softened, about 20 minutes; drain. Thinly slice peel.
- Combine marinade ingredients in a bowl. Add beef and stir to coat. Let stand for 10 minutes.
- Combine sauce ingredients in a bowl.
- Place a wok over high heat until hot. Add 2 tablespoons oil, swirling to coat sides. Add chilies and cook, stirring, until fragrant, about 10 seconds. Add beef and stir-fry until no longer pink, 1½ to 2 minutes. Remove meat and chilies from pan.
- Add remaining ½ tablespoon oil, swirling to coat sides. Add tangerine peel, onion, and celery; stir-fry for
- Place on a serving plate and garnish with orange slices
Getting Ready:
Cooking:
1 minute. Return meat and
chilies to wok and add sauce; bring to a boil. Add cornstarch solution
and cook,
stirring, until sauce boils
and thickens.
Notes
- Homemade Appeal
- The dried peels of tangerines and oranges are a flavoring staple in many Chinese dishes. It's easy to make your own at home. Peel the fruit, cut the peel into pieces, and cut or scrape away the white pith from the inside of the peel. Let the pieces sun- or air-dry until they're firm but still flexible, then store them in an airtight jar.
- Martin Yan
↑ Back to top
Tangy and Creamy Macaroni Salad
Tags: Pasta
Salad
Servings: 8 to 10
Ingredients
- 1 1/2 cups mayonnaise
- 1/2 cup sour cream
- 3/4 cup whole milk
- 3 tablespoons Dijon mustard
- 2 tablespoons fresh lemon juice from 1 lemon
- 1 tablespoon hot sauce, preferably Texas Pete
- 3/4 teaspoon Worcestershire sauce
- 3/4 teaspoon garlic powder
- 1 pound elbow macaroni
- 1/2 cup apple cider vinegar
- 1 rib celery, finely chopped
- 1/4 cup finely chopped shallots
- 4 scallions, finely sliced
- Kosher salt and freshly ground black pepper
For the
Dressing:
For the Salad:
Steps
- For the dressing: Whisk together all ingredients in a medium bowl. Set aside.
- For the Salad: In a large pot of salted boiling water, cook pasta until very tender, about 15 minutes. Drain pasta and transfer to a large bowl. Add vinegar and stir until completely absorbed. Let pasta stand until cool, about 10 minutes.
- Add dressing and stir until well coated. Stir in celery, shallots, and scallions. Season with salt and pepper. Cover and chill in refrigerator for at least 1 hour before serving.
↑ Back to top
Tangy and Creamy Macaroni Salad
Is starred.
Servings: 8 to 10
Ingredients
- 1 1/2 cups mayonnaise
- 1/2 cup sour cream
- 3/4 cup whole milk
- 3 tablespoons Dijon mustard
- 2 tablespoons fresh lemon juice from 1 lemon
- 1 tablespoon hot sauce, preferably Texas Pete
- 3/4 teaspoon Worcestershire sauce
- 3/4 teaspoon garlic powder
- 1 pound elbow macaroni
- 1/2 cup apple cider vinegar
- 1 rib celery, finely chopped
- 1/4 cup finely chopped shallots
- 4 scallions, finely sliced
- Kosher salt and freshly ground black pepper
For the
Dressing:
For the Salad:
Steps
- For the dressing: Whisk together all ingredients in a medium bowl. Set aside.
- For the Salad: In a large pot of salted boiling water, cook pasta until very tender, about 15 minutes. Drain pasta and transfer to a large bowl. Add vinegar and stir until completely absorbed. Let pasta stand until cool, about 10 minutes.
Add
dressing and stir until well coated. Stir in celery, shallots, and
scallions. Season with salt and pepper. Cover and chill in
refrigerator
for at least 1 hour before serving.
↑ Back to top
Tangy Peanut-Avocado Salsa
Servings: 1 1/2 cups
Ingredients
- 2 tablespoons roasted peanuts
- 2 serrano chiles, stemmed and roughly chopped
- 1/3 cup roughly chopped, loosely packed cilantro
- 2 tablespoons fresh lime juice
- 1 ripe avocado, pit removed, flesh scooped from the skin and roughly chopped
- Salt
Steps
- In a blender jar combine the peanuts, chile, cilantro, lime juice and 1/2 cup water. Blend until completely smooth . Add the avocado and pulse until thoroughly blended. Taste and season with salt, usually about 1/2 teaspoon, and thin with additional water if you think necessary.
↑ Back to top
Tasajo
Adapted from https://patijinich.com/tasajo/

Tags: Beef
Mexican
Servings: 6
Ingredients
- 2 pounds flank steak
- 2 to 3 teaspoons kosher or coarse sea salt
- Vegetable oil for cooking
Steps
- Cut the flank steak against the grain into slices of about 1/4-inch thick, or as thin as you can. One by one, place the slices between two sheets of parchment or wax paper. Use a meat pounder to pound them very thin, less than 1/8-inch, or until you start to see the bottom sheet of paper through the meat (but not so thin that it is completely breaking apart).
- As you move along, place the pounded slices on a cooling rack set on top of a large sheet pan or chopping board. Once done, sprinkle 1 1/2 teaspoons salt on one side. Flip over and sprinkle with remaining 1 1/2 teaspoons salt.
- Leave to air dry and cure for at least 3 hours and up to 8 hours. (Alternately, you can leave at room temperature for 2 hours and refrigerate for the remaining time.)
- When ready, pre-heat a grill or grill pan over medium-high heat. Once hot, brush the meat with vegetable oil and cook in batches for 1 to 2 minutes per side. Rest under aluminum foil until ready to use.
↑ Back to top
Tasajo Torta with Smoky Guacamole

Tags: Beef
Mexican Sandwiches
Ingredients
- 6 Mexican bolillos or telera rolls, or 3-4” long pieces of baguette
- 1 cup refried beans
- 2 pounds cooked Tasajo
- 1 cup Oaxaca cheese, shredded
- 6 slices of tomato
- 1 recipe Smoky Guacamole
Steps
- Slice the bread in half. Toast under the broiler, on the grill, or on a hot comal until warmed and slightly browned. Remove from heat.
- Spread refried beans on each of the bottom half of each roll. On top of the refried beans, place the meat, shredded cheese, a tomato slice and a generous dollop of the guacamole. Top with the other toasted bread half and serve!
↑ Back to top
Tempura Batter

Tags: Batters
Japanese
Ingredients
- 1 cup of flour
- 1 tablespoon cornstarch
- 1 1/2 cups of seltzer water
- Salt
Steps
- Combine all ingredients. Use as batter for meats and vegetables
Notes
- FAVORITE
↑ Back to top
Tender Italian Sugar Cookies

Tags: Cookies
Italian
Ingredients
- 3/4 cup shortening
- 3/4 cup sugar
- 3 eggs
- 1 teaspoon vanilla extract
- 3 cups all-purpose flour
- 3 teaspoons baking powder
- 1/8 teaspoon salt
- 1/4 cup milk
- 2 tablespoons butter, melted
- 1/2 teaspoon vanilla extract
- 2 to 1/2 cups confectioners' sugar
- Food coloring and coarse sugar, optional
ICING:
Steps
- Preheat oven to 400°. In a large bowl, cream shortening and sugar until light and fluffy. Beat in eggs and vanilla. Combine flour, baking powder and salt; gradually add to creamed mixture and mix well.
- Shape dough into 1-1/2-in. balls. Place 1 in. apart on ungreased baking sheets. Bake 8-10 minutes or until lightly browned. Remove to wire racks to cool.
- For icing, in a small bowl, combine milk, butter, vanilla and confectioners' sugar until smooth. Tint with food coloring if desired. Dip tops of cookies in icing; allow excess to drip off. Sprinkle with coarse sugar if desired. Place on waxed paper; let stand until set. Yield: 3 dozen.
Notes
- FAVORITE
↑ Back to top
Texas-Style Baked Beans

Ingredients
- 1 tablespoon butter, or as needed
- 2 tablespoons vegetable oil
- 1 medium red onion, diced
- 2 cloves garlic, minced, or more to taste
- 1 pound bacon, diced
- 1 medium red bell pepper, diced
- 3 medium jalapeno peppers, minced, or to taste
- 1 cup beer, or more to taste
- 1 cup barbecue sauce
- 1 cup brown sugar
- ¼ cup molasses
- 6 cups cooked pinto beans
- 1 pinch garlic salt, or to taste
- cracked black pepper to taste
Steps
- Preheat the oven to 375 degrees F (190 degrees C). Grease a 9x13-inch baking dish with 1 tablespoon butter.
- Heat oil in a large skillet over medium-high heat. Sauté onion and garlic in hot oil until onion begins to soften, 5 to 7 minutes. Add bacon, bell pepper, and jalapeños; cook and stir until bacon is browned, 7 to 10 minutes.
- Stir beer, barbecue sauce, brown sugar, and molasses together in a large bowl. Stir in pinto beans, bacon-onion mixture, garlic salt, and pepper. Pour bean mixture into the prepared baking dish.
- Bake in the preheated oven until bubbling and browned, about 45 minutes.
Notes
- To bake beans on a wood smoker, preheat the smoker to between 250 and 275 degrees F (120 and 135 degrees C). Pour bean mixture into a greased 9x13-inch foil pan. Cook in the smoker for 30 minutes. Cover the pan with aluminum foil and continue cooking for 2 to 3 hours. Uncover and transfer beans to an oven preheated to 375 degrees F (190 degrees C) for 10 minutes to brown the beans.
↑ Back to top
Texas-Style Baked Beans
Ingredients
- 6 center-cut bacon slices, chopped
- 1 medium yellow onion, finely chopped (about 1 1/2 cups)
- 1 small red bell pepper, chopped (about 1 cup)
- 2 jalapeño chiles, seeded and finely chopped (about 1/3 cup)
- 3 large garlic cloves, finely chopped
- 1/2 cup dark lager beer (such as Modelo Negra)
- 3/4 cup barbecue sauce (such as Sweet Baby Ray's Original Barbecue Sauce)
- 1/4 cup light brown sugar
- 1 Tbsp. Worcestershire sauce
- 2 tsp. chili powder
- 1 tsp. kosher salt
Steps
- Preheat oven to 350°F. Cook bacon in a large skillet over medium, stirring occasionally, until crisp, 10 to 12 minutes. Transfer bacon to a paper towel-lined plate, reserving 2 tablespoons of the drippings in skillet; reserve remaining drippings for another use
- Increase heat to medium-high. Add onion, bell pepper, jalapeños, and garlic; cook, stirring often, until tender, about 6 minutes.
- Add remaining ingredient, and simmer.
- Remove from heat, and transfer mixture to a 2-quart baking dish. Cover with aluminum foil.
- Bake in preheated oven 20 minutes. Remove foil, and continue to bake until bubbling around edges and hot, 15 to 20 minutes more. Top with cooked bacon crumbles.
Cook bacon:
Cook vegetables:
Add beer, and bring to a simmer over medium-high. Simmer, stirring
occasionally, until slightly reduced, about 3 minutes. Stir in beans,
barbecue sauce, brown sugar, Worcestershire sauce, chili powder, and
salt. Bring mixture to a simmer over medium-high.
Add beans to baking
dish:
Bake:
↑ Back to top
Texas-Style Chili
Tags: Beef
Chillis Tex-Mex
Servings: 12
Ingredients
- 1 tablespoon whole cumin seeds
- 1½ teaspoons whole coriander seeds
- 4 pounds beef chuck roast or steak
- 1 teaspoon salt, more to taste
- 3 tablespoons vegetable oil, plus extra as needed
- 1 large yellow or white onion, chopped, plus extra chopped onion for serving
- 6 large garlic cloves, minced
- 4 to 7 large fresh green jalapeños (depending on how much heat you like), stemmed, seeded and chopped
- 3 tablespoons masa harina or 1 corn tortilla, torn into pieces (optional)
- 2 tablespoons ground pure chile powder, such as pasilla, Chimayo or ancho
- 1 tablespoon dried oregano
- 1 (12-ounce) bottle Negra Modelo beer
- 1 28-ounce can diced tomatoes, or 3 10-ounce cans Ro-Tel canned tomatoes with green chiles
- 1 ounce unsweetened chocolate
- 3 whole dried large red chiles, such as New Mexico or guajillo
- Chopped fresh cilantro, for serving
- Fritos or warmed flour tortillas, for serving
Steps
- Watch
- In a small heavy skillet, toast cumin and coriander seeds until fragrant. In a mortar and pestle, or in a coffee grinder, grind to a powder and set aside.
- Meanwhile, roughly cut beef into 2-inch cubes, or slice it against the grain into pieces about ¼-inch thick by 1½ inches square. Sprinkle with salt.
- In a large, heavy pot over high heat, heat oil until shimmering. Working in batches to avoid crowding the pan, brown the meat, turning occasionally until crusty. Adjust heat to prevent scorching. As it is cooked, remove the meat to drain on paper towels. Add more oil as needed for browning, but do not clean out the pot.
- To the empty but crusty pot, add onion, garlic, jalapeños, masa harina or tortilla (if using), chile powder, cumin-coriander powder and oregano. Cook, stirring, until onion has softened, 5 to 10 minutes. Add meat, beer, tomatoes, chocolate, whole dried chiles and 1 quart water. Bring to a gentle simmer and simmer about 1½ hours, or until meat is fork-tender. Remove the dried chiles. Taste and add salt if necessary.
- Serve immediately or let cool and refrigerate. The chili tastes best one or two days after it is made.
- Reheat over low heat if necessary and serve in bowls, sprinkled with chopped onion and cilantro. Add Fritos for crunch, or dip tortillas into the spicy gravy.
Make the recipe with us:
↑ Back to top
Thai Beef with Basil
Tags: Beef
Stir-Fry Thai
Servings: 4
Ingredients
- 2 tablespoons vegetable oil, divided
- 6 garlic cloves, thinly sliced
- 2 red chiles, thinly sliced, seeded for less heat if desired, divided
- 1 pound ground beef
- Kosher salt and freshly ground black pepper
- ½ cup low-sodium chicken broth
- 3 cups fresh basil leaves, divided
- 2 medium carrots, julienned or coarsely grated
- 2 scallions, thinly sliced
- 4 tablespoons fresh lime juice, divided
- 2 tablespoons reduced-sodium soy sauce
- 1 tablespoon fish sauce (such as nam pla or nuoc nam)
- 1 teaspoon sugar
- Steamed rice and lime wedges (for serving)
Steps
- Heat 1 Tbsp. oil in a large skillet over high heat. Add garlic and 1 chile and cook, stirring, until fragrant, about 30 seconds. Add beef, season with salt and pepper, and cook, breaking up with a spoon and pressing down firmly to help brown, until cooked through and nicely crisped in spots, 8–10 minutes. Add broth and 2 cups basil and cook, stirring, until basil is wilted, about 2 minutes.
- Toss carrots, scallions, 1 Tbsp. lime juice, and remaining chile, 1 cup basil leaves, and 1 Tbsp. oil in a small bowl.
- Mix soy sauce, fish sauce, sugar, and remaining 3 Tbsp. lime juice in another small bowl until sugar dissolves.
- Top rice with beef and slaw and drizzle with soy dressing. Serve lime wedges alongside for squeezing over.
↑ Back to top
Thai Drunken Noodles (Pad Kee Mao)
Tags: Austria
Chicken Noodles Thai
Servings: Servings 2 -3Tap or
hover to scale
Ingredients
- 7 oz /200g dried rice noodles , wide (Note 1)
- 2 tbsp oil (peanut, vegetable or canola)
- 3 large cloves of garlic , minced
- 2 birds eye chilli or Thai chillies , deseeded, very finely chopped (Note 2)
- 1/2 onion , sliced
- 200 g /7oz chicken thighs , cut into bite size pieces (breast ok too)
- 2 tsp fish sauce (or soy sauce)
- 2 green onions , cut into 3cm/2" pieces
- 1 cup Thai or Thai Holy Basil leaves (sub regular basil, Note 3)
- 3 tbsp oyster sauce
- 1 1/2 tbsp light soy sauce (Note 4)
- 1 1/2 tbsp dark soy sauce (Note 4)
- 2 tsp sugar
- 1 tbsp water
NOODLES:
STIR FRY:
SAUCE:
Steps
- Prepare noodles per packet directions.
- Mix Sauce in a small bowl.
- Heat oil in wok or large heavy based skillet over high heat.
- Add garlic and chilli and cook for 10 seconds. Don't inhale - the chilli will make you cough!
- Add onion, cook for 1 minute.
- Add chicken and fish sauce, and fry until cooked, around 2 minutes.
- Add green onion, noodles and sauce and cook for 1 minute until the sauce reduces and coats the noodles.
- Remove from heat and immediately add basil, toss until just wilted, then serve immediately.
Notes
- Wide rice noodles - use wide ones and prepare per packet. I use ones labelled as "Pad Thai" rice noodles (see in post, here it is at Woolworths). Fine to use thinner ones if you can't find wide ones.
- Chilli - 2 birds eye or Thai chillies gives this a nice buzz of spice but won't blow your head off! Feel free to adjust to your taste. Can also use a dollop of chilli paste instead - add it with the chicken.
- Thai Basil - tastes like regular basil with slight aniseed flavour. Traditionally made with Thai Holy Basil which tastes like regular basil but most restaurants outside Thailand use regular Thai Basil (easier to find, sold at Harris Farms and some Woolies, Coles in Australia).
- Substitute with regular basil (it tastes like Drunken Noodles in Thailand!)
- Soy Sauce - both light and dark soy sauce can be substituted with all purpose soy sauce (ie soy sauce that is just labelled "soy sauce" without "dark" or "light" or "sweet" in front of it).
- Can also sub the dark soy with more light soy.
- DO NOT use all dark soy sauce - will be far too strong.
- Nutrition per serving, assuming 3 servings.
↑ Back to top
Thai Peanut Slaw
Tags: Amish
Salad Slaw
Thai
Ingredients
- 1 small head napa cabbage, thinly sliced
- 4 cups shredded carrots
- 1 bunch radishes (about 8), halved and thinly sliced
- 1 bunch scallions, thinly sliced
- 2 tablespoons fish sauce
- 2 tablespoons rice wine vinegar
- Juice of 1 lime
- 1/2 cup peanuts
Steps
- Combine the cabbage, carrots, radishes, and scallions in a large mixing bowl.
- In a small mixing bowl, whisk together the fish sauce, vinegar, and lime juice.
- Pour the dressing over the cabbage and toss to combine. Taste for seasoning and add salt as necessary.
- Transfer the salad to a platter and garnish with the peanuts.
Notes
- FAVORITE
↑ Back to top
Thai Pickled Cabbage
Adapted from https://www.sidewalkshoes.com/thai-pickled-cabbage/

Tags: Pickles
Thai
Servings: 12
Ingredients
- 1 1/2 pounds napa cabbage
- 2 tablespoons kosher salt
- 1/2 cup lime juice
- 3 tablespoons fish sauce
- 1 tablespoon sugar
- 1 clove garlic finely minced
- 1 1/2 inch piece of ginger peeled and finely minced
- 1 small jalapeño chile
Steps
- Discard the tough outer leaves and quarter the cabbage. Chop into about 1-inch pieces. Place in a colander and sprinkle with salt. Toss it with your hands. Let the cabbage sit in a sink, draining for about 20 minutes. Stir it about halfway through. The cabbage will start to wilt and look wet.
- Combine the lime juice, fish sauce, sugar, garlic, and ginger in a large bowl. Stem the jalapeño and slice it into thin rounds and add to the bowl.
- Rinse the cabbage with cool water to get rid of some of the salt. Squeeze it to get rid of all the excess moisture, then let it drain well.
- Add the drained cabbage to the brine and toss to combine. It can be eaten immediately, but it is much better the next day. Can be refrigerated for at least 3 weeks.
↑ Back to top
Thai Pork and Noodles
Adapted from https://www.foodnetwork.com/recipes/food-network-kitchen/thai-pork-and-noodles-recipe-1973512
Tags: Noodles
Pork Thai
Servings: 4
Ingredients
- 1 pound thin boneless pork chops, fat trimmed
- 8 ounces wide Thai rice noodles
- 1 cup fresh cilantro (leaves and stems)
- Finely grated zest and juice of 1 lime
- 2 slices peeled ginger
- 2 cloves garlic, smashed
- 3 red jalapeno peppers, seeded and roughly chopped
- 2 shallots, roughly chopped
- 3 tablespoons fish sauce
- 2 tablespoons packed light brown sugar
- 4 tablespoons peanut oil
- 1/4 pound green beans, split lengthwise and cut into pieces
Steps
- Place the pork in the freezer about 10 minutes to make it easier to slice. Soak the noodles in very hot water until just tender, about 10 minutes; drain. Snip the noodles with scissors into shorter lengths. Cut the frozen pork crosswise into 1/4-inch-wide strips.
- Puree the cilantro, lime zest and juice, ginger, garlic, jalapenos, shallots, fish sauce, brown sugar and 1 tablespoon water in a food processor until smooth, scraping down the processor as needed.
- Heat 3 tablespoons peanut oil in a large skillet over high heat. Add half the cilantro mixture and stir-fry 1 minute. Add the pork and stir-fry until no longer pink, 2 to 3 minutes. Transfer the pork with a slotted spoon to a plate. Add the remaining 1 tablespoon peanut oil to the skillet; add the green beans and stir-fry until tender, 4 to 5 minutes. Add the noodles, pork and 2 tablespoons of the remaining cilantro mixture. Cook, tossing with tongs, until heated through, about 2 minutes. Stir in the remaining cilantro mixture to taste.
Notes
- My Private Notes
- Add a Note
- Categories:
↑ Back to top
Thai Salad Dressing
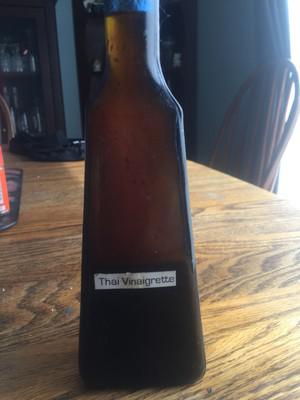
Tags: Dressings
Homemade
Is starred.
Ingredients
- 2 Tbsp. lime juice
- 2 Tbsp. soy sauce
- 2 Tbsp. fish sauce
- 1 Tbsp. rice vinegar
- 2 Tsp Chilli Garlic Paste
- 1 Tbsp Tamarind Chilli Paste
- 1 Tbsp. white sugar (to taste)
- 1/2 Tsp white pepper
- 1/2 cup oil
↑ Back to top
Thai Sweet Chile Sauce
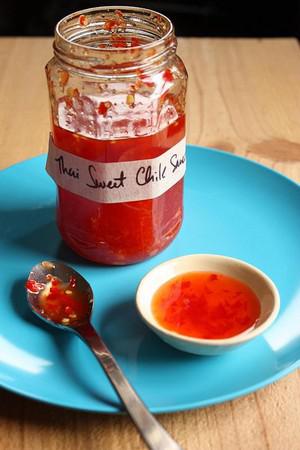
Tags: Condiments
Thai
Servings: about 2 cups
Ingredients
- ⅓ cup coarsely chopped cilantro stems and roots
- 2 cups water
- 3 to 4 tablespoons coarsely chopped garlic
- 4 ounces Fresno chiles, mostly seeded and coarsely chopped
- ⅛ teaspoon salt
- About 2 cups distilled white vinegar
- 1 ⅓ cups sugar
Steps
- Put the cilantro stems and water into a sauce pan. Bring to a simmer and cook for 5 minutes. Remove from the heat and cover. Let steep for 20 minutes.
- Meanwhile, use an electric mini chopper to grind the garlic, chiles, and salt to a coarse texture. Set aside.
- Strain the cilantro liquid through a mesh strainer. Measure the liquid. You should have about 1 ¾ cups. Transfer to a saucepan. Add the same quantity of vinegar as you had of the cilantro liquid. Add the sugar and chiles and garlic mixture. Stir.
- Bring to a boil over medium-high heat, then lower the heat to simmer. Let simmer until the volume has reduced by half. (How much time this takes depends on the size of your saucepan. Use a shallow, wide pan to hasten the process.) The resulting sauce should be slightly thick.
Remove from the heat and set aside, uncovered, to cool completely.
Expect the sauce to thicken further and concentrate in flavor.
Use immediately or transfer
to a jar and refrigerate. Bring to room temperature before using.
↑ Back to top
Thai Sweet Chili Sauce
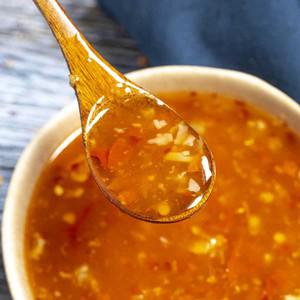
Tags: Condiments
Thai
Servings: 24 tablespoons
Ingredients
- 1/2 cup water
- 1/2 cup rice vinegar
- 1/4 cup sugar use 2 tablespoons for less sweet
- 3 tablespoons hot chili flakes use dried/crushed - bird's eye chilies, Thai chilies, japones, chile de arbol, or others - or use fresh minced
- 1 tablespoon rice wine
- 1 tablespoon sriracha or sambal oelek
- 1 tablespoon fish sauce
- 1 teaspoon fresh minced ginger
- 1 teaspoon fresh minced garlic
- 1 tablespoon cornstarch mixed with 2 tablespoons water to make a slurry - double this for thicker sweet chili sauce
Steps
- Add all of the ingredients to a small pot.
- Heat to a boil, then reduce heat and simmer for 5 minutes, stirring, until it thickens.
- Cool and enjoy. Keep refrigerated.
↑ Back to top
Thai Sweet Chili Sauce

Servings: makes about 1 1/2 cups
Ingredients
- 1 cup plus 2 tablespoon water, divided
- 2 tablespoons cornstarch
- 3 medium cloves of garlic, minced (about 1 tablespoon)
- 2 tablespoons finely chopped fresh Fresno, red Thai chilies, or red jalapeño peppers (seeds left in for a hotter sauce)
- 2/3 cup sugar
- 1/3 cup rice vinegar
- 2 teaspoons salt
Steps
- In a small bowl, whisk together 2 tablespoons water and cornstarch. Set aside.
- In a medium saucepan, mix together remaining 1 cup water, garlic, peppers, sugar, vinegar, and salt. Bring to a boil over medium heat, reduce heat and simmer for 3 to 5 minutes.
- Stir cornstarch mixture to re-combine, then whisk into simmering sauce and cook until thickened, about 1 minute more. Remove from heat, let cool, and use immediately or store in an airtight container in the refrigerator.
↑ Back to top
Thai Watermelon Salad
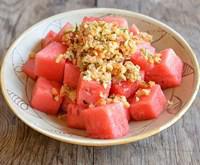
Tags: Fruit
Salad Thai
Servings: 8
Ingredients
- 3 cloves garlic, finely minced
- 2 tablespoons packed light palm sugar or brown sugar
- 3 tablespoons fish sauce
- 1/4 cup (60 ml) fresh lime juice
- 2 Thai or Serrano chiles, minced with seeds intact for fun
- 1 tablespoon finely chopped kaffir lime leaf (remove the midrib)
- 1/3 cup (90 ml) dried shrimp, briefly rinsed to soften and finely chopped
- 1/2 cup (120ml) roasted, unsalted peanuts, chopped
- A volleyball-size seedless watermelon
Steps
- For the dressing, combine the garlic, sugar, fish sauce, and lime juice in a bowl, stirring to dissolve the sugar. Add the lime leaf, dried shrimp, and peanuts. Set aside for 15 minutes, then revisit the dressing for a taste test. Add extra lime juice, sugar, or fish sauce as needed to balance the flavors. Set aside or refrigerate for up to 3 days; return to room temperature before using.
- Cut the watermelon into 1-inch (2.5 cm) cubes. Pile them into individual bowls, on a dramatic platter or in a shallow bowl. Top with the dressing and serve.
Notes
- FAVORITE
↑ Back to top
Thai-Style Marinated Flank Steak and Herb Salad
Tags: Beef
Salad Thai
Servings: 6 to 8
Ingredients
- 1/2 cup palm sugar or brown sugar
- 1/4 cup water
- 3 tablespoons fish sauce
- 1/3 cup lime juice
- 2 cloves garlic, grated on a microplane zester
- 1 tablespoon Thai chile powder (or red chile flakes)
- 1/4 cup vegetable oil
- 1 whole flank steak, about 2 pounds (see notes)
- 1/2 cup loosely packed mint leaves
- 1/2 cup loosely packed cilantro leaves
- 1 small bunch chives, cut into 1 1/2-inch segments
- 1/2 cup loosely packed basil
- 4 shallots, thinly sliced
- 1 to 2 cups mung bean sprouts
For the
Marinade:
For the Salad:
Steps
- Combine water and sugar in a small saucepan and heat over medium heat until completely dissolved. Transfer to a small bowl, add fish sauce, lime juice, garlic, and chile powder and stir to combine. Transfer half to a small container and reserve until step 4. Add oil to remaining half and whisk to combine. Place flank steak inside a gallon-sized zipper-lock bag with marinade. Press out air, seal bag, and allow meat to marinate, turning occasionally, for at least 1 hour and up to 12.
- Remove steak from marinade and pat dry with paper towels. Light one chimney full of charcoal and wait until they're covered in grey ash. Spread evenly over 1/2 of grate, leaving other half empty. Put cooking grate in place, cover, and allow grill to preheat for 5 minutes. Clean and oil grilling grate , then place flank steak over hot side of grill, cook until well charred, about 3 minutes. Flip steak and continue to cook until second side is well charred, about 3 minutes longer. Transfer steak to cooler side of grill, cover, and cook until center of steak registers 125°F (52°C) on an instant-read thermometer for medium-rare, or 135°F (57°C) for medium, about 5 minutes longer. Transfer to a cutting board, tent with foil, and allow steak to rest for at least 5 minutes. Proceed to step 4.
- Alternatively, to finish indoors: Heat 2 tablespoons vegetable or canola oil in a large stainless steel or cast iron skillet over high heat until shimmering. Add steak and cook, turning frequently, until an instant-read thermometer registers 125°F for medium-rare or 135°F for medium, reducing heat as necessary if steak smokes excessively or starts to burn. Transfer to a wire rack set in a rimmed baking sheet and allow to rest 5 to 10 minutes.
- Thinly slice beef against the grain and transfer to a large bowl. Add herbs, shallots, bean sprouts, and reserved marinade, and toss to combine. Serve immediately.
Notes
- If you're using a gas grill, set half of the burners to high and leave the others off for two-zone grilling.
- An equivalent weight of skirt, flap, or hanger steak can be used in place of flank steak.
↑ Back to top
Thai-Style Vegetable Rice Noodles
Tags: Thai
Vegetables
Ingredients
- 4 ounces uncooked flat rice noodles (pad Thai noodles)
- 1 cup thinly sliced radishes
- 1/2 cup chopped green onions
- 1/2 cup chopped fresh basil
- 1/2 cup fresh cilantro leaves
- 1/4 cup fresh mint leaves
- 2 tablespoons fresh lime juice
- 1 tablespoon Thai fish sauce
- 2 tablespoons peanut oil
- 1 1/2 tablespoons grated peeled fresh ginger
- 6 garlic cloves, sliced
- 2 Thai chiles, finely chopped
- 1 pound snow peas, trimmed
- 3/4 teaspoon kosher salt
- 1/2 cup chopped unsalted, dry-roasted peanuts
Steps
- Cook noodles according to package directions, omitting salt and fat. Drain and rinse under cold water; drain. Place in a medium bowl. Add radishes and next 6 ingredients (through fish sauce); toss well.
- Combine oil, ginger, garlic, and chiles in a large skillet over low heat; cook for 2 minutes. Increase heat to medium-high; cook an additional 1 minute or until garlic begins to brown. Add snow peas and salt to pan; cook 3 minutes or until crisp-tender, stirring occasionally. Add snow pea mixture to noodle mixture; toss well. Sprinkle with nuts.
Notes
- FAVORITE
↑ Back to top
Thanksgiving Leftovers Hot Pockets

Tags: Holidays
I made this. Is starred.
Servings: 6 pockets
Ingredients
- All-purpose flour, for surfaces
- 1 pound homemade or store-bought pizza dough, divided into 6 even balls (see Tip)
- Leftover stuffing
- Leftover roasted or mashed sweet potatoes
- Leftover roast turkey, shredded
- Leftover cranberry sauce
- Leftover gravy
- 1 tablespoon heavy cream or milk
- Shredded Parmesan or 3 slices of Swiss or Cheddar, each cut into two rectangles
Steps
- Lightly flour a work surface and lay the 6 dough balls out on top. Dust with flour and cover with a clean kitchen towel. Allow the dough balls to rest at room temperature until easy to stretch, about 45 minutes.
- Adjust an oven rack to the center position and heat oven to 425 degrees. Working 1 at a time and leaving the rest covered as you work, roll and stretch each ball of dough into a circle about 7 inches in diameter.
- Working with 1 circle at a time, layer a total 1 cup of leftovers in a log about 2 inches wide and 5 inches long down the center: Start with a layer of stuffing, which absorbs the juices as the pockets bake, then add vegetables, turkey, cranberry sauce and gravy. Do not overstuff.
- Fold the top and bottom of the dough over the ends of the log. Lift the right side over the log, stretching it a little to completely cover the filling while making sure the top and bottom stay tucked in. Fold the left side over and repeat. You should end up with a neat package about the size of a Chinese egg roll. Repeat with the remaining dough circles and filling.
- Transfer the pockets seam side down to a parchment-lined rimmed baking sheet. Combine the heavy cream or milk with 2 tablespoons of leftover gravy (if you have any) and brush the pockets with the mixture. (You can use plain heavy cream or milk if you do not have any leftover gravy.) Use a sharp knife to cut three slits on the top of the pockets for ventilation. Sprinkle the pockets with a dusting of shredded Parmesan or lay a half slice of Swiss or Cheddar on top of each one.
- Bake until deep golden brown, 12 to 18 minutes. Serve immediately with extra gravy and cranberry sauce for spooning or dipping. You can also refrigerate the cooked pockets and reheat them in a toaster oven, about 7 minutes at 425 degrees.
Notes
- You can also use canned pizza dough or thawed frozen puff pastry for this. Divide and roll the dough into 6 (7-by-6-inch) rectangles. When forming the pockets, fold one side over the other and crimp the edges with a fork to seal. Bake as directed.
↑ Back to top
These 5-Ingredient, One-Bowl Moroccan Biscuits Are Buttery
Soft and Sweet Like Cornbread

Servings: 8
Ingredients
- 270 g semolina flour ( 9.5 ounces; 1 1/2 cups), preferably coarse flour such as King Arthur brand, plus more for sprinkling
- 25 g ( 2 tablespoons) granulated sugar
- 1 teaspoon baking powder
- 3/4 teaspoon Diamond Crystal kosher salt; for table salt use half as much by volume
- 75 g ( 5 tablespoons) unsalted butter, melted and cooled slightly
- 1/2 cup ( 120 ml) whole milk (see notes)
- Serving spread of choice, such as butter or jam
Steps
- In a large mixing bowl, whisk to fully combine semolina flour, sugar, baking powder, and salt. Add melted butter and mix with your fingers until mixture has a sandy, crumbly texture.
- Add milk and mix with your hands until dough comes together and forms a ball. It should be soft but not sticky. If dough is too wet, sprinkle 1 tablespoon semolina over top and knead in until absorbed. Repeat if needed until proper texture is achieved. Let it rest for 15 minutes to allow semolina to absorb the liquid.
- Lightly dust a work surface with semolina and transfer dough to it. Using the palm of your hands, flatten dough into a 1/2-inch-thick circle, about 8 inches in diameter. Sprinkle dough’s surface with more semolina, then use a 3-inch round cookie cutter or glass to cut out discs. Gather dough scraps and reshape into 1/2-inch-thick round and cut out more discs; you should have 8 discs total. (Alternatively, divide the dough into eight equal portions and shape them into individual 1/2-inch-thick discs by hand.)
- Heat a 12-inch cast-iron or stainless-steel skillet over medium-low heat for 3 minutes. Place 4 dough rounds in dry skillet and cook, pressing down occasionally with a spatula to prevent doming, until golden brown on first side, 5 to 7 minutes.
- Flip flatbreads and continue to cook, adjusting heat as needed to prevent burning, until golden brown on second side, 3 to 5 minutes. Transfer cooked flatbreads to a parchment paper–lined baking sheet. Wipe skillet clean, then repeat with remaining 4 semolina breads. Serve immediately with your choice of spreads.
- Special Equipment
- 12-inch cast-iron or stainless-steel skillet
- Make-Ahead and Storage
- Leftover harcha can be stored in an airtight container at room temperature for up to 3 days. To freeze, individually wrap the cooked harcha in plastic, then transfer to an airtight container or freezer bag and freeze for up to 2 months. Reheat frozen harcha in a dry skillet over medium heat, flipping occasionally until warmed through or heat in a toaster oven.
↑ Back to top
These Homemade Real-Deal Thai Drunken Noodles Are *Way*
Better Than Takeout
Servings: 1 to 2
Ingredients
- 4 ounces ( 113 g) fresh rice noodle sheets or 2 ounces (56 g) dried wide rice noodles (see notes)
- 1 teaspoon ( 5 g) neutral oil, such as canola or vegetable
- 2 tablespoons ( 30 ml) Thai oyster sauce
- 1 tablespoon ( 15 ml) fish sauce, plus more for serving
- 1 tablespoon ( 15 ml) Thai thin soy sauce
- 1/2 teaspoon granulated sugar, plus more for serving
- 1/4 teaspoon ground white pepper, plus more for serving
- 4 medium cloves garlic ( 20 g), peeled
- 7 fresh Thai red chiles (1/2 ounce; 15 g), such as bird's eye, stemmed
- 2 tablespoons ( 30 ml) neutral oil, such as canola or vegetable
- 1/2 ounce (15 g) grachai, julienned if needed (1 tablespoon) (see notes)
- 5 fresh or frozen makrut lime leaves, middle ribs removed (see notes)
- 3 ounces ( 85 g) pork shoulder, sliced very thinly into roughly 1- by 1 1/2-inch pices (1/2 cup) (see notes)
- 1 ounce ( 28g) long beans, sliced into 1-inch pieces on a bias (1/4 cup)
- 1 ounce ( 28 g) fresh or canned baby corn, sliced into 1/2-inch pieces (1/3 cup)
- 1 1/2 ounces ( 40 g) Chinese broccoli, sliced into 1 1/2–inch pieces on a bias ( 3/4 packed cup)
- 2 fresh red long chile (1 1/2 ounces; 40 g), such as Holland, Fresno, or Cayenne, seeds removed and cut on the bias into 1/4-inch-thick slices (see notes)
- 1/4 cup (8 g) picked Thai holy basil or Thai sweet basil leaves
- Thai chile flakes, for serving
- Chile vinegar, for serving
For the
Noodles:
For the
Stir-Fry Sauce:
For the
Stir-Fry:
Steps
- If Using Fresh Noodle Sheets: Cut fresh noodle sheets into 1 1/2-inch wide strips and place in a mixing bowl; set aside.
- If Using Dried Noodles: In a large heatproof bowl, cover noodles with 1 quart boiling water. Allow the noodles to hydrate until pliable, 15 to 20 minutes. Drain thoroughly and rinse three times with cold water to remove excess starch. Return drained noodles to bowl and toss with oil until evenly coated and no longer sticky; set aside.
- For the Stir-Fry Sauce: In a small bowl, whisk together oyster sauce, fish sauce, thin soy sauce, granulated white sugar, and white pepper until well combined; set aside.
- For the Stir-Fry: In a mortar and pestle, pound garlic and Thai red chiles into a rough paste.
- Heat a wok or large carbon-steel, stainless-steel, or cast iron skillet over high heat until lightly smoking. Add oil and swirl to coat the surface. Add garlic-chile paste and cook, using a large spoon or wok spatula to stir constantly, until fragrant but not browned, about 30 seconds; lower heat as needed to prevent garlic from browning.
- Turn the heat back to high and add grachai, makrut lime leaves, and pork. Cook, stirring constantly, until the pork is almost fully cooked, about 40 seconds.
- Add long beans, baby corn, and Chinese broccoli and cook, stirring vigorously, until vegetables are just starting to become tender and lightly charred in spots. Add prepared noodles, then pour the sauce in around the sides of the wok. Continue stirring and tossing until the sauce is fully absorbed by the noodles, about 2 minutes.
- For Serving: Remove from heat and stir in sliced red chile and basil leaves until basil is just wilted. Serve immediately, offering additional fish sauce, white pepper, Thai chile flakes, sugar, and chile vinegar alongside for diners to stir-in to taste.
Notes
- This recipe is best when prepared with fresh rice noodles, which come in sheets that can be cut by hand. Dry rice noodles are a good substitute if you can't find fresh, though the widest ones are not typically as wide as the fresh can be cut, and they have a chewier, more firm texture.
- Lime leaves often come in a double-leaf form on each stem. Each of those double leaves (2 per stem) counts as one leaf here in this recipe.
- A Holland chile and Fresno chile will have a similar mild heat level that is balanced with a sweet finish, while a fresh Cayenne chile will be spicier. A jalapeño chile may also be substituted in this recipe, though it will deliver less sweetness.
- You can buy boneless pork shoulder and slice it very thinly yourself; par-freezing helps for thinner slices. You want roughly 1/8-inch thick slices that are about 1x1.5-inches in size. You can also buy pre-sliced pork as it is sold in Asian markets for hot pot instead.
↑ Back to top
Thin-Crust Pizza
Tags: Pizza
Ingredients
- 3 cups (16 1/2 ounces) bread flour , plus more for work surface (see note)
- 2 teaspoons sugar
- 1/2 teaspoon instant or rapid-rise yeast
- 1 1/3 cups ice water (about 10 1/2 ounces) (see note)
- 1 tablespoon vegetable oil , plus more for work surface
- 1 1/2 teaspoons table salt
- 1 (28-ounce) can whole peeled tomatoes, drained and liquid discarded
- 1 tablespoon extra-virgin olive oil
- 1 teaspoon red wine vinegar
- 2 medium garlic cloves, minced or pressed through garlic press (about 2 teaspoons)
- 1 teaspoon table salt
- 1 teaspoon dried oregano
- 1/4 teaspoon ground black pepper
- 1 ounce finely grated Parmesan cheese(about 1/2 cup)
- 8 ounces whole milk mozzarella, shredded (about 2 cups) (see note)
Dough:
Sauce:
Cheese:
Steps
- In food processor fitted with metal blade, process flour, sugar, and yeast until combined, about 2 seconds. With machine running, slowly add water through feed tube; process until dough is just combined and no dry flour remains, about 10 seconds. Let dough stand 10 minutes.
- Add oil and salt to dough and process until dough forms satiny, sticky ball that clears sides of workbowl, 30 to 60 seconds. Remove dough from bowl and knead briefly on lightly oiled countertop until smooth, about 1 minute. Shape dough into tight ball and place in large, lightly oiled bowl. Cover tightly with plastic wrap and refrigerate for at least 24 hours and up to 3 days.
- : Process all ingredients in food processor until smooth, about 30 seconds. Transfer to medium bowl or container and refrigerate until ready to use.
- : One hour before baking pizza, adjust oven rack to second highest position (rack should be about 4 to 5 inches below broiler), set pizza stone on rack, and heat oven to 500 degrees. Remove dough from refrigerator and divide in half. Shape each half into smooth, tight ball. Place on lightly oiled baking sheet, spacing them at least 3 inches apart; cover loosely with plastic wrap coated with nonstick cooking spray; let stand for 1 hour.
- Coat 1 ball of dough generously with flour and place on well-floured countertop. Using fingertips, gently flatten into 8-inch disk, leaving 1 inch of outer edge slightly thicker than center. Using hands, gently stretch disk into 12-inch round, working along edges and giving disk quarter turns as you stretch. Transfer dough to well-floured peel and stretch into 13-inch round. Using back of spoon or ladle, spread 1/2 cup tomato sauce in thin layer over surface of dough, leaving 1/4-inch border around edge. Sprinkle 1/4 cup Parmesan evenly over sauce, followed by 1 cup mozzarella. Slide pizza carefully onto stone and bake until crust is well browned and cheese is bubbly and beginning to brown, 10 to 12 minutes, rotating pizza halfway through. Remove pizza and place on wire rack for 5 minutes before slicing and serving. Repeat step 5 to shape, top, and bake second pizza.
FOR THE DOUGH:
FOR THE SAUCE:
TO BAKE THE PIZZA:
Notes
- Our preferred brand of whole-milk mozzarella is Dragone. You can shape the second dough ball while the first pizza bakes, but don't top the pizza until right before you bake it. If you don't have a baking stone, bake the pizzas on an overturned and preheated rimmed baking sheet. It is important to use ice water in the dough to prevent overheating the dough while in the food processor. Semolina flour is ideal for dusting the peel; use it in place of bread flour if you have it. The sauce will yield more than needed in the recipe; extra sauce can be refrigerated for up to a week or frozen for up to a month.
- TOPPING TIPS: We like our Thin-Crust Pizza simply dressed with tomato sauce and handfuls of shredded mozzarella and Parmesan, but additional toppings are always an option--provided they're prepared correctly and added judiciously. (An overloaded pie will bake up soggy.) Here are a few guidelines for how to handle different types of toppings:
- HEARTY VEGETABLES Aim for a maximum of 6 ounces per pie, spread out in a single layer. Vegetables such as onions, peppers, and mushrooms should be thinly sliced and lightly sautéed (or microwaved for a minute or two along with a little olive oil) before using.
- DELICATE VEGETABLES AND HERBS Leafy greens and herbs like spinach and basil are best placed beneath the cheese to protect them or added raw to the fully cooked pizza.
- MEATS Proteins (no more than 4 ounces per pie) should be precooked and drained to remove excess fat. We like to poach meats like sausage (broken up into 1/2-inch chunks), pepperoni, or ground beef for 4 to 5 minutes in a wide skillet along with 1/4 cup of water, which helps to render the fat while keeping the meat moist.
↑ Back to top
Thirty-Minute Mozzarella
Tags: Cheese
Dairy Homemade
Servings: YIELD 0.75 servings
TOTAL TIME 1 hrs
Ingredients
- 1 1/2 teaspoons citric acid , dissolved in 1/2 cup cool water
- 1 gallon pasteurized whole milk
- 1/4 teaspoon liquid rennet or 1/4 rennet tablet , diluted in 1/4 cup cool un-chlorinated water
- 1 teaspoon cheese salt (coarse, non-iodized flake salt similar to pickling salt, do not use iodized salt)
Steps
- Slowly heat the milk in a stainless steel pot to 55 degrees. While stirring, add the citric acid solution to the milk and mix thoroughly
- Heat the milk to 90 degrees over medium-low heat. The milk will begin to curdle. Gently stir in the diluted rennet with an up-and-down motion for 30 seconds. Then let the milk sit still while heating it to between 100 and 105 degrees. In about 5 to 8 minutes, the curds should be pulling away from the sides of the pot. Turn off the heat.
- The curds will look like thick yogurt and have a bit of shine to them, and the whey will be clear. If the whey is still milky white, wait a few more minutes before turning off the heat. Scoop out the curds with a slotted spoon and put into a 2-quart microwavable bowl. Press the curds gently with your hands, pouring off as much whey as possible.
- Microwave the curds on high for 1 minute. (Without a Microwave follows below.).
- Drain off all excess whey. Gently fold the cheese over and over (as in kneading bread) with your hand or a spoon. This distributes the heat evenly throughout the cheese, which will not stretch until it is too hot to touch (145 degrees inside the curd). You may want to don rubber gloves at this point, as the cheese will be extremely hot to the touch.
- Microwave two more times for 35 seconds each; add salt to taste after the second time. After each heating, knead again to distribute the heat.
- Knead quickly until it is smooth and elastic. When the cheese stretches like taffy, it’s done. If the curds break instead of stretch, they are too cool and need to be reheated.
- When the cheese is smooth and shiny, roll it into small balls and eat while warm. Or place them in a bowl of ice water for half an hour to bring the inside temperature down rapidly; this will produce a consistent smooth texture throughout the cheese. Although best eaten fresh, it can be stored in the refrigerator at this point.
Notes
- How to Make Quick Mozzarella Cheese Without a Microwave*.
- Follow the recipe for 30-minute Mozzarella until Step 5.
- When you get to Step 5, reserve the whey. Then put on heavy rubber gloves.
- Heat the reserved whey to at least 175 degrees Fahrenheit.
- Add 1/4 cup of cheese salt to the whey.
- Shape the curd into one or more balls, put them in a ladle or strainer, and dip them into the hot whey for several seconds.
- Knead the curd with spoons between each dip and repeat this process several times until the curd is smooth and pliable. When it stretches like taffy, it's done.
- Roll the cheese into small balls, and serve warm. Or place them in a bowl of ice water for half an hour to bring the inside temperature down rapidly. This will produce a consistent, smooth texture throughout.
↑ Back to top
This One-Pan Dinner Is 'So Tasty!'
Adapted from https://mail.google.com/mail/u/0/#inbox/WhctKLbvWZQnBKfsTwndNdbfXTzDnNjtLVlfgSPdDCsNHZQDSPwwWkLfllsWWRBMBKfMHdv
↑ Back to top
Three Sisters Soup
Servings: 6
Ingredients
- 6 cups fat-free, low-sodium chicken broth or vegetable broth
- 1 15.25-ounce can no-salt-added whole-kernel corn, rinsed and drained
- 1 15.25-ounce can no-salt-added kidney beans, rinsed and drained
- 1 small onion, chopped
- 1 rib of celery, chopped
- 1 15-ounce can solid-pack pumpkin (not pie filling)
- 5 fresh medium sage leaves
- 1/2 teaspoon dried sage
- 1/2 teaspoon curry powder
OR:
Steps
- Pour the broth into a large stockpot. Bring to a boil over medium-high heat.
- Stir in the corn, beans, onion, and celery. Boil, still over medium-high heat, for 10 minutes.
- Stir in the pumpkin, sage, and curry. Reduce the heat and simmer on medium-low heat for 20 minutes.
↑ Back to top
Tlayudas (Oaxacan Quesadillas)
Adapted from https://www.177milkstreet.com/recipes/tlayudas-oaxacan-quesadillas-mexico-street-food-chorizo

Tags: Mexican
Tortillas
Ingredients
- 3 TABLESPOONS GRAPESEED OR OTHER NEUTRAL OIL
- 8 OUNCES FRESH MEXICAN CHORIZO SAUSAGE (SEE NOTE), CASING REMOVED, CRUMBLED
- 4: LARGE JALAPEÑO CHILIES, STEMMED, SEEDED AND THINLY SLICED
- 1: BUNCH SCALLIONS, CUT INTO 1-INCH PIECES
- 4: 8-INCH FLOUR TORTILLAS
- 1: CUP BLACK BEAN PUREE
- 4: OUNCES WHOLE-MILK MOZZARELLA CHEESE, SHREDDED (1 CUP)
- SHREDDED LETTUCE, TO SERVE
- PICKELED RED ONIONS, TO SERVE
- SLICED TOMATO, TO SERVE
- GREEN CHILI AND TOMATILLO HOT SAUCE, TO SERVE
Steps
- Heat the oven to 450°F with a rack in the middle position. In a 12-inch cast-iron or other heavy skillet over medium-high, heat 1 tablespoon of oil until barely smoking. Add the chorizo and cook, stirring occasionally and breaking the meat into small bits, until well browned, about 5 minutes. Using a slotted spoon, transfer the chorizo to a paper towel–lined plate; set aside. Add the jalapeños and scallions to the pan, then cook, stirring occasionally, until the vegetables are lightly charred, 3 to 5 minutes. Transfer to the plate with the chorizo; set aside.
- Pour the remaining 2 tablespoons oil onto a rimmed baking sheet and brush to coat the entire surface. Place 2 tortillas on the baking sheet to coat the bottoms with oil, then flip them and coat the second sides. Spread ¼ cup of the bean mixture evenly on half of each tortilla, all the way to the edges. Top the beans on each with ¼ of the cheese, then fold the unfilled half over to cover and press gently to seal. Transfer to a plate. Repeat with the remaining tortillas, beans and cheese.
- Place the filled and folded tortillas in a single layer on the baking sheet. Bake until the cheese has melted and the bottoms of the tortillas are golden brown, about 10 minutes. Using a metal spatula, transfer the tlayudas to a wire rack and cool for 5 minutes. Carefully open each and fill as desired with the chorizo-jalapeño-scallion mixture, lettuce, pickled onions, tomato and hot sauce. Re-fold, then cut into wedges. Serve warm.
Notes
- Tip: Don't use Spanish chorizo, which is dry-cured and firm, like salami. Mexican chorizo, which is soft and fresh is the type to use here.
↑ Back to top
Todd's Famous Blueberry Pancakes

Tags: Pancakes
Ingredients
- 1 1/4 cups all-purpose flour
- 1/2 teaspoon salt
- 1 tablespoon baking powder
- 1 1/4 teaspoons white sugar
- 1 egg
- 1 cup milk
- 1/2 tablespoon butter, melted
- 1/2 cup frozen blueberries, thawed
Steps
- In a large bowl, sift together flour, salt, baking powder and sugar. In a small bowl, beat together egg and milk. Stir milk and egg into flour mixture. Mix in the butter and fold in the blueberries. Set aside for 1 hour.
- Heat a lightly oiled griddle or frying pan over medium high heat. Pour or scoop the batter onto the griddle, using approximately 1/4 cup for each pancake. Brown on both sides and serve hot.
Notes
- FAVORITE
↑ Back to top
Toffee Bits
Adapted from https://handletheheat.com/homemade-toffee-bits/

Rated 4/5
Servings: 1 1/2 cups
Ingredients
- 1 stick (113 grams) unsalted American butter*
- 1 cup (200 grams) light brown sugar
- 1 teaspoon fine salt
Steps
- Line a small rimmed baking sheet with parchment paper or a silicone baking mat.
- In a heavy-bottomed small saucepan, begin melting the butter over medium heat. Add the sugar and salt to the partially melted butter and whisk vigorously for one minute until combined. Cook, stirring constantly, until the mixture looks like melted peanut butter and a candy thermometer reaches 295 to 305°F, about 10 minutes.
- If the mixture separates at all, remove from heat and whisk vigorously until recombined. Return to heat and continue cooking.
- Immediately and carefully pour the hot toffee onto the prepared baking pan, allowing it to spread into an even layer. Let cool and harden for about 20 minutes.
- Place the sheet of toffee on a cutting board or in a zip top bag. Use a mallet, rolling pin, or heavy object to crack it into small pieces. You can also cut into bits with a sharp serrated knife. Store in an airtight container for up to 1 week.
Notes
- If using European-style butter (82% butterfat+) in this recipe, add 1-2 tablespoons of water to the melting butter.
↑ Back to top
Toffee Cheesecake Bars

Tags: Cakes and Pastries
Ingredients
- 1 cup all-purpose flour
- 3/4 cup confectioners' sugar
- 1/3 cup baking cocoa
- 1/8 teaspoon baking soda
- 1/2 cup cold butter
- 1 package (8 ounces) reduced-fat cream cheese
- 1 can (14 ounces) sweetened condensed milk
- 2 eggs, lightly beaten
- 1 teaspoon vanilla extract
- 1 to 1/4 cups milk chocolate English toffee bits, divided
Steps
- Preheat oven to 350°. In a small bowl, combine flour, confectioners' sugar, cocoa and baking soda. Cut in butter until mixture resembles coarse crumbs. Press onto the bottom of an ungreased 13x9-in. baking dish. Bake 12-15 minutes or until set.
- In a large bowl, beat cream cheese until fluffy. Add milk, eggs and vanilla; beat until smooth. Stir in 3/4 cup toffee bits. Pour over crust. Bake 18-22 minutes longer or until center is almost set.
- Cool on a wire rack 15 minutes. Sprinkle with remaining toffee bits; cool completely. Cover and refrigerate 8 hours or overnight. Yield: 2-1/2 dozen.
Notes
- FAVORITE
↑ Back to top
Tomatillo-Avocado Salsa
Tags: Condiments
Mexican Salsas
Ingredients
- MEDIUM TOMATILLOS (ABOUT 6 OUNCES), HUSKED, CORED AND HALVED
- CUP LIGHTLY PACKED FRESH CILANTRO
- SCALLIONS, ROUGHLY CHOPPED
- SERRANO CHILIES, STEMMED, SEEDED AND ROUGHLY CHOPPED
- MEDIUM GARLIC CLOVE, SMASHED AND PEELED
- TABLESPOON GRAPESEED OR OTHER NEUTRAL OIL
- KOSHER SALT
- RIPE AVOCADO, HALVED, PITTED, PEELED AND ROUGHLY CHOPPED
- TEASPOONS LIME JUICE
3:
3:
2:
1:
1:
1:
2:
Steps
- 01 In a food processor, combine the tomatillos, cilantro, scallions, chilies, garlic, oil and 1¼ teaspoons salt. Process until finely chopped, about 1 minute. Add the avocado and lime juice, then process until smooth and creamy, about 1 minute, scraping the bowl as needed. Taste and season with salt. SEE IT
↑ Back to top
Tomato Basil Salad
Adapted from https://www.jocooks.com/recipes/tomato-basil-salad/
Tags: Salad
Ingredients
- 3 cups cherry tomatoes (halved)
- ⅓ cup shallots (sliced thin)
- 1 cup bocconcini
- 20 basil leaves (chopped chiffonade*)
- ¼ cup olive oil (extra virgin)
- 3 tablespoon balsamic vinegar
- ½ teaspoon salt (or to taste)
- ½ teaspoon pepper (or to taste)
- Before You Begin! If you make this, please leave a review and rating letting us know how you liked this recipe! This helps our business thrive & continue providing free recipes.
Steps
- Add the tomatoes, shallots, bocconcini, and half the basil too a large serving bowl. Whisk the olive oil, balsamic vinegar, salt, and pepper in a separate small bowl.
- Pour the dressing into into the serving bowl. Toss everything well to coat in the dressing. Sprinkle the remaining basil over the salad and serve.
Notes
- To chop your basil chiffonade, lay the leaves over top of each other, starting with the largest leaves on the bottom. You may have to do this in batches. Starting from the side of the leaves, roll them tightly. Chop the leaves, from the tip, creating 1/4″ slices. Gently fluff the slices with your fingers to separate them.
- Unlike other types of salad, this will actually keep well for 2-3 days stored in an airtight container in the fridge. In fact, those ingredients marinating in the dressing may taste even better! The only issue to be wary of is moisture being drawn from the tomatoes and collecting at the bottom of the container.
↑ Back to top
Tomato Jam
Adapted from http://www.foodinjars.com/2010/09/tomato-jam/
Tags: Jams and Jellies
Ingredients
- 5 pounds tomatoes, finely chopped
- 3 1/2 cups sugar
- 8 tablespoons lime juice
- 2 teaspoons freshly grated ginger
- 1 teaspoon cinnamon
- 1/2 teaspoon ground cloves
- 1 tablespoon salt
- 1 tablespoon red chili flakes
Steps
- Combine all ingredients in a large, non-reactive pot. Bring to a boil and then reduce temperature to a simmer. Stirring regularly, simmer the jam until it reduces to a sticky, jammy mess. This will take between 1 and 1 1/2 hours, depending on how high you keep your heat.
- When the jam has cooked down sufficiently, remove from heat and fill jars, leaving 1/4 inch of head space. Wipe rims, apply lids and twist on rings. Process in a boiling water canner for 20 minutes.
- When time is up, remove jars from water bath and allow them to cool. When jars are cool enough to handle, test seals. Store jars in a cool, dark place for up to one year.
Notes
- FAVORITE
↑ Back to top
Tomato Pesto Tart with Cauliflower Crust

Tags: Vegetarian
Ingredients
- 12 oz. clean cauliflower florets
- 1 cup shredded mozzarella cheese
- 1 egg, beaten
- 1 tsp oregano
- 3/4 tsp minced fresh garlic
- 1/4 tsp turmeric
- 1/4 tsp salt
- 1/8 tsp cayenne pepper
- 1/4 cup basil pesto - for a homemade recipe, click here
- 1/2 cup crumbled goat cheese
- 2 ripe tomatoes
- A few sprigs of fresh basil
- 1/4 tsp crushed red pepper flakes, or more to taste (optional)
Steps
- Preheat oven to 425 degrees F and place a rack in the center of the oven. Pulse your cauliflower florets in a food processor until they resemble fine crumbles or couscous (don't over-process to a paste). Alternatively you can hand grate the cauliflower using the fine holes on your grater.
- Place the processed cauliflower in a microwave-safe bowl and microwave it on high for 7 minutes. No need to add any liquid, the cauliflower will steam itself. While cauliflower is cooking, line a baking sheet with parchment paper or a silpat.
- Take the cauliflower out and stir it repeatedly to release steam and cool it down, until it is lukewarm (not hot) to the touch.
- the bowl with the cauliflower, add the mozzarella, egg, oregano, minced fresh garlic, turmeric, salt and cayenne pepper. Stir the mixture with a fork until well blended.
- Place the cauliflower mixture in a pile in the center of the lined baking sheet. Gently press out the mixture to form a 9-10 inch circle of even thickness, making sure to keep the center as thin as the edges. This is the beginning of your cauliflower "crust."
- Use your fingers to gently press against the outer edge of the crust to form a small edge around the circle.
- Lay both hands flat in the center of the circle and GENTLY press to flatten out the middle, ensuring an even thickness throughout the crust.
- Place the crust into the hot oven and let it bake for about 20 minutes, turning the baking sheet around once halfway through baking, till the crust is golden brown.
- While crust is cooking, slice the tomatoes thin and shred or chiffonade the basil.
- Remove the crust from the oven and let it cool for 5-10 minutes. Use a spatula to very gently slide the cooked crust off of the parchment paper directly onto a greased baking sheet. Preheat your oven's broiler. Spread out the pesto onto the center surface of the crust to the outer edges. Sprinkle half of the goat cheese evenly across the top of the pesto. Lay the sliced tomatoes on, then sprinkle the rest of the goat cheese across the top. Sprinkle the surface evenly with crushed red pepper flakes.
- Place the tomato tart into the oven under the broiler. Broil for 3-4 minutes until hot and bubbly, keeping an eye on the crust to make sure it doesn't burn (it will get dark brown but shouldn't blacken).
- Remove the tart from the oven and sprinkle with fresh basil. Serve sliced warm or at room temperature. Keep in mind that the bottom "crust" of this tart will be slightly soft in the center. Slices are best eaten with a fork and knife.
Notes
- FAVORITE
↑ Back to top
Tomato-Olive Focaccia

This recipe recreates the light, open-crumbed
focaccia we ate in Bari, Italy. To achieve that texture, the dough must
be wet—so wet, in fact, it verges on a thick, yet pourable batter.
Resist the temptation to add more flour than is called for. Shaping
such a sticky, high-hydration dough by hand is impossible. Instead, the
dough is gently poured and scraped into the oiled baking pan; gravity
settles it into an even layer. If you have trouble finding
Castelvetrano olives, substitute any large, meaty green olive. To slice
the baked focaccia for serving, use a serrated knife and a sawing
motion to cut through the crust and crumb without compressing it. If
desired, serve with extra-virgin olive oil for dipping. For
convenience, the dough can be prepared and transferred to the baking
pan a day in advance. After it has settled in the pan, cover tightly
with plastic wrap and refrigerate. The next day, prepare the toppings.
Uncover, top the dough with the olives and tomatoes and let stand at r
Servings: 12
Ingredients
- 500 grams (3⅔ cups) bread flour
- 5 teaspoons instant yeast
- 1 teaspoon white sugar
- 2 cups water, cool room temperature
- 8 tablespoons extra-virgin olive oil, divided
- 3½ teaspoons kosher salt, divided
- 1 cup cherry tomatoes, halved
- 1 cup Castelvetrano olives, pitted and halved (see note)
- 1 teaspoon dried oregano
- 3/4 teaspoon ground black pepper
Steps
- In a stand mixer with the dough hook, mix the flour, yeast and sugar on medium until combined, about 30 seconds. With the mixer on low, drizzle in the water, then increase to medium and mix until the ingredients form a very wet, smooth dough, about 5 minutes. Turn off the mixer, cover the bowl and let stand for 10 minutes. Meanwhile, coat the bottom and sides of a large bowl with 2 tablespoons of oil; set aside.
- Sprinkle 2 teaspoons of salt over the dough, then knead on medium until smooth and elastic, about 5 minutes; the dough will be wet enough to cling to the sides of the bowl. Using a silicone spatula, scrape the dough into the oiled bowl. Dip your fingers into the oil pooled at the sides of the bowl and dab the surface of the dough until completely coated with oil. Cover tightly with plastic wrap and let stand at room temperature for 5½ to 6 hours; during this time, the dough will double in volume, deflate, then rise again (but will not double in volume again).
- After the dough has risen for about 4½ hours, heat the oven to 500°F with a baking steel or stone on the middle rack. Mist a 9-by-13- inch metal baking pan with cooking spray, then pour 2 tablespoons of the remaining oil in the center of the pan; set aside.
- When the dough is ready, gently pour it into the prepared pan, scraping the sides of the bowl with a silicone spatula to loosen; try to retain as much air in the dough as possible. The dough will eventually settle into an even layer in the pan; do not spread the dough with a spatula, as this will cause it to deflate. Set aside while you prepare the tomatoes.
- In a medium bowl, use a potato masher to lightly crush the tomatoes. Scatter the olives evenly over the dough, then do the same with the tomatoes, leaving the juice and seeds in the bowl. If the dough has not fully filled the corners of the pan, use your hands to lightly press the toppings to push the dough into the corners. Let stand uncovered at room temperature for 20 minutes.
- Drizzle the dough with the remaining 4 tablespoons oil, making sure each tomato is coated. Sprinkle evenly with the oregano, remaining 1½ teaspoons salt and the pepper. Place the pan on the baking steel or stone and bake until golden brown and the sides of the focaccia have pulled away from the pan, 20 to 22 minutes. Cool in the pan on a wire rack for 5 minutes. Using a wide metal spatula, lift the focaccia from the pan and slide it onto the rack. Cool for at least 30 minutes before serving.
Notes
- Don't disturb the dough during its rise. And when transferring the dough to the baking pan, handle it gently. The goal is to retain as much gas in the dough as possible so the focaccia bakes up with an airy texture. Don't use a baking dish made of glass or ceramic; neither will produce a crisp, browned exterior, and glass is not safe to use in a 500°F oven.
↑ Back to top
Tonkatsu or Chicken Katsu (Japanese Breaded Pork or
Chicken Cutlets)
Adapted from https://www.seriouseats.com/recipes/2017/04/tonkatsu-chicken-pork-katsu-japanese-breaded-cutlets-recipe.html
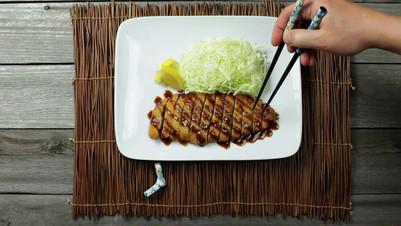
Tags: Chicken
Japanese Pork
Servings: 2
Ingredients
- 2 boneless, skinless chicken breast halves, about 8 ounces (225g) each; or 4 boneless, skinless chicken thighs, 4 to 5 ounces (110 to 140g) each; or 4 boneless pork sirloin cutlets, 4 to 5 ounces (110 to 140g) each
- Kosher salt and freshly ground black pepper
- 1 cup all-purpose flour (about 5 ounces; 140g)
- 3 large eggs, thoroughly beaten
- 1 1/2 cups Japanese-style panko bread crumbs (about 5 ounces; 140g)
- Vegetable, canola, or peanut oil, for frying
- Finely shredded green cabbage
- Lemon wedges
- Steamed white rice
- Japanese-style pickles (sunomono), optional
- Homemade or store-bought tonkatsu sauce
To Serve:
Steps
- If Using Chicken Breasts: Cut each breast half into 2 cutlets. Place them, one at a time, in a heavy-duty zipper-lock bag and pound gently to 1/4-inch thickness, using a meat pounder or the bottom of a heavy 8-inch skillet. (See this guide for step-by-step directions.) Season generously with salt and pepper. For best results, let them rest in the refrigerator for at least 4 hours and up to overnight after seasoning. Proceed to step 3.
- If Using Thighs or Pork Cutlets: Place thighs or cutlets, one at a time, in a heavy-duty zipper-lock bag and pound gently to 1/4-inch thickness, using a meat pounder or the bottom of a heavy 8-inch skillet. Season generously with salt and pepper. Proceed immediately to step 3.
- Fill a large cast iron or stainless steel skillet with 1/3 inch oil. (To speed things up even more, use 2 skillets simultaneously.) Heat over high heat until shimmering and just shy of smoking, about 350°F (175°C) on an instant-read thermometer.
Fill 3 wide, shallow bowls or high-rimmed plates with flour, beaten
eggs, and panko, respectively. Working with one thigh or cutlet at a
time, dredge in flour with your first hand, shaking off excess.
Transfer to egg dish, then turn thigh or cutlet with your second hand
to coat both sides. Lift and allow excess egg to drain off, then
transfer to bread crumb mixture. With your first hand, scoop bread
crumbs on top of thigh or cutlet, then gently press, turning to ensure
a good layer of crumbs on both sides. Transfer thigh or cutlet to a
clean plate and repeat with remaining meat. If this is done properly,
your first hand should touch only dry ingredients, while your second
hand should touch only wet, making the process less messy.
Using tongs or your fingers, gently lower cutlets into hot fat, laying
them down away from you to prevent hot fat from splashing toward you.
(Work in batches if necessary.) Fry, gently swirling pan and rotating
cutlets for even browning, and adjusting heat as necessary for a
steady, vigorous bubble (around 300 to 325°F; 150 to 160°C), until
bottom side is set, about 1 1/2 minutes. Flip cutlets and fry until
other side is set, about 1 1/2 minutes longer. Continue cooking,
swirling frequently and flipping occasionally, until well browned on
both sides, about 3 minutes longer. Transfer to paper towels to drain
and season with salt right away. Repeat with remaining cutlets.
Slice katsu into thin strips and serve immediately with shredded
cabbage, lemon wedges, white rice, Japanese pickles (if desired), and
tonkatsu sauce.
↑ Back to top
Tonkatsu Sauce (Japanese-Style Barbecue Sauce)
Adapted from https://www.seriouseats.com/recipes/2012/09/tonkatsu-sauce-japanese-barbecue-recipe.html
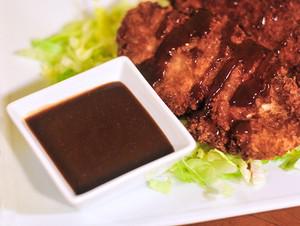
Tags: Condiments
Japanese
Servings: makes about 1/2 cup
Ingredients
- 1/3 cup ketchup
- 2 tablespoons Worcestershire sauce
- 1 tablespoon soy sauce
- 1 tablespoon mirin
- 1 tablespoon sugar
- 1 teaspoon Dijon mustard
- 1/4 teaspoon garlic powder
Steps
- In a small bowl, stir together ketchup, Worcestershire, soy sauce, mirin, sugar, mustard, and garlic powder. Use immediately or store in an airtight container in the refrigerator for up to a month.
↑ Back to top
Too Sauced to Pork Vinegar Sauce
Adapted from http://buffalo.com/2014/06/03/uncategorized/make-vinegar-bbq-sauce-like-championship-bbq-team/
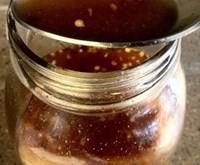
Tags: Condiments
Mop
Ingredients
- 1/2 cups cider vinegar
- 1 1/2 cups distilled vinegar
- 3 tablespoons ketchup
- 2 tablespoons smoked paprika
- 2 tablespoons light brown sugar
- 1 teaspoon mustard powder
- 1 tablespoon white sugar
- 4 teaspoons flake salt
- 1/2 tablespoon Cholula chipotle hot sauce
- 1/2 teaspoon Sriracha chile sauce
- 1 teaspoon cayenne, or more to taste
- 1 teaspoon finely ground black pepper, or more to taste
- 1 teaspoon crushed red pepper, or more to taste
Steps
- Pour vinegars and sugars into a non-reactive bowl, such as stainless steel. Whisk vigorously for 30 seconds.
- Whisk in the paprika, mustard powder, flake salt, cayenne, and black pepper for another minute. Add the ketchup, Cholula, and Sriracha and whisk together.
- Pour it all into a jar, scrape the bits in and add crushed red pepper. Shake vigorously for 15 seconds and put it in the fridge.
- Let it sit for one to three weeks. Shake it daily for 15 seconds the first week. Shake before use. Serve with good barbecue.
Notes
- FAVORITE
↑ Back to top
Top Sirloin Hot Pot

Tags: Asian
One Pot
Ingredients
- 2 tablespoons vegetable oil
- 4 ounces sliced shiitake mushroom caps
- 5 cloves garlic, thinly sliced
- One 1-inch piece fresh ginger, peeled and finely chopped
- 4 cups beef broth
- 3 tablespoons soy sauce
- Kosher salt and finely ground black pepper
- 12 ounces top sirloin steak, very thinly sliced by a butcher
- 2 cups cooked short grain rice
- 1 Persian cucumber, thinly sliced
- 1 bunch scallions, thinly sliced
- 1 small hot red chile, thinly sliced
- Kimchi, as needed
- Lime wedges, for serving
Steps
- Heat the oil in a medium, heavy saucepan over medium-high heat until hot. Stir in the mushrooms and cook until golden, about 6 minutes. Stir in the garlic and ginger and cook, stirring until golden, about 5 minutes. Stir in the beef broth, 2 cups water, the soy sauce and 1/2 teaspoon each salt and pepper and bring to a boil.
- Cut the steak into thin strips and divide among 4 serving bowls. Place 1/2 cup rice on top. Season the broth with salt and pepper, and then ladle into the bowls. Divide the cucumbers, scallions, chile and kimchi among the bowls. Serve with lime wedges.
Notes
- FAVORITE
↑ Back to top
Tornado Cake
Tags: Cakes and Pastries
Ingredients
- Cake
- 1 1/2 cups sugar
- 2 eggs
- 2 cups Gold Medal UNBLEACHED all-purpose flour (bleached flour toughens baked goods)
- 1 cup chopped nuts
- 2 cups fruit cocktail with syrup (16-oz. can)
- 2 tsp. baking soda
- 1/4 cup brown sugar
- 1 stick butter (I used Land O’Lakes, because I already had some on hand, but use what you like–don’t need anything too fancy.)
- 1 cup coconut
- 3/4 cup brown sugar
- 1/2 cup evaporated milk or half-and-half
icing:
Steps
- Measure sugar into a large mixing bowl. Add eggs.
- Add a can of UNDRAINED fruit cocktail. You need all the juice and syrup.
- Add baking soda and UNBLEACHED all-purpose flour. Bleached flour toughens baked goods.
- Stir ingredients with a wooden spoon to combine.
- Pour into a 9×13″ glass baking dish that’s been sprayed with cooking spray.
- Measure brown sugar into a small mixing bowl. Add chopped nuts.
- Stir to combine.
- Sprinkle the brown sugar-walnut streusel topping over top of the cake batter.
- Bake at 325 about 40 minutes. Remove from oven.
- While cake is baking make Boiled Coconut Icing: Melt butter in a medium-sized saucepan over a medium heat. Add half-and-half cream, heavy whipping cream, or evaporated milk. You need the thicker consistency–not regular milk.
- Add coconut.
- Add brown sugar
- Stir to combine. Bring ingredients to a boil and boil for 2 minutes. Here the icing is done. Remove from heat and pour the hot mixture over the cake while the cake itself is still warm.
- Allow the cake to cool completely before cutting.
- Broil?
Notes
- FAVORITE
↑ Back to top
Torta Ahogada

Tags: Mexican
Sandwiches
Ingredients
- Ingredients for the Carnitas: [Print this Recipe]
- 2 1/2 lbs of pork shoulder, cut into large cubes
- 1 orange, juiced
- 2 limes, juiced
- 5 cloves of garlic
- 1 tsp salt
- 1 tsp cracked black pepper
- 1 tsp cumin powder
- water
- 20 chile de arbol, stems and seeds removed
- 1/2 cup of cider vinegar
- 3 Roma tomatoes, quartered, pulp removed
- 1 tsp dried oregano
- 1/2 tsp cumin powder
- 2 cloves of garlic
- 1 white onion, roughly chopped
- small pinch of ground cloves
- 1 tsp salt
- 1/4 cup of fresh cilantro, leaves and stems
- 1/2 cup of water
- Hard rolls, like an Italian hard roll or a French Batard (You want a hard exterior and a soft interior)
- Pickled red onions (for a quicker pickle, you can add sliced onions to orange juice, with a couple of bay leaves for about two hours)
- Avocado, sliced (optional)
Ingredients
for the Sauce:
Steps
- To cook the carnitas, add the marinated pork and the marinade to a heavy pot. Pour in water to just cover the top of the pork. Cover, turn the heat on medium, then uncover in 2 hours. Turn up the heat and reduce all of the liquid, stirring along the way. Continue to cook the pork, getting the exterior a bit browned and crisp. Once the liquid is dissolved, turn off the heat, and poke a fork into it. The pork should fall apart. Resist to try the pork, as you might eat a lot of it!
- To make the sandwich, slice your bread lengthwise, making a nice pocket. Do not slice all of the way through.
- Stuff the carnitas into the pocket, and pour on the sauce. Top with pickled onions and dig in.
Notes
- FAVORITE
↑ Back to top
Torta Ahogada (Mexican "Drowned" Sandwich)
Adapted from http://www.saveur.com/article/Recipes/Torta-Ahogada
Tags: Mexican
Sandwiches
Ingredients
- 3/4 oz. dried chiles de arbol (about 30), stemmed and seeded
- 3/4 cup cider vinegar
- 2 tbsp. pumpkin seeds, toasted
- 1 1/2 tbsp. sesame seeds, toasted
- 1 tsp. dried oregano
- 1 tsp. kosher salt
- 1/4 tsp. ground cumin
- 1/8 tsp. ground allspice
- 1/8 tsp. ground cloves
- 2 cloves garlic
- 1 crusty bolillo or Italian roll
- 1 1/2 cups leftover roasted pork shoulder, shredded
- 1/4 small yellow onion, thinly sliced
- 1 radish, thinly sliced
Steps
- Combine chiles, vinegar, pumpkin and sesame seeds, oregano, salt, cumin, allspice, cloves, and garlic in a blender, and puree until very smooth. Pour through a medium strainer into a bowl, discard solids, and stir in 3/4 cup water.
- Heat oven to 350°. Split roll and fill bottom half with pork. Place on baking sheet and bake until warmed through and bread is toasted, about 6 minutes. Add onion, radish, and top bun; pour chile de arbol sauce over sandwich, and let sit, so that the sauce soaks in.
Notes
- FAVORITE
↑ Back to top
Tortang Talong (Filipino Eggplant Omelette)
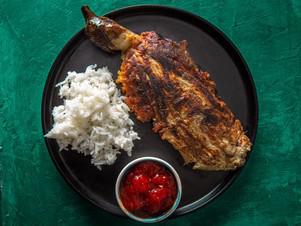
Servings: 4
Ingredients
- 4 medium Japanese eggplants (about 1 1/2 pounds; 680 g total), see notes
- 2 tablespoons ( 30 ml) plus 3/4 cup ( 175 ml) vegetable oil, divided, plus extra as needed
- 1 small yellow onion ( 4 ounces; 113 g), finely chopped
- 1 medium garlic clove ( 5 g), minced
- Kosher salt and freshly ground black pepper
- 8 ounces ( 227 g) ground pork
- 1 tablespoon ( 15 ml) oyster sauce
- 1 1/2 teaspoons ( 8 ml) fish sauce
- 1 1/2 teaspoons ( 8 ml) soy sauce
- 5 large eggs, divided
- Cooked white rice, for serving
- Ketchup or banana ketchup, for serving
Steps
- Adjust oven rack to middle position and preheat oven to 350°F (180°C). With the tip of a sharp knife, poke four 1/2-inch slits in each eggplant. Place eggplant on a rimmed baking sheet lined with parchment paper or aluminum foil and roast until fully tender, offering little to no resistance when pierced with a knife, about 30 minutes. Set aside until cool enough to handle, about 15 minutes.
- Peel eggplant as best as you can, leaving stems attached; discard skin. With the back of a fork, press down firmly to flatten each eggplant along its length until it resembles a large teardrop in shape; set aside.
- In a 12-inch stainless steel, cast iron, or nonstick skillet, heat 2 tablespoons (30ml) vegetable oil over medium-high heat. Add onion and garlic, season lightly with salt, and cook, stirring frequently, until soft and translucent, about 5 minutes. Add ground pork and cook, stirring occasionally and breaking up any large pieces, until cooked through and lightly browned, about 4 minutes. Add oyster sauce, fish sauce, and soy sauce and continue to cook, stirring frequently, until liquid is absorbed, about 1 minute. Remove skillet from heat, and set aside to let cool slightly.
- In a medium bowl, beat 3 eggs until homogenous and frothy. Add ground pork mixture and stir to combine; set aside. In a wide, shallow dish, beat remaining 2 eggs until homogenous and frothy, season with salt and pepper, and set aside. Clean skillet and return to stovetop.
- Adjust oven temperature to 200°F (95°C). Set a wire rack in a rimmed baking sheet and line with a double layer of paper towels. In the cleaned skillet, heat 3/4 cup (175ml) vegetable oil over medium-high heat until shimmering. Working with one eggplant at a time, hold eggplant by stem, and evenly coat on all sides with beaten egg mixture. Allow excess egg to drip off, and carefully add to skillet. Repeat coating process with second eggplant and add to skillet. Top each eggplant with a heaping 1/4 cup (60g) of ground pork mixture, evenly pressing mixture down along the length of each eggplant to ensure it adheres to the surface. Cook, shaking pan occasionally, until bottom side is golden brown and crisp, about 3 minutes. Using a slotted spatula, carefully flip eggplant and continue to cook until golden brown on second side, about 1 minute 30 seconds.
- Transfer eggplant to prepared baking sheet, then transfer to oven to keep warm. Repeat coating and cooking process with remaining eggplant, adding more oil to skillet as needed.
- Transfer to individual plates and serve immediately with white rice and ketchup.
- Special Equipment
- 12-inch stainless steel skillet, cast iron skillet, or nonstick skillet
Notes
- If you can't find Japanese eggplant, you can substitute Chinese eggplant. The cooking time may take up to 10 to 15 minutes longer, just be sure to roast the eggplant until it's fully tender.
- To enjoy a vegetarian version, you can omit the ground pork mixture, and skip step 3. In Step 4, whisk two eggs with salt and pepper in a wide, shallow dish, then proceed as directed in Step 5.
↑ Back to top
Tortillas the Café Sucre Flour

Servings: 16
Ingredients
- 3 cups all-purpose flour
- 1 teaspoon kosher salt I use Morton's
- 1 teaspoon baking powder
- ⅓ cup extra virgin olive oil, vegetable oil or other fairly neutral flavored oil
- 1 cup warm water
Steps
- Combine flour, salt and baking powder in a medium-size bowl. Using a sturdy silicone spatuala or a sturdy wooden spoon, mix dry ingredients until well combined.
- Make a well in the center of the dry ingredients and add the oil and water. Stir well from the bottom up, until all dry ingredients are incorporated and the dough begins to come together and form a shaggy ball.
- Turn dough out onto a lightly floured work surface and knead for 1-2 minutes until the dough is nice and smooth. Proceed with step number 3 below for the remainder of the recipe.
- Combine flour, salt and baking powder in the bowl of a stand mixer. Using the dough hook, mix dry ingredients until well combined.
- Add oil and water with mixer running at a medium speed. After about 1 minute, or when mixture comes together and begins to form a ball, decrease mixing speed to low. Continue to mix for 1 minute or until dough is smooth.
- Transfer dough to a lightly floured work surface. Divide into 16 equal portions. Turn each piece to coat with flour. Form each piece into a ball and flatten with the palm of your hand. Cover flattened balls of dough with a clean kitchen towel and allow to rest for at least 15 minutes (or as much as 2 hours) before proceeding.
- After the rest period, heat a large pan over medium heat. Roll each dough piece into a rough circle, about 6-7 inches in diameter, keep work surface and rolling pin lightly floured. Don’t stack uncooked tortillas on top of each other or they will stick together. (I like to separate my tortillas with parchement paper.)
- When the pan is hot, place one dough circle into the pan and allow to cook 45 seconds to 1 minute or until the bottom surface has a few pale brown spots and the uncooked surface is bubbly. If browning too fast, reduce the heat a bit. If it’s taking longer than a minute to see a few pale golden brown spots on the underside of tortillas, increase the heat a bit. Flip to other side and cook for 15-20 seconds. The tortillas should be nice and soft but have a few small brown spots on the surface.
- Remove from pan with tongs and stack in a covered container or zippered bag to keep the tortillas soft.
- Serve warm or allow to cool for later use. When ready to use, place a slightly damp paper towel in the bottom of a microwave-safe container (with a cover) that will hold the stacked tortillas. Microwave uncovered for 15-30 seconds (start with 15) or until warm, then keep covered to hold heat while serving.
- Store in an airtight container or zippered bag at room temperature for 24 hours or refrigerate for up to 1 week. To freeze, separate tortillas with parchment paper or waxed paper and place in a zippered bag before placing in the freezer.
To make by hand:
To make with a mixer:
Notes
- See Café Tips above in post for additional instruction and tips.
↑ Back to top
Traditional French Cassoulet
Servings: 6 to 8
Ingredients
- 1 pound ( 454 g) dried cannellini beans
- 3 tablespoons ( 27 g) Diamond Crystal kosher salt; for table salt, use half as much by volume or the same weight
- 5 cups ( 1.2 L) homemade or store-bought unsalted chicken stock, divided (see notes)
- 3 packets unflavored gelatin ( 3/4 ounce; 21 g), such as Knox (optional, see notes)
- 2 tablespoons ( 30 ml) duck fat (optional)
- 8 ounces ( 227 g) salt pork, cut into 3/4-inch cubes (about 1 1/4 cups)
- 8 ounces ( 227 g) boneless pork shoulder, cut into 1-inch cubes
- 4 skin-on, bone-in chicken thighs, 4 fresh duck legs, or 4 prepared duck confit legs
- Freshly ground black pepper
- 1 pound ( 454 g) garlic sausage (divided into 2-4 segments, if sausage is large)
- 1 large onion ( 12 ounces; 340 g), finely diced (about 1 1/2 cups)
- 1 medium carrot ( 4 ounces; 113 g), unpeeled and cut into 3-inch sections
- 2 ribs celery ( 6 1/2 ounces; 188 g), cut into 3-inch sections
- 1 whole head garlic ( 2 3/4 ounces; 80 g)
- 4 sprigs flat-leaf parsley
- 2 bay leaves
- 6 cloves
Steps
- In a large bowl, cover beans with 3 quarts (2.8L) water and add salt. Stir to combine, then let stand at room temperature overnight. Drain and rinse beans; set aside.
- Adjust oven rack to lower-middle position and preheat oven to 325°F (160°C). Place 4 cups (946ml) stock in a large liquid measuring cup and sprinkle gelatin, if using, over top. Set aside. In a large Dutch oven, heat duck fat (if using), salt pork, and pork shoulder and cook over high heat, stirring occasionally, until browned all over, about 9 minutes (if not using duck fat, cook pork with no additional fat). Using a slotted spoon, transfer to a large bowl, leaving rendered fat in Dutch oven, and set aside.
- Season chicken or duck thighs with pepper (do not add salt) and place skin side down in Dutch oven. Cook without moving until well-browned, 6 to 8 minutes. Transfer to a plate and let cool to room temperature.
- Add sausages to Dutch oven and cook, turning occasionally, until well-browned, about 2 minutes per side. Transfer to bowl with salt pork. Drain all but 2 tablespoons fat from pot.
- Add onion to Dutch oven and cook, stirring and scraping up browned bits from bottom of pot, until onion is translucent but not browned, about 4 minutes. Add drained beans, carrot, celery, garlic, parsley, bay leaves, cloves, and stock/gelatin mixture. Bring to a simmer over high heat. Reduce to low, cover Dutch oven, and cook until beans are slightly softened but retain a bite, about 20 minutes.
- Cover cooled chicken or duck and transfer to refrigerator. Using tongs, remove carrots, celery, parsley, bay leaves, and cloves from pot and discard. Add pork and sausages to pot and stir to incorporate. Beans should be almost completely submerged. Transfer to oven and cook, uncovered, adding remaining 1 cup (237ml) stock halfway through by pouring it carefully down side of pot as necessary to keep beans mostly covered, until a thin crust forms on top, about 1 hour 30 minutes.
- Break crust with a spoon and shake pot gently to redistribute. Nestle chicken or duck into the Dutch oven, skin side up. Return to oven and continue cooking, stopping to break and shake crust every 30 minutes, until crust is deep brown and thick, an additional 1 hour 30 minutes. Serve immediately.
- Special Equipment
Notes
- If you are using homemade chicken stock that already has lots of gelatin (i.e., it should thicken and gel when chilled), you can omit the unflavored gelatin here; if your stock is store-bought, or if it's homemade but watery even when chilled, the unflavored gelatin is an essential ingredient.
- Make sure not to use a salted, or even low-sodium, chicken broth, especially if opting for duck confit, lest the dish end up too salty.
↑ Back to top
Traditional Hungarian Sausage

Tags: Hungary
Pork Sausage
I made this. Is starred. Rated 5/5
Ingredients
- 4 1/2 lbs pork butt
- 1/2 lb back fat or pork belly
- 1 3/4 Tbsp kosher salt
- 1 tsp Cure #1 level
- 2 1/2 tsp black pepper
- 6 1/2 Tbsp sweet paprika
- 3 Tbsp hot paprika
- 7 cloves garlic pressed
- 3 tsp caraway seeds ground
- 1 tsp sugar
- 1 cup ice water
Steps
- Cut the meat, and the back fat, into 2" (5-6 cm) pieces, mix with salt and Cure #1. Place in a container, cover, and refrigerate for 24 hours.
- Grind the pork and the pork belly/back fat (partially frozen for 20 min in a freezer) through a medium-size plate - 1/4" (6mm). You can also chop the meat and the fat finely with a knife.
- Mix the ground meat with the seasonings, adding a cup of ice water. Mix well until the meat becomes sticky.
- Stuff into hog casings (28-32 mm), making 1-foot lengths and tying them into rings. Prick any visible air pockets with a needle.
- Hang the sausage to condition in a cold room at 33F - 38F (like an unheated garage in winter) or refrigerate overnight. Do not let the sausages freeze.
- Dry for about 60 minutes in the smoker at about 110F - 130F without smoke. The sausages should be completely dry before applying smoke.
- Smoke at around 130F for 2-4 hours or until the casings develop a nice brown color. Use oak, beech, cherry, hickory, or pecan wood.
- Next, poach at 161F - 165F for 25 - 35 minutes or until the internal temperature reaches 154F -158F.
- Cool the sausages down in an ice bath or shower them with cold water and dry them with paper towels. If you have access to a fairly cold room, again, like an unheated garage in winter, just hang them there to cool down.
- Optionally, hang the sausage in a cool room or a curing chamber for 5-7 days to dry at about 55F and 75% relative humidity. This will prolong the shelf life and intensify the flavor of the sausage.
- Store in a refrigerator.
Alternatively, bake in an oven with convection, with a hot water pan
below the sausages, at 175F for about 30-50 minutes or until the
internal temperature reaches 154F - 158F.
You can also finish cooking the sausage in the smoker/smokehouse by
gradually increasing the temperature in the smoker to 165F-175F-185F
and up to 195F. This method is not as easy and may take a long time
depending on weather conditions and humidity inside the smoker.
↑ Back to top
Tricked-Up Brisket Rub
Tags: Mushrooms
Rubs and Blends
Servings: YIELD Makes about 3/4
cup
Ingredients
- 1/4 cup Hungarian paprika
- 2 tablespoons sugar
- 2 tablespoons brown sugar
- 1 tablespoons cumin
- 2 tablespoons dried chipotle chile powder
- 1 tablespoon freshly ground pepper
- 1 tablespoon cayenne
- 1 tablespoon onion powder
- 1 tablespoon garlic powder
Steps
- Combine all ingredients in a bowl; mix well. Store rub in an airtight container
Notes
- FAVORITE
↑ Back to top
Turkish Mixed Vegetable Pickles
Tags: Pickles
Turkish
Ingredients
- 1 medium green cabbage (about 2 1/4 pounds; 1kg), quartered, cored, and cut into 1-inch strips
- 1/2 lemon, thinly sliced into rounds
- 8 medium cloves garlic (1 1/2 ounces; 40g), minced
- 4 sprigs dill
- 5 medium carrots (about 8 ounces; 227g total), peeled and cut into thin rounds
- 1 medium cauliflower (about 1 1/2 pounds; 680g), cored and cut into 1-inch florets
- 2 red, yellow, or green bell peppers (about 6 ounces; 170g each), stemmed, seeded, and cut into 1/2-inch strips
- Two large pinches red pepper flakes, preferably Aleppo or Urfa (optional)
- 4 fresh grape vine leaves (optional)
- 4 1/4 cups (1L) room temperature water
- 3 1/2 fluid ounces (100ml) of wine or cider vinegar
- 1 3/4 ounces (50g) non-iodized kosher or sea salt (about 5 1/2 tablespoons Diamond Crystal kosher salt; for table salt use half as much by volume)
Steps
- In two clean 1-quart (1L) glass canning jars, tightly pack cabbage until jars are about 1/3 full; press down as much as possible to minimize air space.
- Layer on top lemon slices, minced garlic, dill sprigs, carrots, cauliflower, and bell peppers until each jar is about 2/3 full; press down firmly to pack ingredients into jars and remove air space. If using, add a large pinch of red pepper flakes and 2 fresh grape leaves to each jar. Top with additional cabbage, packing to compress, until jars are full. Note: You will have leftovers of each vegetable, which can be reserved for another use (such as roasted in the oven).
- In a large vessel or mixing bowl, stir together water, vinegar, and salt until salt is fully dissolved. Slowly pour the brine into each jar until vegetables are completely submerged. Use a paring knife to remove any large air bubbles by gently sliding it into the jars.
- Seal the jars tightly and set on plates to catch any potential overflow. Store the jars at room temperature, away from direct sunlight, until brine ferments and becomes pleasantly sour and refreshingly tangy, about 1 to 2 weeks; throughout the fermentation process, you should notice bubbles forming and the brine becoming cloudy. Discard the pickles if any off aromas or flavors develop or if the pickles become slimy. Surface molds can sometimes grow during fermentation and are typically harmless, though they should be scraped off; that said, it's better to discard the pickle if in doubt about its safety.
- Store pickles in the refrigerator until ready to eat; flavors will continue to meld and improve over time as the pickle sits.
- Special Equipment
- Two 1-quart (1L) glass canning jars
Notes
- You can experiment with different vegetable combinations based on the season and your preferences. Enjoy the pickles, and don't forget to savor the brine, as is customary in Turkish cuisine.
↑ Back to top
Turtle Cookie Bars
Tags: Cookies
Ingredients
- 2 cups all-purpose flour
- 1 cup firmly packed brown sugar
- 1/2 cup butter, softened
- 2 nd Layer
- 1 cup pecan halves or chopped pecans
- 2/3 cup butter
- 1/2 cup firmly packed brown sugar
- 1 cup milk chocolate morsels
Crust:
Steps
- Preheat oven to 350 degrees. Combine first 3 ingredients in a mixing bowl; beat at medium speed with an electric mixer until blended. Pat mixture firmly into an ungreased 13x9 inch pan.
- Arrange pecans over crust.
- Combine 2/3 cup butter and 1/2 cup brown sugar in a saucepan; bring to a boil over medium high heat, stirring constantly. Cook 3 minutes, stirring constantly. Pour mixture over pecans. Bake at 350 degrees for 15-17 minutes or until golden and bubbly.
- Remove from oven; sprinkle with chocolate morsels. Let stand 2-3 minutes or until slightly melted. Gently swirl chocolate with a knife, leaving some morsels whole (do not spread). Let cool on a wire rack at room temperature until chocolate is set. Cut into square
Notes
- FAVORITE
↑ Back to top
Two-Hour Gravlax
Tags: Appetizers and Dim
Sum Fish
Scandinavian
Servings: 6
Ingredients
- 2 tablespoons kosher salt
- 2 tablespoons sugar
- 1 pound skinless, boneless salmon
- Small slice of red onion, very finely chopped
- 2 tablespoons chopped fresh cilantro, parsley, or dill
Steps
- Have on hand a 12-inch platter.
- In a bowl, mix the salt and sugar. Sprinkle a little salt-sugar on the platter.
- Rub your fingers along the cut (not skinned) side of the salmon and pull out any bones. With a long sharp knife, cut the salmon on a diagonal into very thin slices. Set them on the platter without overlapping. Sprinkle the salt-sugar mixture all over. Add the onion and fresh herbs.
- Cover tightly and refrigerate for at least 2 hours or for up to 1 day. Serve with crusty bread.
↑ Back to top
Two-Minute Aioli
Servings: Makes about 1 cup
Ingredients
- 1 whole egg
- 4 medium cloves garlic, minced
- 2 teaspoons juice from 1 lemon
- 1/2 cup canola, vegetable, or light olive oil oil
- 1/2 cup extra-virgin olive oil
- Kosher salt and freshly ground black pepper
Steps
- Place egg, garlic, and lemon juice in the bottom of an immersion blender cup. Pour canola (or vegetable or light olive) oil on top and allow to settle for 15 seconds. Place head of immersion blender at bottom of cup and switch it on. As aioli forms, slowly tilt and lift the head of the immersion blender until all oil is emulsified. (For food processor instructions, see note).
- hand blender with a cup that just fits its head
Transfer aioli to a medium bowl. Whisking constantly, slowly drizzle
in
extra-virgin olive oil. Season to taste with salt and pepper. Store in
a sealed container in the refrigerator for up to two weeks.
Special Equipment:
Notes
- Use the best quality extra-virgin olive oil you can find but do not be tempted to add it directly to the hand blender cup—it will turn bitter. If you don't have an immersion blender with a cup, you can make the aioli in a food processor. Combine the egg, garlic, and lemon juice in a food processor. With the machine running, slowly drizzle in the canola or light olive oil, scraping down the sides as necessary. Transfer the half-finished aioli to a bowl and proceed with step two.
↑ Back to top
The Ultimate Beef Stroganoff
Servings: 4
Ingredients
- 2 (0.25 ounce) packets unflavored powdered gelatin (about 5 teaspoons)
- 2 cups (475ml) homemade or store-bought low-sodium chicken stock
- Kosher salt and freshly ground black pepper
- 2 tablespoons (6g) mild paprika
- 4 (1 1/2- to 2-inch thick) beef tenderloin steaks, 6 to 8 ounces each (see note)
- 3 tablespoons (45ml) canola or vegetable oil
- 12 ounces (340g) button mushrooms, quartered
- 8 ounces (225g) peeled pearl onions (about 24 onions, see note)
- 3 tablespoons (45g) unsalted butter, divided
- 1 medium shallot, thinly sliced (about 1/4 cup)
- 4 sprigs fresh thyme
- 1 teaspoon soy sauce
- 2 teaspoons Worcestershire sauce
- 1 teaspoon Asian fish sauce
- 2 teaspoons Dijon mustard
- 1 cup (235ml) dry white wine
- 1 cup (225g) sour cream, plus more for serving
- 1 pound (455g) dried egg noodles
- 1/4 cup (20g) minced fresh parsley leaves
Steps
- Sprinkle gelatin over chicken stock in a small bowl or liquid measuring cup. Set aside. Bring a large pot of salted water to a boil.
- Combine 1 tablespoon salt, 1 teaspoon pepper, and half of paprika in a small bowl. Season steaks generously on all sides with mixture (you may not need all the mixture) and press with the flat of your hand to adhere. Heat half of vegetable oil in a large skillet or sauté pan over high heat until lightly smoking. Add meat and cook, turning occasionally, until well-browned on both sides and center of steaks register 115°F (46°C) at the thickest part for rare or 125°F (52°C) for medium-rare. Remove from pan, transfer to a plate, and set aside.
- Add remaining vegetable oil to the same pan and add the mushrooms. Return to medium heat and cook, stirring and tossing frequently, until mushrooms have released their liquid and are just starting to brown, about 8 minutes. Add 1 tablespoon butter and pearl onions and continue to cook, stirring, until onions and mushrooms are softened and well-browned, about 6 minutes longer.
- Add shallots, thyme, and remaining paprika, and cook, stirring, until fragrant. Add soy sauce, Worcestershire sauce, fish sauce, and mustard and cook, stirring, until mostly evaporated, about 30 seconds. Add any collected juices from the plate with the meat, followed by white wine. Cook until reduced to just a few tablespoons.
- Add broth/gelatin mixture and bring to a heavy simmer. Carefully pour off liquid into a heatproof cup or liquid measuring cup. Add sour cream to a medium bowl. Whisking constantly, slowly pour hot liquid over sour cream and whisk until fully homogeneous.
- Return sour cream mixture to pan along with remaining 2 tablespoons butter. Bring to a boil over medium-high heat and season to taste with salt and pepper. Return steaks to pan until barely warmed through, about 1 minute. Remove from heat.
- Cook noodles according to package directions. When cooked, drain and return to pot, reserving 1 cup of pasta cooking water. Transfer steaks to a cutting board and pour the sauce, mushrooms, and onions over the noodles. Stir to coat pasta, adding pasta cooking water as necessary until it reaches a loose, creamy consistency. Stir in half of minced parsley.
- Thinly slice steaks. To serve, divide pasta and cream sauce evenly between 4 hot serving bowls. Top with sliced steak, spooning a little extra sauce over them. Add a dollop of sour cream, sprinkle with remaining parsley, and serve, advising guests to remove large thyme sprigs as they find them.
Notes
- Any tender steak cut can be used in place of tenderloin. I recommend hanger steaks or flap meat (sometimes labeled sirloin tip in the Northeast). If using an alternative steak cut, I advise cooking to medium-rare instead of rare.
- Frozen pearl onions can be used in place of fresh, though fresh will have better flavor and texture. Peel pearl onions by trimming the ends, cutting a small X into the ends of each one, submerging in boiling water for 30 seconds, and peeling under cold running water. The skins will slip right off. Watch this video for details.
↑ Back to top
Uncle John's Christmas Cookies
Tags: Cookies
Holidays
Ingredients
- 2 cups sugar
- 3/4 cup butter or margarine, softened
- 2 or 3 eggs
- 3 teaspoons vanilla
- 3/4 cup milk
- 4 cups flour
- 1 teaspoon nutmeg
- 3 teaspoons baking powder
- Pinch of salt
Steps
- Preheat oven to 350°F.
- Mix together flour, nutmeg, baking powder, and salt - set aside
- Cream together sugar and butter
- Add eggs, vanilla, and milk and mix until well combined
- Slowly add dry ingredients to wet, mixing until well blended - dough will be slightly sticky.
- Refrigerate 2-3 hours or overnight.
- Roll out 1/4" thick on floured surface.
- Cut with floured cookie cutters.
- Place on ungreased cookie sheet.
- Bake in 350°F oven for 8-10 minutes until bottom of cookie is light brown - tops do not brown- and cookie is set.
Notes
- FAVORITE
↑ Back to top
Uncle Scotty's Atomic Retrofire Brisket Rub
Tags: Barbecue
Beef Rubs and Blends
Is starred.
Servings: YIELD 1.5 Cups
Ingredients
- 4 tablespoons dark brown sugar
- 4 tablespoons kosher salt
- 2 tablespoons black pepper
- 4 tablespoons paprika
- 2 tablespoons ancho chilli
- 1 tablespoons de arbol chilli
- 1 tablespoon dry mustard
- 2 tablespoons garlic powder
- 2 tablespoons onion powder
- 1 tablespoon cumin seed
- 2 teaspoons coriander seed
- 1 teaspoon dried oregano
- 1 tablespoon celery seed
- 1 teaspoon oregano, crushed
Steps
- Toast the cumin and coriander. When almost done add celery. Grind. Mix all the ingredients together and apply a thorough coating to meat. May be stored for several months in an air tight container in a cool, dark place.
Notes
- FAVORITE
↑ Back to top
Uncle Scotty's Atomic Retrofire Dry Rub
Tags: Barbecue
Rubs and Blends
Is starred. Rated
5/5
Ingredients
- 4 tablespoons paprika
- 4 tablespoons brown sugar
- 4 tablespoons kosher salt
- 4 tablespoons cracked black pepper
- 2 tablespoons ground cumin
- 2 tablespoons ancho chilli powder
- 2 tablespoons dry mustard
- 2 tablespoons ground coriander
- 1 tablespoon cayenne pepper
Steps
- Combine thoroughly and store in a cool dry place.
↑ Back to top
Uncle Scotty's Atomic Retrofire Dry Rub
I made this.
Ingredients
- 4 tablespoons paprika
- 4 tablespoons brown sugar
- 4 tablespoons kosher salt
- 4 tablespoons cracked black pepper
- 2 tablespoons ground cumin
- 2 tablespoons ancho chilli powder
- 2 tablespoons dry mustard
- 2 tablespoons ground coriander
- 1 tablespoon cayenne pepper
Steps
- Combine thoroughly and store in a cool dry place.
Notes
- FAVORITE
↑ Back to top
Uncle Scotty's Atomic Retrofire Ranchero Salsa
Tags: Condiments
Salsas Tex-Mex
I made this. Is starred. Rated 5/5
Ingredients
- 1 Ancho chilli
- 1 Gaujillo chilli
- 1 de Arbol chilli
- 1 Cascabel chilli
- (or a combination to your taste) . --
- 1 Cup white onion finely chopped
- 1/2 Cup celery finely chopped
- 1 clove Garlic, chopped.
- 1 tablespoon Mexican Spice Blend
- 1 tablespoon Cornstarch
- 1 14 1/2 oz. Can Whole Tomatoes
- 2 Cups Chicken Stock
Steps
- Toast the chillies, shredded by hand.
- Heat two Tbl. of neutral oil in a heavy saucepan or skillet and saute the onion, garlic, celery and chillies for 2 to three minutes. Add a Tbl. or so of the spice blend, 1 Tbl. Cornstarch, a 14.5 ounce can of whole tomatoes and two cups of chicken or beef broth.
- Simmer for about 1/2 hour, cool and combine in a blender in batches.
Notes
- FAVORITE
↑ Back to top
Uncle Scotty's Atomic Retrofire Wet Mop
Tags: Condiments
Mop Sauces
Southern
Is starred.
Ingredients
- 1 cup White Vinegar
- 1 cup Cider Vinegar
- 1 Tbl. Sugar
- 2 Tsp Crushed Red Pepper
- 1 Tsp. Aleppo Pepper
- 1 Tbl. Ketchup
- 1 Tsp. Mustard Powder
- 2 Tbl. Hot Sauce
- Salt and Pepper and whatever
↑ Back to top
Uncle Scotty's Chicken Rub
Tags: Poultry
Rubs and Blends
Ingredients
- 1/3 cup coarse salt
- 1/3 cup dried sage
- 1/3 cup garlic powder
- 1/4 cup onion flakes
- 1/4 cup paprika
- 3 tablespoons dried thyme
- 3 tablespoons freshly ground black pepper
- 3 tablespoons dried oregano
- 1 teaspoon ground de arbol chilli
- 1 teaspoon ground guajillo chilli
- 1 teaspoon ground chipotle chilli
Steps
- In a large bowl, combine the salt, sage, garlic powder, onion flakes, paprika, thyme, black pepper, oregano, and cayenne. Rub the dried herbs between your palms to crush them as you add each to the mixture. This rub will keep in an airtight container for 6 months. Shake or mix well before using.
Notes
- FAVORITE
↑ Back to top
Uncle Scotty's Mexican Spice Blend
Tags: Mexican
Spices
Is starred. Rated
5/5
Ingredients
- 3 Tbl. Ancho Chilli Powder
- 1 Tsp. Chipotle Chilli Powder or Smoked Paprika
- 1 Tsp. Ground Black Pepper
- 1 1/2 Tsp. Mexican Oregano Crumbled
- 1 Tsp. Granulated Garlic
- 1 Tsp. Granulated Onion
- 2 Tsp. Dark Brown Sugar
- 1/2 Tsp. Granulated Sugar
- 2 Tsp. Cumin Toasted and Ground
- 2 Tsp. Coriander Toasted and Ground
- 1 Tsp. Cocoa Powder
- 1 Tsp. Ground Cinnamon
- 1 Tsp Epazote
↑ Back to top
Vaguely Vietnamese Slow Cooker Pork Tacos

Tags: Pork
Vietnam
Servings: 6 to 8
Ingredients
- 1 tablespoon sesame oil
- 1 medium-size yellow onion, peeled and diced
- 8 cloves garlic, peeled and minced
- 2 tablespoons fresh ginger, peeled and minced
- 1/2 cup hoisin sauce
- 1/4 cup fish sauce
- 1 tablespoon sriracha sauce
- 1/2 bone-in pork shoulder, skin and fat removed, approximately 5 pounds
- 12 to 16 flour tortillas, warmed
- 1/3 cup rice vinegar
- 2 teaspoons grated fresh ginger
- 1 tablespoon sesame oil
- 2 tablespoons neutral oil, like peanut or grapeseed
- 1 teaspoon sriracha sauce, or to taste
- 1 small green cabbage, cored and sliced thinly
- 2 medium-size cucumbers, peeled and sliced into julienne
- 2 medium-size carrots, peeled and sliced into julienne
- 1 Asian pear, peeled, cored and sliced into julienne
- 1/2 bunch fresh cilantro, rinsed, dried and roughly chopped
For the pork:
For the slaw:
Steps
- Prepare the pork: Place a sauté pan over medium-high heat. After a minute or so, swirl in the sesame oil and then the onions, stirring to combine. Sauté for about 5 minutes, then add the garlic and continue to cook until the onions are soft and becoming translucent. Turn off the heat, stir in the ginger and set aside.
- Add the hoisin sauce and the fish sauce to the pan, and stir to combine, loosening the mixture with a little less than half a cup of water. Add sriracha sauce to taste.
- Put a few spoonfuls of the sauce in the bottom of a slow cooker, then nestle the pork on top of it. Pour the remaining sauce over the top of the pork. Cover the slow cooker and cook on low for 5 to 7 hours, or until the pork shreds easily with a fork. Remove the pork from the slow cooker and allow to rest for a few minutes.
- Meanwhile, make the slaw: Put the vinegar, ginger, sesame oil, neutral oil and sriracha sauce in a large bowl and whisk to combine. Add the cabbage, cucumbers, carrots and Asian pear and toss to combine.
- Shred the pork with a pair of forks. Discard bones. Return the pulled pork to the slow cooker and stir to combine with the juices. Serve with the slaw and warmed tortillas, with the cilantro on the side.
Notes
- FAVORITE
↑ Back to top
Vajdasági Salted Roll with Cheese and Ham

Tags: Finger Food
Hungary Pastry
Rated 5/5
Ingredients
- Ingredients: 4 cups (500g) of flour, 1 1/4 cups (300 ml) of milk, 1 egg, 1/4 cup (50 ml) of oil, 1 teaspoon of sugar, 1 teaspoon of salt (15 g), 1 tablespoon of instant yeast
Steps
- Filling: little less than 1 stick (80 g) of butter, 1 egg, 1 tablespoon of flour, 3.5 ounces (100 g) of grated cheese, 3.5 ounces (100 g) of smoked ham, 1/2 teaspoon of salt
Topping: 2 ounces (60
g) of grated smoked cheese, 1 egg for brushing the dough
“Vajdaság” is a region that was a part of Hungary until a hundred
years
ago; now it is located in Serbia. This delicious treats probably
originates from there.
It
is a very delicious salty snack, which quickly disappears from your
table. My husband has just proved this fact. You should probably
double
the amounts you can find here. I was using smoked ham and a
double-smoked cheese for this recipe, but you can use any type of
cheese or ham.
Combine the yeast, 1 teaspoon of sugar and warm milk. Sprinkle a
little
flour on top, then cover the bowl with a lid. Let it rest for 5-8
minutes. Pour the flour and salt in a standing mixer's bowl, then add
the egg and the oil. Add the risen yeast with the milk, then knead the
ingredients into a dough.
You will get a sticky dough, but that's perfectly fine. Transfer the
dough to a well-floured surface and knead it for a minute more. Then,
place the dough in a bowl, sprinkle with flour and cover with a
plastic
wrap. Let it test until it has doubled in size.
Meanwhile, whisk the soft
butter, the flour, salt and egg, then set aside.
After resting, roll out the dough into a 20x15-inch rectangle. Spread
the prepared butter evenly, then add the grated cheese and chopped
ham.
Roll up like a strudel, then cut two-inch-wide slices. Put the swirls
on a lined baking pan upright. Cover them with a kitchen towel. Let it
rest for 20 minutes. After resting, brush them with an egg, then add
the grated cheese on top.
Bake it in preheated 355F
oven until golden brown.
↑ Back to top
Vanilla Ice Cream
Tags: Desserts
Homemade Ice Cream
Servings: YIELD 1 1/2 quarts
Ingredients
- 3 cups half-and-half
- 1 cup heavy cream
- 8 large egg yolks
- 9 ounces vanilla sugar
- 2 teaspoons pure vanilla extract
Steps
- Watch how to make this recipe.
- Place the half-and-half and the heavy cream into a medium saucepan, over medium heat. Bring the mixture just to a simmer, stirring occasionally, and remove from the heat.
- In a medium mixing bowl whisk the egg yolks until they lighten in color. Gradually add the sugar and whisk to combine. Temper the cream mixture into the eggs and sugar by gradually adding small amounts, until about a third of the cream mixture has been added. Pour in the remainder and return the entire mixture to the saucepan and place over low heat. Continue to cook, stirring frequently, until the mixture thickens slightly and coats the back of a spoon and reaches 170 to 175 degrees F. Pour the mixture into a container and allow to sit at room temperature for 30 minutes. Stir in the vanilla extract. Place the mixture into the refrigerator and once it is cool enough not to form condensation on the lid, cover and store for 4 to 8 hours or until the temperature reaches 40 degrees F or below.
- Pour into an ice cream maker and process according to the manufacturer's directions. This should take approximately 25 to 35 minutes. Serve as is for soft serve or freeze for another 3 to 4 hours to allow the ice cream to harden.
Notes
- FAVORITE
↑ Back to top
Vanilla Pomegranate Oatmeal Cookies

Tags: Cookies
Servings: ~24 COOKIES
Ingredients
- 1 cup cake flour, sifted
- ¾ cup bread flour
- ½ teaspoon baking soda
- ½ teaspoon sea salt
- 1 ½ cups old-fashioned oats
- 10 tablespoons unsalted butter, softened
- ½ cup plus 2 tablespoons granulated sugar
- ½ cup plus 2 tablespoons light brown sugar
- 1 egg, room temperature
- 2 teaspoons pure vanilla extract
- 1 cup chocolate chips
- ½ cup pomegranate seeds (drained and dried on a paper towel)
Steps
- In a medium bowl, whisk together the flours, baking soda, salt, and oats.
- In the bowl of an electric mixer fitted with the paddle attachment, beat the butter and sugars until light and fluffy, about 2 minutes. Add the egg and vanilla extract and mix until combined.
- Add the dry ingredients and mix until just combined. Fold in the chocolate chips and pomegranate seeds using a stiff rubber spatula.
- Cover the dough with plastic wrap and chill for at least 30 minutes to an hour.
- Preheat oven to 350 degrees F. Line two baking sheets with parchment paper or silicone mats.
- Using a medium cookie scoop, scoop out cookie dough and arrange 2 inches apart.
- Bake cookies for 12-14 minutes or until lightly golden around the edges.
- Remove from oven and let cool on baking sheet for two minutes before transferring to a wire rack. Cool completely.
↑ Back to top
Vegan Challah

Tags: Breads
Vegan
Ingredients
- 1 package active dry yeast
- 1 cup very warm water
- 4 cups bread flour
- 1 teaspoon salt
- 1/2 cup vegan cane sugar + 1 teaspoon vegan cane sugar
- 1/3 cup safflower oil
Steps
- Mix yeast, water, and 1 teaspoon of sugar in a small bowl. Let it sit until it bubbles.
- Combine flour, salt, and sugar. Add oil and then the yeast mixture.
- Mix together and knead for at least 10 minutes (by hand or with a bread mixer.) You know when it is done when you can push your finger into it and the little indentation stays there. Aha!
- Place the dough in an oiled bowl and let it rise for an hour and a half.
- Take the dough out to shape into challahs. Then let the challahs rise again for fifteen minutes.
- Preheat the oven to 350°. Brush the challahs with cold water and place in the oven for 30 minutes.
Notes
- FAVORITE
↑ Back to top
Vegan Creamy Leek Pasta
Tags: Pasta
Vegan Vegetables
Servings: 4
Ingredients
- Kosher salt and black pepper
- 3 medium leeks (about 1 to 1 1/4 pounds total)
- ½ cup extra-virgin olive oil
- 1 pound bucatini, fettuccine or linguine
- 1 lemon
Steps
- Bring a large pot of salted water to a boil over high.
- Meanwhile, prepare your leeks: Trim 1/2 inch off both ends, then cut each leek crosswise, separating the bottom third of the white portion from the top two-thirds of light and dark leek greens. Halve the greens lengthwise, wash them, then set them aside.
- Halve your leek whites lengthwise, cut them crosswise into 2-inch segments, then slice those segments thinly lengthwise to create matchsticks. (If you notice any grit in the sliced leek whites, wash them thoroughly, transfer them to a dish towel, squeezing to remove excess moisture, then spread them out to dry.)
- In a small, deep saucepan, heat the olive oil over medium-high and line a baking sheet with paper towels. Working in three to four batches for even cooking, add about 1/4 of the white leek strips and cook, stirring frequently, until golden, about 4 minutes. The key here is to keep residual cooking in mind: Since your delicate leeks will continue cooking after being removed from the hot oil, you want to pull them from the hot oil when about a third of each batch is fully golden, a third is lightly golden and another third is still green. (They won’t cook perfectly evenly; it’s not you, it’s them and the nature of cooking.) Remove them swiftly, using a slotted spoon and tilting the saucepan to transfer the leeks to the paper towel-lined plate. Season to taste with salt. Repeat with the remaining batches. Set the oil aside to cool.
- Add the pasta and leek greens to the boiling water, reduce the heat to medium-high and cook, stirring occasionally, until the pasta is just shy of al dente, about 8 minutes. Reserve 1 cup pasta cooking water. Using tongs, transfer the leek greens to a blender, then pour the pasta into a colander set in the sink.
- Add the reserved leek oil to the leek greens, along with 2/3 cup pasta water and a generous pinch each of salt and pepper, and blend until creamy. Add the sauce to the pot and stir in the pasta. Season to taste with salt and pepper, and add more pasta water, if desired, to thin the sauce. Divide among plates and sprinkle with frizzled leeks. Grate fresh lemon zest on top, if desired, then squeeze with lemon. Serve immediately.
↑ Back to top
Vegan Doro Wat
Adapted from https://holycowvegan.net/vegan-doro-wat/
Tags: Ethiopia
Servings: 10 servings Author:
Vaishali · Holy Cow
Ingredients
- 1/2 cup extra virgin olive oil
- 1/4 cup minced onions
- inch piece of ginger , grated or minced
- 3 cloves garlic , grated or minced
- inch piece cinnamon stick
- 1 tsp turmeric
- 1/8 tsp grated nutmeg
- 3 cloves of green cardamom
- Place the saucepan over medium heat. When it starts to bubble , reduce heat and let the oil simmer for about 20-25 minutes. Pass through a sieve and reserve the oil.
- 1/4 cup of dry , red chillies
- 1 tbsp paprika
- inch stick cinnamon
- 1 tsp ground ginger powder
- 1/2 tsp coriander seeds
- 3 cloves
- 2 berries of allspice
- 1 tsp grated nutmeg
- Process to a fine powder and set aside.
- 1 8- oz package of tempeh , cubed and sprinkled with juice of half a lemon (The tempeh is optional. I just used this for extra protein and it was delicious, but just use veggies if you can't find this or don't want to use it)
- 1 1/2 pounds of crimini or portabella mushrooms , halved or quartered if large (eggplant and potatoes would also be great in this dish)
- 3 medium onions , finely chopped
- 1 six-ounce can of tomato paste
- 1 cup dry white wine (optional)
- 1 tbsp grated garlic
- 1 tbsp grated ginger
For the Niter
Kibbeh:
Combine in a
saucepan:
For the
Berbere:
Place in a
blender or spice grinder:
Other
ingredients:
Steps
- Heat a large saucepan. Add the onions and stir. When the onions start looking dry, add 1/4 cup of water and cook until the mixture dries up. Keep adding a couple of tablespoons of water each time the onions dry and start to stick, stirring at frequent intervals, until the onions become golden-brown. Like I said earlier, this took me more than an hour on medium heat, but don't skip this step and hurry to add other ingredients because the roasted onions add a lot of flavor.
- Now add the tomato paste, ginger and garlic and cook, stirring frequently, about 2-3 minutes.
- Add the Berbere, 1/2 cup of water, and the Niter Kibbeh. Stir to mix and bring the mixture to a boil.
- Add the mushrooms and tempeh and stir well. Bring the sauce to a boil (add more water if the mixture is very dry), slap a lid on, lower the heat to simmer, and let the mixture cook about 15-20 minutes.
- Add the white wine, if you're using it, and simmer for another 10 minutes. If you're not adding wine, skip this step.
- Serve hot over rice or with some crusty bread. Tip: This tastes even better when you've allowed it to stand for a few hours, or overnight, to let the flavors meld together.
↑ Back to top
Vegan Lemon Loaf (No Eggs, No Butter, No Milk!)
Tags: Vegan
Ingredients
- 2 1/4 cups self-rising flour gluten-free, if necessary
- 1 cup superfine sugar caster sugar * See notes
- 1 teaspoon baking powder
- 2/3 cup water
- 6 1/2 tablespoon sunflower oil can use any oil of choice
- 1 lemon juiced and zested
- 3/4 cup powdered sugar confectioners's sugar/icing sugar
Steps
- Preheat the oven to 200C/400F. Line a loaf pan with parchment paper and set aside.
- In a mixing bowl, add your self-rising flour, baking powder and superfine sugar/caster sugar, and mix well. Add your lemon zest, water, oil and lemon juice, and mix well, until a smooth batter remains.
- Transfer the batter into the lined loaf pan and bake for 40-45 minutes, or until a skewer comes out clean.
- Remove from the oven and let cool in the pan for 10 minutes, before transferring to a wire rack to cool completely. Once cooled, glaze the loaf and slice.
- To make the glaze, combine your powdered sugar with either 1-2 tablespoons of lemon juice, milk or water, until desired texture remains.
Notes
- To keep it sugar free, please refer to the body of the post. You can also make your own superfine/caster sugar by blending your sugar into a finer consistency.
- TO STORE- Store lemon loaf at room temperature in a sealed container, for up to 5 days. You can also refrigerate it, and it will keep fresh for up to 10 days.
- TO FREEZE- Place loaf in a freezer-friendly container and store in the freezer for up to 6 months. You can also freeze individual slices, and keep them in ziplock bags.
↑ Back to top
Vegetable Broth Base
Adapted from https://www.mycookbook-online.net/recipes/2254683/

Ingredients
- 2 leeks, white and light green parts, chopped and washed (2 1/2 cups, 5 oz)
- 2 carrots, peeled and cut into 2 inch pieces (2/3 cups, 3 oz)
- 1/2 small celery root, peeled and cut into 1/2 inch pieces (3/4 cup, 3 oz)
- 1/2 cup fresh parsley leaves, and thin stems (1/2 oz)
- 3 tablespoons dried minced onions
- 2 tablespoons kosher salt
- 1 1/2 tablespoons tomato paste
- 3 tablespoons soy sauce
Steps
- Process everything, except tomato paste and soy sauce, in food processor, scraping down sides of bowl frequently, until paste is as fine as possible, about 3 to 4 minutes.
- Add tomato paste and process for one minute, scraping down sides of bowl every 20 seconds.
- Add soy sauce and continue to process one minute longer.
- Transfer mixture to airtight container and tap firmly on counter to remove any air bubbles. Press small piece of parchment paper against surface of mixture and cover.
- Freeze up to 6 months.
- Use 1 tbl to one cup boiling water to make broth. Strain if you desire a particle-free broth. The salt content of the mixture will keep it from freezing so that you can scoop it straight from the container.
Notes
- FAVORITE
↑ Back to top
Veggie Ricotta Calzones

Tags: Pastry
Vegetarian
Ingredients
- 1 (6oz) bag baby spinach,1 (10oz) package sliced mushrooms,1 medium yellow onion diced, 1 red or orange bell pepper diced sautéed in 2 tablespoons butter until softened.Cool veggies10-15 minutes before using.
- 8 ounces ricotta cheese
- 4 ounces mozzarella cheese;shredded
- 1 ounce Parmesan cheese;grated
- 1 tablespoon olive oil
- 2 large eggs,1 for filling,1 lightly beaten with 2 tablespoons water in a ramekin and set aside.
- 1 teaspoon garlic powder
- 1/2 teaspoon dried oregano
- 1/8 teaspoon red pepper flakes
- 1 teaspoon salt
- 1 lb pizza dough
- ︎Preheat oven to 500°.
Steps
- Combine cooled veggie mix,ricotta, mozzarella,oil, egg yolk,garlic powder, oregano,pepper flakes,and salt in a large bowl.
︎Place dough on lightly
floured surface and divide into 4 even pieces.
︎With your hands, flatten and stretch each piece into a 7 inch round
on
a piece of parchment paper.If the dough stops stretching, let it rest
5
minutes before stretching more.
︎Spread 1/4 of veg- cheese filling evenly over half of each dough
round, making sure to leave a 1 inch border around the edge.
︎Brush the edges with egg wash and then fold the other half of the
dough circle over veg- cheese mixture, leaving the bottom 1/2 inch
border uncovered.
︎Press edges of dough
together and pinch with fingers to seal.
With kitchen shears,snip 4
steam vents in top of calzones and brush tops with egg wash.
Transfer calzones onto parchment lined baking sheet and bake for 8
minutes, brush with any remaining egg wash and sprinkle with grated
parmesan, then bake for another 8 minutes.
︎Move to wire rack and let
cool for 5 minutes before serving. Serve with marinara or pizza
sauce.
↑ Back to top
Viet-Style Maggi Roast Chicken and Butternut Squash
Adapted from https://substack.com/home/post/p-162160994
Servings: 4
Ingredients
- Ingredients for 3 batches of Magic Maggi Marinade
- 1.4kg | 3 lbs bone-in, skin-on chicken thighs and or drumsticks (6 to 8)
- 2 Tbsp canola or other neutral oil
- 360g | 12 oz asparagus (1 bunch)
- 150g | 5 oz carrot (1 medium)
- Fine sea salt
Steps
- Marinate the chicken: On a baking sheet, combine the marinade ingredients (I use my hand). Taste to verify a salty, garlicky, peppery flavor. Add the chicken pieces and massage the marinade into the flesh, distributing the seasonings all over. When possible, peel back the skin to get marinade between the flesh and skin. Refrigerate the baking sheet, uncovered, for at least 2 hours and up to 24 hours for the best flavor.
- Remove the chill and roast: An hour before roasting, remove the chicken from the refrigerator. Position a rack in the middle of the oven and preheat to 425°F (220°C). Line a baking sheet with aluminum foil. Drizzle the oil onto the chicken then rub it all over. Arrange on the prepared baking sheet, skin side up.
- Roast the chicken until you hear gentle sizzling, about 15 minutes. Check browning and if needed, rotate the pan for even cooking. Continue roasting until the skin is nicely browned and crispy, about 15 minutes. Total roasting time is about 30 minutes, depending on the size of the pieces. To test doneness: poke the meatiest part with a toothpick, cake tester, or knife tip and juices should run clear; the temperature should be at least 155°F (70°C).
- Prep the veggies: While the chicken roasts, trim and cut the asparagus into 2 to 3-inch-long (5cm to 7.5cm) pieces. Keep the tender tips separate. Peel the carrot, halve lengthwise, then thinly cut on the diagonal into pieces that match the asparagus in length.
- Cook the veggies and serve: Transfer the chicken to a platter. Scrape jus (clear fat and dark juices into a small container; the fat conveniently floats upward.
- Heat a large wok or skillet over high heat. Swirl in 1 Tbsp of the fat from chicken jus. Swirl around to coat then add the carrot. Stir, turn, and spread the carrot out so they have full contact with the skillet. Leave for 30 seconds or so, then tepeat the motions to stir-fry the carrot until they are bright orange and glistening, but still crisp.
- Add the thicker asparagus pieces, sprinkle on some salt, the keep stir-frying until glistening and bright. Splash in 1 to 2 tablespoons of water, stir, then cover. Lower the heat slightly to steam-cook until barely tender, 1 minute. Uncover, throw in the asparagus tips, lightly salt then stir-fry until all is just cooked, 1 to 2 minutes. If you want to add a teaspoon of the roast chicken jus, do it in the last minute so it seasons but does not burn or darken the vegetables too much.
- Transfer the vegetables to the chicken platter (if there’s room) or a separate serving dish. Pour off the fat from the jus (it’s good for other dishes), then add the dark juices to the platter, if you like. Bring to the table and dive in to savor the Maggi magic.
- ✅ To remove the peel from the squash, trim the ends then halve crosswise. Stand the squash on wider its cut end to steady then use a knife to cut off the skin. You can use a peeler instead but I love my Chinese vegetable cleaver to get all the hard skin off quickly.
- Roast the squash before the chicken.
- After the chicken roasts for 15 minutes, put the squash in to roast in the lower third of the oven. After pulling the chicken out of the oven, move the veggies to the middle rack to finish. Timing may vary because the lower third of the oven is hotter than the middle.
Maggi Roasted Butternut
Squash and Mushroom:
✅ If you want to roast
the veggies with the chicken, you have 2 options:
↑ Back to top
Vietnamese Beef-Noodle Soup with Asian Greens

Tags: Soups
Vietnam
Servings: 4
Ingredients
- 1 (8-ounce) sirloin steak
- 4 ounces uncooked wide rice stick noodles
- 1 1/2 cups thinly sliced yellow onion
- 3 whole cloves
- 2 cardamom pods
- 2 garlic cloves, halved
- 1 (3-inch) piece peeled fresh ginger, thinly sliced
- 1 star anise
- 4 cups fat-free, less-sodium beef broth
- 2 cups water
- 1 tablespoon less-sodium soy sauce
- 1 teaspoon brown sugar
- 2 teaspoons fish sauce
- 4 cups baby bok choy leaves
- 1 cup snow peas, trimmed
- 1 small fresh Thai chile, thinly sliced into rings
- 1 cup fresh bean sprouts
- 1/4 cup fresh basil leaves
- 1/4 cup fresh mint leaves
- 4 lime wedges
Steps
- Freeze beef for 10 minutes; cut across grain into 1/8-inch-thick slices.
- Cook noodles according to package directions. Drain and rinse with cold water; drain.
- Place onion and next 5 ingredients (through star anise) in a large saucepan; cook over medium-high heat 5 minutes, stirring frequently. Add broth and 2 cups water; bring to a boil. Strain broth mixture though a fine sieve over a bowl; discard solids. Return broth to pan. Add soy sauce, sugar, and fish sauce; bring to a boil. Add bok choy and snow peas; simmer 4 minutes or until peas are crisp-tender and bok choy wilts.
- Arrange 1/2 cup noodles into each of 4 large bowls. Divide raw beef and chile slices evenly among bowls. Ladle about 1 2/3 cups hot soup over each serving (broth will cook beef). Top each serving with 1/4 cup bean sprouts, 1 tablespoon basil, and 1 tablespoon mint. Serve with lime wedges.
Notes
- FAVORITE
↑ Back to top
Vietnamese Caramel Bbq Sauce
Tags: Condiments
Vietnam
Servings: 4
Ingredients
- 1⁄4 cup sugar
- 4 tablespoons water, divided
- 2 tablespoons fish sauce
- 1 lime, juice of
- 1 Thai chile, sliced
- 1 garlic clove, chopped
- 1 shallot, finely diced
- 2 teaspoons cornstarch
- 1 tablespoon water
FOR THE
VIETNAMESE CARAMEL BBQ SAUCE:
Steps
- To make the Vietnamese Caramel BBQ Sauce: To a saucepan add the 2 tablespoons water and sugar. Over medium heat simmer until it turns a deep golden brown, about 5 minutes. Watch carefully.
- In a small bowl mix together 2 tablespoons water, fish sauce and lime juice; carefully add (it will sputter) to the carmelized sugar mixture, heating low until the caramel dissolves.
- Add the chili, garlic and shallots and simmer to reduce by half, about 3-5 minutes.
- Mix the cornstarch into the remaining 1 tablespoon water, add it into the sauce and simmer until it thickens, about a minute. Remove from heat and set aside.
↑ Back to top
Vietnamese Green Papaya Salad with Beef Jerky Goi Du Du Bo
Kho
Tags: Salad
Vietnam
Ingredients
- 2 tablespoons regular (light) soy sauce
- 2 tablespoons dark soy sauce
- 1 tablespoon unseasoned rice vinegar
- 2 tablespoons sugar
- 2 teaspoons Sriracha hot chili sauce, or 1 or 2 Thai or serrano chiles, finely chopped
- 1 green papaya, about 2 pounds
- 1 teaspoon sugar
- 2 1/2 teaspoons salt
- 4 ounces homemade Vietnamese beef jerky or Asian-style beef jerky, cut into strips with scissors to match papaya pieces (about 1 cup total)
- 1/4 cup shredded fresh Thai basil leaves
Dressing:
Steps
- To make either dress dressing, in a small bowl, stir together all of the ingredients, stirring until the sugar dissolves. If guests are chile heat sensitive, leave the Sriracha out and serve some on the side. Set the dressing aside to develop the flavors.
- Peel the papaya with a vegetable peeler and then cut off the stem. Halve the papaya lengthwise and use a spoon to scoop out and discard the seeds. Cut each half lengthwise into quarters, and then use a knife (or grapefruit knife or melon baller) to remove the thin white layer lining the cavity. Using a Japanese Benriner slicer or a food processor fitted with the largest shredder blade, shred the papaya pieces. Aim for thin strands about 1/16 inch thick, no more than 3/16 inch wide, and 2 1/2 to 3 inches long (about the size of the shredded mozzarella you put on a pizza).
- Put the shredded papaya in a colander, add the sugar and 1 1/2 teaspoons of the salt, and use both hands to massage the sugar and salt vigorously into the papaya. After a few minutes, the papaya will be a little slimy and limp yet still firm. At that point, rinse it under lots of cold running water to remove the salt and sugar.
- Working in batches, wring out excess moisture from the papaya in a nonterry dish towel: position a mound of the papaya in the center, roll it up in the towel, and then twist the ends in opposite directions to force out the liquid. Do this 3 or 4 times. You want to extract enough water from the papaya yet not completely crush it. Transfer the papaya to a large bowl and fluff it up to release it from its cramped state.
- Just before serving, add the beef jerky and Thai basil to the green papaya and toss to distribute evenly. At home, I normally pour on about 3/4 of the dressing, toss and taste, adding more dressing as needed. Or, serve the dressing on the side and invite guests to dress their own salad.
Notes
- An important part of this salad is to have the papaya crunchy, and Viet cooks can soak the shredded papaya in a slaked lime-and-water solution. I prefer the old fashioned method of squeezing on the shreds, which renders the papaya dryish so that once the dressing is poured on, the papaya soaks up all the flavors like a sponge.
↑ Back to top
Vietnamese Lemon Grass Beef and Noodle Salad (Bun Bo Xao)
Adapted from http://cooking.nytimes.com/recipes/1016865-vietnamese-lemon-grass-beef-and-noodle-salad-bun-bo-xao

Tags: Noodles
Staples Vietnam
Is starred.
Ingredients
- 4 tablespoons Demerara or granulated light brown sugar
- 3 tablespoons rice vinegar
- 4 tablespoons lime juice, from 2 large limes
- 4 tablespoons best quality fish sauce, such as Red Boat
- 2 garlic cloves, minced
- 1 1-inch length ginger, peeled and minced
- 1 medium-hot red chile, such as Fresno, chopped
- 1 hot red or green bird chile, thinly sliced
- 12 ounces rice vermicelli noodles
- 1 pound beef skirt steak or sirloin, in thin 1/4-inch slices
- 2 tablespoons best quality fish sauce, such as Red Boat
- 1 tablespoon Demerara or granulated light brown sugar
- 3 garlic cloves, minced
- 3 tablespoons finely chopped lemon grass, tender centers only
- 1 head lettuce, such as butter lettuce or Little Gems, tender center leaves separated
- 2 tablespoons vegetable oil
- 4 scallions, slivered
- 1 medium carrot, cut in 3-inch lengths, julienned (about 1 cup)
- 1 small cucumber, 3-inch lengths, julienned (about 1 cup)
- 1 3-inch length daikon radish, julienned (about 1 cup)
- Mixture of cilantro sprigs, mint leaves, basil leaves and small perilla (shiso) leaves, about 3 cups
- 4 tablespoons crushed roasted peanuts
- 4 tablespoons fried shallots, available in Asian groceries (or make your own using this recipe)
- Small handful bean sprouts or sunflower sprouts (optional)
For the
dipping sauce:
For the
stir-fry:
Steps
- In a small bowl combine sugar, rice vinegar and lime juice and stir to dissolve. Add fish sauce, garlic, ginger, chiles and 1/2 cup water and stir together. Let sit for 15 minutes for flavors to meld. (May be prepared a day ahead and refrigerated.)
- Bring a large pot of water to the boil. Add rice noodles, stir and turn off heat. Let noodles soften (5 to 8 minutes, depending on brand), then drain and rinse with cold water. Leave in colander at room temperature.
- Meanwhile, combine beef, fish sauce, sugar, garlic and lemon grass in a bowl. Massage seasoning into beef and let sit for 15 minutes.
- Line a serving bowl or four individual large wide soup bowls with a few lettuce leaves and top with noodles.
- Heat the oil in a wok over high heat. When wok is nearly smoking, add beef and quickly stir-fry until lightly browned and just cooked, about 2 minutes. Work in batches if necessary so meat browns and doesn’t steam. (If you do not have a wok, you may use a cast iron skillet and work in batches.)
- Top noodles with cooked beef, scallions, carrot, cucumber and daikon. Sprinkle with herbs, crushed peanuts and fried shallots (add sprouts if using). Drizzle lightly with dipping sauce and pass remaining sauce at table.
Notes
- FAVORITE
↑ Back to top
Vietnamese Lemongrass-Chili Oil
Tags: Chillis
Condiments Vietnam
Steps
- Combine 1/2 cup vegetable oil with 3 Tbsp.
- minced lemongrass (2-3 stalks, trimmed and minced) in
- small saucepan over medium heat. Heat until
- lemongrass aroma is released and it sizzles, about 30
- seconds to one minute. Add 4-6 Tbsp. ground dried red
- chilies (hot) and cook for additional 15 seconds or until
- chilies also sizzle and get a shade darker. Remove from
- heat. Use this for a noodle bowl topping, fried rich enrichment or anything else you fancy.
Notes
- FAVORITE
↑ Back to top
Vietnamese Pickled Daikon and Carrots for Banh Mì (Do
Chua)
Tags: Pickles
Vietnam
Servings: YIELD Makes about 1
quart
Ingredients
- 1 large carrot, peeled, cut into strips 1/8th-inch square and 3 inches long (about 2 cups)
- 1 medium daikon radish, peeled, cut into strips 1/8th-inch square and 3 inches long (about 2 cups)
- 1/4 cup sugar
- 1 tablespoon kosher salt
- 1 cup water
- 1/2 cup rice wine vinegar
Steps
- Combine carrots, radish, sugar, and salt in a large bowl. Using fingertips, massage salt and sugar into vegetables until dissolved. Add water and rice vinegar. Pack vegetables into a quart-sized mason jar. Pickles can be used immediately, or for best results, seal jar and refrigerate at least overnight and up to 1 week.
Notes
- For easiest results, use a mandoline to make the initial slices of carrot and daikon, then a knife to cut the slices into strips.
↑ Back to top
Vietnamese Pork Chops

Tags: Pork
Vietnam
Ingredients
- 1/2 cup plus 2 tbsp. sugar
- 1/3 cup thinly sliced shallots
- 1/4 cup thinly sliced lemongrass
- 2 tbsp. peanut oil
- 2 tbsp. soy sauce
- 1 1/2 tbsp. fish sauce (available at Red Boat)
- 1 tbsp. ground black pepper
- 8 cloves garlic, finely chopped
- 1 lb. 1/4″-thick pork blade chops, pounded thin
- Cooked white rice and nuoc cham (Vietnamese chili-garlic sauce), for serving
Steps
- Heat 1/2 cup of sugar in a 1-qt. heavy bottomed saucepan over medium-high heat, swirling pan often, until sugar dissolves and turns to liquid caramel. Remove from heat; add 1/4 cup boiling water. Return pan to heat; cook, swirling pan gently, until caramel dissolves in water. Remove from heat and let cool. Transfer to a food processor along with remaining sugar, shallots, lemongrass, oil, soy sauce, fish sauce, pepper, and garlic; purée until smooth. Place pork chops in a 9″ × 13″ baking dish and pour over purée; cover with plastic wrap and chill at least 1 hour or overnight.
- Heat a 12″ cast-iron grill pan over high heat. Working in batches, add chops; cook, turning once, until charred in spots and cooked through, about 2 minutes. Serve immediately with rice and chili-garlic sauce.
Notes
- FAVORITE
↑ Back to top
Vietnamese-American Thanksgiving Salad
Adapted from http://www.vietworldkitchen.com/blog/2012/11/vietnamese-american-thanksgiving-salad-recipe.html
Tags: Salad
Vietnam
Ingredients
- 1 or 2 Thai, Fresno or serrano chiles, chopped
- 1 clove garlic, chopped
- 1/2 teaspoon plus 1 teaspoon sugar
- 1 pinch salt
- 2 to 2 1/2 tablespoons fish sauce
- 5 tablespoons unseasoned Japanese rice vinegar
- 1 carrot, cut into julienne or matchsticks
- 1 fennel bulb, cored and thinly sliced (1 cup / 115 g total)
- 2 1/2 cups packed / 200 g shredded red cabbage
- 2 to 3 tablespoons chopped fresh mint and/or basil (Thai or Italian) leaves
- 2/3 cup toasted cashew halves and pieces
Steps
- Use a mortar and pestle to mash the chile, garlic, 1/2 teaspoon sugar, and salt into an orange-red paste. Scrape it into a bowl and add the remaining teaspoon of sugar, fish sauce and rice vinegar. Stir to dissolve the sugar and salt. Taste and tweak to create a spicy, tart, savory, lightly garlicky dressing.
- In a large bowl, combine the carrot, fennel, cabbage, herb, and cashew. Pour the dressing over the salad and toss well, either with tongs or better yet, with your hand in a gentle massaging motion. The vegetables will soften slightly but remain a little crunchy. Taste and adjust the flavors to your liking, balancing the sour, sweet, salty, and spicy. Transfer to a serving plate, leaving any unabsorbed dressing behind, and serve.
Notes
- FAVORITE
↑ Back to top
Vietnamese-Style Baked Chicken
Tags: Chicken
Vietnam
Servings: 4
Ingredients
- 2 pounds ( 900 g) bone-in, skin-on chicken thighs
- 1/4 cup ( 60 ml) soy sauce
- 1/4 cup ( 60 ml) Asian fish sauce, such as Red Boat
- 1/4 cup ( 55 g) palm or dark brown sugar
- 2 tablespoons ( 30 ml) grapeseed or other neutral oil
- 2 packed tablespoons ( 7 g) fresh cilantro leaves and tender stems, finely chopped
- 1 1/2 tablespoons ( 20 ml) fresh juice from 1 lime
- 1 teaspoon (5g) finely grated zest from 1 lime
- 1 tablespoon ( 10 g) minced peeled fresh ginger
- 2 teaspoons (10ml) hot chile paste ( sambal oelek)
- 3 medium cloves garlic, minced or grated (about 2 teaspoons)
- Sliced limes and cilantro leaves, for garnish
Steps
- Place thighs in a large zipper-lock bag. In a medium bowl, whisk together soy sauce, fish sauce, sugar, oil, cilantro, lime juice and zest, ginger, chili-garlic paste, and garlic. Pour marinade into bag with chicken, seal bag, and toss to coat well. Let chicken marinate for at least 30 minutes and up to 4 hours.
- Preheat oven to 425°F (218°C) and set oven rack to middle position. Line a rimmed baking sheet with foil and place a wire rack on top. Remove chicken from bag, allowing marinade to drip off, and set on wire rack skin-side up, making sure to leave space between thighs. Discard marinade. Bake until thighs register 155 to 160°F (68 to 71°C) on an instant-read thermometer, about 35 minutes. (Be sure to measure temperature in the center of the thickest part of the thighs, but not directly against the bone.) If chicken skin is not brown and crisp enough by the time the thighs are cooked through, set broiler to high and broil until browned and crisp, about 1 minute, being careful not to burn the skin. Transfer chicken to a platter and let rest for 5 minutes. Garnish with lime slices and cilantro, then serve.
↑ Back to top
Waffle House-Style Waffles

Tags: Breakfast
Servings: 4
Ingredients
- 1 ½ cups flour
- 2 tablespoons cornstarch
- 1 teaspoon salt
- ½ teaspoon baking powder
- ½ teaspoon baking soda
- 1 large egg
- ¼ cup sugar
- ¼ cup salted butter, softened, plus more for serving
- 1 teaspoon vanilla extract
- 1 cup half-and-half
- ½ cup buttermilk
- cooking spray
- pure maple syrup, and/or chocolate chips, for serving
Steps
- Whisk together flour, cornstarch, salt, baking powder, and baking soda in a bowl.
- Whisk together egg, sugar, butter, and vanilla in a separate large bowl until mixture is smooth. Whisk in half-and-half and buttermilk. Add flour mixture; stir until just combined and a few lumps remain. (Do not overmix.) Chill, covered, at least 1 hour or up to overnight.
- Preheat waffle iron to medium-high; lightly coat with cooking spray. Pour about 2/3 cup batter onto waffle iron. Cook until golden and crisp on edges, 4 to 6 minutes. Transfer to a plate; keep warm. Repeat with remaining batter.
- Serve waffles with maple syrup, chocolate chips, and/or additional butter.
↑ Back to top
Watermelon Lime Chiller

Tags: Beverages
Fruit
Ingredients
- 3 cups cubed seedless watermelon, well chilled
- 1 1/2 fresh limes, juiced
- 1/4 cup rum (optional)
- Sugar (or your favorite sweetener), to taste
- Fresh mint sprigs for garnish
↑ Back to top
Watermelon Margaritas

Tags: Beverages
Servings: 6
Ingredients
- 2 teaspoons sugar
- 1 lime wedge
- 3 1/2 cups cubed seeded watermelon
- 1/2 cup tequila
- 2 tablespoons sugar
- 3 tablespoons fresh lime juice
- 1 tablespoon Triple Sec (orange-flavored liqueur)
- Lime wedges or watermelon balls (optional)
Steps
- Place 2 teaspoons sugar in a saucer. Rub the rims of 6 glasses with 1 lime wedge; spin rim of each glass in sugar to coat. Set prepared glasses aside.
- Combine watermelon and next 4 ingredients (through Triple Sec) in a blender; process until smooth. Fill each prepared glass with 1/2 cup crushed ice. Add 1/2 cup margarita to each glass. Garnish with lime wedges or melon balls, if desired.
Notes
- FAVORITE
↑ Back to top
Watermelon, Heirloom Tomato, and Feta Salad

Tags: Cheese
Fruit Salad
Vegetables
Servings: YIELD Makes 6 servings
Ingredients
- 3 tablespoons extra-virgin olive oil
- 2 tablespoons chopped mixed fresh herbs
- 1 tablespoon fresh lemon juice
- 1/2 teaspoon kosher salt
- 4 heirloom tomatoes, cut into chunks
- 1 cup (1-inch) cubed red seedless watermelon
- 1 cup (1-inch) cubed seeded yellow watermelon
- 1/4 cup vertically sliced red onion
- 1/2 cup crumbled feta cheese
Steps
- Whisk together first 4 ingredients in a large bowl. Add tomato, watermelon, and onion; toss to coat. Sprinkle with cheese; toss gently.
Notes
- FAVORITE
↑ Back to top
West African Peanut Stew
Servings: 4–6
Ingredients
- ⅓ cup vegetable oil
- 2 lb. bone-in chicken thighs, skin discarded, patted dry with paper towels
- Kosher salt
- 1 large yellow onion, finely chopped
- ¼ cup finely chopped ginger
- 4 dried chiles de árbol
- 1 tsp. ground coriander
- 1 tsp. ground turmeric
- ½ tsp. freshly ground black pepper
- ½ tsp. ground cumin
- ¼ tsp. ground cinnamon
- ¼ tsp. fenugreek seeds
- 3 whole cloves
- 2 Tbsp. tomato paste
- ¾ cup smooth salted peanut butter
- 4 cups homemade chicken stock or low-sodium chicken broth
- 1 cup canned diced tomatoes
- 1 medium eggplant (about 1 lb.), peeled and cut into 1-in. cubes
- 10 okra pods (about 4 oz.), cut into 1-in. lengths
- Steamed white rice, for serving
- 1 fresh red chile, such as peri-peri or bird’s-eye, thinly sliced
- Roasted salted peanuts, coarsely chopped, for garnish
Steps
- To a pot set over medium-high heat, add 3 tablespoons of the vegetable oil. Season the chicken generously with salt and cook, turning once, until lightly browned on both sides, about 10 minutes. Transfer the chicken to a plate and set aside.
- To the empty pot, add the onion, ginger, chiles de á rbol, and the remaining oil and cook, stirring frequently, until softened, about 8 minutes. Add the coriander, turmeric, black pepper, cumin, cinnamon, fenugreek, and cloves and cook until fragrant, about 1 minute. Add the tomato paste and cook, stirring, until slightly darkened, about 3 minutes. Stir in the peanut butter, tomatoes, reserved chicken, and chicken stock and turn the heat to high. When the liquid boils, turn down the heat to medium-low and cook, partially covered, until the chicken is done but not falling off the bone, about 25 minutes. Add the eggplant and okra and cook, stirring occasionally, until the chicken is very tender and the vegetables are soft, 25–30 minutes more. Season with salt to taste.
- To serve, ladle the soup over rice, if desired, and sprinkle with the fresh chile and peanuts.
↑ Back to top
White Bean Tapenade
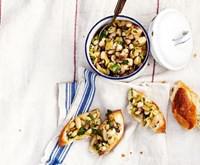
Tags: Beans and Other
Legumes Dips and
Spreads
Ingredients
- 1 15-ounce can white beans (such as cannellini or Great Northern), rinsed, coarsely chopped
- 1/2 cup pitted mixed olives, coarsely chopped
- 2 tablespoons coarsely chopped fresh flat-leaf parsley
- 2 tablespoons extra-virgin olive oil
- 1 teaspoon thinly sliced lemon zest
- 1/8 teaspoon crushed red pepper flakes
- 1 tablespoon (or more) fresh lemon juice
- Kosher salt, freshly ground pepper
- 1 baguette (for serving)
Steps
- Toss beans, olives, parsley, oil, lemon zest, red pepper flakes, and 1 tablespoon lemon juice in a medium bowl; season with salt, pepper, and more lemon juice, if desired. Serve tapenade with baguette.
- DO AHEAD: Tapenade can be made 2 days ahead. Cover and chill; bring to room temperature before serving.
Notes
- FAVORITE
↑ Back to top
White Beans and Carrots with Roasted Orange Vinaigrette
I made this.
Servings: 4-6
Ingredients
- 2 oranges
- 1 pound carrots
- 8 oz (3) beets
- 1 large red onion halved and sliced ½in thick
- 1 medium fennel bulb, trimmed halved cored and cut into ½ in wedges
- 5 tbsp extra-virgin olive oil (divided)
- 2 tbsp. chopped fresh thyme
- kosher salt
- fresh ground pepper
- 3 tbsp. white balsamic vinegar
- 15½ oz can cannellini beans
- ½ c chopped toasted hazelnuts or almonds (optional)
Steps
- Heat the oven to 425°
Grate 1 tbsp. orange zest
then halve oranges
In a large bowl toss the carrots, beats, onion, fennel with 2tbsp of
oil, half of the thyme, 1 tsp. salt and 1/2 tsp pepper.
Spread on rimmed baking sheet
with the orange halves cut side up
reserve the bowl
Roast until the carrots and
beets are tender (35-40 minutes)
In the bowl whisk together
3tbsp oil
orange zest
remaining thyme
vinegar
1/2 tsp salt
1/2 tsp pepper
Add the beans and toss to
coat
Add tossed beans to baking
sheet using a slotted spoon and stir them in
reserve the dressing
Roast an additional 5-10
minutes until the veggies begin to brown
Remove pan from oven- using
tongs squeeze the roasted orange juice into the dressing
transfer the vegetable bean
mixture into a bowl and dressing and toss to coat
Season as necessary Sprinkle
with nuts
↑ Back to top
Whole Grilled Sea Bass with Asian Aromatics
Ingredients
- 2 whole Santa Barbara sea bass or other whole fish (about 2 pounds each), cleaned and trimmed
- Sea salt and freshly ground black pepper
- 2 stalks lemongrass
- 3 jalapeno chiles, thinly sliced crosswise
- 6 scallions, trimmed and thinly sliced crosswise
- 4 cloves garlic, thinly sliced crosswise
- 2 limes, thinly sliced
- 6 thin slices fresh ginger
- 2 tablespoons thinly slivered fresh ginger
- 1 tablespoon fish sauce (optional)
- 5 tablespoons sesame oil plus more for brushing the fish
Steps
- Prepare the fish: Make 3 slashes in each side of the fish. (This helps the fish cook more evenly.) Generously season the inside of the fish with salt and pepper. Stuff the cavity of each fish with a lemongrass stalk, jalapenos, scallion, garlic, lime slices, and ginger slices. (The remaining aromatics go on at the end). Pin the cavities shut with small bamboo skewers or toothpicks. Brush the outside of the fish with sesame oil and season on both sides with salt and pepper.
- Set up your grill for indirect grilling and preheat to medium-high (400 degrees). When grill is hot, char the cedar planks directly over the fire. This will take about 5 minutes.
- Let the planks cool, then arrange the fish on the charred sides. Place the planks on the grill over the drip pan away from the heat. Indirect grill the fish until browned and cooked through, 30 to 40 minutes. Use an instant-read thermometer to check for doneness: The internal temperature will be about 135 to 140 degrees.
- When the fish is cooked, transfer it on the planks to a heatproof platter. Sprinkle the remaining chiles, scallions, garlic, and slivered ginger on top. Heat the remaining 5 tablespoons of sesame oil in a small saucepan almost to smoking. (Do this on your grill’s side burner or on the stove.) Immediately, drizzle the hot oil over the aromatics on top of the fish. It will cook them in an aromatic blast of sizzle and smoke. Serve the fish at once.
Notes
- Our thanks to the sponsors of Project Smoke Season 3:
- Steven Raichlen’s Project Smoke is a production of Maryland Public Television, Barbacoa, Inc., and Resolution Pictures. © 2017 Barbacoa, Inc.
↑ Back to top
Whole Roasted Cauliflower with Whipped Goat Cheese

Tags: Cheese
Vegetables
Servings: 6
Ingredients
- 2 1/2 cups dry white wine
- 1/3 cup olive oil
- 1/4 cup kosher salt
- 3 tablespoons fresh lemon juice
- 2 tablespoons unsalted butter
- 1 tablespoon crushed red pepper flakes
- 1 tablespoon sugar
- 1 bay leaf
- 1 head of cauliflower, leaves removed
- 4 ounces fresh goat cheese
- 3 ounces cream cheese
- 3 ounces feta
- 1/3 cup heavy cream
- 2 tablespoons olive oil plus more for serving
- Coarse sea salt (for serving)
Roasted
Cauliflower
Whipped Goat
Cheese and Assembly
Steps
- Preheat oven to 475°. Bring wine, oil, kosher salt, juice, butter, red pepper flakes, sugar, bay leaf, and 8 cups water to a boil in a large pot. Add cauliflower, reduce heat, and simmer, turning occasionally, until a knife easily inserts into center, 15-20 minutes.
- Using 2 slotted spoons or a mesh spider, transfer cauliflower to a rimmed baking sheet, draining well. Roast, rotating sheet halfway through, until brown all over, 30-40 minutes.
- While cauliflower is roasting, blend goat cheese, cream cheese, feta, cream, and 2 tablespoons oil in a food processor until smooth; season with sea salt. Transfer whipped goat cheese to a serving bowl and drizzle with oil.
- Transfer cauliflower to a plate. Drizzle with oil; sprinkle with sea salt. Serve with whipped goat cheese.
- DO AHEAD: Whipped goat cheese can be made 1 day ahead. Cover; chill.
Roasted Cauliflower
Whipped Goat Cheese and
Assembly
Notes
- FAVORITE
↑ Back to top
Whole Roasted Chicken Infused with Tangerines and Rosemary
with a Tangerine Glaze
Tags: Chicken
Poultry
Servings: about 2/3 cup
Ingredients
- 1 whole chicken, about 4 pounds
- 2 tablespoons unsalted butter
- Salt and pepper
- Essence, recipe follows
- 1 yellow onion, quartered
- 3 tangerines, quartered
- 4 sprigs fresh rosemary
- 1 cup fresh tangerine juice
- 1 tablespoon honey
- Salt and pepper
- 8 roasted new potatoes, cut into wedges, warm
- 1 cup assorted roasted baby root vegetables, i.e. baby carrots, red, and golden beets, warm
- 2 fresh rosemary sprigs
Steps
- Preheat the oven to 400 degrees F.
- Rub the entire chicken with the butter. Season the chicken with salt, pepper, and Essence, including the cavity and the area between the skin and the breast meat. Season with onions and tangerines with salt and pepper. Stuff the cavity with the onions, tangerines, and fresh rosemary.
- Place the chicken on a rack in a roasting pan. Place in the oven. Roast the chicken for 45 minutes to an hour or until the juices run clear. After the chicken has roasted for 20 minutes, baste the entire bird with the pan drippings. Baste every ten minutes.
- For the glaze: Remove the chicken from the oven and allow to rest, reserving the pan drippings. In a hot saute pan, add the pan drippings, tangerine juice, and honey. Season with salt and pepper. Reduce the sauce to 1/2 cup, about 8 to 10 minutes.
- Place the roasted chicken on a platter. Arrange the roasted vegetables around the roasted chicken. Drizzle the sauce over the chicken and garnish with rosemary sprigs.
- Combine all ingredients thoroughly and store in an airtight jar or container.
- Yield: about 2/3 cup
- Recipe from "New New Orleans Cooking", by Emeril Lagasse and Jessie Tirsch. Published by William and Morrow, 1993.
Notes
- FAVORITE
↑ Back to top
Whole Roasted Fish with Oregano, Parsley, and Lemon
Adapted from https://www.seriouseats.com/recipes/2014/07/whole-roasted-fish-oregano-parsley-lemon-recipe.html
Servings: 4
Ingredients
- Kosher salt
- 2 (2-pound; 900g) whole white-fleshed fish, such as sea bass, branzino, or porgy, scaled and gutted
- Freshly ground black pepper
- Lemon slices, peeled garlic cloves, peeled ginger slices, fresh oregano sprigs, and/or fresh parsley sprigs, for stuffing
- Extra-virgin olive oil, for rubbing and drizzling
Steps
- Fill a large bowl about halfway full with room-temperature water and add enough salt to taste, stirring to dissolve salt. Add fish and let soak for 10 minutes. Drain fish and pat dry inside and out with paper towels.
- Preheat oven to 350°F (180°C) and position rack in center of oven. Line a rimmed baking sheet with parchment paper. Season fish inside and out with salt and pepper. Stuff belly cavities with lemon slices, garlic cloves, ginger, and herb sprigs.
- Roast fish until an instant-read thermometer inserted into thickest part registers 135°F (57°C), about 20 to 25 minutes, depending on dimensions of fish. Alternatively, roast until fins come right off when pulled and flesh can be felt to flake under the skin when you press on it. Let rest 5 minutes.
- Gently remove fillets from bone cage, drizzle with olive oil, and serve.
↑ Back to top
Whole-Wheat Sandwich Bread
Tags: Breads
Ingredients
- Biga
- 2 cups (11 ounces) bread flour
- 1 cup (8 ounces) warm water (100-110 degrees)
- 1/2 teaspoon instant or rapid-rise yeast
- Soaker
- 3 cups (16 1/2 ounces) whole wheat flour, plus extra for kneading
- 1/2 cup wheat germ(see note)
- 2 cups (16 ounces) whole milk
- Dough
- 1/4 cup honey
- 4 teaspoons table salt
- 2 tablespoons instant or rapid-rise yeast
- 6 tablespoons unsalted butter, softened
- 2 tablespoons vegetable oil
- Bread flourfor work surface
Steps
- For the Biga: Combine bread flour, water, and yeast in large bowl and stir with wooden spoon until uniform mass forms and no dry flour remains, about 1 minute. Cover bowl tightly with plastic wrap and let stand at room temperature (70 degrees) overnight (at least 8 hours and up to 24 hours).
- For the Soaker: Combine whole-wheat flour, wheat germ, and milk in large bowl and stir with wooden spoon until shaggy mass forms, about 1 minute. Turn out dough onto lightly floured work surface and knead until smooth, 2 to 3 minutes. Return soaker to bowl, cover tightly with plastic wrap, and refrigerate overnight (at least 8 hours and up to 24 hours).
- For the Dough: Tear soaker apart into 1-inch pieces and place in bowl of stand mixer fitted with dough hook. Add biga, honey, salt, yeast, butter, and oil. Mix on low speed until cohesive mass starts to form, about 2 minutes. Increase speed to medium and knead until dough is smooth and elastic, 8 to 10 minutes. Turn out dough onto lightly floured counter and knead 1 minute. Shape dough into ball and place in lightly greased container. Cover tightly with plastic wrap and allow to rise at room temperature 45 minutes.
- Gently press down on center of dough to deflate. Holding edge of dough with fingertips, fold partially risen dough over itself by gently lifting and folding edge of dough toward middle. Turn bowl 90 degrees; fold again. Turn bowl and fold dough 6 more times (total of 8 folds). Cover and allow to rise at room -temperature until doubled in volume, about 45 minutes.
- Adjust oven racks to middle and lowest positions, place baking stone on middle rack, and heat oven to 400 degrees. Spray two 81/2 by 41/2-inch loaf pans with nonstick cooking spray. Transfer dough to well-floured counter and divide into 2 pieces. Working with 1 ball of dough at a time, pat each into 8 by 17-inch rectangle. With short side facing you, roll dough toward you into firm cylinder, keeping roll taut by tucking it under itself as you go. Turn loaf seam side up and pinch it closed. Place loaf seam side down in prepared loaf pan, pressing gently into corners. Repeat with second ball of dough. Cover loaves loosely with plastic wrap and allow to rise at room temperature until almost doubled in size, 60 to 90 minutes (top of loaves should rise about 1 inch over lip of pan).
- Place empty loaf pan or other heatproof pan on bottom oven rack and bring 2 cups water to boil on stovetop. Using sharp serrated knife or single-edge razor blade, make one 1/4-inch-deep slash lengthwise down center of each loaf. Pour boiling water into empty loaf pan in oven and set loaves on baking stone. Reduce oven temperature to 350 degrees. Bake until crust is dark brown and internal temperature registers 200 degrees on instant-read thermometer, 40 to 50 minutes, rotating loaves 180 degrees and side to side halfway through baking.
- Transfer pans to wire rack and let cool 5 minutes. Remove loaves from pans, return to rack, and cool to room temperature, about 2 hours.
Notes
- Technique
- Soaking Wheat for Better Bread
- When developing the recipe for whole-wheat bread, our goal was to cram as much whole wheat into the dough as possible to create a seriously wheaty sandwich loaf. Fifty percent whole wheat wasn’t enough to get us to this goal—but any more and the bread got too heavy and developed off-flavors. Would giving the whole-wheat flour a long soak before creating the final dough allow us to bump up its amount?
- The Experiment
- We baked two loaves, each with a 60:40 ratio of whole wheat to refined bread flour. We soaked the whole-wheat flour in the first batch overnight in the milk from our recipe before combining it with the other ingredients. In the second batch, we didn’t give the whole-wheat flour any special treatment and proceeded with the recipe as usual.
↑ Back to top
Wonton Soup

Servings: READY IN: 46mins
SERVES: 6-8
Ingredients
- 8 cups chicken stock (or canned broth)
- 3 scallions, left whole
- 2 inches fresh ginger, peeled and sliced into thin coins
- kosher salt, to taste
- 2 tablespoons chicken stock (or canned broth)
- 2 1⁄4 teaspoons cornstarch
- 1 tablespoon minced scallion
- 1 inch fresh ginger, peeled and minced
- 1 ⁄4 lb ground pork
- 1 tablespoon soy sauce
- 1 tablespoon dry sherry
- 1 teaspoon sesame oil
- 1 pinch sugar
- 20 wonton wrappers (3 1/2 inch squares)
- 1 cup fresh spinach leaves, torn into large pieces and packed in cup
SOUP BASE
WONTONS
SOUP ADDITION
Steps
- Soup Base:.
- Place ingredients for soup base into a large soup pot and bring to a boil over medium heat.
- Once boiling, reduce heat to low, cover and simmer for 10 minutes to combine flavors.
- Remove broth from heat and set aside.
- Wontons:.
- Place 2 tbsp chicken stock and cornstarch into a large mixing bowl and stir to combine.
- Add minced scallions, minced ginger, pork, soy sauce, dry sherry, sesame oil, and sugar, and stir well.
- Fill a cup with water and set it nearby.
- Place a wrapper in front of you so that it looks like a diamond.
- Dip your finger in the water and moisten all 4 edges of the wrapper.
- Place about 1 tsp of the meat mixture in the center of the wrapper and fold in half over the filling to make a triangle.
- Press firmly along the sides to seal it and remove any excess trapped air.
- Moisten the left and right corners of the triangle and pinch them together.
- Place stuffed wonton on a wax paper lined baking sheet and cover lightly with a kitchen towel.
- Repeat until all wontons are made.
- Soup:.
- Bring reserved broth to a boil, cover and reduce heat to medium low.
- Add wontons to simmering broth.
- Stir occasionally until wonton filling is firm and cooked through - about 5 minutes.
- Stir in spinach leaves and cook for 30 seconds until they wilt.
- Serve hot.
↑ Back to top
Worcestershire Sauce
Adapted from http://www.stumbleupon.com/su/30EKDy/www.bruceandmark.com/we-cook/2012/5/23/worcestershire-sauce.html

Tags: Condiments
Ingredients
- 2 cups (500 ml) malt vinegar (look for it from online grocers)
- 2 cups (500 ml) distilled white vinegar (the strong stuff)
- 1 cup (250 ml) molasses (preferably unsulfured molasses)
- 1 cup (250 ml) soy sauce (don't even think about low-sodium here)
- 1/2 cup (120 ml) tamarind concentrate (look for it in the Latin American aisle with the condiments)
- 1/3 cup kosher salt
- 1/4 cup brown mustard seeds
- 1/4 cup yellow mustard seeds
- 1 tablespoon whole cloves
- 1 tablespoon coriander seeds
- 1 tablespoon minced peeled fresh ginger
- 1/2 tablespoon cracked black peppercorns
- 1/2 tablespoon cracked white peppercorns
- 1 teaspoon turmeric
- 2 large yellow onions, chopped
- 4 to 6 juicy tinned anchovy fillets, chopped
- 12 green cardamom pods, crushed
- 12 to 15 chiles de árbol, stemmed, then chopped (all the seeds, too)
- 6 smashed, peeled garlic cloves
- 2 cinnamon sticks
- 1 star anise pod
- 1 cup (200 grams) white granulated sugar
Steps
- Yep, empty out the spice drawer. Stir it all around in the pan and bring it to a full simmer over medium-high heat. Then knock the heat down to low and simmer for about 10 minutes.
- And yes, anchovies. Worcestershire sauce is probably modeled on garum, an ancient Roman condiment made from the juice of salted, often fermented anchovies. If you've never had garum--look for it from suppliers online--then you've never really had a truly great grilled artichoke. Just sayin'.
- While the cauldron's going, melt 1 cup (200 grams) white granulated sugar in a large nonstick skillet set over medium heat. Pour in the sugar, leave it be for a bit, then stir it with a heat-safe spatula. Continue cooking until it's pretty dark, not black, but definitely beyond amber. More flavor, more flavor.
- Crank the heat up under the cauldron, bring it to a full boil, and slowly pour in the hot sugar syrup. It'll foam and roil. Beware.
- Stir until the sugar dissolves in the saucepan, then reduce the heat a bit and simmer for 5 minutes, until slightly thickened. Pour the contents of the pan into a big glass jar (got mine at a big-box store), seal closed, and set it in the fridge to ripen for 3 to 4 weeks. Then strain it through a fine-mesh sieve (to catch even the ginger threads) and into smaller glass bottles or jars; seal these closed and store them in the fridge for up to 4 months. Bring a little as a house gift for your next dinner party. You'll be invited back. Soon. And often.
Notes
- FAVORITE
↑ Back to top
Worcestershire Sauce
Adapted from http://www.stumbleupon.com/su/30EKDy/www.bruceandmark.com/we-cook/2012/5/23/worcestershire-sauce.html

Tags: Condiments
Is starred.
Ingredients
- 2 cups (500 ml) malt vinegar (look for it from online grocers)
- 2 cups (500 ml) distilled white vinegar (the strong stuff)
- 1 cup (250 ml) molasses (preferably unsulfured molasses)
- 1 cup (250 ml) soy sauce (don't even think about low-sodium here)
- 1/2 cup (120 ml) tamarind concentrate (look for it in the Latin American aisle with the condiments)
- 1/3 cup kosher salt
- 1/4 cup brown mustard seeds
- 1/4 cup yellow mustard seeds
- 1 tablespoon whole cloves
- 1 tablespoon coriander seeds
- 1 tablespoon minced peeled fresh ginger
- 1/2 tablespoon cracked black peppercorns
- 1/2 tablespoon cracked white peppercorns
- 1 teaspoon turmeric
- 2 large yellow onions, chopped
- 4 to 6 juicy tinned anchovy fillets, chopped
- 12 green cardamom pods, crushed
- 12 to 15 chiles de árbol, stemmed, then chopped (all the seeds, too)
- 6 smashed, peeled garlic cloves
- 2 cinnamon sticks
- 1 star anise pod
- 1 cup (200 grams) white granulated sugar
Steps
- Yep, empty out the spice drawer. Stir it all around in the pan and bring it to a full simmer over medium-high heat. Then knock the heat down to low and simmer for about 10 minutes.
- And yes, anchovies. Worcestershire sauce is probably modeled on garum, an ancient Roman condiment made from the juice of salted, often fermented anchovies. If you've never had garum--look for it from suppliers online--then you've never really had a truly great grilled artichoke. Just sayin'.
- While the cauldron's going, melt 1 cup (200 grams) white granulated sugar in a large nonstick skillet set over medium heat. Pour in the sugar, leave it be for a bit, then stir it with a heat-safe spatula. Continue cooking until it's pretty dark, not black, but definitely beyond amber. More flavor, more flavor.
- Crank the heat up under the cauldron, bring it to a full boil, and slowly pour in the hot sugar syrup. It'll foam and roil. Beware.
- Stir until the sugar dissolves in the saucepan, then reduce the heat a bit and simmer for 5 minutes, until slightly thickened. Pour the contents of the pan into a big glass jar (got mine at a big-box store), seal closed, and set it in the fridge to ripen for 3 to 4 weeks. Then strain it through a fine-mesh sieve (to catch even the ginger threads) and into smaller glass bottles or jars; seal these closed and store them in the fridge for up to 4 months. Bring a little as a house gift for your next dinner party. You'll be invited back. Soon. And often.
Notes
- FAVORITE
↑ Back to top
Years in the Making, a Keeper Japanese Orange Dressing
Adapted from https://andreanguyen.substack.com/p/japanese-orange-salad-dressing-carrot-ginger-dressing
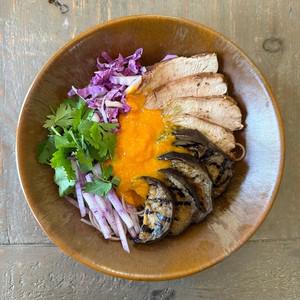
Servings: 2 cups (480ml)
Ingredients
- 180g | 6 oz carrot (1 large)
- 1 cup water, divided
- 1/2 tsp vegetable bouillon paste or instant dashi granules, plus more as needed
- 2 big pinches smoked paprika
- 45g | 1.5oz shallot or yellow onion, thinly sliced
- 30g | 1 oz peeled ginger, thinly sliced (3 to 4 Tbsp)
- 40 to 50g | 2 to 2 1/2 Tbsp white (shiro) miso
- 2 Tbsp unseasoned rice vinegar
- 1 Tbsp agave or honey
- 80ml | 1/3 cup neutral oil, such as canola or rice bran
- 1/16 to 1/8 tsp xanthan gum (optional, to bind)
- Fine sea salt
Steps
- Prep and cook the veggies: Peel the carrot, cut lengthwise, then cut crosswise into half-moons that are no thicker than 1/4 inch (6mm). Transfer the carrot to a small saucepan, add 1/2 cup (120ml) water, bouillon paste, and smoked paprika.
- Bring to a vigorous simmer over medium, then turn down the heat to medium-low to maintain the bubbly action. Cover and cook until the carrot pieces are mostly pierceable with the tip of a knife (you’ll meet a little resistance), 5 minutes. Most of the water will have disappeared. Add the shallot, continue the bubbly cooking, stirring until softened and water is no longer visible, about 1 minute. Remove from the heat and briefly cool, uncovered, for 5 minutes to settle flavors and allow excess moisture to evaporate.
- Whirl into creaminess: Scrape the carrot mixture into a blender, food processor, or mini chopper. Add the remaining 1/2 cup (120ml) water plus the ginger, miso, vinegar, oil, and 1/16 tsp xanthan gum. Blend into a velvety, thick texture like a loose hummus.
- Check the flavor and texture: Taste the dressing and if needed, blend in up to 1 1/2 tsp miso, a pinch of smoked paprika, or extra pinches bouillon (dashi granules) or salt. Aim for a bold savory finish. Whatever that the dressing eventually dresses will be mildly salty so the dressing needs to bring on the salty hit.
- If the dressing texture seems loose, blend in the remaining 1/16 tsp xanthan (if using). The dressing is ready to use or to store.
- Build the leafy, salady part: Use crisp Romaine, iceberg, or cabbage, torn into bite size pieces or cut into chewable ribbons. For color, add some radicchio or some other interesting leaves like purple Napa, which suddenly popped up at our local markets last week.
- Play with your vegetables! Spring has so much to offer, such as purple napa cabbage and daikon.
- Add pops of crunch and color: Look to thinly sliced radishes, daikon, and cucumber. Use a vegetable peeler to shave rainbow colored carrot. To crisp up radishes, daikon, or carrot, put the thin pieces in ice water till they bend, then you can drain and keep them refrigerated for days; I use a mandoline to make super thin slices. Snap peas or snow peas, halved lengthwise on the diagonal, would be great too.
- Include juicy crunch: Cherry tomatoes cut in half are swell.
- Inject herbaceous notes: Not necessary because the ginger is there but I’d try mint, shiso, cilantro, or tarragon. Coarsely chop or tear the herbs if they’re big.
- Add substance for a main-dish salad: Employ leftovers (roast chicken, poached or grilled seafood, grilled pork or beef, grilled eggplant, panfried tofu, char siu tofu or pork , Maggi chicken or butternut squash you get the idea!). Or, quickly sear off some shrimp or mushroom. Edamame or garbanzos (chickpeas) would be swell too. Any topping should be at room temperature or slightly warm.
- Produce that I’d avoid: Baby lettuce mix would collapse under the weight of this dressing. Raw mushroom would be no bueno. (Raw mushroom often becomes like wet cardboard in salads. )
- Side salads use 1 1/2 to 2 cups of greens and veggies (50 to 75g) plus 2 to 3 Tbsp dressing
- Main-dish salad with needs 4 cups (150g) of greens and veggies, 1/3 cup dressing, plus whatever protein you want
- Plop some sauce on your plate and drag morsels through it to see how the sauce transforms the food. Get fancy and smear sauce on a plate then put your protein on top. The dressing’s vibrant color is a knockout.
- Offer the sauce in a bowl with crudités, such as: endive, little gem leaves, celery, snow peas, blanched asparagus, thickly sliced cucumber, thinly sliced radishes, jicama sticks.
How to use the dressing:
(1) Start with a salad
(of course):
You want a base of crisp leaves plus some crunchy thrills for color
and
flavor pops. How I build salads for this carrot-ginger dressing:
How much dressing to use
per salad: It’s up to you but in general, I’ve noticed this pattern of
usage in my home:
(2) Let the dressing be
a sauce or dip:
This is a nice way to
gauge how the carrot-orange dressing plays with others:
↑ Back to top
Yellow Rice
Tags: Mexican
Rice
Ingredients
- 1/2 cup Achiote Oil
- 1/2 cup Sofrito
- 1/2 cup alcaparrado (see below) or coarsely chopped pimiento-stuffed olives
- 2 to 3 tablespoons salt
- 1 teaspoon ground cumin
- 1 teaspoon ground black pepper
- 2 bay leaves
- 3 cups long grain white rice
- Chicken Broth, homemade or canned as needed (about 4 cups)
Steps
- Heat the achiote oil in a heavy 4- to 5-quart pot with a tight-fitting lid over medium heat. Stir in the sofrito and cook until most of the water is evaporated. Add the alcaparrado or olives, salt, cumin, pepper, and bay leaves, stirring to combine. When the mixture is bubbling, add the rice, stirring to coat and to fix the color to the rice. Pour in enough chicken broth to cover the rice by the width of two fingers. Bring to a boil and boil until the broth reaches the level of the rice.
- Stir the rice once, reduce the heat to low, cover, and cook for 20 minutes, without opening the pot or stirring.
- Gently fluff the rice up by scooping the rice from the bottom to the top. Serve hot.
Notes
- FAVORITE
↑ Back to top
Yemeni Spice Rub
Tags: Spices
Yemen
Servings: YIELD Makes about 1 cup
Ingredients
- 1/3 cup caraway seeds (generous 1 ounce)
- 1/3 cup cumin seeds (about 1 ounce)
- 3 tablespoons cardamom seeds (about 1/2 ounce)
- 1 tablespoon whole black peppercorns
- 4 whole cloves
- 3 tablespoons coarse kosher salt
- 3 tablespoons ground turmeric
Steps
- Heat heavy large skillet over medium-high heat. Add first 5 ingredients; toast until aromatic and cumin seeds are slightly darker, stirring often, about 2 minutes. Cool slightly. Working in batches, finely grind spice mixture and salt in spice mill. Transfer to medium bowl. Whisk in turmeric. Transfer to airtight container. DO AHEAD: Can be made 1 month ahead. Store at room temperature.
Notes
- FAVORITE
↑ Back to top
Yen Ta Fo "Pink Noodle Soup" เย็นตาโฟ
Adapted from https://hot-thai-kitchen.com/yen-ta-fo/

Servings: 4 servings
Ingredients
- 4 cubes Chinese red bean curd
- 2 Tbsp red bean curd liquid
- 3 Tbsp Sriracha hot sauce (if you’re making this for kids and you want NO heat at all, you can substitute ketchup)
- 5 Tbsp white vinegar
- 3 Tbsp sugar
- 4 cloves garlic
- 1-2 Thai chilies, optional
- 2 tsp fish sauce
- (This is a basic broth you can use for regular noodle soup!)
- Serves 4 (about 3/4 cup per serving)
- 720 ml pork stock, unsalted (or sub chicken stock, see note)
- 2 tsp soy sauce
- ¼ tsp salt
- ½ tsp sugar
- A dash white pepper
- Noodles, any kind you like in your soup. For dry rice noodles, soak them in water until softened and drain.
- Protein options: fish balls, shrimp balls, squid balls, fish cakes, or any kind of Asian style seafood balls/cakes. These are available at Asian grocery stores at the seafood counter, in the refrigerated section, or in the frozen section. You can also just use fresh seafood if you can’t find these.
- Vegetables: water spinach or regular spinach leaves, a handful per person
- Fried garlic & garlic oil (see instructions)
- Chopped cilantro and/or green onion for garnish
- Other common toppings: Tofu puffs, fried wonton wrappers, cooked chicken or pork blood, and if you’re in Thailand, preserved squid is a classic in Yen Ta Fo (but I don’t like it!).
Yen Ta Fo
Sauce:
The Broth:
* Note: Because the Yen Ta Fo sauce has a strong flavour, your stock
can simply be made by simmering pork bones in water for 2 hours
without
any aromatics.
Steps
- For the Yen Ta Fo sauce: Combine all ingredients and blend until smooth. Simmer gently over low heat for 3-4 minutes to cook the garlic and the chilies.
- For the broth: Bring the broth to a boil and add all the seasoning. Taste and add more salt as needed, it should be seasoned strongly enough to be a stand-alone broth for regular noodle soups. Keep the broth hot over very low heat while you prep the noodles.
- For fried garlic: Chop a head of garlic and add to a small pot or wok. Add just enough oil to almost cover the garlic. Turn the heat on medium until the garlic starts to bubble, then turn the heat down to maintain gentle bubbling. Fry the garlic, stirring frequently, until the garlic is golden. Remove from heat and pour into a bowl immediately to stop the cooking. If you want to keep the garlic crispy you can drain it from the oil and keep them separate.
- Assembly: Bring a large pot of water to a simmer and add your fish balls/cakes and tofu puffs and leave them in there to heat up while you blanch other things (this is not what I did in the video, but it works better!).
- Blanch your noodles in a strainer; how long this takes depends on what type of noodles you are using, but if using rice noodles that are fully cooked like I did in the video, or if using thin dry rice noodles that have been soaked in water, it should take just 5 seconds. Be careful not to overcook because remember they will be soaking in hot soup later! Drain well and add to serving bowls.
- Blanch your vegetables for a few seconds just until wilted, drain well and add to bowls. Take out the fish balls and tofu and add to bowls. Add about 1 – 1½ tablespoon of Yen Ta Fo sauce per bowl (you can add more later if you like), sprinkle with a teaspoon of fried garlic and oil, and pour the hot broth over. Sprinkle with chopped cilantro and/or green onions, and garnish with fried wontons, if using.
↑ Back to top
Yocheved Hirsch's Round Challah

Tags: Breads
Jewish
I made this. Is starred. Rated 5/5
Ingredients
- 1/3 cup warm tap water (about 110°)
- 1 envelope yeast
- 1/2 cup flour
- 5 cups flour
- 1/4 cup sugar
- 1 cup warm tap water
- 1/2 cup oil
- 2 teaspoons salt
- 2 large eggs, plus 2 egg yolks
- 2 cups raisins (I soaked them in a mixture of warm water and dark rum
- before incorporating them into the dough)
Sponge:
Dough:
Steps
- Mix these 3 ingredients together and let sit for about 10 minutes. (If you're using "instant" yeast, you don't need to wait this long.)
- Add the sugar, water, oil, salt, eggs and yolks to yeast mixture. Mix in enough flour to make a tacky dough. Change from the mixer paddle to the dough hook. Knead until smooth and elastic, adding only as much flour as needed to form the dough into a cohesive ball. Place in oiled bowl, turning to grease top; cover and let rise at room temperature until doubled, about an hour. Punch down dough and turn out onto a floured surface. If you're going to use the raisins, knead them in at this time. This is A LOT of raisins per loaf. If the dough doesn't cooperate, cover and let it sit for a few minutes before you start again.
- Divide the dough in half. Roll each half into a 28" long rope, then coil the rope around itself to form a spiral. Place on a greased or parchment-covered baking sheet and repeat with the second dough portion. Cover and let rise until doubled, 45-60 minutes.
- Before baking, brush loaves with a well beaten egg. (I used the egg whites that
- were left over from separating the yolks.) Bake in a preheated 375° oven 30-40 minutes until well browned and loaves sound hollow when rapped on their bottoms. Take loaves out of the oven and cool on wire racks.
Sponge:
Dough:
Notes
- FAVORITE
↑ Back to top
Yogurt and Honey Bread
Tags: Breads
Servings: 1 loaf
Ingredients
- 1 cup Greek-style yogurt
- 1/4 cup honey
- 2 1/4 cups ( 10 1/8 ounces) bread flour, divided
- 2 1/4 teaspoons yeast
- 1 teaspoon salt
- 2 tablespoons butter at room temperature
Steps
- Combine the yogurt and honey in a microwave container or small pan and heat gently to warm it to room temperature and melt the honey. Stir to incorporate the honey into the yogurt. If it gets too warm, allow it to cool to room temperature. Put half of the bread flour into the bowl of your stand mixer and add the yogurt mixture and the yeast. Stir to combine. Cover the bowl with plastic wrap and set aside for 20 minutes.
- Add the rest of the flour and knead with the dough hook and knead until the dough is smooth and elastic. Add the salt and butter and continue kneading until it is completely incorporated. Cover the dough with plastic wrap and set aside until doubled in size, about 90 minutes.
- Preheat the oven to 325 degrees and sprinkle some cornmeal on a baking sheet. When the dough had doubled, remove it from the bowl and form it into your preferred shape. Place it on the baking sheet seam-side down. Cover with plastic wrap and set aside until doubled in size, about 45 minutes.
- Remove the plastic wrap, slash the loaf as desired, and bake at 325 degrees until the loaf is browned and the internal temperature of the loaf is about 200 degrees - about 40 minutes. Remove the loaf from the oven and let it cool completely on a rack before cutting.
↑ Back to top
Yogurt Hollandaise Sauce

Tags: Dairy
Sauces
Servings: 1 1/4 cups
Ingredients
- 1 cup low-fat plain yogurt, plain
- 2 teaspoons lemon juice
- 3 egg yolks
- 1⁄2 teaspoon salt
- 1⁄2 teaspoon Dijon mustard
- 1 pinch fresh ground pepper
- optional 1 tbsp fresh dill or parsley
Steps
- Use double boiler or like me - place a strainer/sieve over a sauce pan of water and place a bowl in the sieve.
- Beat yogurt, lemon juice, egg yolks well
- Heat over simmering water, stirring frequently, until sauce has thickened, approx 15 min (sauce will become thinner after about 10 min and then thicken again).
↑ Back to top
Yogurt Hollandaise Sauce
Servings: 1 1/4 cups
Ingredients
- 1 cup low-fat plain yogurt, plain
- 2 teaspoons lemon juice
- 3 egg yolks
- 1⁄2 teaspoon salt
- 1⁄2 teaspoon Dijon mustard
- 1 pinch fresh ground pepper
- optional 1 tbsp fresh dill or parsley
Steps
- Use double boiler or like me - place a strainer/sieve over a sauce pan of water and place a bowl in the sieve.
- Beat yogurt, lemon juice, egg yolks well
- Heat over simmering water, stirring frequently, until sauce has thickened, approx 15 min (sauce will become thinner after about 10 min and then thicken again).
↑ Back to top
You'Ll Want to Put Grilled Watermelon Salsa On Everything
This Summer
Servings: Makes 3 cups.
Ingredients
- 2 Tbsp extra-virgin olive oil, divided
- ½ tsp ground chili powder
- 1½ lb watermelon, sliced ¾-inch thick
- Kosher salt, to taste
- 1 cup cherry tomatoes, coarsely chopped
- ⅓ cup chopped English cucumber
- 2 Tbsp chopped fresh cilantro
- 1 Tbsp chopped red onion
- ½ jalapeño pepper, seeded and chopped
- 1 Tbsp fresh lime juice
- Black pepper, to taste
Steps
- Preheat grill.
- In a small bowl, combine 1 Tbsp olive oil and chili powder. Brush on both sides of watermelon slices; sprinkle with salt. Grill watermelon 3-5 minutes per side or until grill marks form. Transfer to a cutting board. When cool enough to handle, remove rind and seeds; coarsely chop.
- In a large bowl, combine watermelon, tomatoes, cucumber, cilantro, onion, jalapeño and remaining 1 Tbsp olive oil. Stir in juice. Refrigerate 1 hour to let flavors meld. Just before serving, season with salt and pepper.
↑ Back to top
Yucatecan Pickled Red Onions (Escabeche De Cebolla)
Adapted from http://www.saveur.com/article/Recipes/Escabeche-De-Cebolla--Yucatecan-Pickled-Red-Onions
Tags: Mexican
Pickles
Is starred.
Ingredients
- 1 tbsp. kosher salt
- 1 large red onion, thinly sliced lengthwise
- 1 tsp. whole black peppercorns
- 1 tsp. dried oregano
- 1 tsp. cumin seeds
- 3 cloves garlic, peeled and halved lengthwise
- 1 1/2 cups red wine vinegar
Steps
- In a bowl, toss salt and onion together; let sit until onion releases some of its liquid, about 15 minutes. Transfer to jar along with peppercorns, oregano, cumin, and garlic, and pour over vinegar; seal with lid. Refrigerate at least 4 hours before using.
Notes
- FAVORITE
↑ Back to top
Yucatán-Style Pickled Red Onions in Sour-Orange Juice
Servings: 2 cups pickled red
onions
Ingredients
- 1 red onion, finely diced
- 15 whole black peppercorns
- 15 whole allspice berries
- 4 bay leaves
- 1/3 cup juice from 1 grapefruit (2 1/2 ounces; 80ml) (see note)
- 1/3 cup juice from 1 to 2 oranges (2 1/2 ounces; 80ml) (see note)
- 1/3 cup juice from 4 to 5 limes ( 2 1/2 ounces; 80ml) (see note), plus a little extra just in case
- Salt
Steps
- Place onion, peppercorns, allspice, and bay leaves in a small saucepan and cover with water. Bring to a boil over high heat. Remove from heat, drain carefully, and transfer onions to a sealable container, such as a Mason jar.
- Add grapefruit, orange, and lime juice. Onions should be submerged at this point; if they aren't, top off with extra lime juice. Stir to combine, season to taste with salt (they should be quite salty—use about 1 teaspoon of kosher salt or 1/2 teaspoon of table salt), cover, and refrigerate until color deepens, about 2 hours. Onions can be stored in the refrigerator for up to 2 weeks. Do not eat peppercorns, allspice berries, or bay leaves.
Notes
- Seville oranges are sometimes available in Latin markets. If available, use 6 tablespoons Seville orange juice in place of the grapefruit, lime, and orange juice combination.
↑ Back to top
Yuzu-Miso Soba Noodle Soup
Servings: 4
Ingredients
- Salt
- 2 (7-ounce) packets soba noodles
- 5 cups vegetable stock or dashi
- 3 tablespoons bottled yuzu juice (or lemon juice to taste)
- 2 tablespoons white (shiro) miso paste
- 1 (14- to 16- ounce) package extra-firm tofu, cut into 1-inch cubes
- 1 (5-ounce) package baby spinach
- 2 lemons, 1 halved and 1 thinly sliced
- 2 scallions, thinly sliced
Steps
- Bring a large pot of salted water to a boil. Add the soba noodles and cook according to package instructions until just tender. Drain and run under cold water until the noodles are cool; drain again.
- In another pot, add the vegetable stock and heat on medium-high until it comes to a boil. Reduce heat to medium-low and add the yuzu juice and miso paste; stir to combine. Add the tofu and cook for 2 minutes until it is warmed through. Taste the broth and season with salt, if needed.
- Turn off heat. Add the spinach and stir gently, allowing the residual heat to wilt the leaves.
- Divide the soba among four bowls. Ladle the broth, spinach and tofu over the noodles. To serve, squeeze over some lemon juice, top with a few lemon slices and the scallions.
↑ Back to top
Za'atar Chicken, Potatoes and Broccoli
Tags: Chicken
Middle-East
Potato
Ingredients
- 1 pound bone-in, skin-on chicken thighs and/or legs
- 8 halved baby potatoes, 6 large broccoli florets
- 1/4 cup plain yogurt
- zest and juice of 1/2 large lemon
- 1 clove garlic, pressed; salt and pepper to taste
- 3 tablespoons olive oil
- 2 tablespoons za'atar
Steps
- Combine yogurt, lemon zest, garlic, salt and pepper. Chill. Combine oil, lemon juice, za'atar, chicken and vegetables in ziplock bag. Season with salt and pepper and massage to coat. Chill 2-10 hours.
- Spread chicken (skin side up) and vegetables on sheet pan. Push vegetables to edges and turn potatoes cut-side down. Roast at 425°F until chicken registers internal temperature of 160°F (20-30 minutes).
- Remove chicken and vegetables to plates. Spoon yogurt onto sheet pan and scrape with spatula to combine. Pour over chicken.
Options: Top with crushed pistachios and fresh thyme. Replace za'atar
with 1 teaspoon each dried thyme, cumin and sesame seeds.
↑ Back to top
Zucchini and White Bean Salad with Feta and Mint
Ingredients
- 4 zucchini, diced
- 1 can white beans, drained and rinsed
- 1 cup crumbled feta cheese
- Zest of 1 lemon
- ¼ cup lemon juice
- 1 tablespoon liquid honey
- ¼ cup olive oil
- 1 teaspoon freshly ground pepper
- ½ teaspoon salt
- ¼ cup roughly chopped fresh mint leaves
Steps
- Add the zucchini, white beans and feta to a bowl.
- Whisk together the lemon zest, juice, honey, olive oil, salt, and pepper. Pour the dressing over the zucchini mixture and toss to combine. Cover and refrigerate for at least 30 minutes before serving.
- Remove from the fridge and taste for seasoning; add more lemon juice or olive oil if the vegetables have soaked up all flavor from the dressing.
↑ Back to top
Zucchini Cookies
Tags: Cookies
Vegetables
Ingredients
- 1 1/2 cups flour
- 1 cup sugar
- 1/2 teaspoon Baking Soda
- 1/2 teaspoon salt
- 1/4 teaspoon nutmeg
- 3/4 teaspoon cinnamon
- 3/4 cup shortening
- 1 egg
- 1 cup grated zucchini
- 1 3/4 cups quick oats
- Frosting
- 1/2 cup butter, softened
- 3 Tablespoons milk
- 2 teaspoons vanilla
- 3 to 4 cups powdered sugar
Steps
- Cookies
- Preheat oven to 400 degrees F.
- Combine flour, sugar, baking soda, salt, nutmeg and cinnamon together in a large bowl and stir to combine ingredients well. Cut in shortening. Beat in egg until well combined. Add zucchini and oats and beat until evenly mixed in.
- Spoon drops of cookie dough onto greased cookie sheet.
- Bake at 400 degrees F for 8-10 minutes. Let cool.
- Frosting
- Cream butter in a medium bowl. Add remaining ingredients and beat until smooth. Add more milk and/or powdered sugar until desired consistency is reached.
- Frost cookies once they are completely cooled and sprinkle the tops with a little nutmeg.
Notes
- FAVORITE
↑ Back to top
Zucchini Parmesan Crisps
Tags: Snacks
Vegetables
Ingredients
- 1 lb. zucchini or squash (about 2 medium-sized)
- 1/4 cup shredded parmesan (heaping)
- 1/4 cup Panko breadcrumbs (heaping)
- 1 tablespoon olive oil
- 1/4 teaspoon kosher salt
- freshly ground pepper, to taste
Steps
- Preheat oven to 400 degrees. Line two baking sheets with foil and spray lightly with vegetable spray.
- Slice zucchini or squash into 1/4 inch-thick rounds. Toss rounds with oil, coating well.
- In a wide bowl or plate, combine breadcrumbs, parmesan, salt and pepper.
- Place rounds in parmesan-breadcrumb mixture, coating both sides of each round, pressing to adhere. The mixture will not completely cover each round, but provides a light coating on each side.
- Place rounds in a single layer on baking sheets. Sprinkle any remaining breadcrumb mixture over the rounds.
- Bake for about 22 to 27 minutes, until golden brown. (There is no need to flip them during baking -- they crisp up on both sides as is.)
Notes
- FAVORITE
↑ Back to top
Zucchini Parmigiana
Adapted from https://lidiasitaly.com/recipes/zucchini-parmigiana/
Tags: Italian-American
Vegetables
Servings: 6
Ingredients
- 2 POUNDS MEDIUM ZUCCHINI
- ½ TEASPOON KOSHER SALT
- 1 TABLESPOON UNSALTED BUTTER, AT ROOM TEMPERATURE
- 4 OUNCES SLICED WHOLE-WHEAT BREAD
- 4 CUPS MARINARA SAUCE (recipe here)
- 2 CUPS SHREDDED LOW-MOISTURE MOZZARELLA
- 1 CUP GRATED GRANA PADANO
- ¼ CUP CHOPPED FRESH BASIL
- Cookbook
Steps
- Preheat the oven to 400 degrees F. Bring a large pot of water to a boil. Add the whole zucchini, and bring back to a boil. Simmer until the zucchini are almost tender throughout, about 15 minutes. Drain, cool, and slice lengthwise into ½-inch-thick slices. Season with the salt.
- Grease a 9-by-13-inch baking dish with the butter, and fit the bread in one layer into the bottom, trimming to fit if necessary.
- Layer as follows: Spread the bread with 2 cups of the marinara sauce. Arrange half of the zucchini in an even layer. Sprinkle with half of the mozzarella and Grana Padano. Sprinkle with all of the basil. Arrange the remaining zucchini in an even layer. Spread with the remaining marinara, and top with the remaining mozzarella and Grana Padano. Bake, uncovered, until browned and bubbly, about 35 to 40 minutes.
↑ Back to top
Zucchini Pizza Casserole
Tags: Unknown
Servings: 4
Ingredients
- 3½ cups shredded, unpeeled zucchini (about 2 medium zucchinis)
- ¼ tsp salt
- 2 eggs
- ¼ cup grated parmesan cheese
- 4 oz. reduced-fat, shredded mozzarella cheese, divided
- 4 oz. reduced-fat, shredded cheddar cheese, divided
- Cooking spray
- ½ lb 90-94% lean ground beef
- ¼ cup chopped onion
- 1, 14.5-oz. can petite diced Italian tomatoes*
- 1 small green bell pepper, chopped
Steps
- Preheat oven to 400˚F.
- Place zucchini in a strainer, and sprinkle with salt. Let stand 10 minutes, and then press to release moisture.
- Combine zucchini with eggs, parmesan, and half of the mozzarella and cheddar cheese.
- Press mixture into a lightly greased baking dish. Bake, uncovered, for 20 minutes.
- Meanwhile, cook the beef and onion in a medium skillet until done. Drain any liquid, and then stir in the tomatoes.
- Pour beef mixture over the zucchini and sprinkle with the remaining cheddar and mozzarella cheese. Top with green pepper.
- Bake for an additional 20 minutes or until heated through.
↑ Back to top
Zucchini-Oat Dark Chocolate Chip Cookies
Adapted from https://www.verybestbaking.com/recipes/145079/Zucchini-Oat-Dark-Chocolate-Chip-Cookies/detail.aspx

Tags: Cookies
Vegetables
Ingredients
- 1 1/2 cups all-purpose flour
- 1 teaspoon ground cinnamon
- 1/2 teaspoon baking soda
- 1/2 cup (1 stick) butter, softened
- 3/4 cup granulated sugar
- 1 large egg
- 3/4 teaspoon vanilla extract
- 1 1/2 cups shredded zucchini (1 medium)
- 1 cup quick oats
- 1 cup chopped nuts
- 1 2/3 cups (10-oz. pkg.) NESTLÉ® TOLL HOUSE® Dark Chocolate Morsels
Steps
- PREHEAT oven to 350° F. Lightly grease baking sheets.
- COMBINE flour, cinnamon and baking soda in small bowl. Beat butter, sugar in large mixer bowl until well combined. Add egg and vanilla extract, beat well. Add zucchini; gradually beat in flour mixture. Stir in oats, nuts and morsels. Drop by rounded teaspoon 2 inches apart onto prepared baking sheets.
- BAKE for 9 to 11 minutes or until light golden brown around edges. Cool on baking sheets for 2 minutes; remove to wire rack to cool completely. Store in tightly covered container at room temperature.
Notes
- FAVORITE
↑ Back to top